"How to Host a Static Website on AWS S3 with Custom Error Handling"
 Aakanksha Deshmukh
Aws S3 (simple storage service) :-
A bucket is a container for objects. An object is a file and any metadata that describes that file.
Amazon S3, or Amazon Simple Storage Service, is a service offered by Amazon Web Services (AWS) that provides object storage through a web service interface. It was designed to make web-scale computing easier for developers.
Amazon S3 has a simple web services interface that you can use to store and retrieve any amount of data, at any time, from anywhere on the web. It gives any developer access to the same highly scalable, reliable, fast, inexpensive data storage infrastructure that Amazon uses to run its own global network of websites.
Steps to host a static website on amazon S3:-
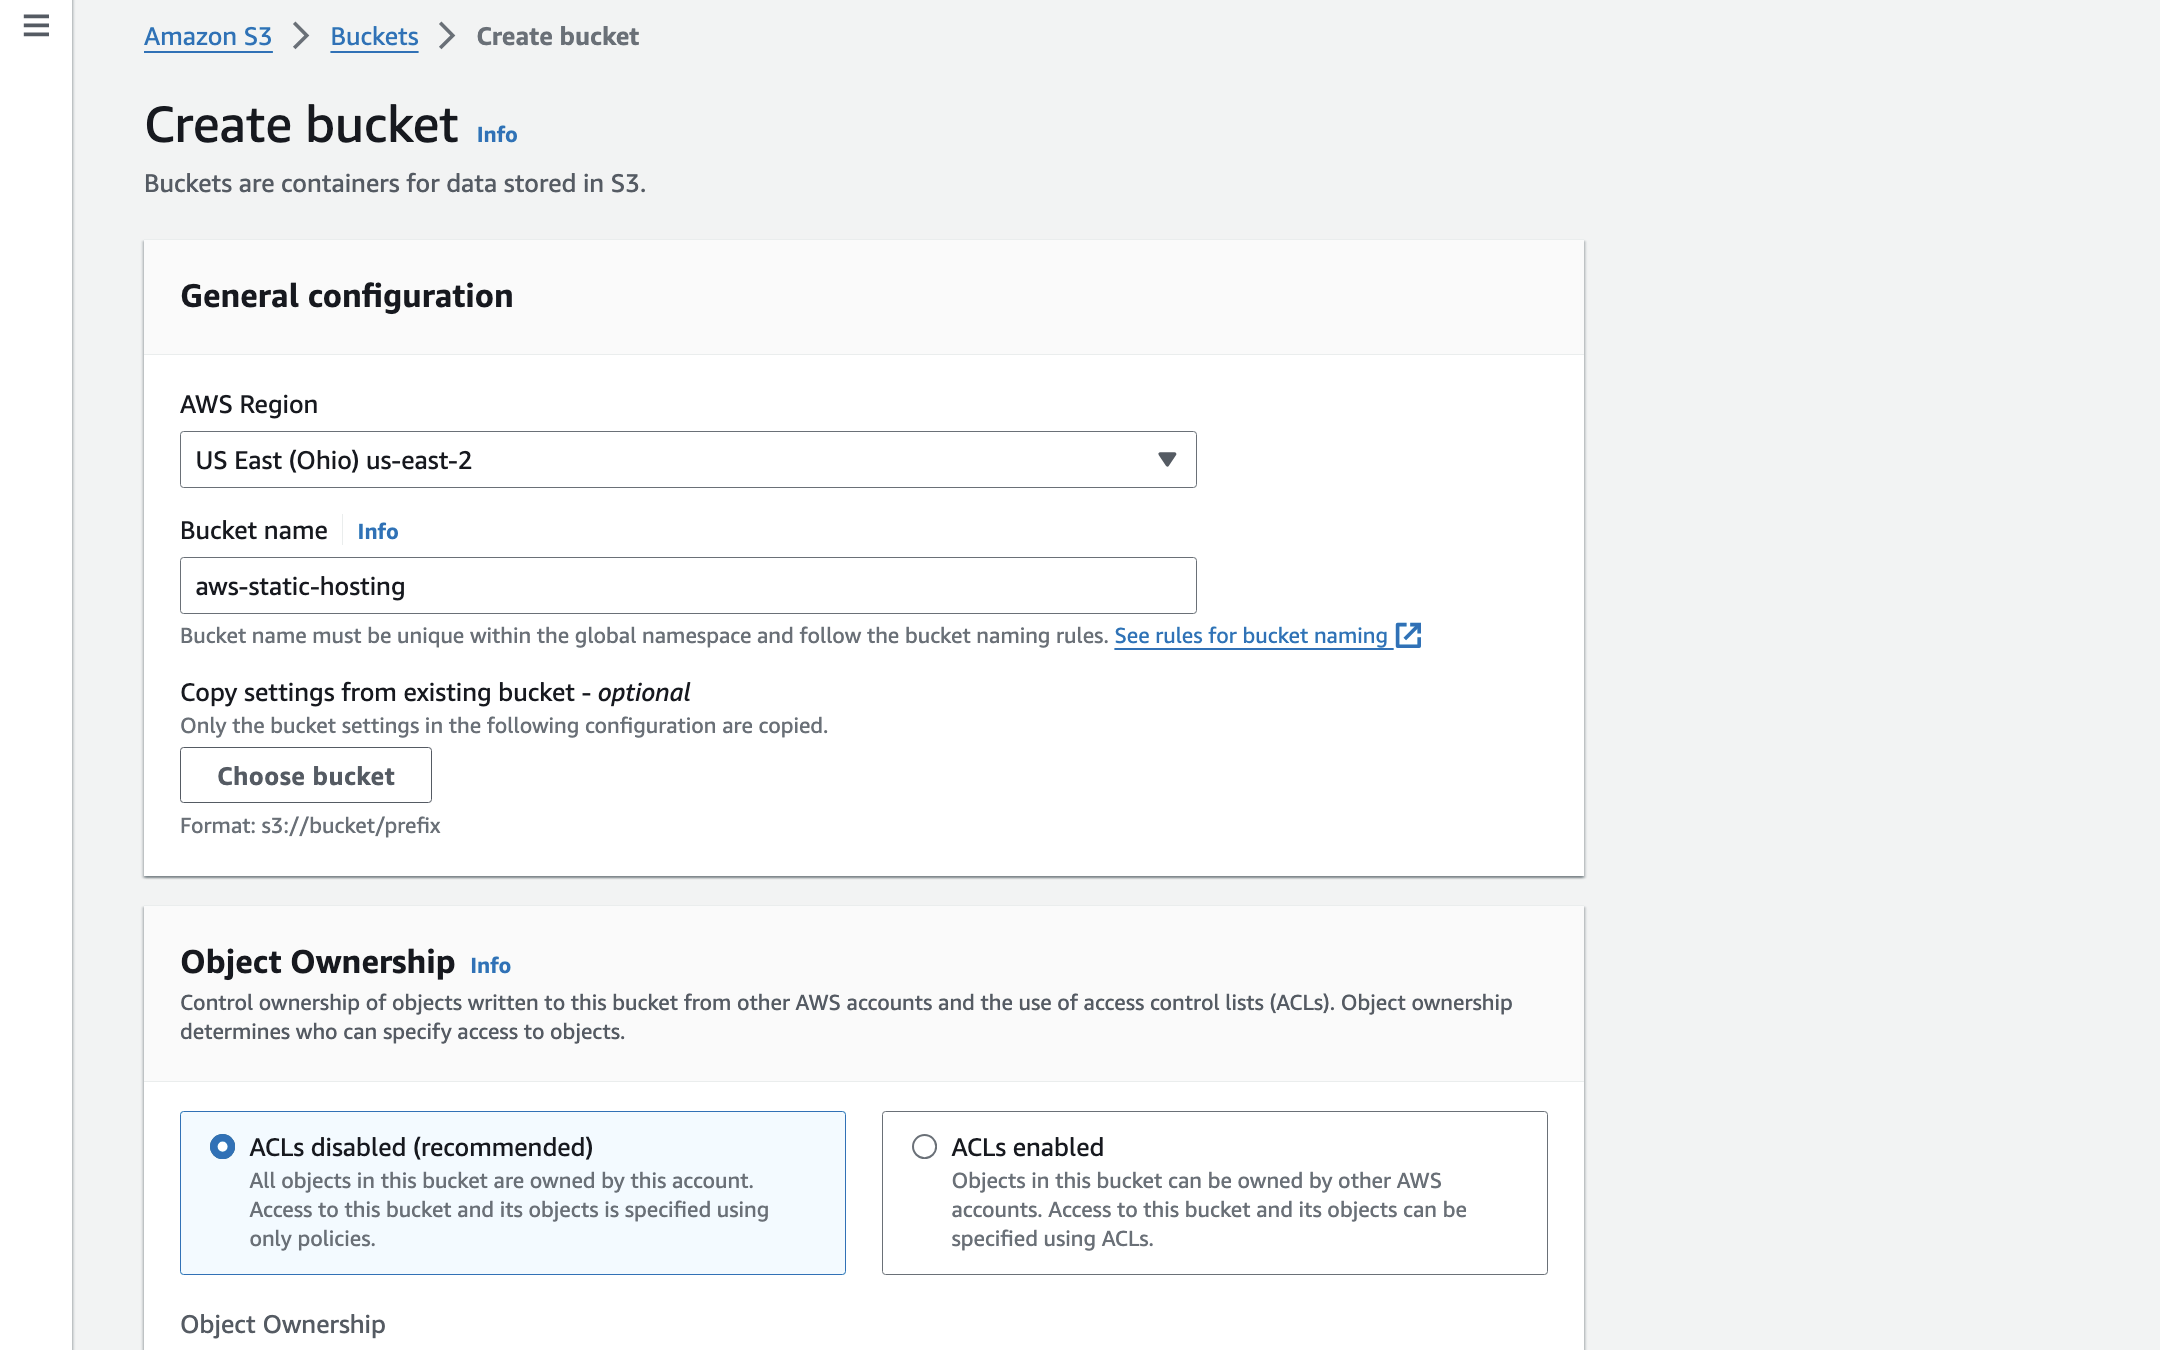
firstly you need to create a bucket in S3 and give a unique name to your bucket. select the region in which you have to create a bucket.
In Object Ownership select ACLs disabled (recommended) as we dont want to share our buckets to any other aws account.
The Block Public Access settings in Amazon S3 are designed to provide granular control over the accessibility of your S3 resources to the public. Public access to S3 resources can be managed through various mechanisms like Access Control Lists (ACLs), bucket policies, and access point policies.
1. Block public access to buckets and objects granted through new access control lists (ACLs)
Use Case: You want to ensure that any new buckets or objects created in the future do not accidentally have public access permissions. This setting is beneficial in environments where buckets and objects are frequently added, and there's a policy against public access for compliance or security reasons. It does not affect existing permissions.
Simple Explanation: Imagine every time you get a new diary (bucket) or add a new page (object) to it, there’s a default lock that comes with it. This setting ensures that every new diary or page you add automatically has a lock that keeps it from being read by the public.
Example: If you start writing in a brand new diary or add a new page, this setting stops anyone from reading these new entries unless you specifically give them a key.
2. Block public access to buckets and objects granted through any access control lists (ACLs)
Use Case: This setting is more stringent than the previous one. It's used when you want to enforce a no-public-access policy across all existing and future buckets and objects in your account, regardless of their ACL settings. This is particularly useful for organizations with strict data privacy regulations or when the data stored in S3 is sensitive and should not be publicly accessible under any circumstances.
Simple Explanation: This takes the safety a step further. Not only does it keep all your new diaries and pages locked, but it also goes back and locks all the pages and diaries you’ve ever written, just in case some of them weren’t locked properly before.
Example: Even if you forgot to put a lock on some of your older diary entries, this setting retroactively locks every single page, old and new, so no one can peek without your permission.
3. Block public access to buckets and objects granted through new public bucket or access point policies
Use Case: This setting prevents new bucket and access point policies from accidentally granting public access. It's a preventative measure to ensure that future policies do not unintentionally make buckets or objects public. This setting is useful in scenarios where bucket policies are used to manage access but there is a requirement to ensure that no future policy changes can make the data public.
Simple Explanation: Sometimes, you might create a rule that says, "All my friends can read my diaries." This setting ensures that no new rule like this can be made by accident. It’s like deciding not to hand out any more keys to your diary, even though you might have given some out in the past.
Example: If you decide from now on that no new friends can read your diary, this setting makes sure that any new rules you make won’t accidentally give them access.
4. Block public and cross-account access to buckets and objects through any public bucket or access point policies
Use Case: This is the most comprehensive setting, designed to prevent any public or cross-account access to your S3 resources through bucket or access point policies. It is particularly useful in scenarios where the utmost level of security is required, and there is no legitimate business need for the data to be accessed publicly or from accounts outside of your organization. This setting ensures that, even if a policy is mistakenly configured to grant public or cross-account access, S3 will ignore those permissions and keep the data private.
Simple Explanation: This is the most secure setting. It’s like saying, "Even if I’ve given keys to some friends or made rules that let people read my diary, I’m changing my mind." Now, even those rules won’t work anymore. It’s as if you’ve put your diary in a safe, and only you know the combination.
Example: Suppose you once made a rule that all your friends and their friends (cross-account) could read any of your diaries. But now, you’ve decided that’s too many people. By choosing this setting, even those old rules won’t allow access anymore. Your diary is now completely private, unless you decide to give someone specific access.
If you want everyone to access your S3 bucket, you need to make sure none of the "Block Public Access" options are turned on. as we want to host our website we will not select any of these.
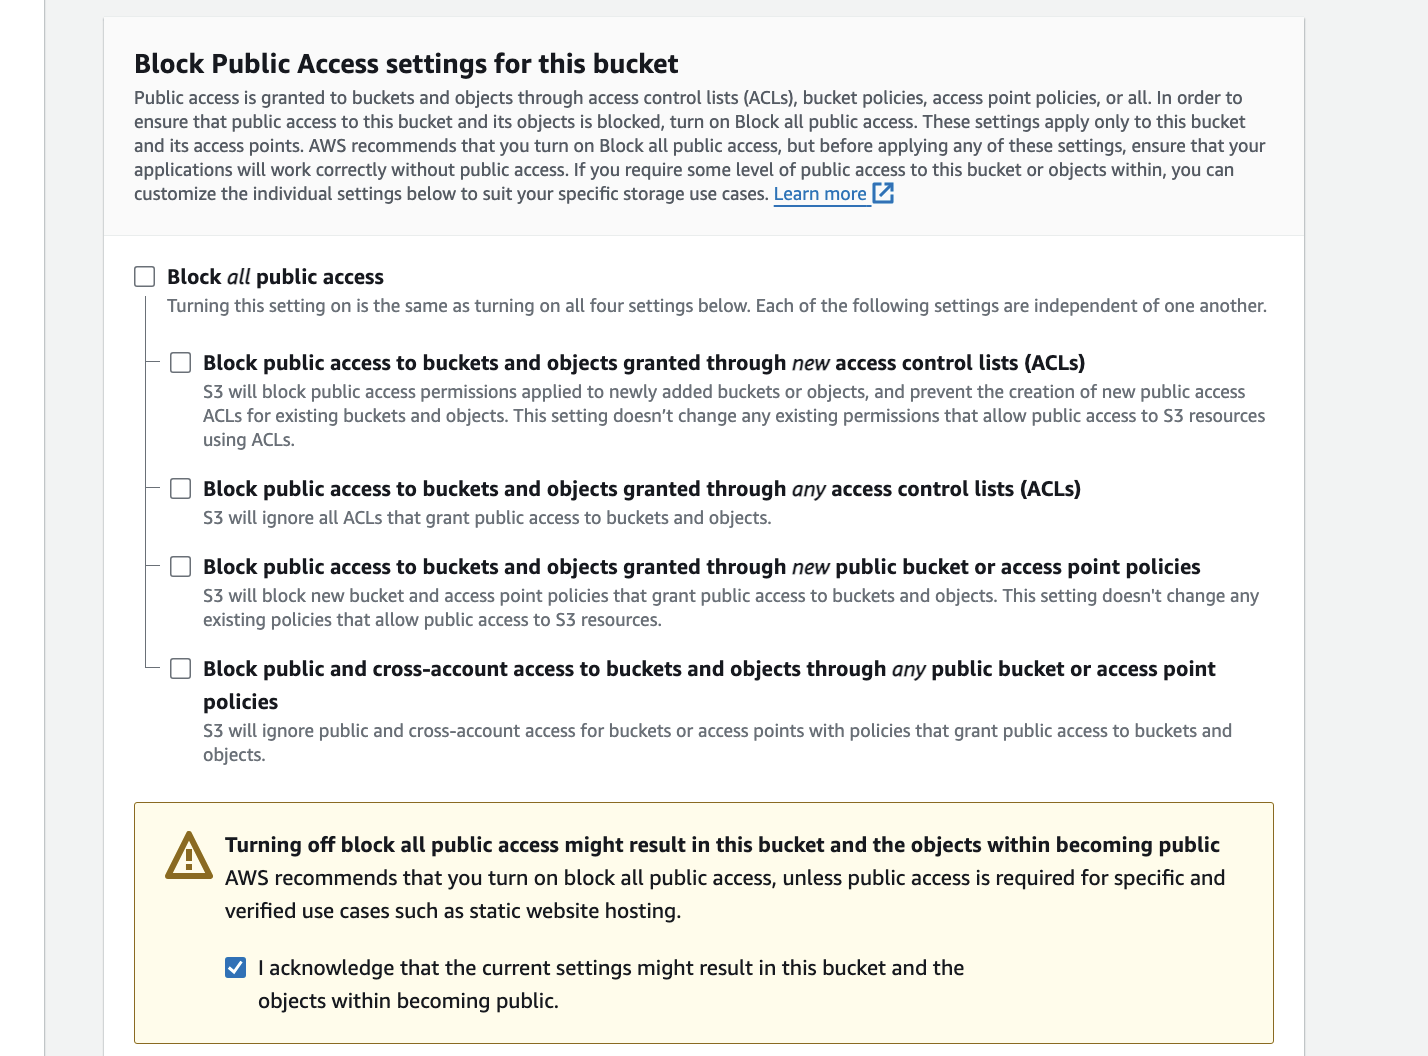
If you want everyone to access your S3 bucket, you need to make sure none of the "Block Public Access" options are turned on.
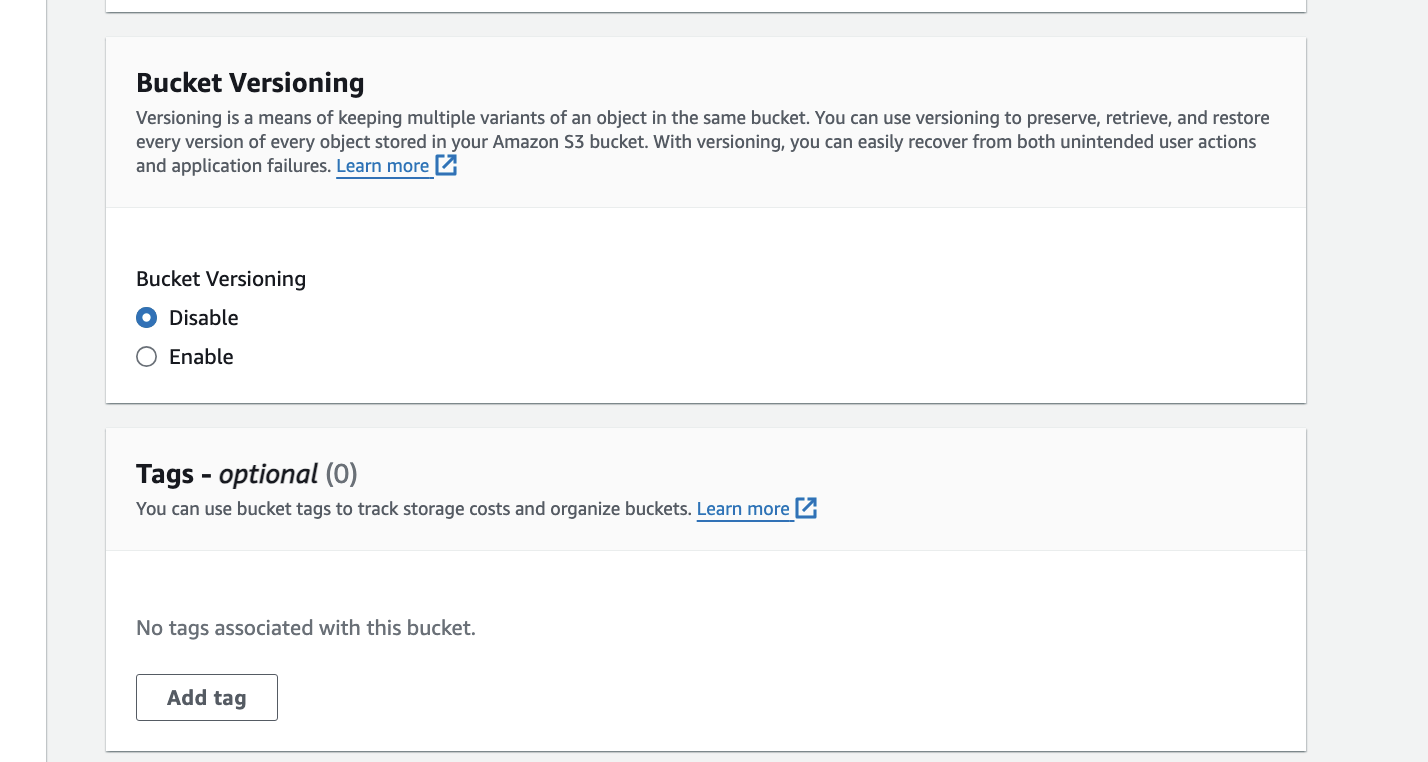
select default setting for versioning and tags are optional.
In default encryption choose Encryption type as Se**rver-side encrypt**ion with Amazon S3 managed keys (SSE-S3). and click on create bucket.
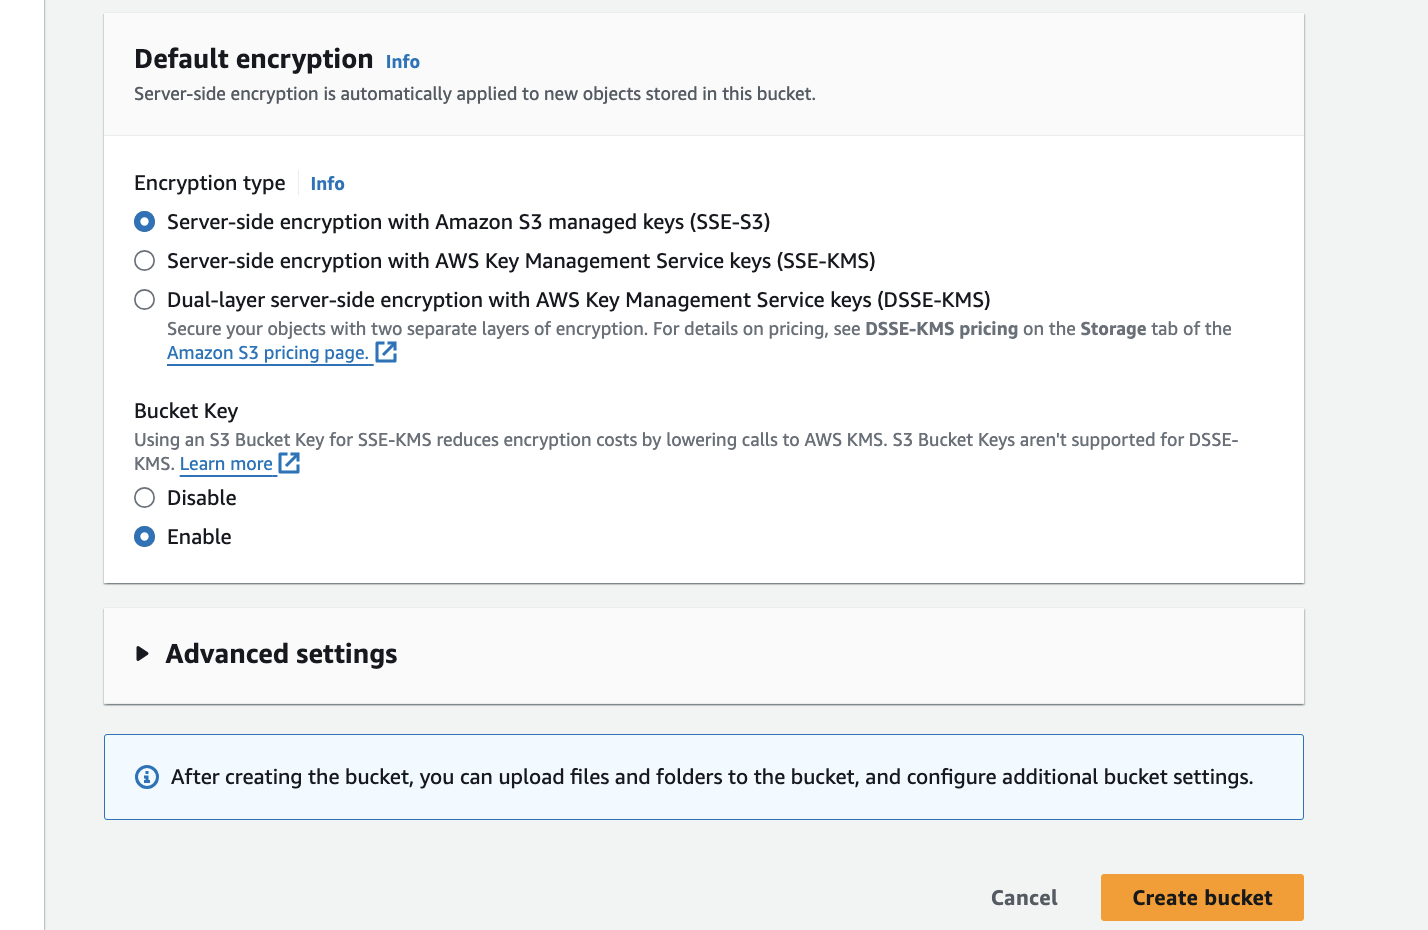
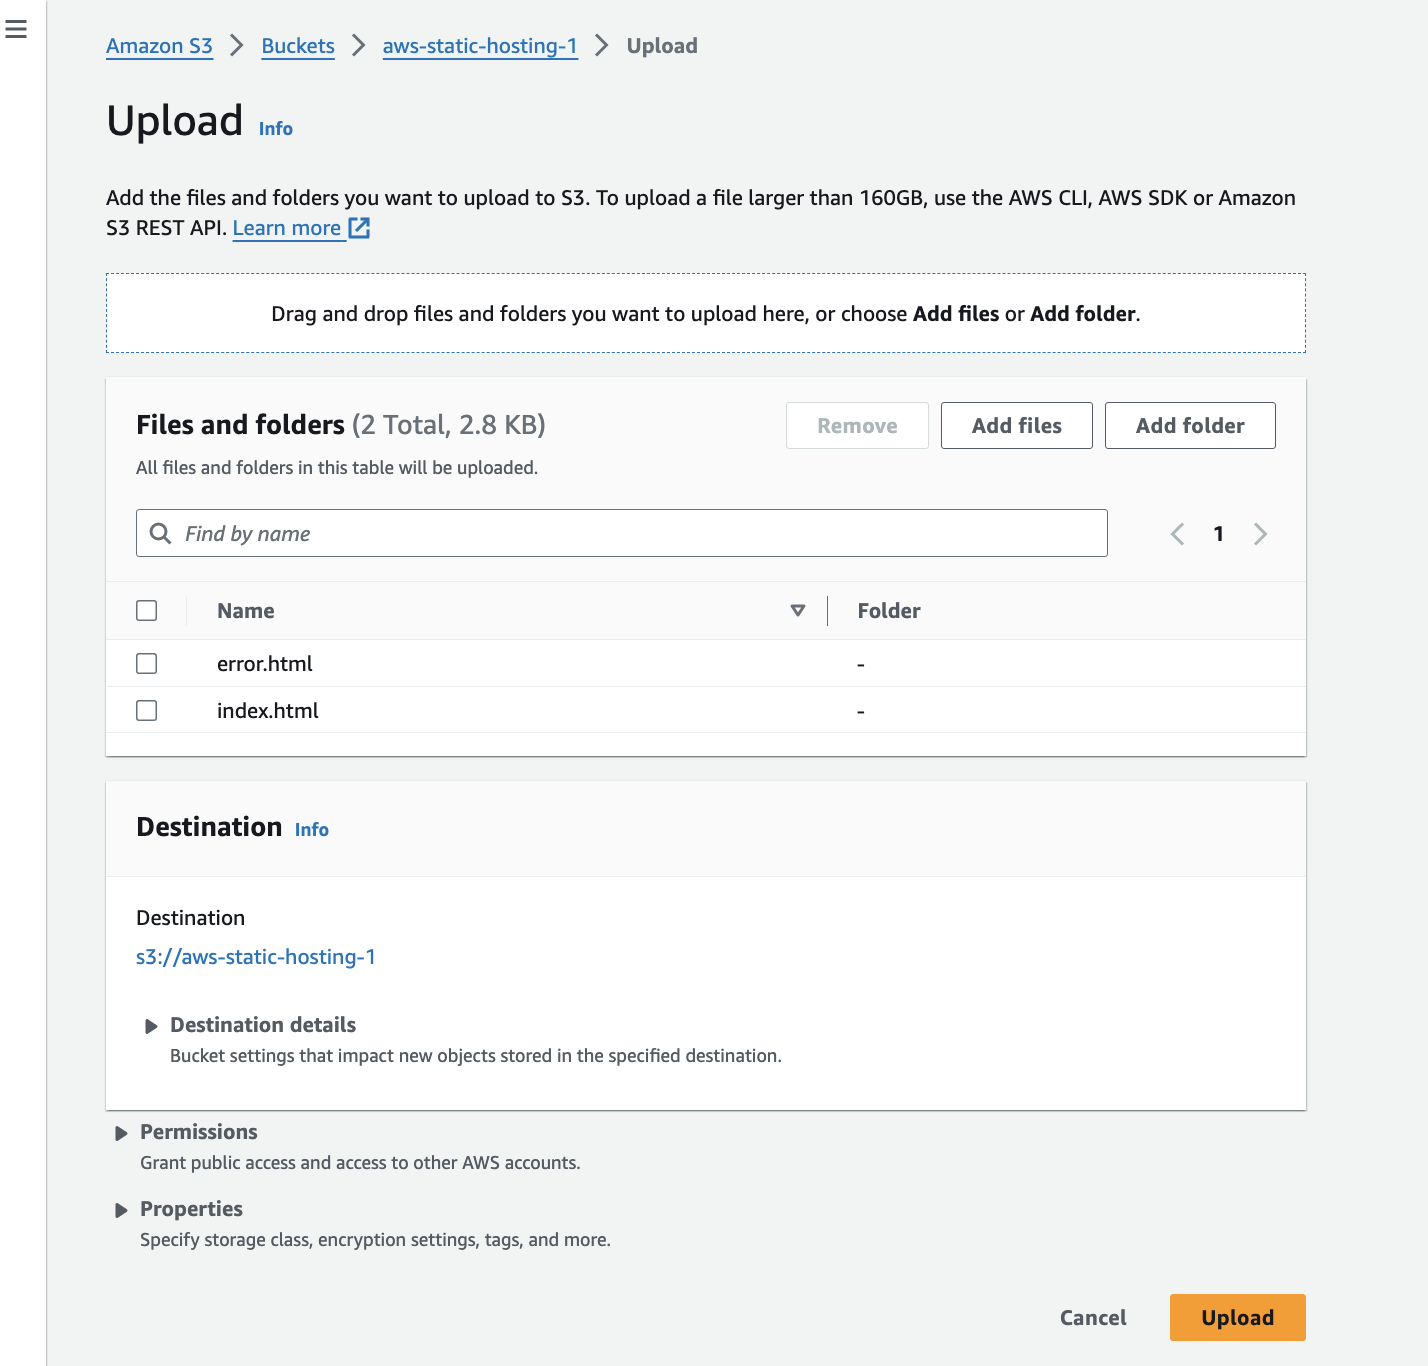
after creating a bucket now upload the files index.html and error.html
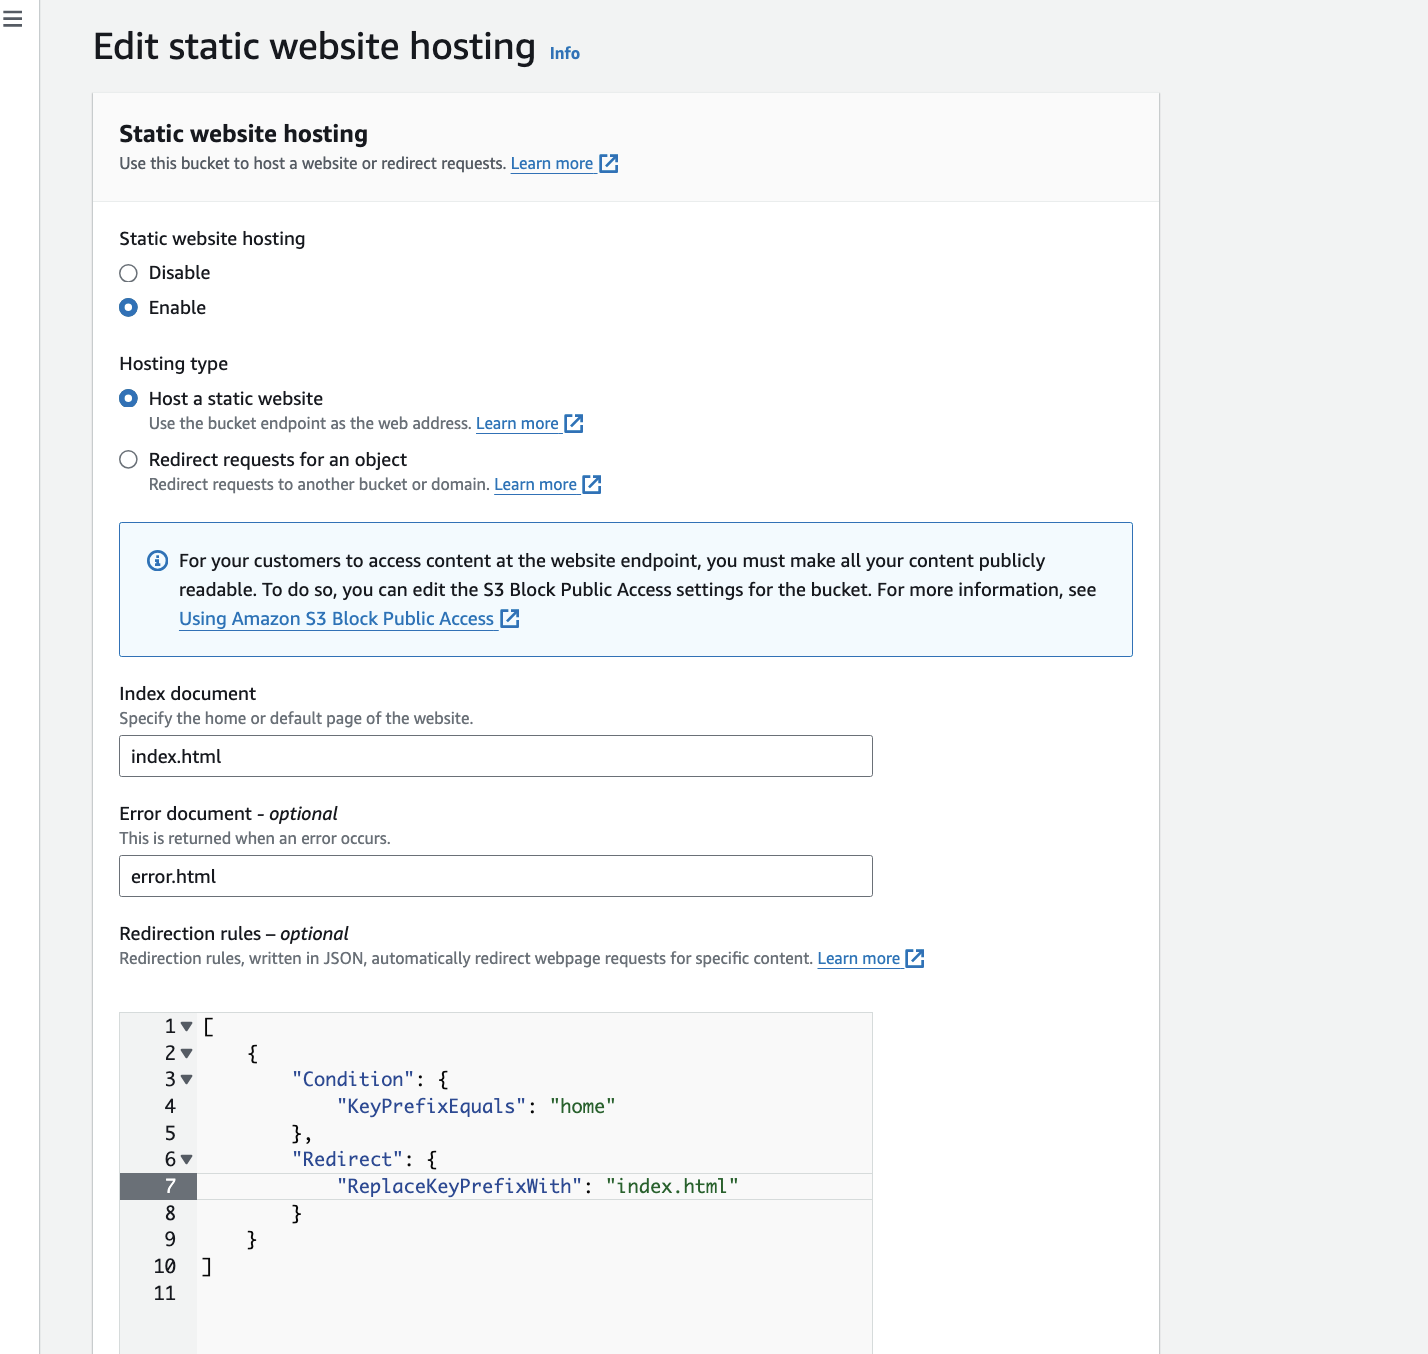
after uploading the files in properties go to Static website hosting and edit details as below and save the changes.
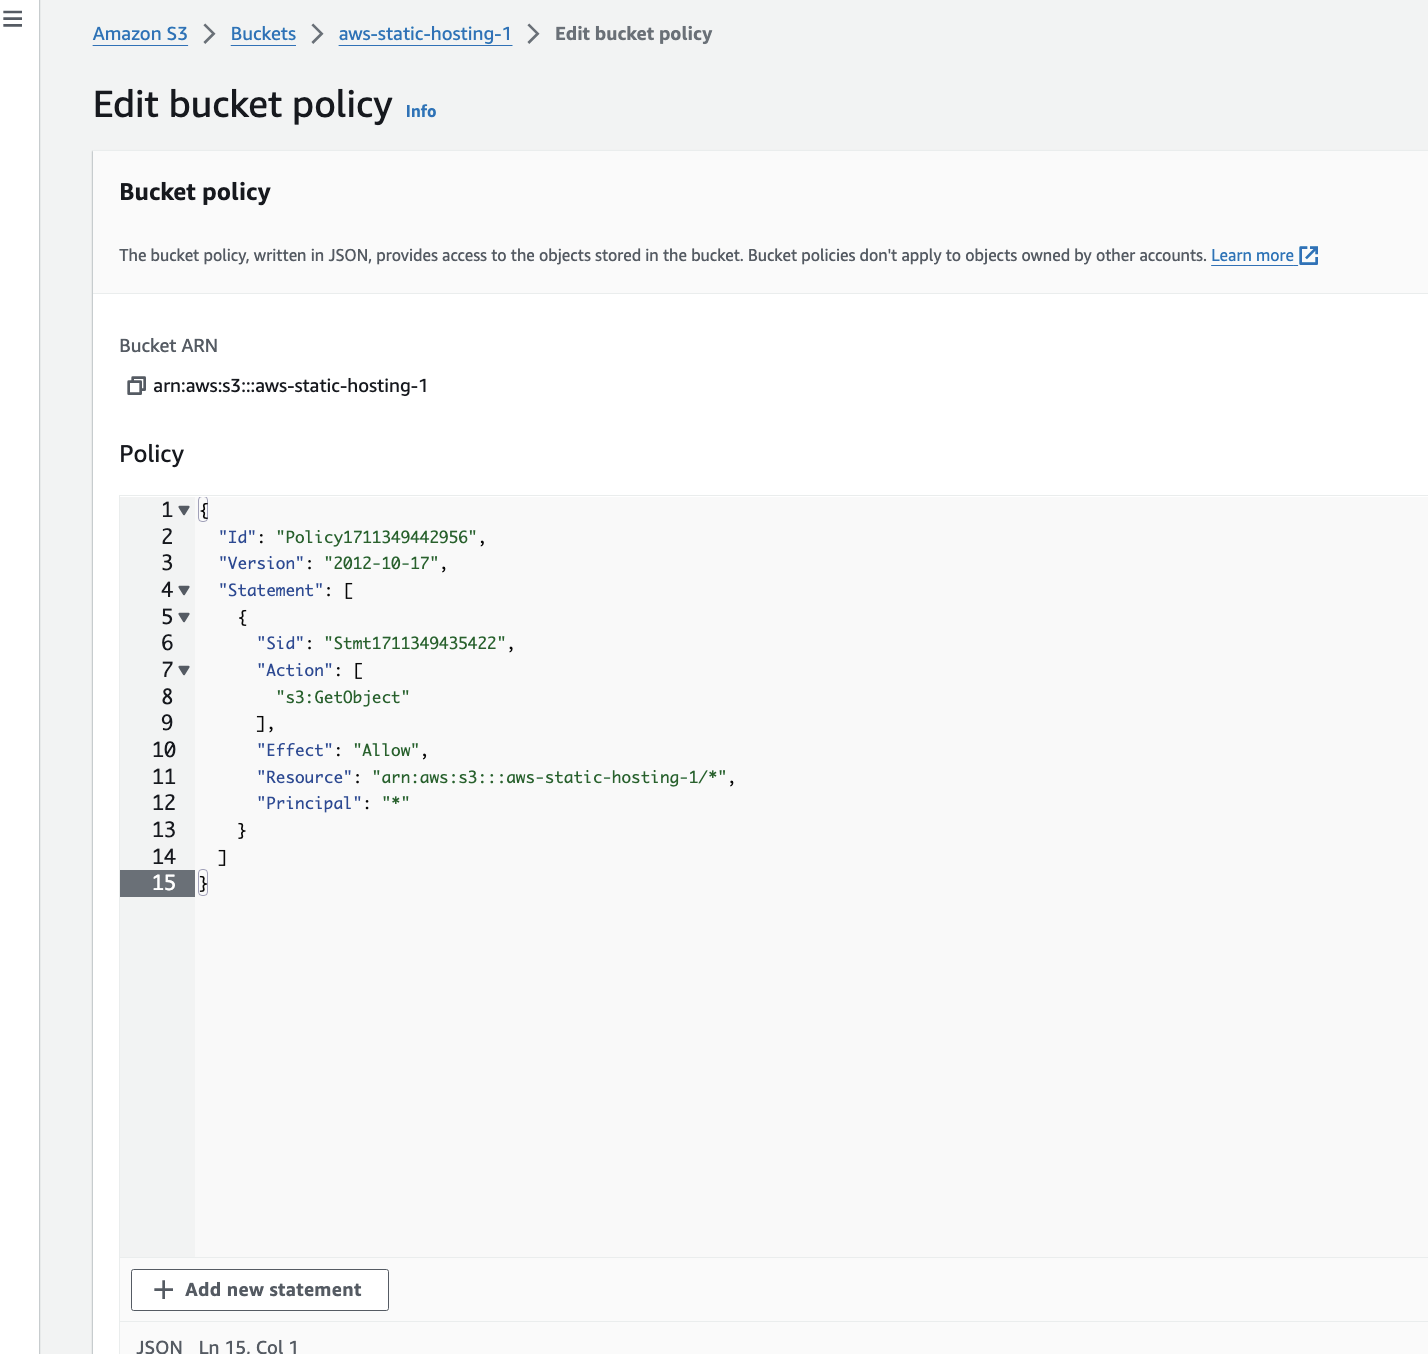
After that go to permission and edit the bucket policy. go to policy generator and select option and generate the policy. and paste it in bucket policy and save changes
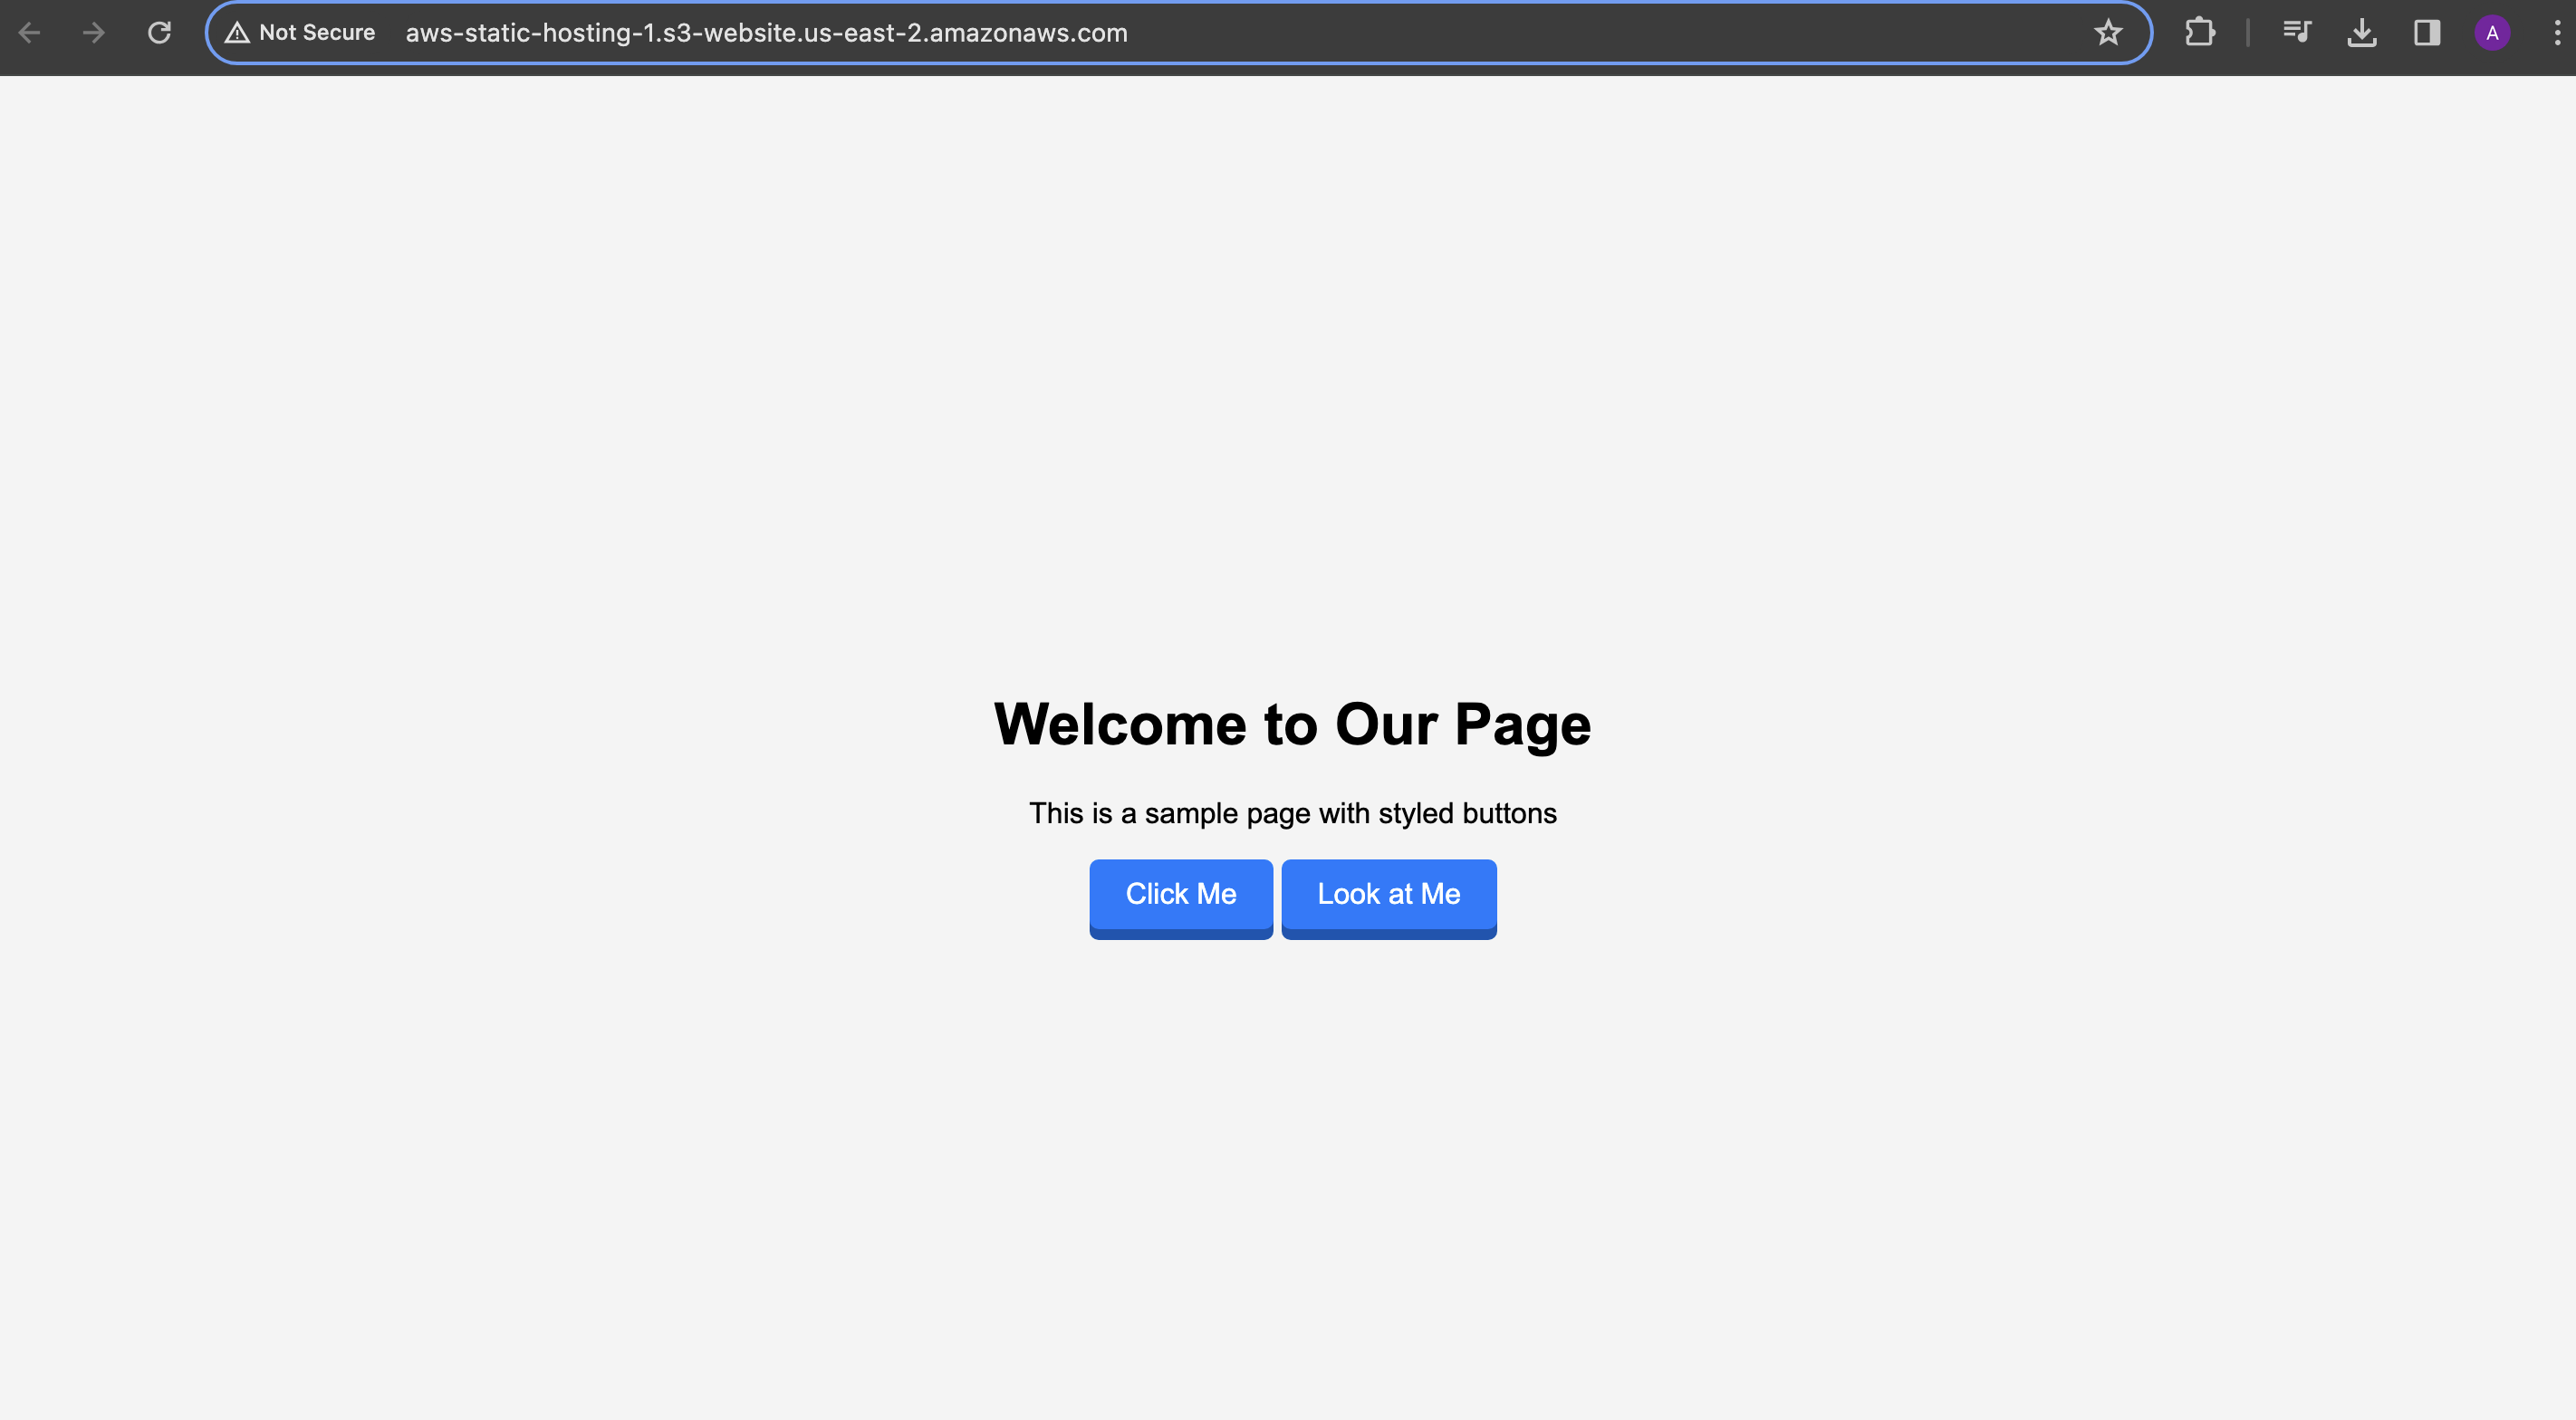
Now again in properties go to static website hosting and click on link you will be able to see your hosted website.

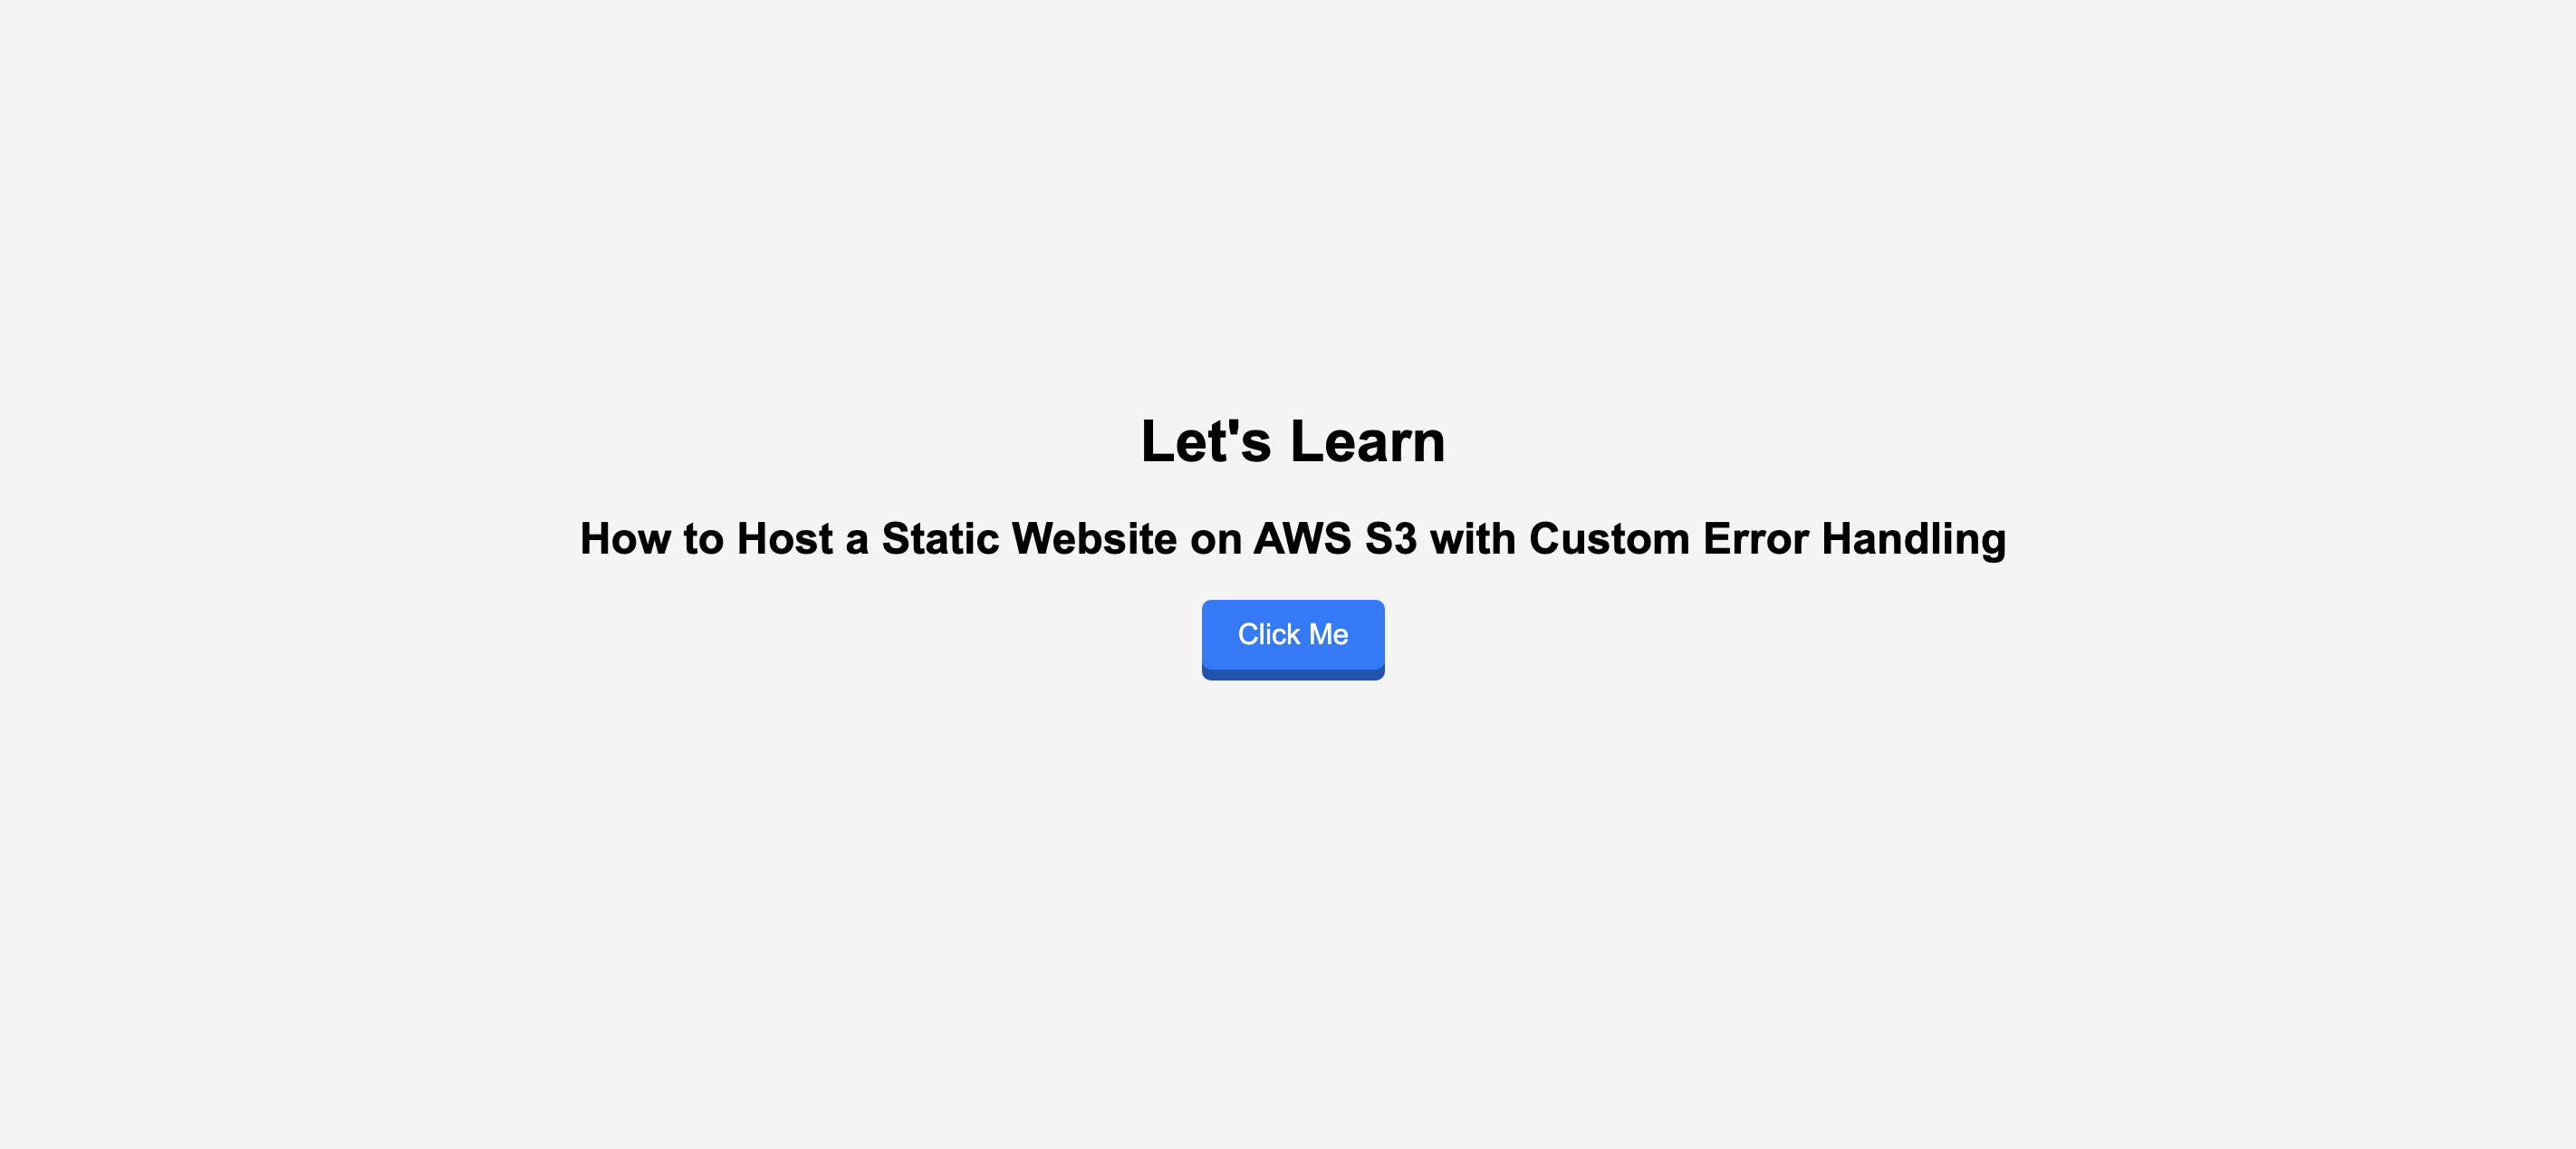
here is the page which I hosted on S3:-
Thank you! for reading my article. hope you liked it.
Subscribe to my newsletter
Read articles from Aakanksha Deshmukh directly inside your inbox. Subscribe to the newsletter, and don't miss out.
Written by

Aakanksha Deshmukh
Aakanksha Deshmukh
I am a Devops Engineer