Step-by-Step Guide to Building a Custom Role Using Azure Portal
 AKEH EUNICE
Introduction
One significant aspect of Azure's flexibility lies in its Microsoft Entra ID system, allowing organizations to manage access to Azure resources. If the Azure built In roles don't meet your company's specific needs of your organization, you can create your own Azure custom roles. Creating a custom role on Azure empowers organizations to fine-tune access permissions, enhancing security and operational efficiency. Custom roles can be created using the Azure portal, Azure PowerShell, Azure CLI, or the REST API. In this guide, we'll walk through the step-by-step process of building a custom role on Azure, empowering you to optimize access control within your Azure environment.
Follow Guidelines
Step 1: Navigate to the Azure Portal Start by logging into the Azure Portal using your credentials
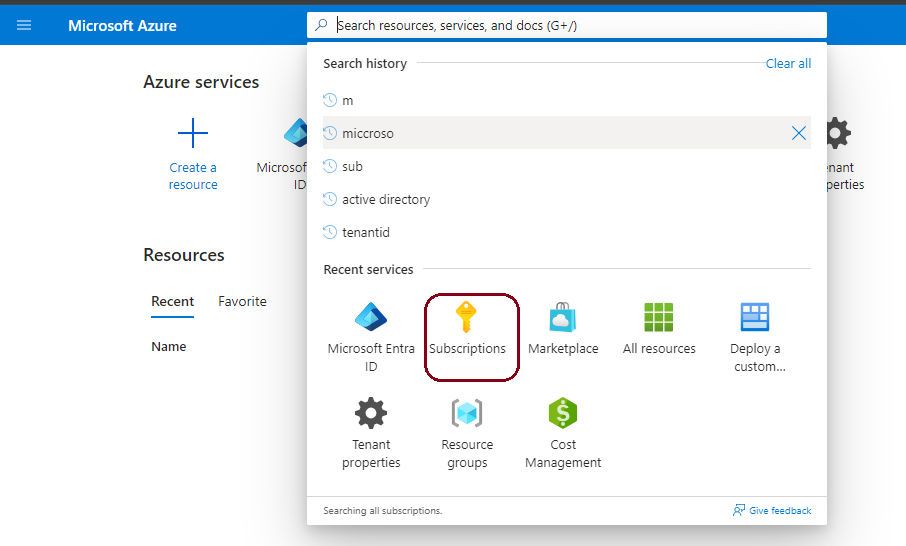
Step 2: Assigning Custom role from the subscription "Click On " "Subscription"

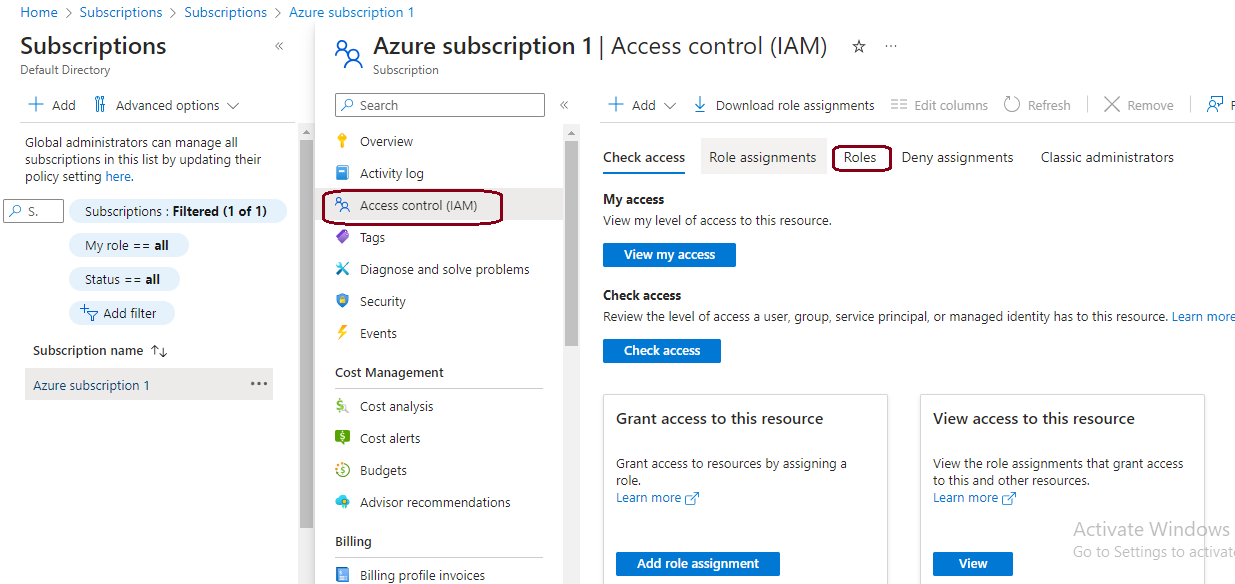
Step 3: Access Role By Using Access Control(IAM) "Select" "Access control(IAM)" and then "Click On" "Roles"
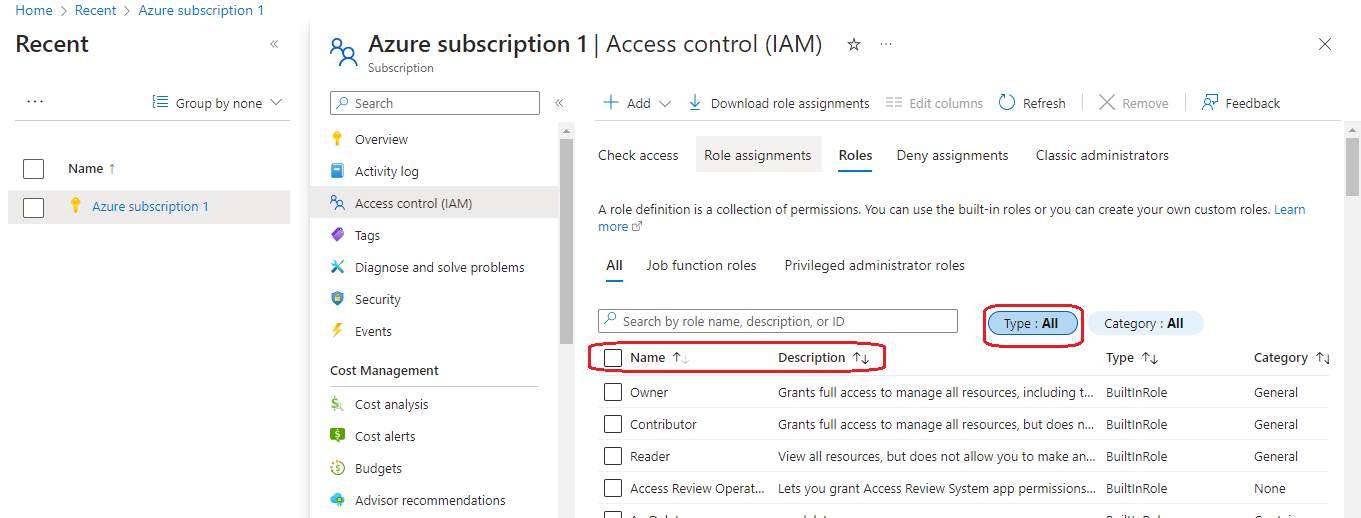
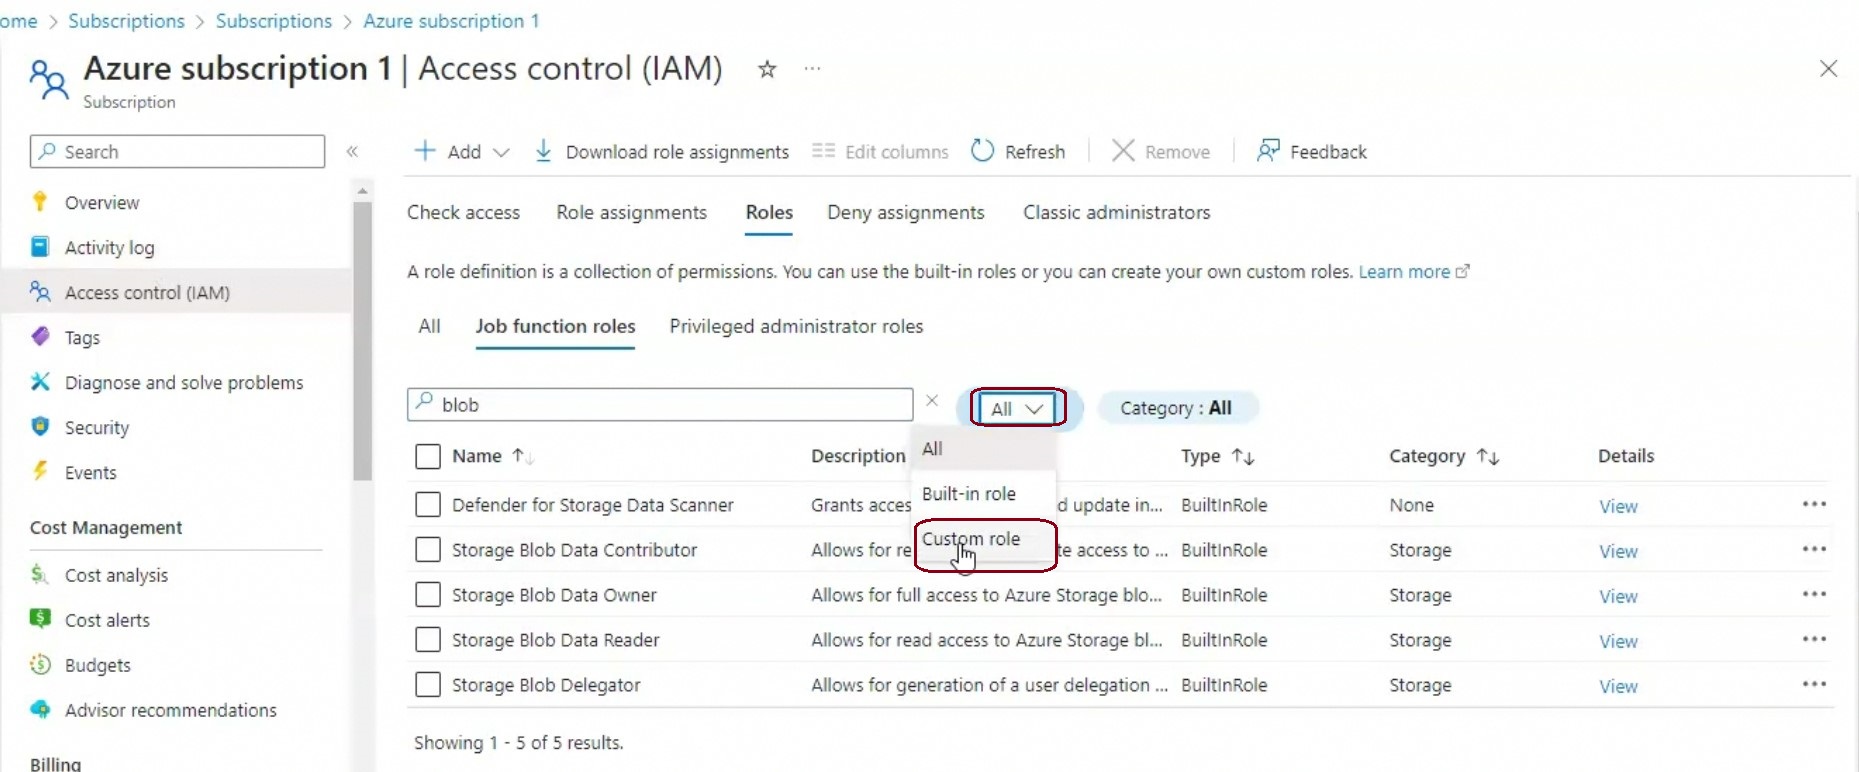
Step 5: View Built In Roles Under Roles tab see a list of over 5000 built-in roles ,If non appeals to you then you build a custom role by "Click On" "Type: All"
Step 6: Access Custom Role "Click On" the dropdown "All" then "Click On" "Custom role"
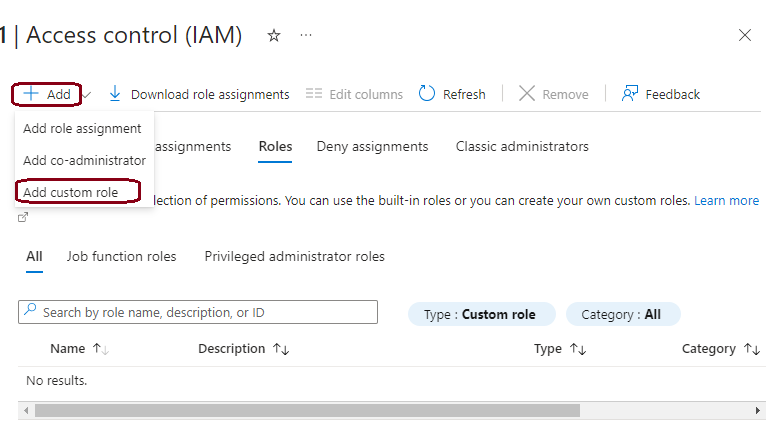
Step 6a: Click on 'New custom role "Click On" "Add" and then "Click on" "Add custom role"
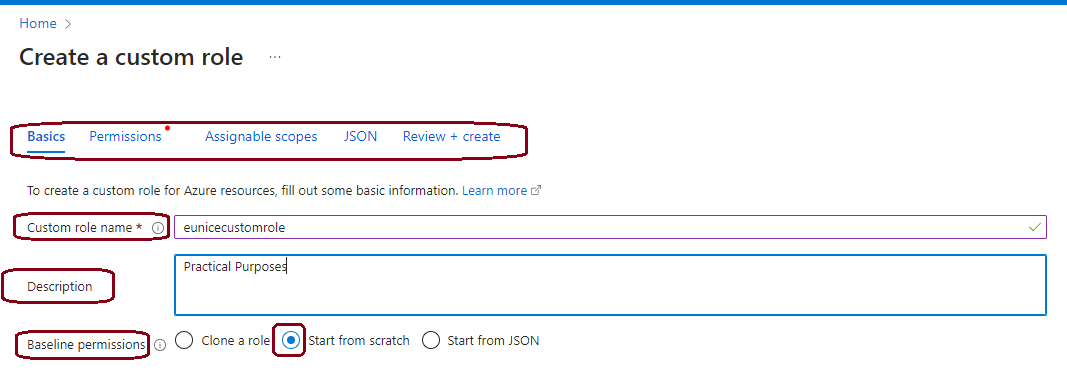
Step 7: Define Role Name and Description Fill n all the settings ,we will begin with Basics Settings. Give a custom role name , description and give permissions
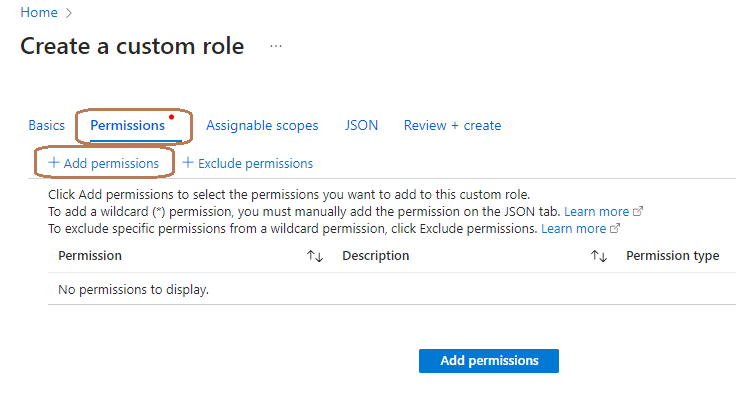
Step 7a: Configure Permissions ; "Click On" "Add permissions"
Step7b: Specify the permissions on the search bar required for the custom role. You can choose from a wide range of actions across various Azure services. Take time to carefully consider the permissions needed to fulfill the role's responsibilities. "Select" "Permission"
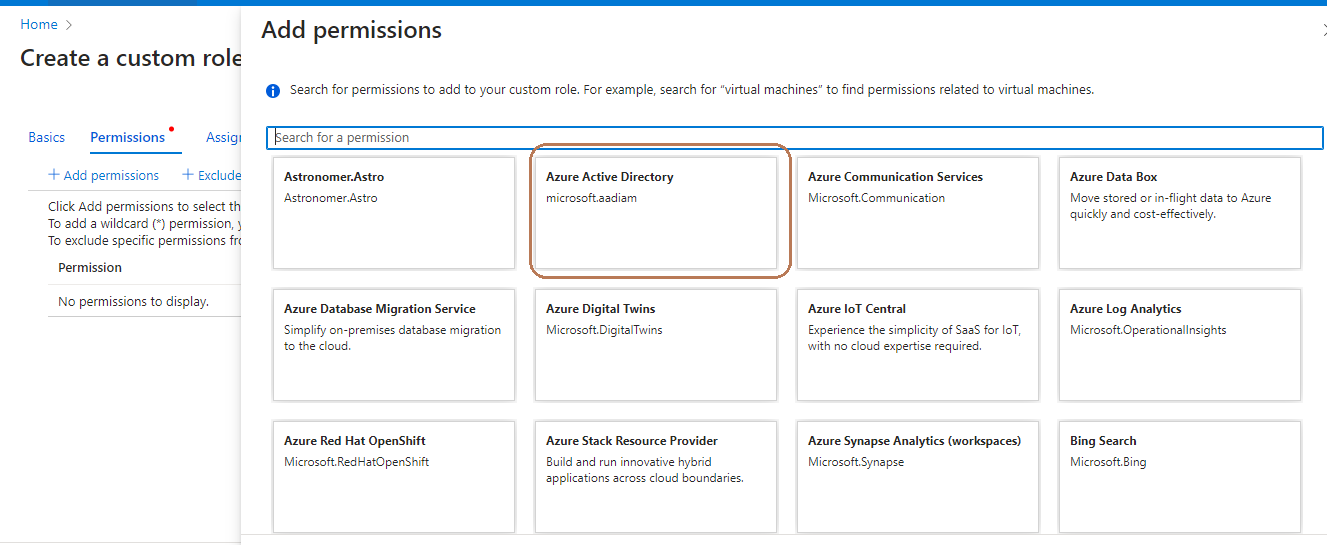
Step7c: Select Actions for the permission and then "Click On" "Add"
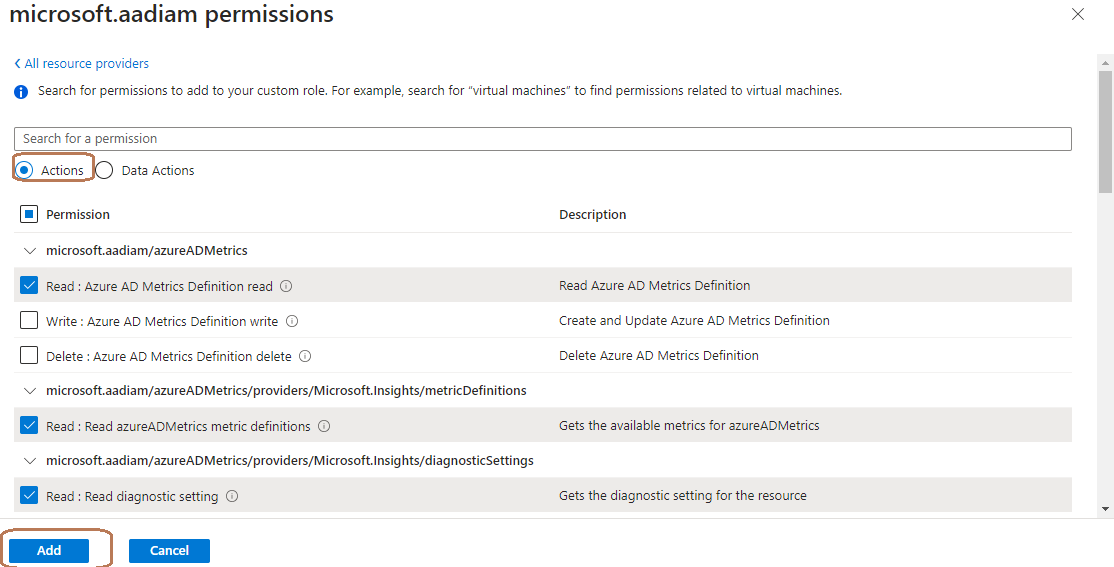
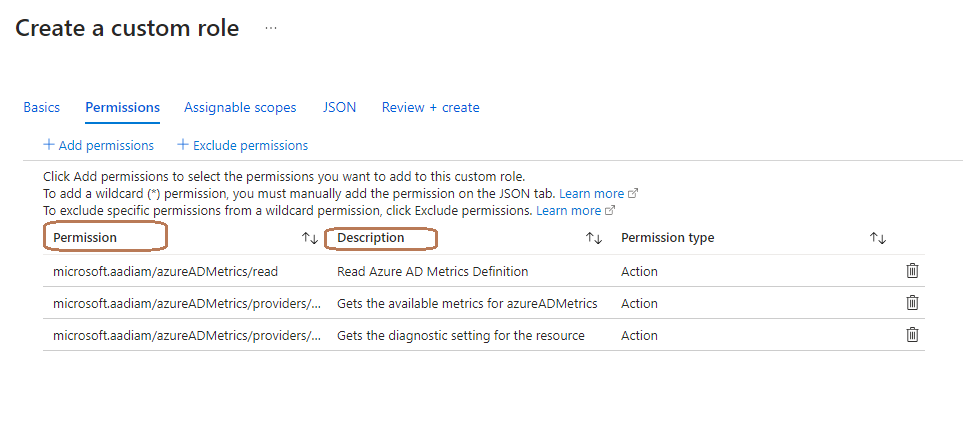
Step7d: View your permission and Actions then "Click On" "Assignable scopes" Note: You can also Add more and Exclude permissions
Step7e: Assignable Scopes Settings Add assignable scope but our "subscription" is our assignable scope

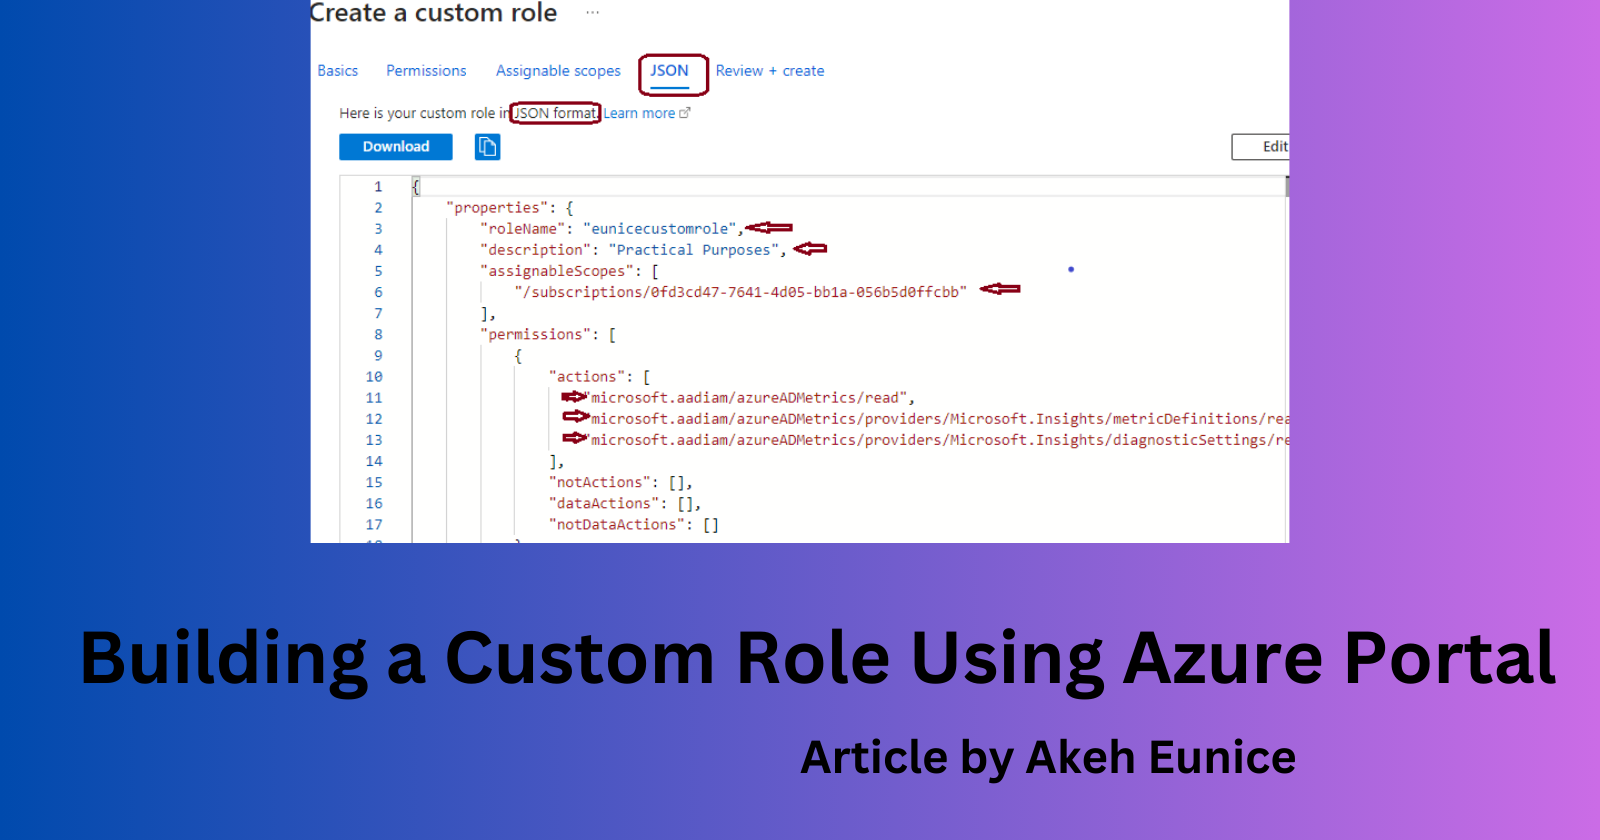
Step8: JSON(JavaScript Object Notation (JSON) is a standard, open file format that uses human-readable text to store and transmit data objects On the JSON tab, you see your custom role formatted in JSON. Next "Click On" "Review + Review"
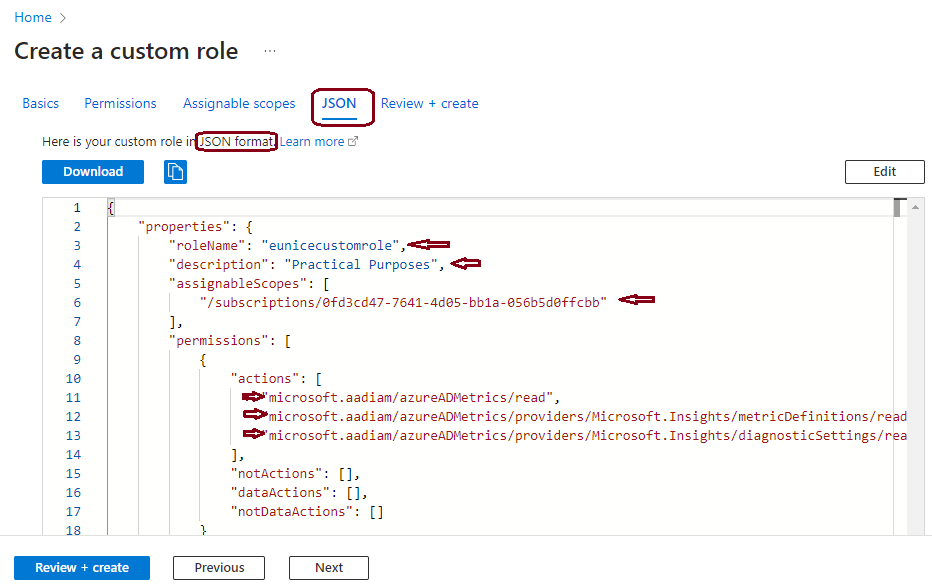
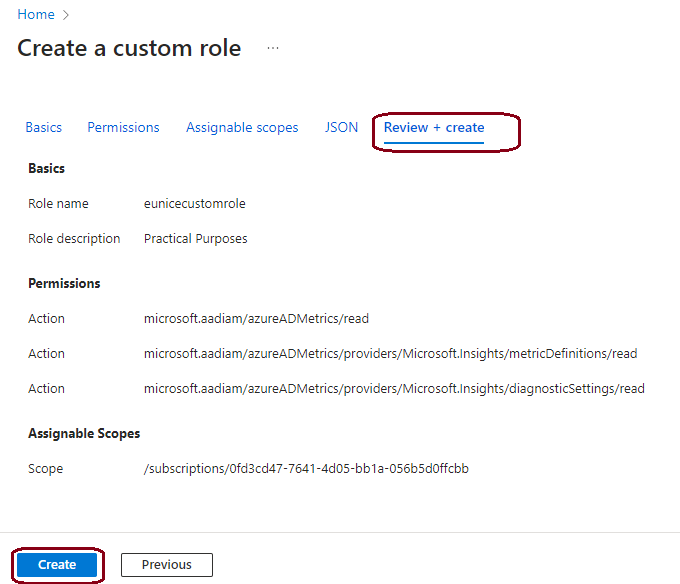
Step9: Create Custom Role Review your custom role settings and then "Click On" "Create"
Step10: Success Message A message box appears indicating your custom role was successfully created, acknowledge by "Clicking On" "Ok"

Step11: View Your Custom Role
"Click On" your "Subscription" then "Select" "Access control(IAM)" "Click On" "Roles"

Conclusion:
Building a custom role on Azure provides organizations with the flexibility to tailor access permissions according to their specific needs. By following the step-by-step guide outlined above, you can create custom roles that align precisely with your organization's requirements, thereby enhancing security and streamlining resource management within your Azure environment. As cloud environments evolve and business needs change, the ability to create custom roles empowers organizations to adapt their access control mechanisms effectively. Embrace the customization capabilities offered by Azure to optimize access management and bolster the security posture of your Azure resources.
Subscribe to my newsletter
Read articles from AKEH EUNICE directly inside your inbox. Subscribe to the newsletter, and don't miss out.
Written by
