CICD with Jenkins, HELM, ArgoCD in Kubernetes
 Er. Sahadev Dahit
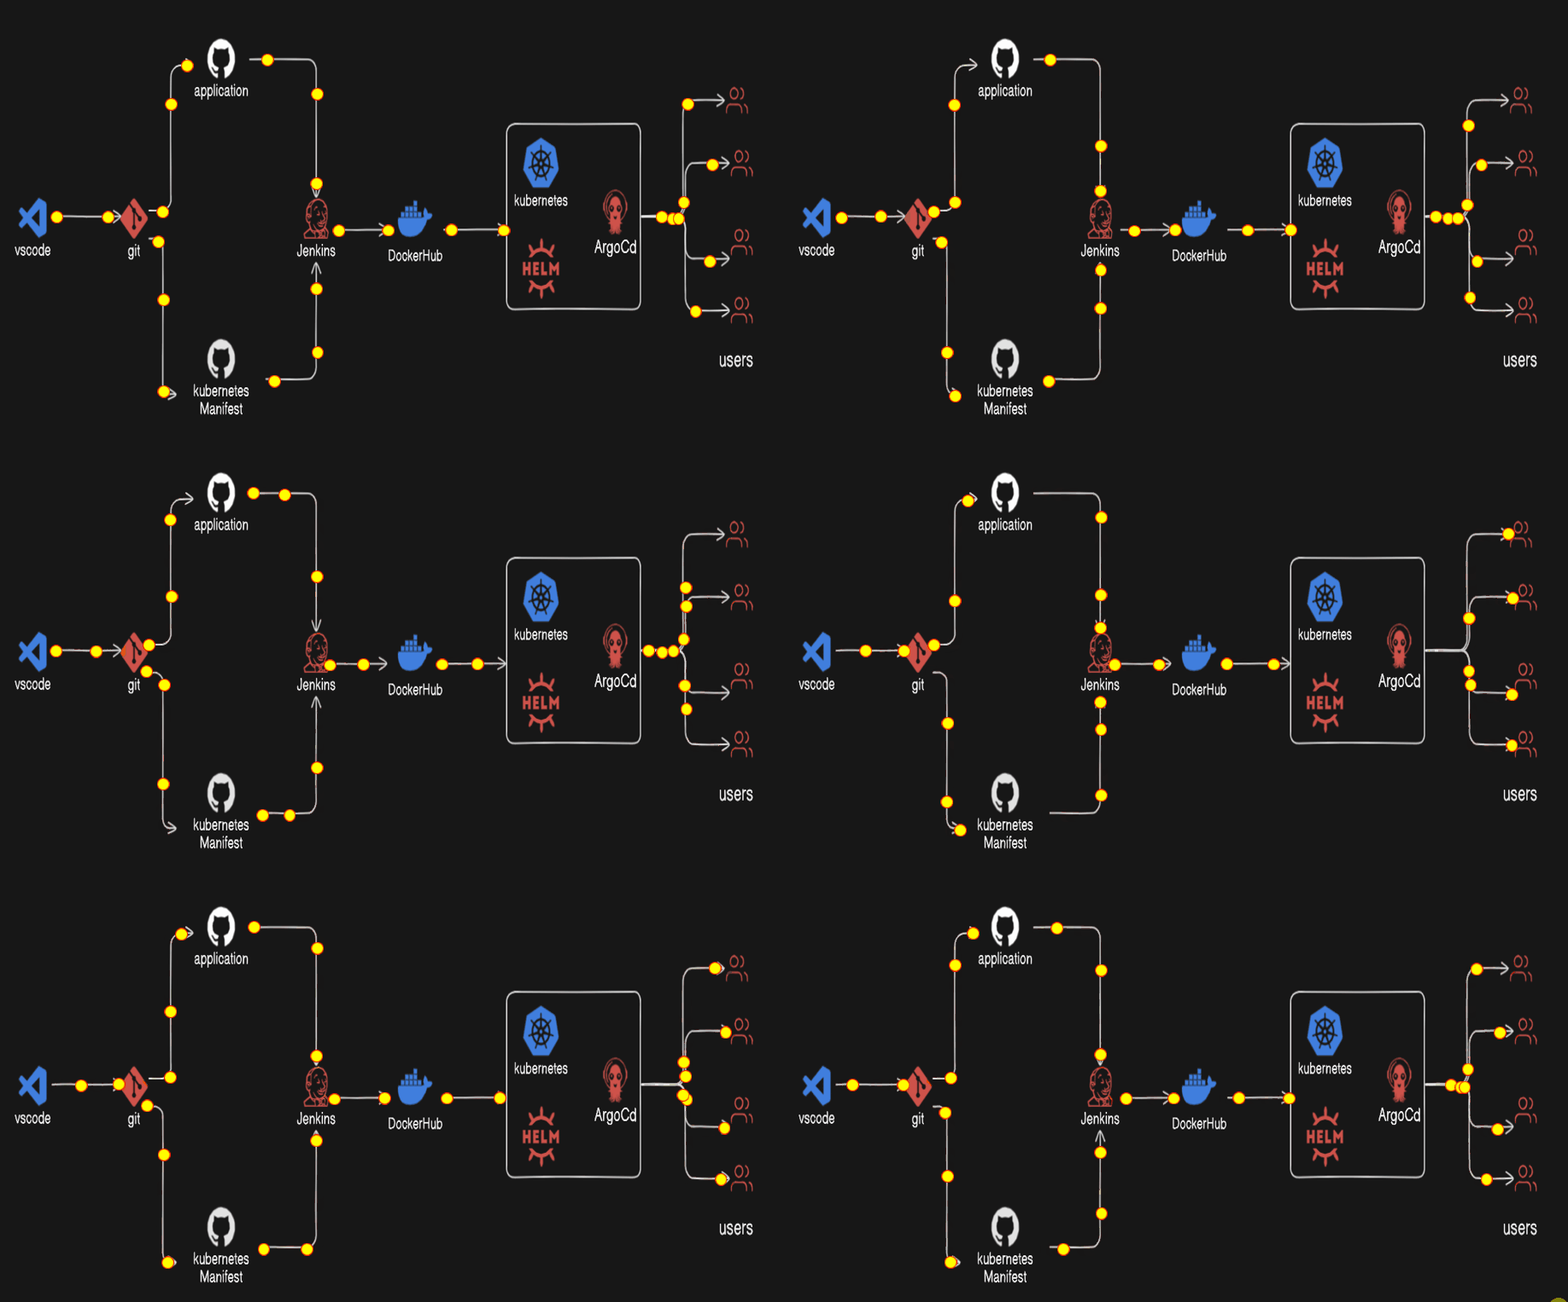
Table of Contents
Introduction
WorkFlow
Project setup with GitHub
Jenkins setup
WebHook
Kubernetes (Minikube) with Helm with Argocd setup
Introduction
Some terms need to be considered:-
Git: Git is a distributed version control system used for tracking changes in source code during software development. It allows multiple developers to collaborate on projects and keeps a history of changes, facilitating version control and team coordination.
GitHub: GitHub is a web-based platform that hosts Git repositories and provides collaboration features such as issue tracking, pull requests, and code review tools. It is widely used by developers and organizations for managing software projects and sharing code.
Webhook: A webhook is a mechanism used to automatically trigger actions in response to events that occur in web applications. In the context of version control systems like GitHub, webhooks are used to notify external services, such as continuous integration (CI) systems like Jenkins, about events like code pushes or pull request creations.
Jenkins: Jenkins is an open-source automation server used for continuous integration and continuous delivery (CI/CD) of software projects. It allows developers to automate various stages of the software development lifecycle, including building, testing, and deploying applications.
Docker: Docker is a platform for developing, shipping, and running applications inside containers. Containers provide a lightweight, portable, and consistent environment for running software across different computing environments.
DockerHub: DockerHub is a cloud-based registry service provided by Docker that allows users to store, share, and distribute Docker container images. It hosts a vast collection of publicly available container images and provides tools for managing containerized applications.
Kubernetes: Kubernetes is an open-source container orchestration platform used for automating the deployment, scaling, and management of containerized applications. It provides features such as automatic scaling, service discovery, and rolling updates, making it easier to manage containerized workloads in production environments.
Helm: Helm is a package manager for Kubernetes that simplifies the deployment and management of applications on Kubernetes clusters. It allows users to define, install, and upgrade complex Kubernetes applications using reusable, version-controlled packages called charts.
ArgoCD: ArgoCD is a declarative, GitOps continuous delivery tool for Kubernetes. It automates the deployment of applications to Kubernetes clusters based on manifests stored in Git repositories. ArgoCD ensures that the desired state of applications matches the state defined in Git, providing a consistent and auditable deployment process.
CI/CD: It is a software development practice automating code integration, testing, and deployment. It ensures fast, reliable delivery of changes to production. CI includes code integration and testing, while CD focuses on automated deployment. Tools like Jenkins, GitLab CI, and GitHub Actions facilitate CI/CD implementation, enhancing development efficiency.
WorkFlow
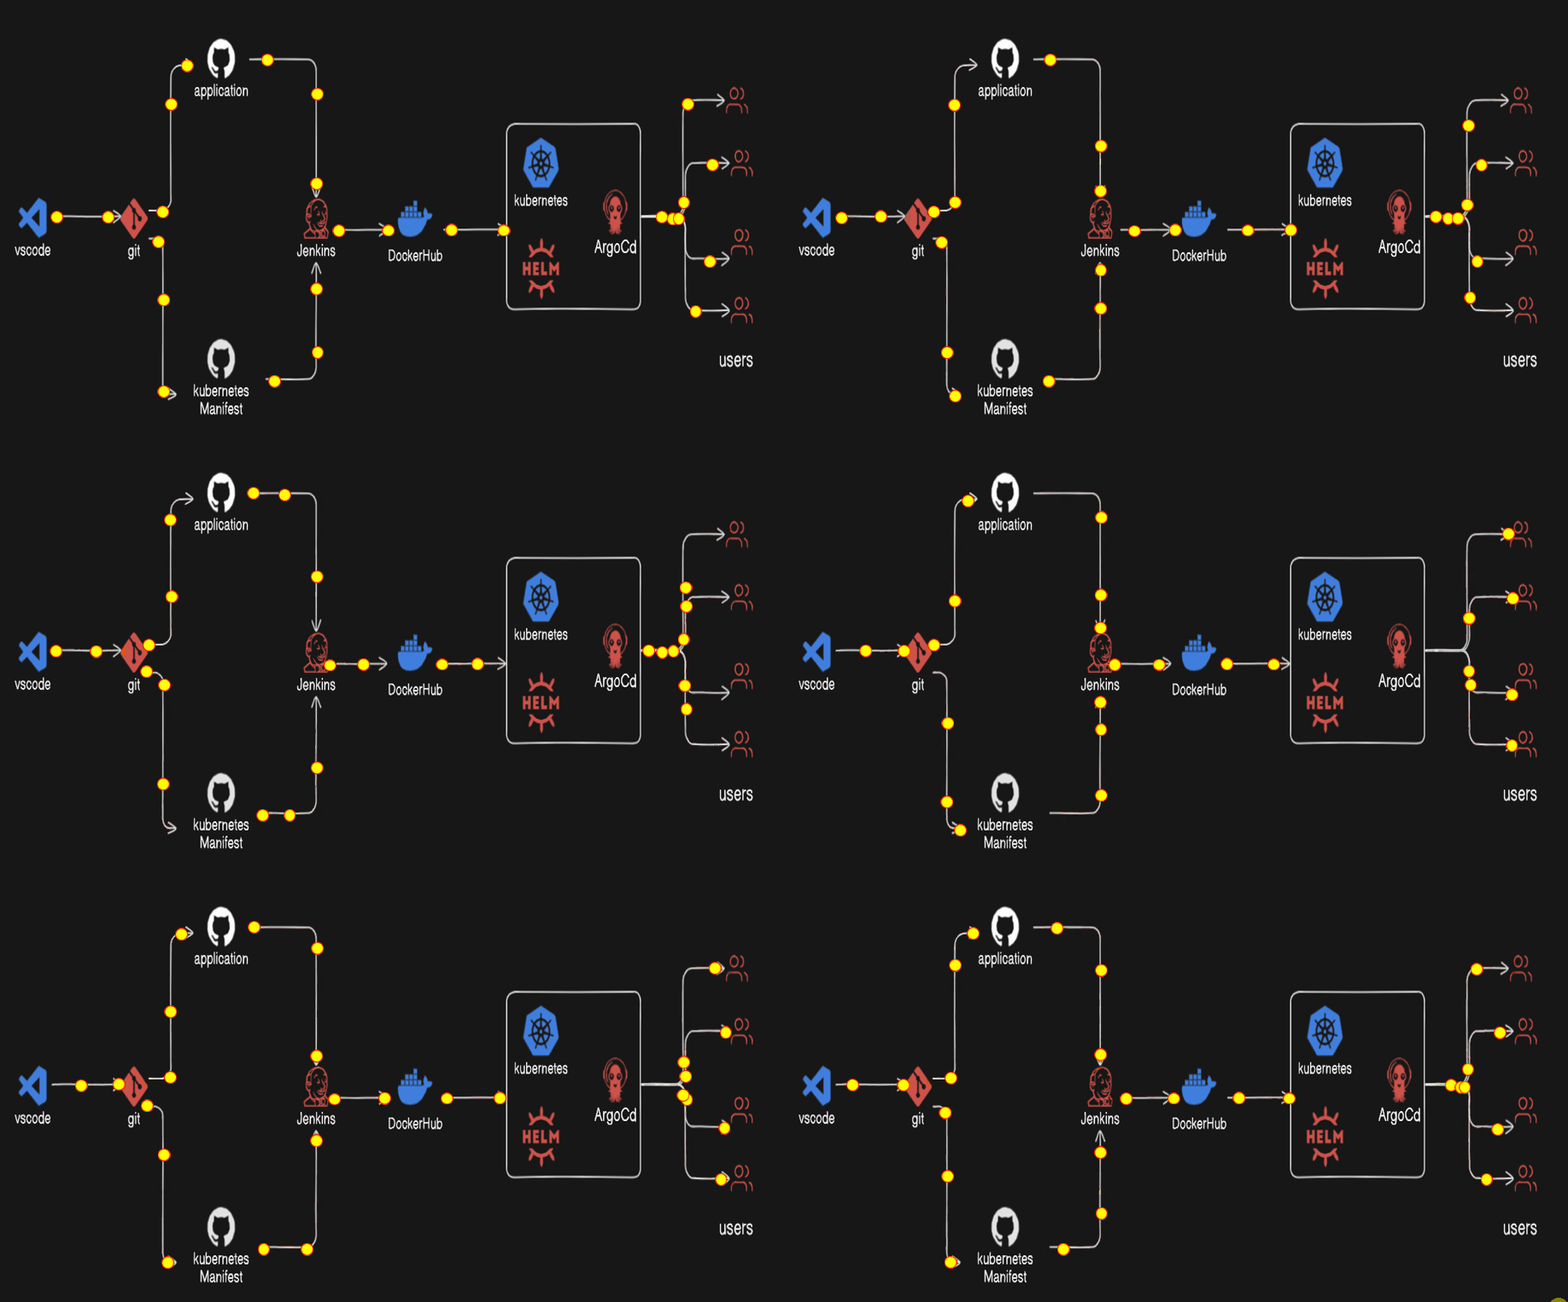
Steps
First of all, we create the two project, one is our web-app and one is for the Kubernetes manifest file.
Publish them in the Github repository separately
Then we create the two pipeline
3.1) First pipeline will clone the web-app repository and build the docker image and push to the docker hub repository with the tag build number. And Trigger the another Job with build number.
3.2) Then the second job or pipeline will be the parameterized jenkins job that update the deployment file with the image with new tag i.e. build number and commit to the github repository.
Then Kubernetes Cluster with minikube has configured the helm package repository and that helm repository will install the argocd.
The gihub repository for kubernetes manifest will be configured for the cicd deployments
GitOps is a method of continuous deployment where infrastructure configuration and application code are stored in a Git repository. Changes made to the repository trigger automated deployment pipelines, ensuring that the desired state of the infrastructure matches the state described in the repository. Continuous monitoring ensures any deviations are corrected automatically.
Project setup with GitHub
Here, we will create the two repository
WebApp repo:- https://github.com/SahadevDahit/CICI-jenkins-helm-argocd
One is for our webapp i.e node js. Make sure that you have installed node js in your machine
node --version
npm init
const express = require('express');
const dotenv = require('dotenv');
dotenv.config();
const app = express();

app.get('/', (req, res) => {
    res.json({
        message: 'Sucessfully deployed cicd pipeline with argocd helm and jenkins'
    });
});

app.get('/api', () => {
    res.json({
        message: 'this for the api server'
    });
})

const port = process.env.PORT || 4000;
// Start the server and listen on the specified port
app.listen(port, () => {
    console.log(`Server is running on http://localhost:${port}`);
});
{
  "name": "cicd-jenkins",
  "version": "1.0.0",
  "description": "cicd deployment with jenkins",
  "main": "index.js",
  "scripts": {
    "test": "echo \"Error: no test specified\" && exit 1"
  },
  "author": "sahadev dahit",
  "license": "ISC",
  "dependencies": {
    "dotenv": "^16.4.5",
    "express": "^4.18.3"
  }
}
And another for the deployment kubernetes manifest file
Github repo :- https://github.com/SahadevDahit/argocd-deployment.git
deployment.yml
apiVersion: apps/v1
kind: Deployment
metadata:
  name: test-node-deployment
spec:
  replicas: 10
  selector:
    matchLabels:
      app: test-node
  template:
    metadata:
      labels:
        app: test-node
    spec:
      containers:
      - name: test-node-container
        image: dahitsahadev/node-argocd:23
        ports:
        - containerPort: 4000
        env:
        - name: PORT
          valueFrom:
            configMapKeyRef:
              name: test-node-config
              key: PORT
service.yml
apiVersion: v1
kind: Service
metadata:
  name: test-node-service
spec:
  selector:
    app: test-node
  ports:
    - protocol: TCP
      port: 80
      targetPort: 4000
  type: NodePort
configmap.yml
apiVersion: v1
kind: ConfigMap
metadata:
  name: test-node-config
data:
  PORT: "5000"
Then push them into the github repo.
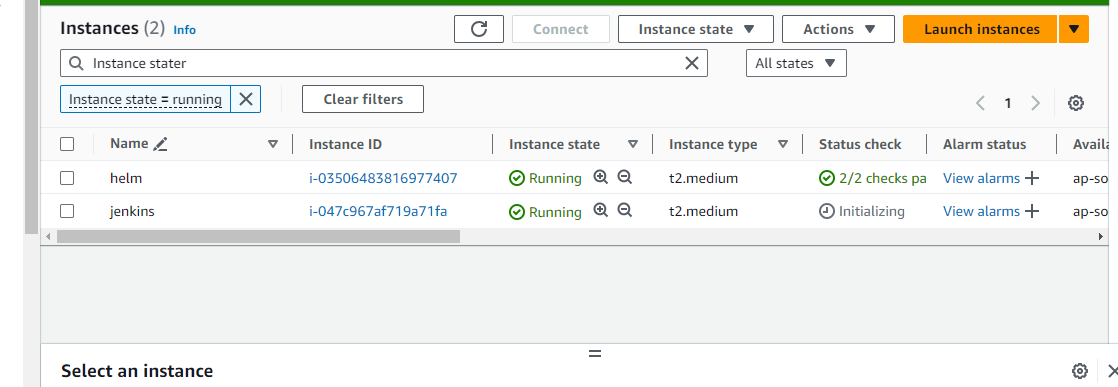
Note: Make sure that the ec2 instance have 2CPU and 2GB RAM to run efficiently for the jenkins and the kubernetes cluster along with the custom tcp port or All Traffic.
4) Jenkins setup
Installations
Reference:- https://www.jenkins.io/doc/book/installing/linux/
sudo wget -O /usr/share/keyrings/jenkins-keyring.asc \
  https://pkg.jenkins.io/debian-stable/jenkins.io-2023.key
echo deb [signed-by=/usr/share/keyrings/jenkins-keyring.asc] \
  https://pkg.jenkins.io/debian-stable binary/ | sudo tee \
  /etc/apt/sources.list.d/jenkins.list > /dev/null
sudo apt-get update
sudo apt-get install jenkins
sudo apt update
sudo apt install fontconfig openjdk-17-jre
java -version
openjdk version "17.0.8" 2023-07-18
OpenJDK Runtime Environment (build 17.0.8+7-Debian-1deb12u1)
OpenJDK 64-Bit Server VM (build 17.0.8+7-Debian-1deb12u1, mixed mode, sharing)
Also install the docker
sudo apt install docker.io
And provide the permission
sudo usermod -aG docker $USER && newgrp docker
Also make sure that you have installed git or you can install from the jenkins plugins
sudo apt update
sudo apt install git
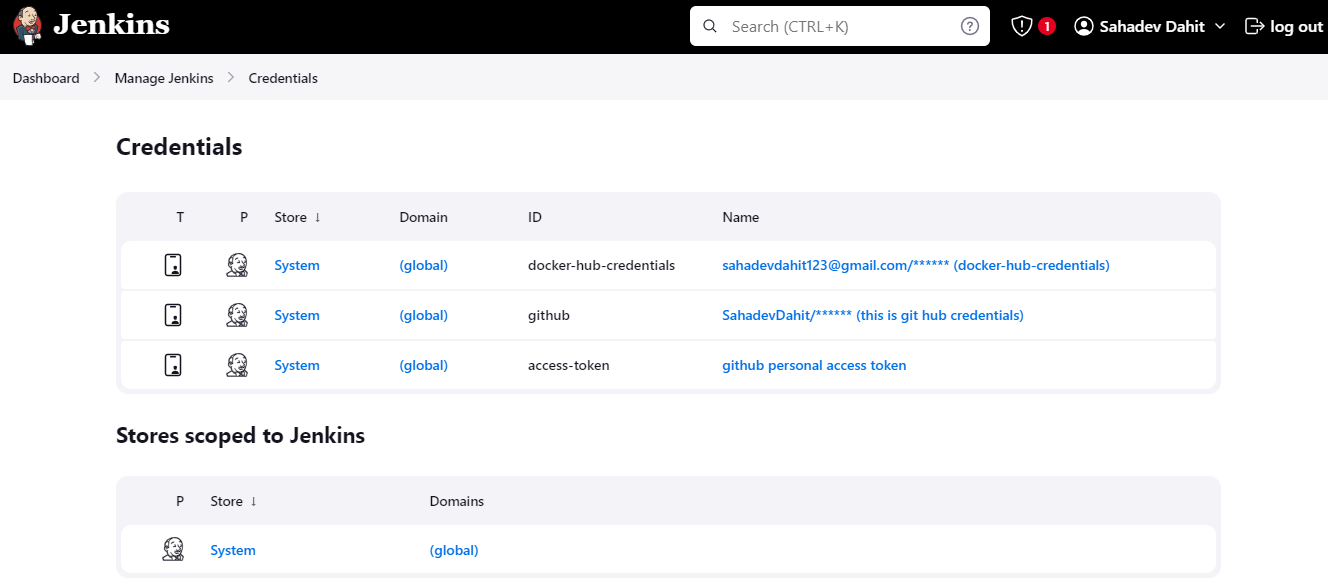
Add the following global credentials
Provide dockerhub and github credentials with username and password
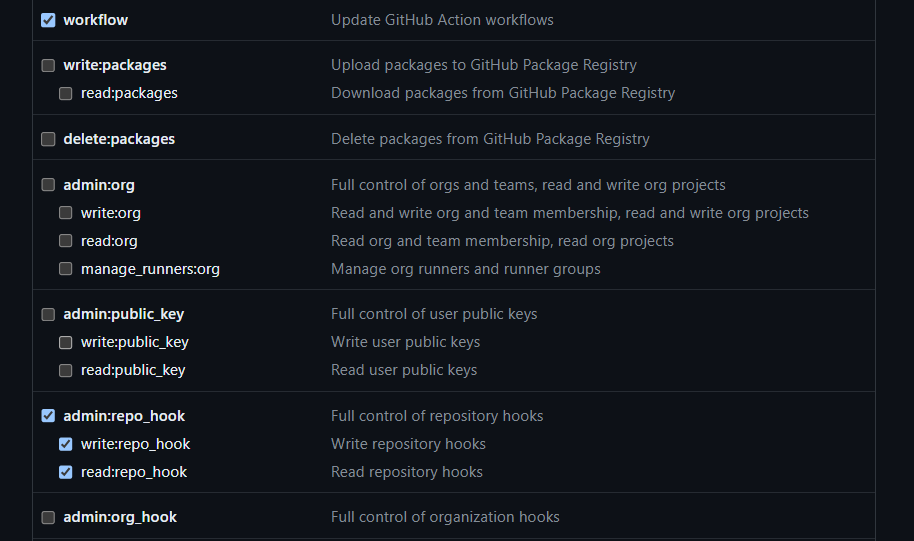
And github access token with the secret text. Generate in the github settings and developer setting.
creating personal access token
And the plugins as well

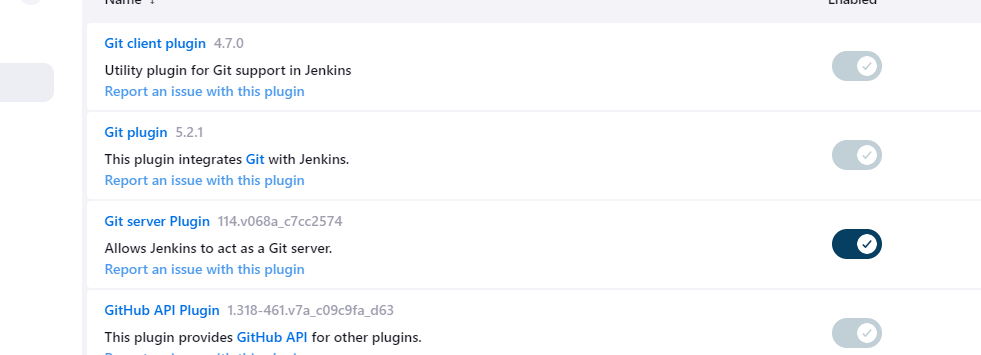
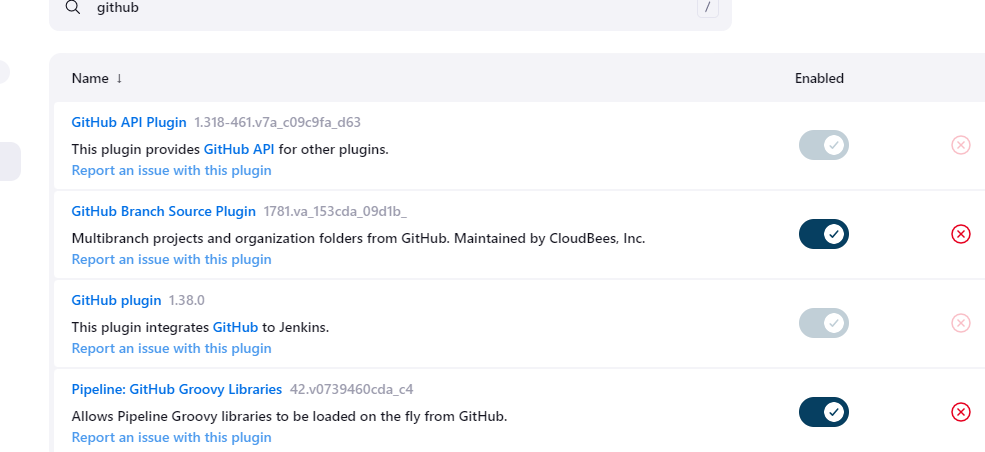
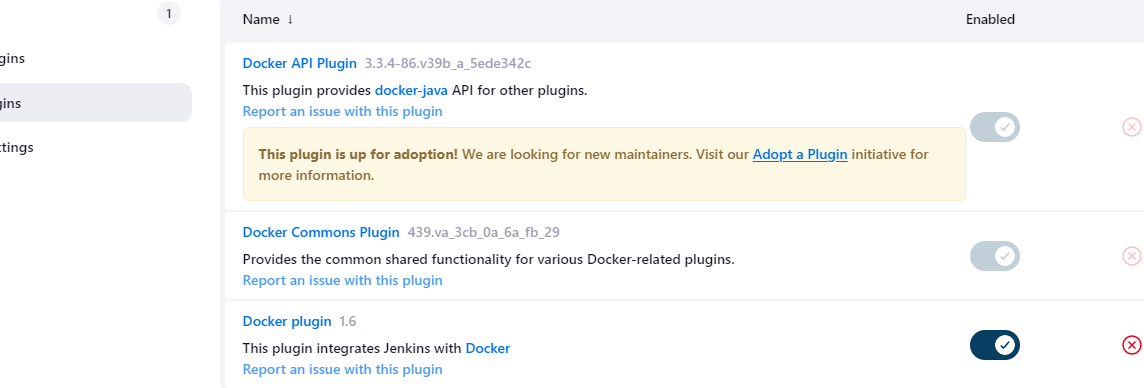
Create the repository in the dockerhub
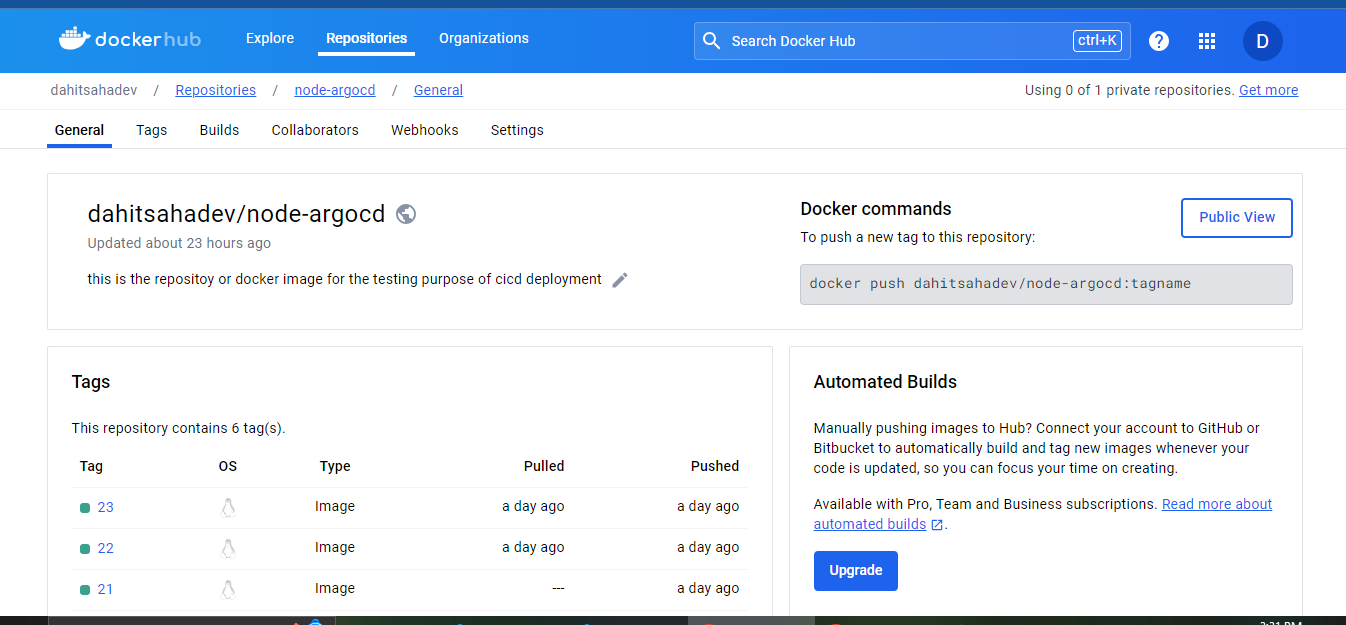
Now create the jenkins job
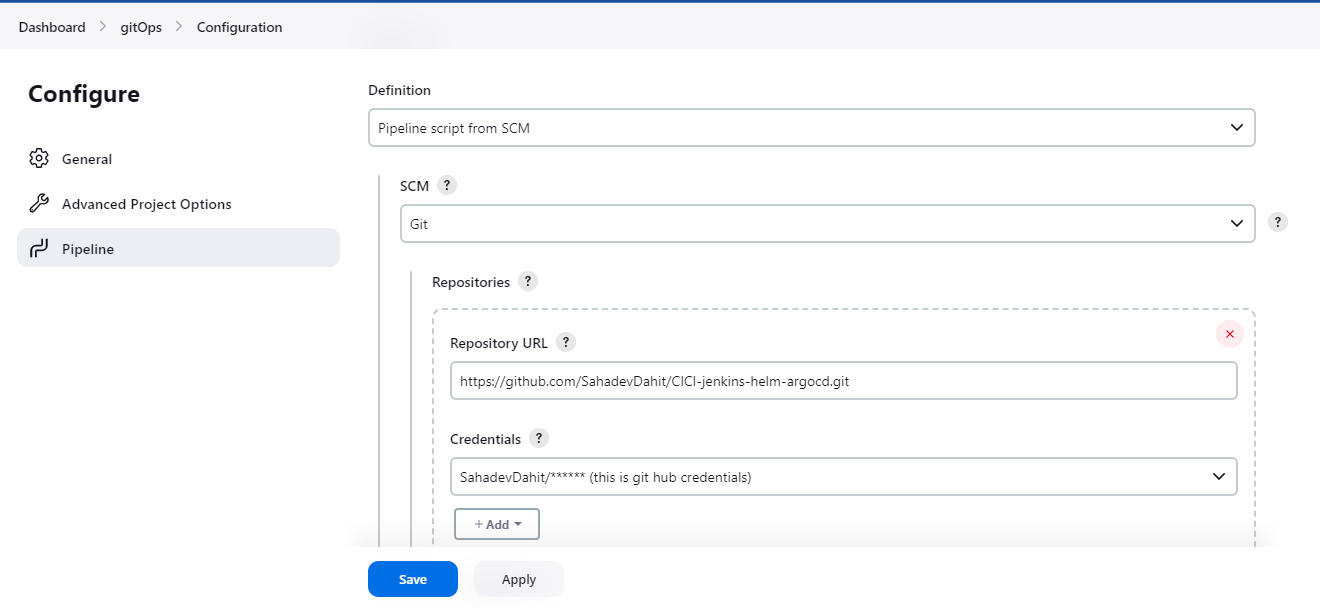
pipeline {
    agent any

    environment {
        DOCKER_IMAGE_NAME = "dahitsahadev/node-argocd"
        DOCKER_IMAGE_TAG = "${env.BUILD_NUMBER}"
    }

    stages {
        stage('Checkout') {
            steps {
                // Checkout the source code from your Git repository
                git branch: 'main',
                url: 'https://github.com/SahadevDahit/cicd-jenkins.git'
            }
        }

        stage('Remove All Previous Docker Images') {
            steps {
                // Remove all Docker images
                sh 'docker rmi $(docker images -a -q) || true'
            }
        }

        stage('Build Docker Image') {
            steps {
                script {
                    // Build the Docker image with the specified name and tag
                    sh "docker build --rm -t ${DOCKER_IMAGE_NAME}:${DOCKER_IMAGE_TAG} ."
                }
            }
        }

        stage('Push Docker Image to Registry') {
            steps {
                script {
                    // Log in to Docker registry and push the Docker image
                    withCredentials([usernamePassword(credentialsId: 'docker-hub-credentials', usernameVariable: 'DOCKERHUB_USERNAME', passwordVariable: 'DOCKERHUB_PASSWORD')]) {
                        sh "echo ${DOCKERHUB_PASSWORD} | docker login -u ${DOCKERHUB_USERNAME} --password-stdin"
                        sh "docker push ${DOCKER_IMAGE_NAME}:${DOCKER_IMAGE_TAG}"
                    }
                }
            }
        }

        stage('Trigger ManifestUpdate') {
            steps {
                echo "triggering updatemanifestjob"
                build job: 'updatemanifest', parameters: [string(name: 'DOCKERTAG', value: env.BUILD_NUMBER)]
            }
        }
    }

    post {
        success {
            echo 'Pipeline execution successful!'
        }
        failure {
            echo 'Pipeline execution failed!'
        }
    }
}
Pipeline Structure:
Agent: Specifies that the pipeline can execute on any available agent.
Environment: Sets up environment variables used within the pipeline. It defines the Docker image name (
DOCKER_IMAGE_NAME) and tag (DOCKER_IMAGE_TAG). The tag is set to the current build number (env.BUILD_NUMBER).Stages:
Checkout: Clones the source code from a Git repository (
SahadevDahit/cicd-jenkins) on themainbranch.Remove All Previous Docker Images: Removes all existing Docker images to ensure a clean environment for building and pushing the new image.
Build Docker Image: Builds the Docker image using the specified name and tag.
Push Docker Image to Registry: Logs in to the Docker registry using provided credentials and pushes the Docker image with the specified name and tag.
Trigger ManifestUpdate: Triggers another Jenkins job (
updatemanifest) namedupdatemanifestjob, passing the Docker image tag (DOCKERTAG) as a parameter. This job is responsible for updating Kubernetes manifests with the newly built Docker image tag.
Post Section:
Success: Displays a message indicating successful pipeline execution if all stages complete successfully.
Failure: Displays a message indicating pipeline execution failure if any stage fails.
Explanation:
The pipeline starts by checking out the source code from the specified Git repository.
It then removes all existing Docker images to ensure a clean build environment.
The Docker image is built using the specified name and tag, incorporating the current build number as the tag.
The built Docker image is pushed to the Docker registry using provided credentials.
Finally, the pipeline triggers another Jenkins job (
updatemanifest) to update Kubernetes manifests with the newly built Docker image tag.
This pipeline automates the process of building, pushing, and updating Kubernetes manifests with Docker images, providing an efficient CI/CD workflow for containerized applications.
Now let's build the another job for updating the kubernetes manifest file
It is parameterized job
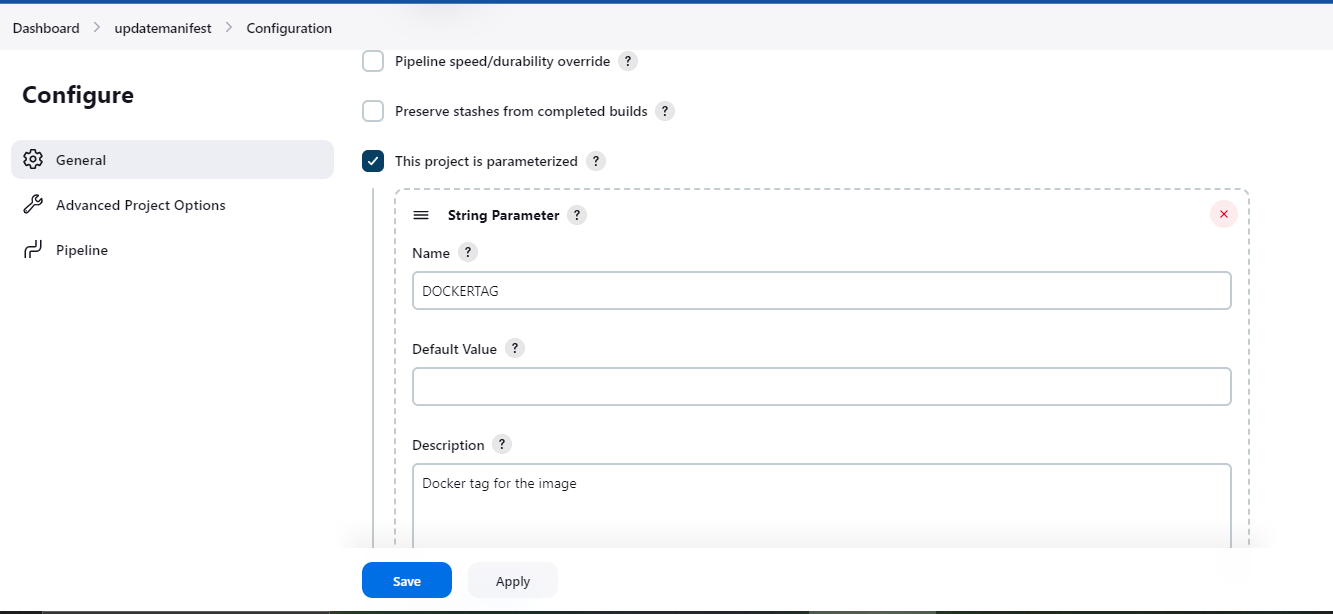
pipeline {
    agent any

    environment {
        // Initialize variables
        GIT_USERNAME = 'SahadevDahit'  // Update with your GitHub username
        GIT_TOKEN_CREDENTIALS_ID = 'access-token'  // Update with the ID of your GitHub PAT credential
    }

    parameters {
        string(name: 'DOCKERTAG', defaultValue: '', description: 'Docker tag for the image')
    }

    stages {
        stage('Clone repository') {
            steps {
                // Specify the repository URL and branch explicitly
                git branch: 'main', url: 'https://github.com/SahadevDahit/argocd-deployment.git'
            }
        }

        stage('Update GIT') {
            steps {
                script {
                    // Retrieve Jenkins credentials for GitHub using PAT
                    withCredentials([string(credentialsId: GIT_TOKEN_CREDENTIALS_ID, variable: 'GIT_TOKEN')]) {
                        catchError(buildResult: 'SUCCESS', stageResult: 'FAILURE') {
                            sh "git config user.email sahadevdahit123@gmail.com"
                            sh "git config user.name SahadevDahit"
                            sh "cat deployment.yml"
                            sh "sed -i 's+dahitsahadev/node-argocd.*+dahitsahadev/node-argocd:${params.DOCKERTAG}+g' deployment.yml"
                            sh "cat deployment.yml"
                            sh "git add ."
                            sh "git commit -m 'Done by Jenkins Job changemanifest: ${params.DOCKERTAG}'"
                            sh "git push https://${GIT_USERNAME}:${GIT_TOKEN}@github.com/${GIT_USERNAME}/argocd-deployment.git HEAD:main"
                        }
                    }
                }
            }
        }
    }

    post {
        success {
            echo 'Pipeline execution successful!'
        }
        failure {
            echo 'Pipeline execution failed!'
        }
    }
}
This Jenkins pipeline is designed to automate the process of updating a Git repository with changes to a Kubernetes deployment manifest file (deployment.yml). Let's break down the key components and explain how the pipeline works:
Pipeline Structure:
Agent: The pipeline is configured to run on any available agent.
Environment: Defines environment variables used within the pipeline. It initializes variables for the GitHub username (
GIT_USERNAME) and the credentials ID of the GitHub Personal Access Token (PAT) (GIT_TOKEN_CREDENTIALS_ID).Parameters: Defines a parameter named
DOCKERTAG, which represents the Docker tag for the image. This allows users to specify the tag when triggering the pipeline.Stages:
Clone repository: Clones the Git repository (
argocd-deployment.git) from GitHub, specifically themainbranch.Update GIT: Performs the following steps:
Configures Git user email and name.
Displays the contents of the
deployment.ymlfile.Updates the Docker image tag in
deployment.ymlusingsed.Displays the updated
deployment.yml.Adds all changes to the Git staging area.
Commits the changes with a commit message indicating the Docker tag used.
Pushes the changes to the GitHub repository using the provided GitHub credentials.
Post Section:
Success: Displays a message indicating successful pipeline execution if all stages complete successfully.
Failure: Displays a message indicating pipeline execution failure if any stage fails.
Explanation:
The pipeline starts by cloning the repository containing the Kubernetes deployment manifest.
It then updates the manifest file (
deployment.yml) to use the Docker image tag specified by the user.After updating the manifest, the pipeline commits the changes to the Git repository and pushes them to the
mainbranch.Finally, the pipeline provides feedback on whether the execution was successful or failed.
This pipeline enables automated updating of Kubernetes deployment manifests in a Git repository, allowing for efficient and controlled deployments based on changes to the Docker image tag.
5) WebHook
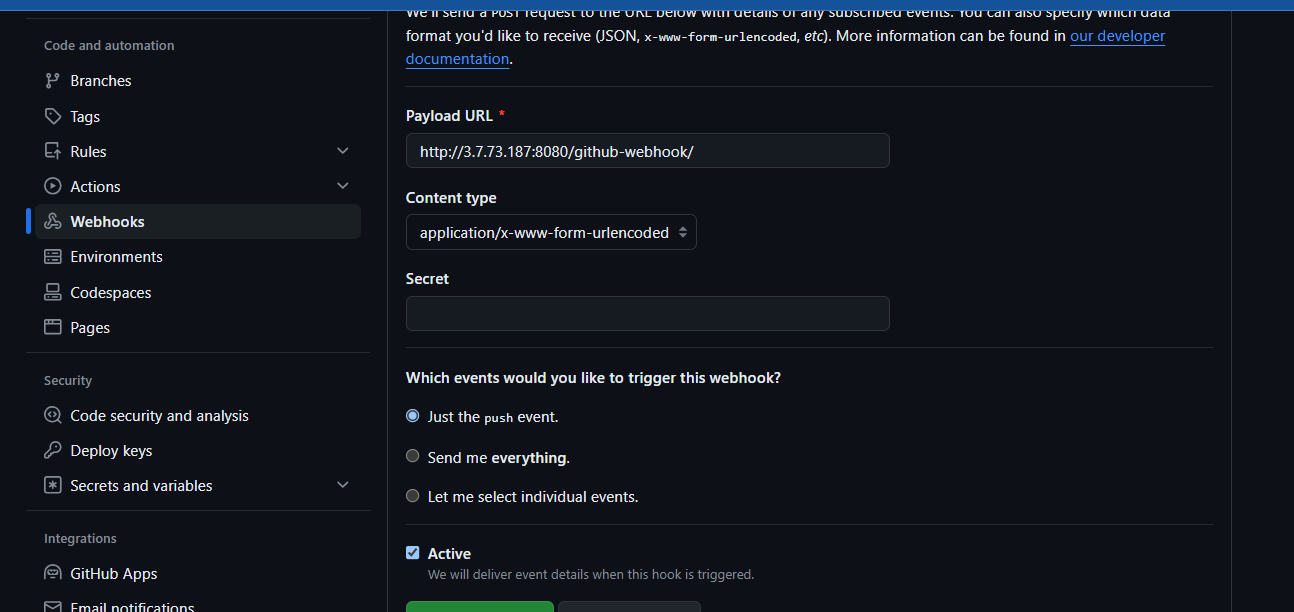

6) Kubernetes (Minikube) with Helm with Argocd setup
Reference:- https://minikube.sigs.k8s.io/docs/start/
requirements:-
2 CPUs or more
2GB of free memory
20GB of free disk space
Internet connection
installation in ec2 ubuntu instance
curl -LO https://storage.googleapis.com/minikube/releases/latest/minikube-linux-amd64
sudo install minikube-linux-amd64 /usr/local/bin/minikube && rm minikube-linux-amd64
minikube start
If you already have kubectl installed (see documentation), you can now use it to access your shiny new cluster:
kubectl get po -A
Alternatively, minikube can download the appropriate version of kubectl and you should be able to use it like this:
minikube kubectl -- get po -A
You can also make your life easier by adding the following to your shell config: (for more details see: kubectl)
alias kubectl="minikube kubectl --"
OR you can install kubectl directly using the kubectl documentation using
reference :- https://kubernetes.io/docs/tasks/tools/
Now install the helm in the minikube cluster
reference:- https://helm.sh/docs/intro/install/
curl https://baltocdn.com/helm/signing.asc | gpg --dearmor | sudo tee /usr/share/keyrings/helm.gpg > /dev/null
sudo apt-get install apt-transport-https --yes
echo "deb [arch=$(dpkg --print-architecture) signed-by=/usr/share/keyrings/helm.gpg] https://baltocdn.com/helm/stable/debian/ all main" | sudo tee /etc/apt/sources.list.d/helm-stable-debian.list
sudo apt-get update
sudo apt-get install helm
Now install the argocd using the helm
Steps for installing argocd using helm charts.
- Clone the argocd github repo into your local with the below command.
git clone https://github.com/argoproj/argo-helm.git
2. Now go to the folder inside the repo where we can install the argocd using the below command.
cd argo-helm/charts/argo-cd/
3. Create a namespace with the name of your choice, here in my case I’m using it as myargo
kubectl create ns myargo
4. Now before installing the argocd with helm, if you want to do any customizations in the values.yaml you can do it and once changes are done in values.yaml file, use the below the command to update the dependencies in helm.
helm dependency up
Once you apply above command, you will get something like below in your terminal.
helm dependency up

Getting updates for unmanaged Helm repositories...
...Successfully got an update from the "https://dandydeveloper.github.io/charts/" chart repository
Hang tight while we grab the latest from your chart repositories...
...Successfully got an update from the "grafana" chart repository
...Successfully got an update from the "prometheus-community" chart repository
Update Complete. ⎈Happy Helming!⎈
Saving 1 charts
Downloading redis-ha from repo https://dandydeveloper.github.io/charts/
Deleting outdated charts
5. Now install the argocd using below command.
helm install myargo . -f values.yaml -n myargo
Once installation is done, lets check the status of the pods.
kubectl get po -n myargo
Use the below command to do the port-forwarding in a detached mode
kubectl port-forward svc/myargo-argocd-server -n myargo --address 0.0.0.0 8080:443 > /dev/null 2>&1 &
To get the initial password
kubectl -n myargo get secret argocd-initial-admin-secret -o jsonpath='{.data.password}' | base64 -d
Remember that default username in admin while login.
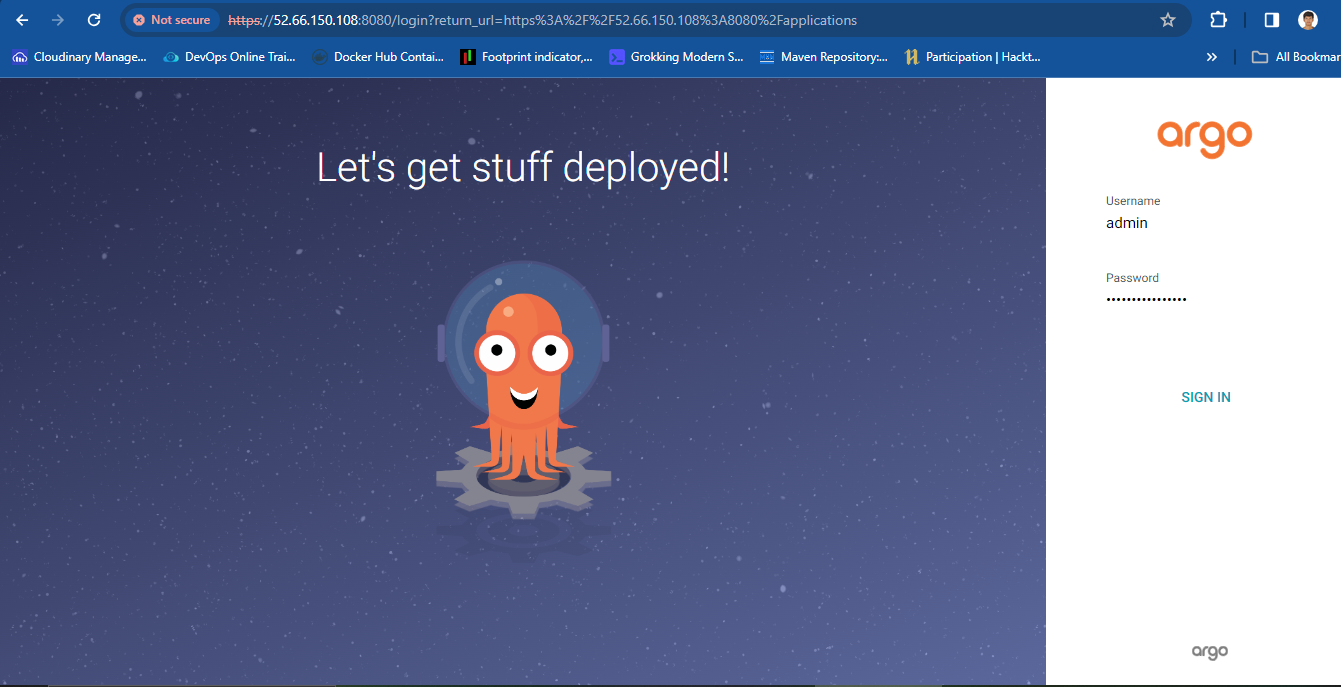
Now create the new apps or project


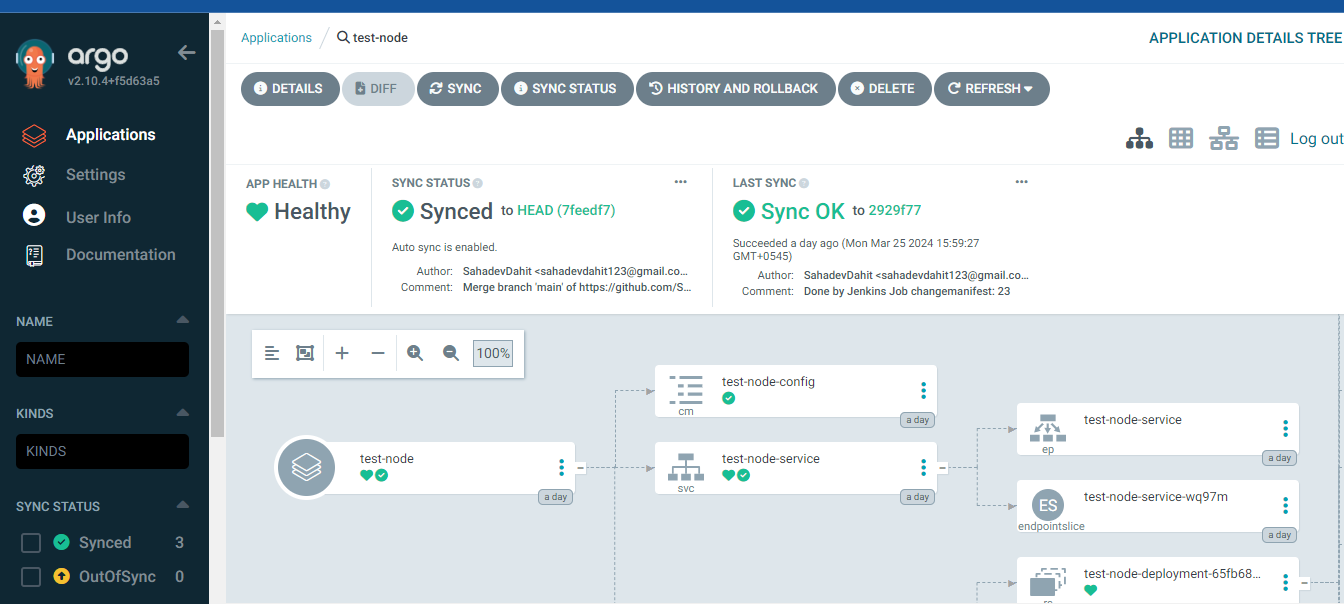
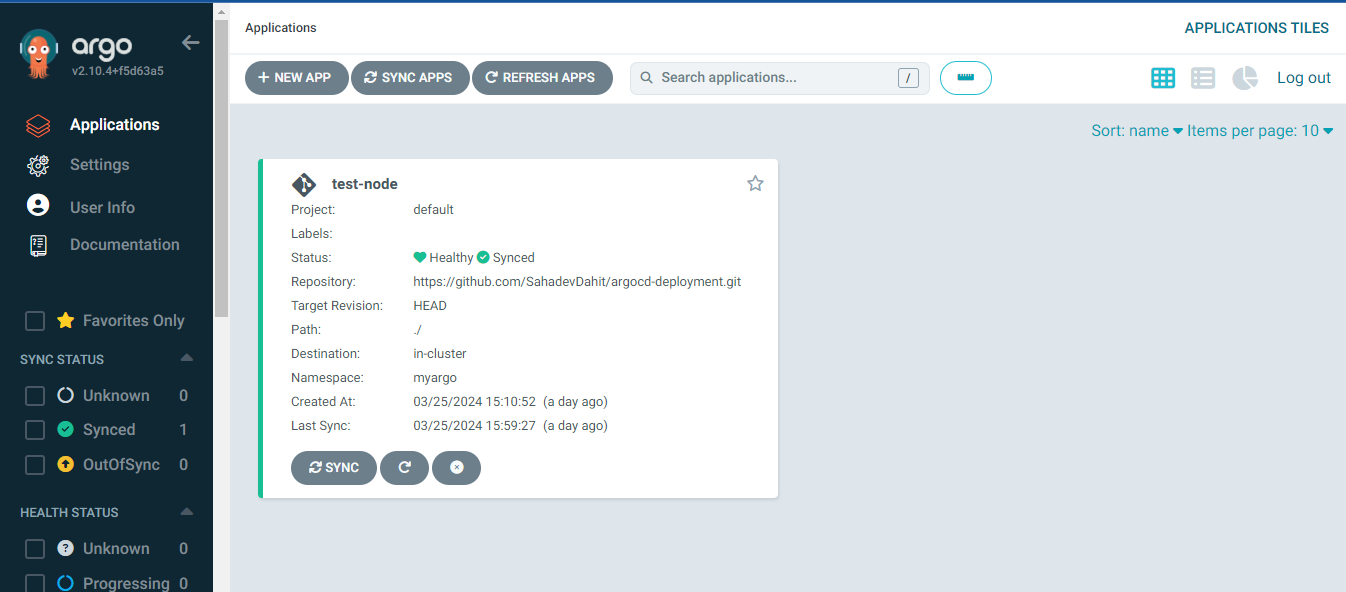
Now expose the service
kubectl get services -n myargo -o wide

Since the pods is running inside the minikube i.e similar to the virtual machine
we need to port forward
kubectl port-forward svc/test-node-service 8082:80 --address 0.0.0.0 -n myargo

Let's make some changes in the code and commit and wait untill it sync
In this way, we can setup the cicd pipeline using the jenkins, webhook , kubernetes, helm and argocd.
Thanks for reading.....................................................
Subscribe to my newsletter
Read articles from Er. Sahadev Dahit directly inside your inbox. Subscribe to the newsletter, and don't miss out.
Written by

Er. Sahadev Dahit
Er. Sahadev Dahit
I am a dedicated full stack engineer and DevOps Engineer with a solid foundation in both front-end and back-end along with Cloud and DevOps.