A simple CI/CD using the AWS Code pipeline
 Ranjith R
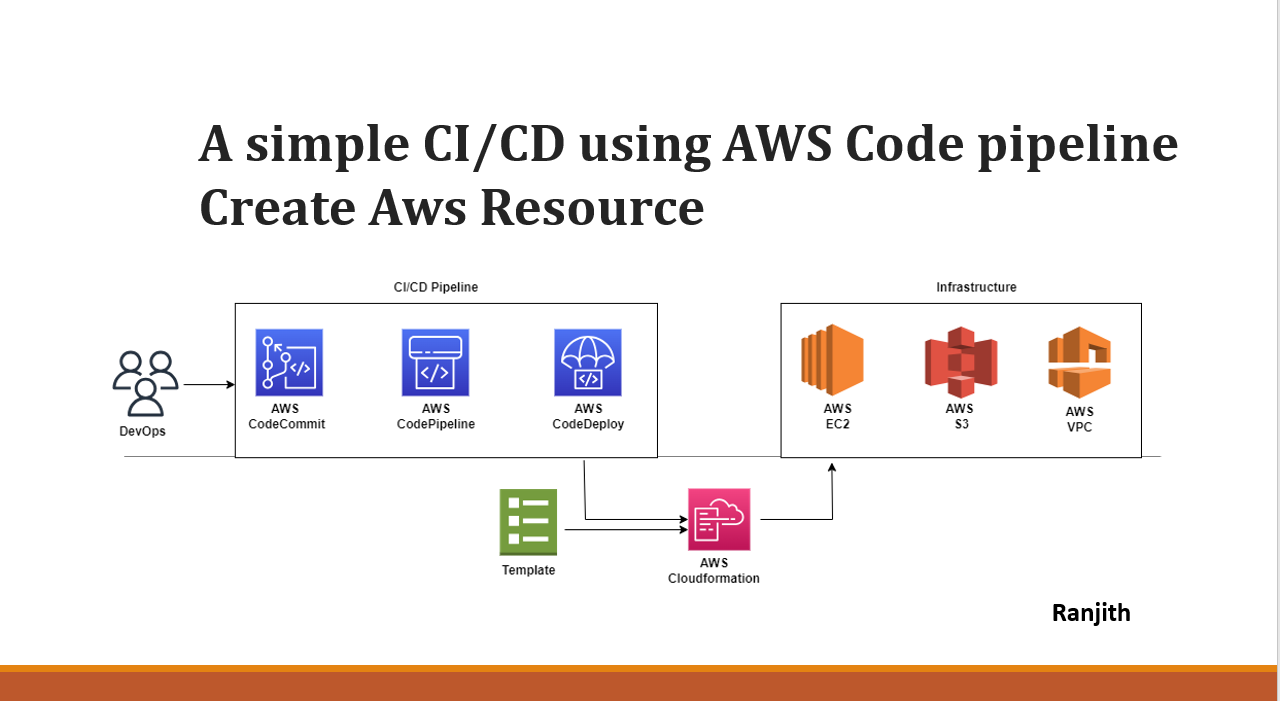
CI/CD stands for Continuous Integration/Continuous Deployment. It is an iterative process that helps ensure code quality, streamline development workflows and deliver software updates rapidly. It is one of the best practices for the DevOps team.
In this article, I will show you how to create an AWS Code pipeline to create AWS resources EC2, S3, VPC, Subnets etc. and also deploy a web server namely, Nginx.

AWS Code pipeline:

AWS Codepipeline is a service provided by Amazon Web Services (AWS) that will fully manage Continuous Integration and Continuous Delivery. While Codepipeline is the primary service, other services can be integrated with Codepipeline to build end-to-end CI/CD pipelines. The other services are :
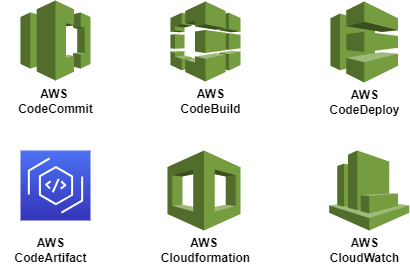
Code pipeline Services
AWS CodeCommit: It is a fully managed source code version control that enables secure code storage.
AWS CodeBuild: This is a fully managed build service. It compiles a source code, runs tests and produces deployable artefacts. This appears as a part of the Build stage.
AWS CodeDeploy: This is a fully managed that automates application deployment to various compute resources like Amazon EC2, AWS Lambda functions and on-premise servers.
AWS CodeArtifact: It is a managed artefact repository for secure storage, publishing, and sharing of software packages.
AWS CloudFormation: It is an Infrastructure as a Code (IaaC) service that automates the provisioning and management of AWS resources.
AWS CloudWatch: It is a monitoring and observability service for collecting, analyzing and acting on logs, metrics, and events in the AWS environment.
For this article, we will be using CodePipeline with services CodeCommit, CodeDeploy and Cloudformation.
Get Started:
Login to your AWS account and Navigate to Identity and Access Management(IAM).
Go to Roles and select Create Role.

IAM
3. Select AWS service and in use-cases, select EC2 and in other AWS services, select Cloudformation. Click Next.
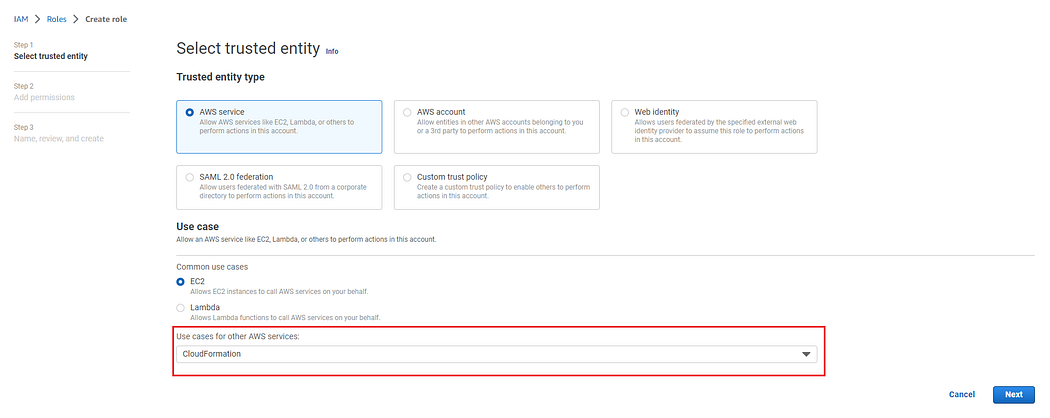
Usecase
4. In permissions, Choose AdministratorAccess, AmazonEC2FullAccess and AWSCloudFormationFullAccess and click Next.

Permissions
5. Provide a name to the role and check for the review of policies that you intended to add and do Create Role.
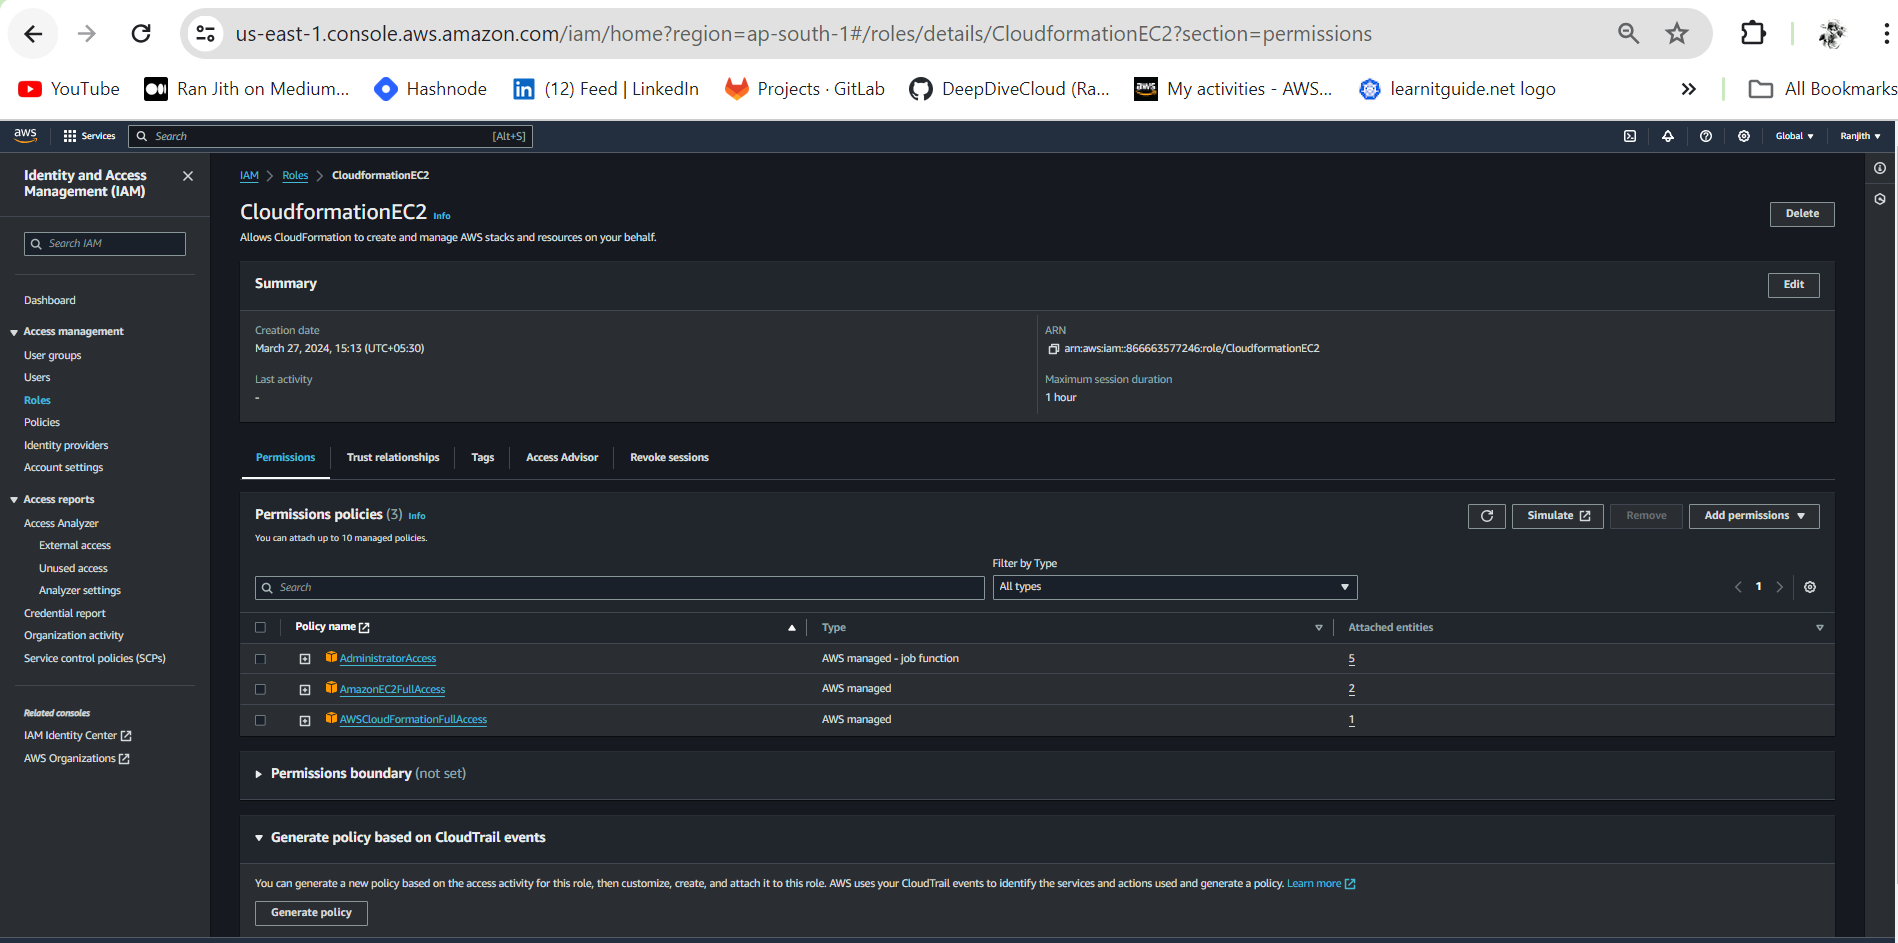
A new Role “cloudformationEC2” has been created. This IAM will be useful while creating the AWS Code pipeline.
AWS Code Pipeline Creation:
Go to CodeCommit in AWS and Click on Create Repository. This repository will contain the source code for the creation of AWS resources i.e. EC2 instance, S3, VPC and Nginx server.
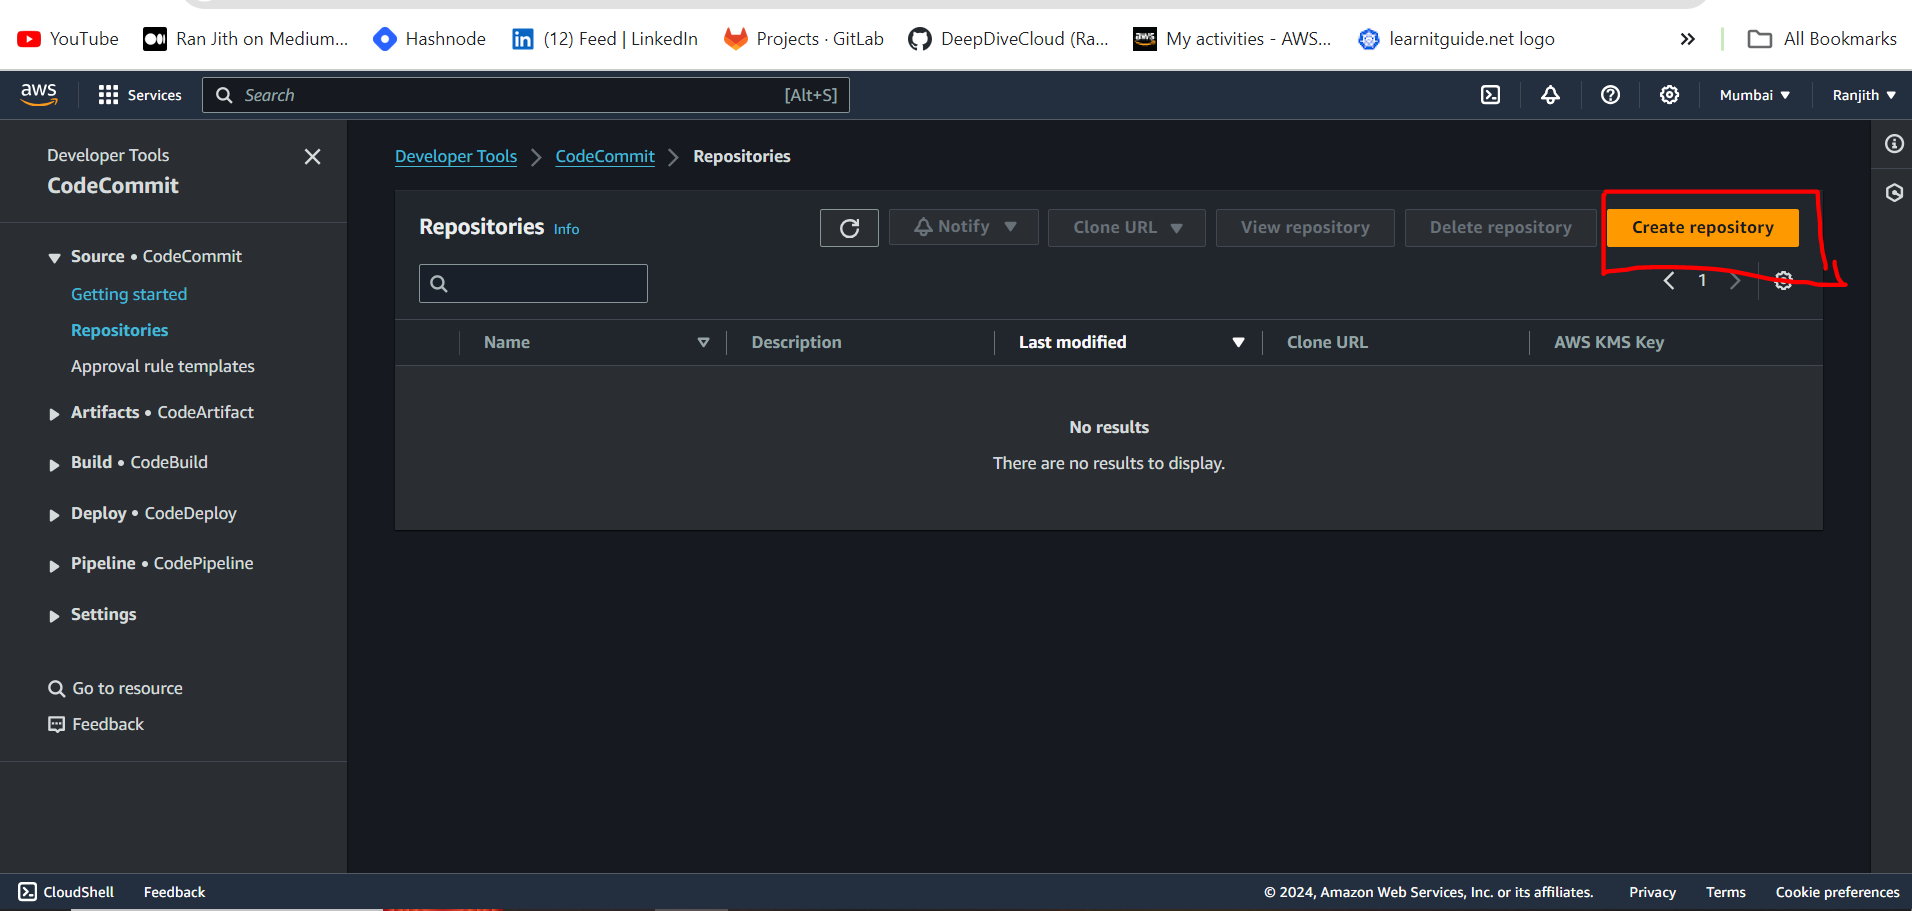
CodeCommit
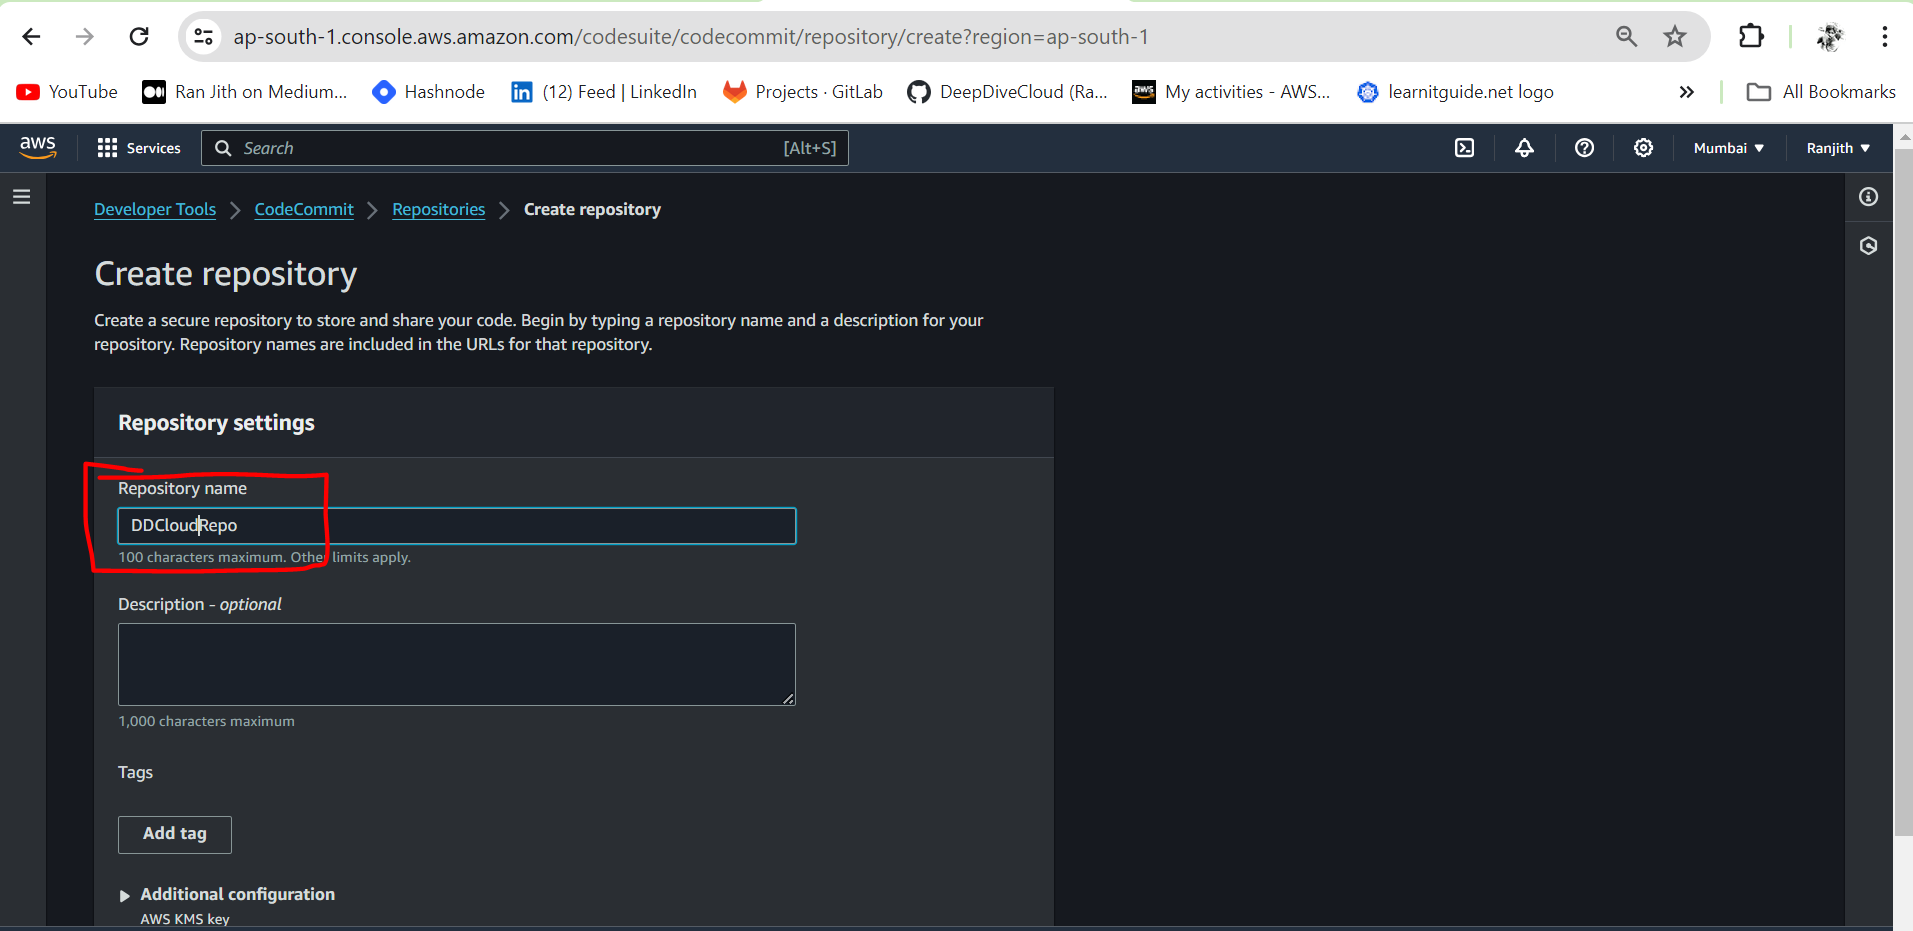
3. Provide a Repository name and click Create.
4. A repository gets created. Now we need to add the file that consists of the code for the creation of AWS Resources and the Nginx server. For that, you will find the option Add file. In that click Create file.
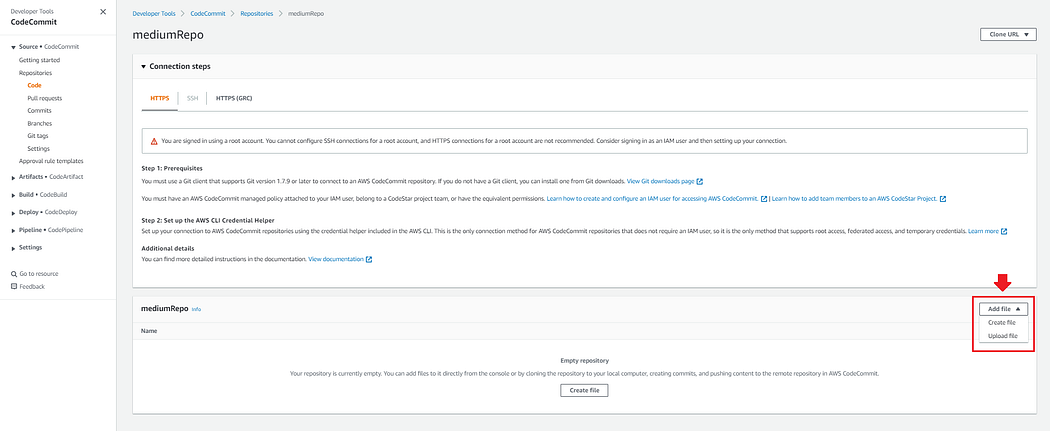
Adding file in Repository
If you have a file, you can use the Upload file option and upload any .yml file as well.
5. In the Info section, you will provide the code.
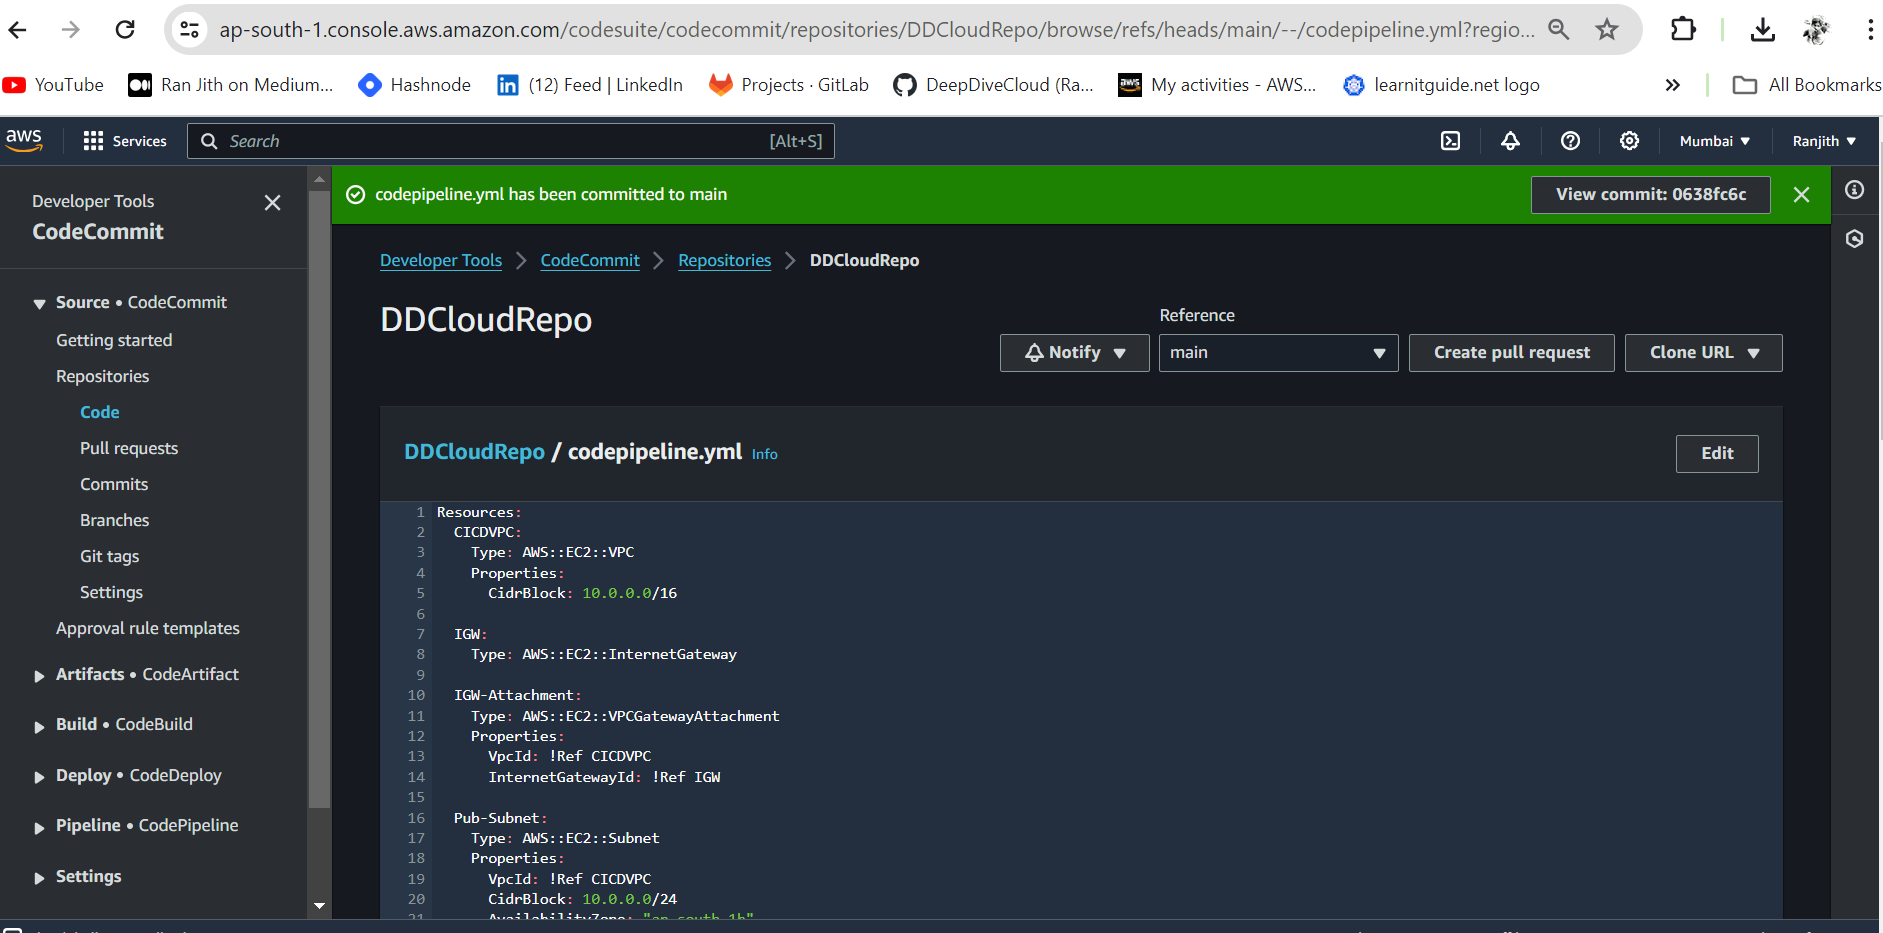
You can find the link to the source code here.
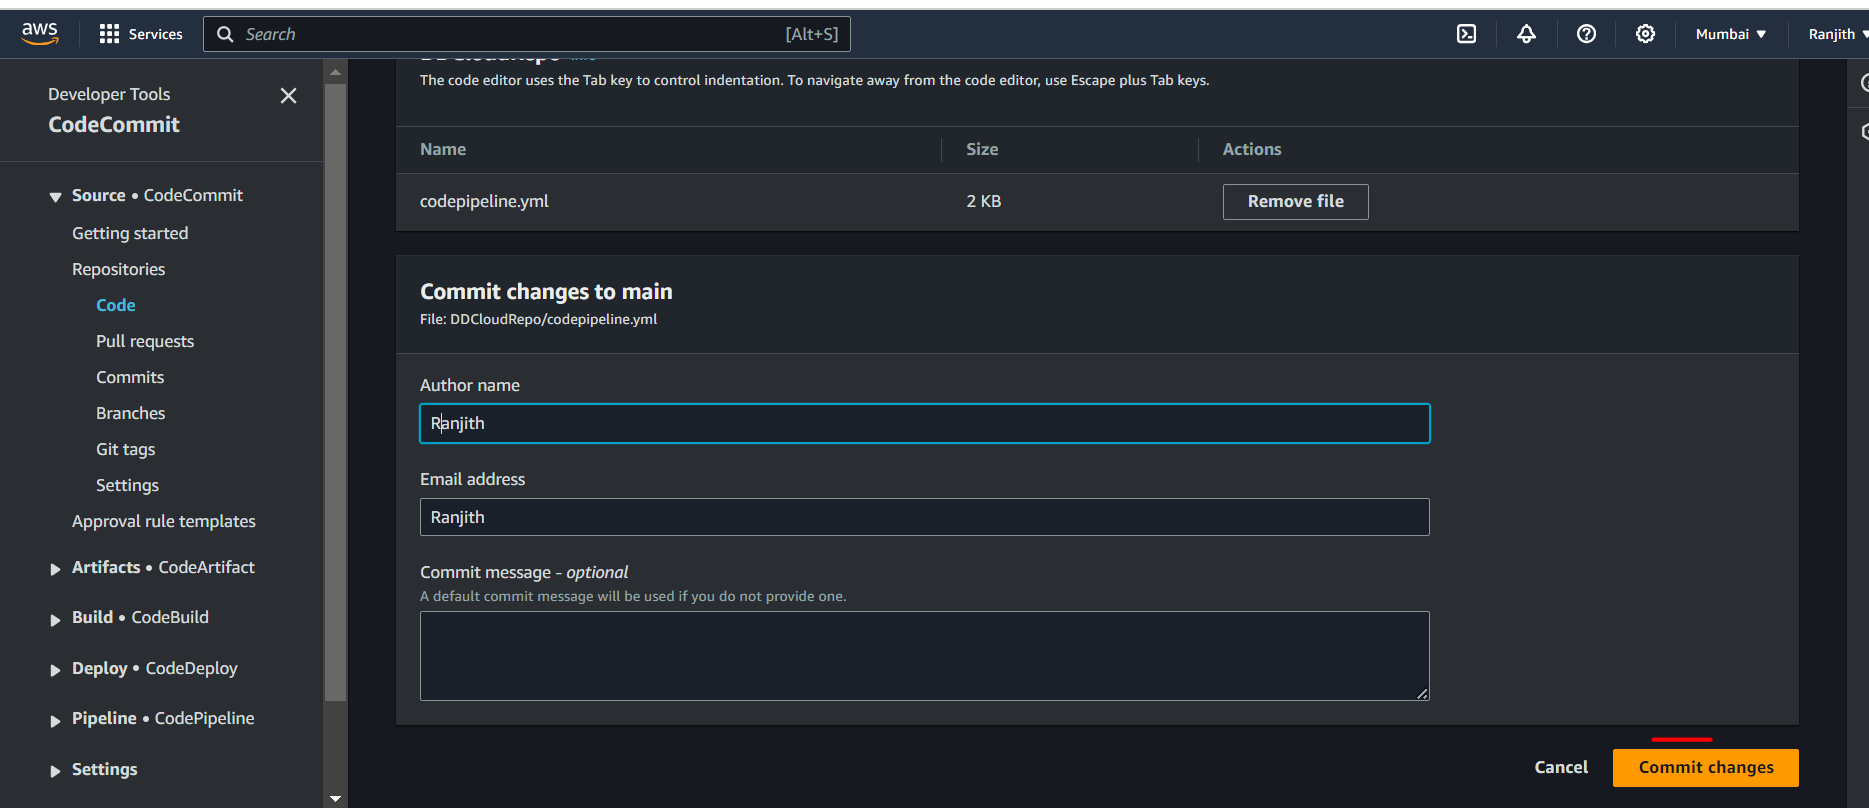
6. After the code has been inserted into the Info section, we need to provide a file name, Author name and Email address. For now, I have given a random name for the demo purpose. After providing the details, click on Commit Changes.
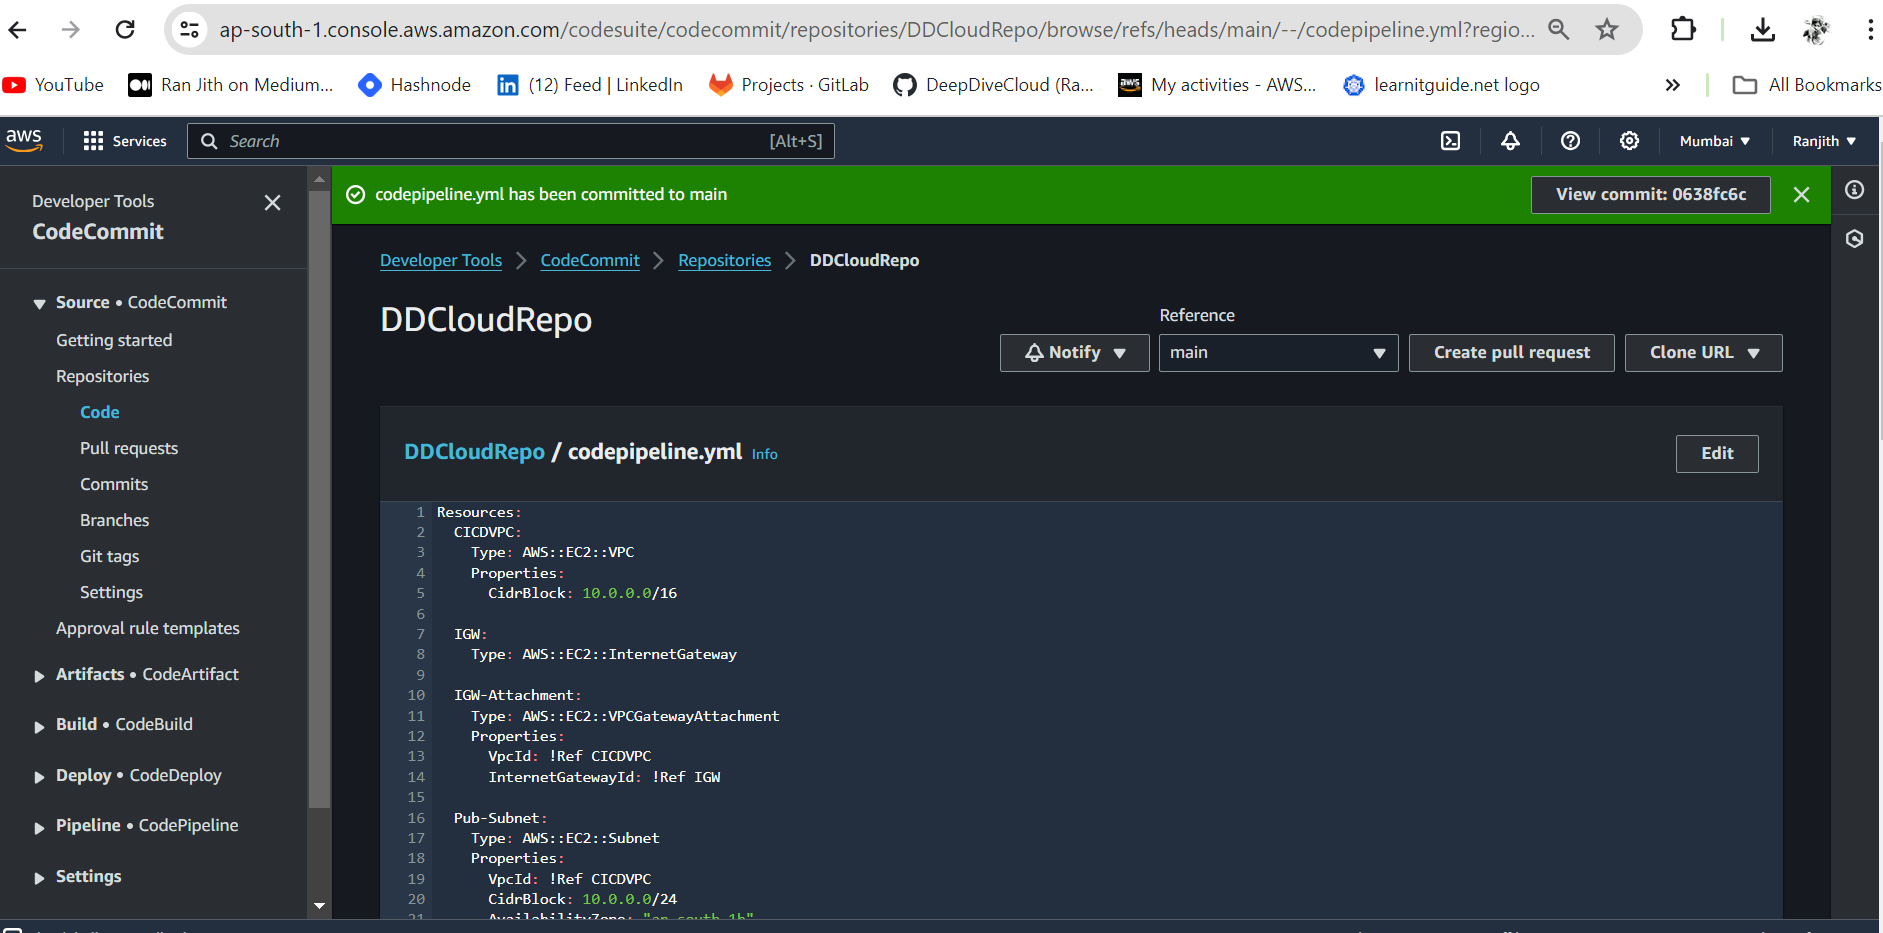
7. The file has been added to the Repo that we have created.
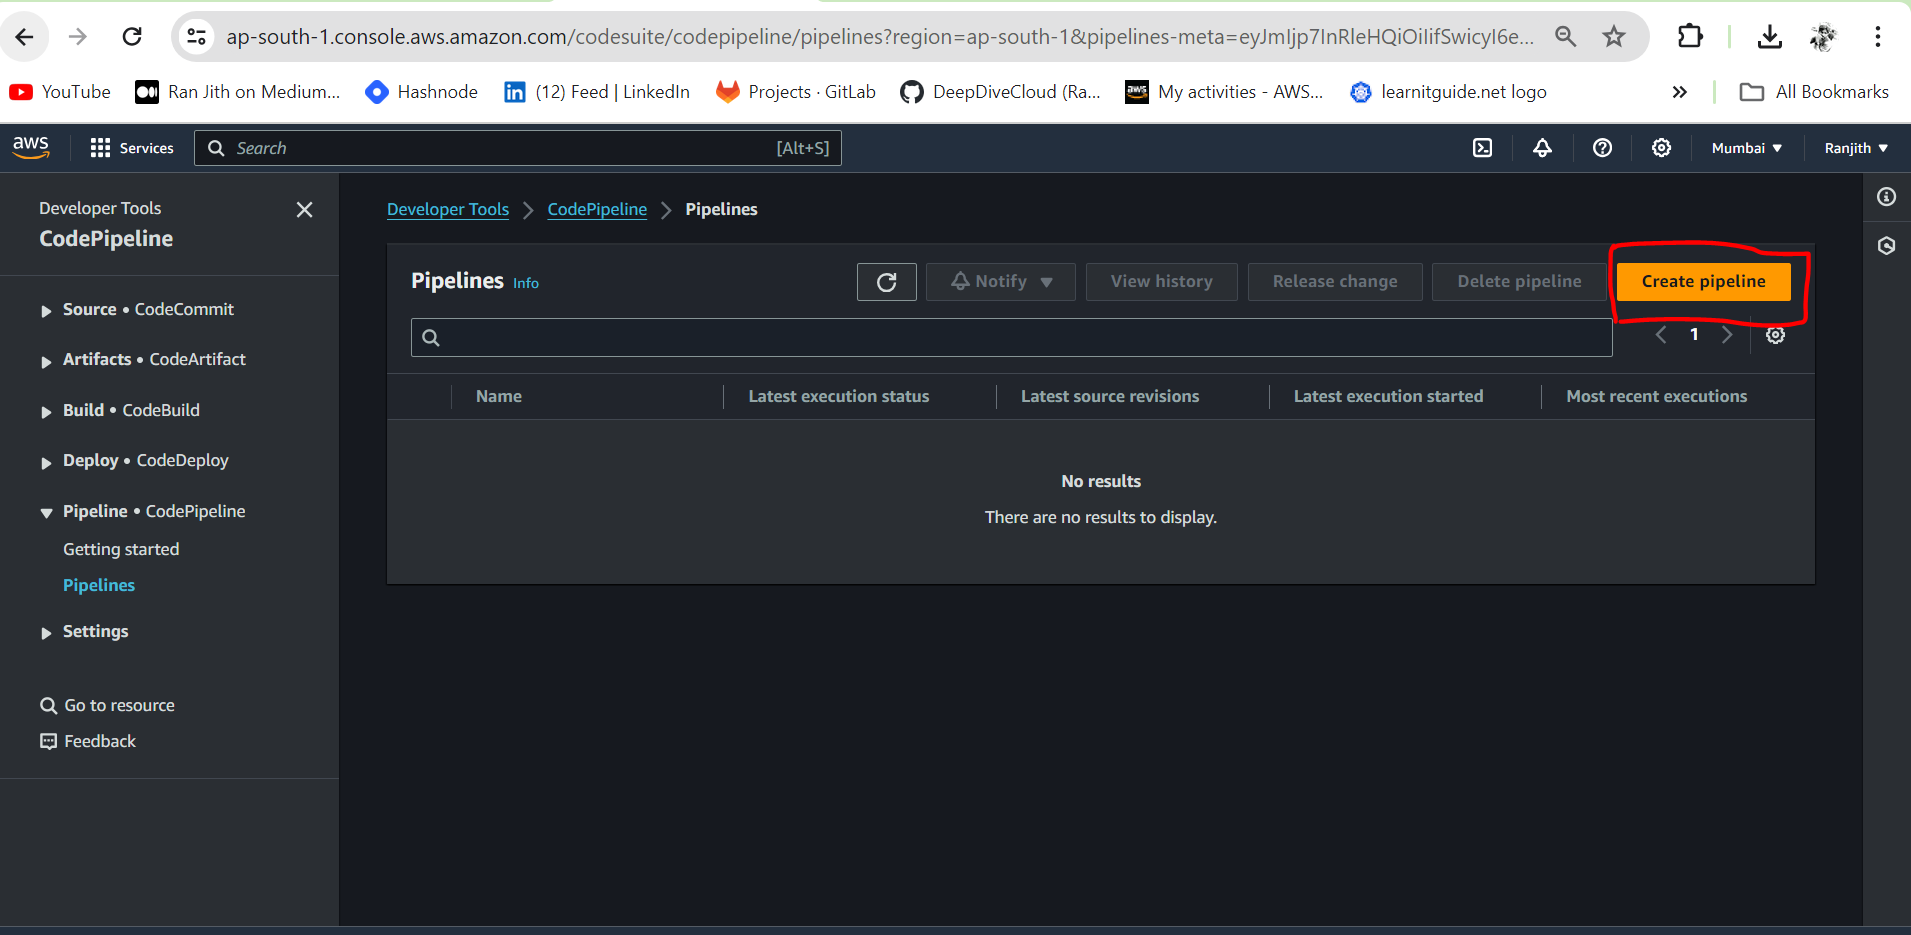
8. Navigate to AWS Code pipeline to create a pipeline. Click Create Pipeline.
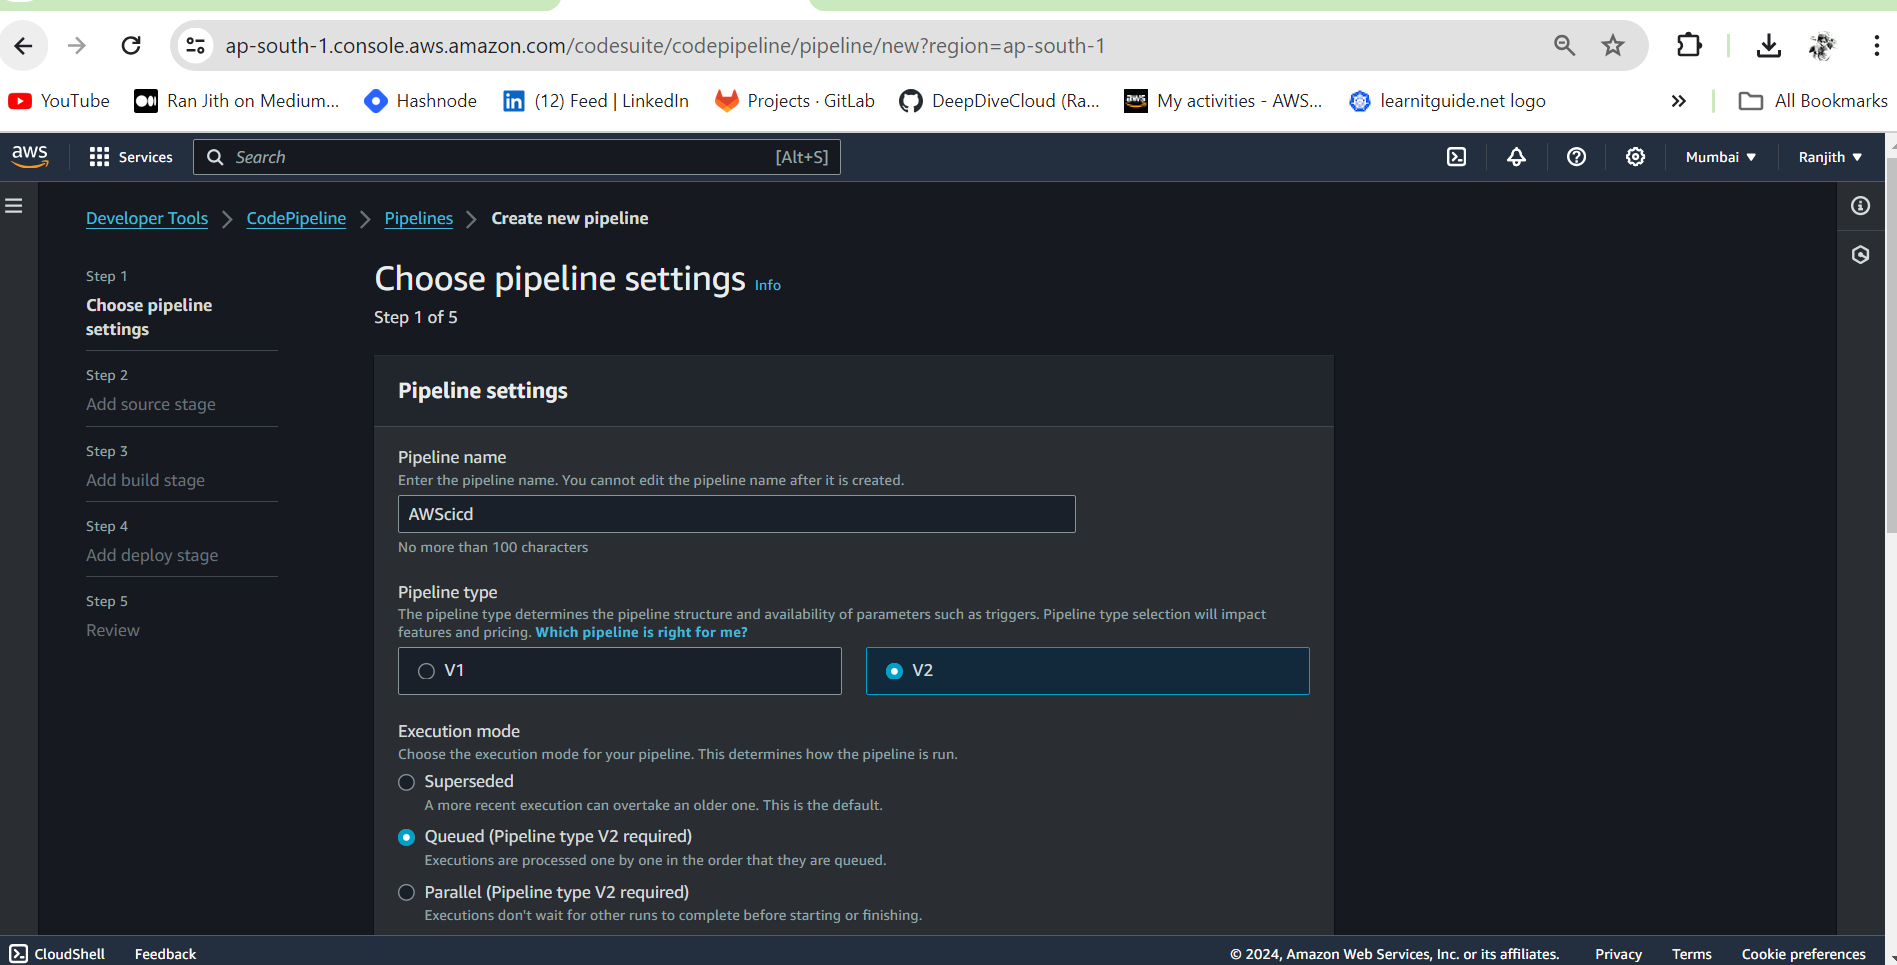
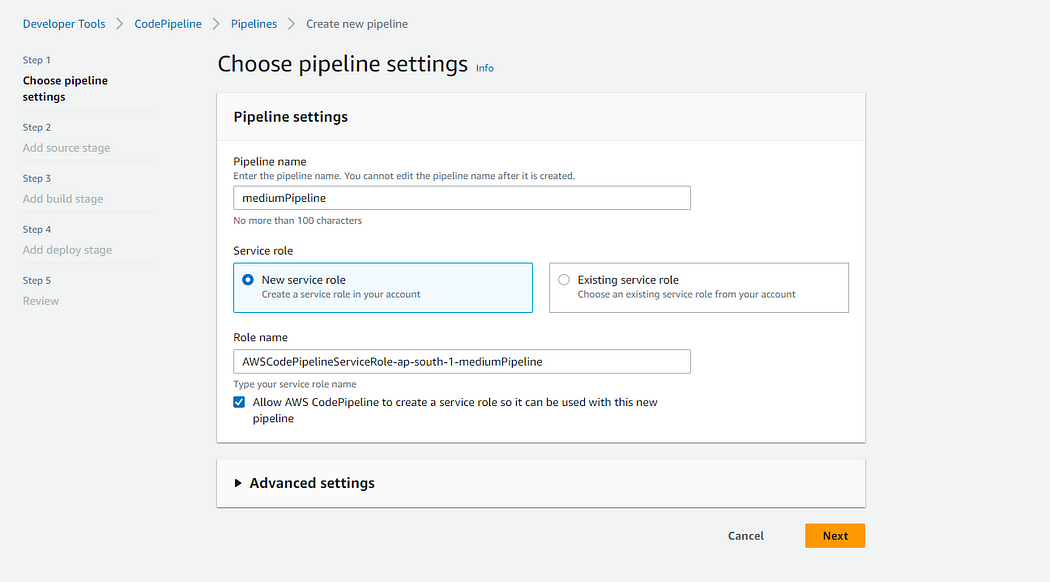
9. Give a name to the pipeline, select the New Service role and make sure to tick the checkbox. The Role name is auto-populated. Do not touch the Advanced settings section. Now click Next.
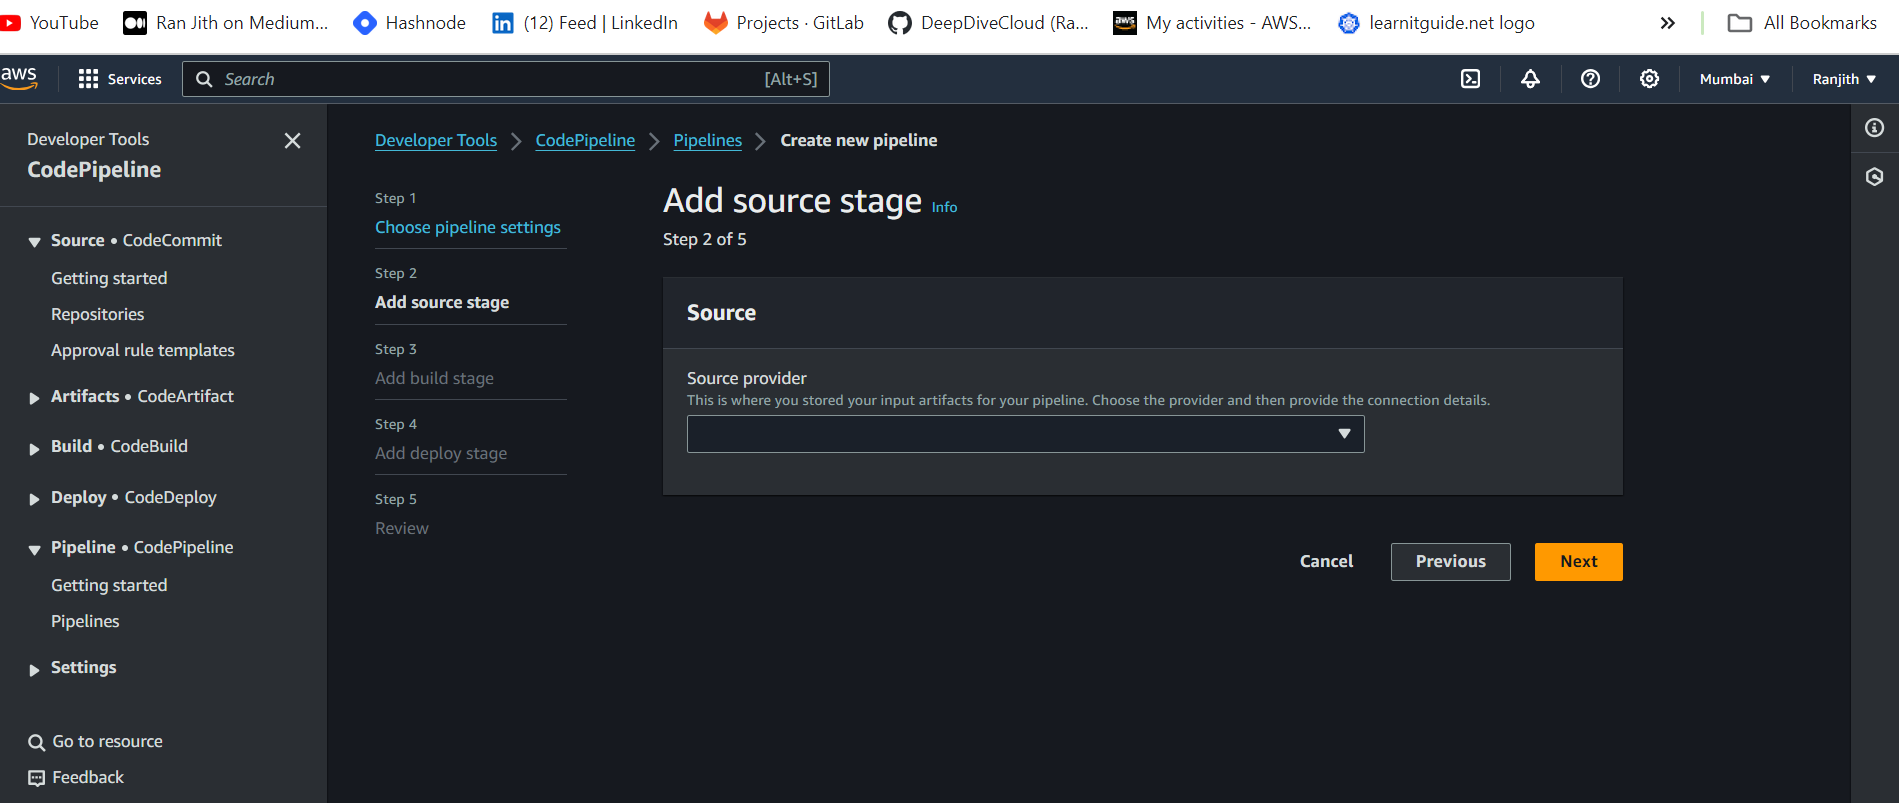
10. The next step is to add the source stage i.e. to add the source that consists of the code.
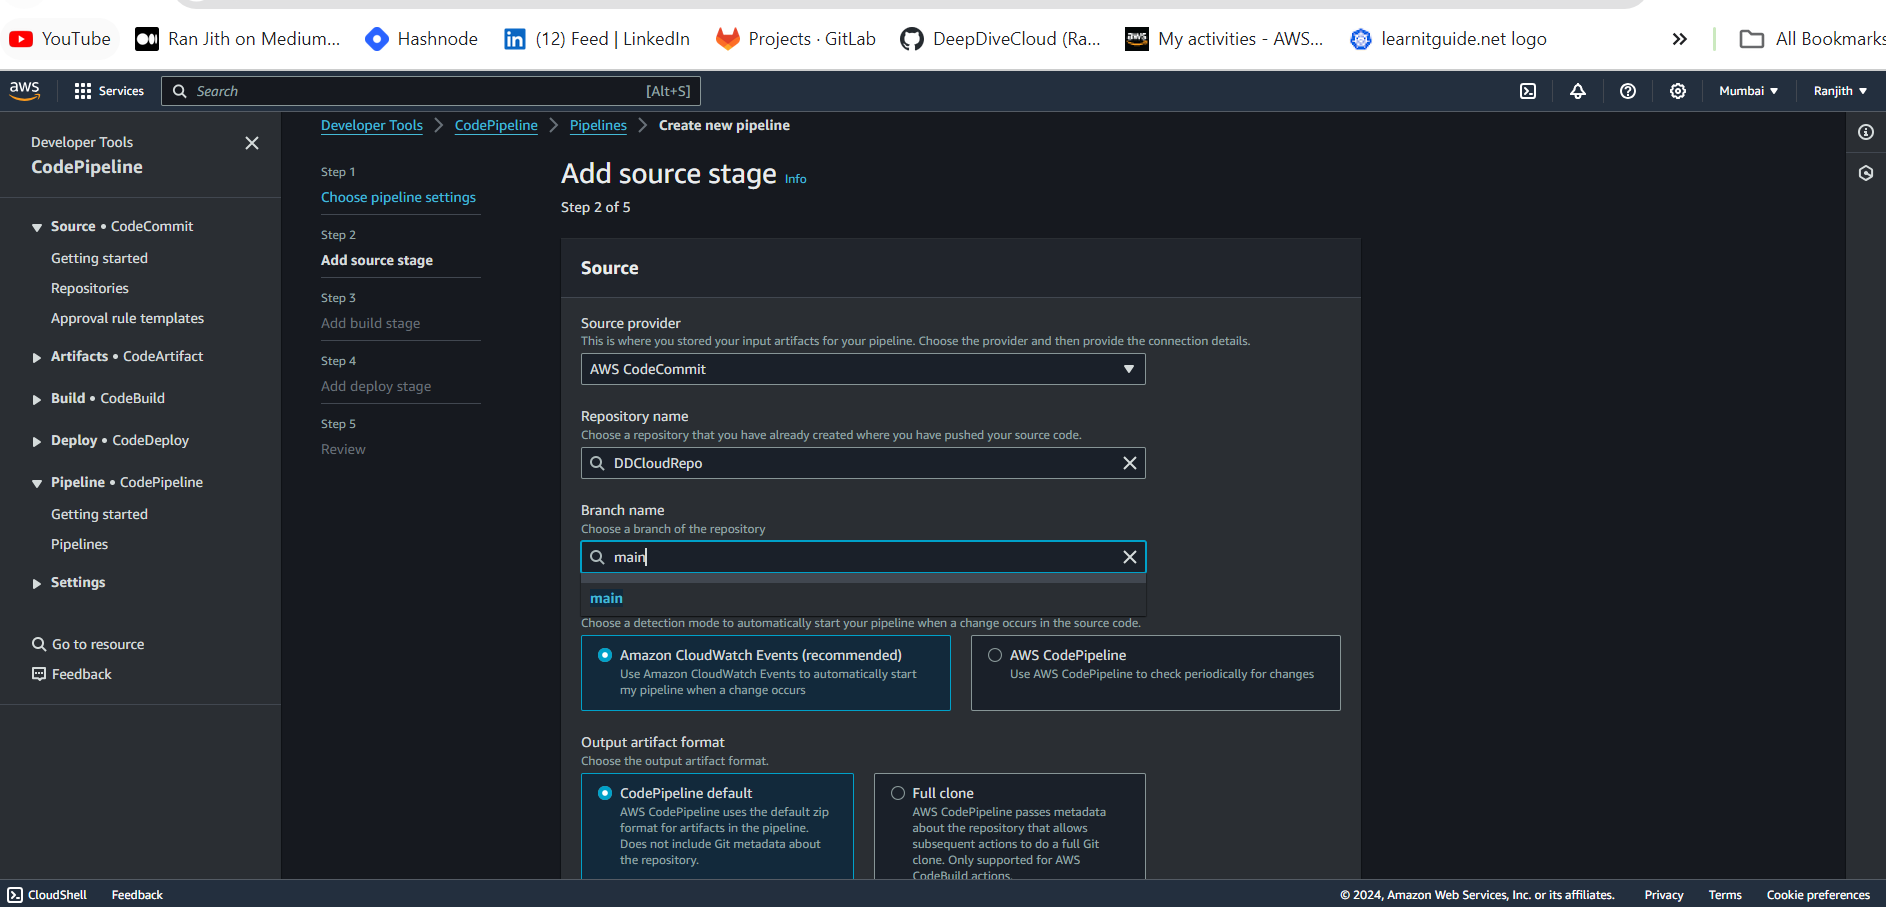
11. As we have added our code in the CodeCommit repo, we will need to choose AWS CodeCommit and select the repo that we have created. As the code is present in the main branch, select the main in the branch name. Click Next.
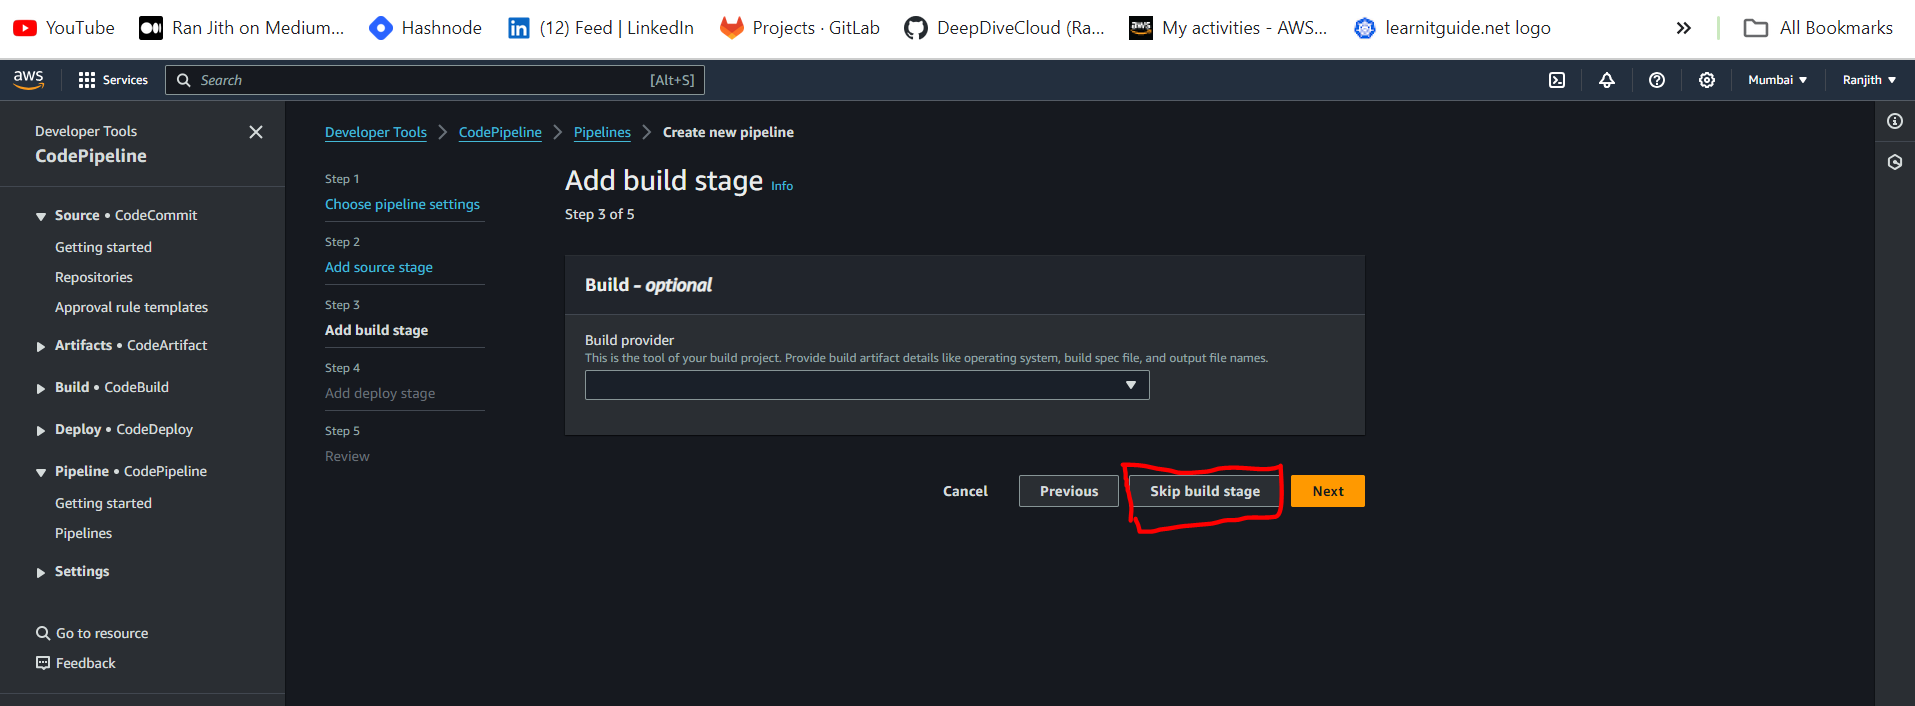
12. As we don’t have a buildspec.yml file, we will skip the build stage.
13. We now need to add the deploy stage.

14. For the Deploy provider, choose AWS CloudFormation and select the appropriate region as to where you want the resources to be created.
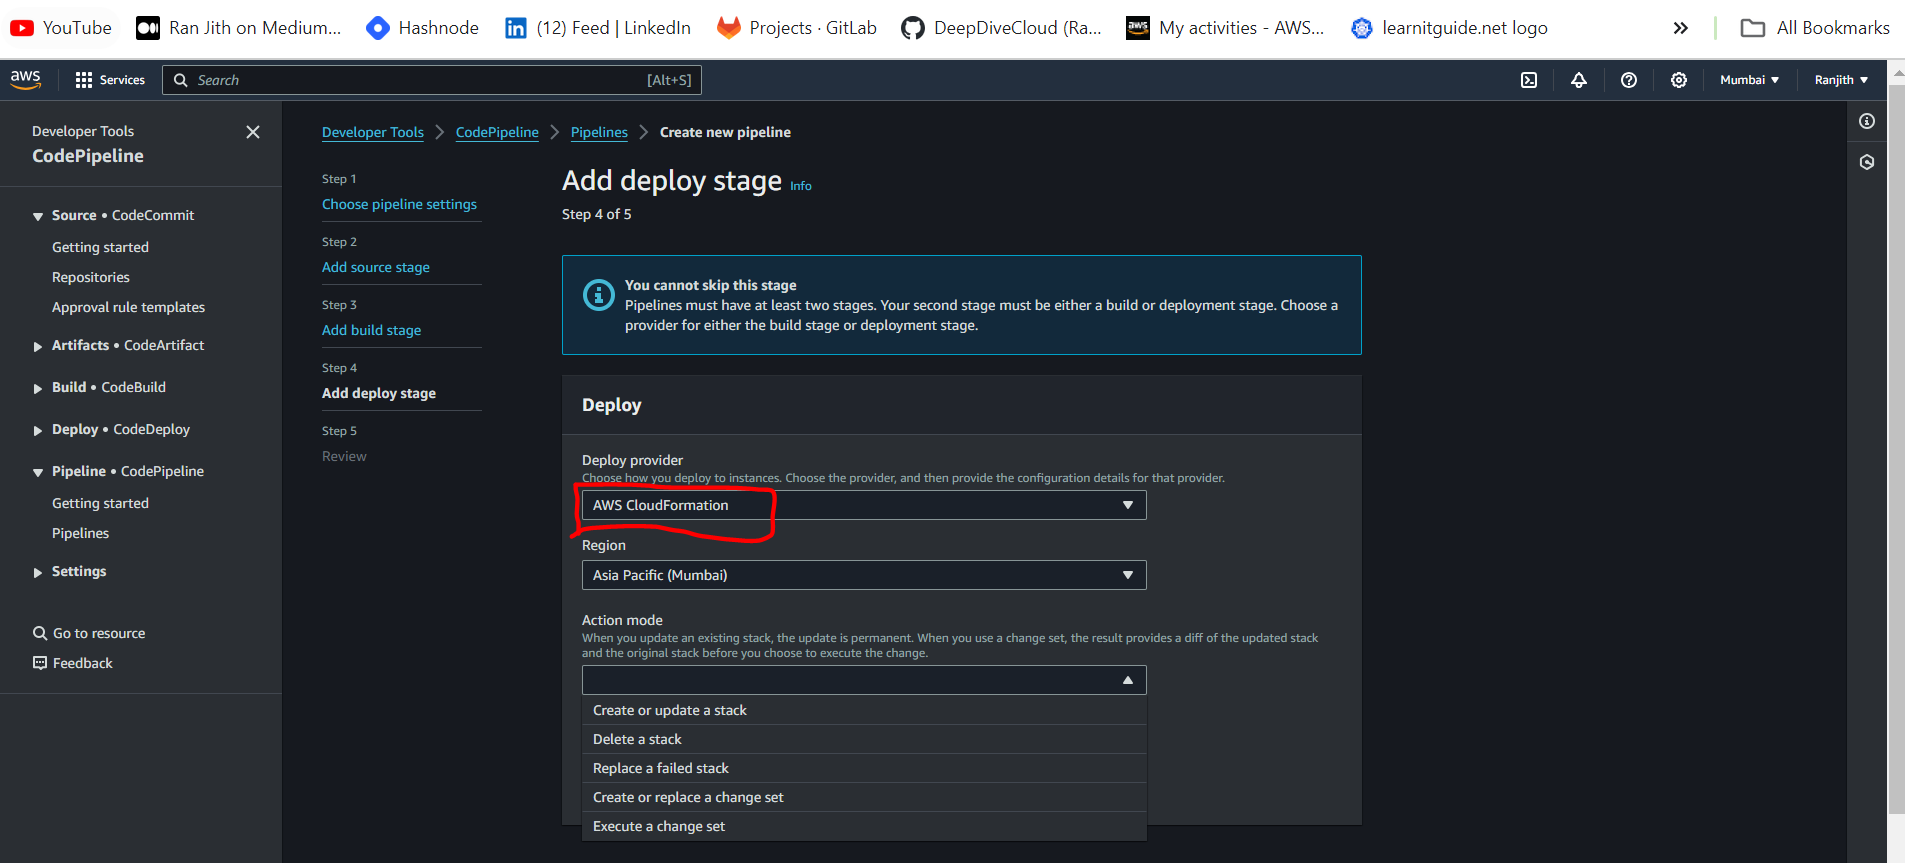
15. As we have selected CloudFormation, our next step is to create the stack. Hence, select Create or Update Stack. Next, provide a stack name of your choice and for the Artifact name, select SourceArtifact and provide the file name that we have created in the repo of CodeCommit section.
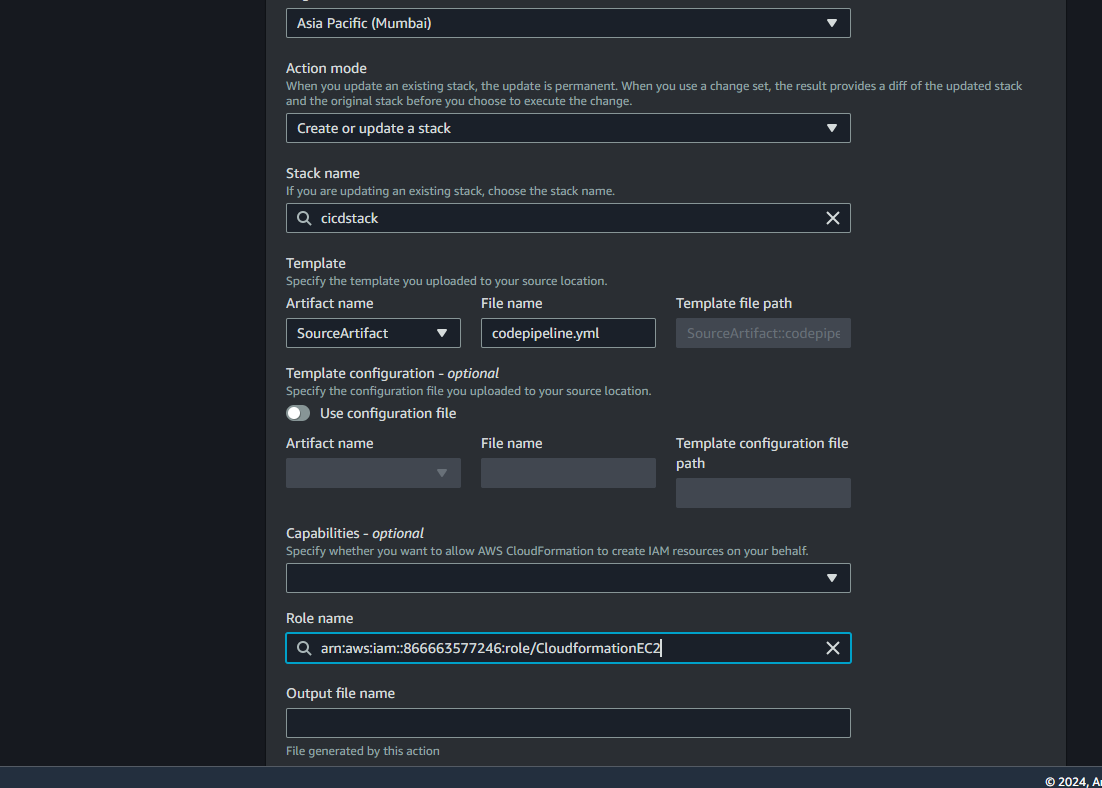
Choose the role that we have created in the Role Name. Click Next.
16. You will get a review of all the stages that we have created to Create a pipeline. Now select Create Pipeline. This should trigger the pipeline creation.
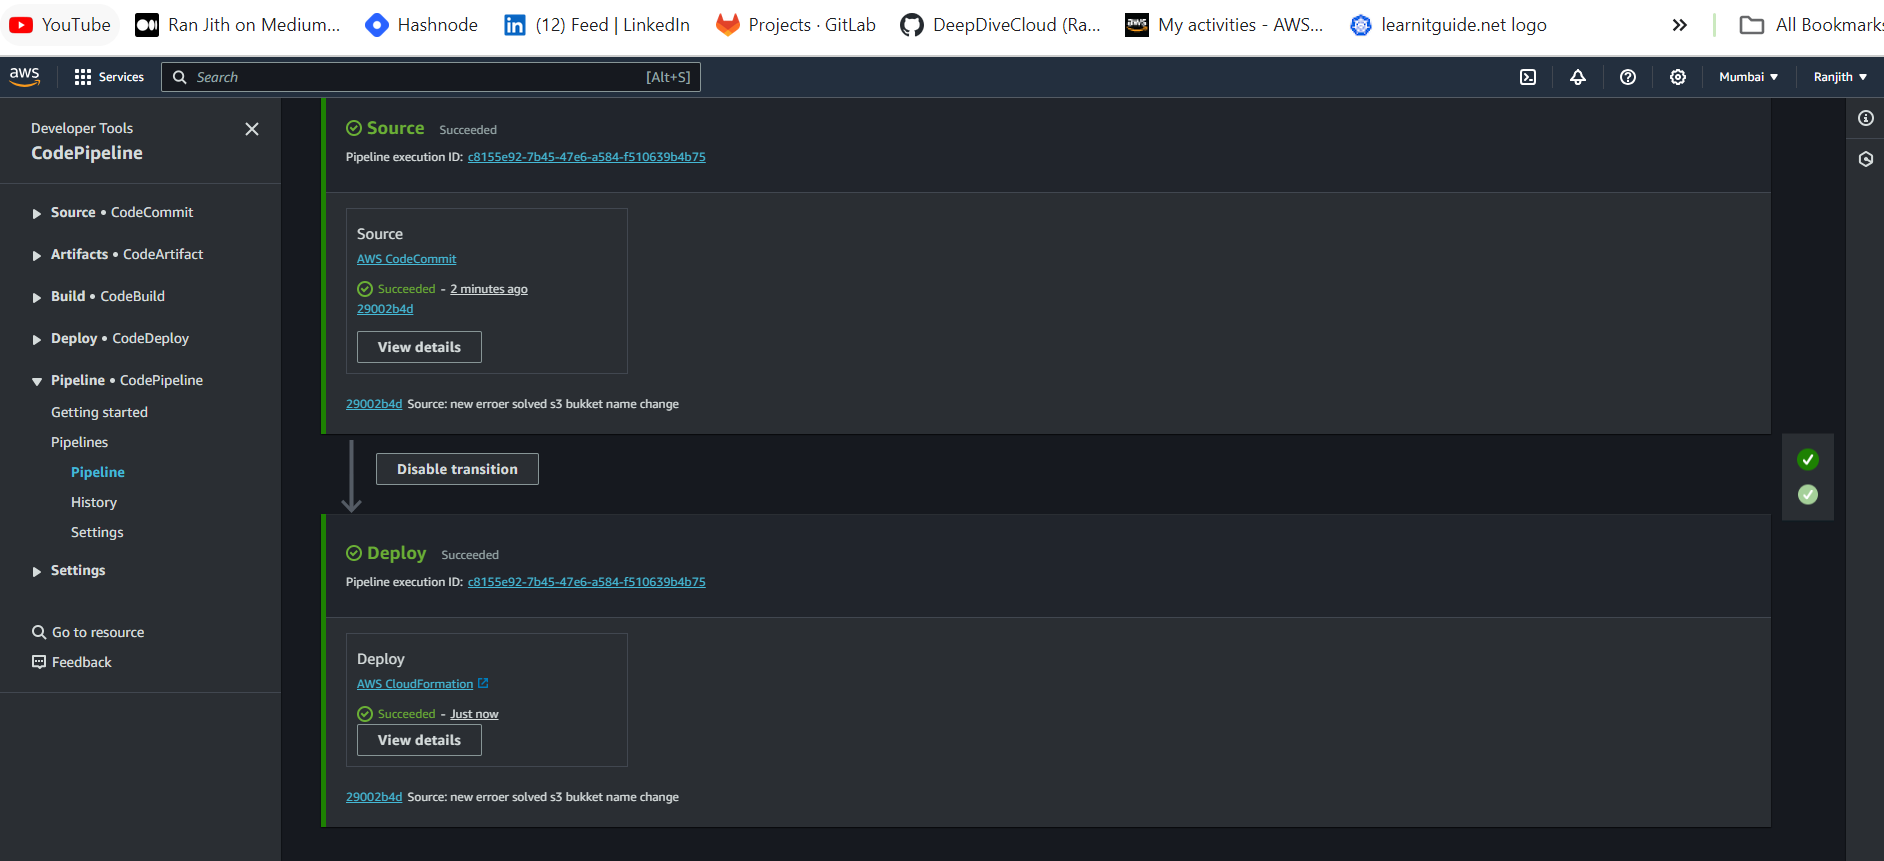
17. Below, we can see that the CodeCommit was successful. If you get an error here, click retry and do Release change.
CodeCommit
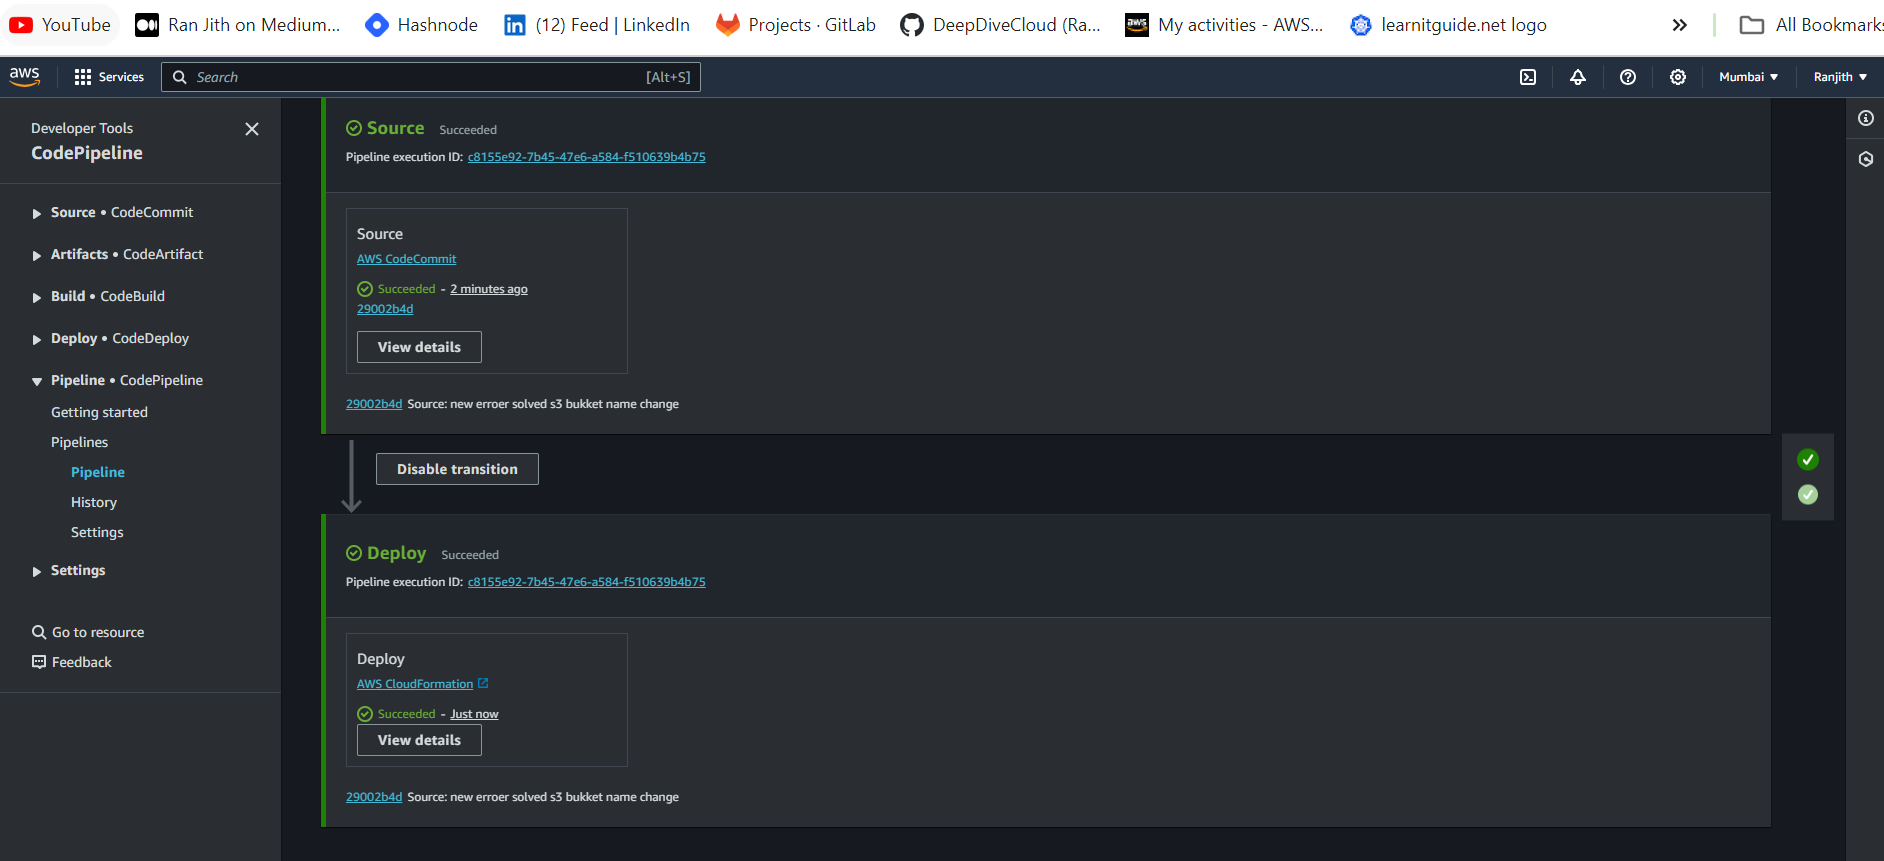
18. The next stage Code Deploy is shown successful as well.
CodeDeploy
19. Go to the CloudFormation page, to check the creation of Stack.

20. Click on the stack to see the resources that have been created.
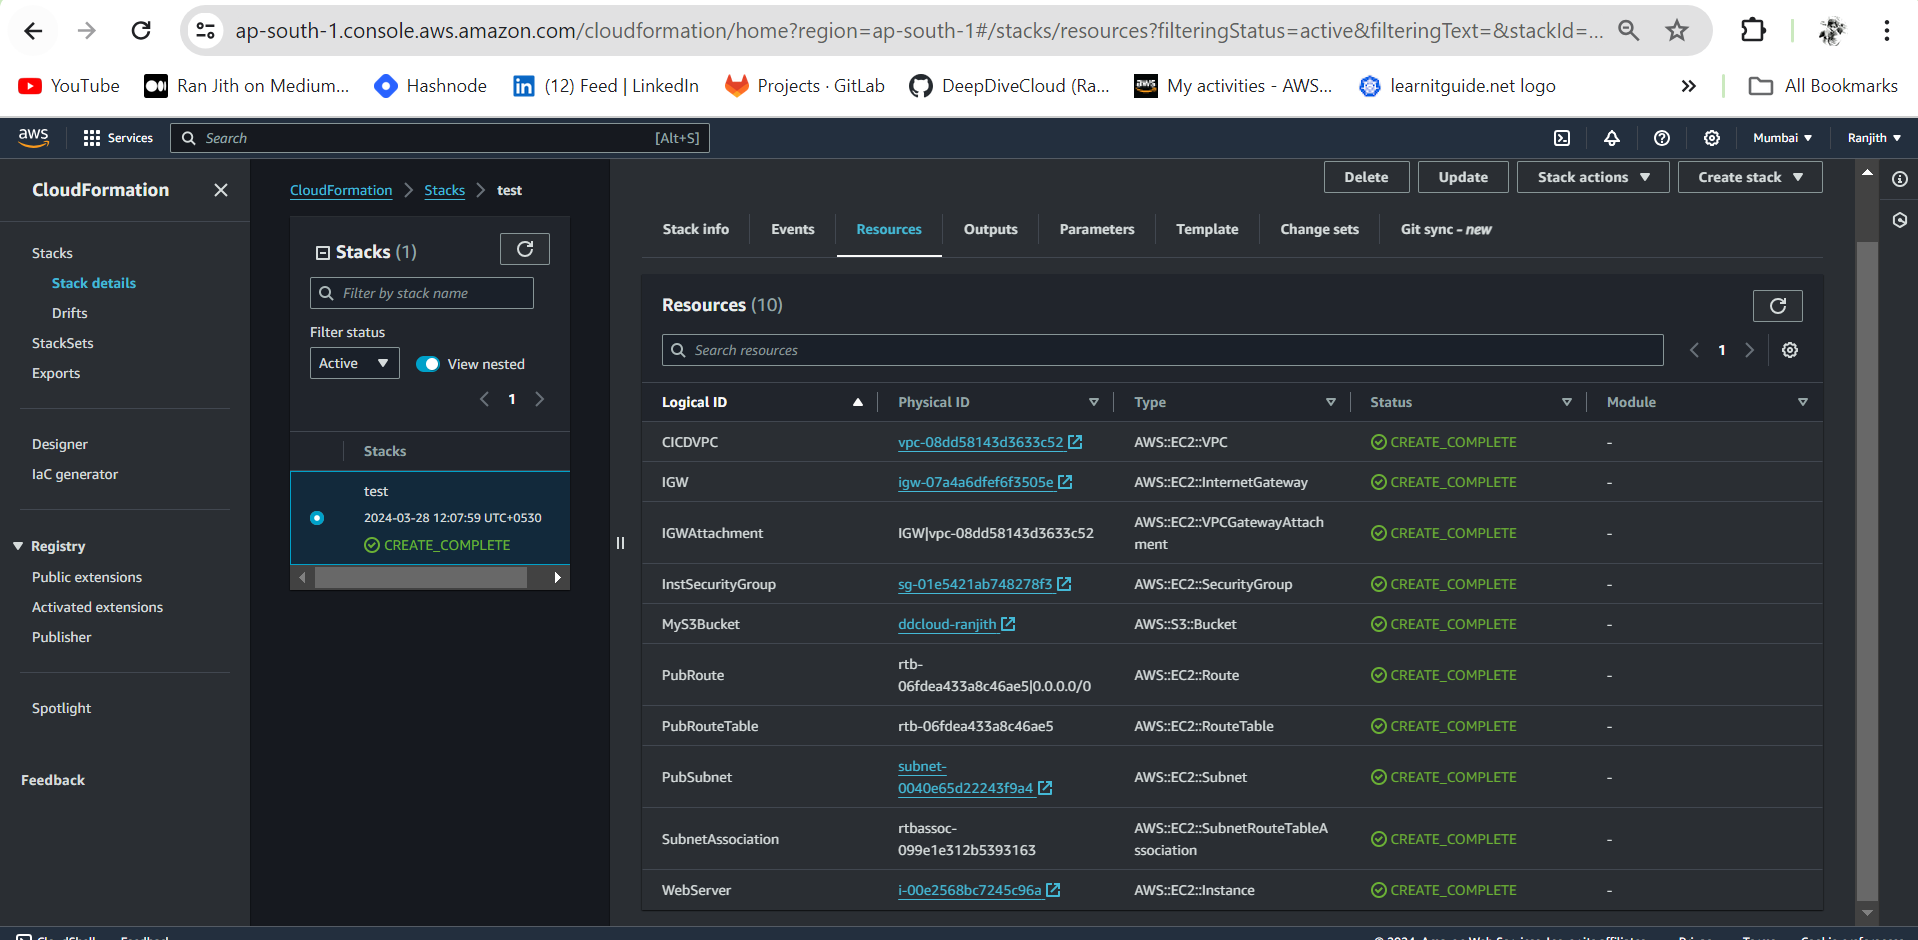
Resources in Stack
21. Resources created :
EC2 Instance named PipelineServer has been created.

EC2 Instance
VPC namely PipelineVPC with a given CIDR block has been created.

VPC
A VPC with a specified Subnet CIDR block, its RouteTable and Internet Gateway has been created.
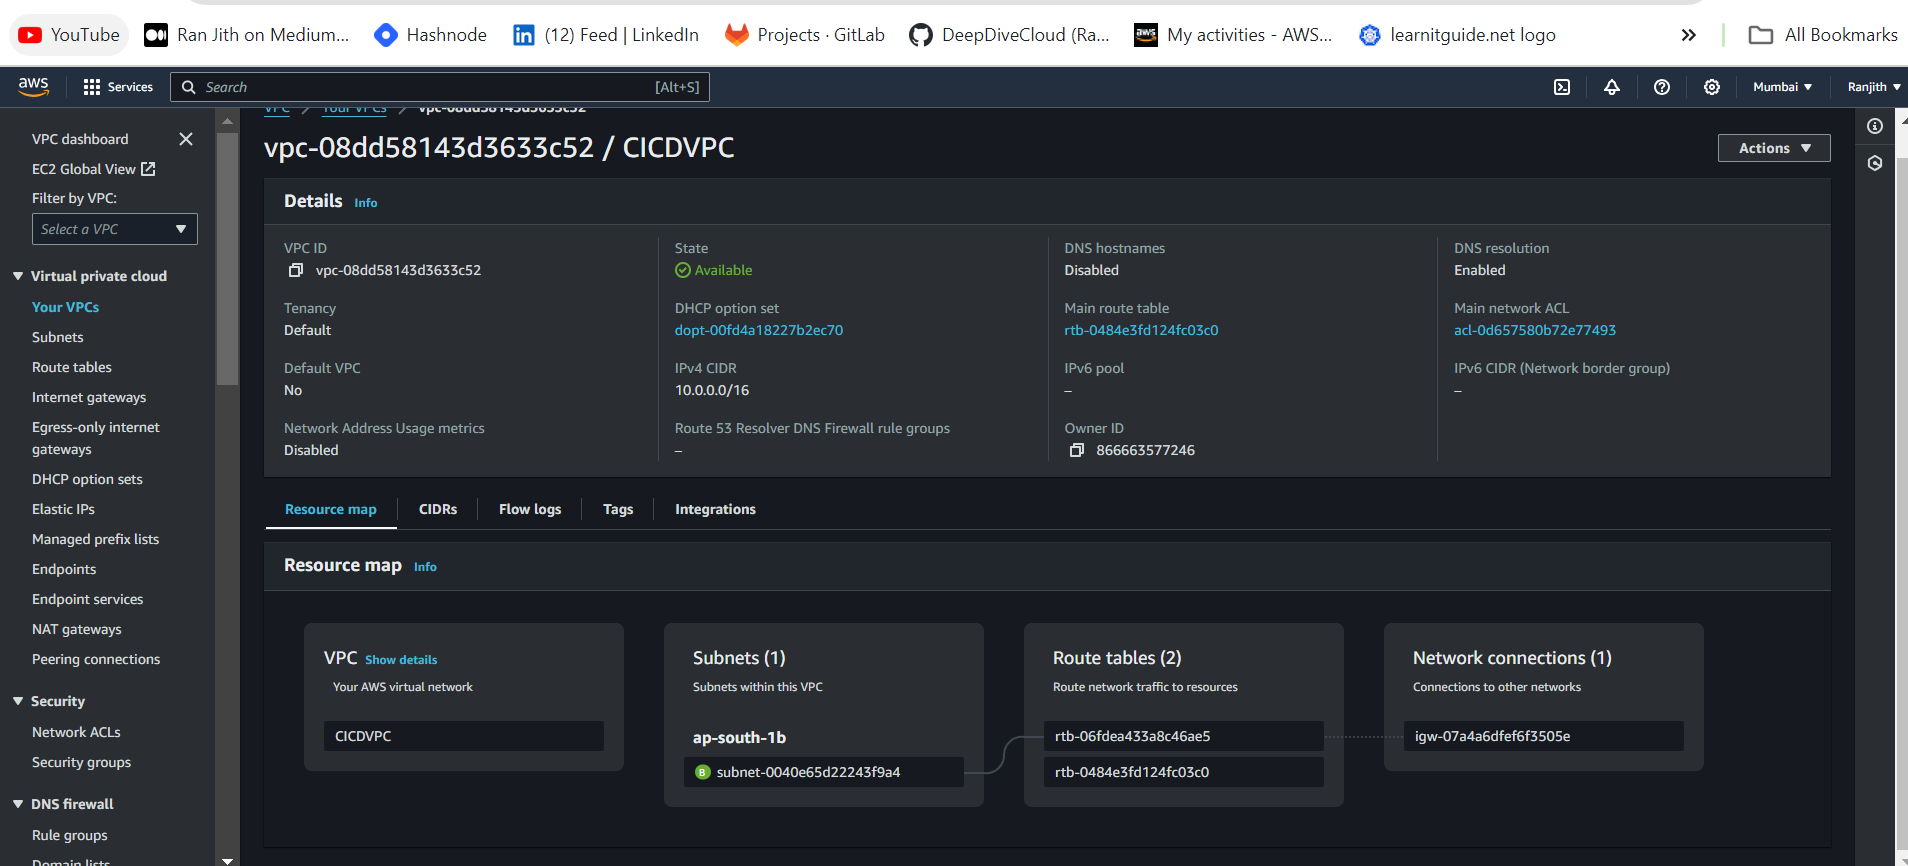
S3 bucket has been created:

S3 Bucket
22. Check if the mentioned ports i.e. 8080, 80 and 22 have been assigned in Security Groups.
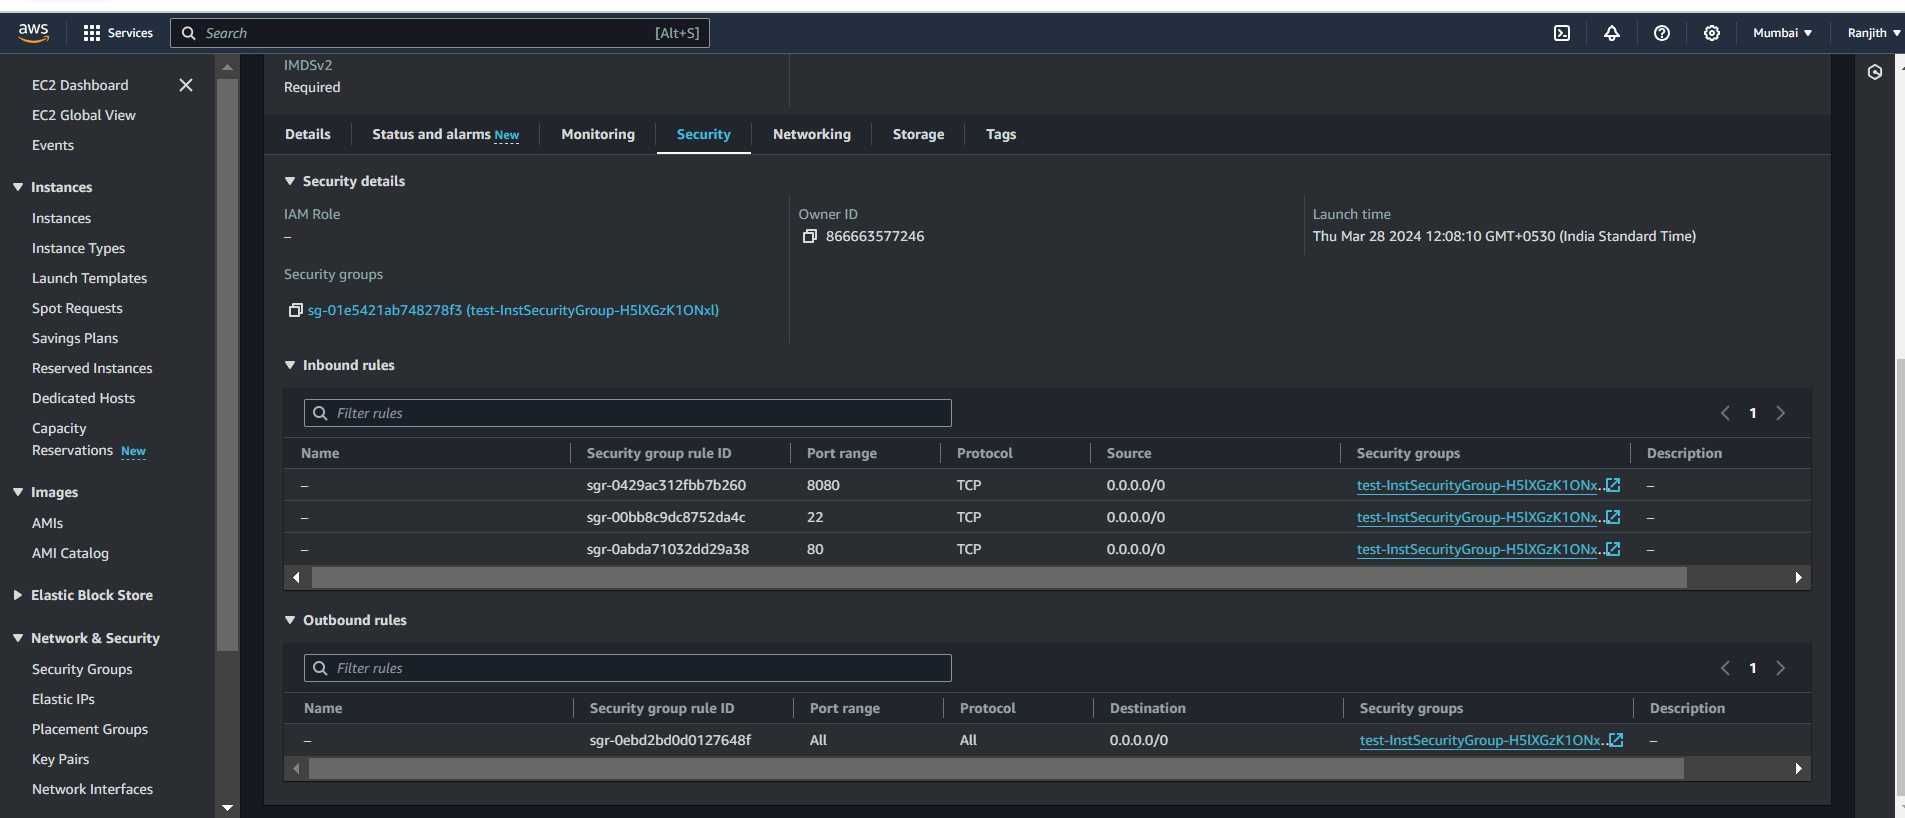
Security Groups
23. Now it's time to check the webserver i.e. Nginx. We can see that a Public IPv4 address has been assigned to EC2 Instance.
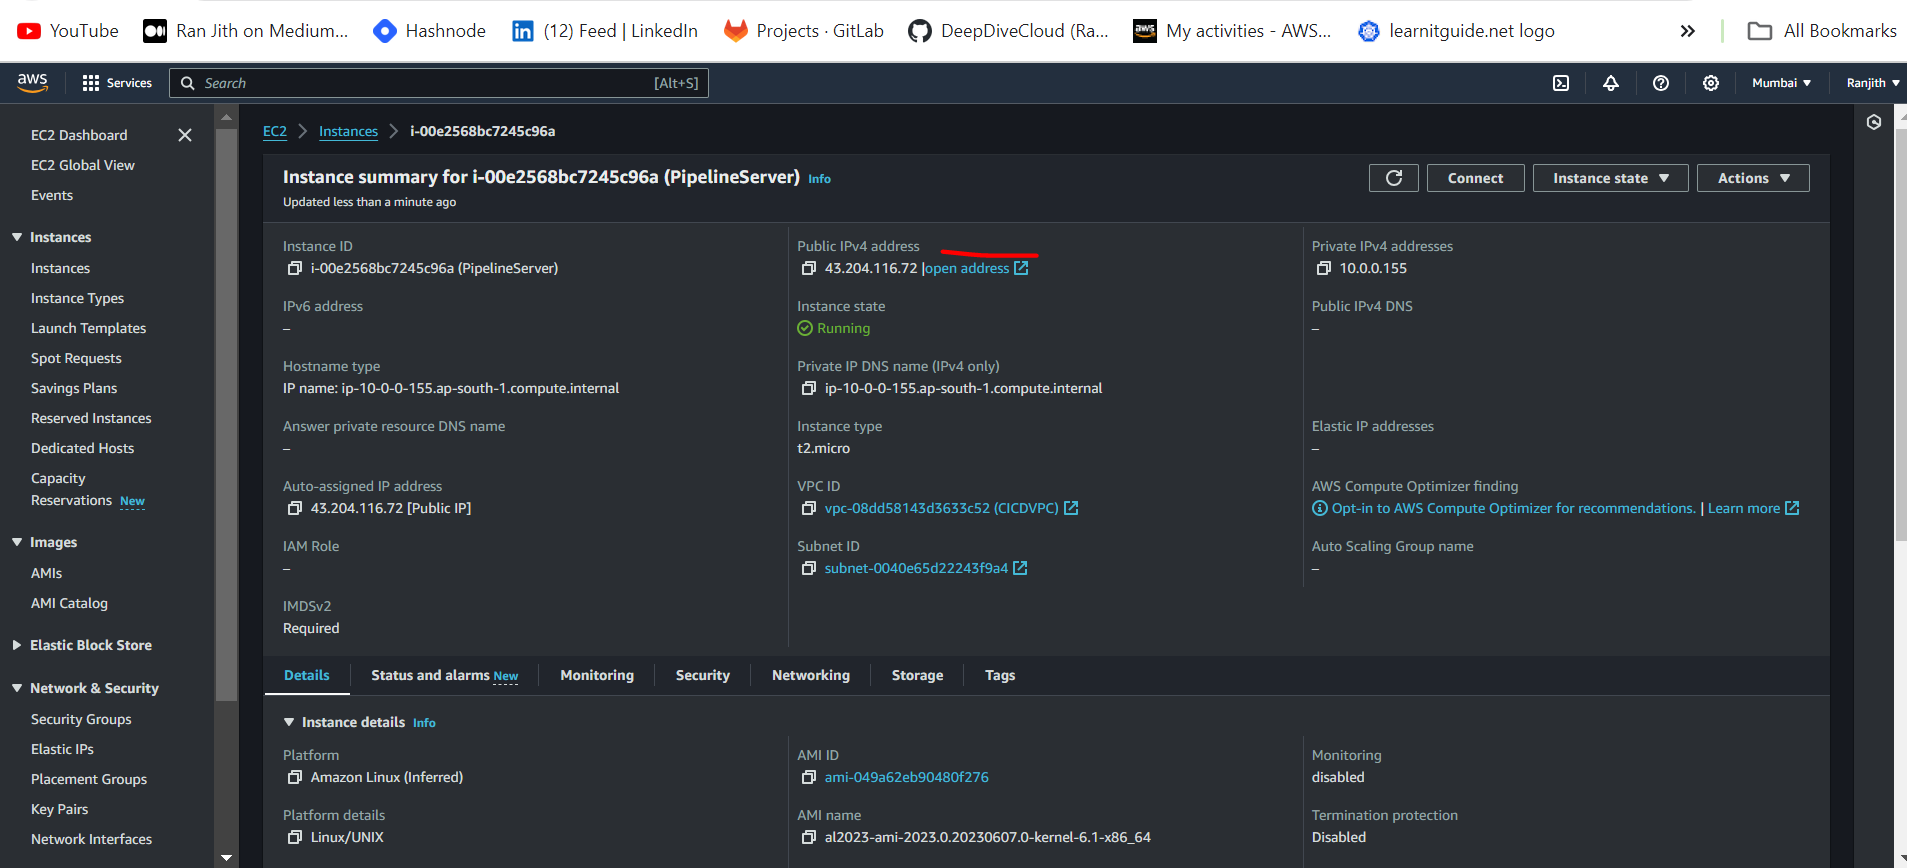
24. To access Nginx server, Connect to http://<public_ipv4_address>:80 from the browser.

Nginx
successfully created a CI/CD using AWS Codepipeline and deployed an Nginx Server.
Subscribe to my newsletter
Read articles from Ranjith R directly inside your inbox. Subscribe to the newsletter, and don't miss out.
Written by
