Easy Deployment with Docker Traefik
 Iwan Prakoso
Table of contents

If you have experience of deploying a website chances are you are using either of Nginx or Apache as your reverse proxy. These two are great web service and mostly can accommodate your needs. But in this article I want to show you one alternative that you can try, it is Traefik.
Traefik is a modern HTTP reverse proxy and load balancer designed to deploy microservices with ease. If you are a developer who also does deployment this article is for you. To make this article short, I will assume you already have some basic concepts in deployment and also understand docker environment.
So let's get going.
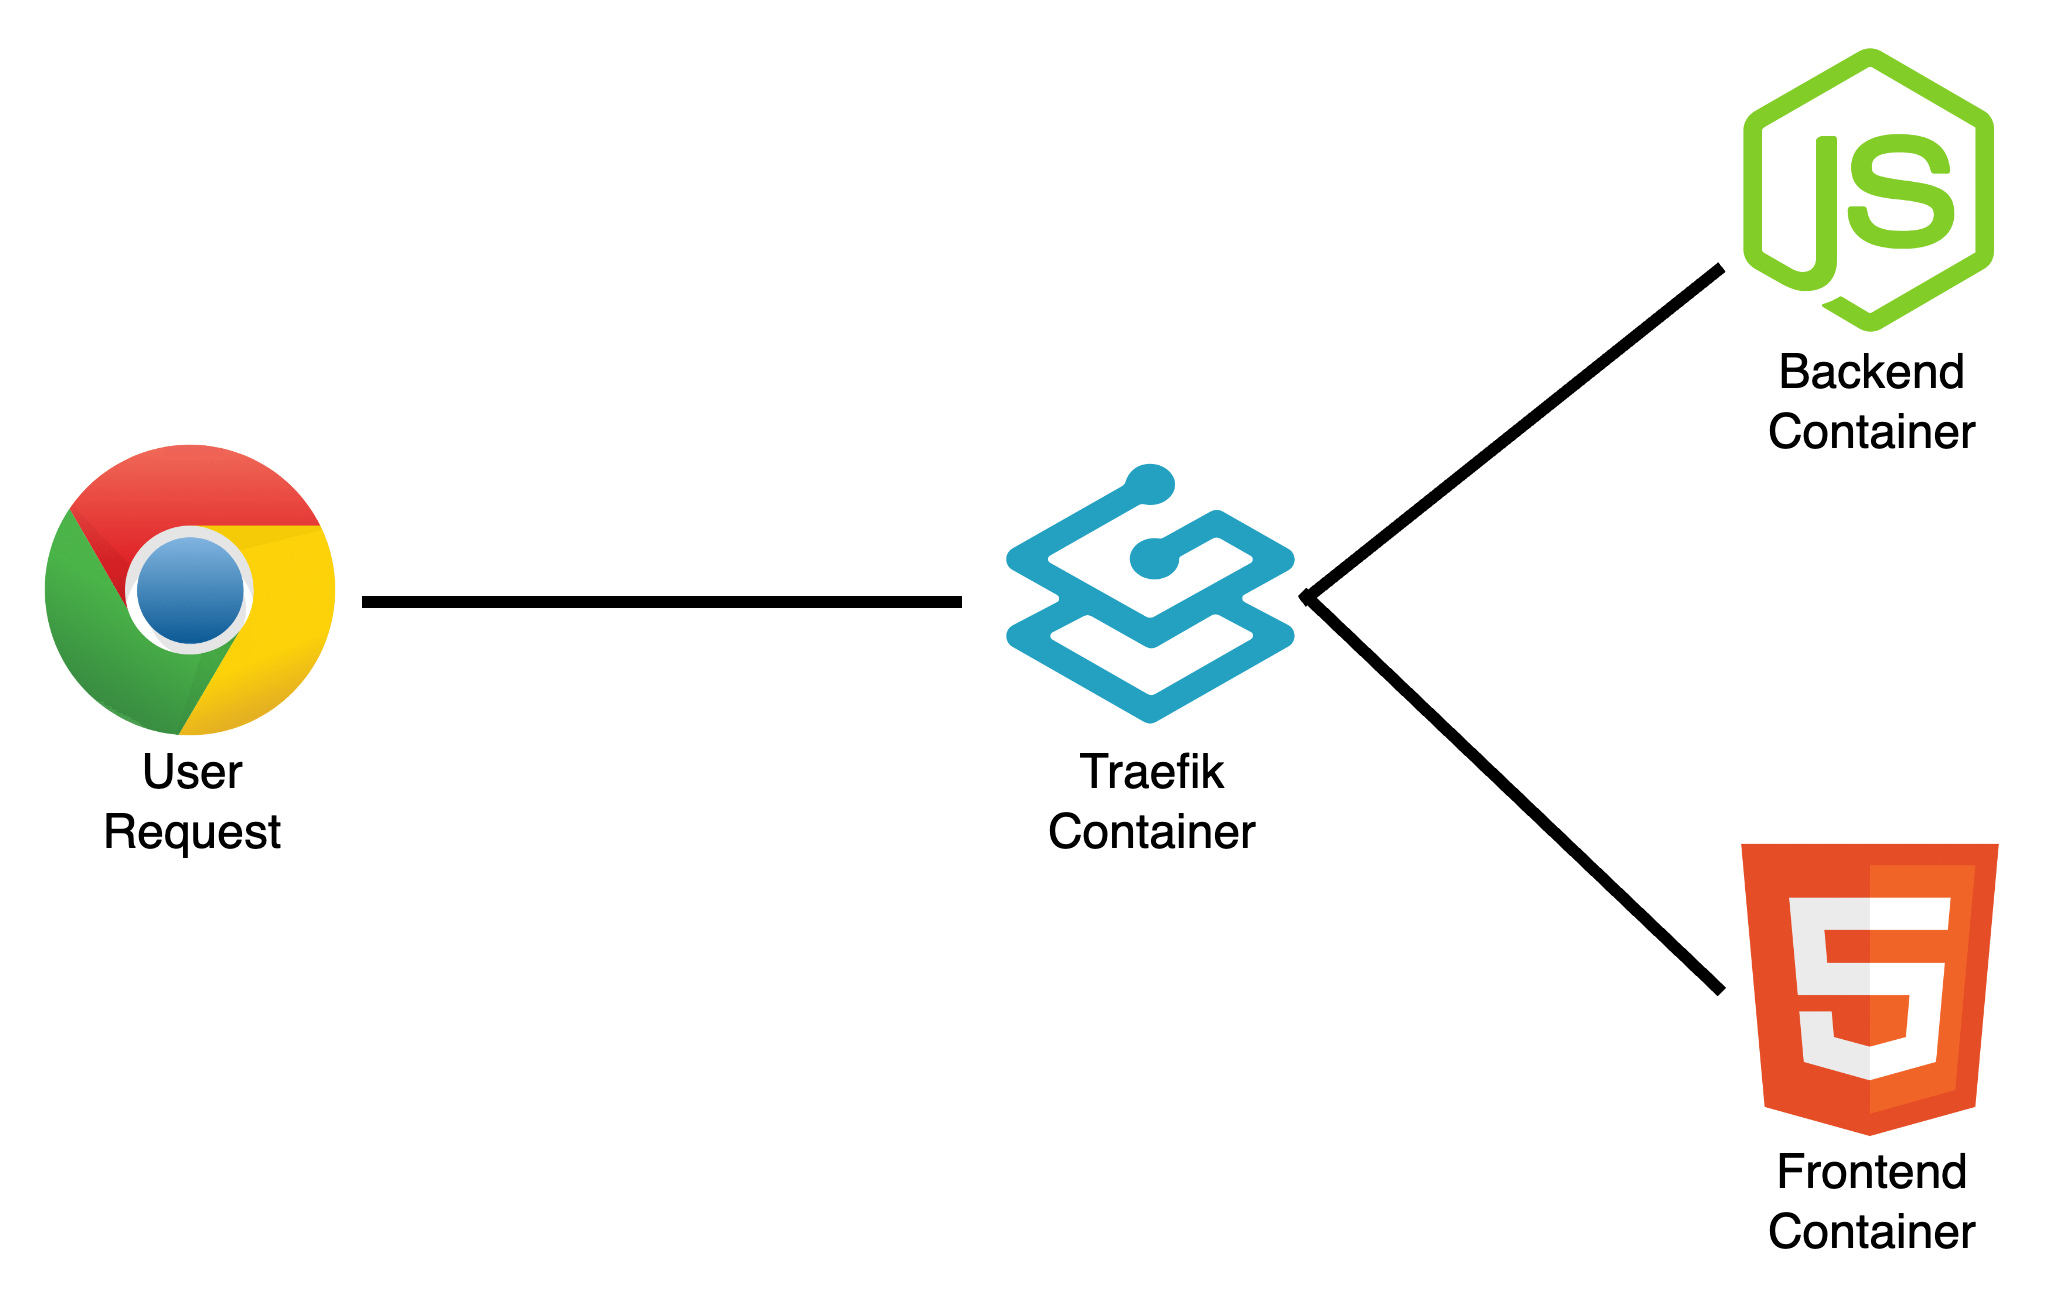
We will built one simple application that consist of frontend application and backend application to serve some data as an API. We will be using Traefik as a reverse proxy that will map the user request to the appropriate application. So there will be three separate docker container like below diagram.

Building The Application
We will build the app as simple as possible because we want to focus on the deployment. So first thing you need to create a new folder project, then create simple-backend and simple-frontend folder inside it.
Frontend
On the frontend side we only make simple html and javascript application that request data from the backend API.
Inside the
simple-frontendfolder createindex.html.<!-- index.html --> <!DOCTYPE html> <html lang="en"> <head> <meta charset="UTF-8"> <meta name="viewport" content="width=device-width, initial-scale=1.0"> <title>Simple App</title> </head> <body> <h1>Simple Frontend</h1> <div id="data-container"> <!-- Data will be displayed here --> </div> <script src="app.js"></script> </body> </html>Create
app.jsto fetch data from the API and then render the data to the HTML using DOM.// app.js document.addEventListener("DOMContentLoaded", fetchData); async function fetchData() { try { // below line will fetch data to the simple-backend container const response = await fetch('http://simple-backend.local/data'); if (!response.ok) { throw new Error('Network response was not ok'); } const data = await response.json(); displayData(data); } catch (error) { console.error('Error fetching data:', error); } } function displayData(data) { const dataContainer = document.getElementById('data-container'); // Example: Displaying data as a list const ul = document.createElement('ul'); data.forEach(item => { const li = document.createElement('li'); li.textContent = item.name; // Assuming each item has a "name" property ul.appendChild(li); }); dataContainer.appendChild(ul); }Create Dockerfile to build
simple-backenddocker image. We are using nginx to serveindex.htmlas a static file. This works because the API fetching are done in the browser by javascript.# Dockerfile FROM nginx:alpine COPY . /usr/share/nginx/html
Backend
On the backend side we will make API with Express JS.
Inside the
simple-backendcreate npm project
npm init -yInstall express and cors
npm install express corsAdd the
index.jscode// index.js const express = require('express'); const cors = require('cors'); const app = express(); app.use(cors()); const PORT = process.env.PORT || 3000; // Sample data const data = [ { id: 1, name: 'Item 1' }, { id: 2, name: 'Item 2' }, { id: 3, name: 'Item 3' }, ]; // Route to get data app.get('/data', (req, res) => { res.json(data); }); app.listen(PORT, () => { console.log(`Server is running on port ${PORT}`); });Add the
Dockerfile# Dockerfile FROM node:alpine WORKDIR /usr/src/app COPY package*.json ./ RUN npm install COPY . . EXPOSE 3000 CMD ["node", "index.js"]
Deploying The Application
We already have backend and frontend applications with its separate Dockerfile. Now we need to create docker compose to build the image from the Dockerfile and also config the reverse proxy using Traefik. I will explain the configuration inside the file.
# docker-compose.yml
version: '3.8'

services:
  simple-proxy:
    image: traefik:v2.5
    container_name: simple-proxy
    command:
      - "--api.insecure=true"
      - "--providers.docker=true"
      # Entry points are the network entry points into Traefik
      # They define the port which will receive the packets
      - "--entrypoints.web.address=:80"
    ports:
      # Using port 80 in local machine to expose reverse proxy entrypoint
      - "80:80"
    volumes:
      - "/var/run/docker.sock:/var/run/docker.sock"
    networks:
      - simple-network

  simple-backend:
    # Below line will build the image from simple-backend Dockerfile
    build:
      context: ./simple-backend
      dockerfile: Dockerfile
    image: simple-backend
    container_name: simple-backend
    labels:
      - "traefik.enable=true"

      # Router rules are a set of matchers configured with values
      # In this case if the incoming request host match with simple-backend.local
      # The router then forwards the request to the service
      - "traefik.http.routers.backend.rule=Host(`simple-backend.local`)"

      # The service load balancer receive requests from routers
      # Then it load balance the request into multiple instance of programs
      # But in this case we only had one instance in port 3000
      - "traefik.http.services.backend.loadbalancer.server.port=3000"
    networks:
      - simple-network

  # The frontend configuration is the same as backend configuration
  simple-frontend:
    build:
      context: ./simple-frontend
      dockerfile: Dockerfile
    image: simple-frontend
    container_name: simple-frontend
    labels:
      - "traefik.enable=true"
      - "traefik.http.routers.frontend.rule=Host(`simple-frontend.local`)"
      - "traefik.http.services.frontend.loadbalancer.server.port=80"
    networks:
      - simple-network

networks:
  simple-network:
Notice that we are using dummy domain for frontend and backend application. In order to our application can resolve the dummy domain, we need to add these domains at /etc/hosts if you're using Linux or Mac, or c:\Windows\System32\Drivers\etc\hosts if you're using Windows.
# /etc/hosts
127.0.0.1    simple-backend.local
127.0.0.1    simple-frontend.local
We can build the docker image bydocker compose build
Run the containerdocker compose up -d
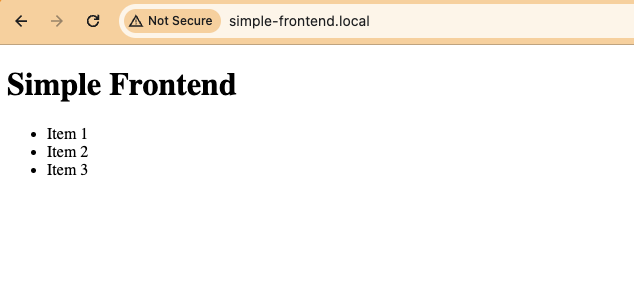
Then access the app on simple-frontend.local or simple-backend.local/data.

Just like that. Thank you!
Reference:
Subscribe to my newsletter
Read articles from Iwan Prakoso directly inside your inbox. Subscribe to the newsletter, and don't miss out.
Written by
