Cloud/DevOps Project - 1
 Biswanath Sah
Hello,
My name is Biswanath Sah, and in this blog, I will guide you through the detailed, step-by-step process of deploying a static website on AWS S3. We will cover everything from setting up your AWS S3 services, configuring S3 buckets, uploading your website files, setting permissions, and finally, making your website publicly accessible. By the end of this tutorial, you will have a fully functional static website hosted on AWS S3.
Let's get started!
Amazon S3
Amazon S3 (Simple Storage Service) is a scalable, durable, and secure cloud storage solution from AWS (Amazon Web Services). It was introduced in March 2006 and has become one of the most popular object storage services worldwide.
With flexible storage options, strong security features, and pay-as-you-go pricing, S3 is perfect for uses like data backup, static website hosting, and content distribution.
Getting Started:
S1: Create S3 bucket, named as "website-host-bucket". Uncheck Block all public access(this will allow pubic read access) and then Create.
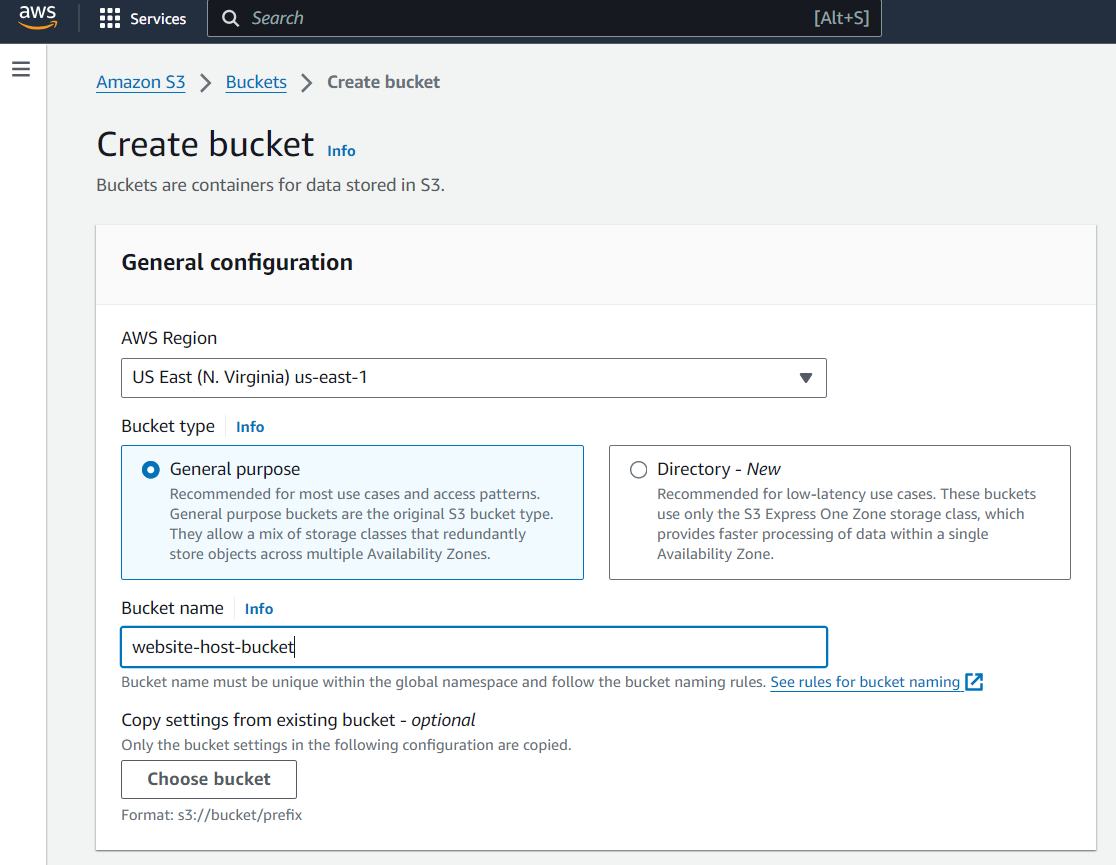
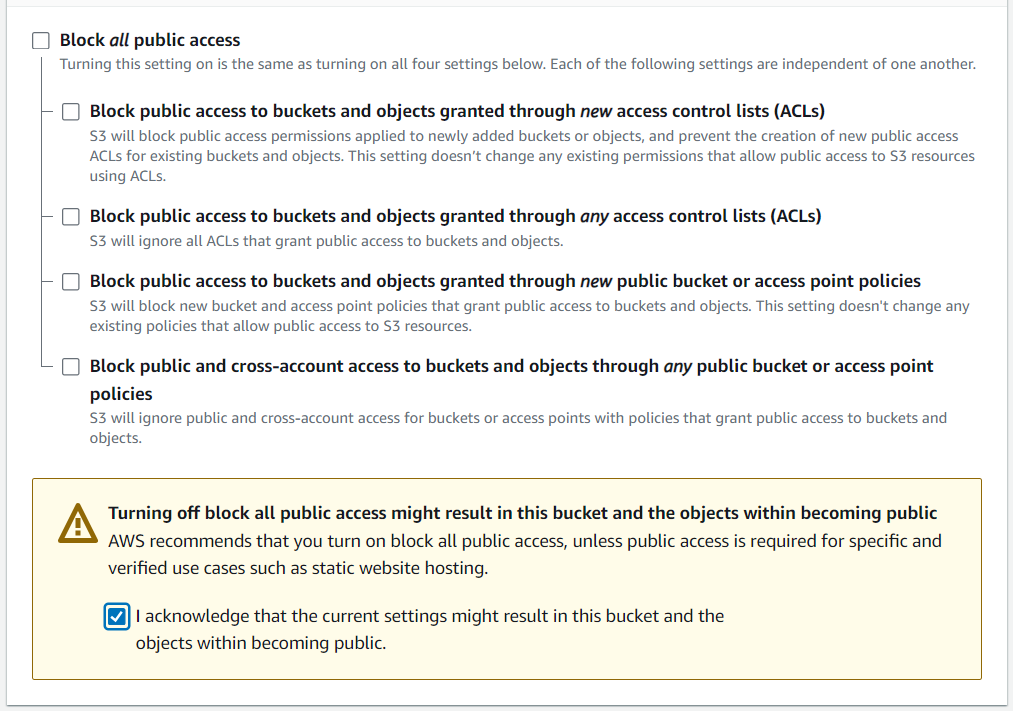
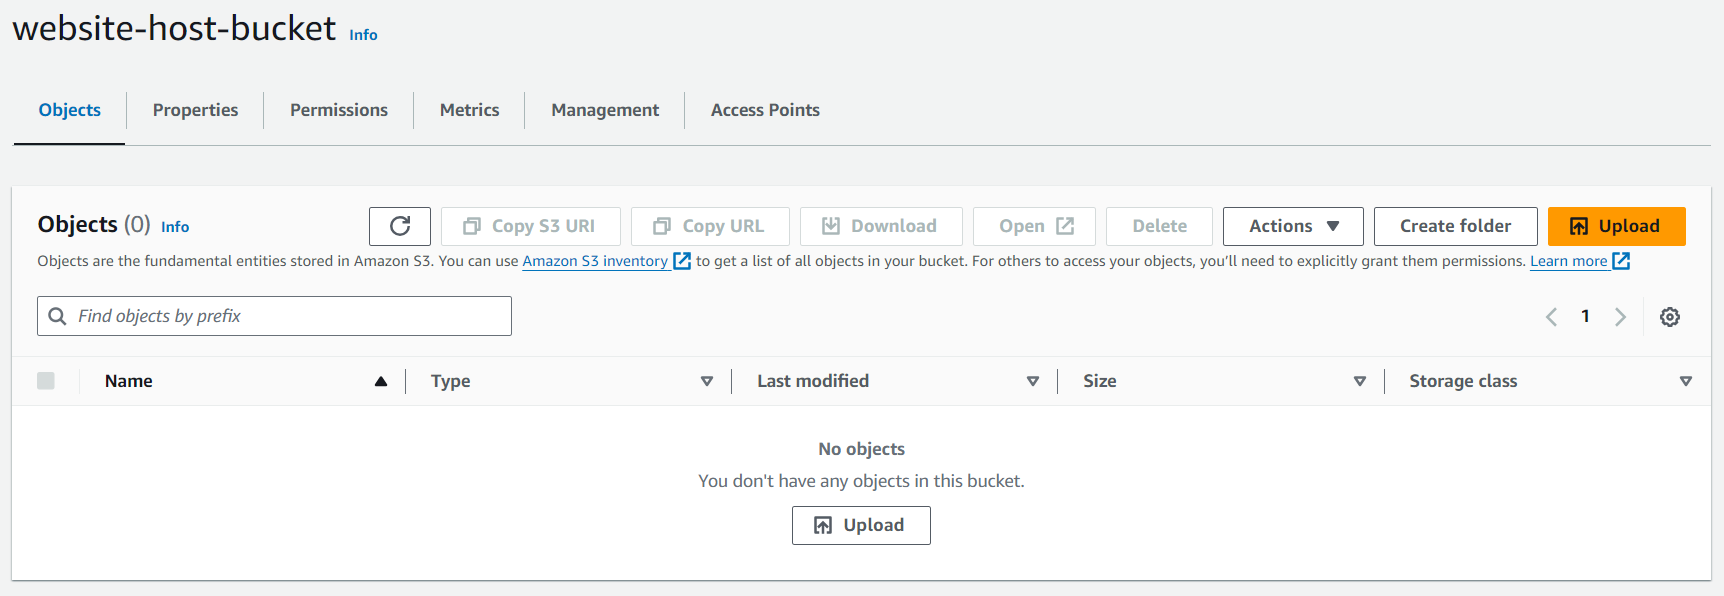
S2: Upload all the files. (The files related to simple website)
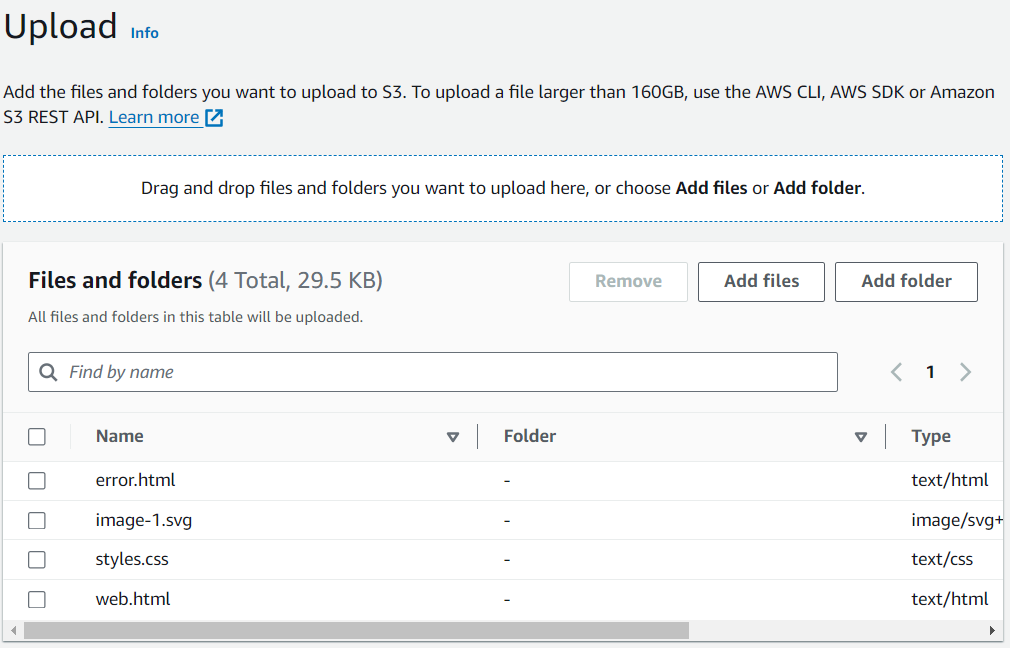
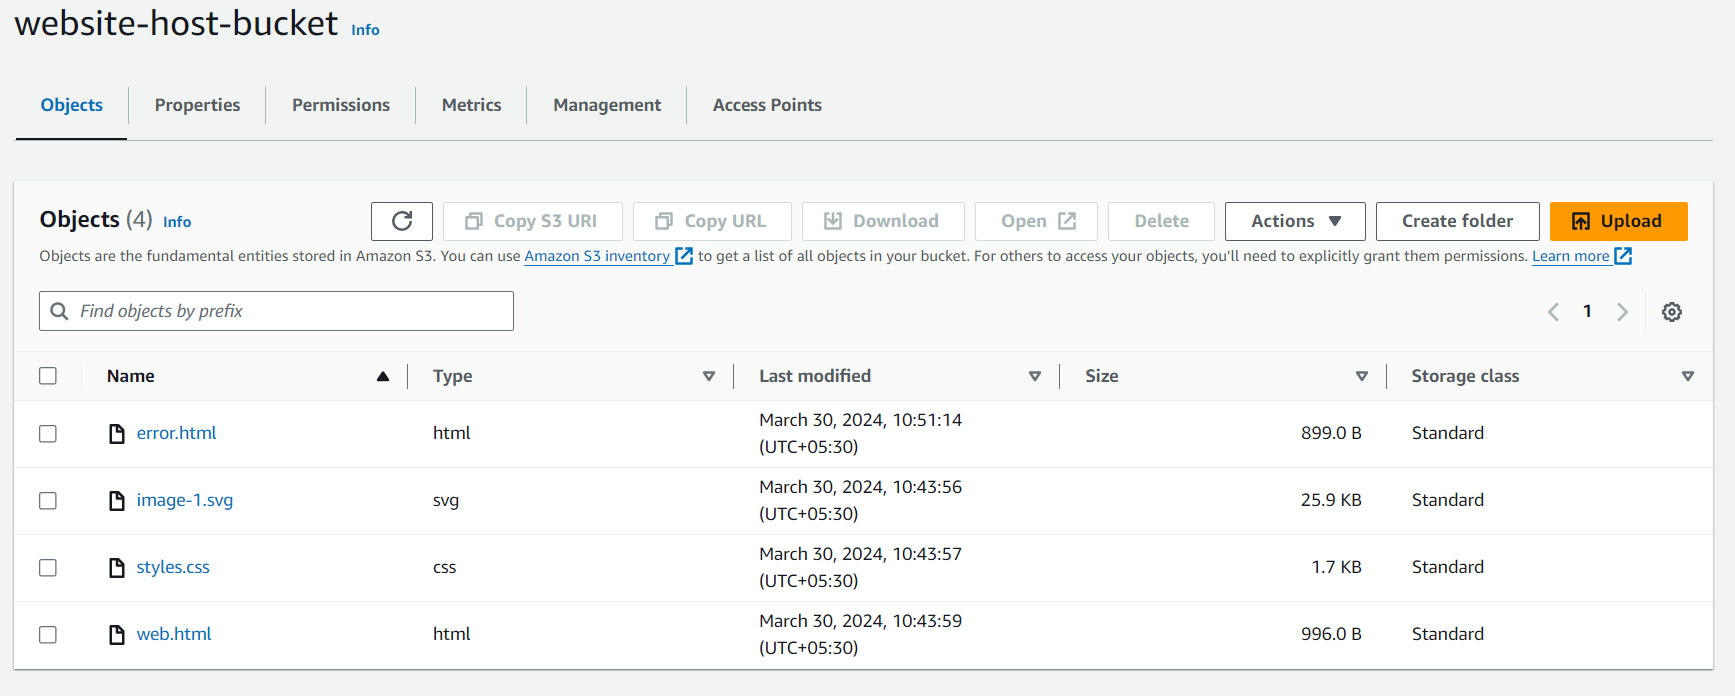
S3: To enable the Static Website Hosting, go to Properties of bucket.

Move down and see the Static Website Hosting is Disabled. Click Edit and Enable it.

Give the index page name(main page) and error page name(to show whenever there is misspelled in url, its Optional) and click Save Changes.
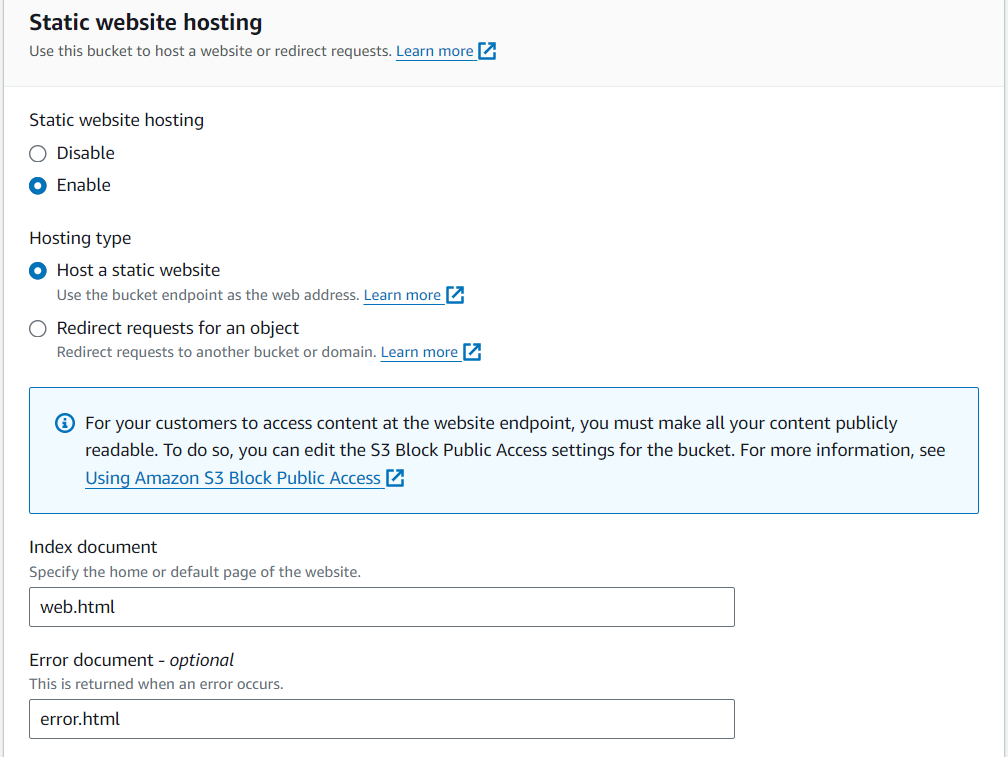
Now copy the URL of Bucket website and paste in new tab. You will get the "403 Forbidden", you get this because your website's objects within the bucket is not not getting access.


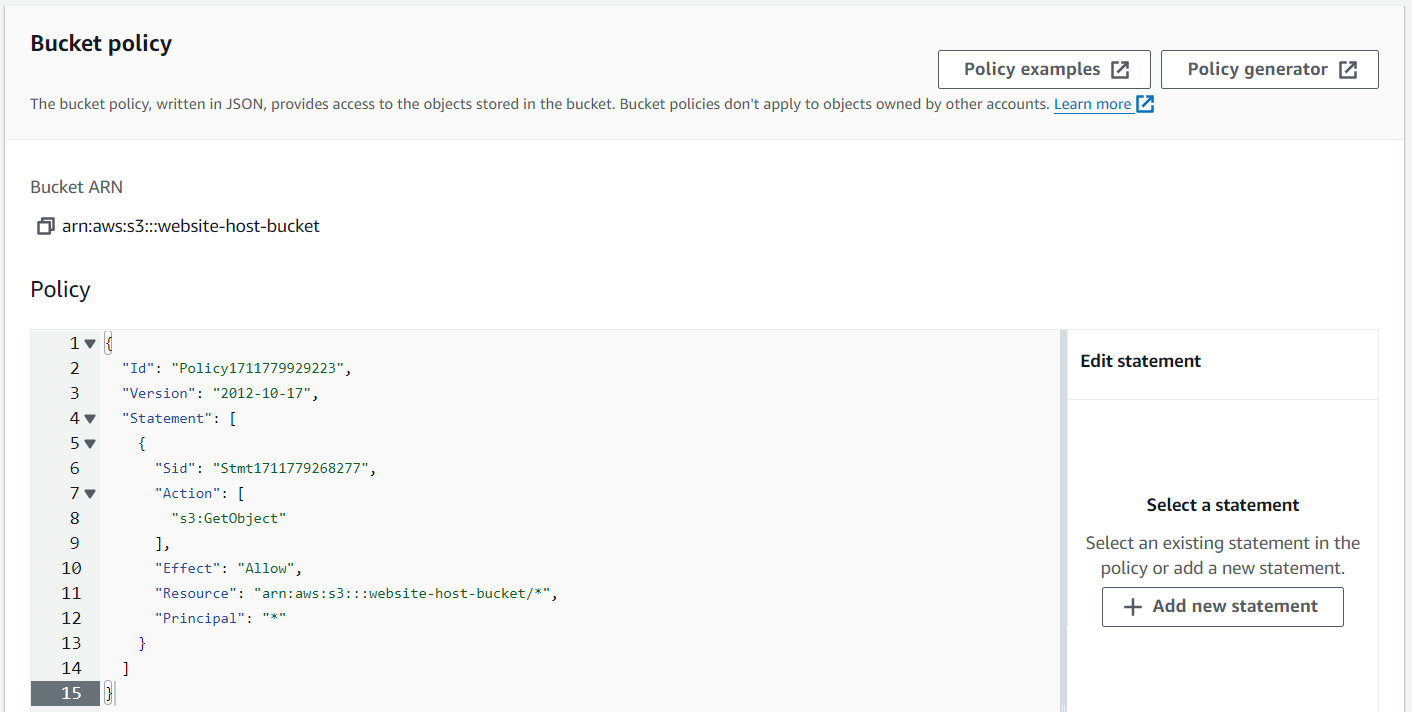
S4: To solve this error, we have to create S3 Bucket policy for the above created bucket to allow the end users to access it. Go to Permissions of Bucket ("website-host-bucket") and edit the Bucket policy. Copy the Bucket ARN(Amazon Resource Name) and click on policy generator (right top corner).

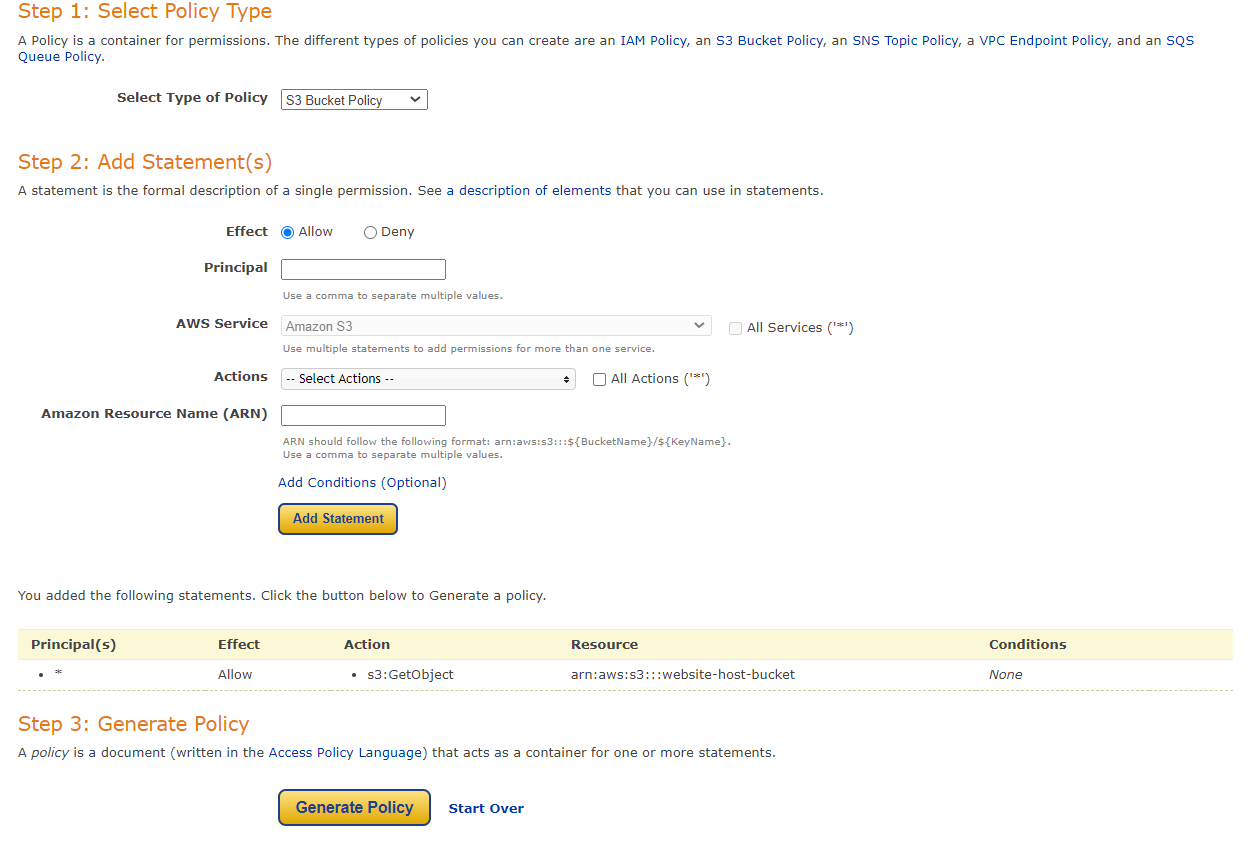
On the Policy generator page:
Select Type : "S3 Bucket Policy"
Principal : *
Actions : Getobject
ARN : "arn:aws:s3:::website-host-bucket"
Click*Add Statement.
ClickGenerate Policy.*
You will get the code like:
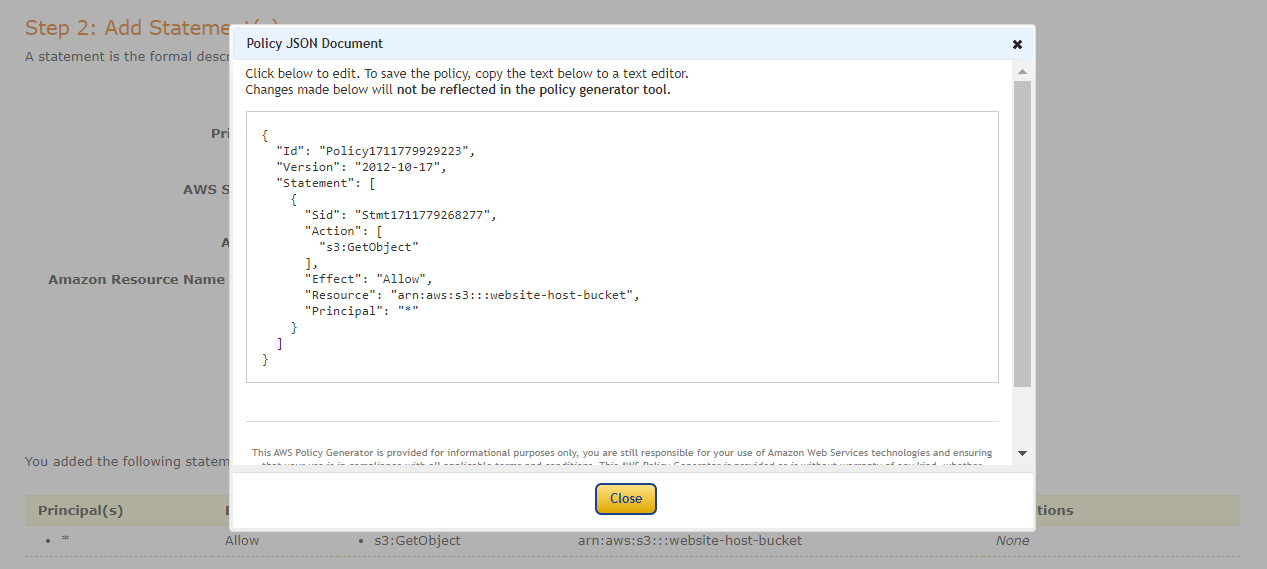
Copy and paste it and add ".../\" in line of "Resources: ...."* on the policy edit page as shown.
S5: Now refresh the page on which you got the 403 forbidden error.

Try:http://....amazonaws.com/[unuploaded file]
e.g. : here i am going to see what is there in the dev.html page which is not uploaded in bucket. Like http://....amazonaws.com/dev.html
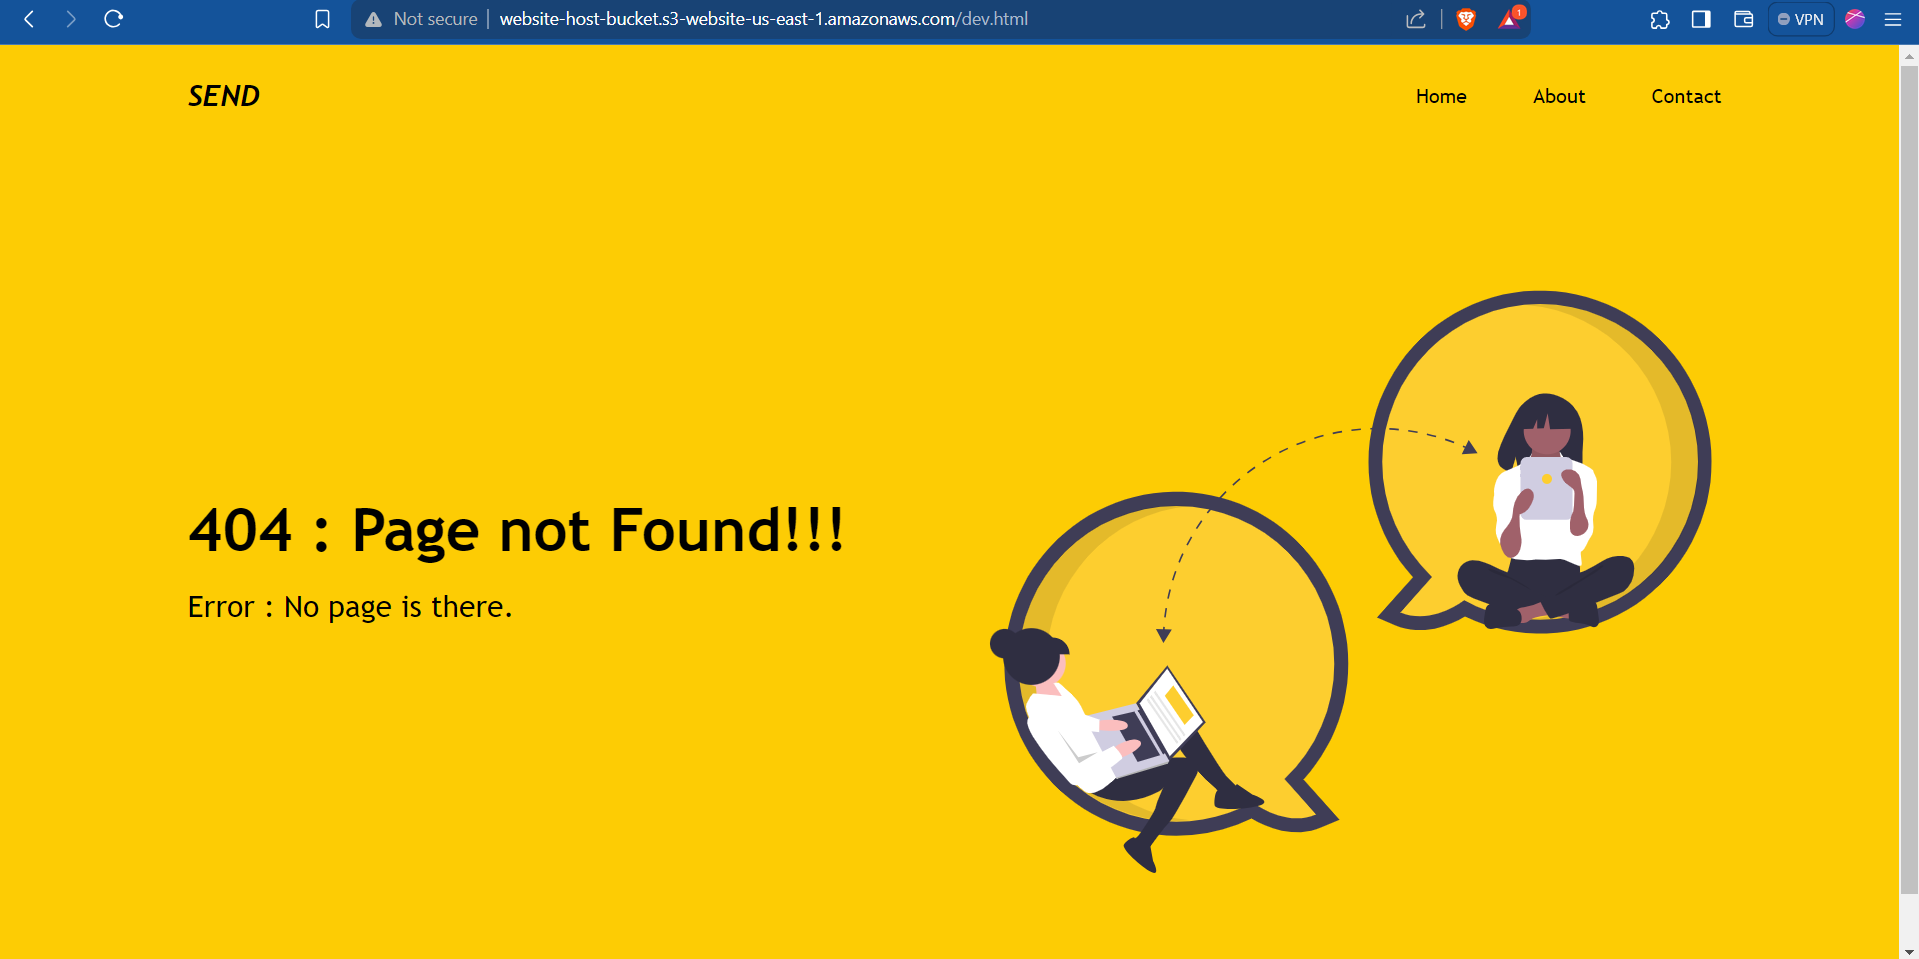
Surprise , I am not getting any error even if the page the is not present. This is the error.html page that i was created to show whenever there is misspelled in the page name you want to go. This is because of the giving the error page name in Step 3.
Hence marks this completion, hope you find this step by step procedure for simple project insightful and have given a try it to.
Do like and follow for more!
Subscribe to my newsletter
Read articles from Biswanath Sah directly inside your inbox. Subscribe to the newsletter, and don't miss out.
Written by
