A Step-by-Step Guide In Creating A SQL Virtual Machine In Azure
 AKEH EUNICE
Introduction
In today's cloud-driven world, businesses are increasingly adopting virtual machines (VMs) to efficiently manage their data and applications. Microsoft Azure provides a robust platform for hosting SQL Server databases on virtual machines, offering scalability, reliability, and security. This step-by-step guide will walk you through the process of creating a SQL virtual machine in Azure, enabling you to leverage the power of the cloud for your database needs.
prerequisites
Create an Azure Account with a valid subscription
Download and install SQL SERVER 2022 and SSMS 19 version on your local machine/pc
To Create A New Azure SQL Database, Follow These Steps:
Step1: Log into Azure portal: Open your web browser and navigate to the Azure Portal (https://portal.azure.com)
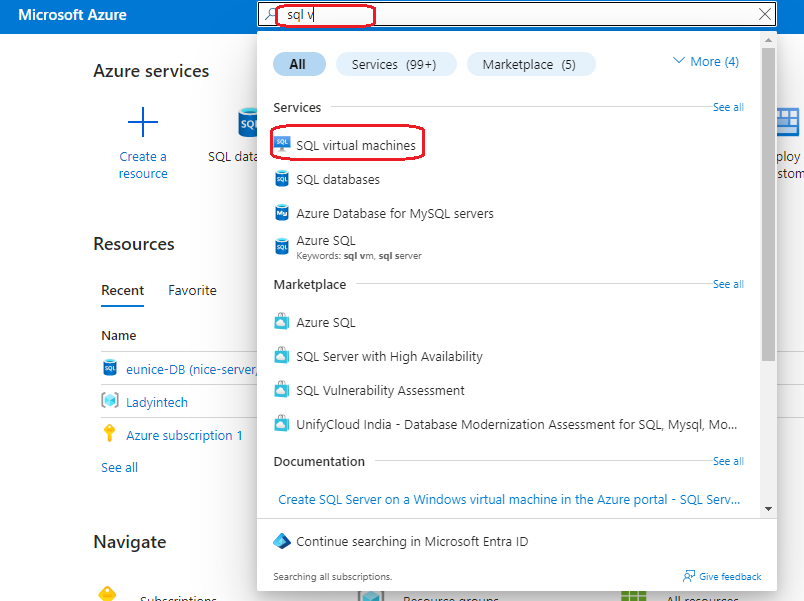
Step2: Search for SQL Server using the homepage's search box
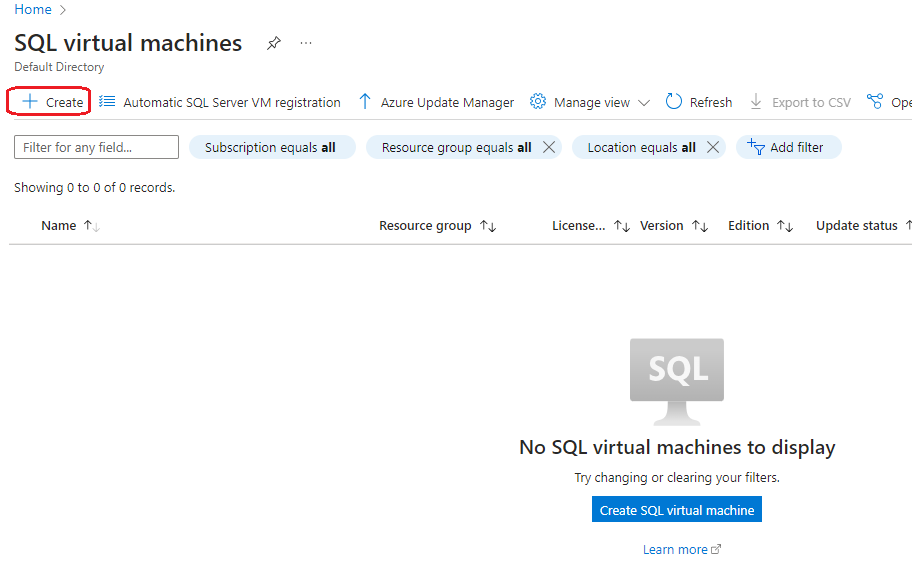
Step3: "Click On" "Create" as highlighted below
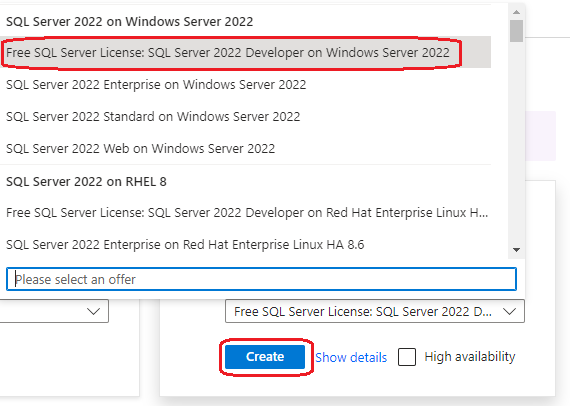
Step4: Select an Image From the SQL virtual machine dropdown
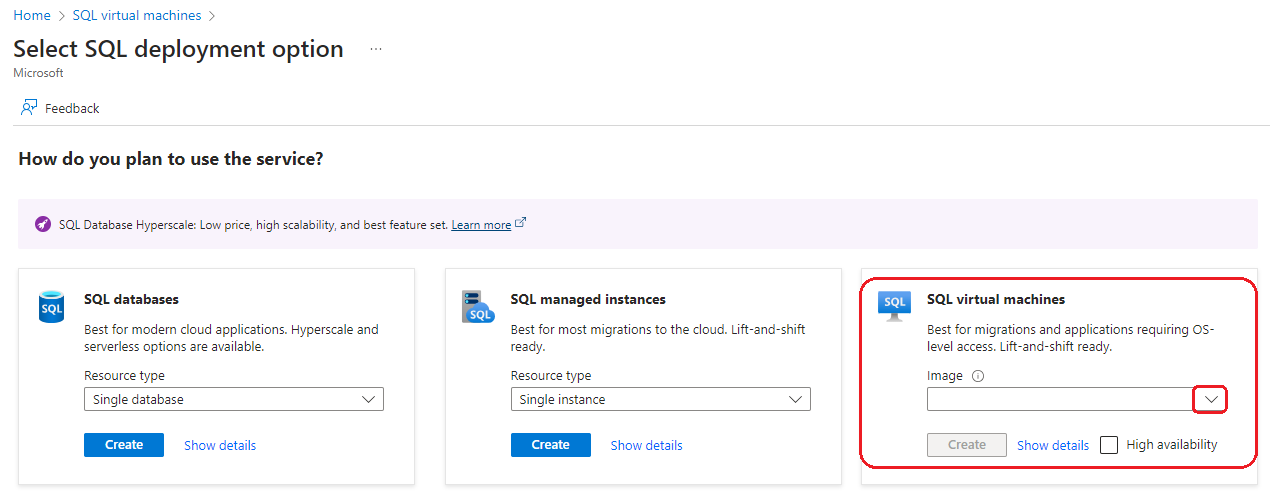
Step4a: "Select" the "Free SQL Server License" and then "Click On" "Create"
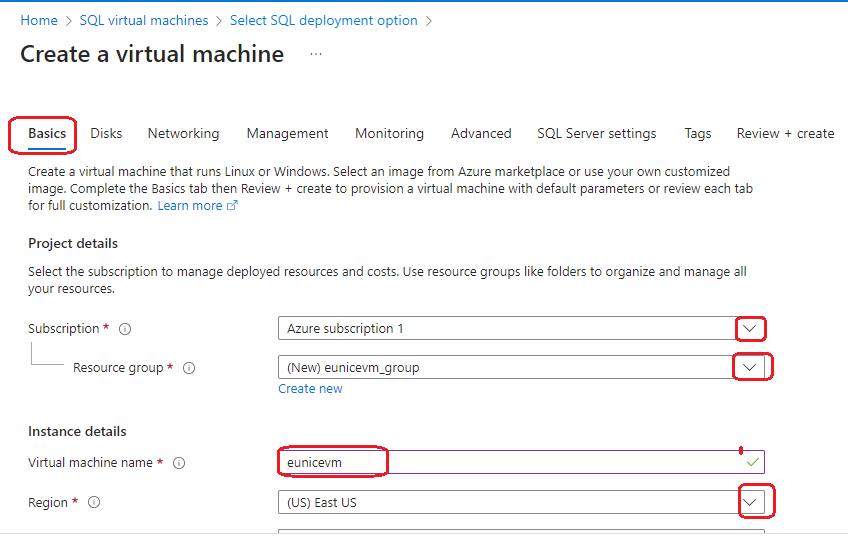
Step5: Fill in Basic Settings Information - "Select" "Subscription" > "Create or Select" "Resource group" > Give your Virtual machine a "Name" and "Select" "Region"
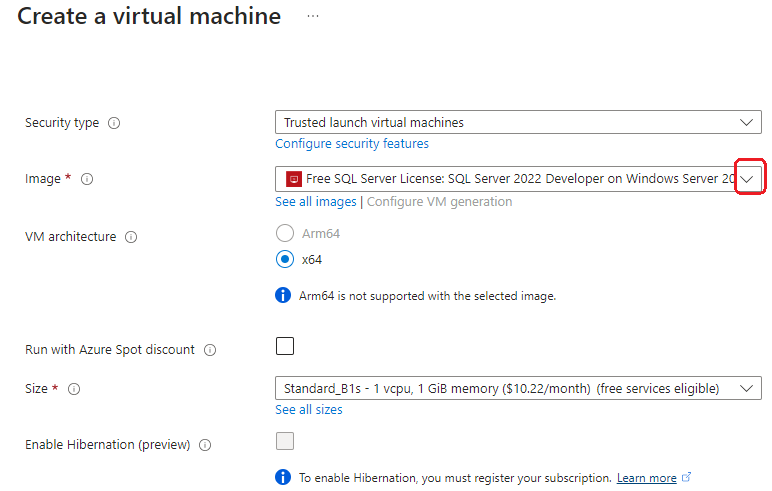
Step5a: Basic Settings - Image has already be select but you can change from the dropdown and leave the rest as default. Note: Select the appropriate VM size based on your workload requirements and budget considerations and Consider factors such as CPU, memory, and storage capacity when choosing the VM size
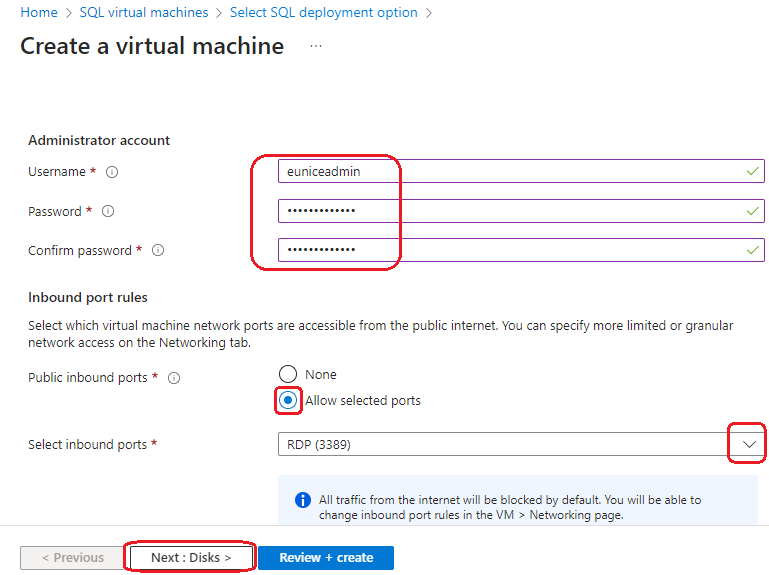
Step5c: Fill in the Administrator Account details - "Username" >"Password" > "Confirm password" and "Tick" "Allowed selected ports" > "Select inbound ports" from the dropdown and then "Click On" "Next: Disks" Note: Note down the server name, database name, and login credentials, as you'll need these later for the migration process
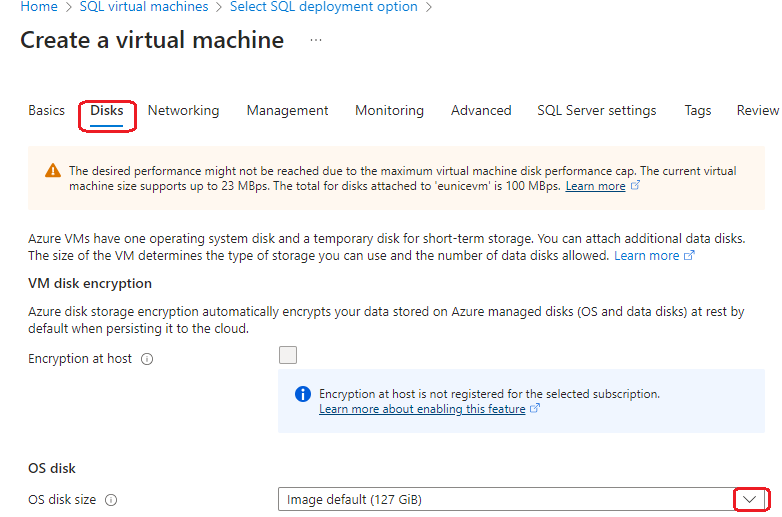
Step6: Disks Settings Tab - From the dropdown "Select" "Os disk size"
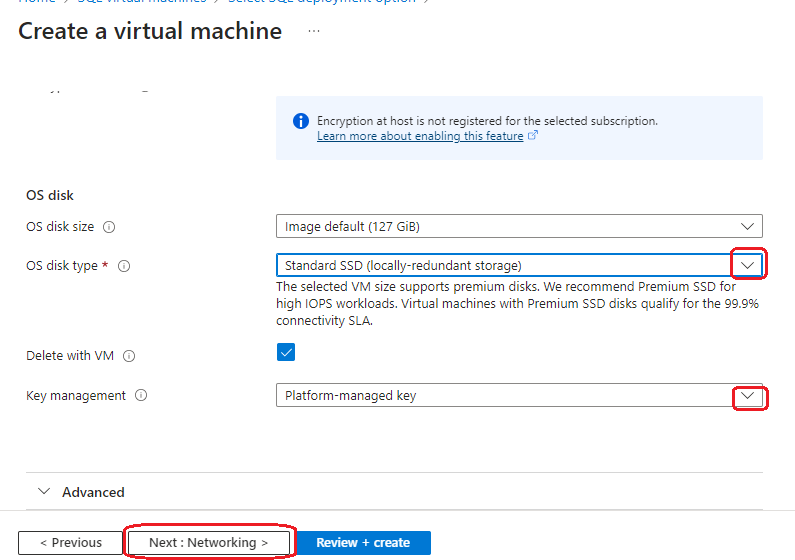
Step6a: Disks Settings - From the dropdown "Select" "OS disk type" to fit your specifications , "Select" "Platform-managed key" and "Click On" "Next: Networking"
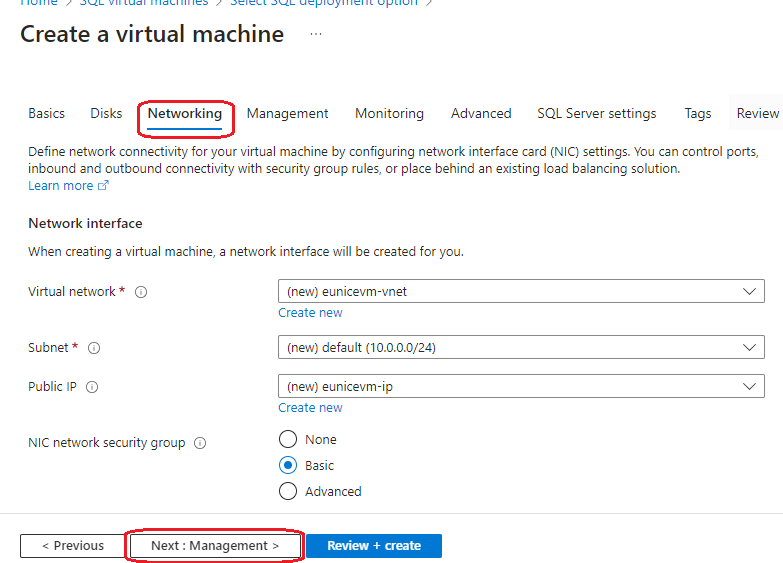
Step7: Networking Settings - Leave as default setting and "Click On" "Next: Management"
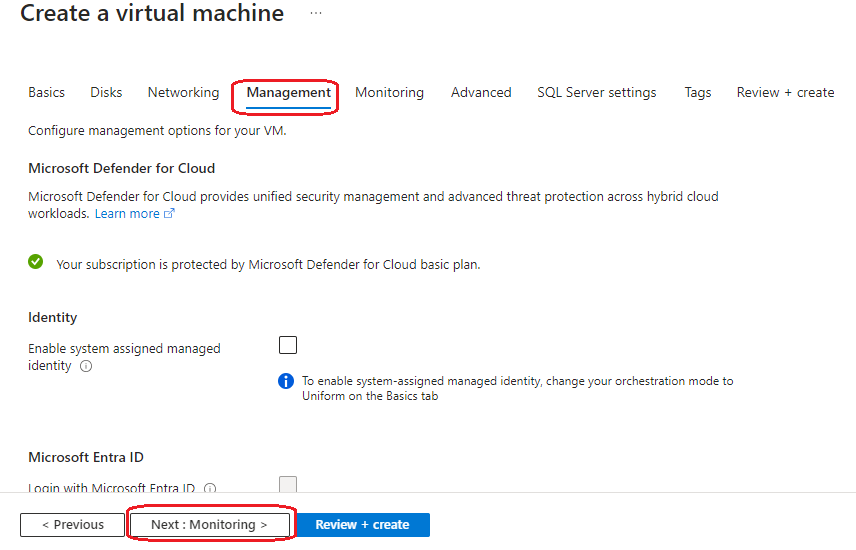
Step8: Management Settings - Leave as default setting and "Click On" "Next: Monitoring"
Step9: Monitoring Settings - Under Diagnostics "Tick" "Enable with managed storage account" and "Click On" "Next: Advanced"
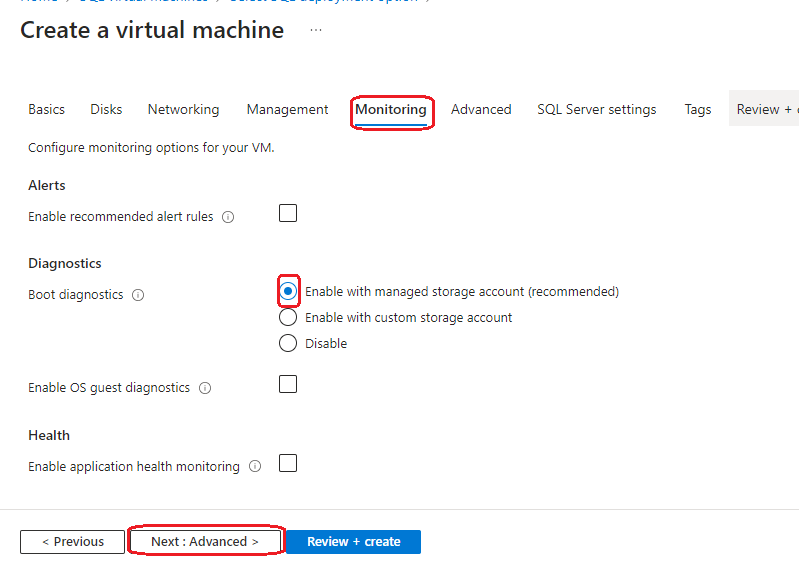
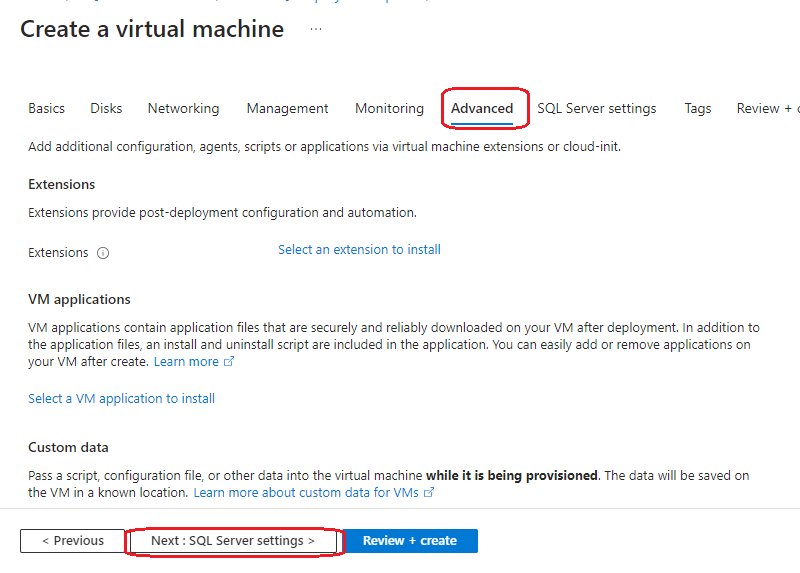
Step10:Advanced Settings - Leave as default setting and "Click On" "Next: SQL server setting"
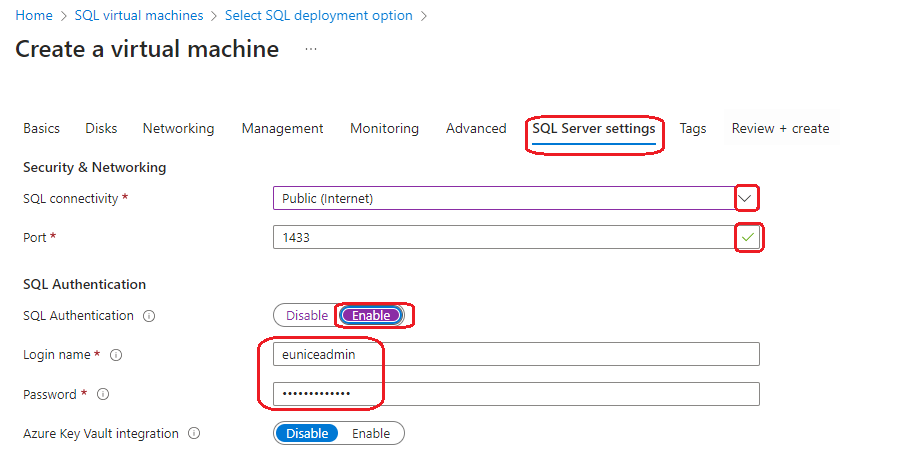
Step11: Configure SQL Server Settings - This step is very important , Select Security & Networking type from the dropdown. "Enable" "SQL Authentication" > Give "Login name" and "Password"
Step11a: SQL Server Settings - Configure your Storage and Instance Settings to suit your specification. "Click On" "Next: Review + Create"
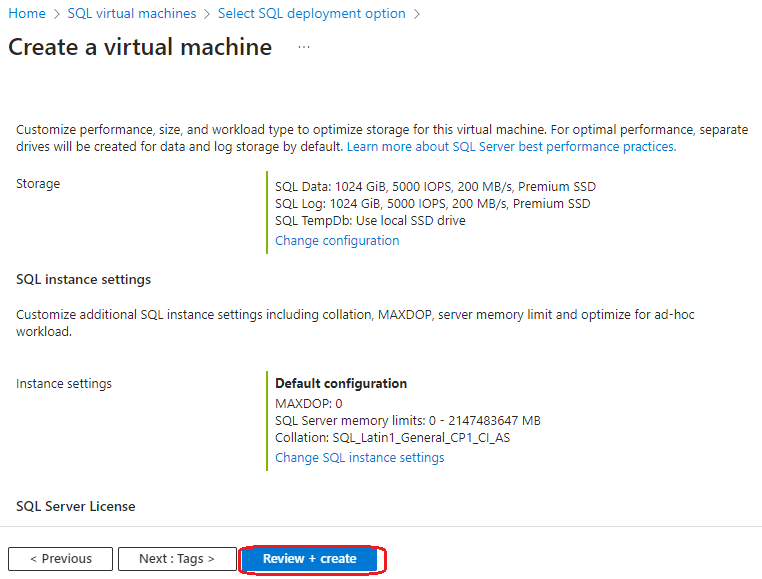
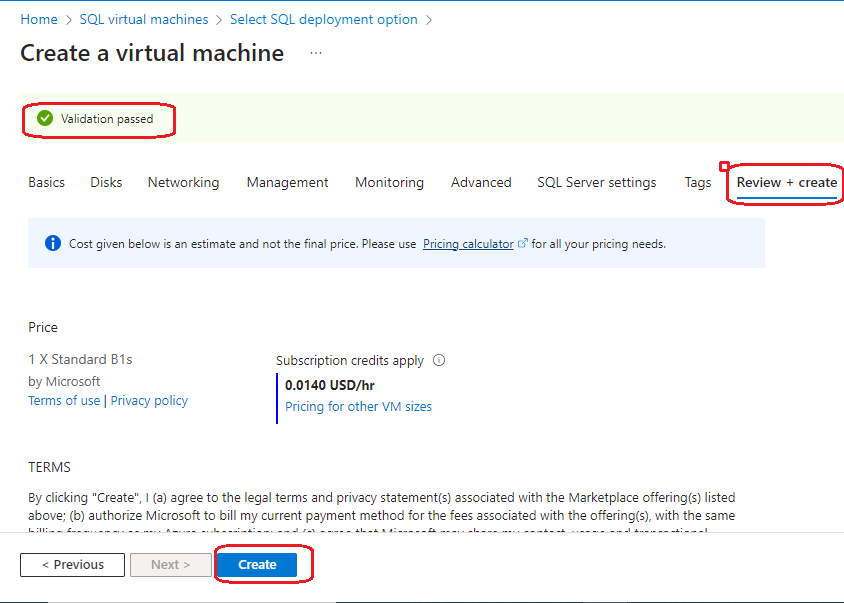
Step12: Review+ Create Settings - Once Validation passed "Click On" "Next: Create"
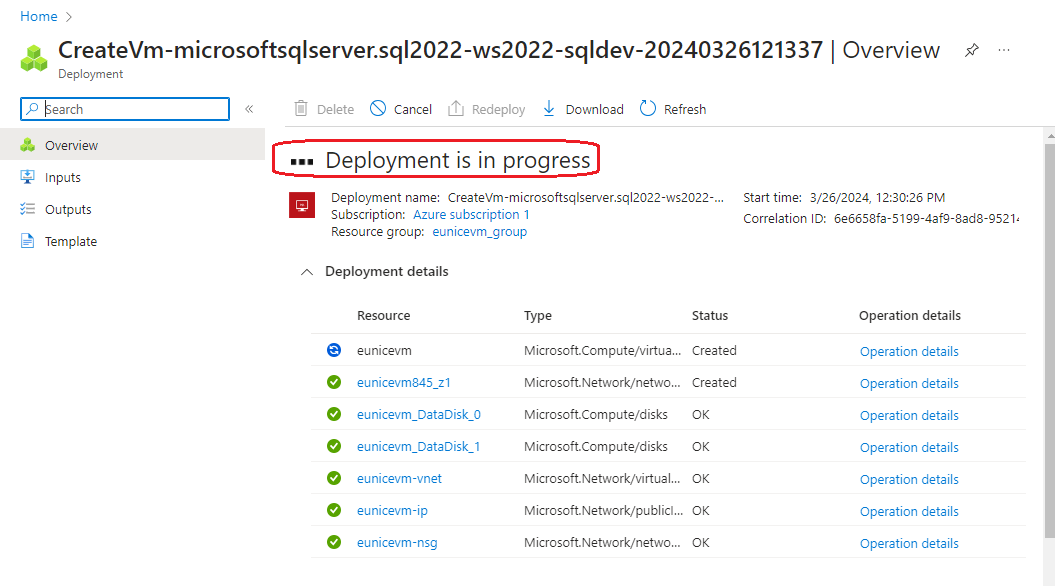
Step13: Deployment in Progress
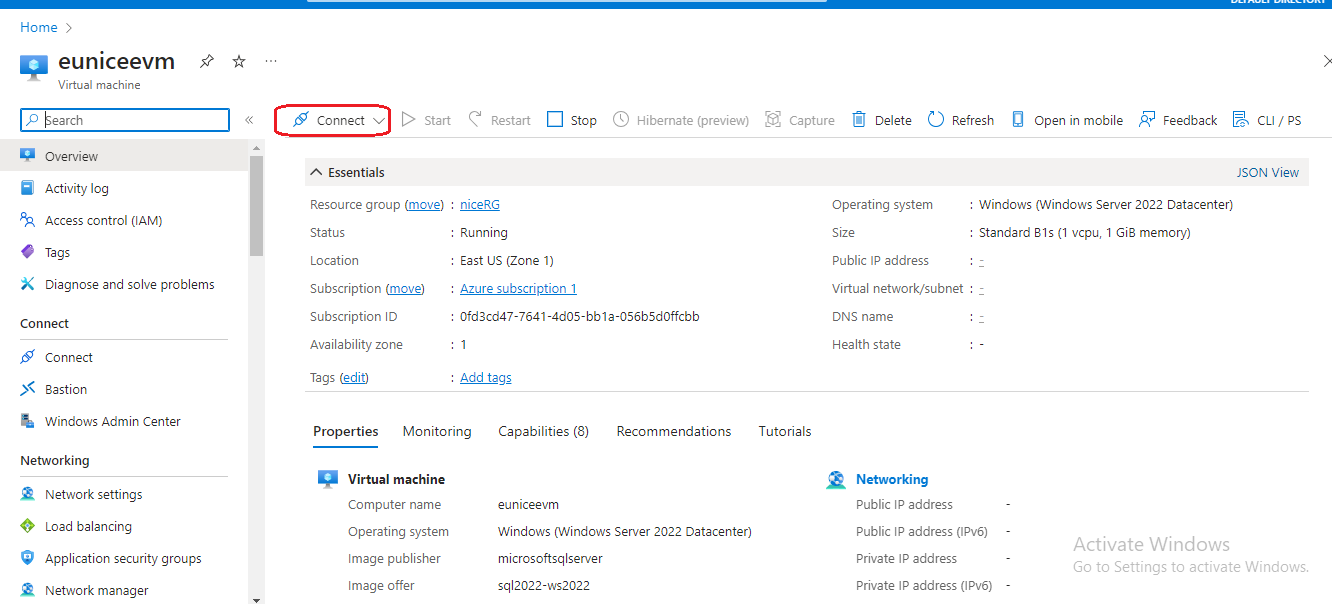
Step14: Connect to your VM Using RDP - Once the deployment is complete, you can access your SQL virtual machine using Remote Desktop Protocol (RDP) "Click On" "Connect"
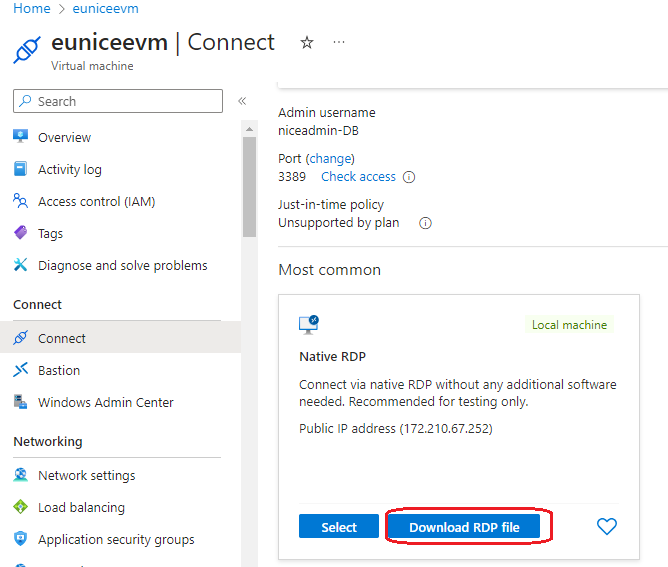
Step15: Download RDP- and save on your local PC
Step16: Connect - Input password and follow prompt until you have successfully accessed your VM
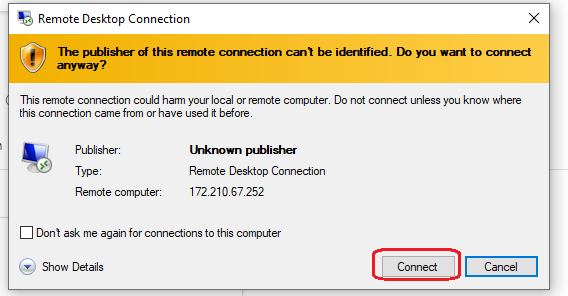
Step17: Connect to the SQL Server instance using SQL Server Management Studio (SSMS) or any other preferred SQL client tool.
Conclusion
Congratulations! You have successfully created a SQL virtual machine in Microsoft Azure, empowering your organization with a scalable and reliable platform for hosting SQL Server databases. By following this step-by-step guide, you can harness the full potential of Azure's cloud infrastructure to optimize your database management processes and drive business growth.
Subscribe to my newsletter
Read articles from AKEH EUNICE directly inside your inbox. Subscribe to the newsletter, and don't miss out.
Written by
