Effortlessly Connect to Your AWS EC2 Instance with AWS Session Manager: A Step-by-Step Guide
 Victor Modebe
Introduction
Cloud computing is being adopted vastly by more than 90 percent of the fortune 500 companies with Amazon Web Services (AWS) getting a large slice of the pie while it continues on it's quest for world domination in the cloud computing space by a very wide margin. Amazon Web Services (AWS) offers a vast array of services that empowers developers to configure, build, deploy and manage applications seamlessly with second to none flexibility and scale. Among these services Amazon EC2 (Elastic Cloud Compute) is a frontrunner, providing resizable compute capacity in the cloud, which has revolutionised the way companies approach IT infrastructure. However, with great power comes the need for secure, efficient management tools, especially when it comes to accessing these virtual servers. Traditional methods, like SSH (Secure Shell), while powerful, come with their own set of challenges, including the management of SSH keys and the security risks associated with open ports.
Enter AWS Session Manager, a game-changer for developers and IT administrators looking for a more secure, streamlined way to access and manage their EC2 instances. This blog post will dive into the world of AWS Session Manager, exploring its benefits over traditional SSH access methods, such as eliminating the need for SSH keys, reducing the attack surface by keeping ports closed, and providing an audit trail of access and command execution. Whether you're a seasoned AWS user or new to cloud computing, this guide will walk you through everything you need to know about connecting to your AWS EC2 instance using AWS Session Manager, ensuring that you can leverage this powerful tool to enhance your cloud management strategy.
What is AWS Session Manager?
AWS Session Manager is a fully managed service provided by Amazon Web Services (AWS) that allows users to manage their Amazon Elastic Compute Cloud (EC2) instances, containers, and virtual machines (VMs) securely and efficiently. It's part of the AWS Systems Manager suite, which offers a unified interface for automating tasks across AWS resources.
The key functionality of Session Manager is to provide a secure browser-based interactive shell and command-line interface (CLI) access to your instances without the need to open inbound ports, manage SSH keys, or use bastion hosts. By eliminating the need for these traditional access mechanisms, Session Manager enhances security and simplifies the management of your compute resources.
Here are some of the notable features and benefits of using AWS Session Manager:
Secure Access: It uses IAM (Identity and Access Management) roles and policies to control access to instances, ensuring that only authorized users can initiate sessions. All session data is encrypted, providing an additional layer of security.
Simplified Management: With Session Manager, there's no need to manage SSH keys or SSL certificates. This simplification reduces the operational burden on teams and minimizes the risk of misconfiguration or unauthorized access.
Audit and Compliance: All sessions can be logged and audited. Session Manager integrates with AWS CloudTrail and Amazon S3 to log session activity and store session output, aiding in compliance and audit processes.
Seamless Integration: It integrates with other AWS services and features, like Amazon CloudWatch for logs, AWS S3 for session output storage, and AWS CloudTrail for audit trails. This integration allows for a cohesive and robust management ecosystem.
Cost-Effective: As a feature of AWS Systems Manager, there are no additional costs for using Session Manager beyond the standard costs for Systems Manager and any associated resources, such as S3 for log storage or CloudWatch logs.
By leveraging AWS Session Manager, organisations can streamline their operations, enhance security, and comply with audit requirements, making it an essential tool for managing cloud resources efficiently and securely.
Prerequisites
To effectively use AWS Session Manager for managing your EC2 instances, you'll need to ensure that several prerequisites are in place. These prerequisites encompass AWS account setup, EC2 instance configuration, and necessary IAM role configurations. Here’s a comprehensive list to get you started:
AWS Account: You will need an active AWS account, if you don't one, you can create it by signing up on the AWS website. You'll need to have a beginner level knowledge of AWS.
AWS Systems Manager Agent (SSM Agent): The AWS Systems Manager Agent (SSM Agent) must be installed and running on the EC2 instances you want to manage. The SSM Agent facilitates communication between your instances and the Systems Manager, enabling features like Session Manager. Most Amazon Machine Images (AMIs) come with the SSM Agent pre-installed, but you should verify and update it to the latest version for the best performance and security. More details can be found here https://docs.aws.amazon.com/systems-manager/latest/userguide/ami-preinstalled-agent.html
IAM Role Configurations: Create an IAM role with permissions that allow the instance to communicate with the Systems Manager service. Attach the
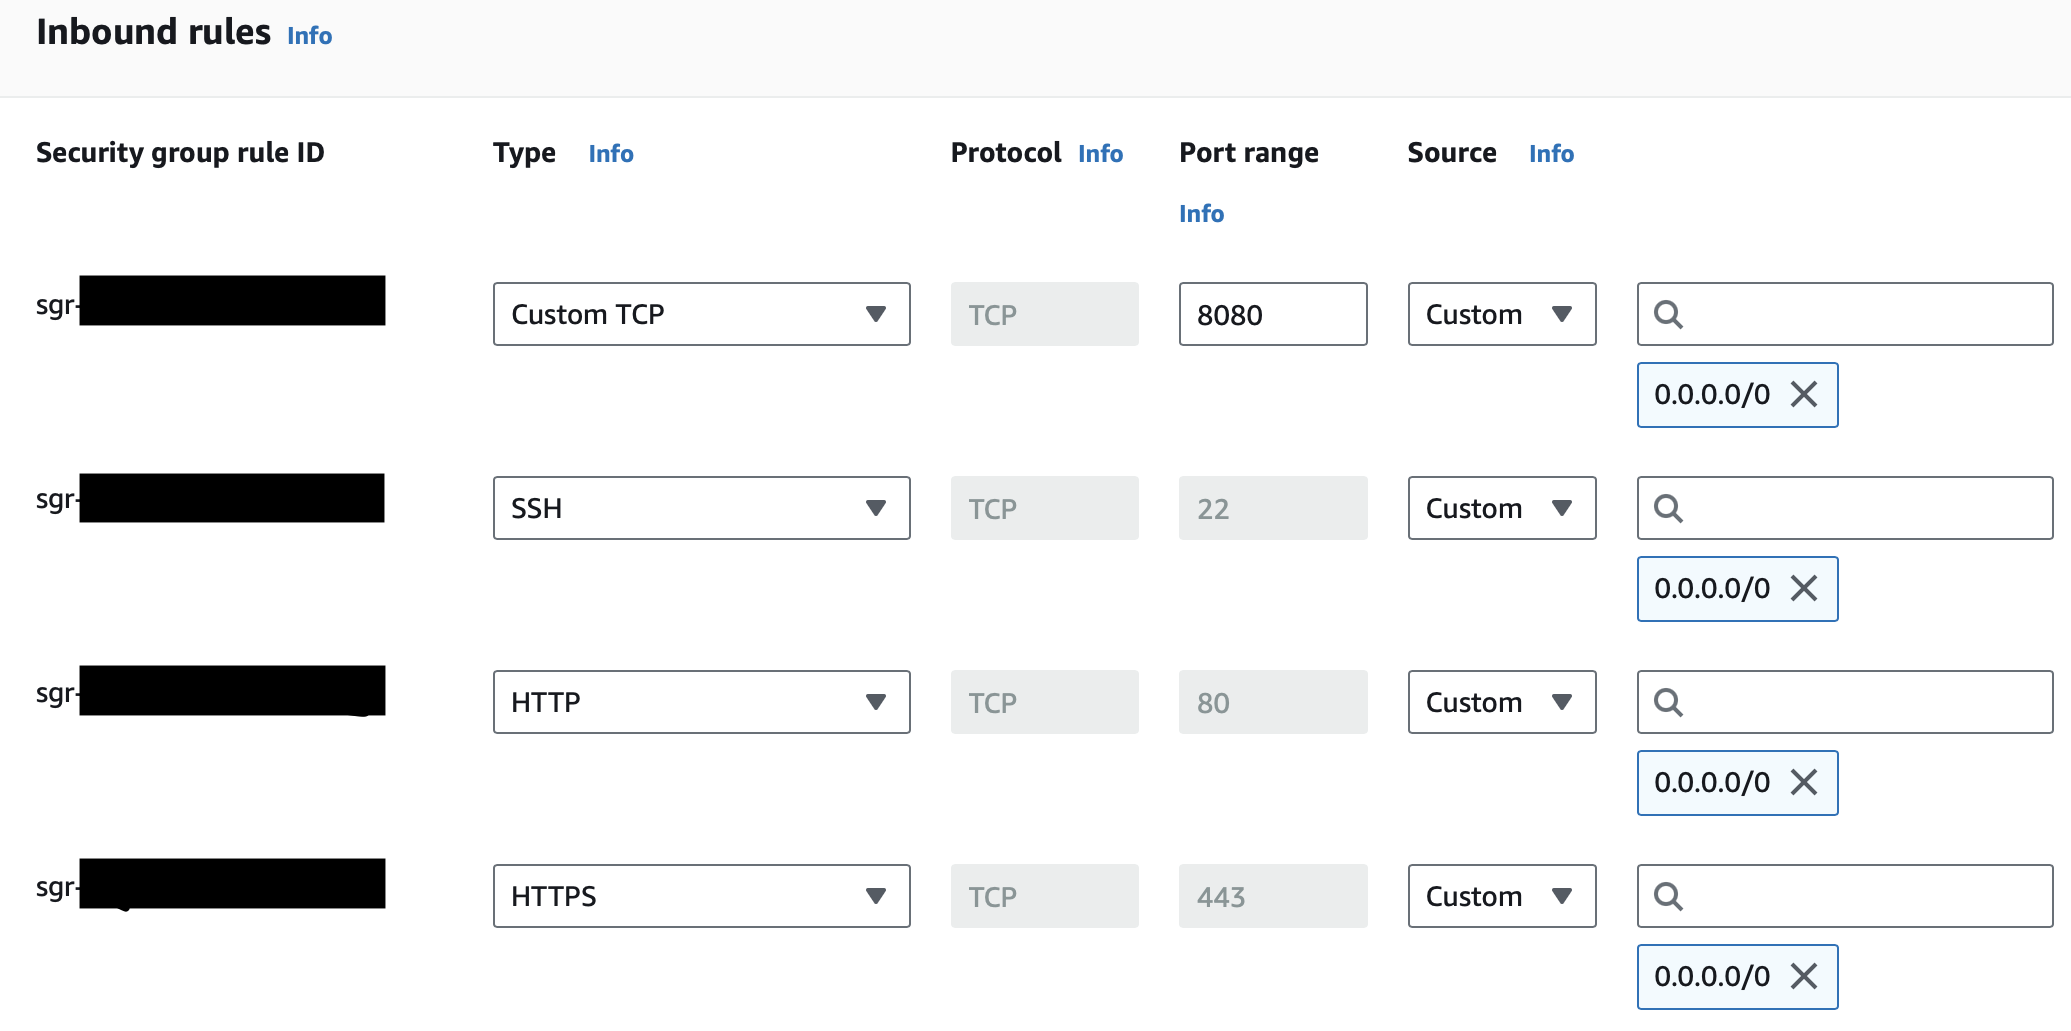
AmazonSSMManagedInstanceCoremanaged policy to this role. This step is crucial for the SSM Agent on your EC2 instances to function correctly. Ensure your IAM user account has the necessary permissions to access Systems Manager and initiate sessions. You can use managed policies likeAmazonSSMFullAccessor create a custom policy that suits your security requirements.Network Configuration: Your EC2 instances must have internet access to communicate with the AWS Systems Manager endpoint. This can be achieved through a public subnet with an internet gateway or through a private subnet with NAT gateway or VPC endpoint configuration. To configure, secure and facilitate access to your EC2 instance, it's essential to configure your instance's security group settings correctly. This involves adjusting the inbound traffic rules to allow connections through TCP protocol on three key ports: 443 for HTTPS, 80 for HTTP, and 8080 for custom TCP traffic. To ensure universal accessibility, set the source IP range to 0.0.0.0/0, which effectively permits any IP address across the globe to interact with your instance via these specified ports or set it to your IP for enhance security. This setup is crucial for enabling secure web access and supporting any specialised applications running on port 8080.
Operating System Compatibility: Ensure that your EC2 instances are running an operating system that is compatible with the SSM Agent. AWS provides a list of supported operating systems on their official documentation.
By ensuring these prerequisites are met, you'll be in a strong position to leverage AWS Session Manager for secure, efficient, and hassle-free management of your EC2 instances.
Setting up your EC2 Instance for Session Manager
The simple solution to configure session manager on your EC2 Instance starts with creating an IAM role for the Instance and attach the AmazonSSMManagedInstanceCore managed policy to this role.
Session manager tends to have some advantages that makes it highly encouraged and it's also a security best practice. With session manager agent installed on your EC2 instance there is no need for SSH keys which can be compromised. As a cloud computing expert, It's always best practice to apply the principles of least privileged when building/designing or configuring cloud infrastructure.
- Launch an EC2 instance, for this blog post I will use Amazon Linux 2023 AMI & t2.micro instance type to eliminate instance cost which has SSM Agent preinstalled. Make sure to configure your network components correctly most especially the inbound traffic on your security group.

For testing purposes I assigned IPv4 on launch of my Instance and opened SSH port 22 to connect to my instance via instance connect and programmatically confirmed if SSM Agent is installed and running on Amazon Linux 2023 operating system.

We can confidently confirm that the SSM Agent is pre-installed and actively running as you can clearly see from above.
sudo systemctl status amazon-ssm-agent
The code above is used to verify the installation of the SSM Agent on Amazon Linux 2023. Refer to Amazon's official documentation to get a list of commands to verify the installation status of the SSM Agent of your instance's operating system type https://docs.aws.amazon.com/systems-manager/latest/userguide/ami-preinstalled-agent.html. Delete SSH inbound rule after confirmation before proceeding to the next step.
NOTE: There is no requirement to allocate an IPv4 address to your instance upon initialisation, and you can effectively establish a connection to your EC2 instance using Session Manager while operating within a private subnet.
Creating an IAM Role for the EC2 Instance
To utilize AWS Session Manager for securely connecting to your EC2 instances without requiring SSH keys, it's essential to have the appropriate IAM role attached to your instances. This guide will walk you through creating an IAM role with the AmazonSSMManagedInstanceCore managed policy, which grants the necessary permissions for your instances to communicate with AWS Systems Manager.
Step 1: Navigate to the IAM Console
Log in to your AWS Management Console.
Open the IAM console by finding the IAM (Identity and Access Management) service in the "Services" menu or by using the search bar.
Step 2: Create a New Role
In the IAM dashboard, click on "Roles" on the left sidebar.
Click the "Create role" button.
Choose "AWS service" as the type of trusted entity.
Select "EC2" under the “Common use cases” section, as this role will be used by EC2 instances. Then, click "Next: Permissions".
Step 3: Attach the AmazonSSMManagedInstanceCore Policy
In the "Attach permissions policies" screen, use the search bar to find the
AmazonSSMManagedInstanceCorepolicy.Check the box next to
AmazonSSMManagedInstanceCoreto select it.Click "Next: Tags" (optional step, you can add tags as per your organizational needs).
Click "Next: Review".
Step 4: Review and Create the Role
Assign a name to your role, such as "EC2SessionManagerRole". You can also add a description for clarity.
Review the details to ensure the
AmazonSSMManagedInstanceCorepolicy is attached.Click "Create role" to finalize the creation process.
Attach the Role to Your EC2 Instance
Navigate to the EC2 dashboard from the AWS Management Console.
Select the "Instances" link on the left sidebar to view your list of instances.
Choose the instance you wish to attach the role to and select "Actions".
Navigate to "Security" and select "Modify IAM role".
In the "IAM role" dropdown menu, select the role you created earlier ("EC2-SSM-ACCESS-ROLE").
Click to apply the changes.

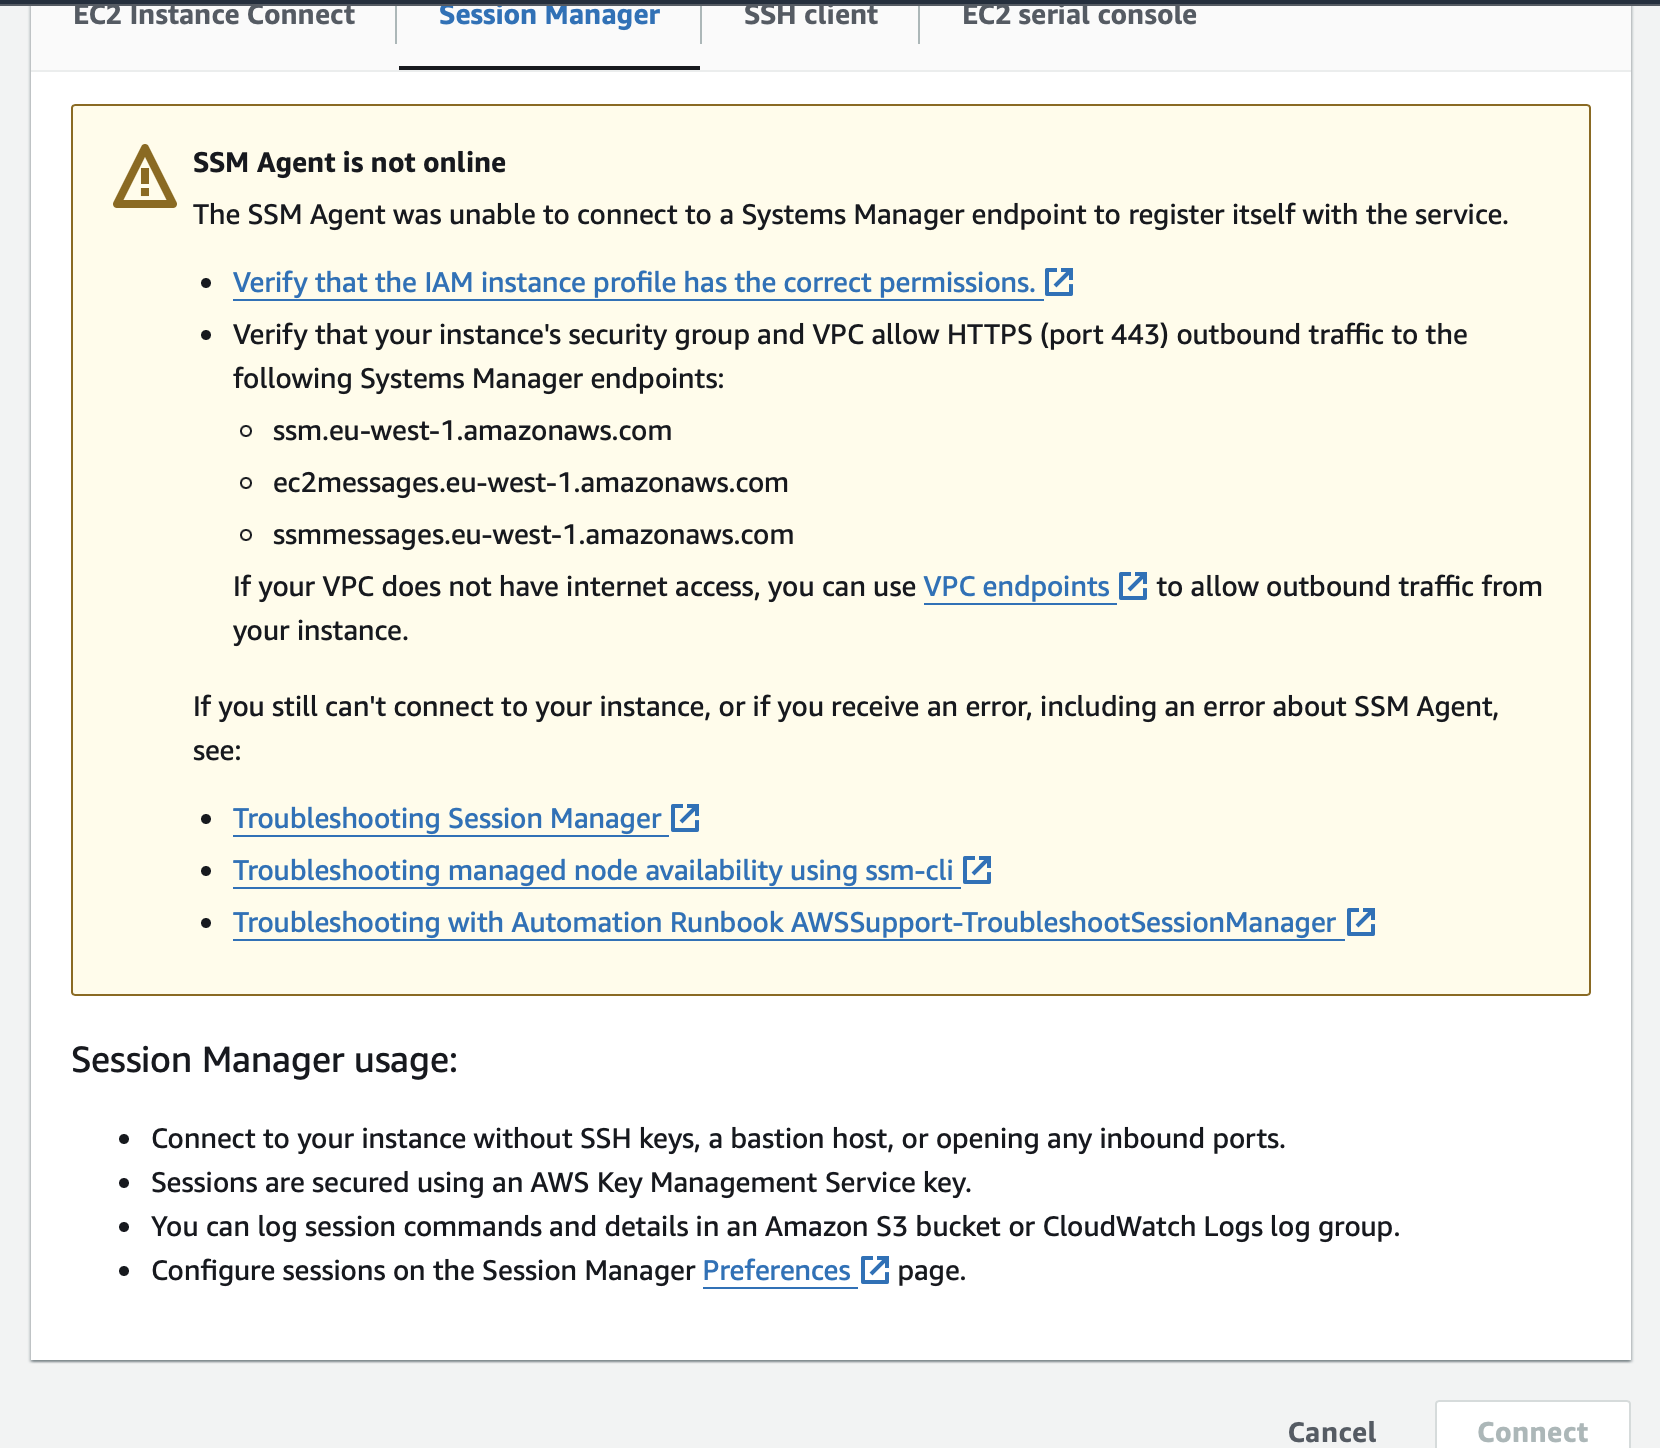
Return to the EC2 dashboard and select the recently modified instance. Right-click on it, then choose the "Connect" option. If you attempt to initiate a session immediately, an error message may appear. This is normal, as it typically takes between 10 to 15 minutes for the newly attached IAM role to become active on your EC2 instance.

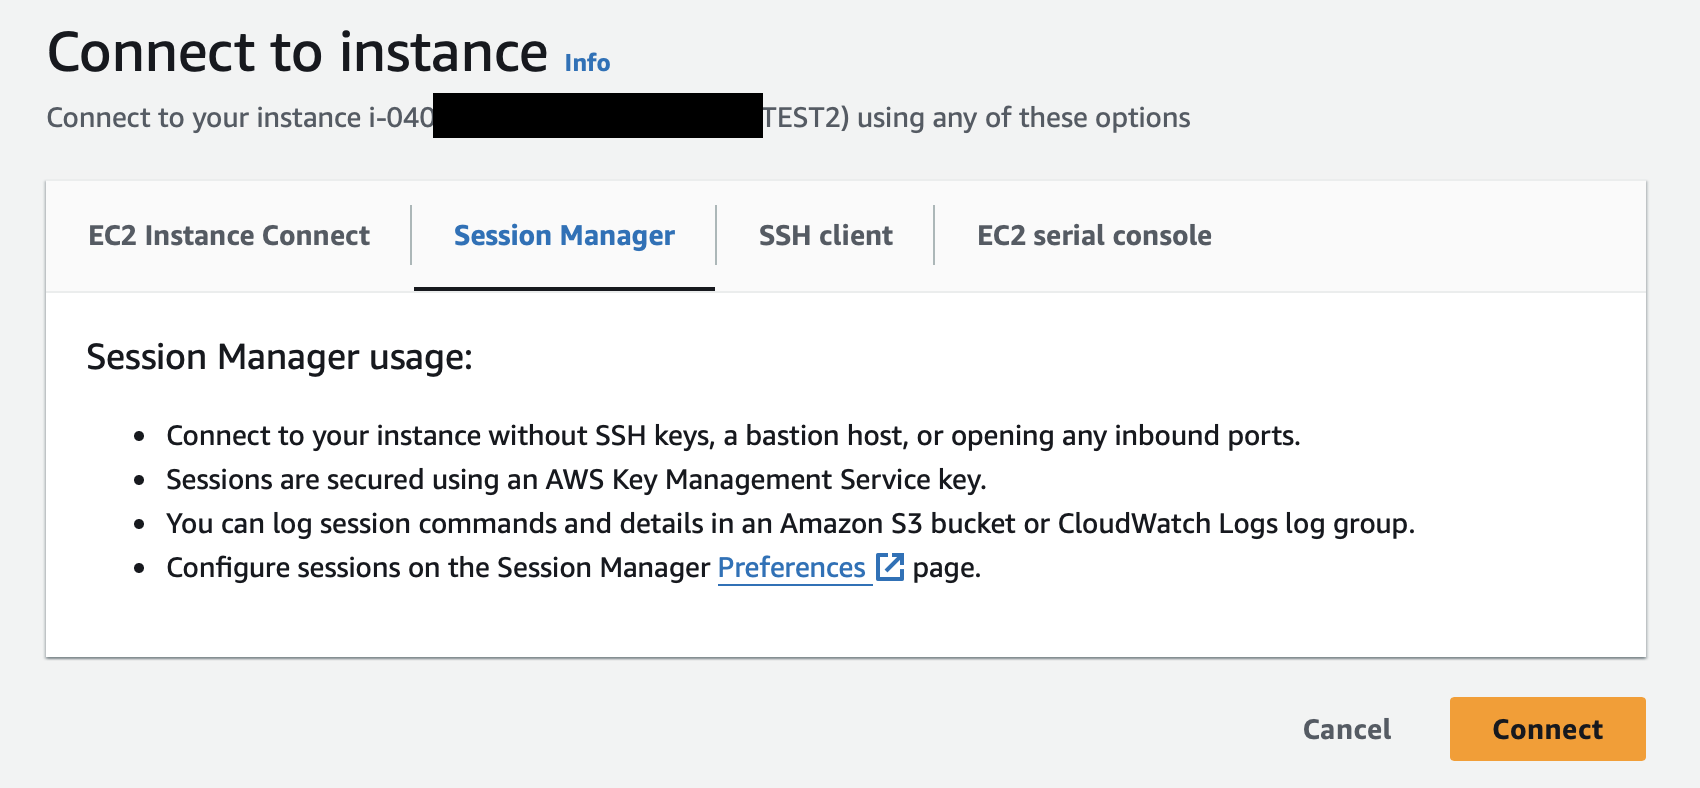
After successfully attaching the IAM role to the EC2 Instance, you will observe the following on your screen within the management console:

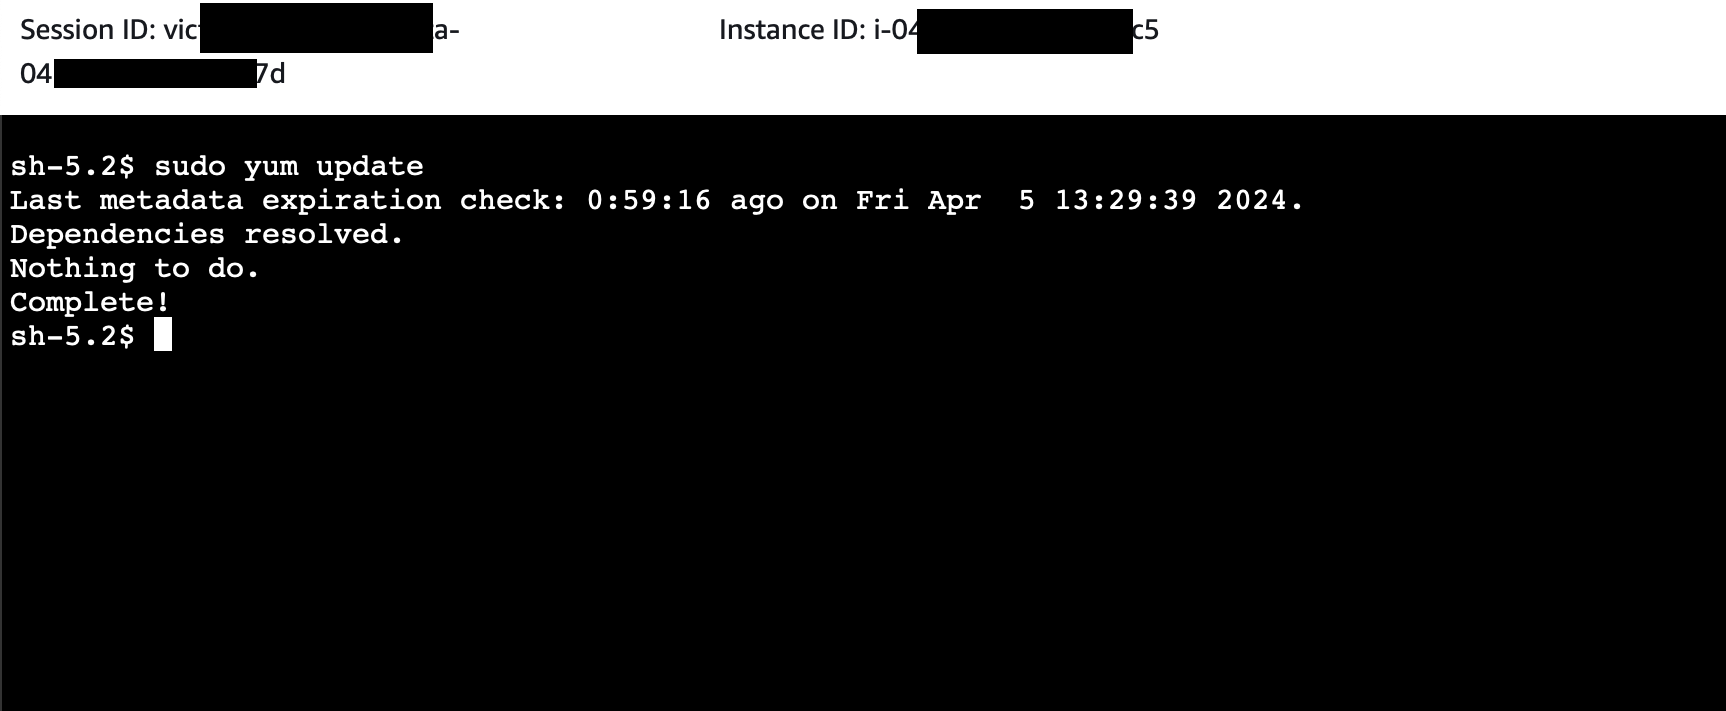
Upon clicking "Connect," you will have successfully established a connection with your EC2 instance via Session Manager. The display on your screen will then confirm that you've executed the steps correctly, leading you into a session where you can directly interact with your EC2 instance.

Conclusion
Your EC2 instance is now equipped with the necessary IAM role to facilitate secure connections via AWS Session Manager. This setup enhances your instance's security by eliminating the need for SSH keys and simplifies access management.
Remember to regularly review and update your IAM policies and roles to adhere to the principle of least privilege, ensuring that your AWS resources are accessible only as necessary.
Thank you for taking the time to read through this guide. I hope it has been informative and helpful in your journey to harness the power of AWS Session Manager for your EC2 instances. Stay tuned for more content like this, designed to empower you on your cloud learning journey.
Subscribe to my newsletter
Read articles from Victor Modebe directly inside your inbox. Subscribe to the newsletter, and don't miss out.
Written by
