Create and develop Flow services to run on the Cloud Runtime with webMethods.io Integration
 TECHcommunity_SAG
products: webMethods.io Integration
Introduction
Setting up Flow services in the cloud runtime lets you take advantage of the scalability and flexibility of the cloud, making your organization more agile when facing changing workloads and varying data volumes. In this tutorial, learn how to create and run a simple Flow service in the cloud.
This is the fifth part of a series of webMethods.io Integration tutorials exploring the platform’s Super iPaaS Develop anywhere, deploy anywhere capabilities. If you missed the previous part, you can find it here: Create and manage your webMethods.io Integration projects.
Prefer watching a video? See our Developer Evangelist Theo Ezell walk through the steps in this video tutorial:
Create and develop Flow services to run on Cloud Runtime
Pre-requisite
A webMethods.io Integration environment.
Note: These capabilities are not available by default. Contact your sales representative for more information.
Steps to follow
For the purposes of this how-to, we are going to create a Flow service that validates if an input string contains an integer value.
Log in to your webMethods.io Integration environment and navigate to the Projects tab. Since every Flow service needs to be in a project, create a new one or open an existing one:
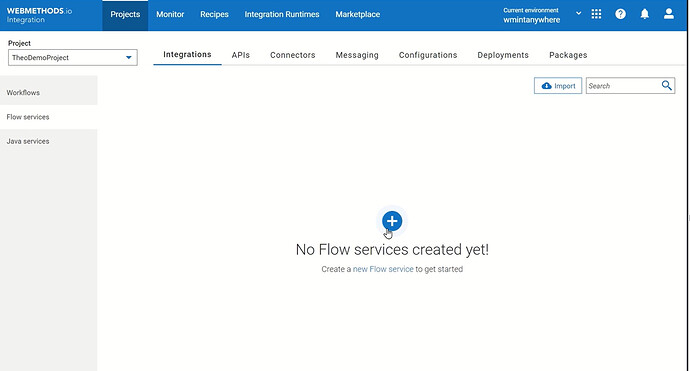
Navigate to the Flow services tab on the left and click the plus sign to add a new Flow service:
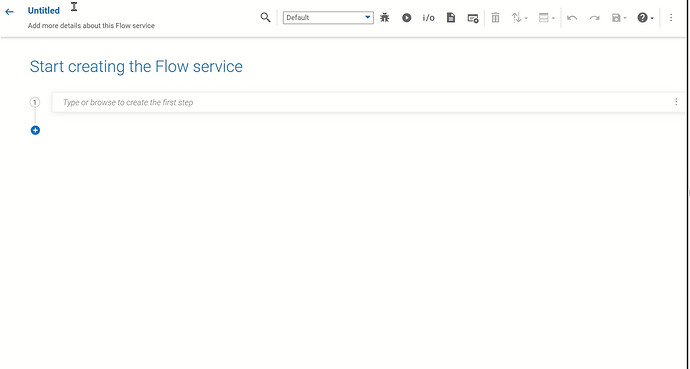
Flow service settings
First, it is important to choose a runtime on which the Flow service will run. In this example, we will set the service as Flow anywhere to run on the Cloud Runtime:
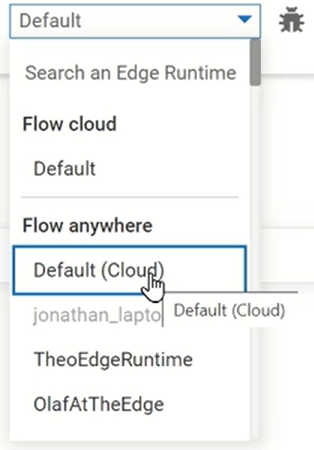
Then, give your Flow service a name (for example, isInteger) and save it:

Next, open the I/O tab to define the input and output signature:

In the Input Fields tab, type a name (inString) and choose String as type:
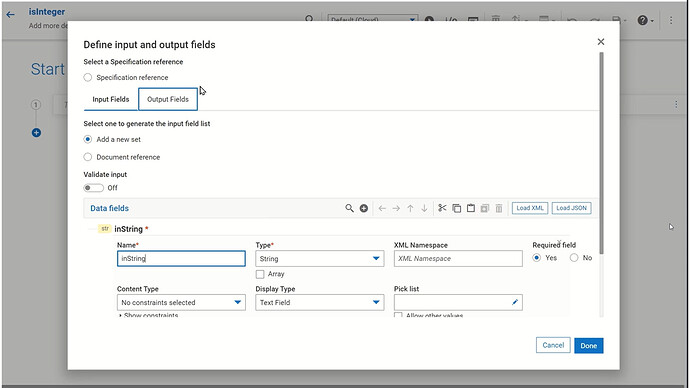
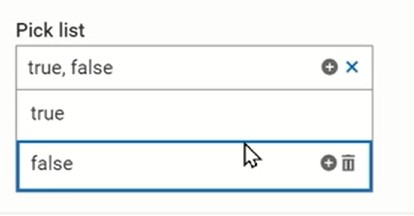
In the Output Fields tab, type again a name (isInteger) and in the Pick list specify the value to be true or false and click Done:

Flow service steps
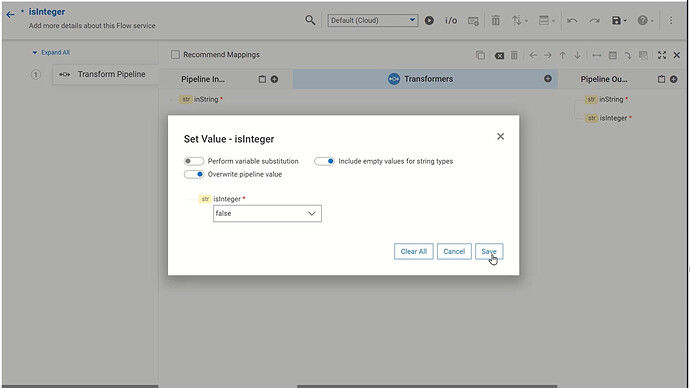
- Start with the Transform pipeline step to set the default output to false. Click on the first step box and choose Transform pipeline from the dropdown menu. Then click on the View/Edit Pipeline button on the right:
 From the View/Edit Pipeline wizard, click on the isInteger Pipeline output string and set the value to false. Click Save and close the edit wizard.
- Add a second step to your Flow service – the built-in isNumber service. This service will let you know if your string has a numeric value.
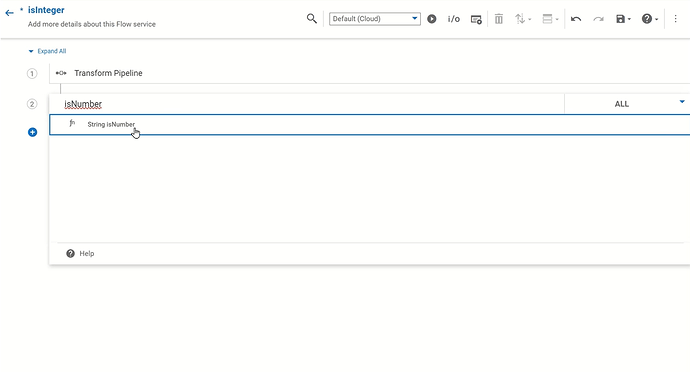
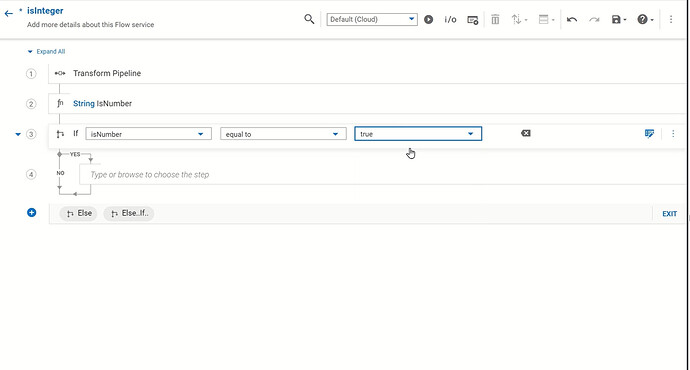
- However, the isNumber service will also return true if the input string has a decimal point. That is why we need to do an additional check for a decimal point. For this purpose, as a third step of your flow service, add an If block – isNumber equal to true:
- If it is true, with the help of IndexOf service will check for a decimal point. In the Yes box, choose from the dropdown menu the IndexOf service:
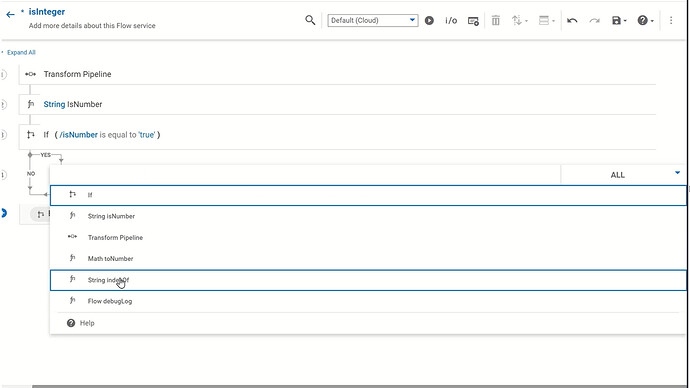 Click on the View/Edit Pipeline option:
 Click on the subString under the Input – IndexOf column and set the value to “.”. Click Save and close the View/Edit wizard.
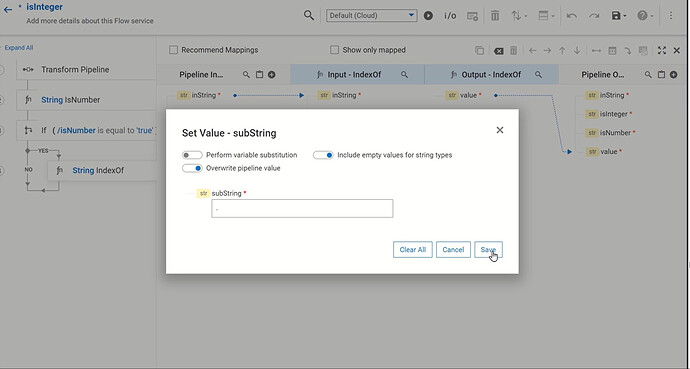
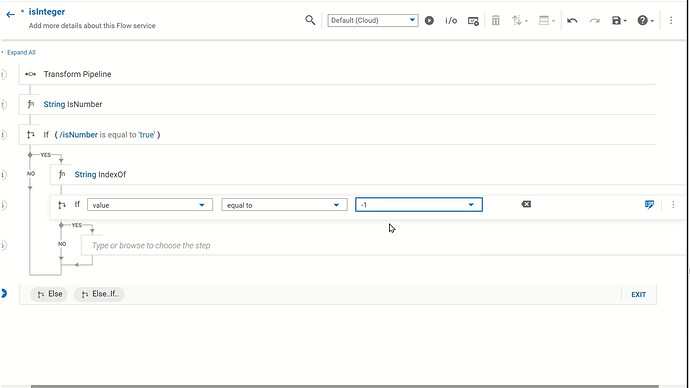
- Now add an additional step under the IndexOf service to check if the value return from the IndexOf service is equal to “-1”. That means that a decimal point is not found in the string:
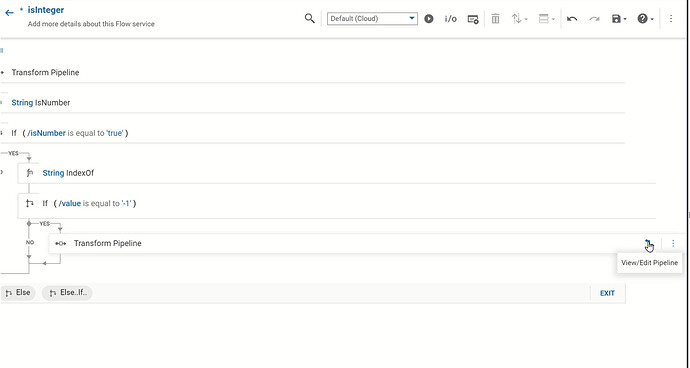
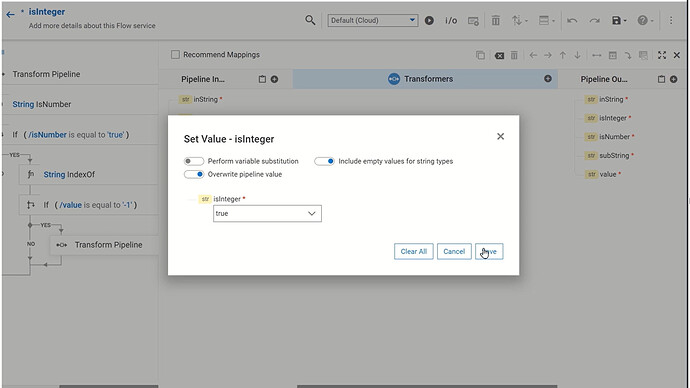
- In this case, we can add a Transform Pipeline step and set the isInteger Pipeline output string to true:
- Especially during development, it’s handy to log input and output values to make sure your code behaves as expected.
That is why as a next step we will add the built-in debugLog service. This service is just like the one on the on-prem Integration Server, so you might recognize it from there.
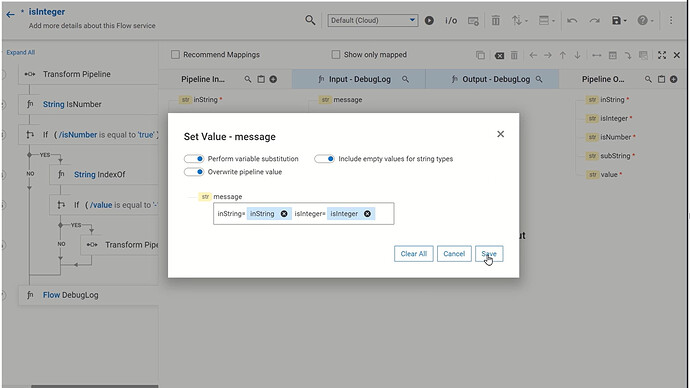
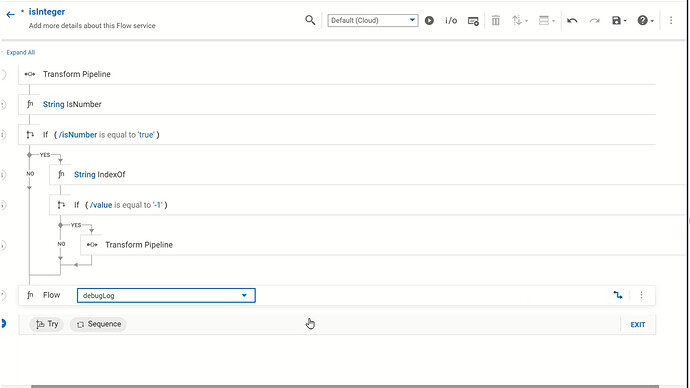 Click the View/Edit button and open the Input - debugLog message string. Enable Perform variable substitution and type a message:
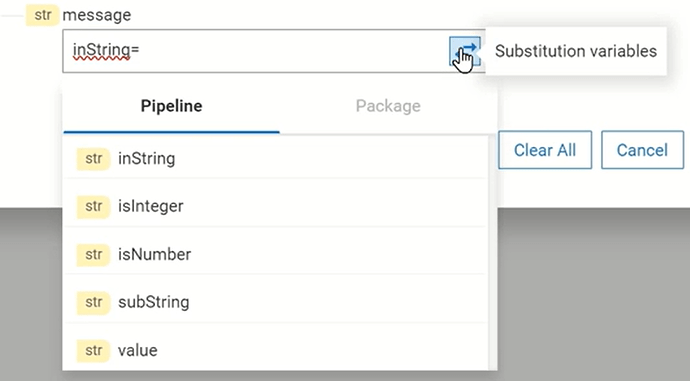
 Use the following button to search for substitution variables:
 Click Save and exit the View/Edit window.
 - Lastly, add one more Transform Pipeline step to get rid of all unnecessary variables that you do not want to return:
 Click View/Edit Pipeline and exclude all the output variables except isInteger using this arrow button:
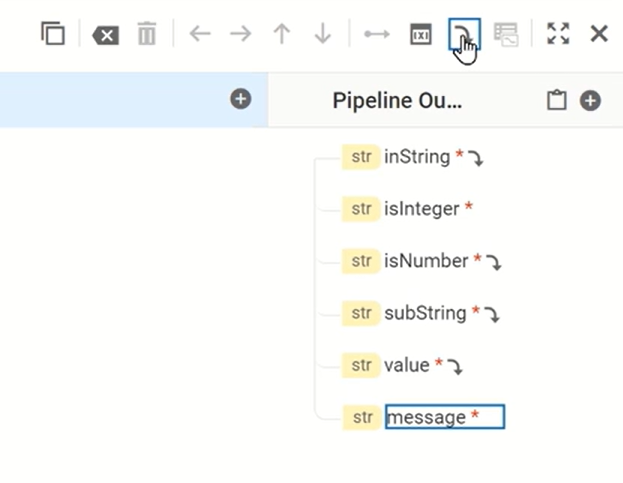 Now we are ready to test the Flow Service.
Test the Flow service
First, don’t forget to save your Flow Service.

Then, you can test it by clicking the play button:

- When testing, you can save the input values as a value set, making it very simple to use the same inputs.
In this case, there is only a single input, which you can set for example to “2” and then save the set as “good”.
 Then click Run and see that the result is true.

- One more test, this time with invalid data. Set the input value for example to “2.75” and save it as “bad”.
 Click Run and the result is false.
 Now, navigate to the Integration Runtimes tab and open the Default Cloud Runtime:
 Check your Debug logs tab to make sure your service is logging correctly and there you should see both isInteger entries:
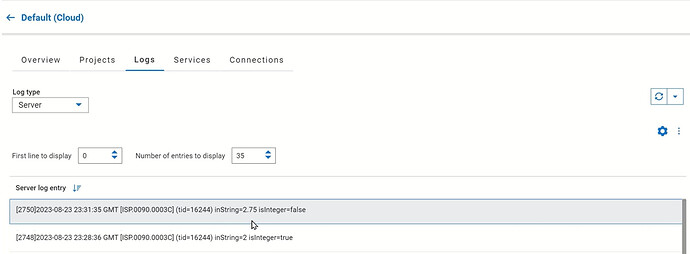
Next steps
After you’ve mastered the creation and development of Flow services, you might be interested in learning how to use workflows to orchestrate Flow services across runtimes:
Use workflows to orchestrate Flow services across runtimes with webMethods.io Integration
Useful links | Relevant resources
- Create and develop flow services to run on cloud runtime
- What is Develop Anywhere, Deploy Anywhere? - Knowledge base / Blog - webMethods - Software AG Tech Community & Forums
- Create and manage your webMethods.io Integration projects
- Register New Edge Runtime with webMethods.io Integration
- Monitor your integration runtimes remotely with webMethods.io Integration.
- Edge Runtime Management with webMethods.io Integration
Subscribe to my newsletter
Read articles from TECHcommunity_SAG directly inside your inbox. Subscribe to the newsletter, and don't miss out.
Written by

TECHcommunity_SAG
TECHcommunity_SAG
Discover, Share, and Collaborate with the Software AG Tech Community The Software AG Tech Community is your single best source for expert insights, getting the latest product updates, demos, trial downloads, documentation, code samples, videos and topical articles. But even more important, this community is tailored to meet your needs to improve productivity, accelerate development, solve problems, and achieve your goals. Join our dynamic group of users who rely on Software AG solutions every day, follow the link or you can even sign up and get access to Software AG's Developer Community. Thanks for stopping by, we hope to meet you soon.