Build a Cross-Platform Messaging App with React Native Expo
 Amos Gyamfi
Building a complete chat messaging app like WhatsApp can take time and effort. There are so many aspects developers need to consider to provide a full and feature-rich messaging experience, such as offline support, media attachment, and more. This tutorial uses Stream Chat from React Native Directory and the Expo framework to create a fully featured cross-platform mobile messaging experience.
This tutorial utilizes the Expo SDK for React Native to provide audio and video attachment playback, haptic notification (vibration), and file sharing similar to WhatsApp.
Tools and Technologies To Get Started
After following the steps in this tutorial to build the sample project, we will test it on an iPhone and an actual Android device. Since we are using the Expo framework to initialize the React Native project, it removes the need for platform-specific configurations in Xcode and Android Studio. Let’s begin by:
Installing VS Code: For developing and running our crossplatform application.
Installing the Expo Go app from the App Store and Google Play Store: To test the messaging app on an iPhone and Android using a QR Code generated from VS Code after running it.
Test the Sample App
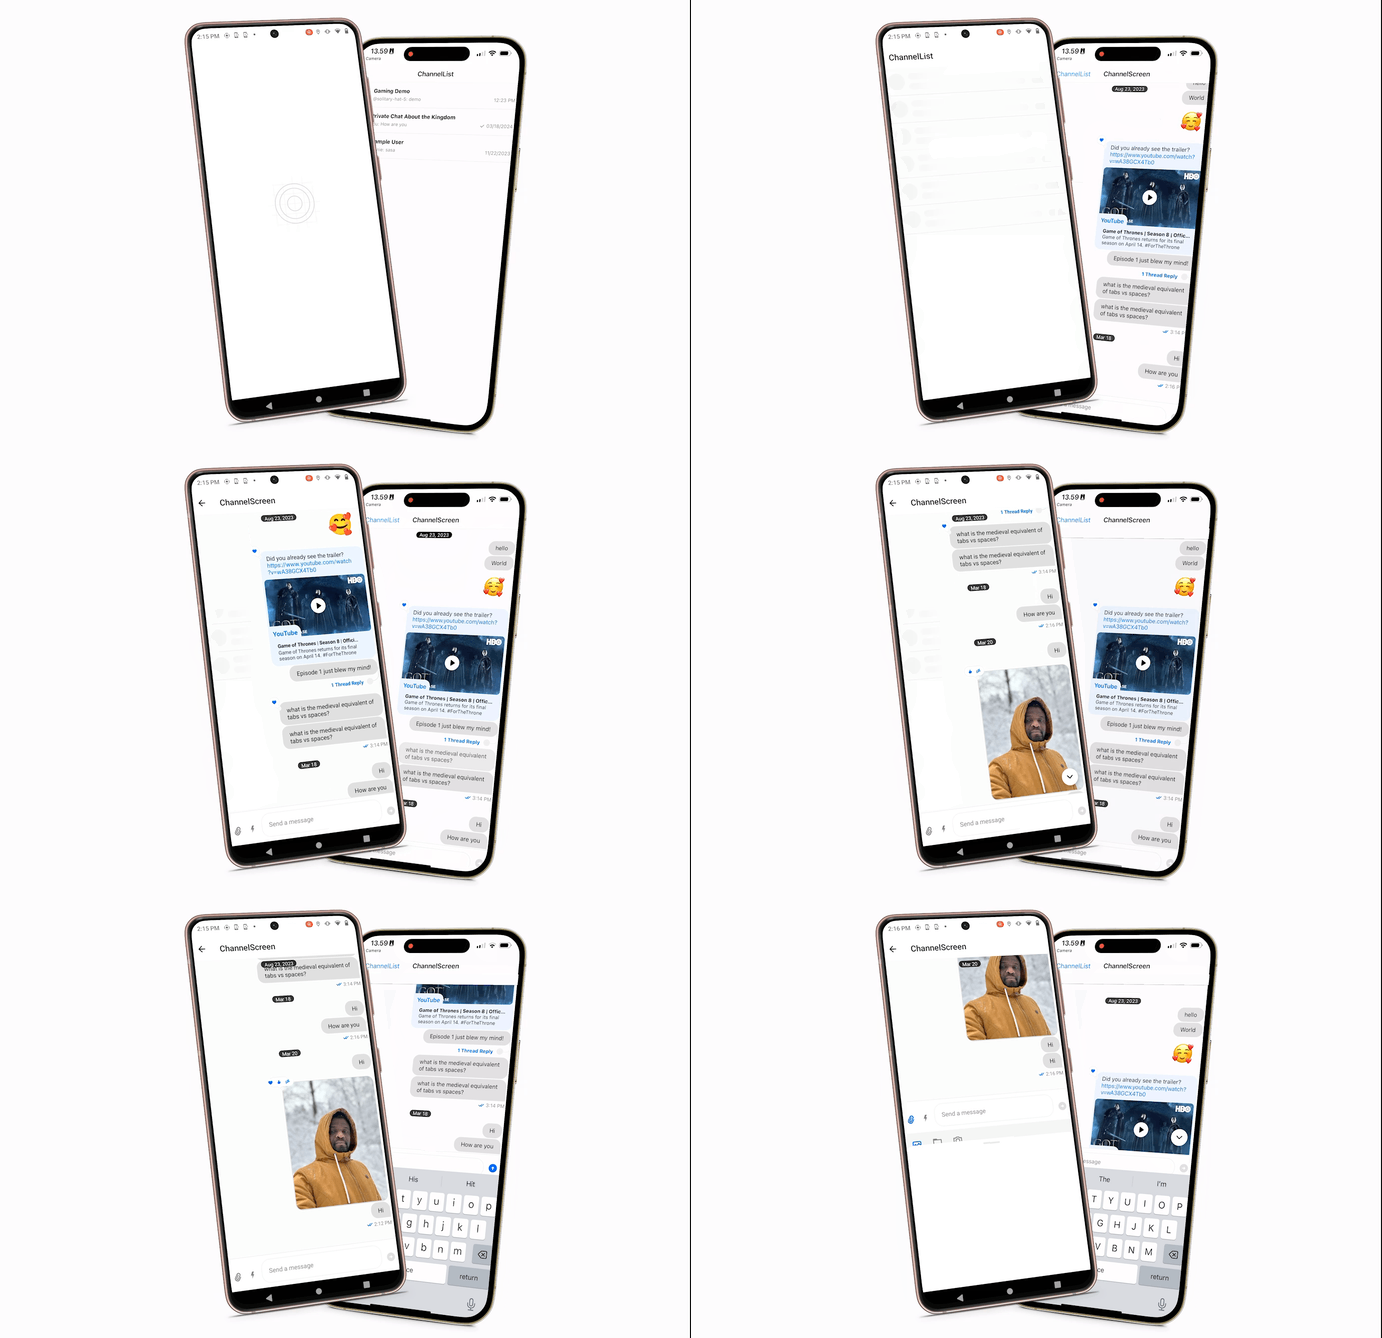
To run the sample project on your iOS and Android devices, you should first install the chat SDK and its dependencies. Install the Expo Go app for iOS and Android. Then, download and add the files in this GitHub repository to the root folder of the Expo project. For the files that come with the Expo project generation, replace their content with the ones in the GitHub repo.
iOS and Android Versions of the Sample App

The image above represents the iOS version of the React Native app. You have noticed a chat channel list (contacts), messages view, media attachment, and reactions.
Similarly, the Android version shown below has the same features as the iOS counterpart.

Choosing a React Native Chat SDK
There are several factors to consider when choosing a chat SDK for a React Native Project. Let's outline some key considerations when selecting a universal messaging SDK for your app.
Offline Support: Users should be able to browse contact lists and send and receive messages offline.
React Native CLI Support: The SDK should integrate seamlessly with apps developers create with React Native CLI.
Expo Support: If you prefer initializing your React Native projects with popular frameworks like Expo, you should be able to implement the chat SDK in an Expo app with minimal effort.
React Native Directory Score: The chat SDK you choose for your project should be one of the recommended chat libraries in the React Native directory.
Regular updates: On React Native Directory, you should check whether the chat SDK has regular updates and higher monthly downloads.
The points above make Stream's Chat SDK for React Native an excellent choice for our use case. Let's install it along with the required dependencies in the following sections to build our cross-platform messaging app.
Create a New Expo App and Install Core Dependencies
The Stream's Chat SDK for React Native provides two installation options.
Using React Native CLI: Requires complicated command line configurations, Android Studio, and Xcode settings.
Using Expo framework: Handles all the configurations mentioned above and provides seamless testing with its GO app on iPhone and Android devices.
Let's go with the Expo approach so that we do not have to worry about performing any additional settings required to run the app. Launch your favorite command line tool, Terminal or Warp, and run the below command to initialize a new React Native Expo app.
First, install Node and run npx create-expo-app NativeChat. Here, we use npx with your Node installation to create a new React Native Expo app called NativeChat.
Now, we have a blank Expo project. Next, we can install the Stream Chat Expo SDK using the command below.
expo install stream-chat-expo
The chat SDK also has the following dependencies.
Flat List: For maintaining visible content position of scrollable UIs.
Netinfo: Helps retrieve information about a network.
Expo File System: Provides access to the file system on Android and iOS. It will enable us to attach files and media to messages.
Expo Image Manipulator: Allows image manipulation on Android and iOS.
Expo Image Picker: Provides access to select and pick images and videos in a device's Photos Library.
Expo Media Library: Helps access a device's Media Library.
React Native Gesture Handler: A gesture and touch system for React Native.React Native Animated: An animation library for React Native projects.
SVG support for React Native.
Open the project in VS Code and cd into the root folder NativeChat. Go to the Toolbar and click Terminal -> New Terminal and run the following multi-command to install the peer dependencies outlined above.
expo install @stream-io/flat-list-mvcp @react-native-community/netinfo expo-file-system expo-image-manipulator expo-image-picker expo-media-library react-native-gesture-handler react-native-reanimated react-native-svg
Configure the App’s babel.config.js and App.js
In the project's root folder, find babel.config.js and add the following code snippet to register the React Native Reanimated plugin we installed previously plugins: [ 'react-native-reanimated/plugin', ],. The content of babel.config.js will look like this:
module.exports = function (api) {
  api.cache(true);
  return {
    presets: ["babel-preset-expo"],
    plugins: [
      "react-native-reanimated/plugin", // The plugin must be the last item
    ],
  };
};
Also, previously, we installed the React Native Gesture Handler. When the app launches, the gesture recognizer should be immediately available. The best location to add it is at the app's entry point, thus in App.js. Open App.js from the project's root folder and add the following to the import section.
import { GestureHandlerRootView } from 'react-native-gesture-handler';
Add Optional Expo Libraries
To improve media upload and document attachment in our messaging app, let's install the following components for the Expo SDK. Note: You may skip the installations below because they are optional.
Expo Document Picker: A library that helps users to pick documents from their devices.
Expo AV: Provides audio and video playback.
Expo Haptics: Helps to access the sound and vibration engine on Android and iOS devices.
Expo Sharing: Provides support for file sharing.
Expo Clipboard: Provides the ability to copy text to the clipboard.
Use the following multi-command to install all the above Expo libraries.
npm add xpo-document-picker expo-av expo-haptics expo-sharing expo-clipboard
Note: You can also add them with yarn.
Setup the Chat SDK for React Native
In this section, we will create a JavaScript object chatClient, to connect the Expo app to a user from the Stream Chat SDK's backend. The chatClient should be initialized with an API key for a production app. Sign up for a free dashboard account to get an API key if you do not have one yet. In this tutorial, we will use hard-coded user credentials just for testing.
Follow the steps below to configure the chat SDK to work with our Expo app.
Step 1: Store the User Credentials
In the project's root folder, add a new JavaScript file, chatConfig.js, and add the following code snippet to store user credentials, such as API key, user ID, token, and name for the app.
// chatConfig.js

export const chatApiKey = "dz5f4d5kzrue";
export const chatUserId = "lively-wood-7";
export const chatUserToken =
  "eyJhbGciOiJIUzI1NiIsInR5cCI6IkpXVCJ9.eyJ1c2VyX2lkIjoibGl2ZWx5LXdvb2QtNyIsImV4cCI6MTcxMDUzMjQ0Nn0.KMkjl68QocLTO_B5E4jIw2s5VBmRLOIvFnZkYNQepmc";
export const chatUserName = "lively";
Step 2: Connect the User
Building your own app? Get early access to our Livestream or Video Calling API and launch in days!
Create a new JavaScript file, useChatClient.js, and add the sample code below to connect the user to the Stream's backend infrastructure.
// useChatClient.js

import { useEffect, useState } from "react";
import { StreamChat } from "stream-chat";
import {
  chatApiKey,
  chatUserId,
  chatUserName,
  chatUserToken,
} from "./chatConfig";

const user = {
  id: chatUserId,
  name: chatUserName,
};

const chatClient = StreamChat.getInstance(chatApiKey);

export const useChatClient = () => {
  const [clientIsReady, setClientIsReady] = useState(false);

  useEffect(() => {
    const setupClient = async () => {
      try {
        chatClient.connectUser(user, chatUserToken);
        setClientIsReady(true);
      } catch (error) {
        if (error instanceof Error) {
          console.error(
            `An error occurred while connecting the user: ${error.message}`,
          );
        }
      }
    };

    // If the chat client has a value in the field `userID`, the user gets connected
    if (!chatClient.userID) {
      setupClient();
    }
  }, []);

  return {
    clientIsReady,
  };
};
Step 3: Share Channel and Thread Data Between Screens
// AppContext.js

import React, { useState } from "react";

export const AppContext = React.createContext({
  channel: null,
  setChannel: (channel) => {},
  thread: null,
  setThread: (thread) => {},
});

export const AppProvider = ({ children }) => {
  const [channel, setChannel] = useState();
  const [thread, setThread] = useState();

  return (
    <AppContext.Provider value={{ channel, setChannel, thread, setThread }}>
      {children}
    </AppContext.Provider>
  );
};

export const useAppContext = () => React.useContext(AppContext);
Step 4: Configure the Chat Screen Components in App.js
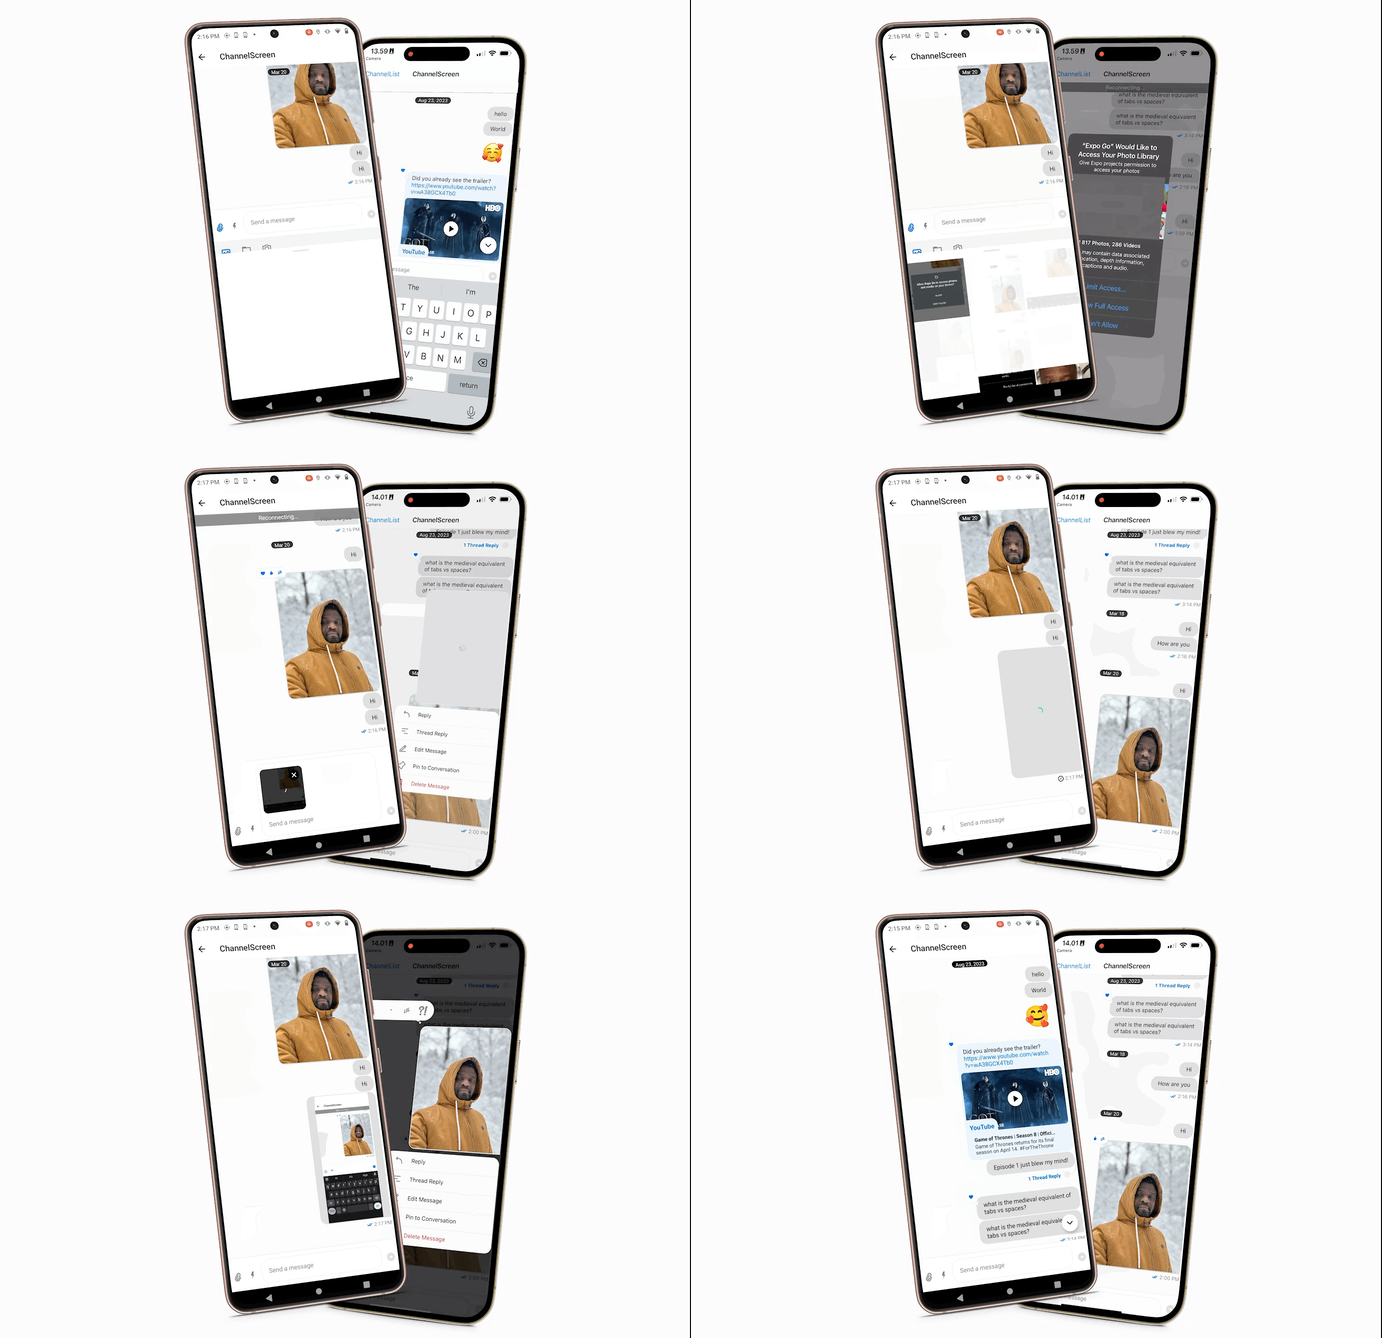
In this section, we configure all the chat screen components at the app's entry point, App.js.
Let's use a step-by-step approach to configure the app screens' navigation, channels filtering and sorting, ChannelListScreen, ChannelScreen, UI overlays, and ThreadsScreen.
1. Import Components and Modules in App.js
import React from "react";
import { NavigationContainer } from "@react-navigation/native";
import { createStackNavigator } from "@react-navigation/stack";
import { SafeAreaView } from "react-native-safe-area-context";
import { Text } from "react-native";
import { useChatClient } from "./useChatClient";
import { GestureHandlerRootView } from "react-native-gesture-handler";
import { AppProvider } from "./AppContext";
import {
  Chat,
  ChannelList,
  OverlayProvider,
  Channel,
  MessageList,
  MessageInput,
  Thread,
} from "stream-chat-expo"; // stream-chat-react-native Or stream-chat-expo
import { StreamChat } from "stream-chat";
import { chatApiKey, chatUserId } from "./chatConfig";
import { useAppContext } from "./AppContext";
Here, we will use the useChatClient to connect the user to the backend chat client and integrate it into the app's NavigationStack. The GestureHandlerRootView will make gestures available soon after the app launches. Also, the AppProvider will make the current stored channel and threads available in the navigation stack.
2. Create a Stack Navigator, Filter, and Sort Channels
const Stack = createStackNavigator();
const chatClient = StreamChat.getInstance(chatApiKey);

const filters = {
  members: {
    $in: [chatUserId],
  },
};

const sort = {
  last_message_at: -1,
};
The code snippet above creates a navigation Stack for the channel list, channel, and thread screens, a chatClient instance with an API key, filters the channel to show members only, and sorts the channel by a last message.
3. Configure the ChannelListScreen Component
const ChannelListScreen = () => {
  const { setChannel } = useAppContext();
  return (
    <ChannelList
      onSelect={(channel) => {
        const { navigation } = props;
        setChannel(channel);
        navigation.navigate("ChannelScreen");
      }}
      filters={filters}
      sort={sort}
    />
  );
};
To display the chat ChannelList, we wrap it in the ChannelListScreen component and use the onSelect function to show the channel screen when a user selects a channel.
4. Configure the ChannelScreen Component
const ChannelScreen = (props) => {
  const { navigation } = props;
  const { channel, setThread } = useAppContext();

  return (
    <Channel channel={channel}>
      <MessageList
        onThreadSelect={(message) => {
          if (channel?.id) {
            setThread(message);
            navigation.navigate("ThreadScreen");
          }
        }}
      />
      <MessageInput />
    </Channel>
  );
};
The ChannelScreen is configured to display three components, chat Channel, list of messages MessageList, and message composer MessageInput.
5. Configure the ThreadsScreen
const ThreadScreen = (props) => {
  const { channel, thread } = useAppContext();
  return (
    <Channel channel={channel} thread={thread} threadList>
      <Thread />
    </Channel>
  );
};
In the above code snippet, we wrap the Thread component with the Channel component to display the thread messages in the app
6. Setup the NavigationStack
const NavigationStack = () => {
  const { clientIsReady } = useChatClient();

  if (!clientIsReady) {
    return <Text>Loading chat ...</Text>
}
The app's NavigationStack component wraps the Chat component and the OverlayProvider to communicate all components in the app to the chatClient and display the overlay components such as reactions view, fullscreen image preview, and attachment preview.
7. Display UI Overlays
  return (
    <OverlayProvider>
      <Chat client={chatClient}>
        <Stack.Navigator>
        <Stack.Screen name="ChannelList" component={ChannelListScreen} />
        <Stack.Screen name="ChannelScreen" component={ChannelScreen} />
        <Stack.Screen name="ThreadScreen" component={ThreadScreen} />
        </Stack.Navigator>
      </Chat>
    </OverlayProvider>
  );
};
The OverlayProvider helps to react to messages with a long press gesture. Configure it in the app's root and outside the navigation stack to show reactions, fullscreen images, and attachment views.
8. Display the default Component
export default () => {
  return (
    <AppProvider>
      <GestureHandlerRootView style={{ flex: 1 }}>
        <SafeAreaView style={{ flex: 1 }}>
          <NavigationContainer>
            <NavigationStack />
          </NavigationContainer>
        </SafeAreaView>
      </GestureHandlerRootView>
    </AppProvider>
  );
};
Finally, in this code snippet, we wrap the default component with the AppProvider and GestureHandlerRootView to use the AppContext and make gestures available immediately when the app launches.
Putting It All Together
Here are complete implementations of the above code snippets in the App.js file.
// App.js

import React from "react";
import { NavigationContainer } from "@react-navigation/native";
import { createStackNavigator } from "@react-navigation/stack";
import { SafeAreaView } from "react-native-safe-area-context";
import { Text } from "react-native";
import { useChatClient } from "./useChatClient";
import { GestureHandlerRootView } from "react-native-gesture-handler";
import { AppProvider } from "./AppContext";
import {
  Chat,
  ChannelList,
  OverlayProvider,
  Channel,
  MessageList,
  MessageInput,
  Thread,
} from "stream-chat-expo"; // stream-chat-react-native Or stream-chat-expo
import { StreamChat } from "stream-chat";
import { chatApiKey, chatUserId } from "./chatConfig";
import { useAppContext } from "./AppContext";

const Stack = createStackNavigator();
const chatClient = StreamChat.getInstance(chatApiKey);

const filters = {
  members: {
    $in: [chatUserId],
  },
};

const sort = {
  last_message_at: -1,
};

const ChannelListScreen = () => {
  const { setChannel } = useAppContext();
  return (
    <ChannelList
      onSelect={(channel) => {
        const { navigation } = props;
        setChannel(channel);
        navigation.navigate("ChannelScreen");
      }}
      filters={filters}
      sort={sort}
    />
  );
};

const ChannelScreen = (props) => {
  const { navigation } = props;
  const { channel, setThread } = useAppContext();

  return (
    <Channel channel={channel}>
      <MessageList
        onThreadSelect={(message) => {
          if (channel?.id) {
            setThread(message);
            navigation.navigate("ThreadScreen");
          }
        }}
      />
      <MessageInput />
    </Channel>
  );
};

const ThreadScreen = (props) => {
  const { channel, thread } = useAppContext();
  return (
    <Channel channel={channel} thread={thread} threadList>
      <Thread />
    </Channel>
  );
};

const NavigationStack = () => {
  const { clientIsReady } = useChatClient();

  if (!clientIsReady) {
    return <Text>Loading chat ...</Text>;
  }

  return (
    <OverlayProvider>
      <Chat client={chatClient}>
        <Stack.Navigator>
          <Stack.Screen name="ChannelList" component={ChannelListScreen} />
          <Stack.Screen name="ChannelScreen" component={ChannelScreen} />
          <Stack.Screen name="ThreadScreen" component={ThreadScreen} />
        </Stack.Navigator>
      </Chat>
    </OverlayProvider>
  );
};

export default () => {
  return (
    <AppProvider>
      <GestureHandlerRootView style={{ flex: 1 }}>
        <SafeAreaView style={{ flex: 1 }}>
          <NavigationContainer>
            <NavigationStack />
          </NavigationContainer>
        </SafeAreaView>
      </GestureHandlerRootView>
    </AppProvider>
  );
};
Run the App on iOS
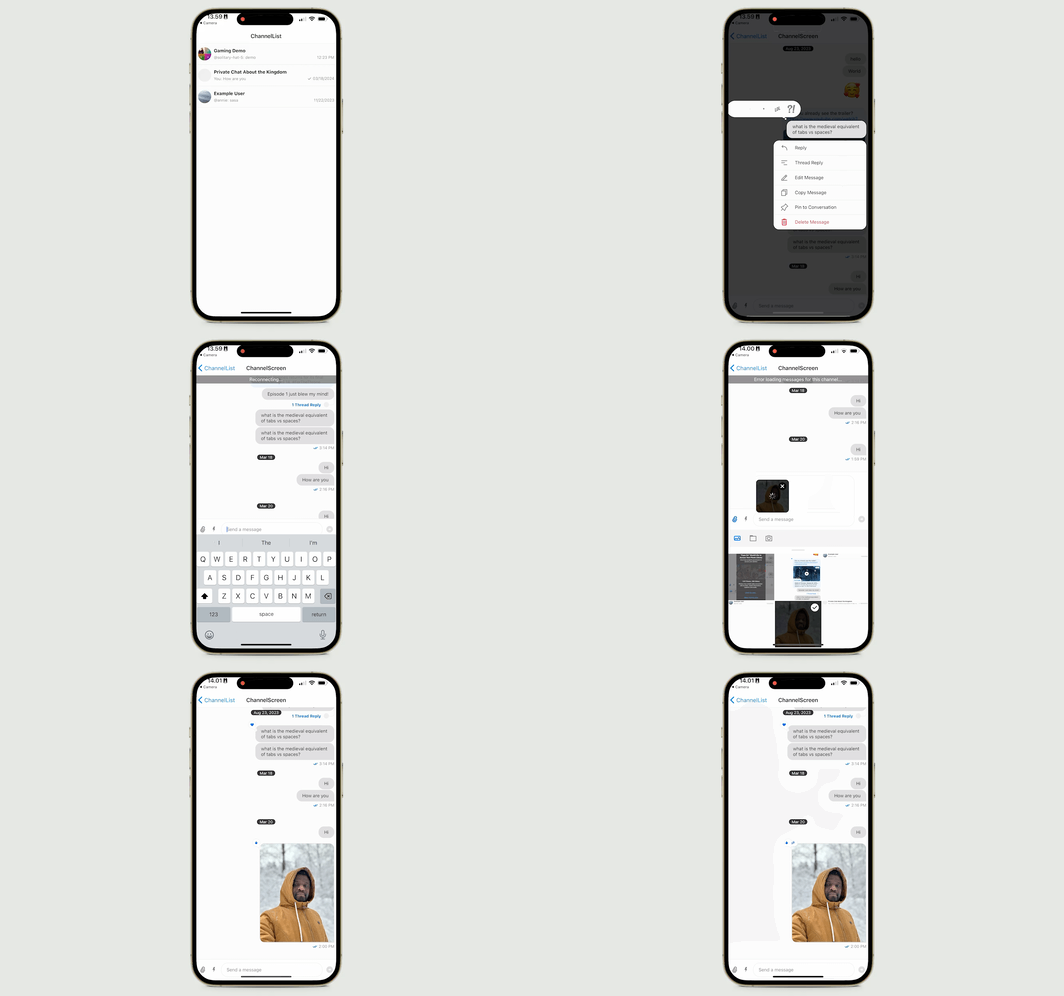
We have configured the Stream Chat SDK to work with our React Native Expo app and set up the required navigation and chat screens. To run the app on an iOS device, you can use the Expo Go app. First, run the following command by navigating to the app's root folder and opening a new Terminal in VS Code.
npx expo start
This command starts the Metro Server and shows a QR code with instructions on how to run the app on iOS, Android, and the web.

Ensure you have installed the Expo Go app on your iPhone or iPad. Launch the default Camera app for iOS and scan the QR code you see after running npx expo start. You will see a button to open the project with the Expo Go app.
Following the steps above will launch the chat channel list screen. You can tap any channel list items to enter the messages screen to start chatting, add images and videos to chats, and show how you feel with reactions.
Run the App on Android
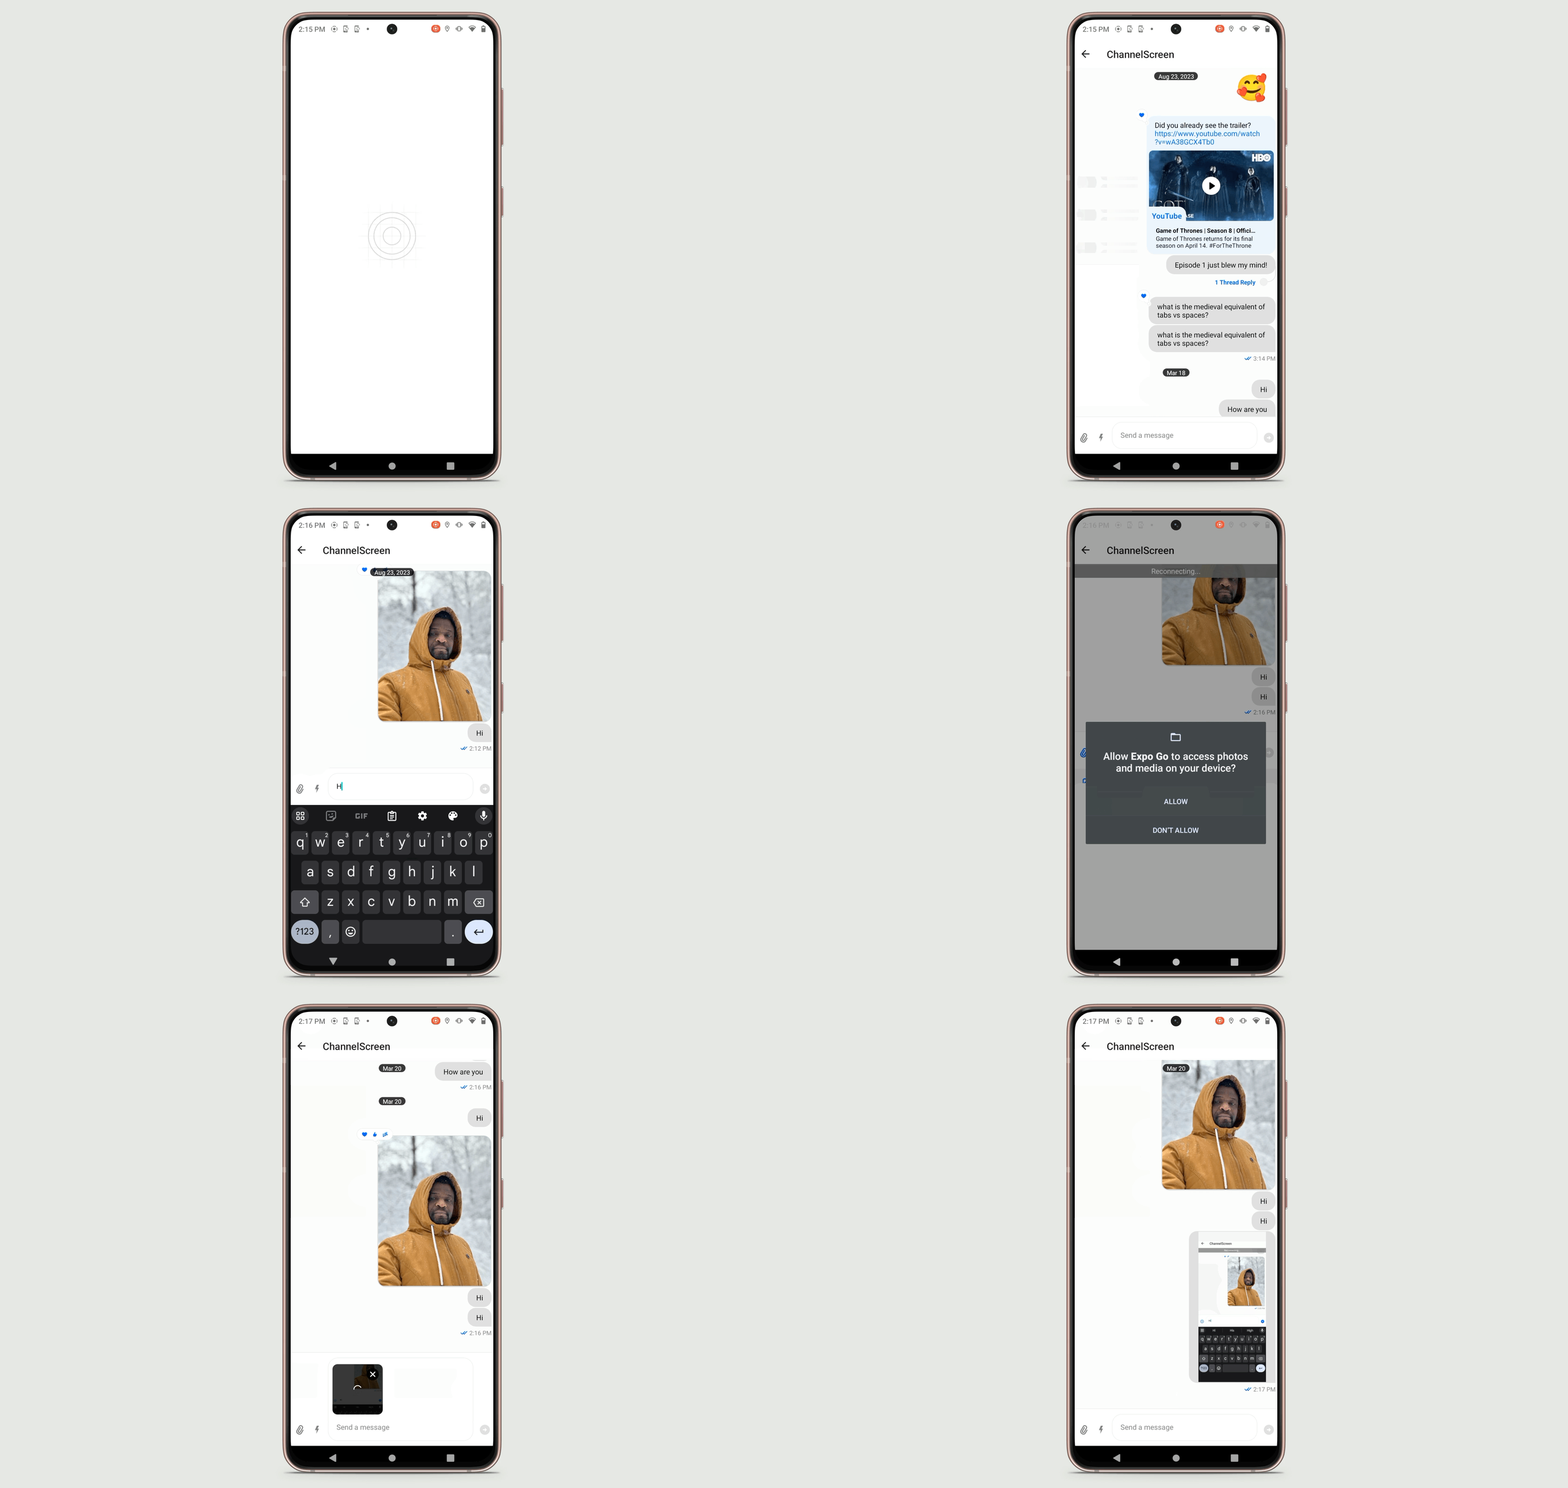
On Android, you should scan the QR code the Metro Server generates with the Expo Go app you have installed instead of the Camera app for Android. After the app launches, you can perform the functions explained in the iOS section.
Where To Go From Here
You have followed this tutorial to create a fully working cross-platform messaging app for React Native using the Expo framework and Stream. Congratulations 👏. You can take what we just built and go further by customizing the chat channel list, message list, message composer, and more. The app supports offline browsing. However, this feature is turned off by default in the SDK. Head to our documentation to learn more about enabling offline support with a single line of code. Also, you can refer to our GitHub sample apps to learn how to build iMessage, Slack, and WhatsApp clones.
Subscribe to my newsletter
Read articles from Amos Gyamfi directly inside your inbox. Subscribe to the newsletter, and don't miss out.
Written by
