Project: Streamlining Node.js Application Deployment with Jenkins Declarative Pipeline
 SWATHI PUNREDDY
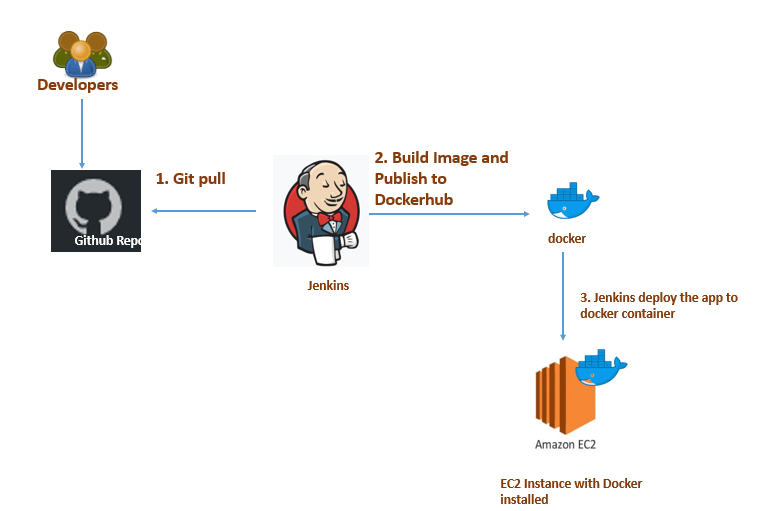
In today's fast-paced software development environment, automating the deployment process is not just beneficial but often necessary to maintain efficiency and reliability. Jenkins, a popular automation server, offers a powerful tool called Declarative Pipeline to streamline the deployment of applications. In this guide, we'll walk through the steps to set up a Jenkins Declarative Pipeline for a Node.js application using a practical example.
Prerequisites
Before diving into the setup process, ensure you have:
- Installed Jenkins on your server. If you haven't done so already, you can follow this guide : https://swathireddy.hashnode.dev/a-step-by-step-guide-to-setting-up-jenkins-and-creating-a-freestyle-project-on-ubuntu-ec2-instance for detailed instructions.
Installing Docker
Update Package Index: Before installing Docker, it's a good practice to update the local package index to ensure you have the latest version of available packages. Run the following command:
Install Docker : update the package index again and install the latest version of Docker:
 sudo apt update
 sudo apt-get install docker-io -y
Verify Docker Installation: After installation, verify that Docker Engine is installed correctly by running the following command:
sudo systemctl status dockerThis command will show the Docker service status, indicating whether it's active and running.
Adding Jenkins to the Docker Group
Check Jenkins User: Verify the username of the Jenkins user on your system. You can typically find this by running:
id -u jenkinsAdd Jenkins to Docker Group: Once you have the Jenkins user's username, add it to the Docker group using the
usermodcommand. Replace<username>with the actual username of your Jenkins user:sudo usermod -aG docker <username>Verify Group Membership: Confirm that the Jenkins user has been added to the Docker group by running:
groups jenkinsThis command should display a list of groups the Jenkins user belongs to, including
docker.Restart Jenkins Service: To apply the group changes, restart the Jenkins service:
sudo systemctl restart jenkins
By following these steps, you'll have Docker installed on your system and the Jenkins user added to the Docker group, allowing Jenkins to interact with Docker and perform container-based operations seamlessly.
Setting Up the Pipeline
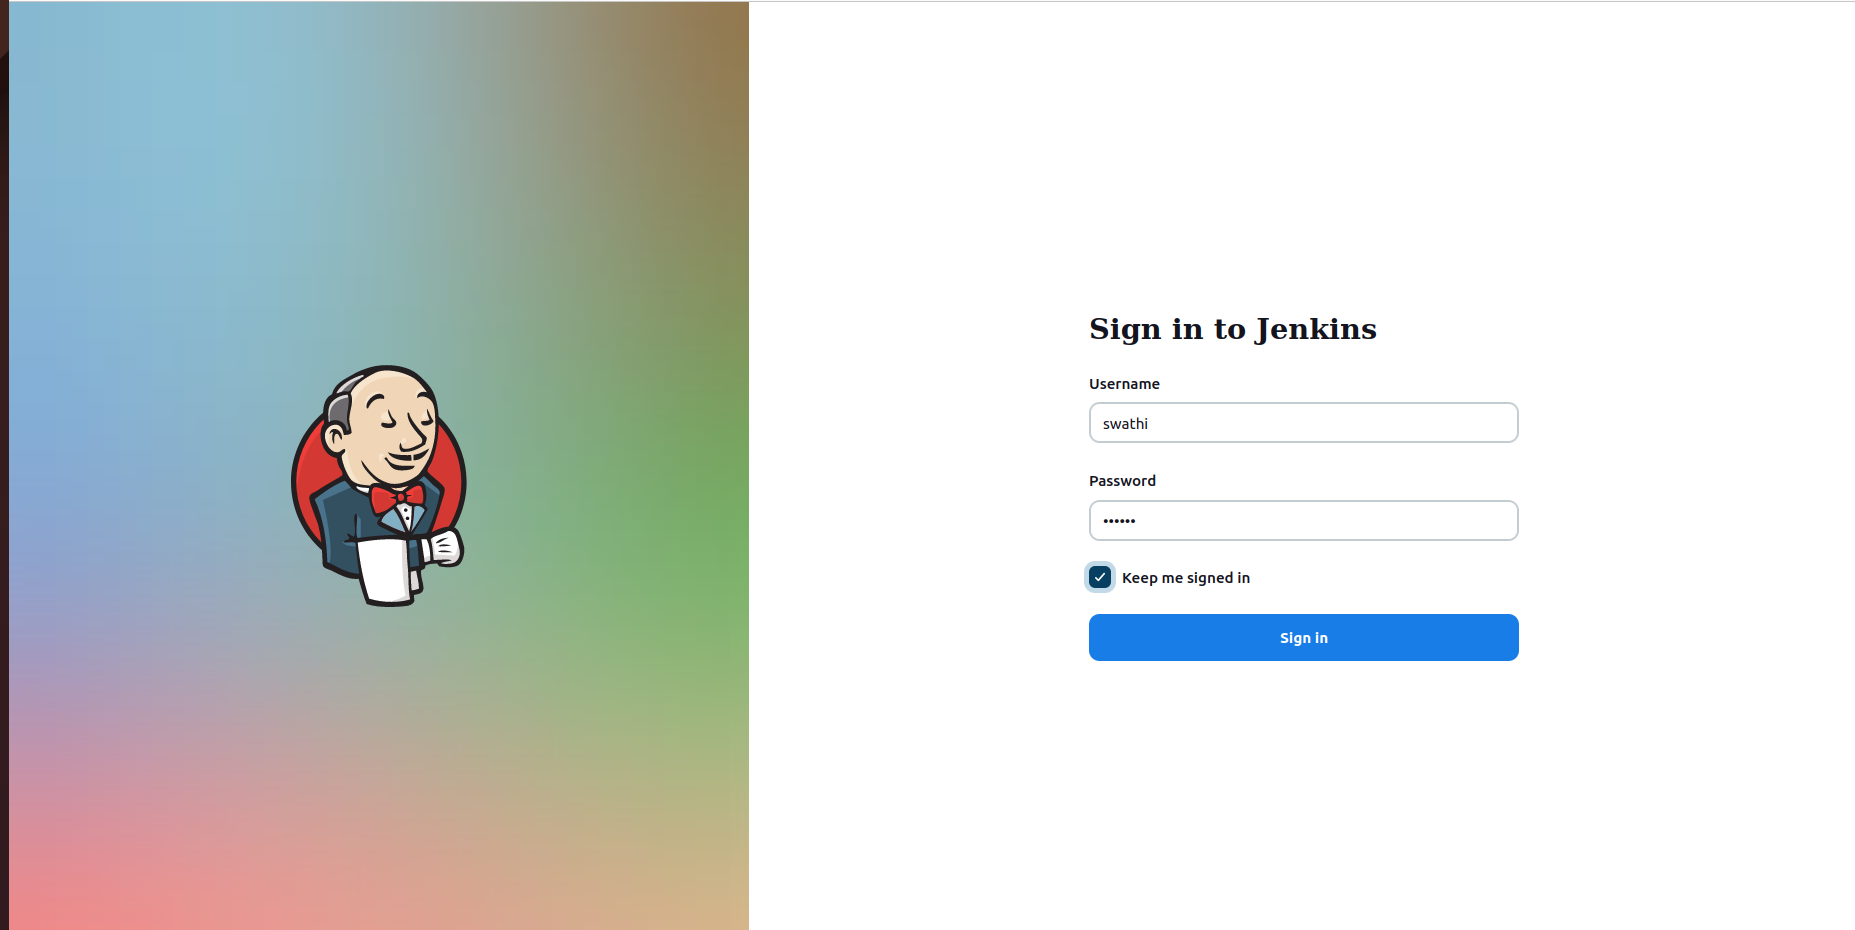
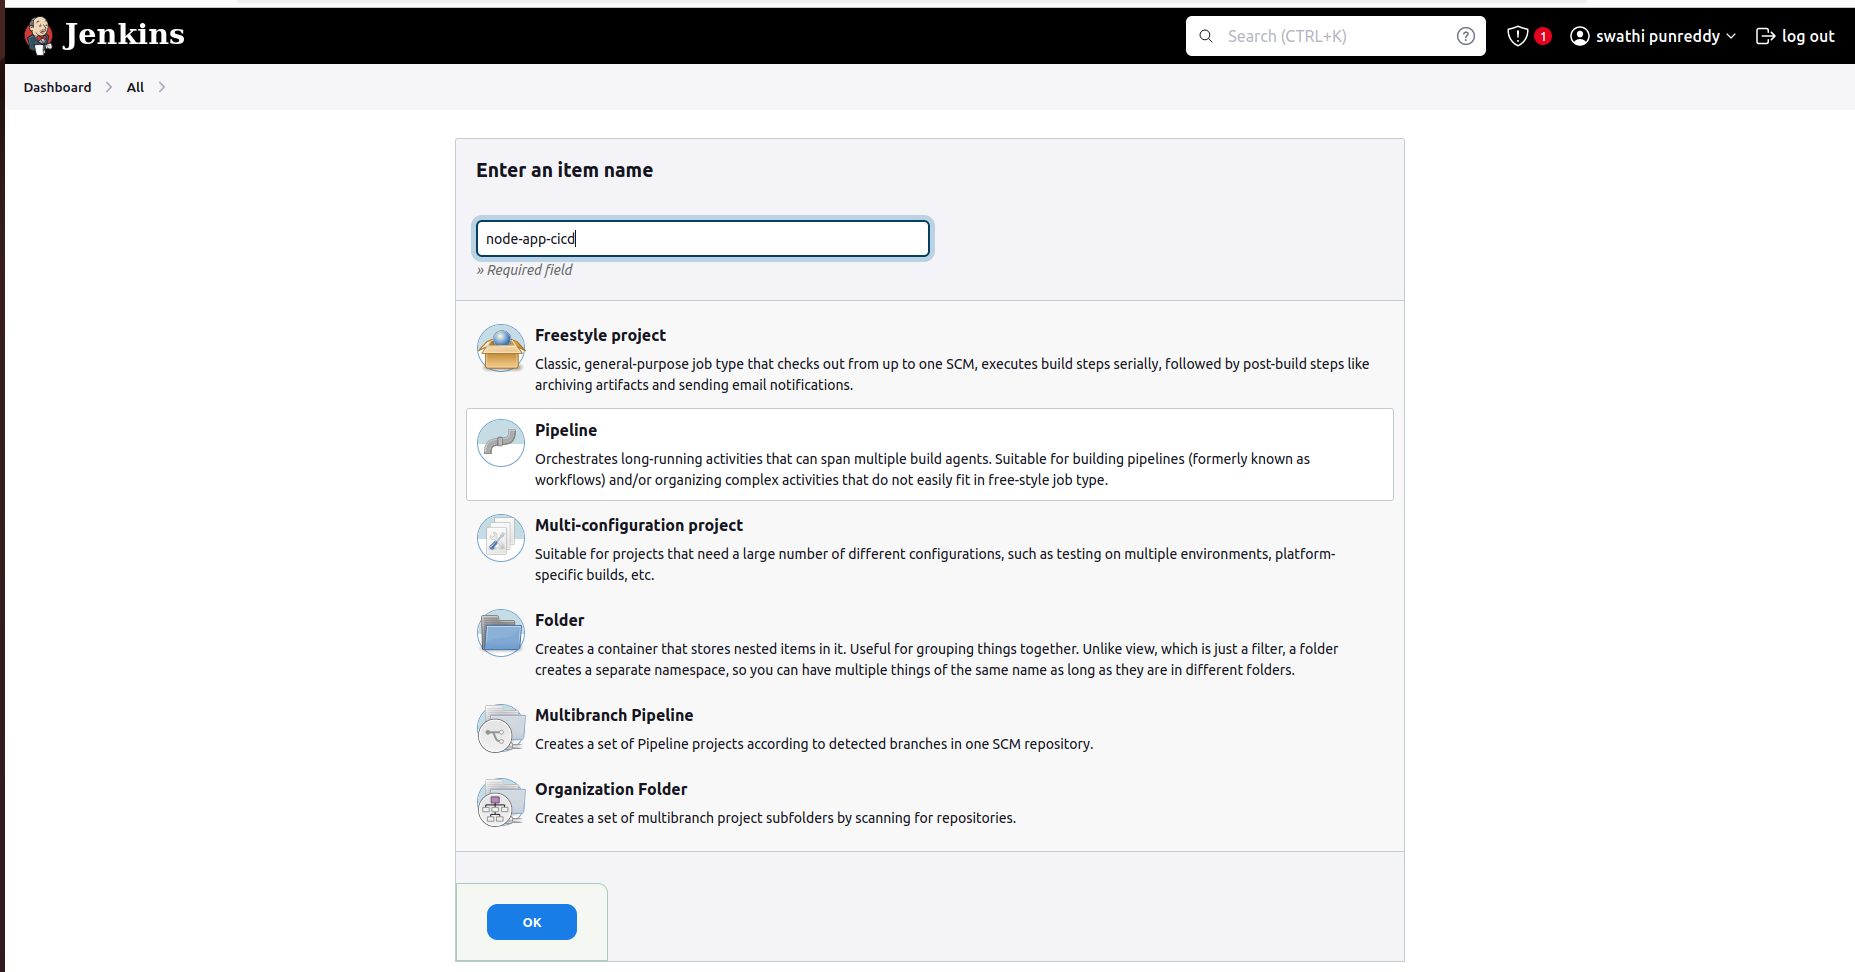
Create a New Jenkins Project:
Log in to your Jenkins dashboard and click on "New Item" to create a new project.
Choose "Pipeline" and give your project a descriptive name and optional description.
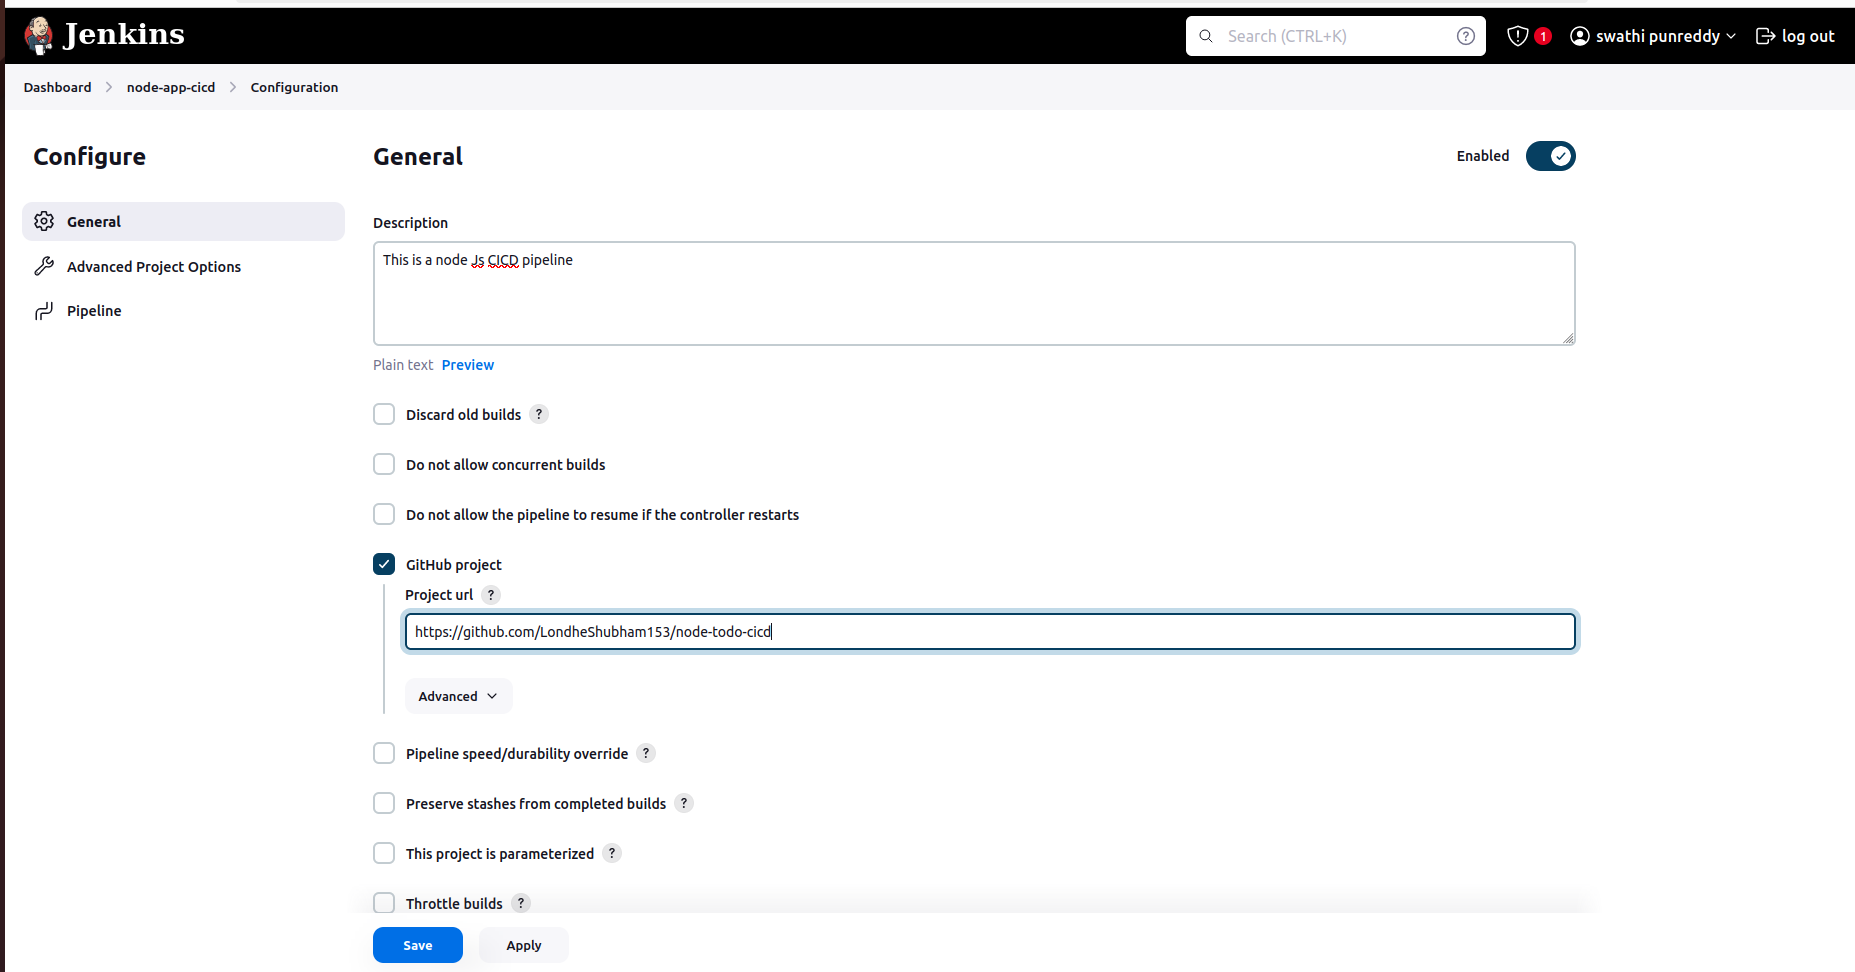
Configure the Pipeline:
In the project configuration, navigate to the "Pipeline" section.
Under "Definition," select "Pipeline script from SCM" and choose Git.
Provide the URL of your GitHub project:
https://github.com/LondheShubham153/node-todo-cicd.Check "GitHub hook trigger for GITscm polling" under "Build Triggers" to enable automatic builds upon code changes.
Define the Pipeline Script:
 pipeline {
     agent any

     stages {
         stage("code") {
             steps {
                 git url: "https://github.com/mandgepratik/node-todo-cicd.git", branch: "master"
                 echo "Code cloned successfully"
             }
         }

         stage("build") {
             steps {
                 sh 'docker build . -t todo-app'
                 echo "Code build successfully"
             }
         }

         stage("deploy") {
             steps {
                 sh "docker run -p 8000:8000 -d todo-app"
                 echo "Node.js application deployed successfully"
             }
         }
     }
 }
Understanding the Pipeline Script
Agent: Specifies the machine Jenkins will execute the Pipeline on.
Stages: Divides the Pipeline into sequential stages.
Code: Clones the application code from the GitHub repository.
Build: Builds the Docker image for the Node.js application.
Deploy: Deploys the application container using Docker.
Executing the Pipeline
Save the Pipeline Configuration.
Click on "Build Now" to trigger the Pipeline.
Jenkins will execute each stage sequentially.
If all stages execute successfully, the deployment will be successful.
Verifying the Deployment
To ensure the deployment is successful:
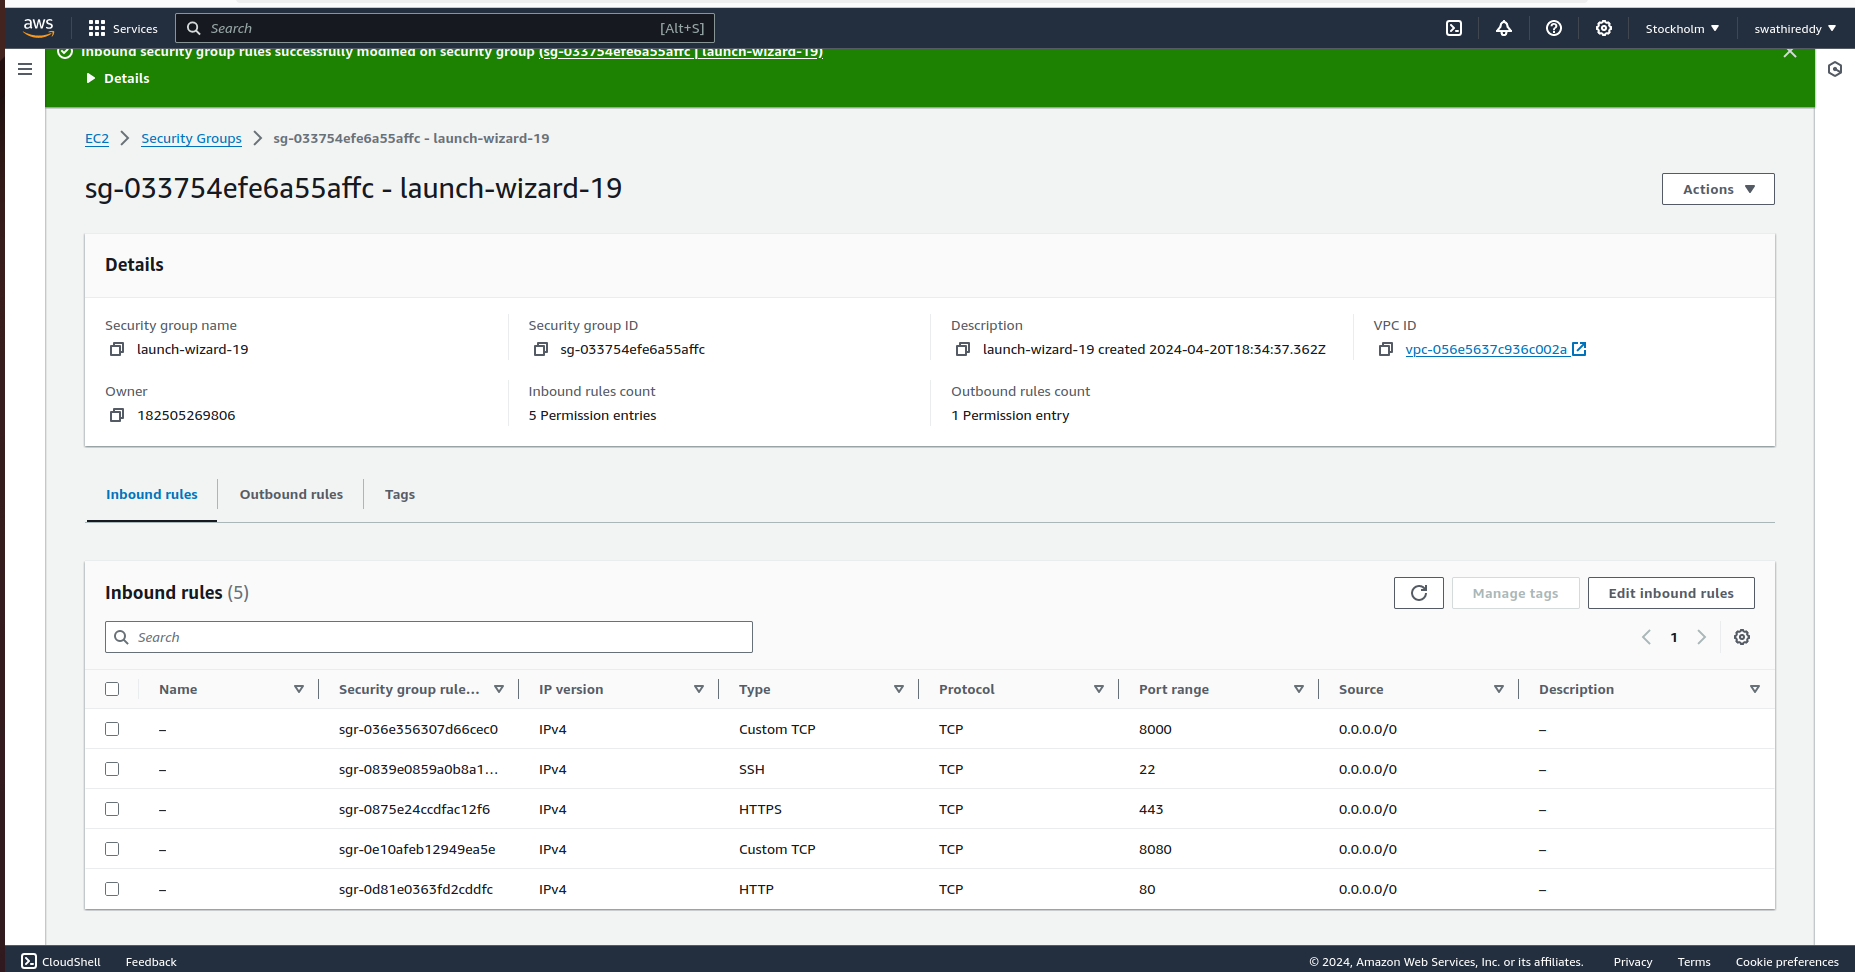
Enable Port 8000:
Ensure the security group of your server allows traffic on port 8000.
Access the Application:
- Visit
http://your_server_ip:8000in your web browser to access the deployed Node.js application.
- Visit
By following these steps, you've successfully set up a Jenkins Declarative Pipeline to automate the deployment process of a Node.js application. This not only saves time but also ensures consistency and reliability in your deployment workflow. Happy coding!
Subscribe to my newsletter
Read articles from SWATHI PUNREDDY directly inside your inbox. Subscribe to the newsletter, and don't miss out.
Written by
