Vulnerability Scanning (nmap, Nessus, Metasploitable 2)
 Jubril Edun
In this project, we will be practicising vulnerability management by scanning a vulnerable virtual machine (Metasploitable 2) using scanning tools (nmap and Nessus)
Vulnerability Management is the process of identifying security flaws and vulnerabilities in software, reporting on these flaws so they can be fixed, with a goal of reducing the risk and impact of cyber-attacks. - [\*Security Blue Team**]*
Metasploitable 2 is an intentionally vulnerable virtual machine created by security company Rapid7. It is designed to be a test environment and playground for ethical hackers. - [\*Security Blue Team**]*
"nmap" is an open-source network discovery and security auditing tool widely used by network administrators for many types of scanning.
Nessus is a software tool used for vulnerability scanning and assessment. It helps organizations identify and analyze security vulnerabilities in their computer systems, networks, and applications.
By the end of this project, you'll have a good understanding of vulnerability management, vulnerability scanning and vulnerability scanning tools.
Let's get started.
Tools needed for this project:
1) A Virtualization software (VMWare or Virtualbox)
2) A running Linux VM(preferably Kali Linux)
3) Nessus, Metasploitable 2, nmap
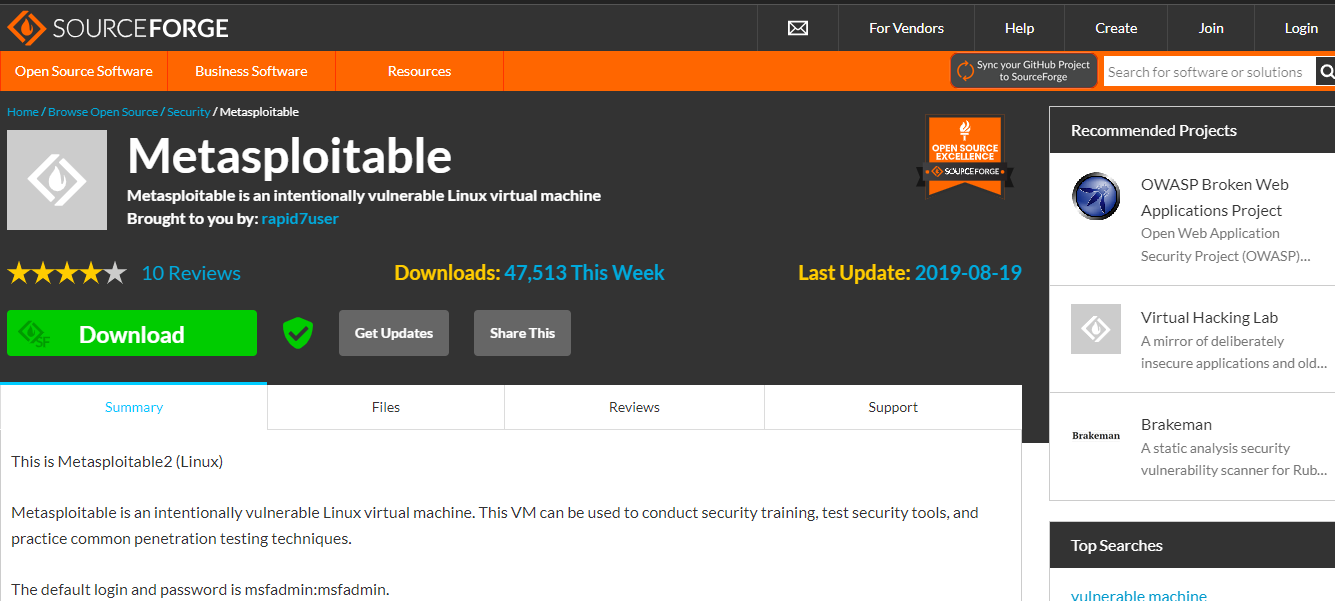
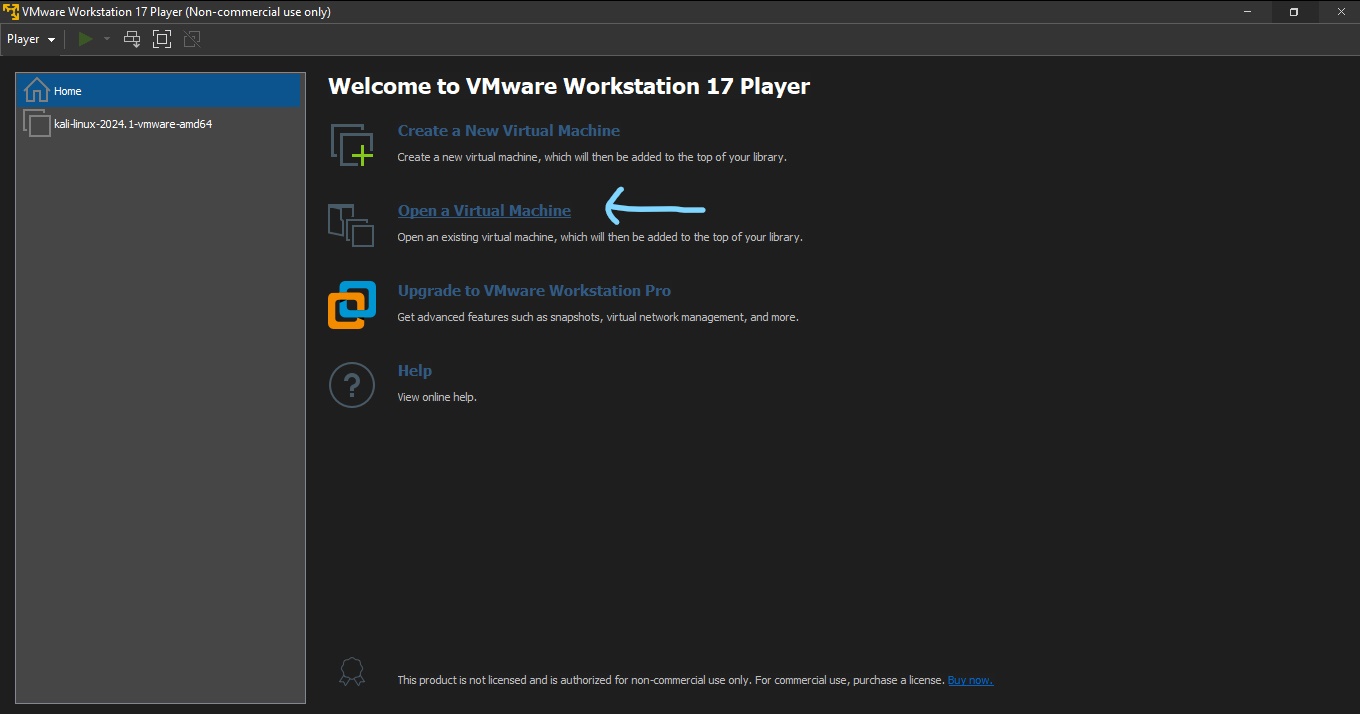
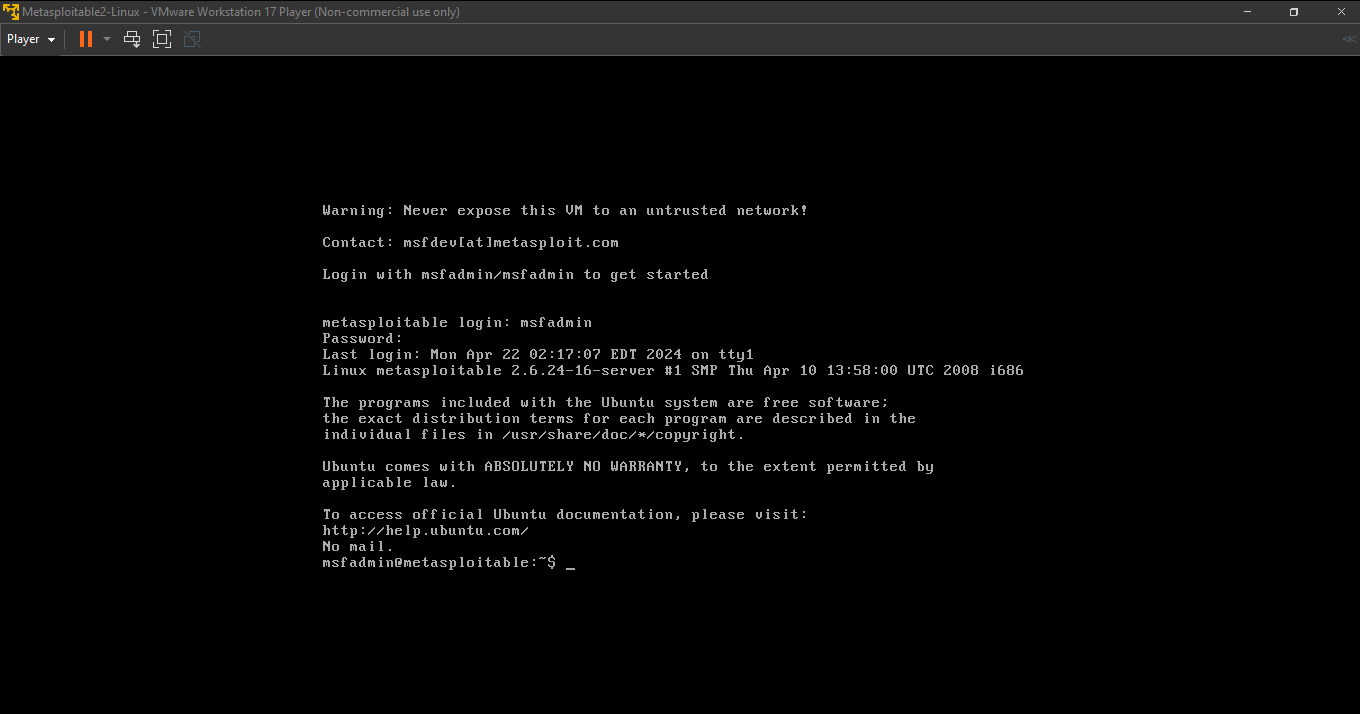
Step 1: Download the Metasploitable 2 VM from https://sourceforge.net/projects/metasploitable/ and open it with the Virtualization software. We will be using VMWare for this project. (Login details - login: msfadmin, password: msfadmin)
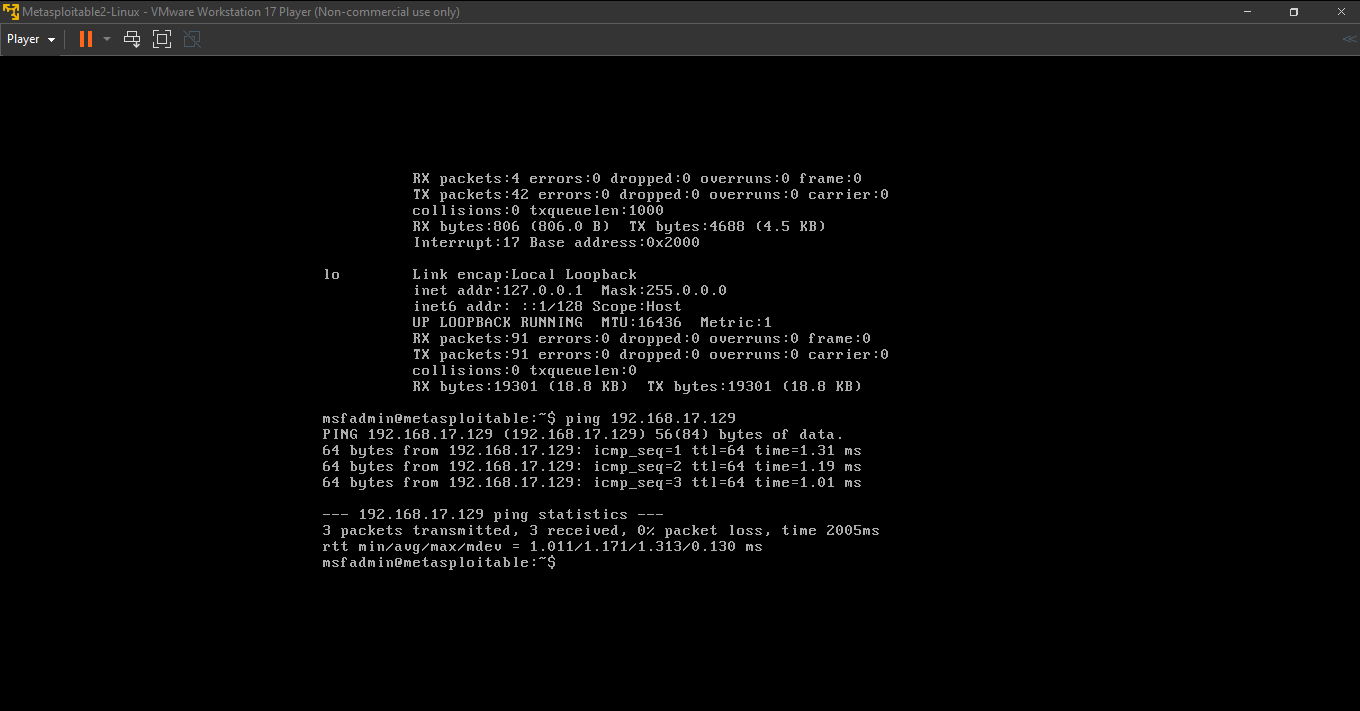
Step 2: Confirm connectivity between the running Linux VM and the Metasploitable 2 VM
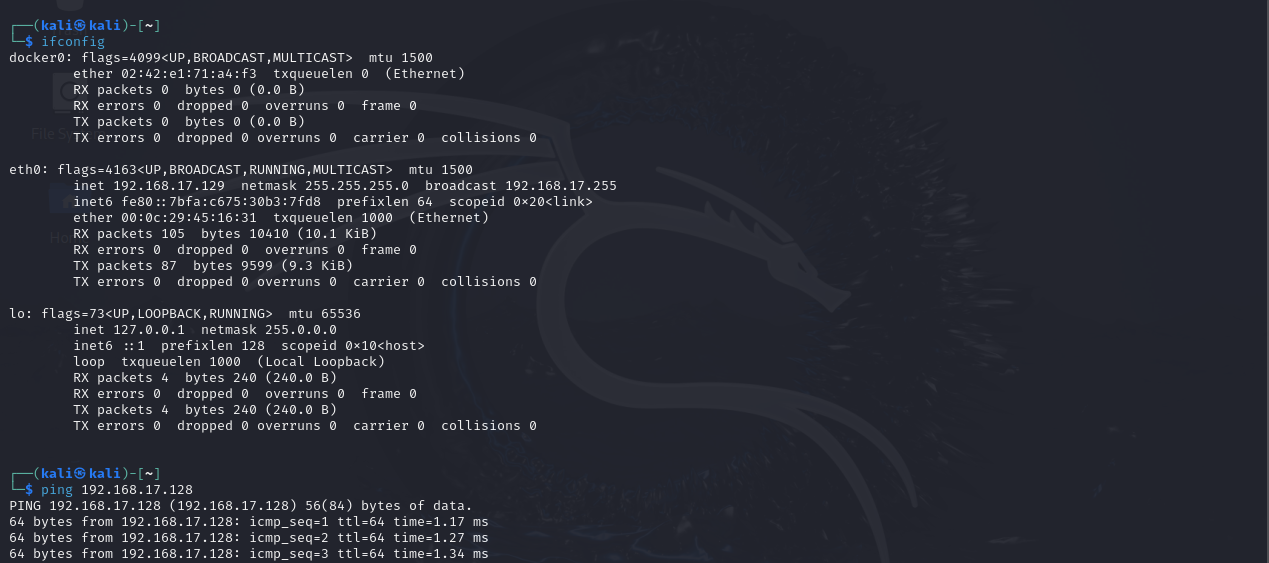
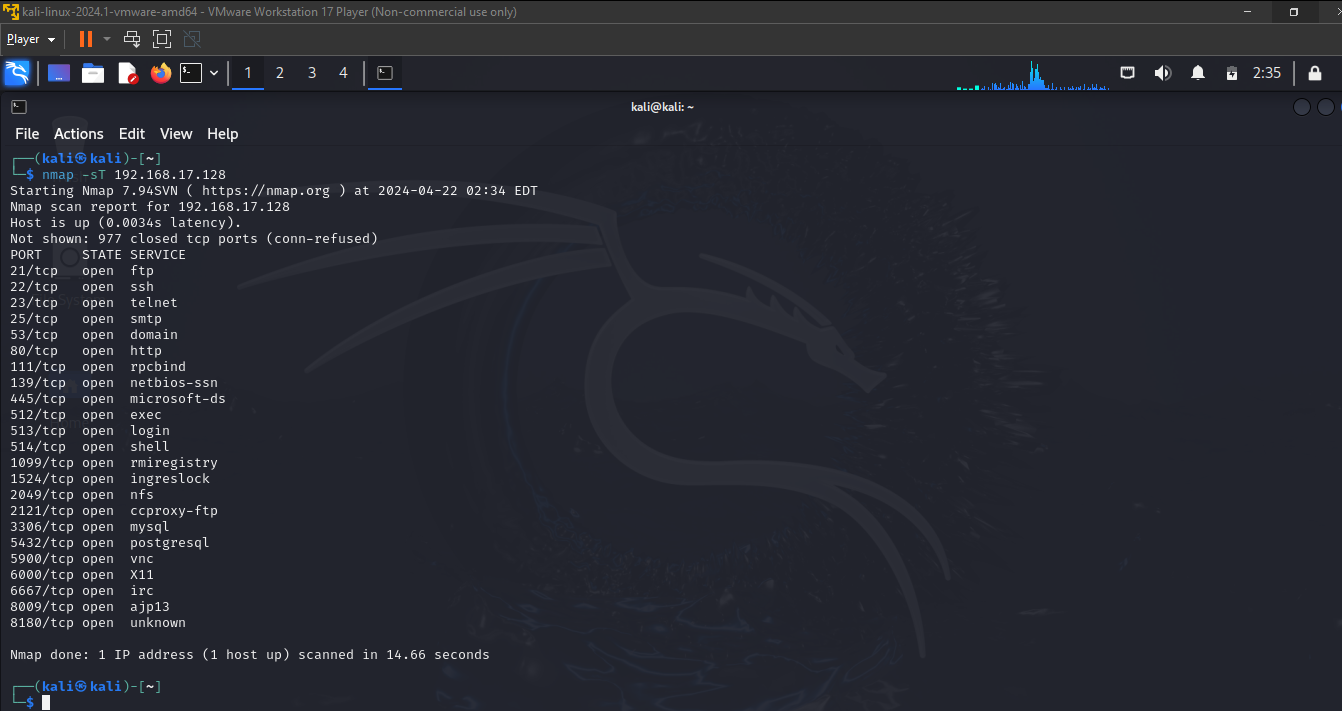
Step 3: Scan the Metasploitable 2 VM from the Linux VM using "nmap"
run a "TCP Connect Scan" to find the number of open TCP ports on the Metasploitable 2 VM.
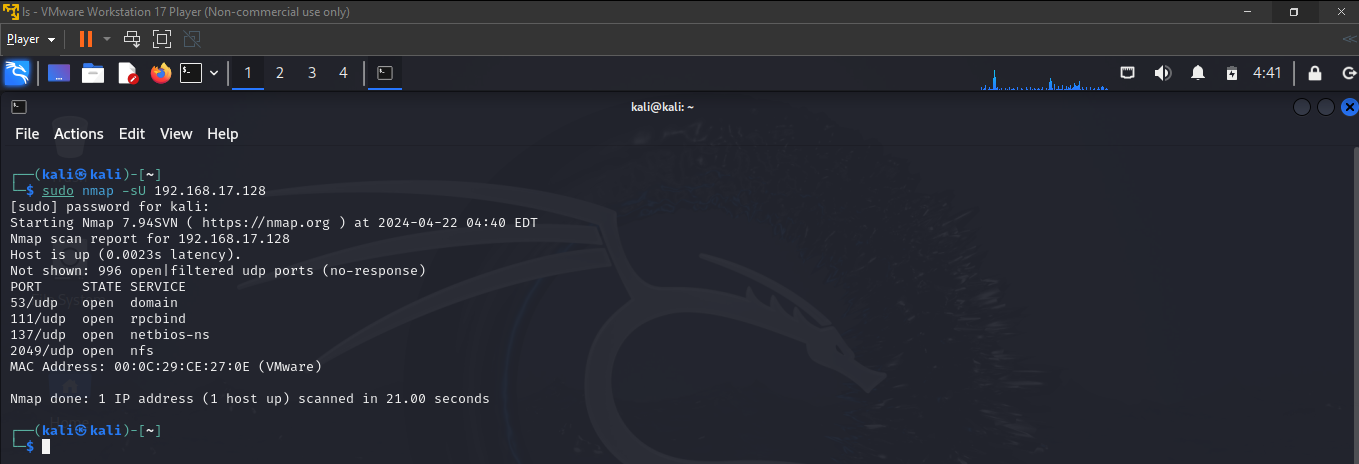
run a "UDP Scan" to find the number of open UDP ports on the Metasploitable 2 VM
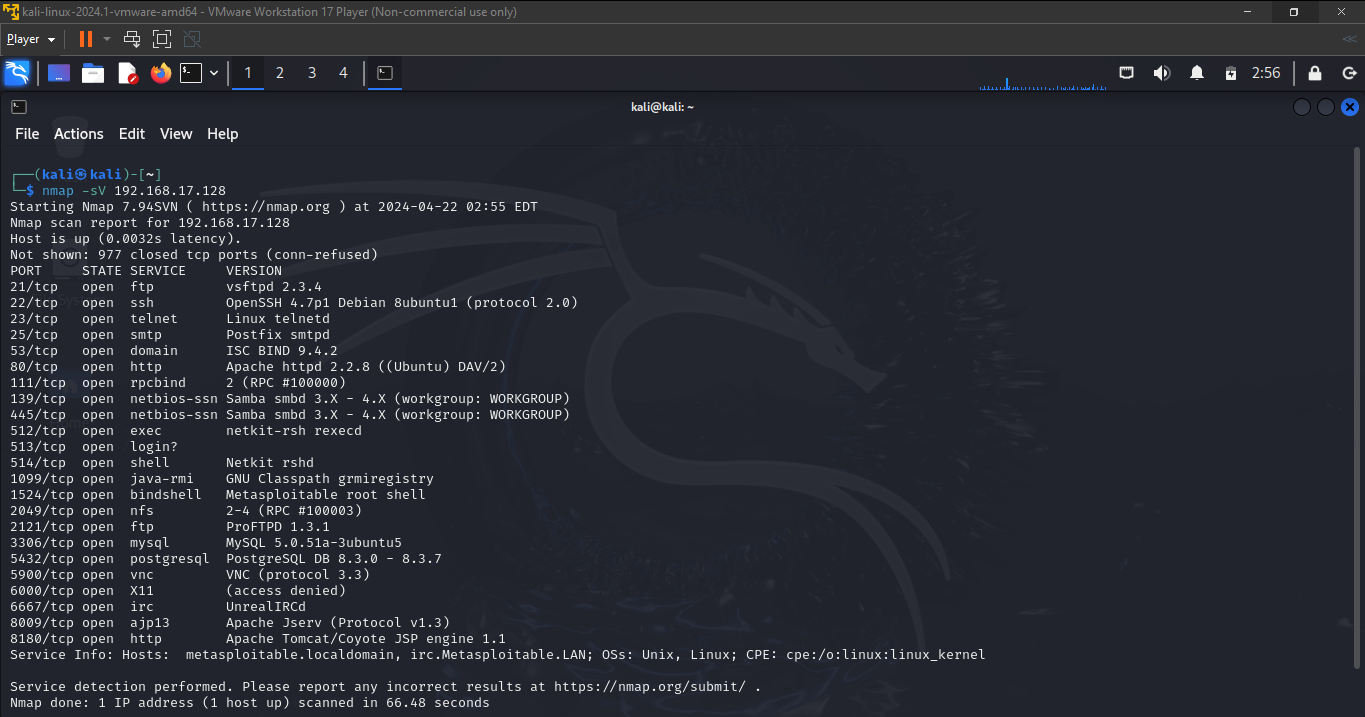
running a "Version Detection" scan to determine the versions of services running on open ports on the Metasploitable 2 VM.
Step 4: Scan the Metasploitable 2 VM from the Linux VM using "Nessus"
following the instructions on https://www.tenable.com/products/nessus/nessus-essentials, register for an activation code and download the free package of Nessus (i.e. Nessus Essentials)
install the downloaded package on your Linux VM and start the nessus service using
service nessusd start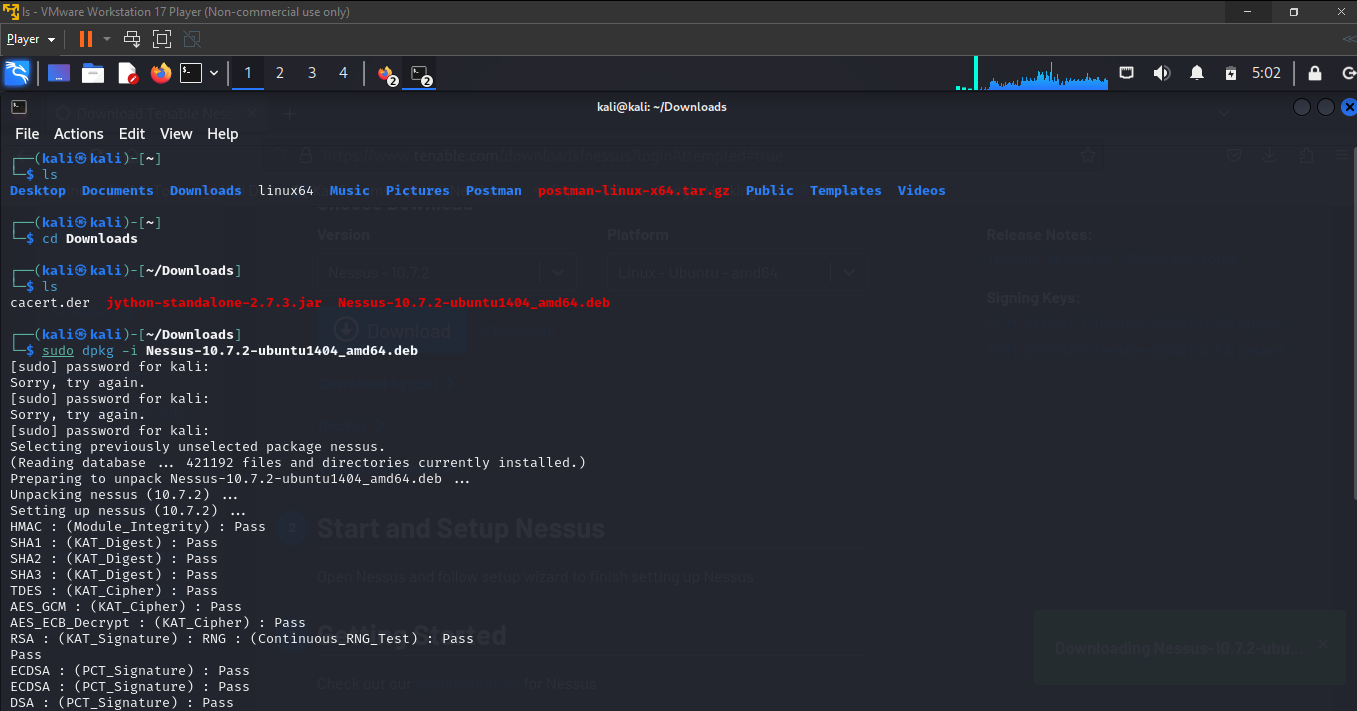
go to your browser, and visit https://kali:8834/ – this is the local web GUI for Nessus. The “kali” section of the URL is your hostname (the part that appears in the terminal after “root@”). If your hostname is “johndoe”, you’ll visit https://johndoe:8834/
follow the instructions of selecting "Nessus Essentials", submitting your activation code and creating an account
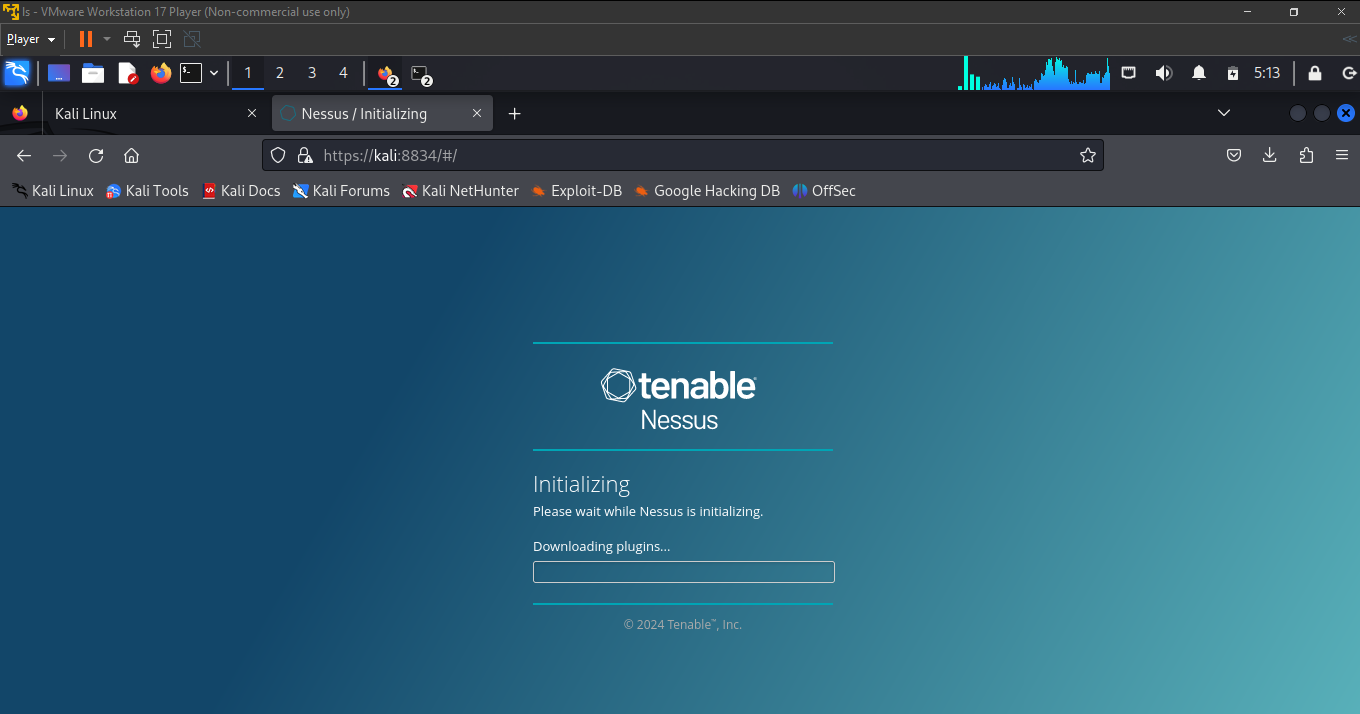
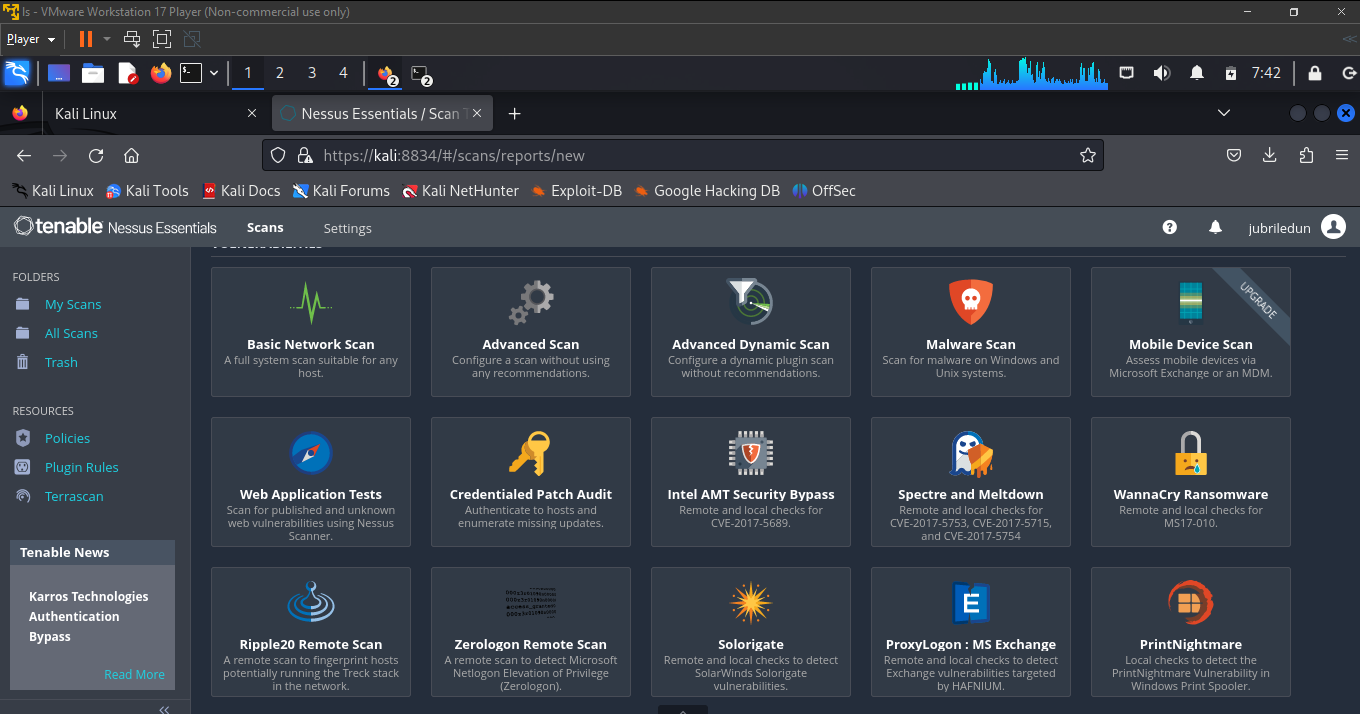
nessus provides several pre-defined scan templates, but in this project we'll be using the Basic Network Scan
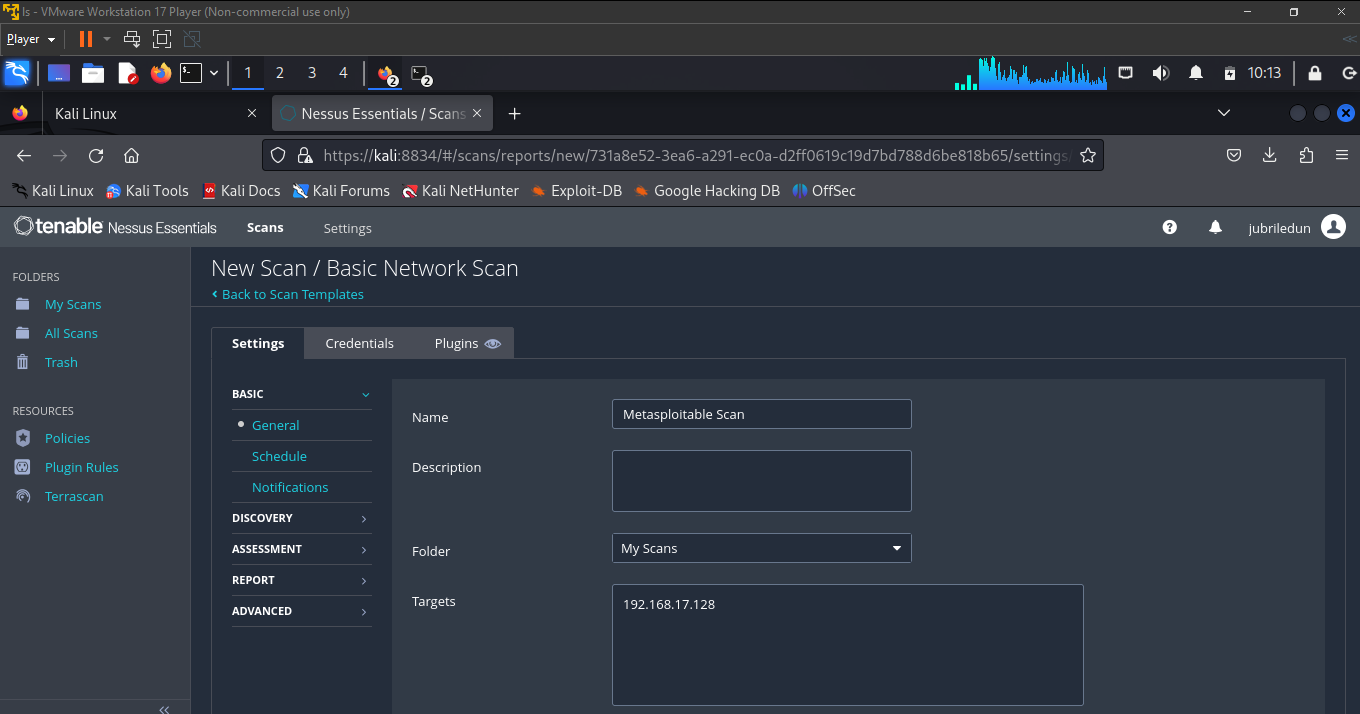
create a new scan by clicking "Policies < Scan Templates < Basic Network Scan ", enter the name of the scan, the target's machine IP and any other details, click on save.
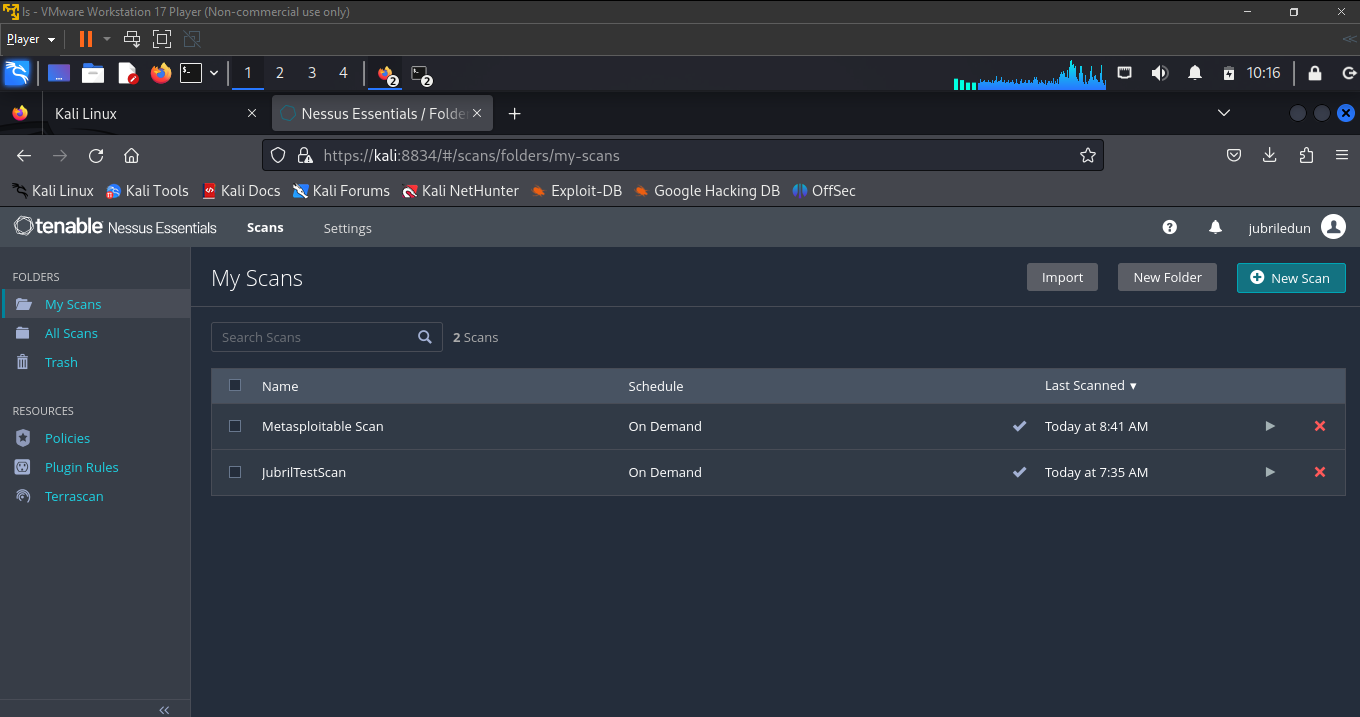
click the play button for Nessus to start scanning the Metsploitable 2 VM
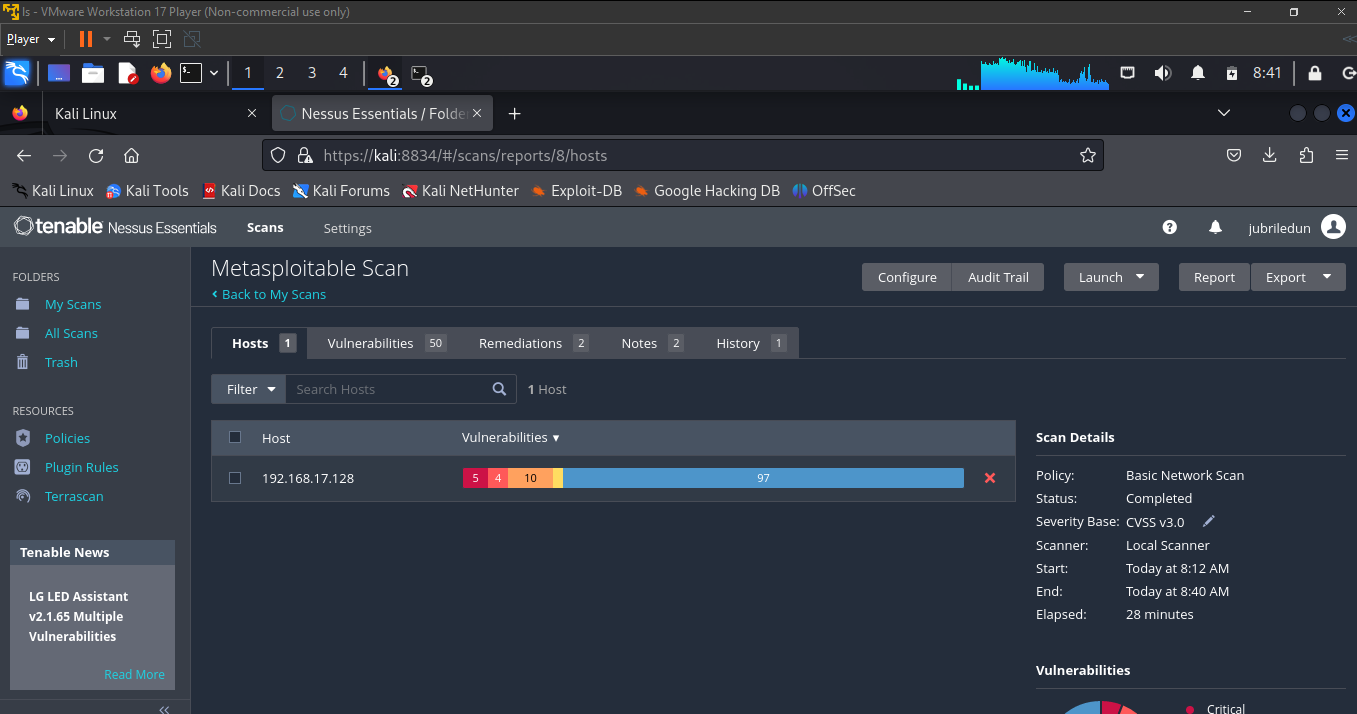
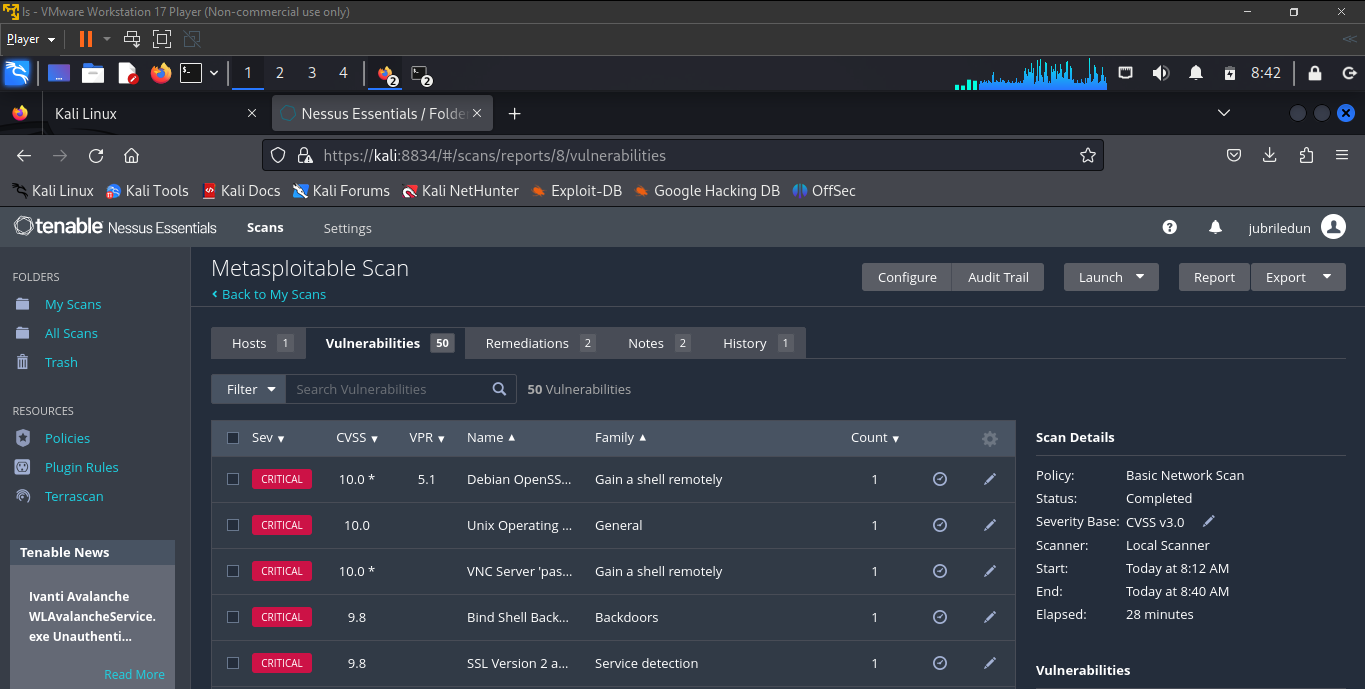
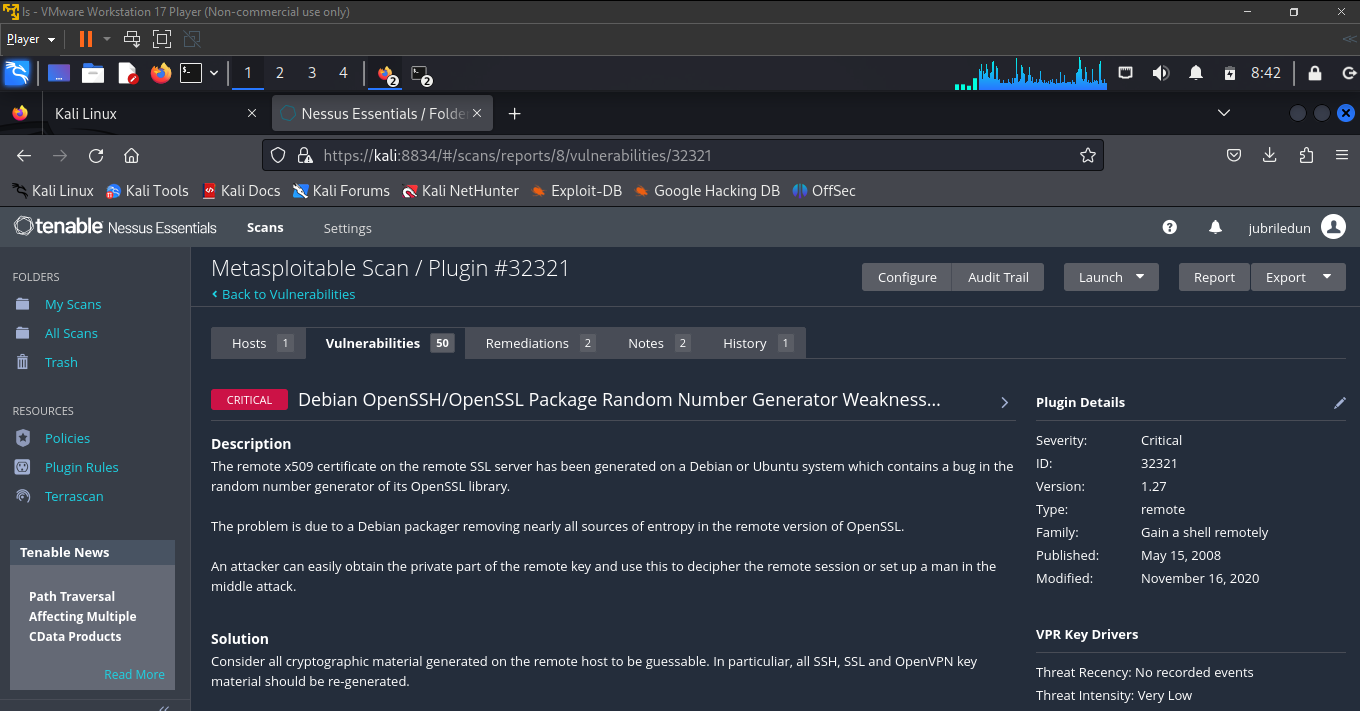
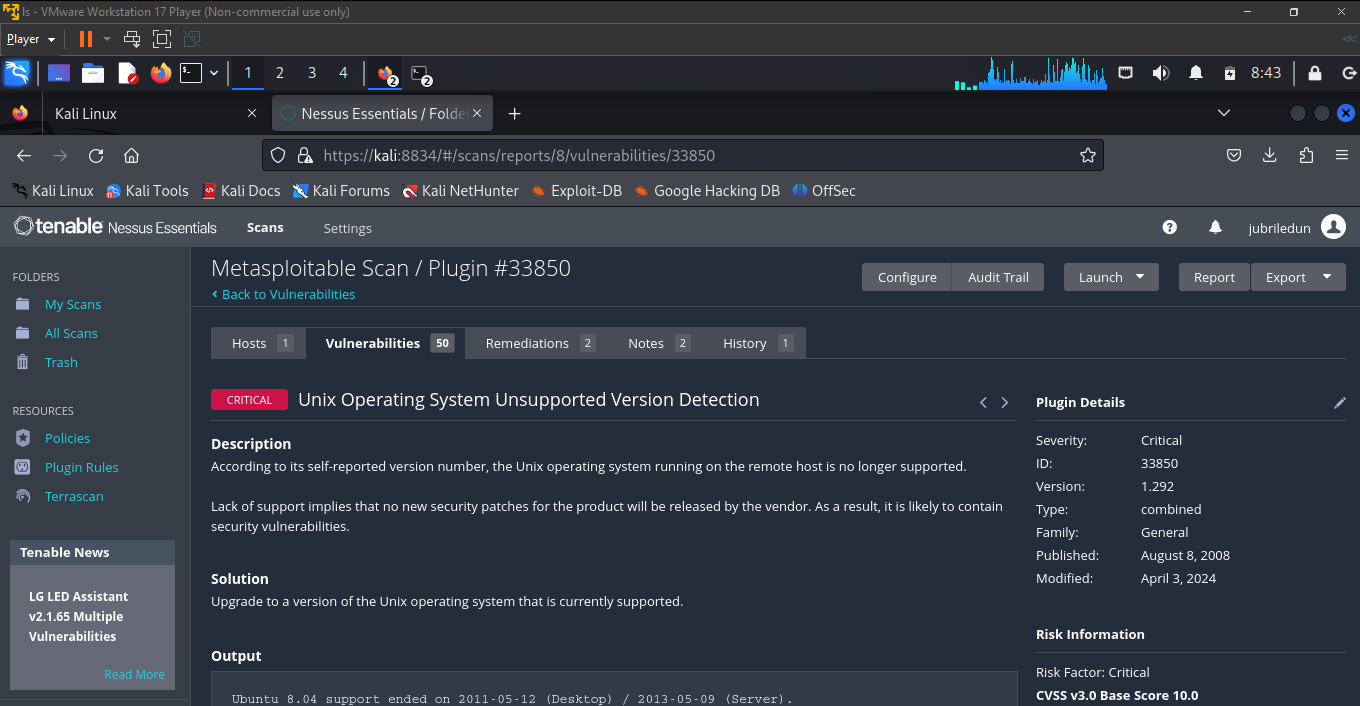
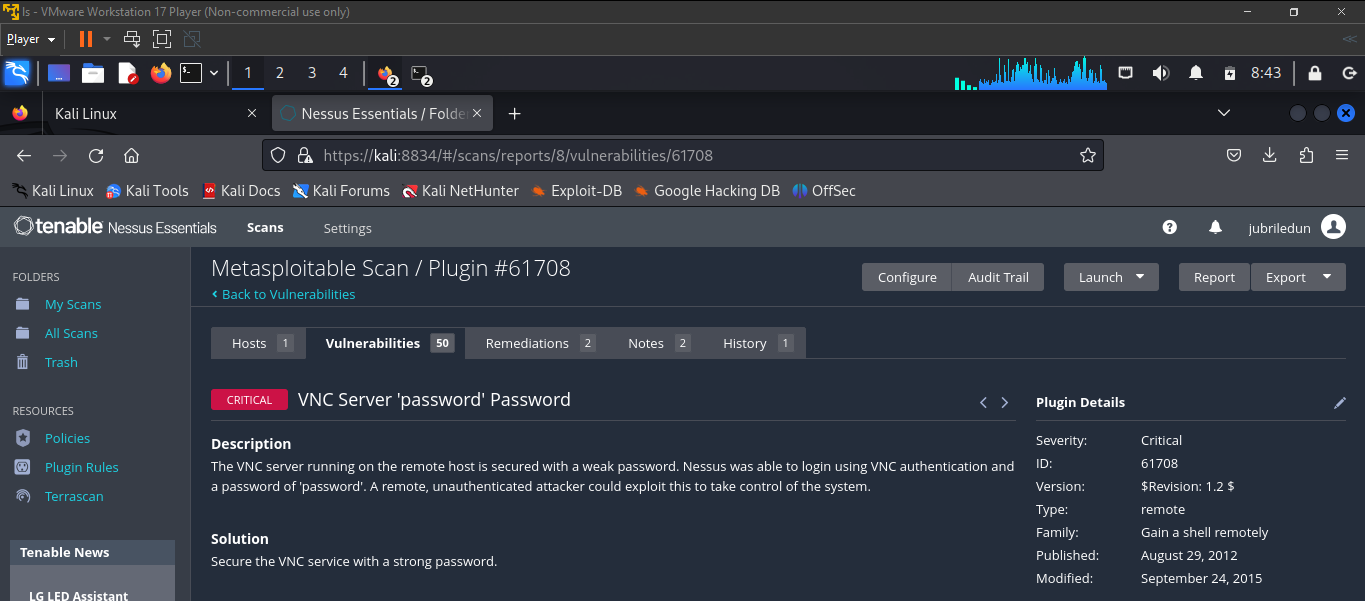
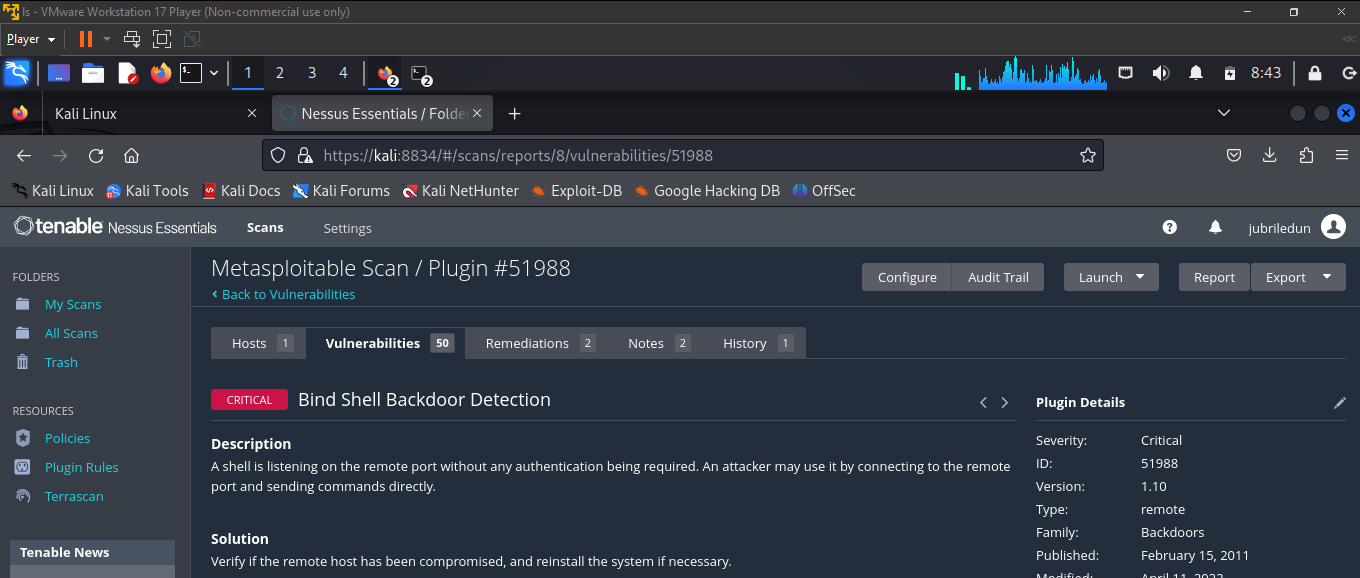
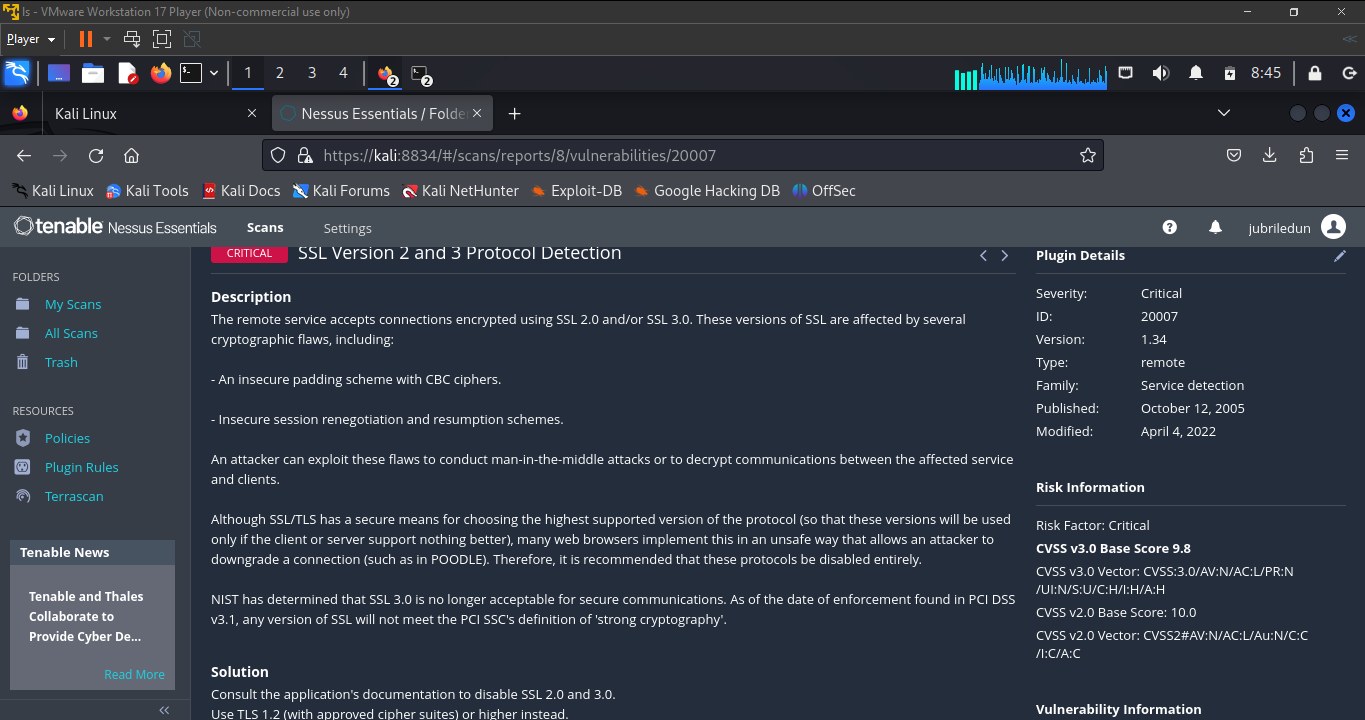
after nessus finishes scanning the Metesploitable 2 VM, click on "Vulnerabilities" to view the vulnerabilities found in the MS2 VM, the criticality level and other information. Click on the individual vulnerabilities to see more information on the vulnerabilities and how they can be resolved.
In the screenshots below, we'll list the top five vulnerabilities found in the MS2 VM.
Voila! QED!
Subscribe to my newsletter
Read articles from Jubril Edun directly inside your inbox. Subscribe to the newsletter, and don't miss out.
Written by

Jubril Edun
Jubril Edun
Hi there, My name is Jubril Edun, a tech enthusiast who is on a learning journey into the world of Cloud Engineering, Cybersecurity and beyond. Join me as I document my learning journey.