Azure Pipelines for Seamless CI/CD
 Saikiran Goud
Introduction:
Azure Pipelines is a cloud-based solution by Microsoft that automatically builds and tests code projects. It supports all major languages and project types and combines Continuous Integration, Continuous Delivery, and Continuous Testing to build, test, and deliver your code to any destination.
Automate Tests, Builds, and Delivery
Azure Pipelines supports continuous integration (CI) and continuous delivery (CD) to continuously test, build, and deploy your code. You accomplish this by defining a pipeline.
The latest way to build pipelines is with the YAML pipeline editor. You can also use Classic pipelines with the Classic editor.
Continuous Integration
Continuous Integration (CI) is the practice used by development teams of automating, merging, and testing code. CI helps to catch bugs early in the development cycle, which makes them less expensive to fix. Automated tests execute as part of the CI process to ensure quality. CI systems produce artifacts and feed them to release processes to drive frequent deployments.
Continuous Delivery
Continuous Delivery (CD) is a process by which code is built, tested, and deployed to one or more test and production environments. Deploying and testing in multiple environments increases quality. CD systems produce deployable artifacts, including infrastructure and apps. Automated release processes consume these artifacts to release new versions and fixes to existing systems. Systems that monitor and send alerts run continually to drive visibility into the entire CD process.

Continuous Testing
Whether your app is on-premises or in the cloud, you can automate build-deploy-test workflows and choose the technologies and frameworks. Then, you can test your changes continuously in a fast, scalable, and efficient manner. Continuous testing offers the following benefits.
Maintain quality and find problems as you develop. Continuous testing with Azure DevOps Server ensures your app still works after every check-in and build, enabling you to find problems earlier by running tests automatically with each build.
Use any test type and any test framework. Choose your preferred test technologies and frameworks.
View rich analytics and reporting. When your build is done, review your test results to resolve any issues. Actionable build-on-build reports let you instantly see if your builds are getting healthier. But it's not just about speed - detailed and customizable test results measure the quality of your app.
How to Use Azure Pipelines?
There are two main options for operating Azure Pipelines - you can define pipelines using YAML code or the Classic UI Editor.
Define Pipelines using YAML syntax
Azure Pipelines provides a YAML configuration called azure-pipelines.yml which allows you to define your pipeline as code.

The process works as follows:
You write a simple YAML configuration file that specifies the structure of your pipeline.
The pipeline YAML is versioned with your code. This means any changes to it can be managed via pull requests and build policies.
Any changes to the pipeline configuration can break the process or have unexpected side-effects. When the pipeline is managed as code, you can easily identify the change that caused a problem and revert or resolve it.
To work with pipelines as YAML code, you’ll need to:
Configure Azure Pipelines to point to your Git repo.
Define your build process using azure-pipelines.yml
Push the YAML code to your version control repository. This will trigger automatic build and deploy, and you can monitor results.
Example YAML Code:
trigger:
- main

stages:
- stage: Build
  jobs:
  - job: Build
    pool:
      vmImage: 'ubuntu-latest'
    steps:
    - task: Npm@1
      inputs:
        command: 'install'
    - task: Npm@1
      inputs:
        command: 'custom'
        customCommand: 'run build'


    - task: PublishBuildArtifacts@1
      inputs:
        PathtoPublish: 'build'
        ArtifactName: 'drop'
        publishLocation: 'Container'

- stage: Deploy
  jobs:
  - job: Deploy
    pool:
      vmImage: 'ubuntu-latest'
    steps:
    - task: DownloadBuildArtifacts@1
      inputs:
        buildType: 'current'
        downloadType: 'single'
        artifactName: 'drop'
        downloadPath: '$(System.ArtifactsDirectory)'
    - task: AzureRmWebAppDeployment@4
      inputs:
        ConnectionType: 'AzureRM'
        azureSubscription: 'Tech Tutorials With Piyush (9e9c27ce-e0c8-4171-a368-ad16977ec849)'
        appType: 'webAppLinux'
        WebAppName: 'TechTutorialsWithPiyush'
        packageForLinux: '$(System.ArtifactsDirectory)/drop'
        RuntimeStack: 'STATICSITE|1.0'
Define Pipelines using the Classic interface
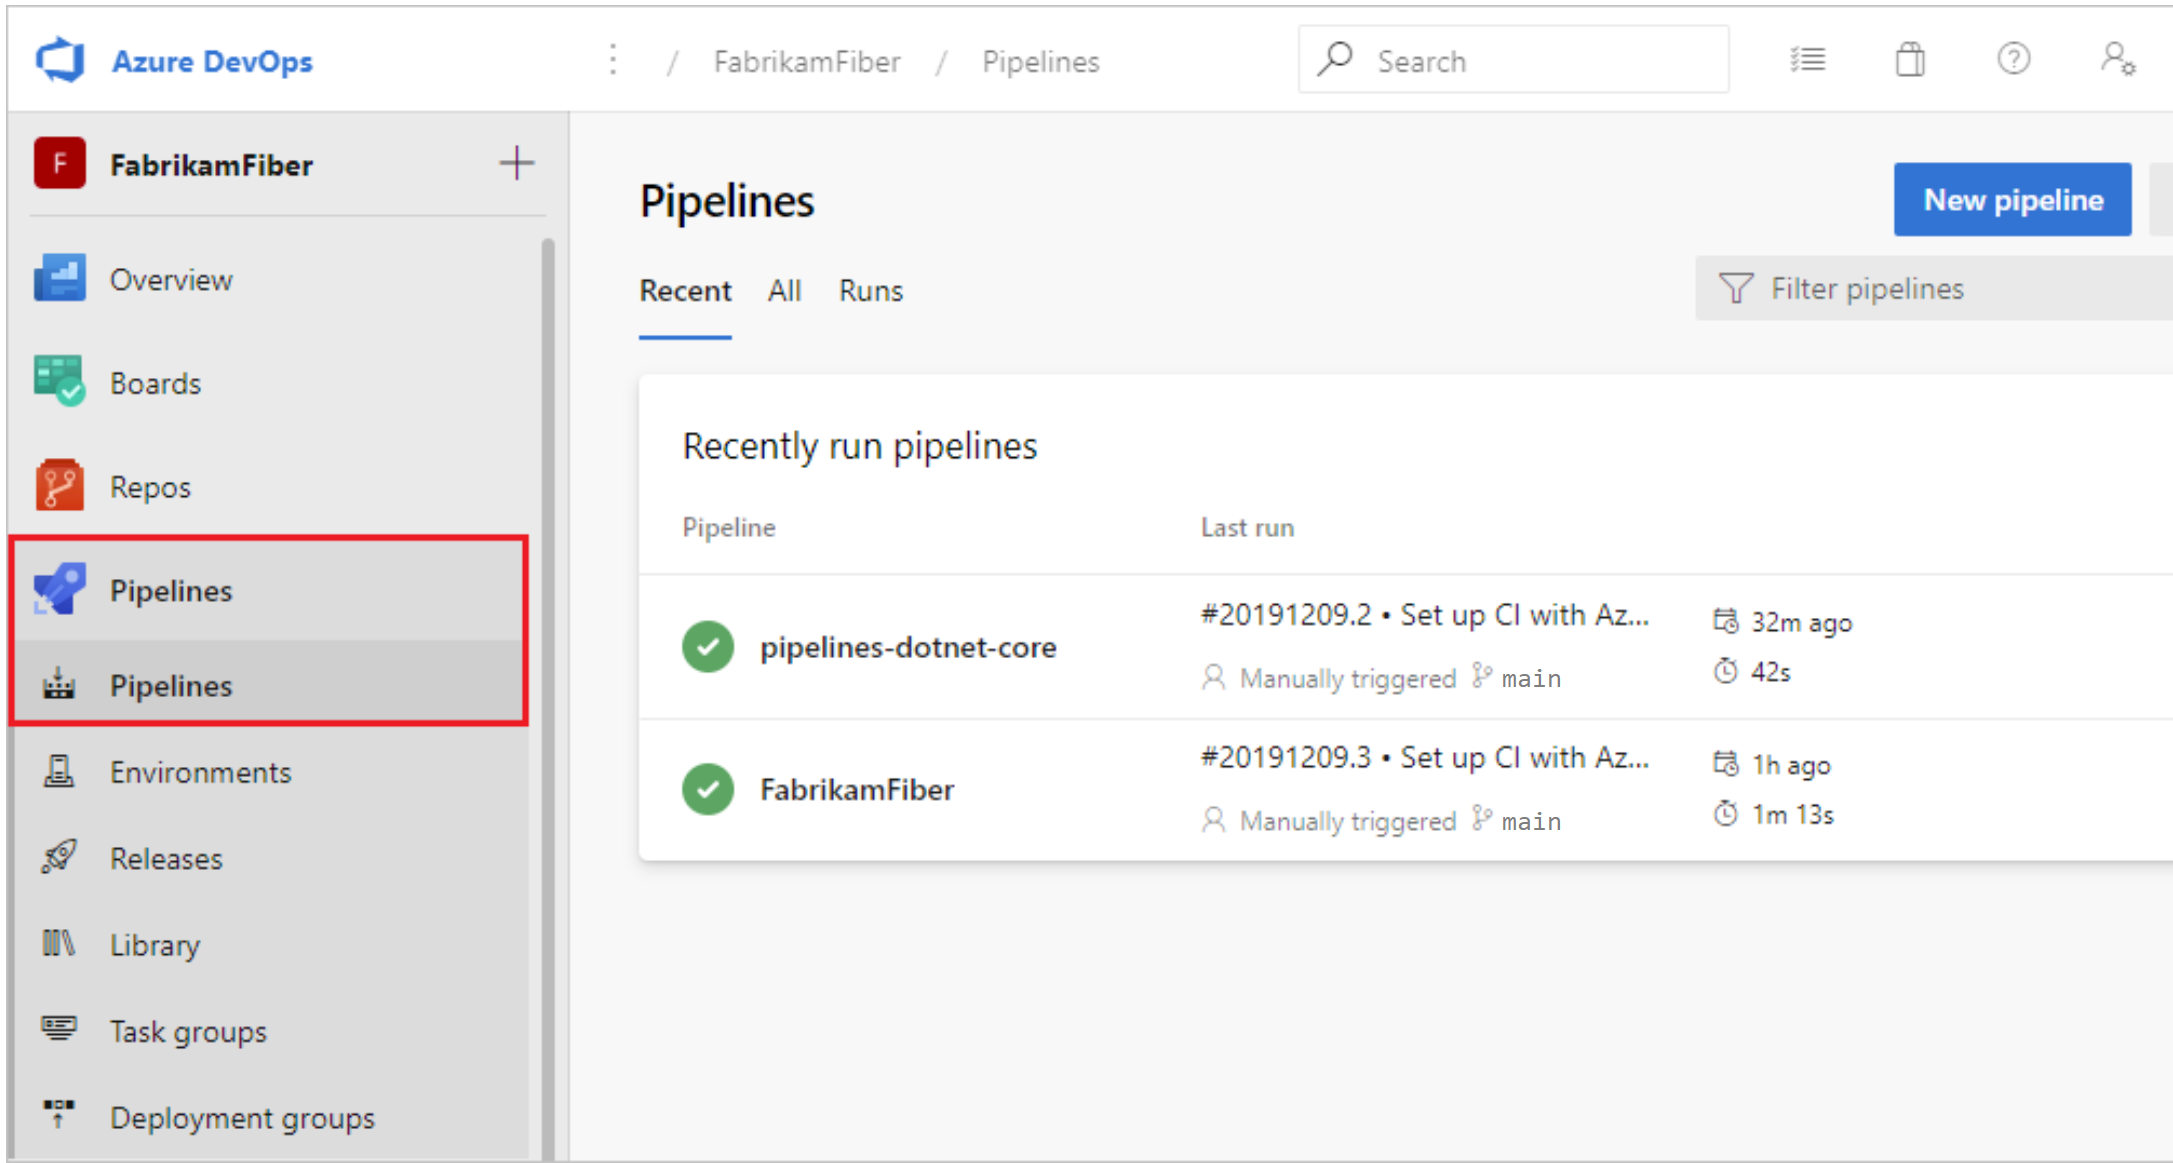
Azure Pipelines also provides a UI that lets you define pipelines manually. You can specify how the pipeline should build and test your code, and a release pipeline that defines how artifacts generated by the build process should be deployed to a target environment.
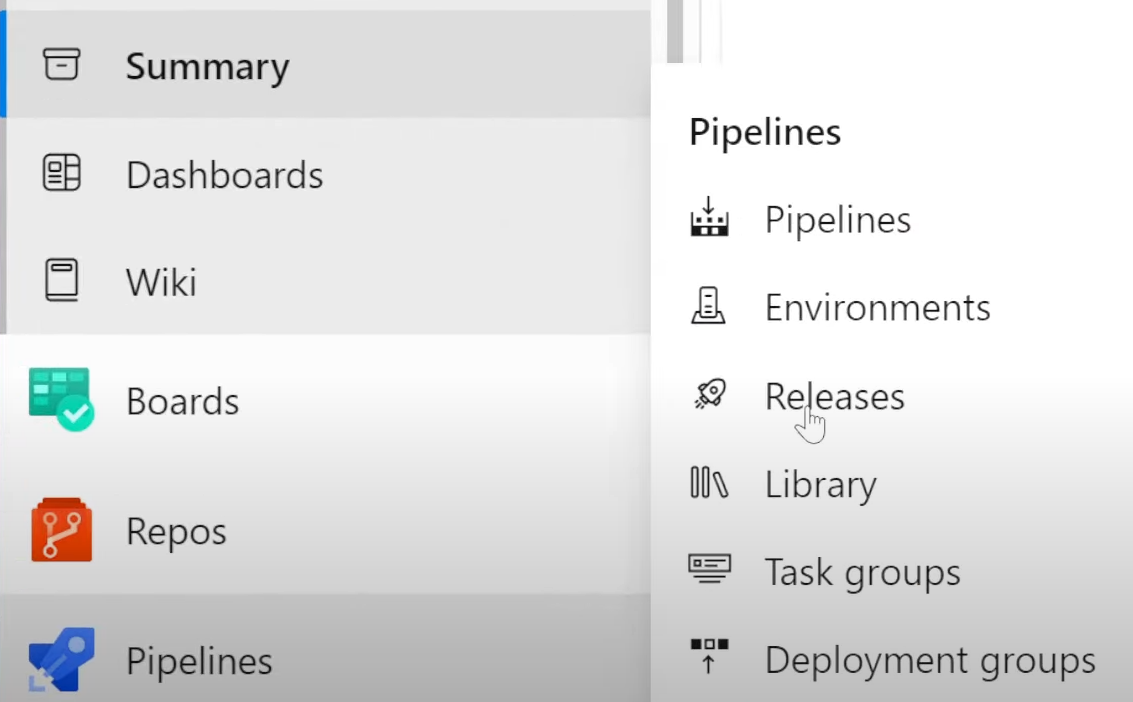
Create and configure pipelines in the Azure DevOps web portal with the Classic user interface editor. You define a Build Pipeline / Pipelines(CI) to build and test your code, and then to publish artifacts. You also define a Release Pipeline(CD) to consume and deploy those artifacts to deployment targets.
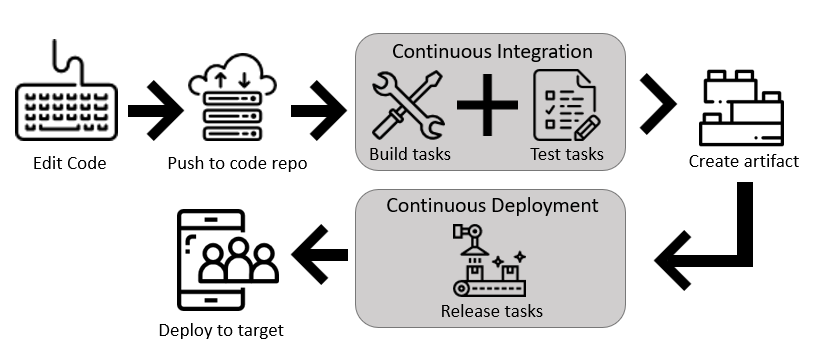
To work with pipelines via the UI, follow these steps:
Configure Azure Pipelines to point to your Git repo.
Use the Azure Pipelines classic editor to create and configure your build and release pipelines.
Push your code to your version control repository. This action triggers your pipeline and runs tasks such as building or testing code.
The build creates an artifact that's used by the rest of your pipeline to run tasks such as deploying to staging or production.
Your code is now updated, built, tested, and packaged. It can be deployed to any target.
End-to-End CICD Pipeline using Azure DevOps Build and Release Pipeline
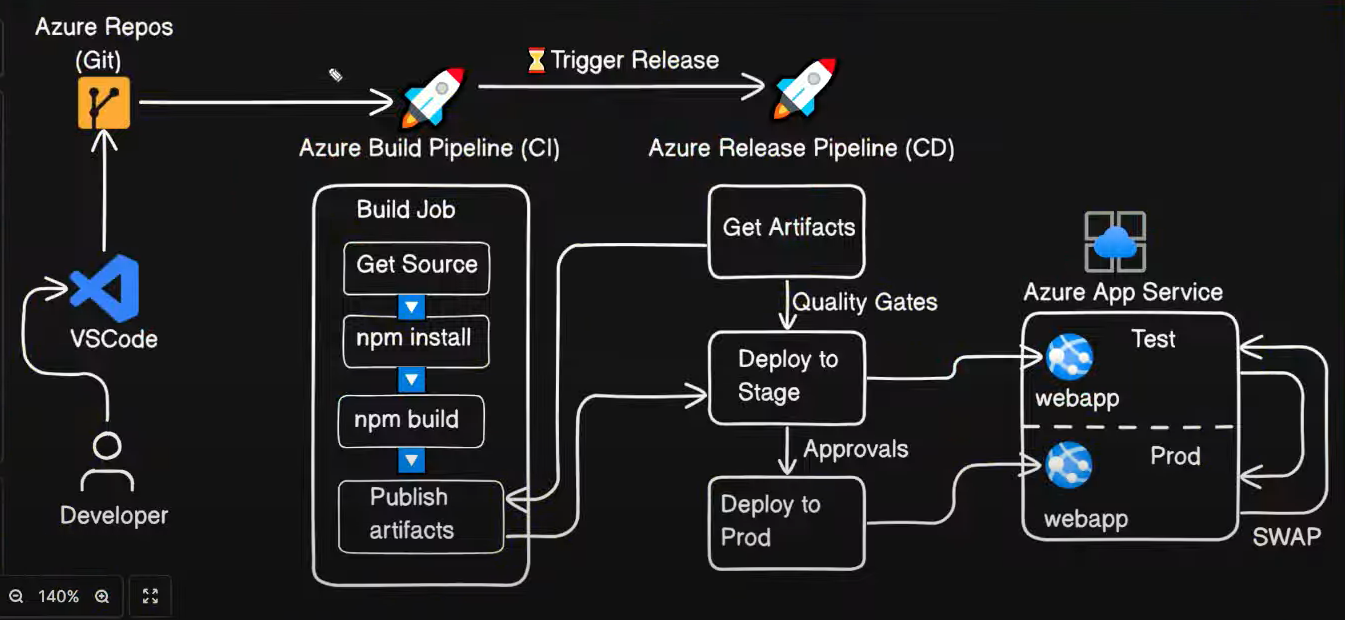
Key Concepts of Azure Pipelines
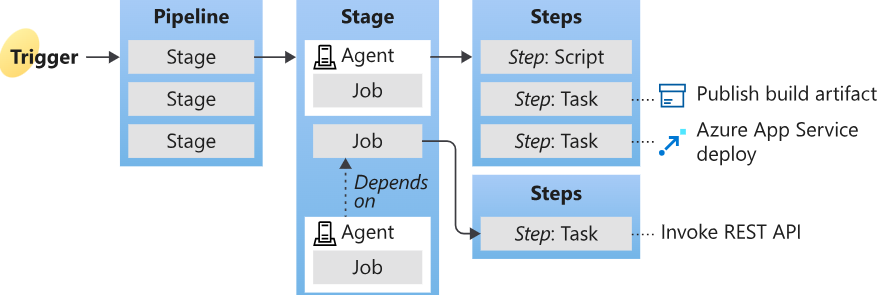
A Trigger tells a Pipeline to run. It could be CI or Scheduled, manual(if not specified), or after another build finishes.
A Pipeline is made up of one or more stages. A pipeline can deploy to one or more environments.
A Stage organizes jobs in a pipeline, and each stage can have one or more jobs.
Each Job runs on one agent, such as Ubuntu, Windows, macOS, etc. A job can also be agentless.
Each Agent runs a job that contains one or more steps.
A Step can be a task or script and is the smallest building block of a pipeline.
A Task is a pre-packaged script that performs an action, such as invoking a REST API or publishing a build artifact.
An Artifact is a collection of files or packages published by a run.
Conclusion
Azure Pipelines emerges as a versatile and powerful solution for automating the build and testing processes of code projects across various languages and project types. By seamlessly integrating continuous integration, continuous delivery, and continuous testing, it streamlines the development workflow, ensuring efficient and reliable delivery of code to any destination.
Its robust capabilities empower developers to focus on innovation and collaboration while Azure Pipelines handles the heavy lifting of the development pipeline. Whether you're a small team or a large enterprise, Azure Pipelines stands as a reliable companion in achieving agility, quality, and speed in software delivery.
Subscribe to my newsletter
Read articles from Saikiran Goud directly inside your inbox. Subscribe to the newsletter, and don't miss out.
Written by

Saikiran Goud
Saikiran Goud
Passionate DevOps Engineer with a strong foundation in CI/CD, automation, and cloud technologies.