Day 45: Deploy Wordpress website on AWS
 Prathmesh Vibhute
Over 30% of all websites on the internet use WordPress as their content management system (CMS). It is most often used to run blogs, but it can also be used to run e-commerce sites, message boards, and many other popular things. This guide will show you how to set up a WordPress blog site.
Task-01
As WordPress requires a MySQL database to store its data, create an RDS as you did in Day 44
Login to aws console and search for RDS in the search box. Click on RDS.
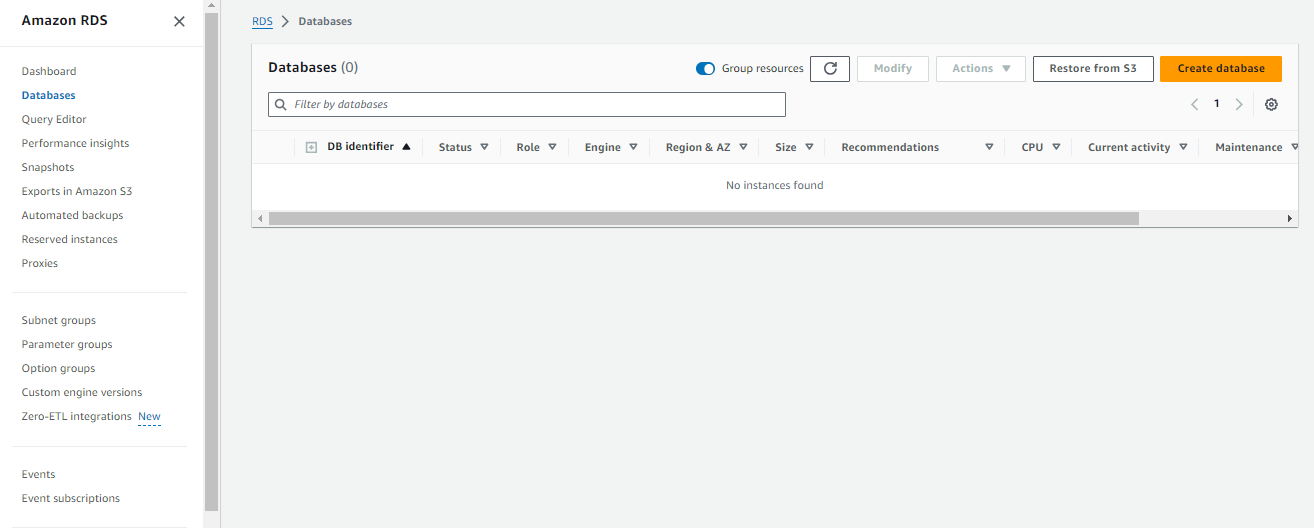
Go to the Amazon RDS console. Click "Create database".
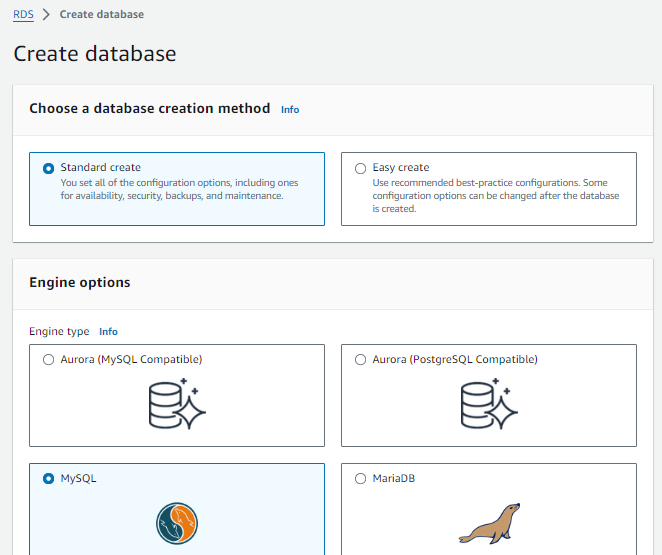
Select "MySQL" as the engine type.
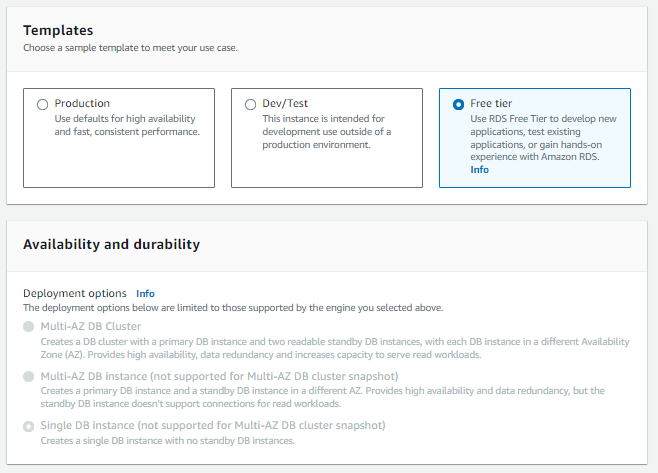
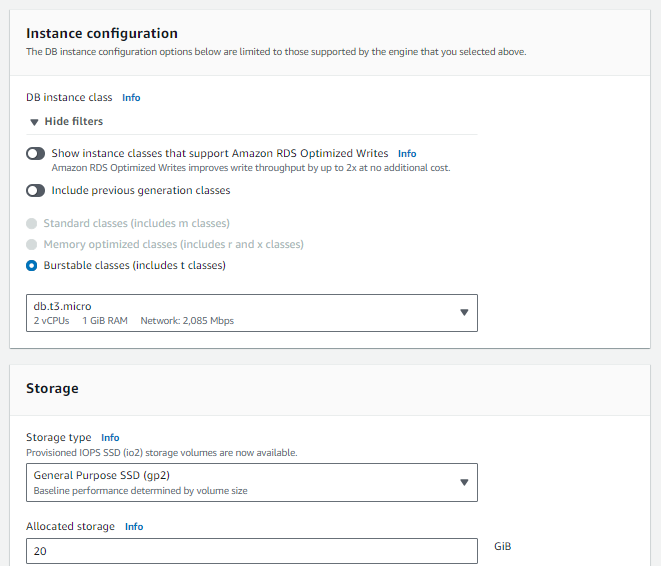
Choose the "Free tier" template for "DB instance class".
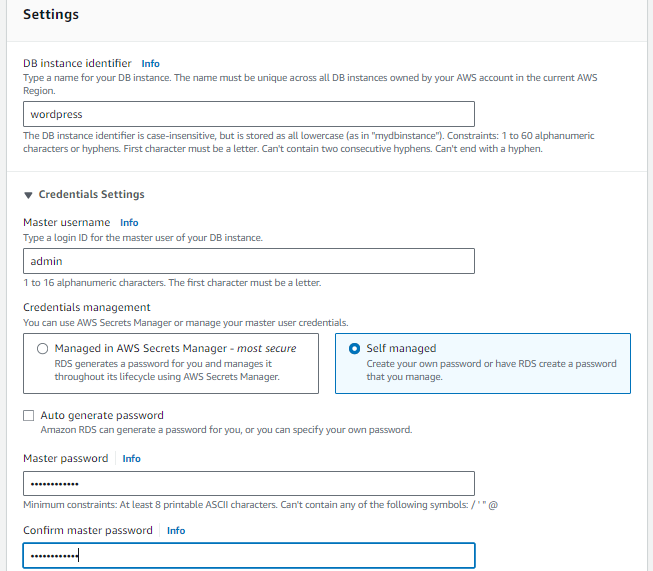
Enter a unique name for the "DB instance identifier".
Set the "Master username" and "Master password" for the database.
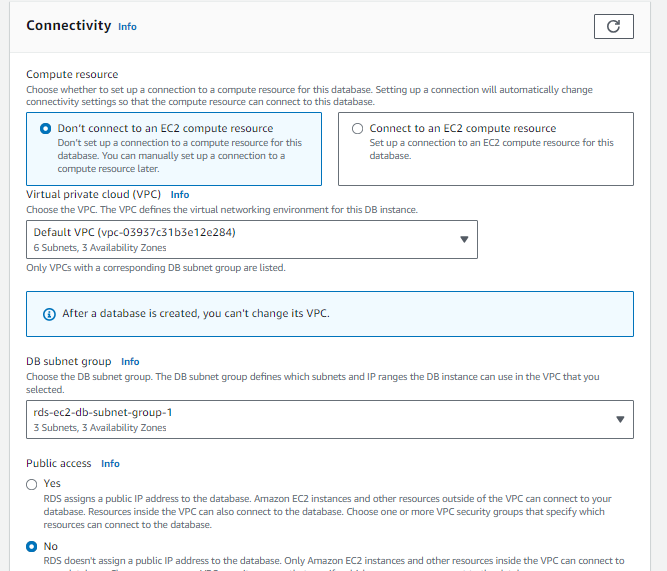
Set the "Virtual Private Cloud (VPC)" and "Subnet group" to create the instance in. Leave the other settings at their default values.
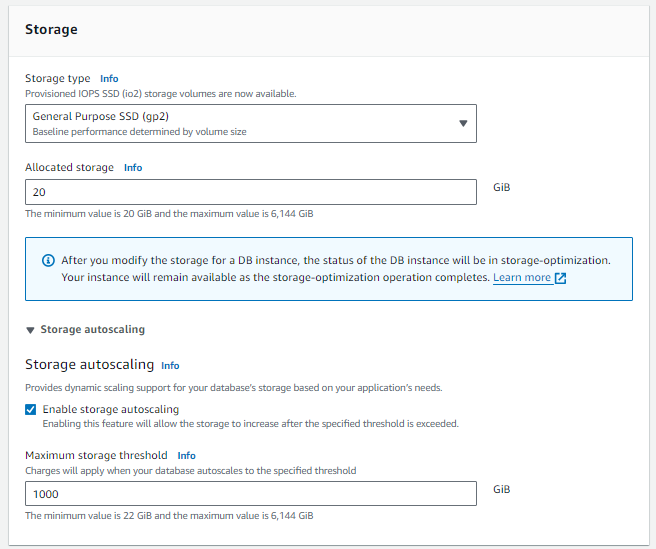
Choose 'Default VPC'
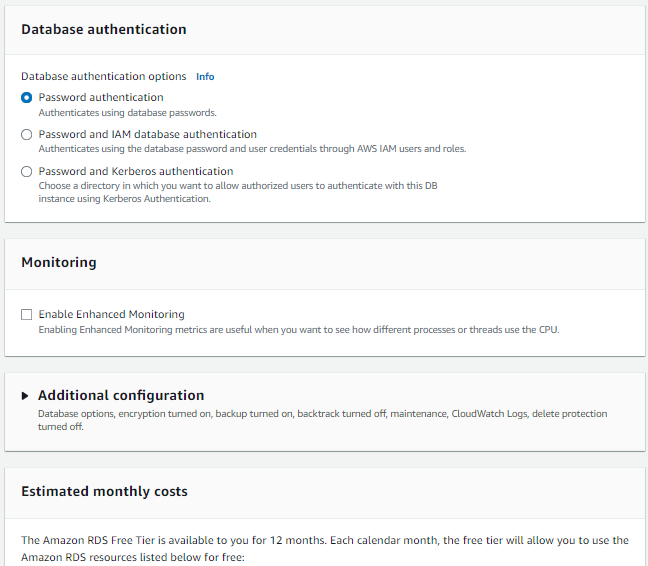
Click on "create database"
Database is created.

To configure this WordPress site, you will create the following resources in AWS:
An Amazon EC2 instance to install and host the WordPress application.
Go to the Amazon EC2 console., Click "Launch Instance", Choose a Linux AMI.
Choose an instance type, such as t2.micro, Choose a VPC and subnet.
Configure security group rules to allow inbound traffic on the appropriate port for the type of database you are using (e.g. port 3306 for MySQL)..
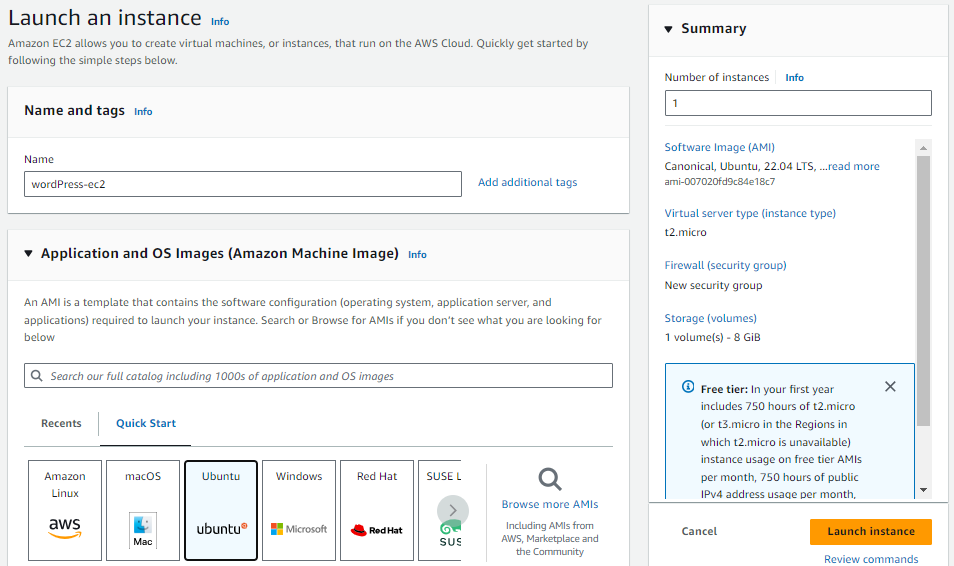
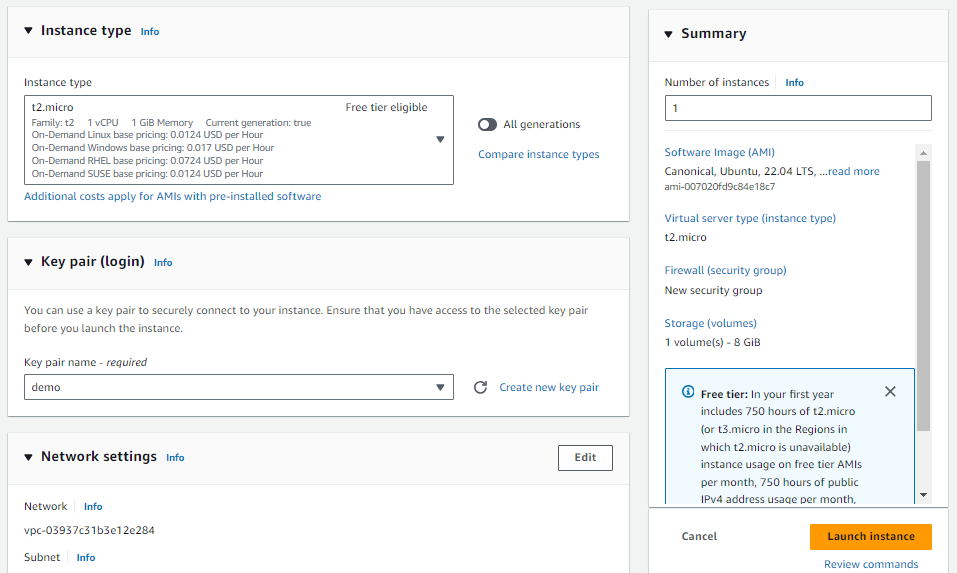
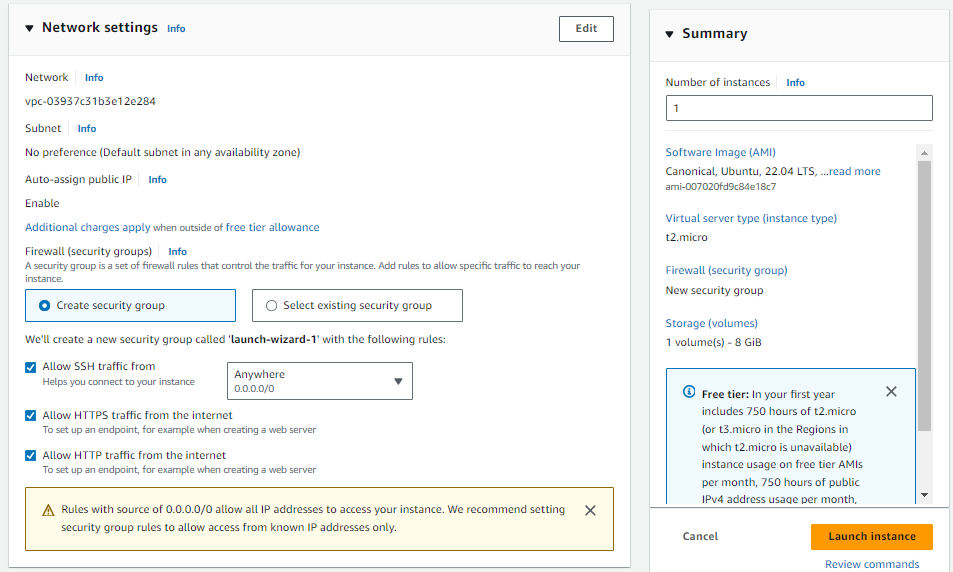

An Amazon RDS for MySQL database to store your WordPress data.
Choose the MySQL database you created, go to the Connectivity & security tab in the display and choose the security group listed in VPC security groups. The console will take you to the security group configured for your database.
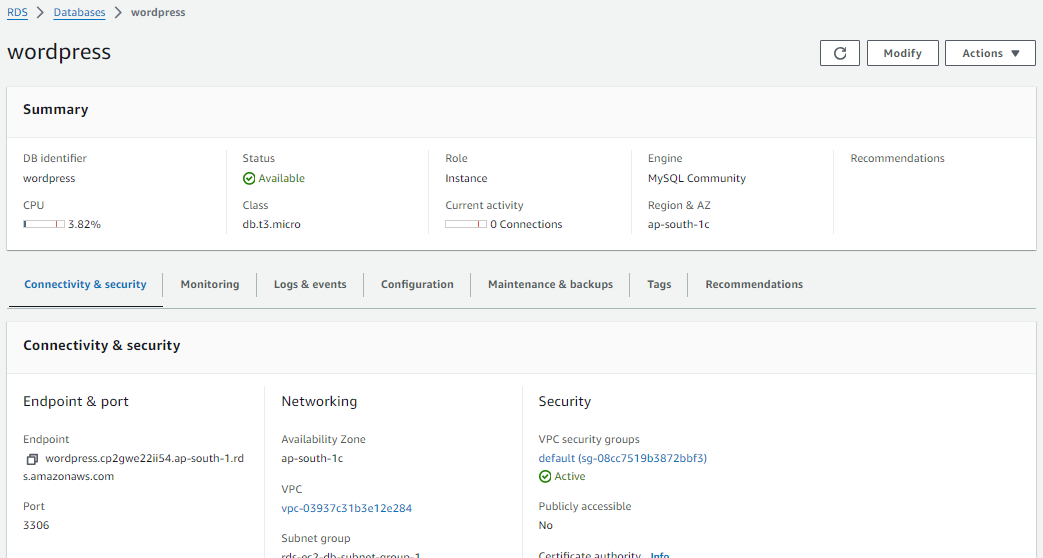
Select the Inbound rules tab, then choose the Edit inbound rules button to change the rules for your security group.
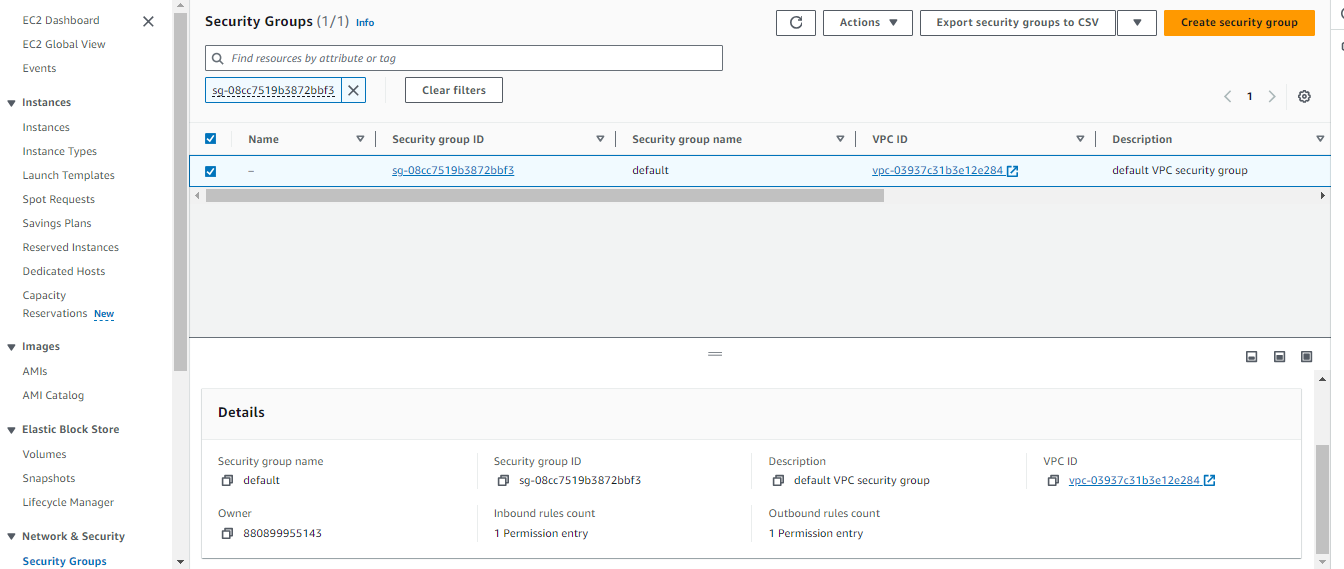
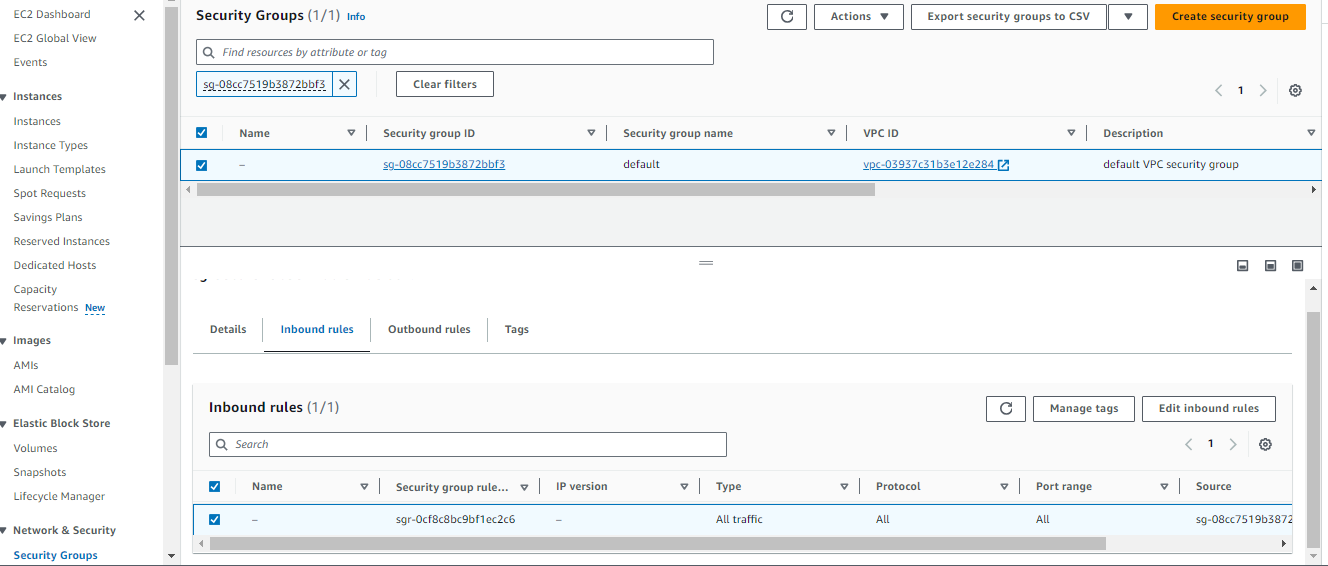
Change the Type property to MYSQL/Aurora, which will update the Protocol and Port range to the proper values.
Choose the security group that you used for your EC2 instance.

SSH into your EC2 instance.
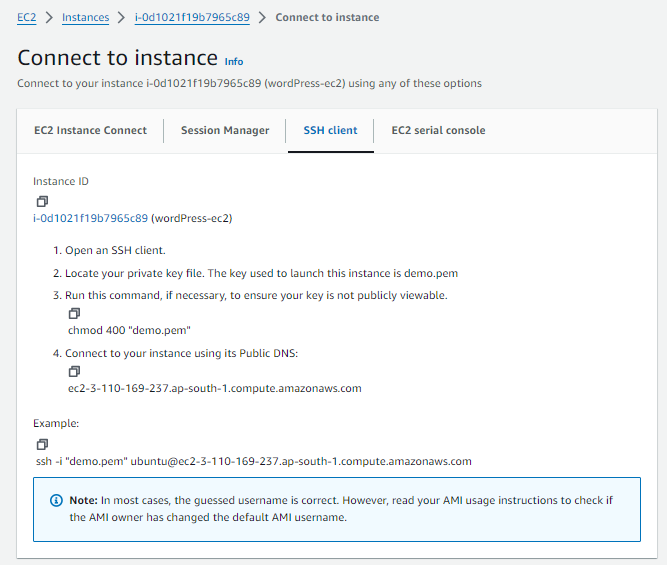
run the following command in your terminal to install a MySQL client to interact with the database.
sudo apt update
sudo apt install mysql-client -y
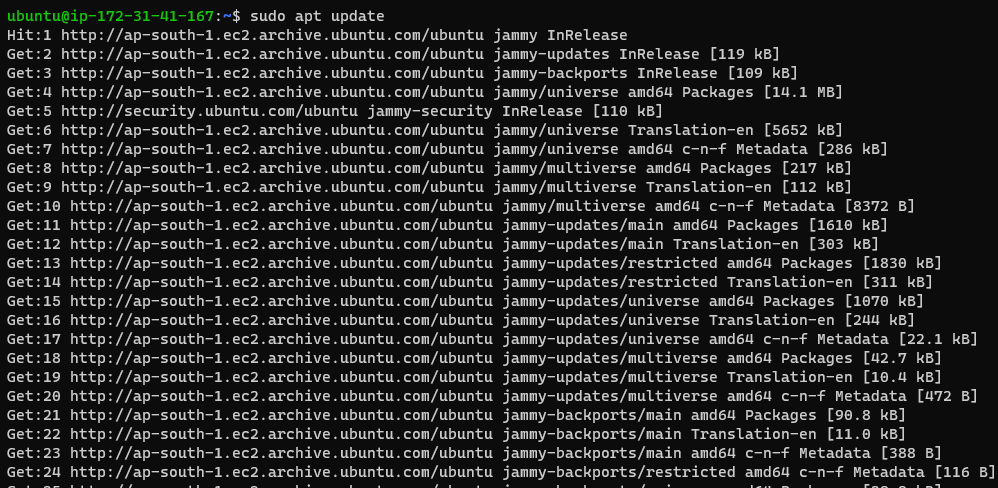
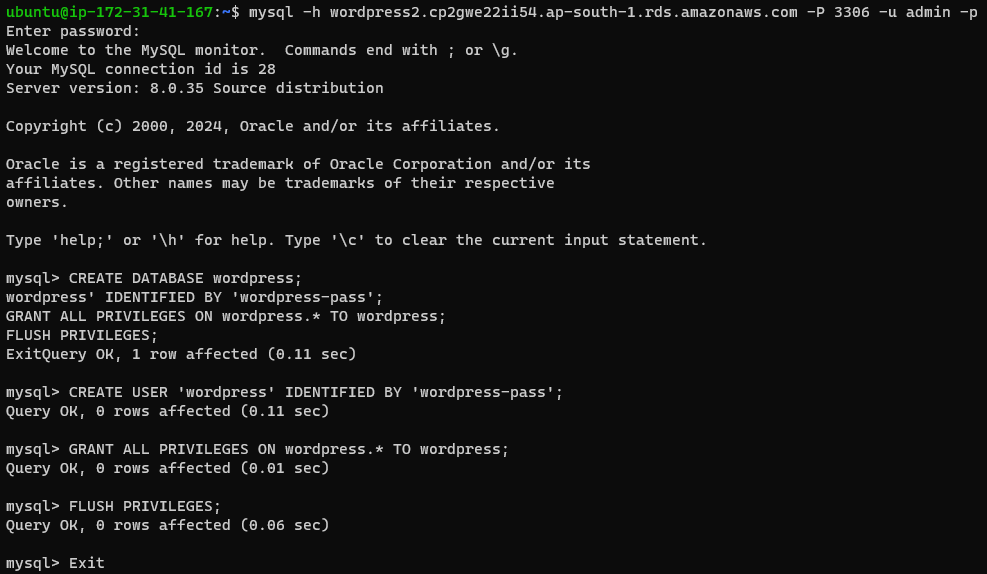
Run the following command in your terminal to connect to your MySQL database. Replace “<user>” and “<password>” with the master username and password you configured when creating your Amazon RDS database. -h is host which is RDS database endpoint.
mysql -h <rds-database-endpoint> -P <port-no> -u <user> -p

Finally, create a database user for your WordPress application and give the user permission to access the wordpress database.
Run the following commands in your terminal:
CREATE DATABASE wordpress;
CREATE USER 'wordpress' IDENTIFIED BY 'wordpress-pass';
GRANT ALL PRIVILEGES ON wordpress.* TO wordpress;
FLUSH PRIVILEGES;
Exit
you should use a better password than wordpress-pass to secure your database.
To run WordPress, you need to run a web server on your EC2 instance.
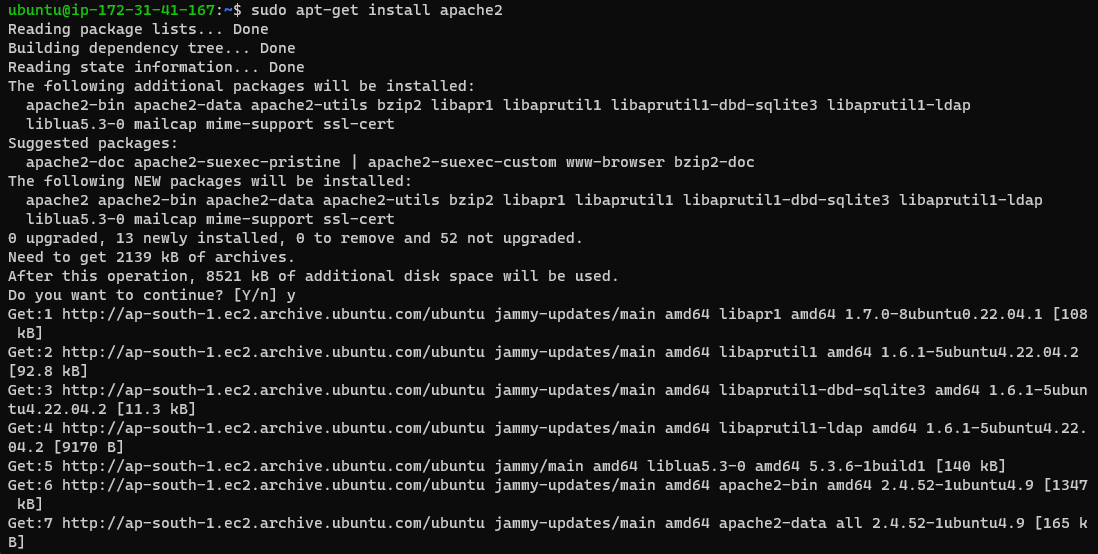
To install Apache on your EC2 instance, run the following command in your terminal:
sudo apt-get install apache2
To start the Apache web server, run the following command in your terminal:
systemctl restart apache2
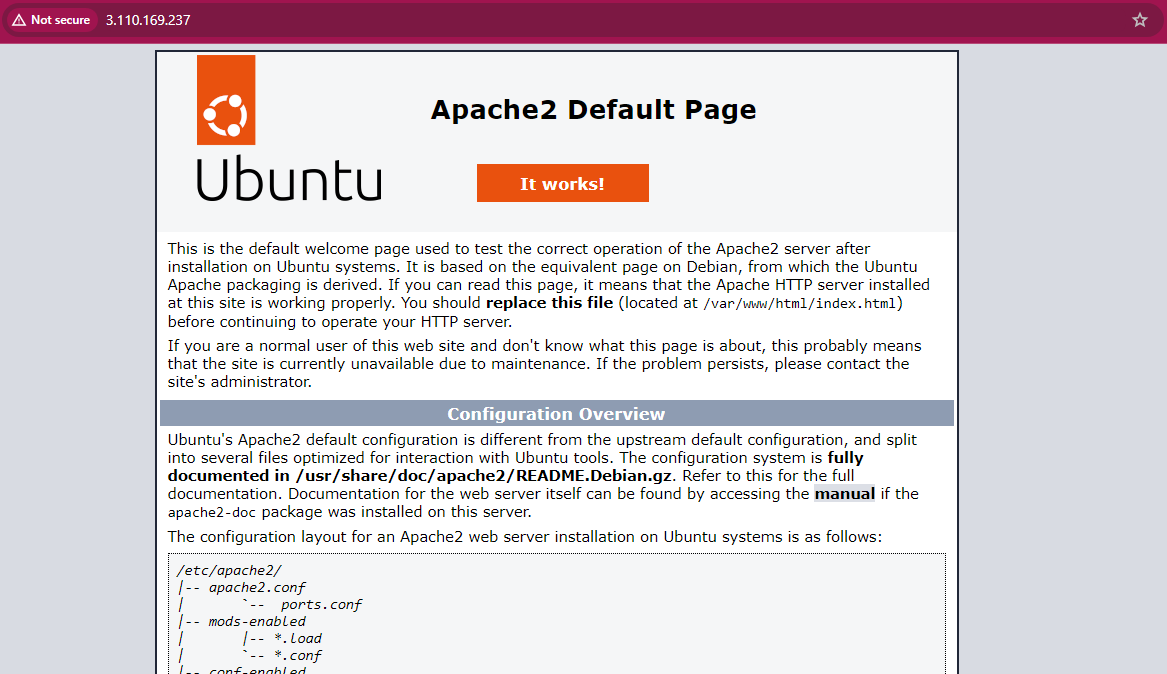
You can see that your Apache web server is working by browsing public-ip of your ec2 instance.
Setup the server and post your new Wordpress app.
First, download and uncompressed the software by running the following commands in your terminal:
wget https://wordpress.org/latest.tar.gz
tar -xzf latest.tar.gz

you will see a tar file and a directory called wordpress with the uncompressed contents using ls command.

Change the directory to the wordpress directory and create a copy of the default config file using the following commands
open the wp-config.php file
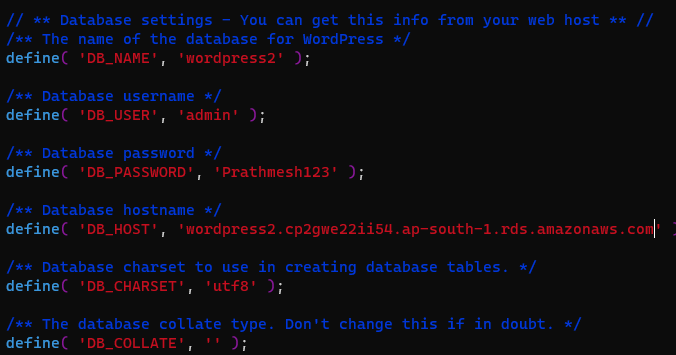
DB_NAME: your RDS database name
DB_USER: The name of the user you created in the database in the previous steps
DB_PASSWORD: The password for the user you created in the previous steps
DB_HOST: The hostname of the database means your database endpoint
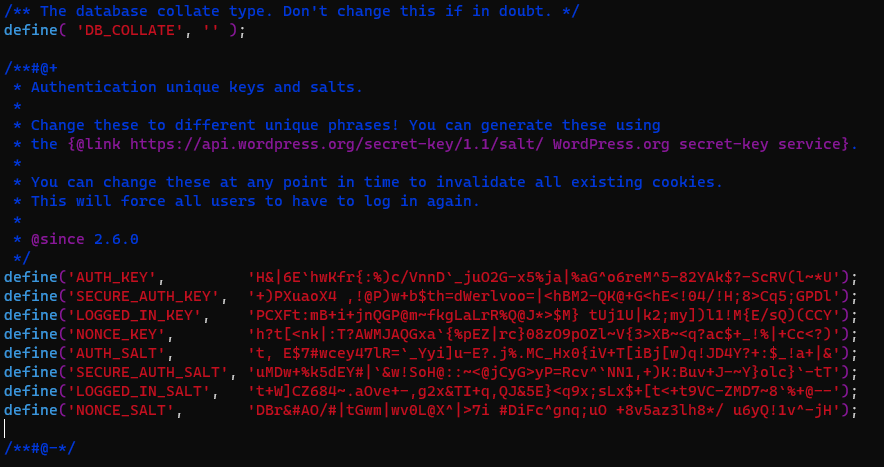
The second configuration section you need to configure is the Authentication Unique Keys and Salts.
You can replace the entire content in that section with the below content:
define('AUTH_KEY',         'H&|6E`hwKfr{:%)c/VnnD`_juO2G-x5%ja|%aG^o6reM^5-82YAk$?-ScRV(l~*U');
define('SECURE_AUTH_KEY',  '+)PXuaoX4 ,!@P)w+b$th=dWerlvoo=|<hBM2-QK@+G<hE<!04/!H;8>Cq5;GPDl');
define('LOGGED_IN_KEY',    'PCXFt:mB+i+jnQGP@m~fkgLaLrR%Q@J*>$M} tUj1U|k2;my])l1!M{E/sQ)(CCY');
define('NONCE_KEY',        'h?t[<nk|:T?AWMJAQGxa`{%pEZ|rc}08zO9pOZl~V{3>XB~<q?ac$+_!%|+Cc<?)');
define('AUTH_SALT',        't, E$7#wcey47lR=`_Yyi]u-E?.j%.MC_Hx0{iV+T[iBj[w)q!JD4Y?+:$_!a+|&');
define('SECURE_AUTH_SALT', 'uMDw+%k5dEY#|`&w!SoH@::~<@jCyG>yP=Rcv^`NN1,+)K:Buv+J-~Y}olc}`-tT');
define('LOGGED_IN_SALT',   't+W]CZ684~.aOve+-,g2x&TI+q,QJ&5E}<q9x;sLx$+[t<+t9VC-ZMD7~8`%+@--');
define('NONCE_SALT',       'DBr&#AO/#|tGwm|wv0L@X^|>7i #DiFc^gnq;uO +8v5az3lh8*/ u6yQ!1v^-jH');
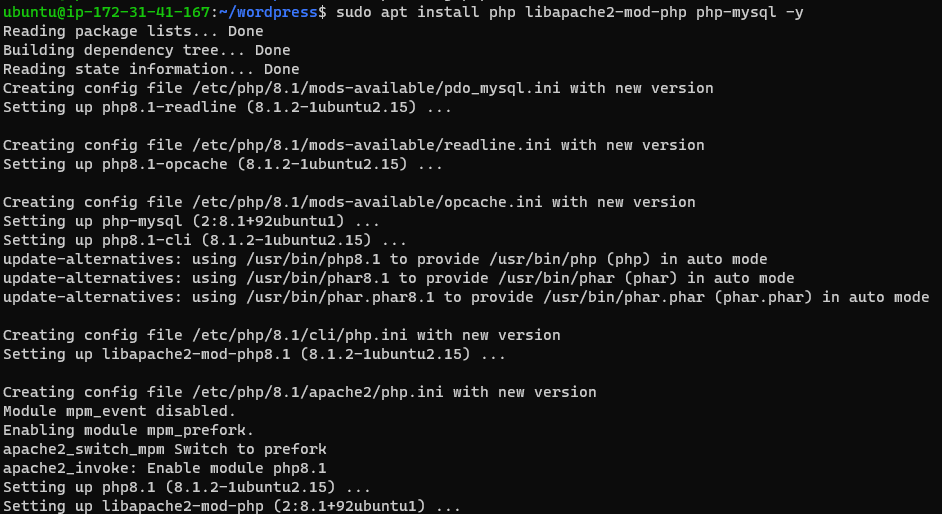
First, install the application dependencies you need for WordPress. In your terminal, run the following command.
sudo apt install php libapache2-mod-php php-mysql -y
Copy your WordPress application files into the /var/www/html directory used by Apache.
sudo cp -r wordpress/* /var/www/html/

Finally, restart the Apache web server
systemctl restart apache2
Browse "ec2-public-ip/wp-admin/" you should see the WordPress welcome page.
I'm confident that this article will prove to be valuable, helping you discover new insights and learn something enriching .
thank you : )
Subscribe to my newsletter
Read articles from Prathmesh Vibhute directly inside your inbox. Subscribe to the newsletter, and don't miss out.
Written by
