Achieving High Availability with the Virtual Machine Scale Set.
 lolade ogundijo
Introduction
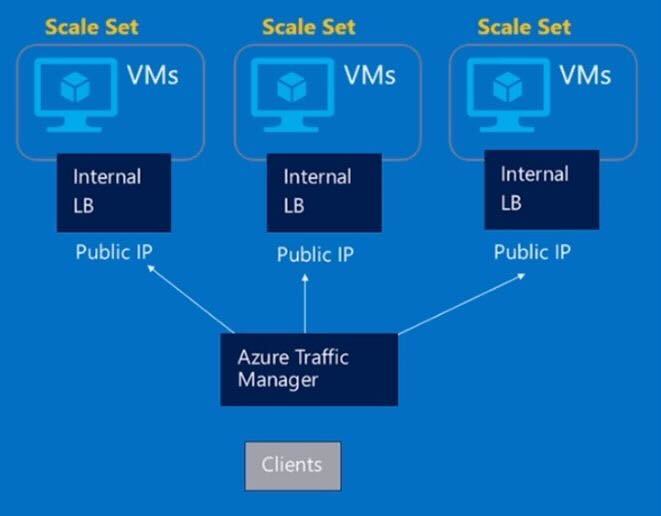
Virtual machine scale sets are a valuable tool for deploying and managing a group of virtual machines in Azure. They provide the ability to easily scale up or down based on demand, ensuring high availability and performance for your applications. Similarly, each virtual machine in a network can be protected, down to the application level.
Furthermore, before we proceed, we will be discussing some important terminologies, like load balancing, orchestration mode, and the difference between scaling mode and scale-in policy configuration.
Load Balancer
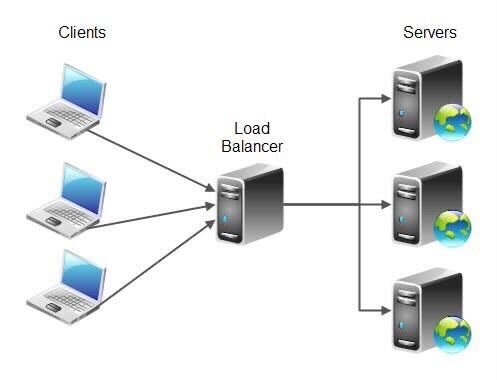
A load balancer is a central point of access in distributed systems that helps evenly distribute incoming network traffic across multiple servers or virtual machines. This distribution ensures that no single server or virtual machine is overwhelmed with traffic, leading to better performance, scalability, and reliability of the system. To read more about load balancers, check out Azure load balancer.
Orchestration mode
Orchestration mode is the capability of a cloud computing system to manage and coordinate multiple tasks and resources in an automated and efficient manner. In Azure, we have uniform orchestration and flexible orchestration.
a. Uniform orchestration: This type of orchestration mode involves a centralized control system that manages and coordinates all the tasks and resources in the cloud environment. Uniform orchestration has a high availability guarantee for fewer than 100 instances and identical virtual machine images; it is also called traditional orchestration.
b. Flexible orchestration: This type of orchestration mode allows for decentralized control, with individual components or services within the cloud environment managing and coordinating their own tasks and resources while still being able to communicate and collaborate with other components as needed. Flexible orchestration has a high availability guarantee for up to 1000 instances and identical or multiple virtual machine images; it is also called new orchestration.
Difference between scaling mode and scale-in policy configuration
Scaling mode and scale-in policy configuration are two key aspects of managing scaling activities in a cloud computing environment. Scaling mode refers to the approach or strategy used to add resources to a system in order to handle an increased workload or demand. This can include vertical scaling, where resources are added to existing instances (such as increasing the CPU or memory of an instance), or horizontal scaling, where additional instances are added to distribute the workload. On the other hand, scale-in policy configuration is the process of defining rules and criteria for removing or reducing resources from a system when the workload decreases. This can include criteria such as minimum CPU utilization, maximum idle time, or a decrease in network traffic.
Now that we have discussed the important terms, let’s get started on how to create virtual machine-scale sets in Azure. As a prerequisite, if you do not have a subscription, go to the Azure portal to create a free account. Login into the Azure Console with your email and password to get started
CREATE YOUR VIRTUAL MACHINE SCALE SETS
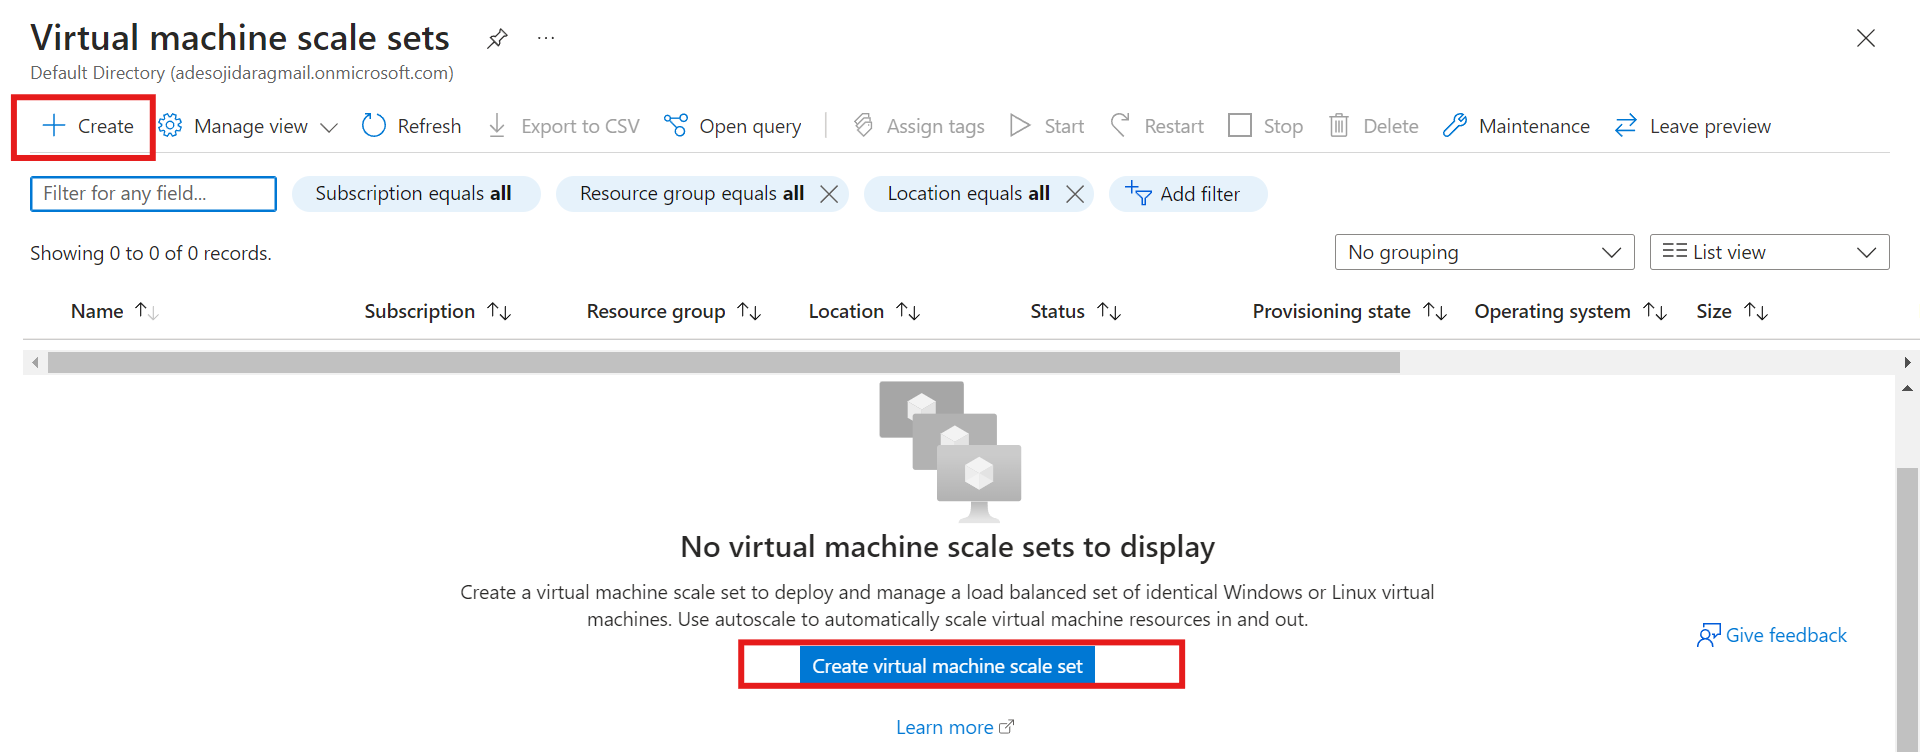
1. a. In the search bar, type "Virtual Machine Scale Set."
b. From the search results, select "Virtual Machine Scale Set" from the list of resources shown
c. Click on the "Create" button
a. You will be directed to the "Basics" page.
b. In the project details category, choose your subscription and your existing resource group or create a new one.

a. In the scale set details, provide a name for your virtual machine scale set.
b. Select the region where you want your virtual machine to be located.
c. Note: For high availability, select Zones 1, 2, and 3. For example, if there is a downtime in Zone 1, the other virtual machines can run in the other zones without disruption.

a. For the orchestration mode, choose "uniform." This means that when a new instance is spun up, the configuration will automatically be the same as all the previous instances.
b. For the security type, click on the drop-down menu to select "trusted launch..." or any other one you want.

a. In scaling, choose "autoscaling." Your VMSS will automatically adjust the number of resources allocated to an application or service based on its current workload or demand
b. Then click on "configure."

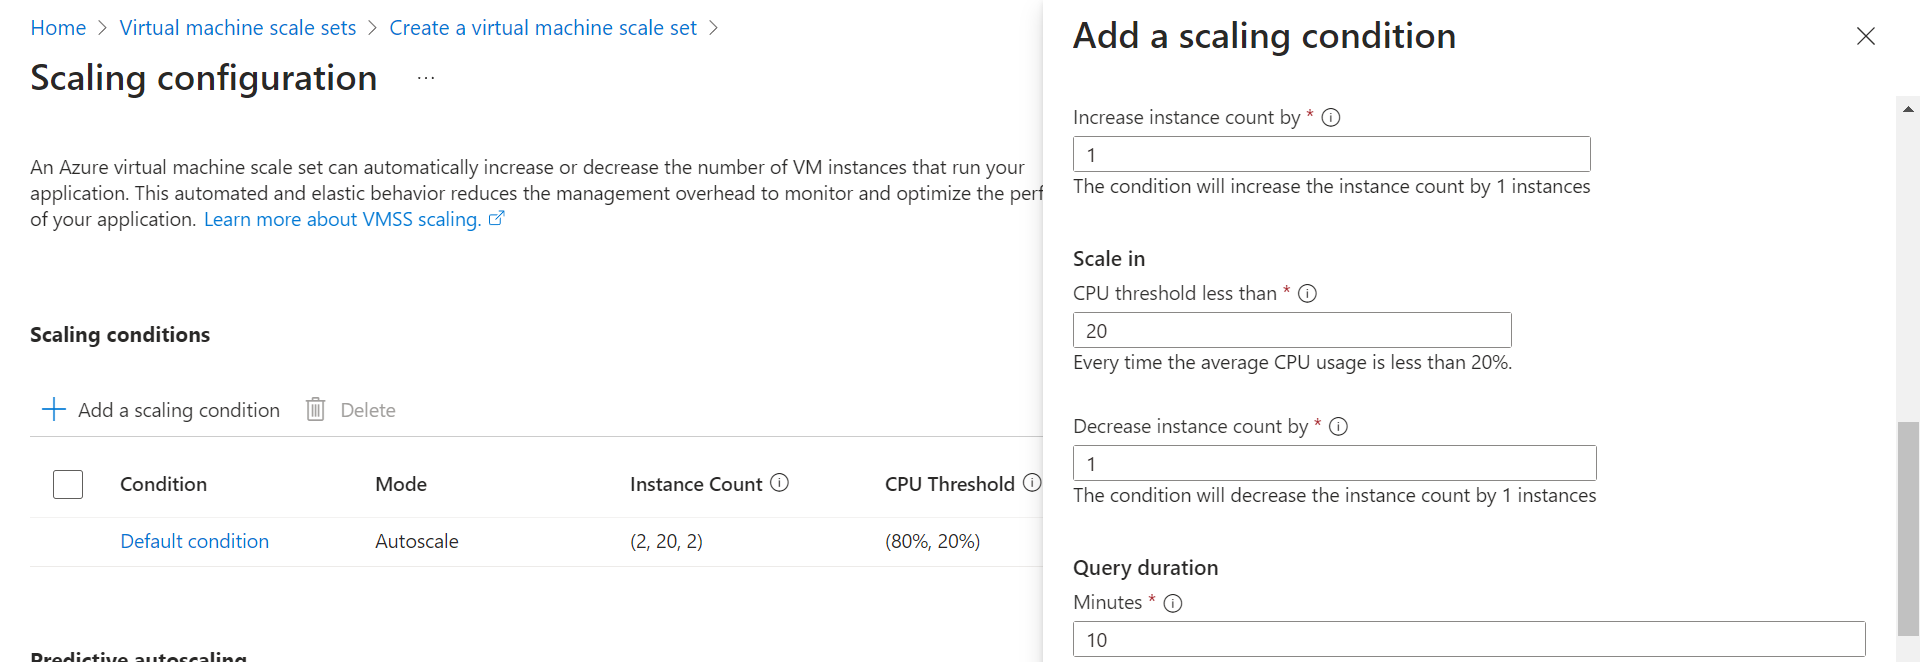
a. In the scaling configuration, you can click on the pencil icon to edit the configuration based on your needs or leave it as default.

a. Initial count means the number of VMs that will be spun up when your VMSS is created.
b. Minimum limit means the minimum number of VMs you will have when scaling down is happening.
c. Maximum limit means the maximum number of VMs you will have when scaling up is happening.
d. Then choose the percentage you want your scale out to happen, the same for scale in, and the number of instance(s) to add or remove.
Then save your configuration.
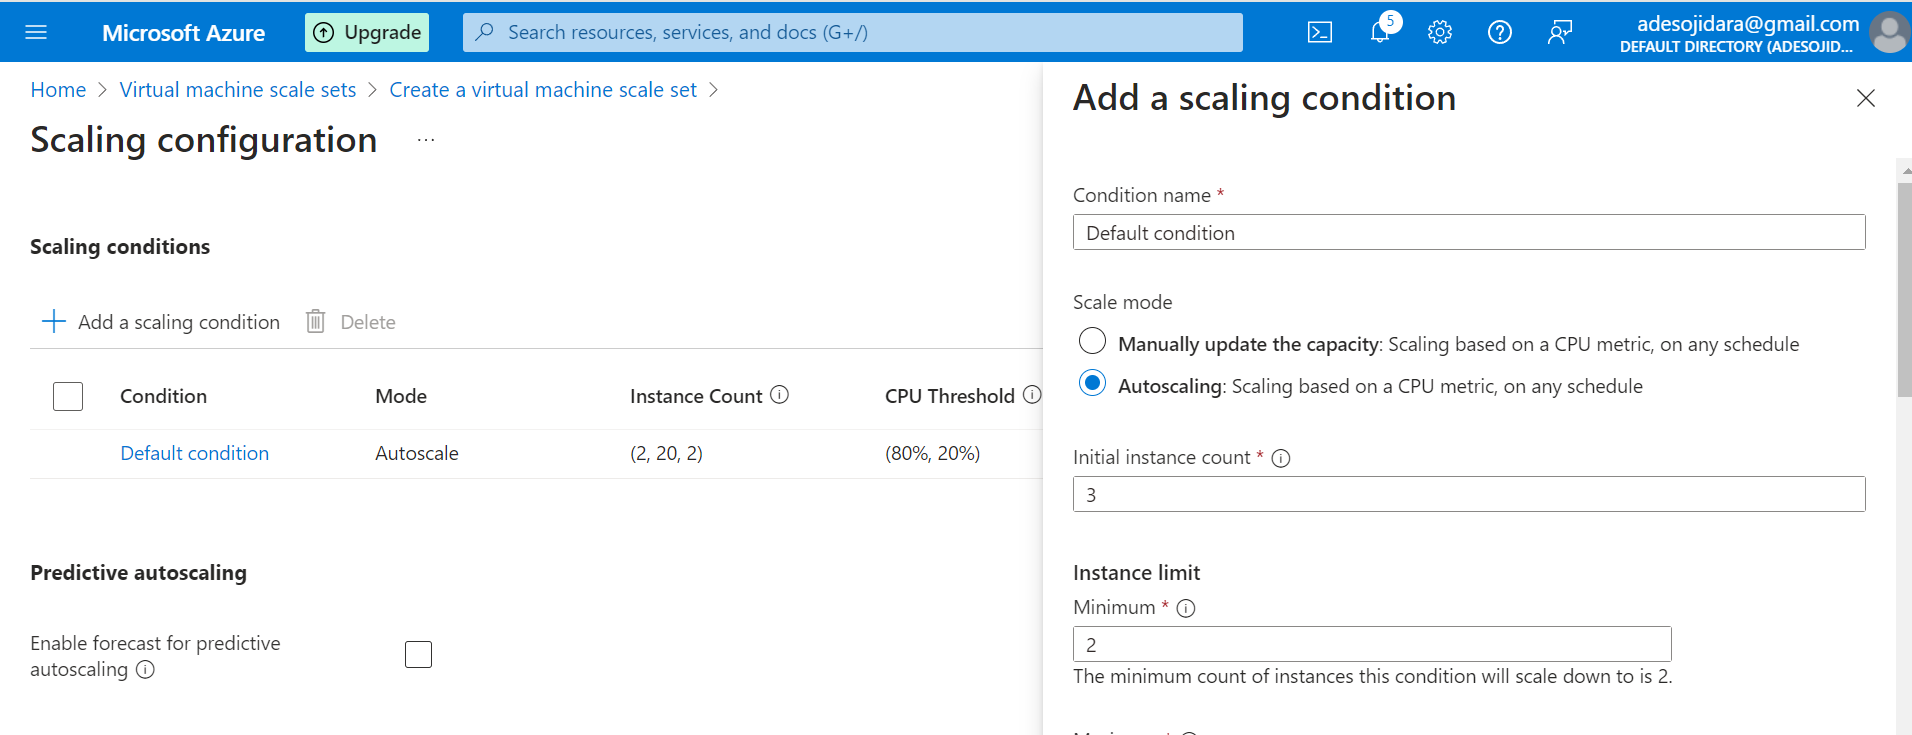
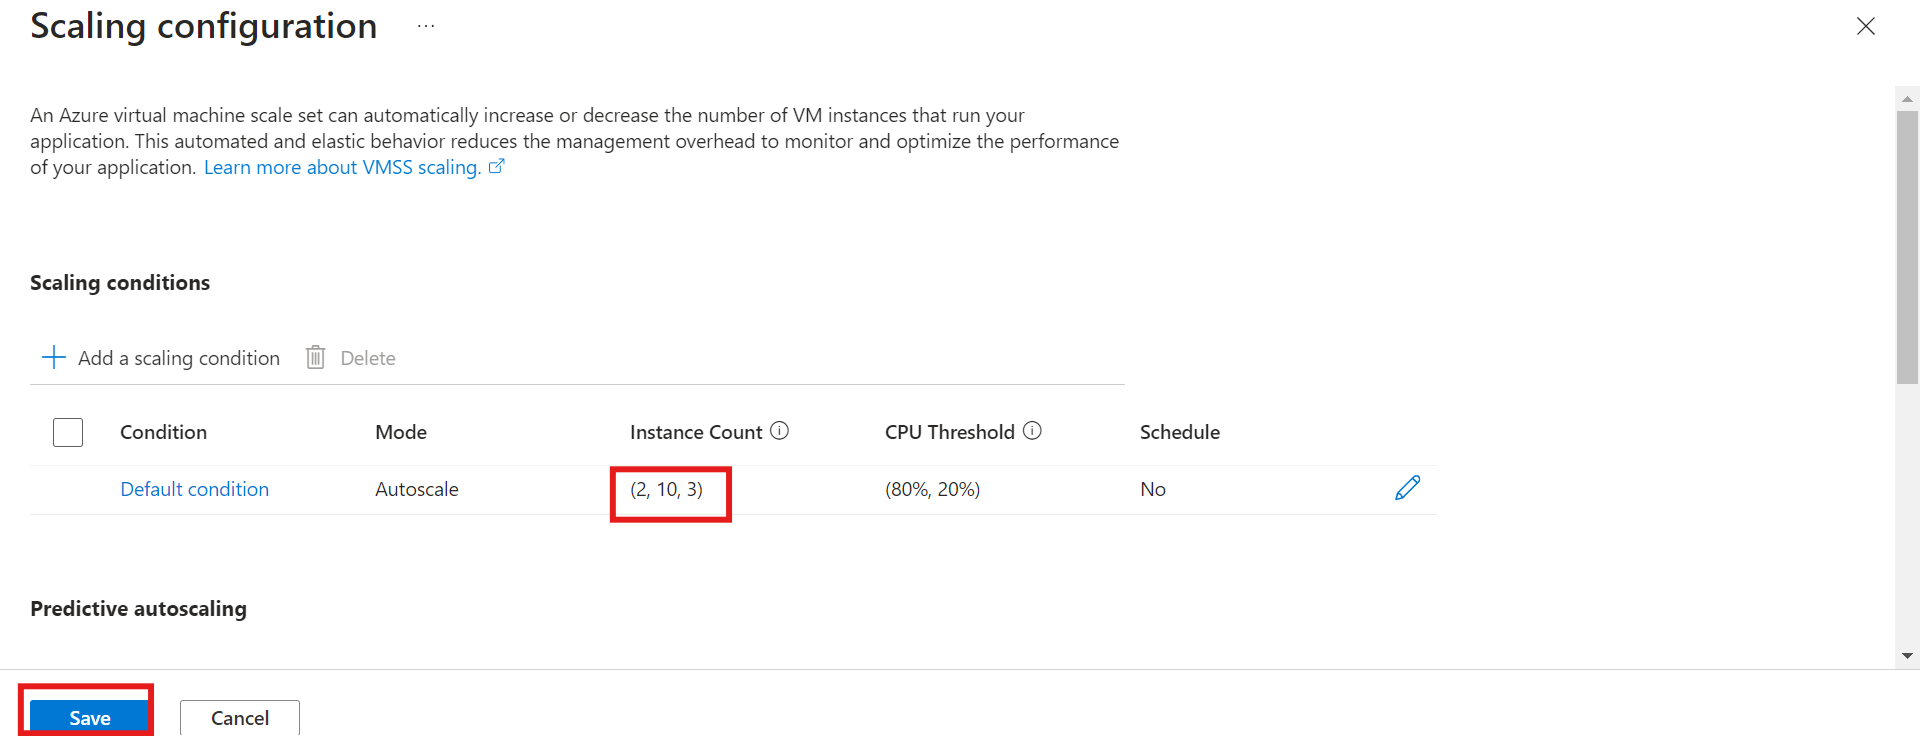
Note: This means my initial instance count is 3, my minimum limit is 2, and my maximum limit is 10.
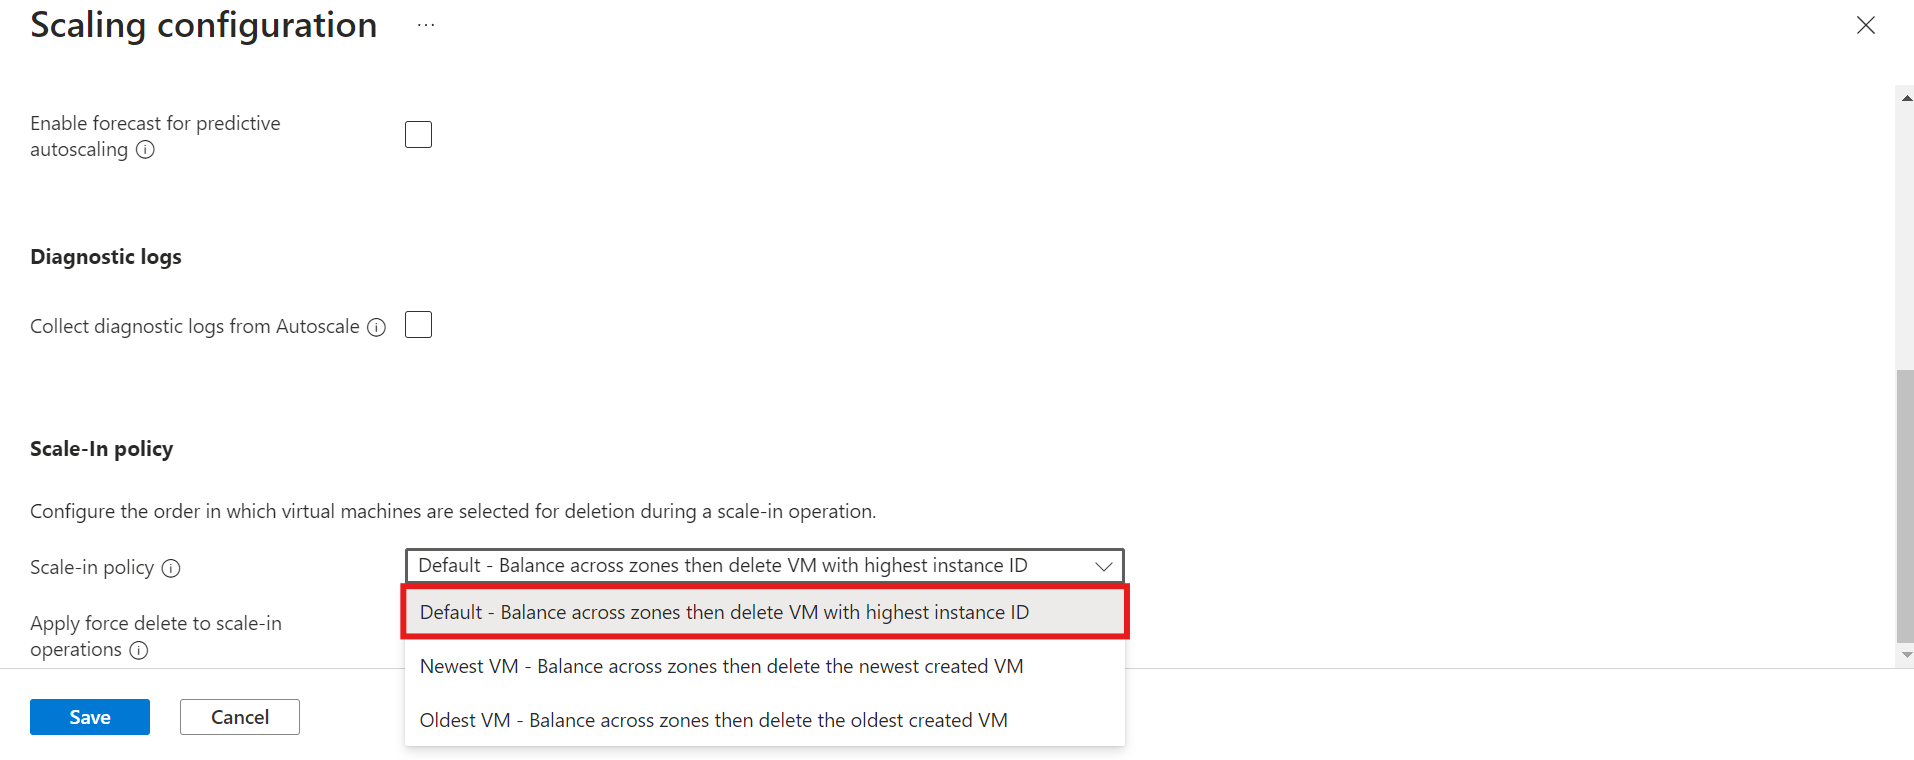
You can leave the scaling-in policy as a default.
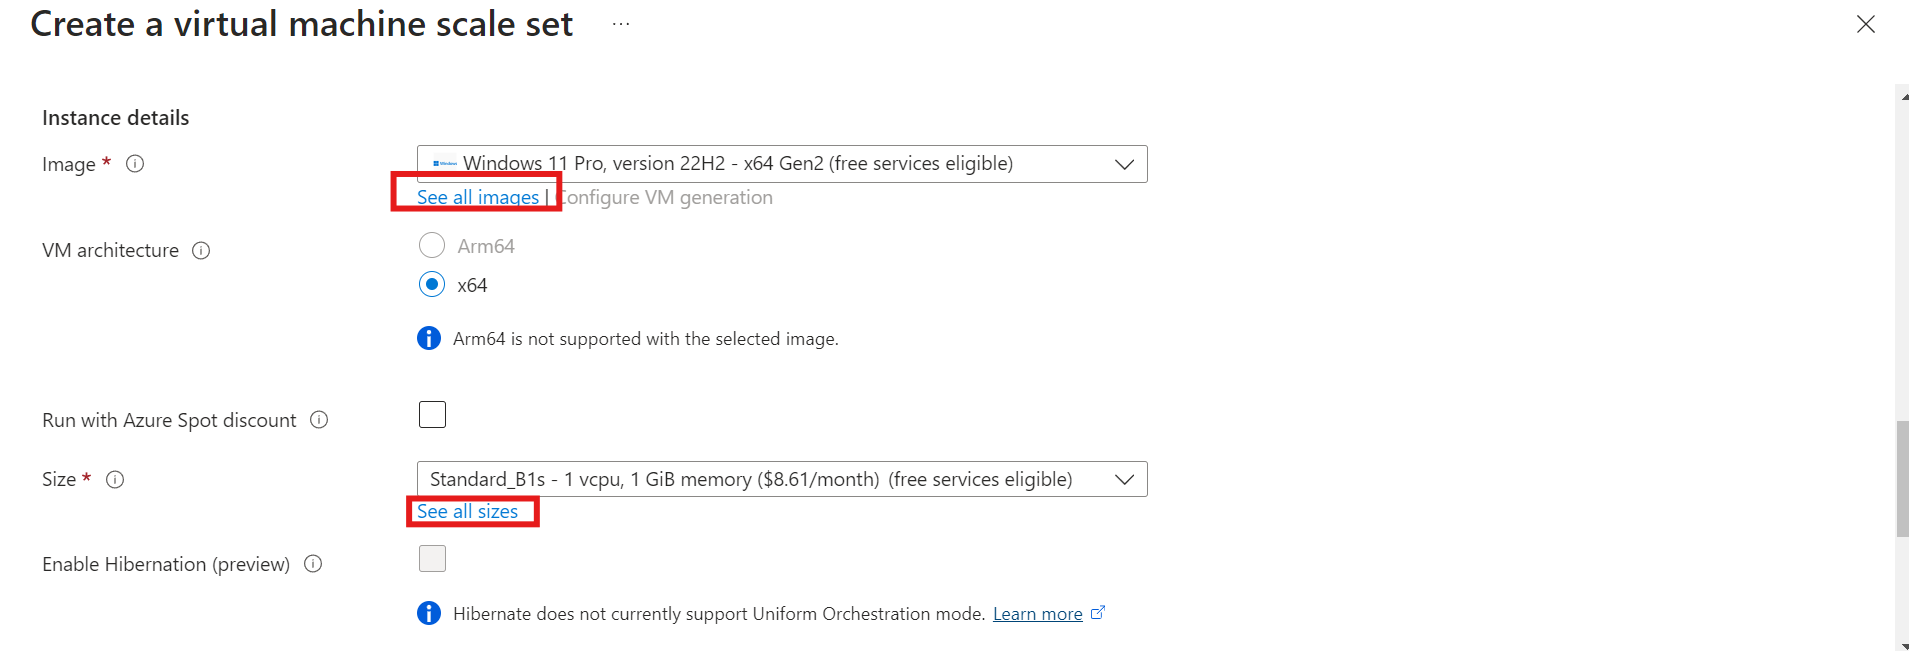
Proceed by clicking the drop-down to choose any image of your choice; in this case, I am using Windows 11 Pro. Then select the size you want.
a. In the administrator account section, provide a username and password.
b. Click on "Next: Spot>" to direct you to the Spot page.

Leave the Spot page in its default state. Click on "Next: Disks" to direct you to the Disk page.
On the Disk page, scroll down to "OS disk" and click on the drop-down to select your choice. Leave the other categories as default and move to the next page, which is the "networking" page
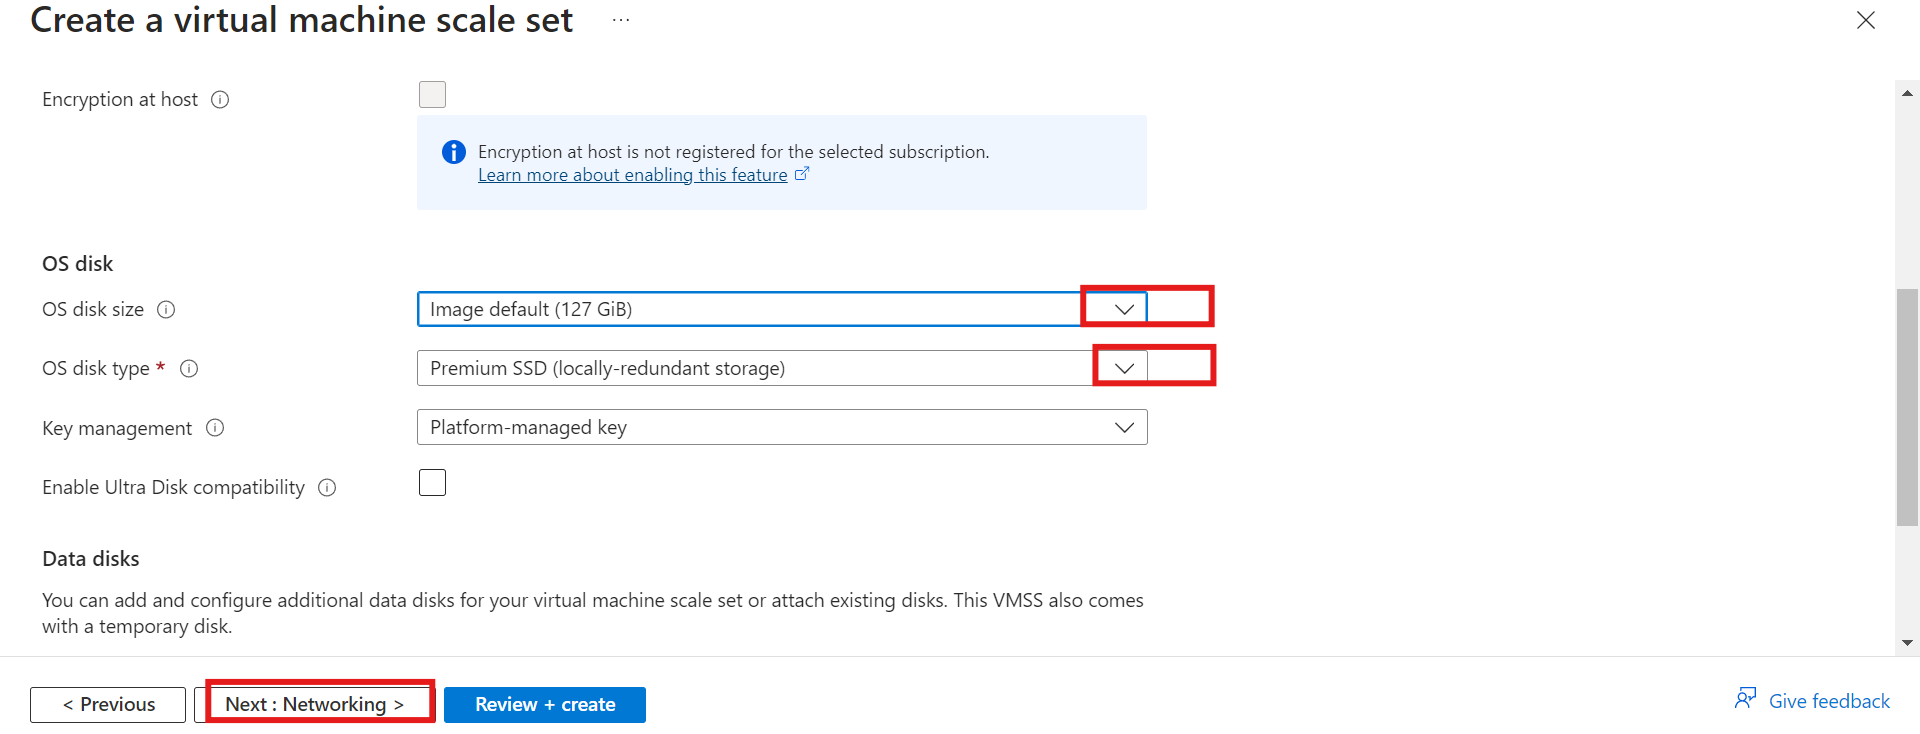
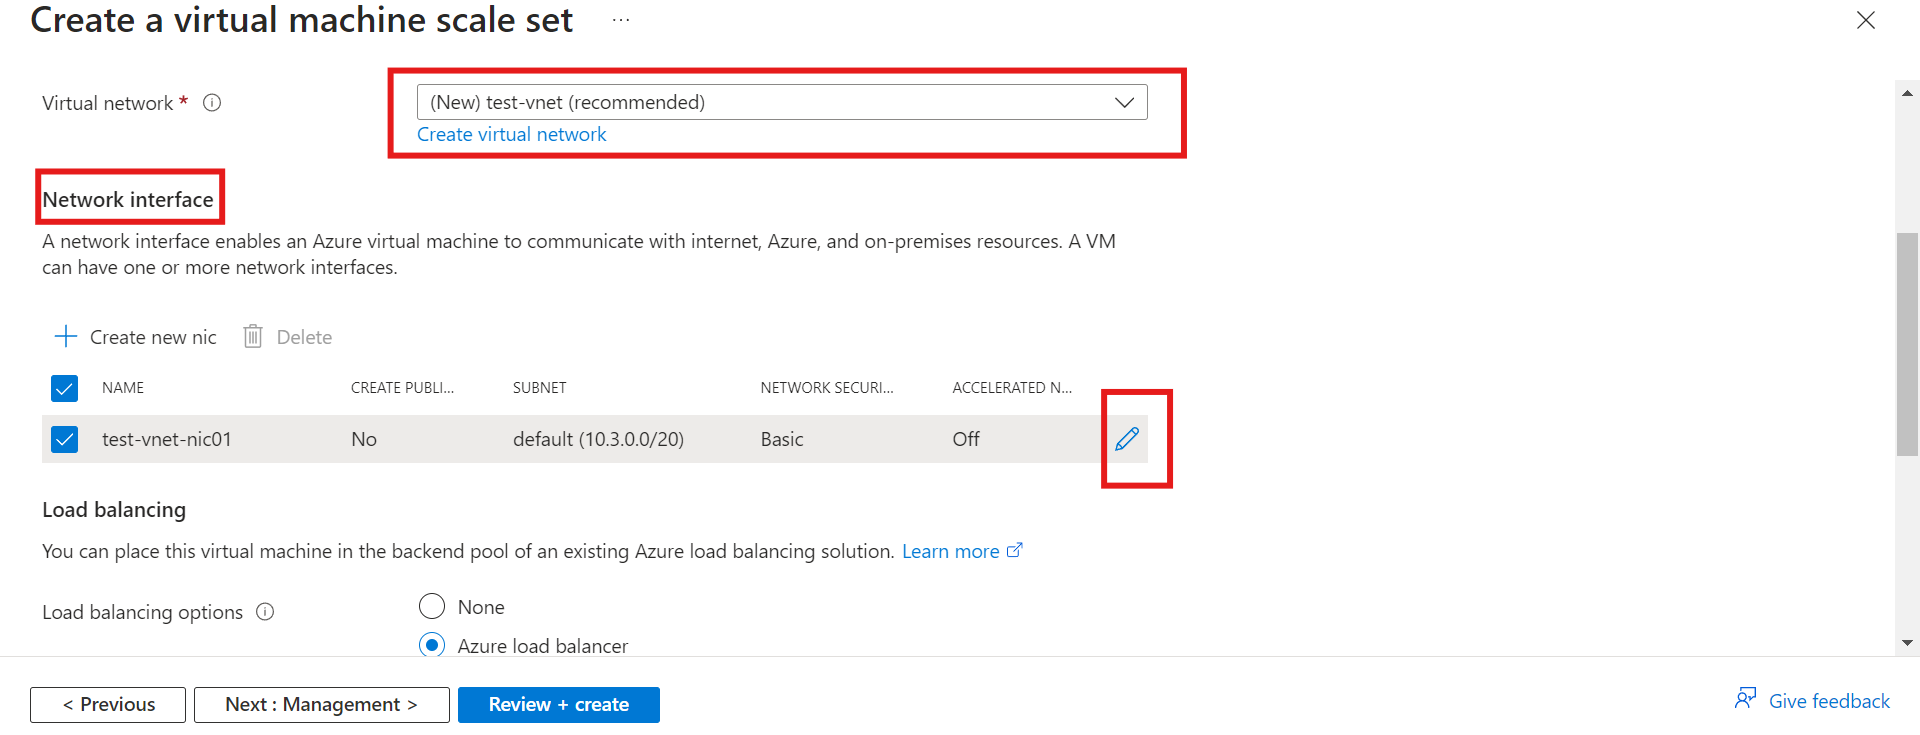
a. A virtual network has been created by default.
b. Scroll down to "Network Interface" and click on your default network to edit.
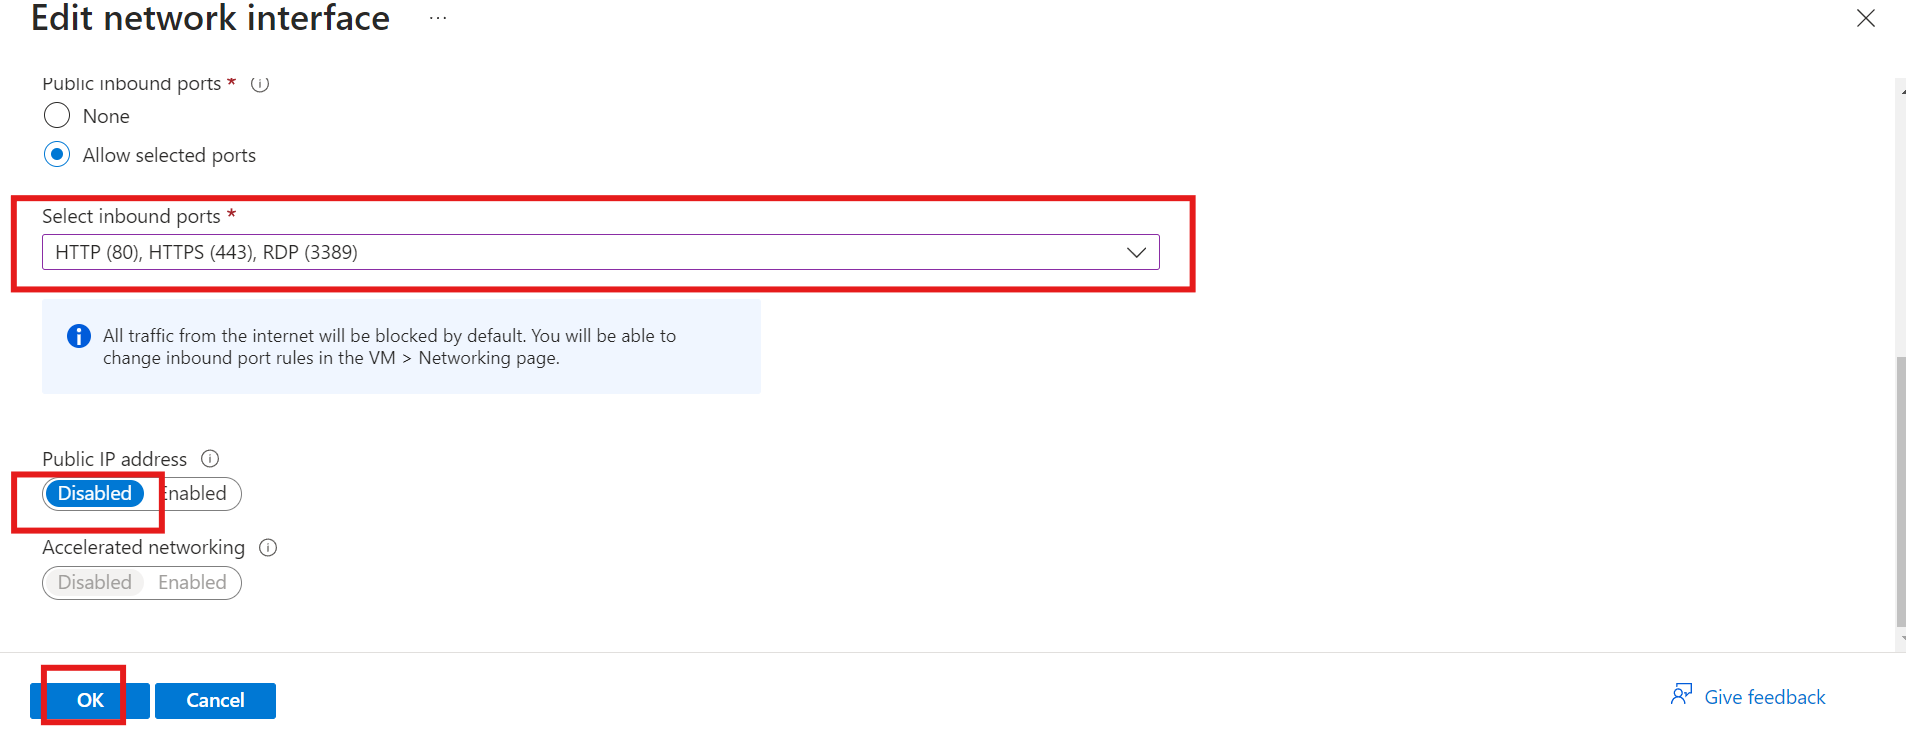
c. On the Edit network interface page, scroll down to "inbound port". Select allow for the "selected port."
d. Go to select inbound port, click on the drop-down, and select HTTP (80) for the web server, HTTPS (443) and RDP (3389) for remote desktop access
e. Scroll down to the public IP address to "Disable" your public IP address.
f. Click on "OK."
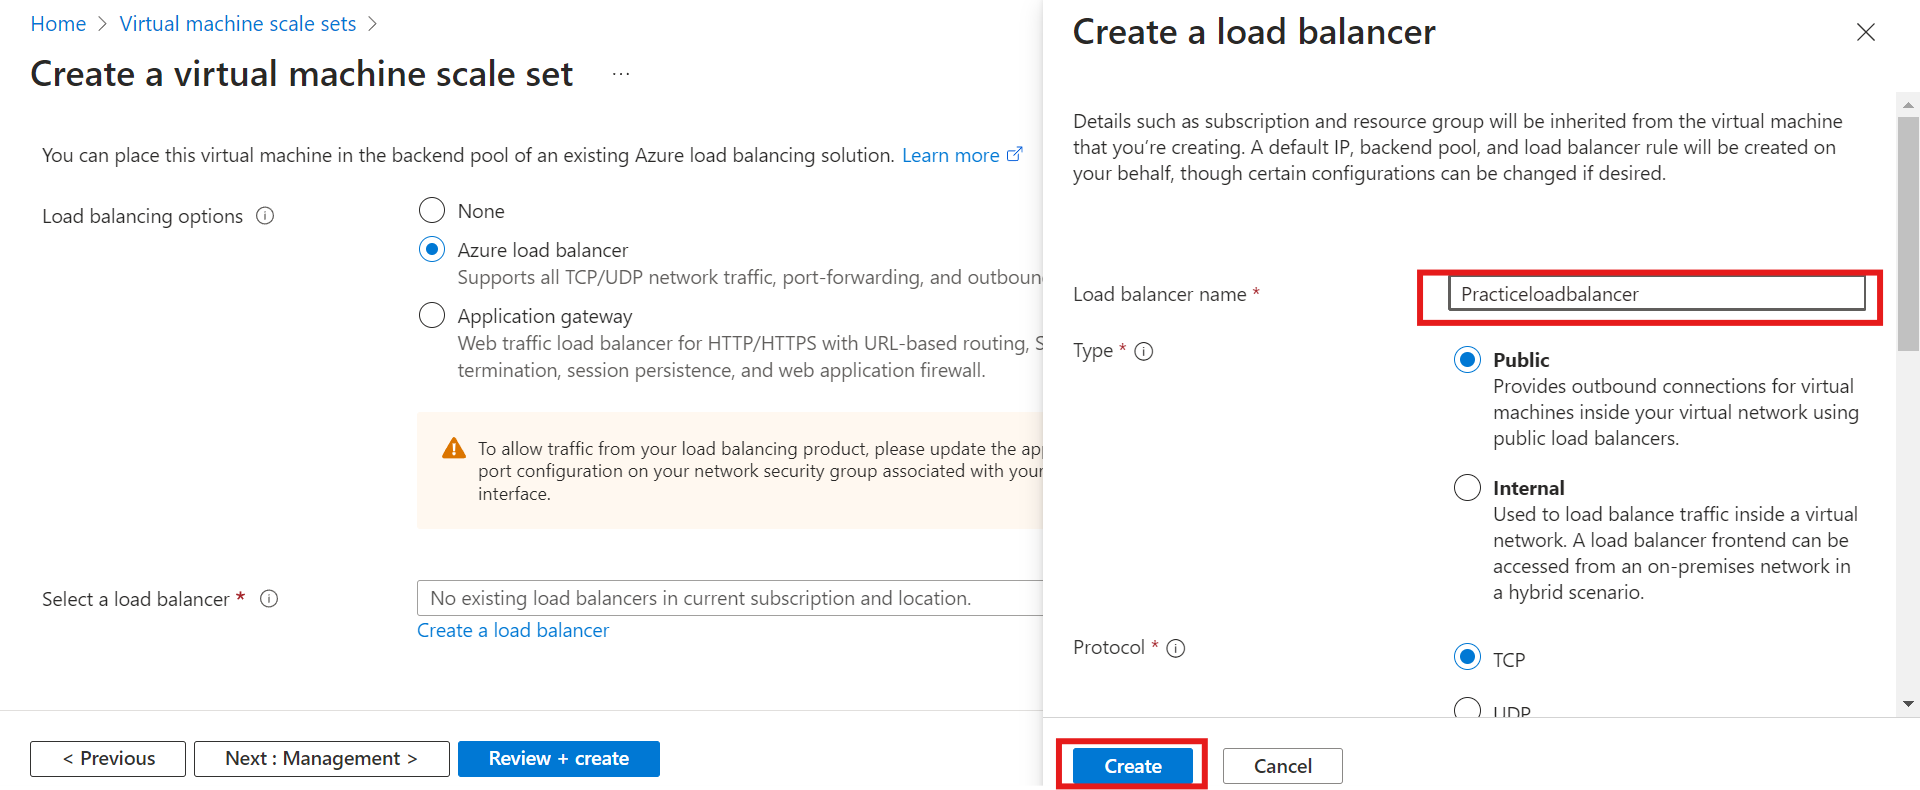
a. On your networking page, go to load balancing and select Azure load balancer as your load balancing option.
b. Create your load balancer by clicking on "Create a load balancer."

c. Give your load balancer a name and leave the other options in their default state. Click on "Create."
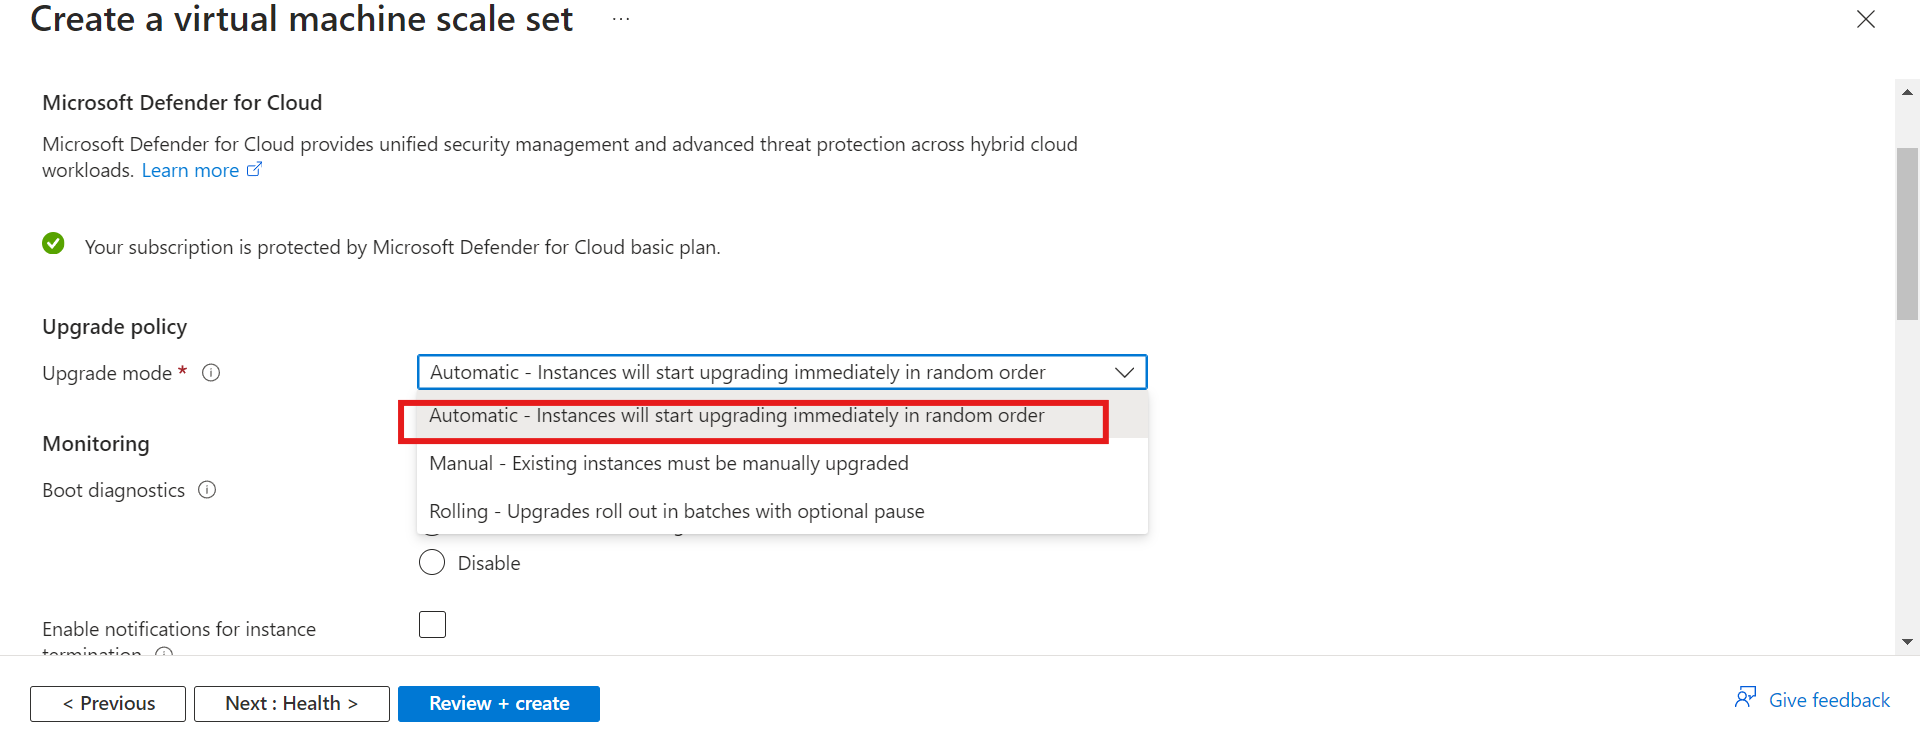
Click on "Next: Management." On Upgrade policy, click on the drop-down to select your upgrade mode; in this case, I chose automatic.
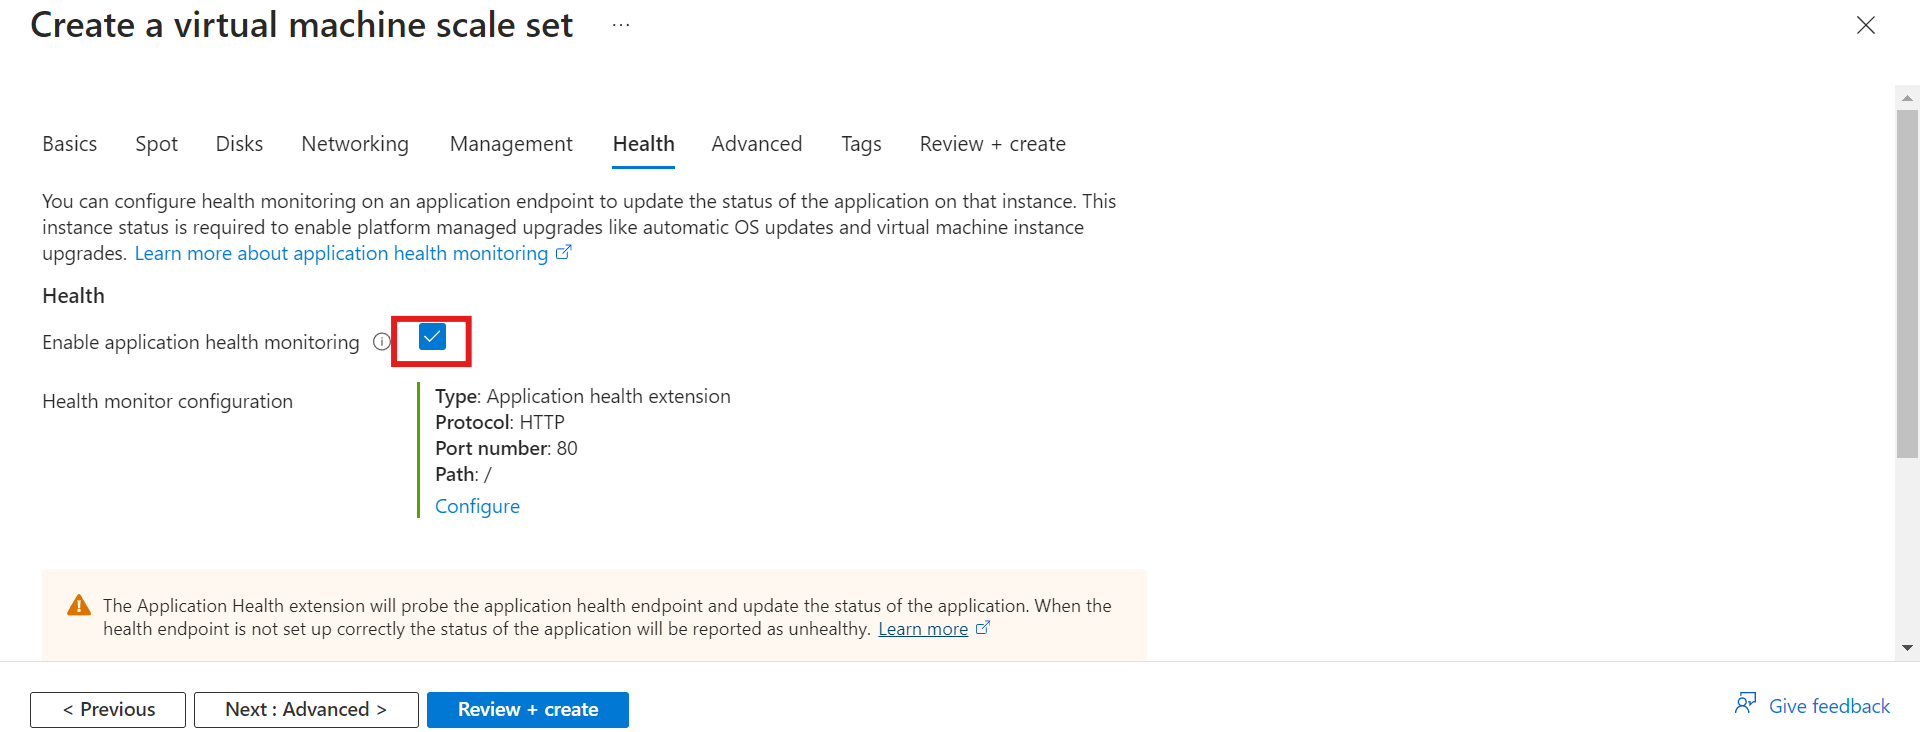
You can enable application health monitoring on the "Health" page.
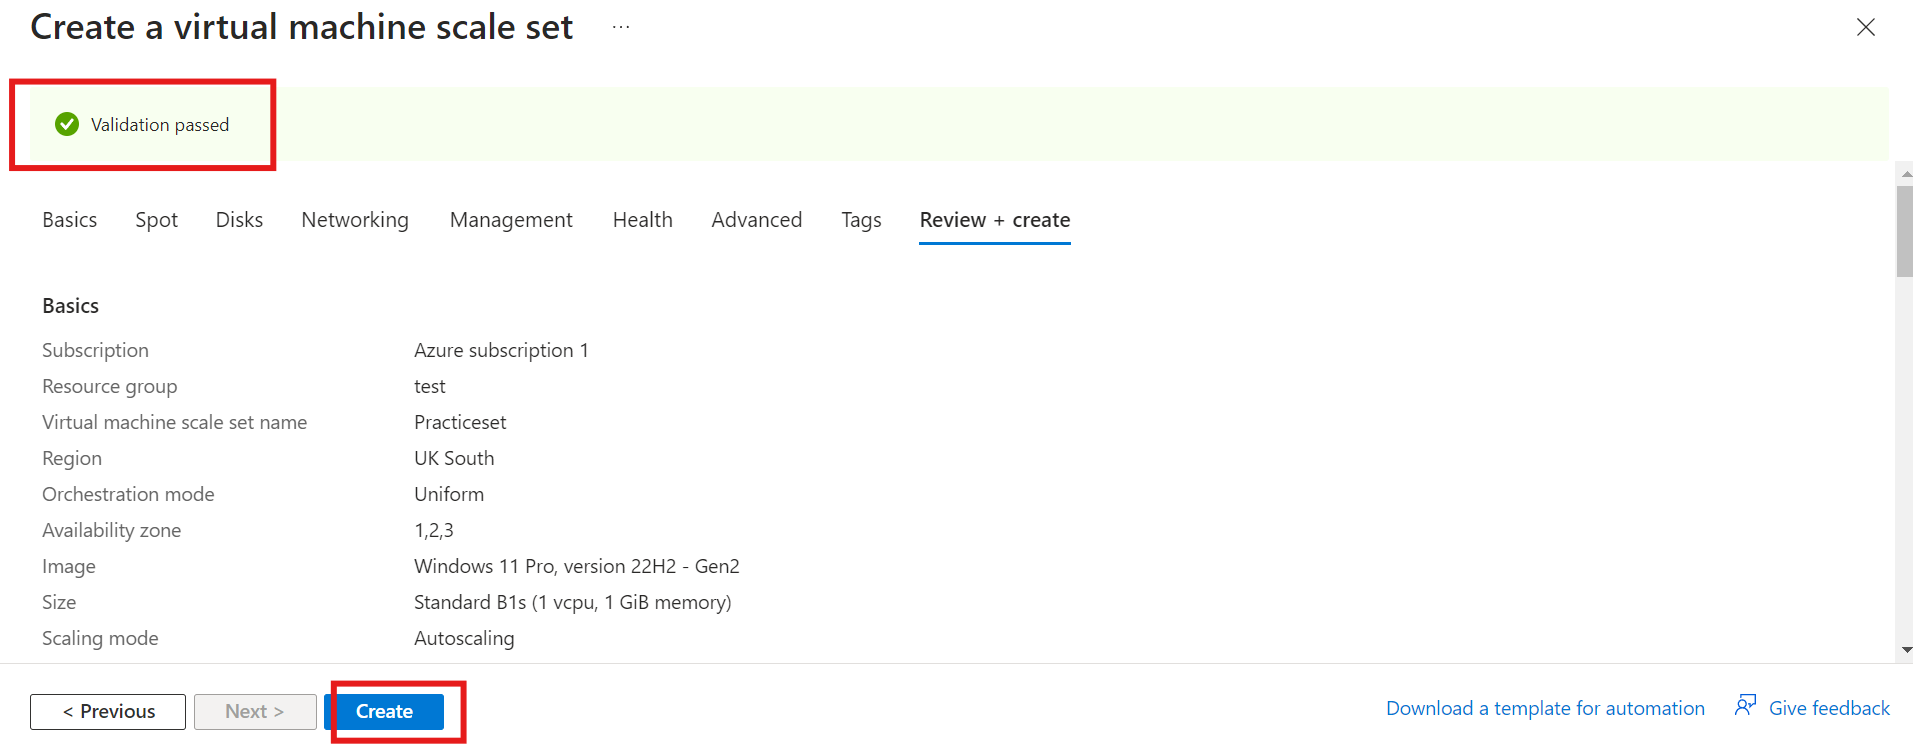
Leave the remaining pages in their default state and proceed to "review+create". Once validation is passed, click on "Create."
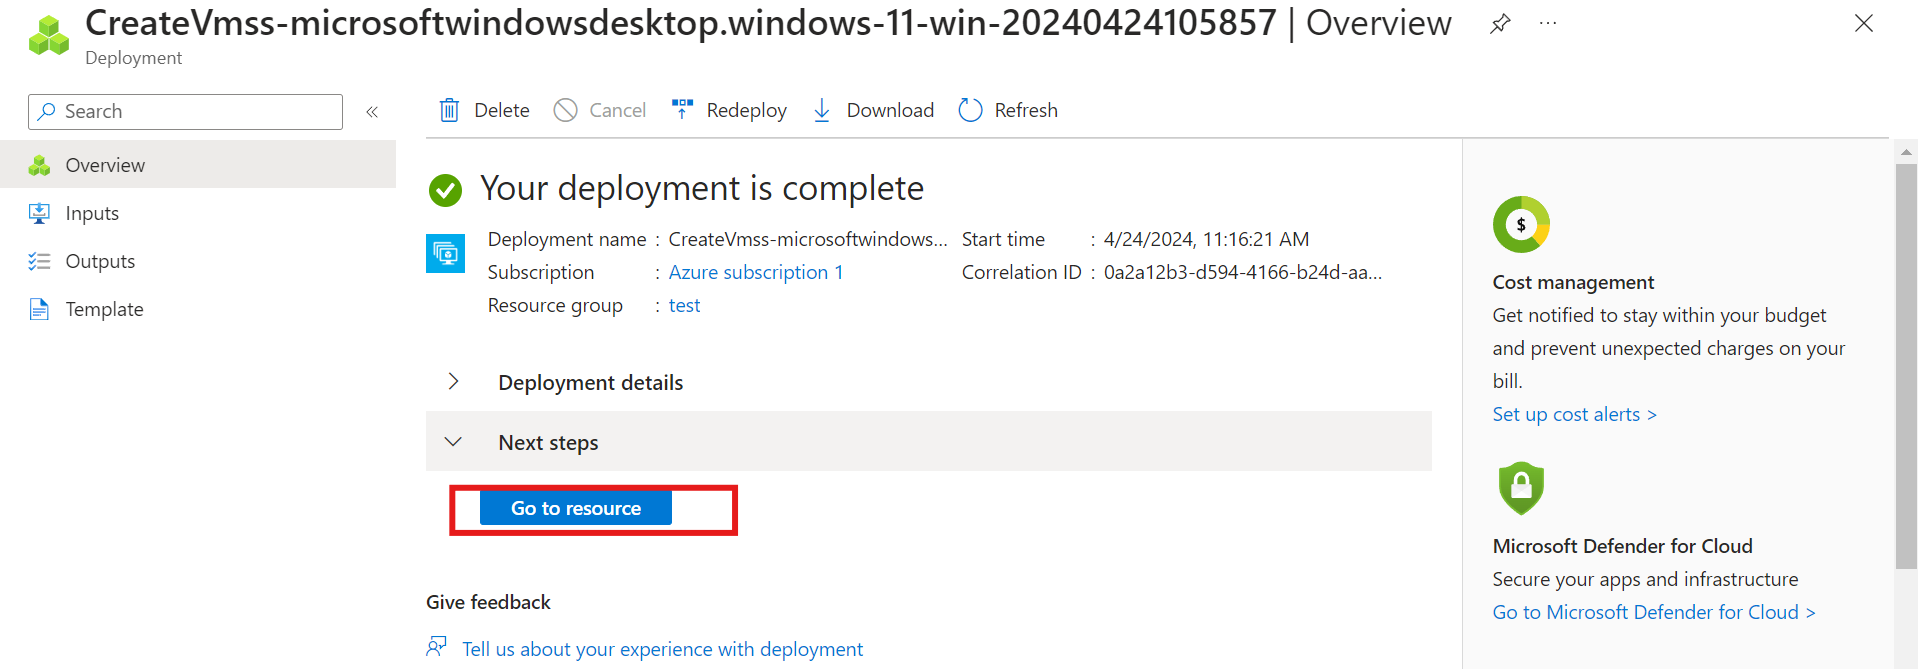
Your resources will begin to deploy. Once deployment is complete, click on "Go to resource."
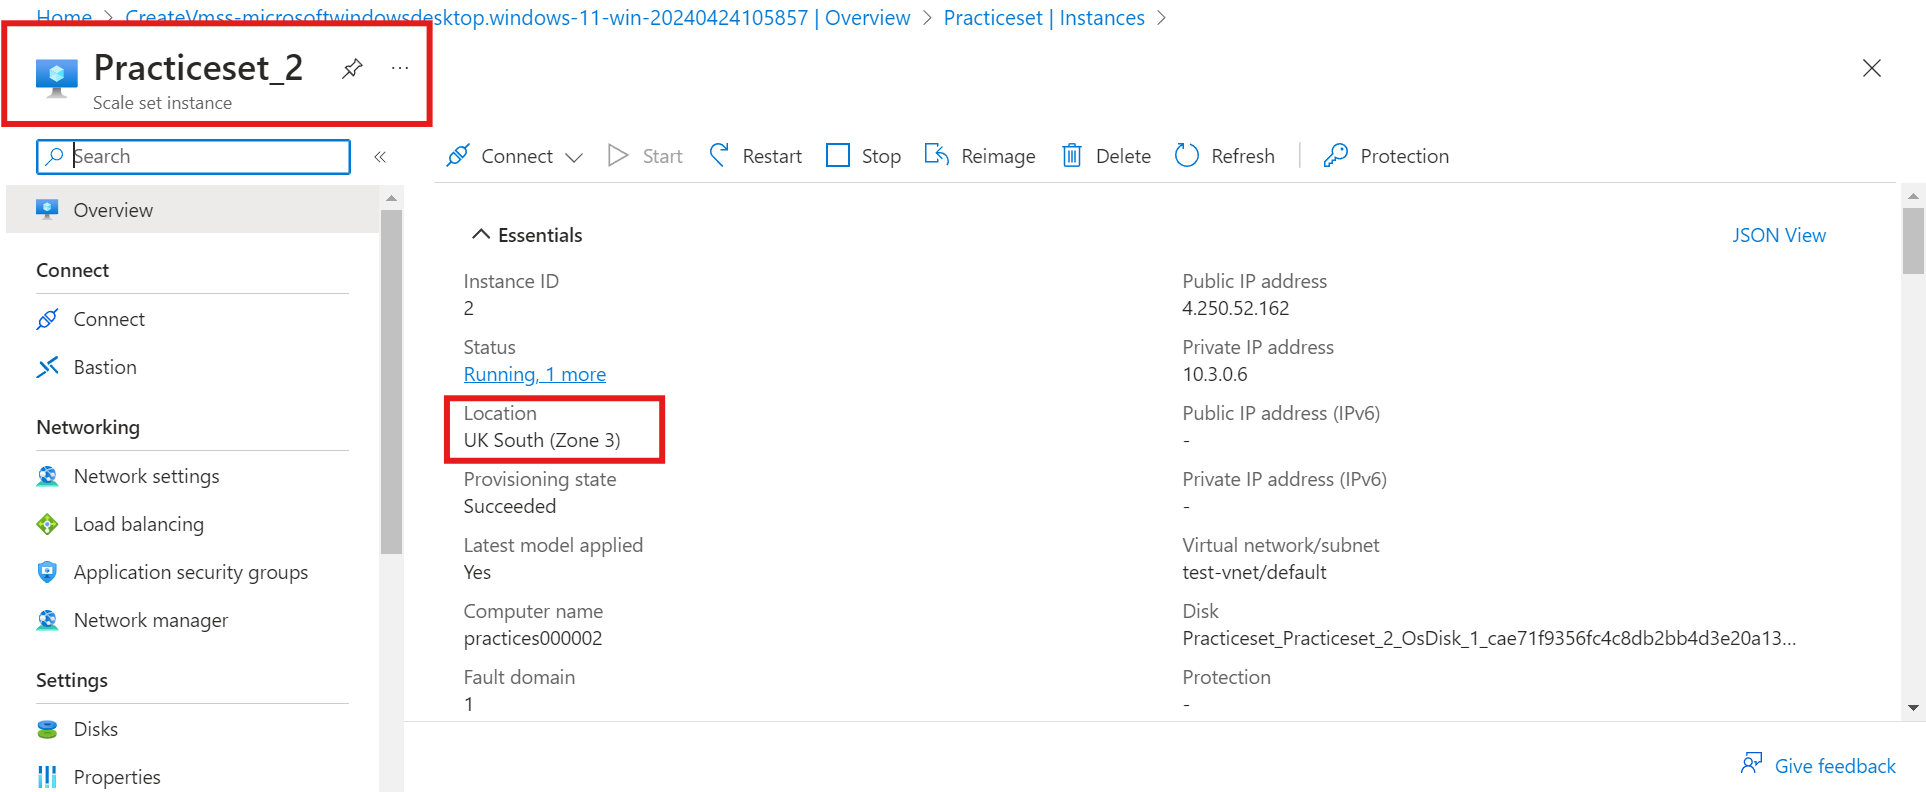
Voila! Your Virtual Machine Scale set is running and has been deployed to the three different zones.
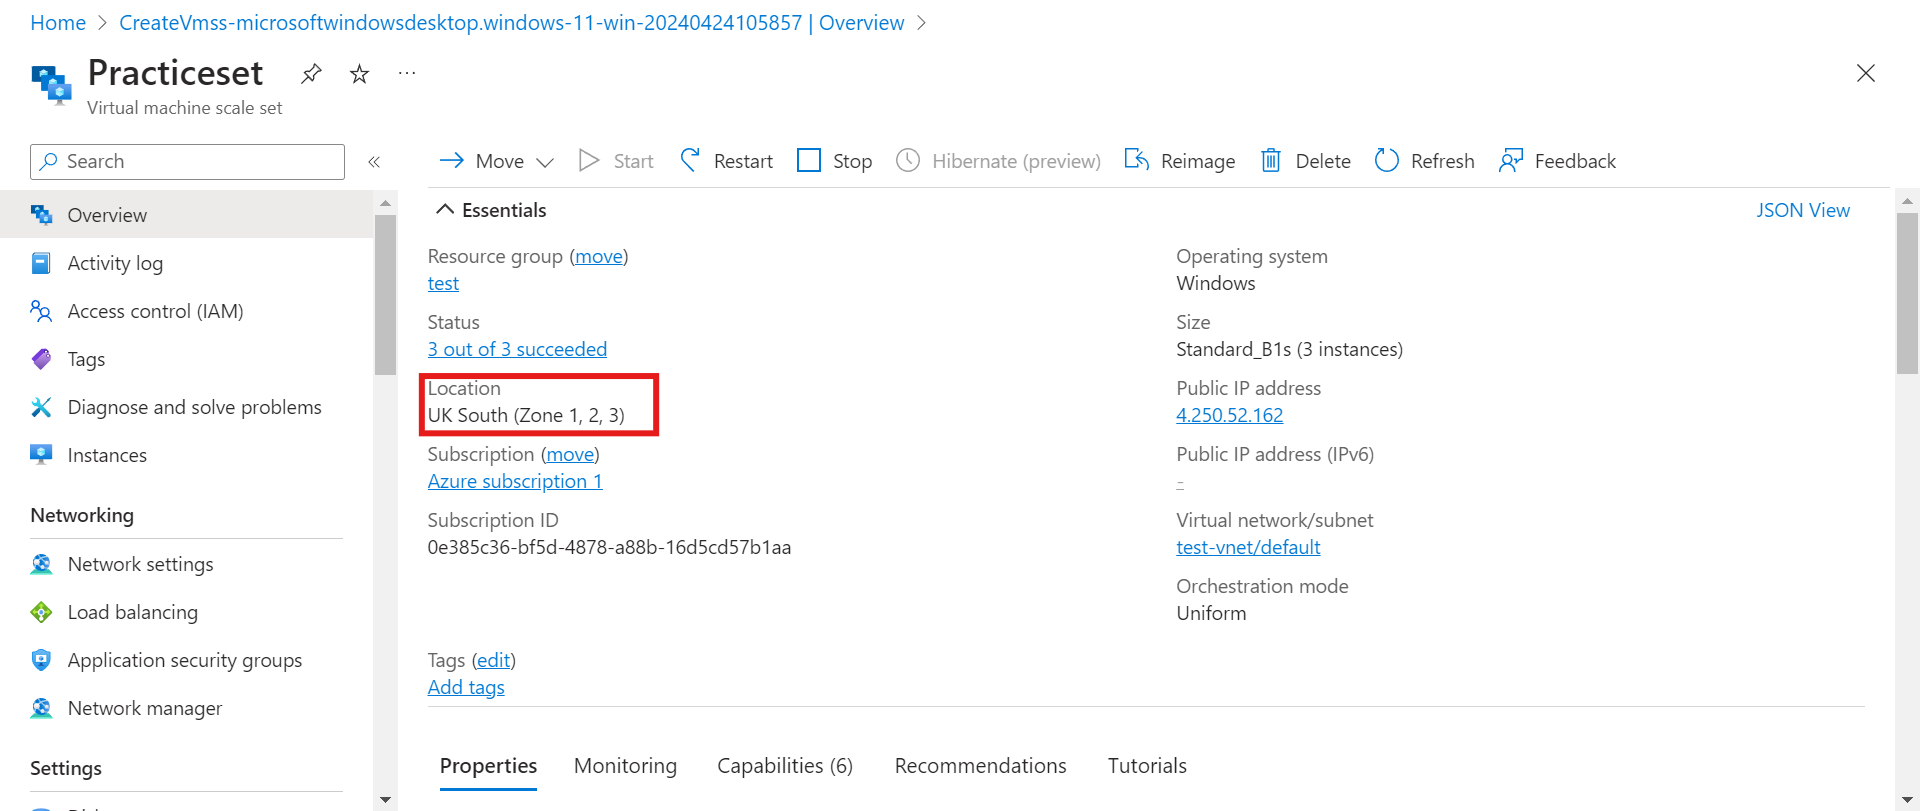
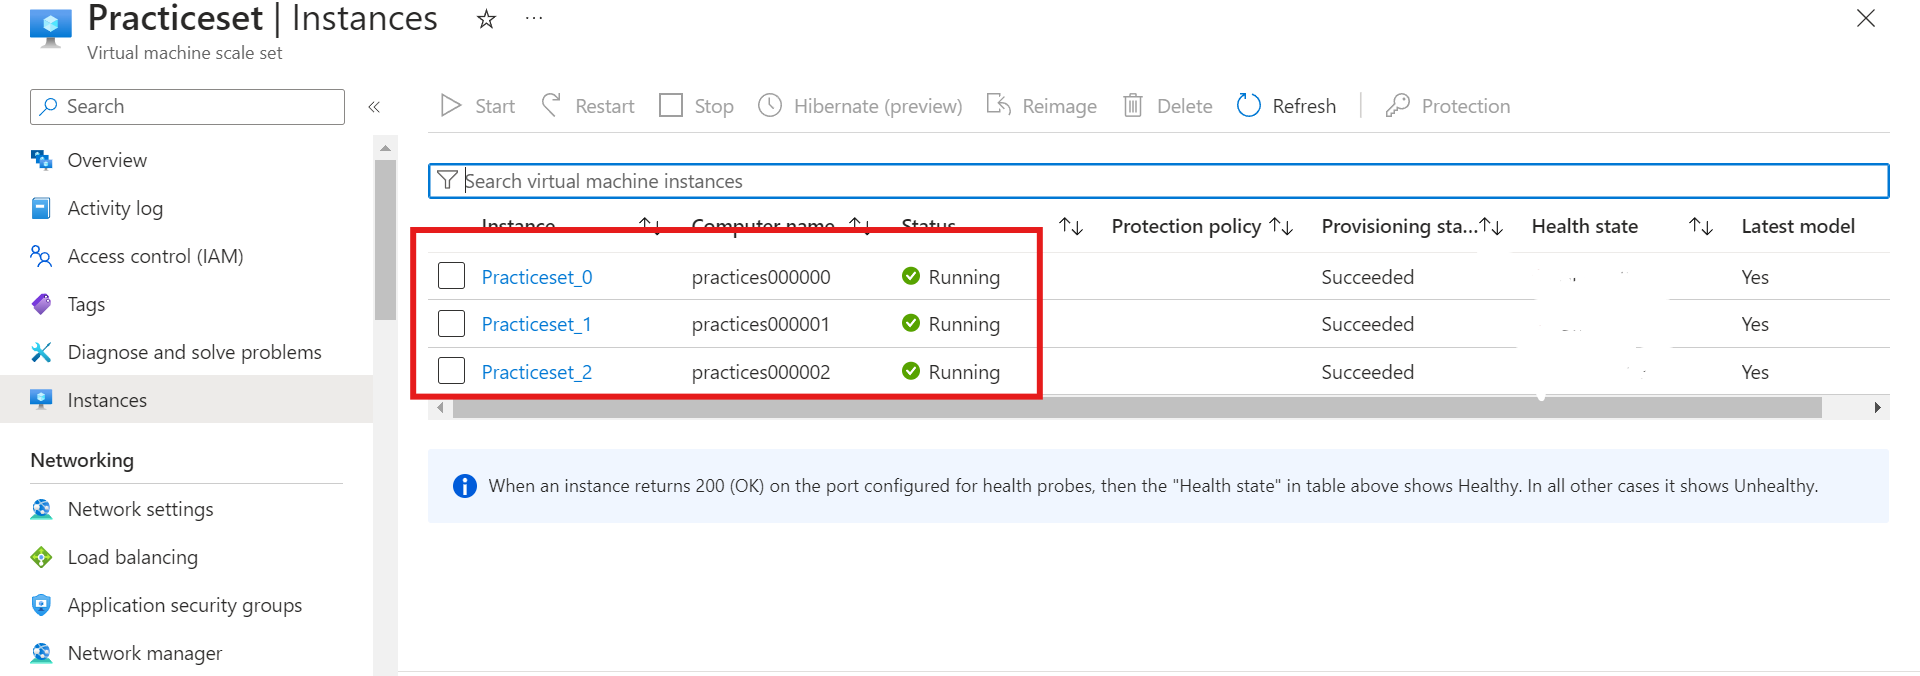
You can click on each of the VMs to check the zones they have been deployed to.
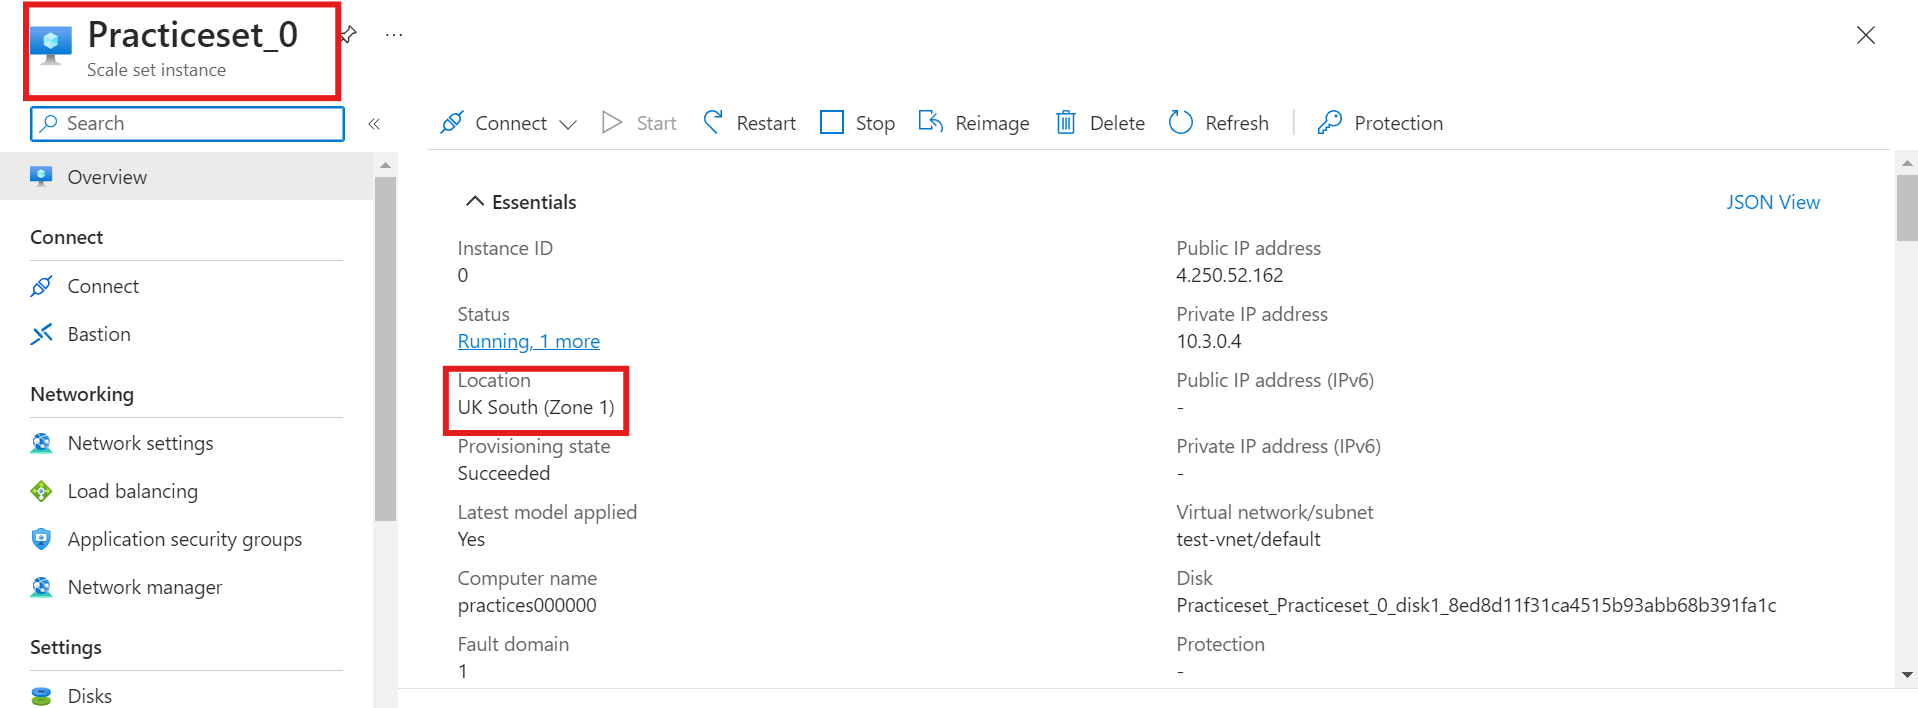
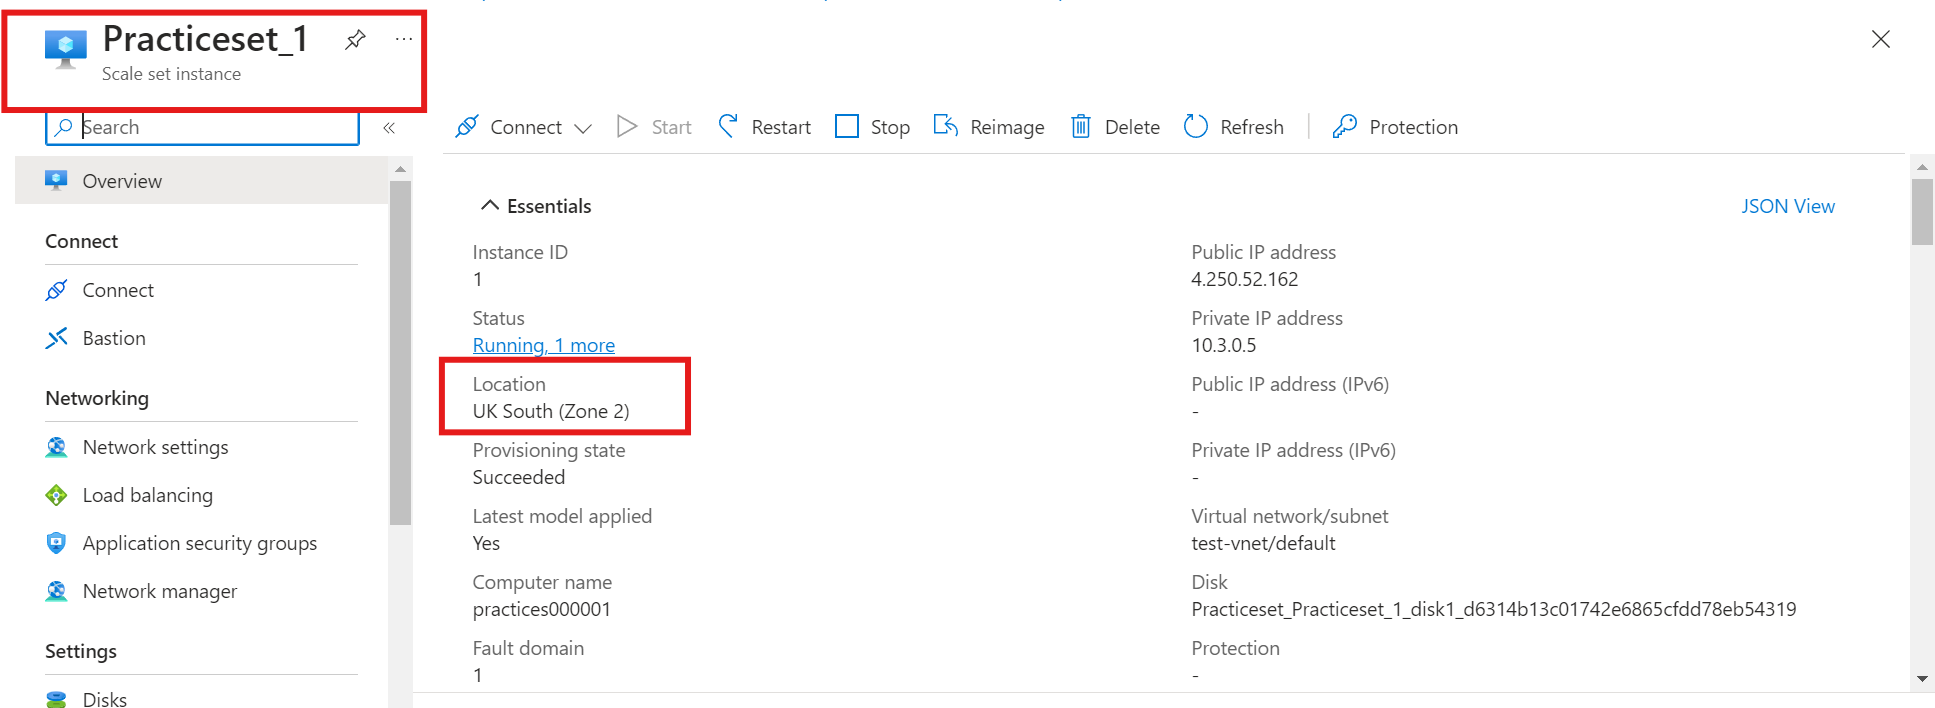
In conclusion, you can achieve high availability and scalability with virtual machine scale sets while also maintaining security and efficient communication within your network. Using virtual machine scale sets, organizations can easily deploy and manage a group of virtual machines in Azure, allowing for scalability and high availability based on demand.
Subscribe to my newsletter
Read articles from lolade ogundijo directly inside your inbox. Subscribe to the newsletter, and don't miss out.
Written by
