Manage Database Releases With Pre- and Post-Deployment Scripts
 Bob Blackburn
Visual Studio protects you and your data during deployments by making sure you do not delete data by accident. Such mishaps can be caused by shortening a column, dropping a column, and similar data operations. You can disable this. But I would only recommend it in rare cases for a hotfix because your production database is unusable.
This forces us to handle data transformations deliberately. In the following discussion we will set up pre- and post-deployment scripts with a release variable to manage deployments. These scripts will be run outside of the DACPAC schema compare. Therefore, you control the necessary data operations and know exactly what is happening in your database.
This is the setup I used to keep up with 20-plus front-end developers on a large time-critical project. If you are new to Visual Studio Database Projects, learn how to set up a project with these articles:
The example is for a pre-deployment script. The steps are the same for a post-deployment script if you must load data after an update, etc.
Create Scripts folder
The Scripts folder will hold your Pre- and Post-Deployment scripts. You will have one each as the script that gets executed. For each task you want to perform, create an individual script and include it in the Pre- or Post-Deployment scripts. This will also allow you to execute scripts per release while maintaining a historical record of the steps performed in each release.
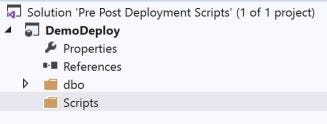
Right-click on the project, Add, New Folder. Name the new folder Scripts.
Create a Pre-Deployment script
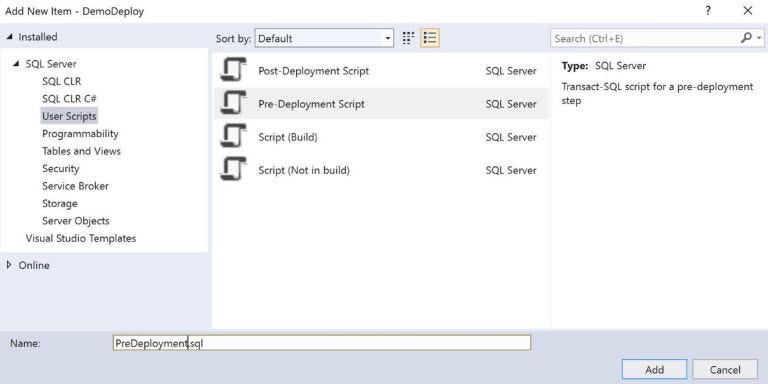
This script will have to have a Build Action of PreDeploy. Right-click the Scripts folder and add a script. Change the default name to PreDeployment. We will add individual scripts to this later.
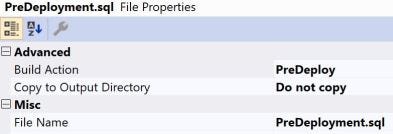
In the attributes pane, it will have PreDeploy as the Build Action.
Create a script for each task you want to perform
You may have many tasks for each release. It is easier to maintain and document if they are not in one long script. Standardize on a naming convention. For example, Release + Description as Rel 1.0 Hello World.
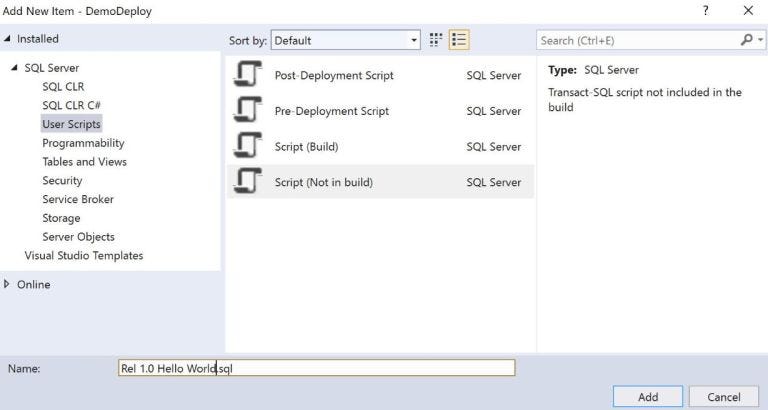
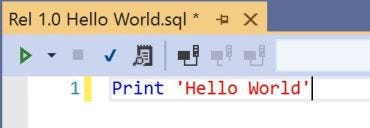
To add the script with the code for the deployment, right-click on the Scripts folder and select add script. Select type Not in Build. It will be included in the Pre/Post Deployment script. Here we will call it Rel 1.0 Hello World.
In the properties pane, the Build Action will be None.

Create a Release variable
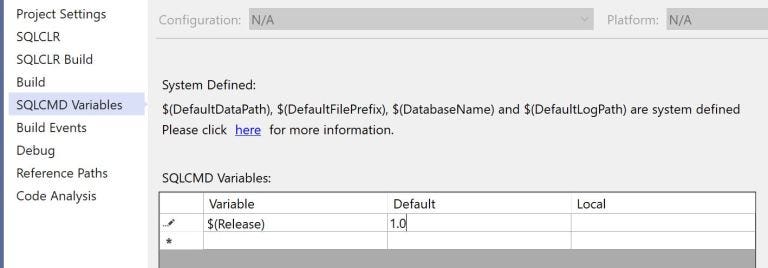
In the Project Properties, create a release variable. You can provide a default if you like, when publishing you can override the default.
Code each deployment task
For the demo, we will just use a print statement. But here is where you will code data type changes, not null, dropped columns, backfilling data, etc.
Update the PreDeployment script
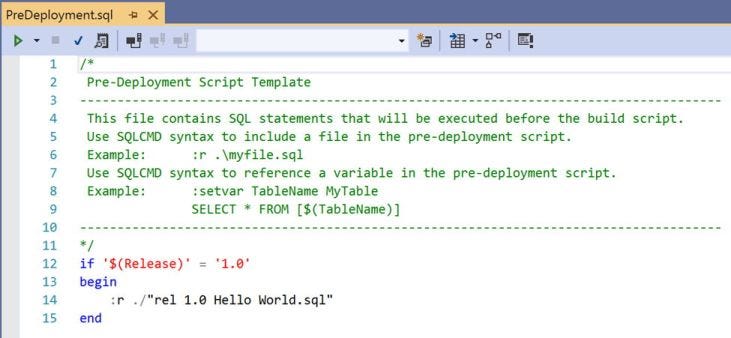
Here we will use conditional logic to include and execute as many scripts as needed. This script is in the SQLCMD format. We can read the variable we set in the project (or updated it in the publish step). For each release of the database, we will have a new section (IF). For scripts with spaces, you will have to double-quote the name.
Publish
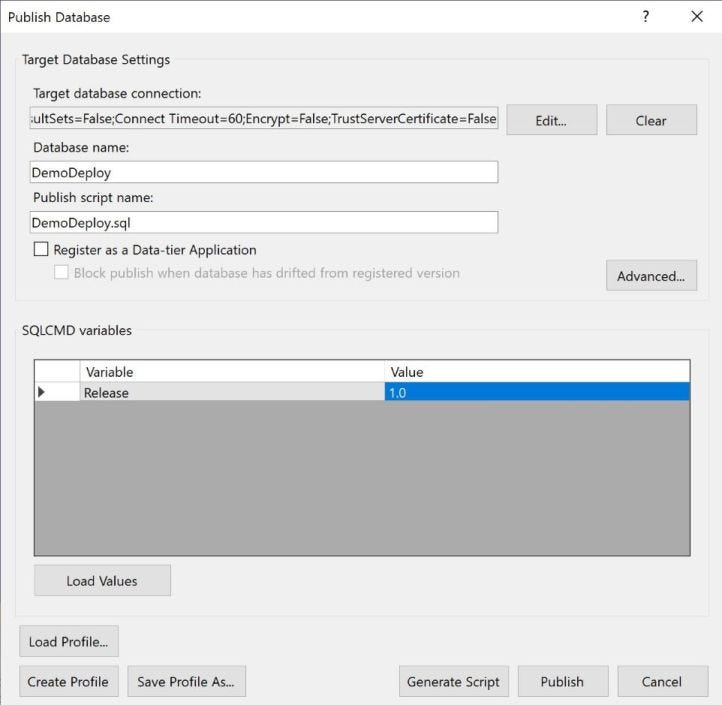
When you publish, you will be prompted to enter the value for the release variable you created. If you created more variables, they will be listed as well. The Load Values button will load the default value.
Results
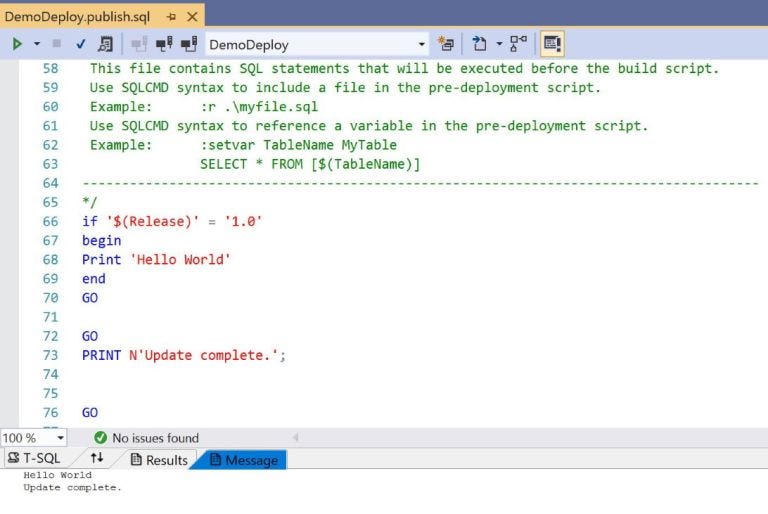
After we publish the database, we can view the results. Here we can see the generated script and the result of printing ‘Hello World.’
Conclusion
Now you can add as many tasks as needed to each release. If you need a Post- Deployment script, the steps are the same.
Subscribe to my newsletter
Read articles from Bob Blackburn directly inside your inbox. Subscribe to the newsletter, and don't miss out.
Written by
