Say Goodbye to Manual Deployments: Automate Your EC2 Autoscaling with CodeDeploy and GitHub Actions
 Avinash Dalvi
Hello Developers,
In this blog, I am going to share my learnings on how to deploy code changes to EC2 autoscaling instances using CodeDeploy and GitHub Actions. But first, let's understand the background behind this.
One of my community friends reached out to me asking for help to automate Amazon EC2 deployment, which involves autoscaling. He explained that he was doing these steps manually by first pulling code changes to one of the EC2 instances and then creating an AMI (Amazon Machine Image). Later, he initialised that AMI to the Auto Scaling group to launch a new instance with the updated code changes. This process was consuming a lot of manual time.
I started working on this problem and tried to search for solutions. I knew about ECS task processes but had never automated EC2 deployment before. It sounds interesting to me.
Let's check out how to do this.
Few concepts need to know before dive into actual solution. I am considering everyone must be aware about Amazon EC2.
CodeDeploy - CodeDeploy is an Amazon deployment service that automates application deployments to Amazon EC2 instances, on-premises instances, serverless Lambda functions, or Amazon ECS services.
Github Actions - GitHub Actions is a continuous integration tool that operates based on your GitHub code lifecycle, such as code push, commit, PR merge, branch creation, and tag creation. You can utilize this hook to trigger other actions like Jenkins jobs, AWS services, and more.
I assume you already have an EC2 setup running under an autoscaling group with a load balancer. I will skip that section. If you need more details on how to create this, watch this video: https://www.youtube.com/watch?v=Ekgi2HfnJcw.
To achieve solutions, let's ensure that your setup covers the following points.
EC2 instance has an IAM profile attached. If not, edit it in the Autoscaling template and then reinitiate the EC2 instances. IAM profile should have access to EC2 service.
The EC2 AMI image should be configured with the CodeDeploy agent. For instructions on how to install the CodeDeploy agent, refer to the following link: https://docs.aws.amazon.com/codedeploy/latest/userguide/codedeploy-agent-operations-install-linux.html
Setting up CodeDeploy with GitHub Actions
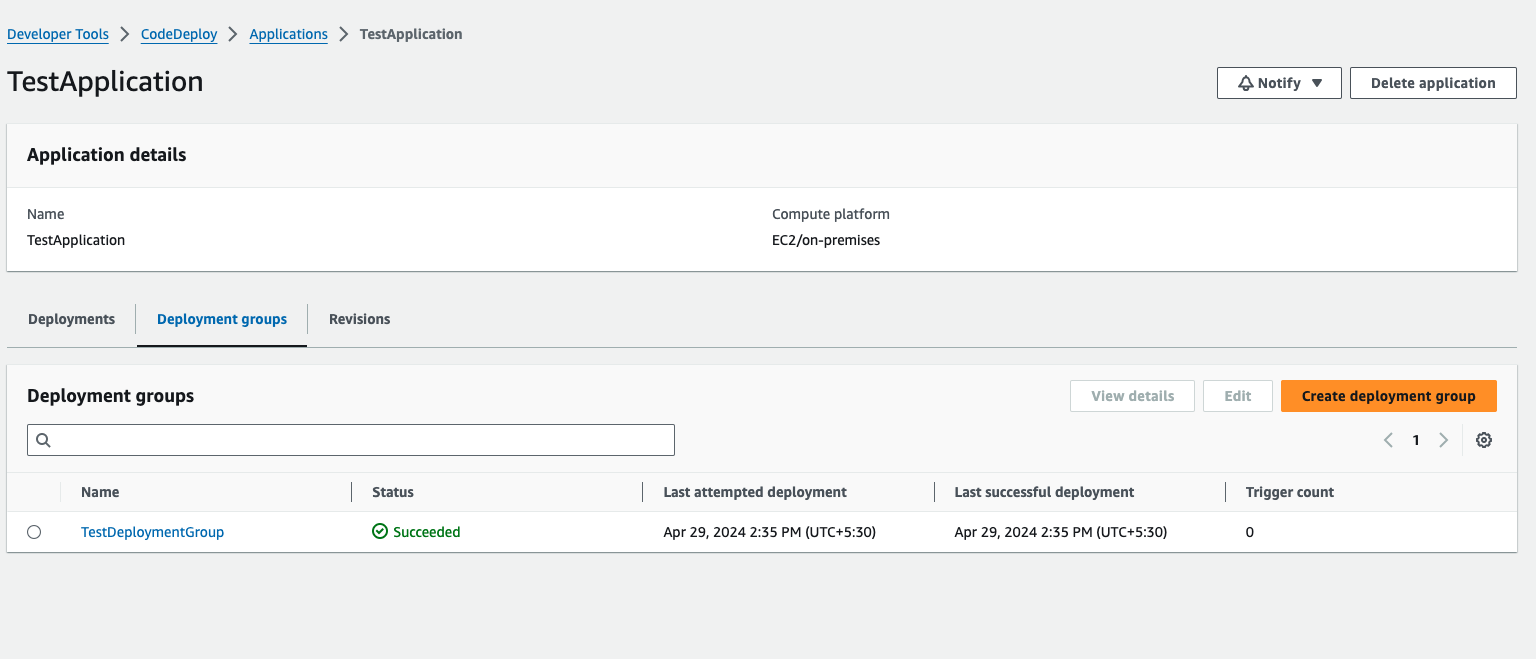
Create a CodeDeploy Application :
Go to the AWS console -> CodeDeploy -> Create Application. Name your application something like "TestApplication" and choose "EC2/on-premise" for the Compute platform option.
Open the application "TestApplication".
Create a Deployment group :
We need an IAM role for this service. First, go to IAM -> Create a role -> Let's name it "CodeDeployTestApplication". Attach policies "AmazonEC2RoleforAWSCodeDeploy" and "AWSCodeDeployRole".
Click on "Create deployment group". Fill in the deployment group name. Next, you will have to choose the IAM role for this service that we created in step 3.
Under "Deployment Type," choose "In place" for rolling out to all instances. If you prefer "Blue/Green Deployment," you can select that option. You can learn more about "Blue/Green Deployment" here.
Under "Environment configuration," select "Amazon EC2 Auto Scaling groups" because we need to deploy code to all instances initiated by Auto Scaling groups.
For "Deployment settings," choose the option that suits you best or create your own configuration. In production, you can use "OneAtATime."

Next, under "Load balancer," you can ignore this if you already have a load balancer attached to your EC2 instances. The options under "Advanced" are optional, so we can skip those.
Create a deployment :
Click on the "Deployment group" created in the above step. Then, click on "Create Deployment."
You have to choose the "Revision Type" to decide how you want to deploy the code, either from an S3 bucket or from GitHub. This blog will demonstrate the process using GitHub.
To choose this option, you need to create a GitHub token that can access your GitHub code repository (Read access). You can find instructions on how to create a GitHub Token here. After creating the token, paste it under "GitHub token name." You can either use the GitHub token or simply type your GitHub username in the search box, then the "Connect to GitHub" option will be enabled.

If you select "Connect to GitHub," authorize GitHub, and choose the repository you wish to deploy.
Next, select the "Commit ID" that you want to push to EC2 instances.
Decide on the behaviour you require under "Additional deployment behavior settings." This is for file operations.
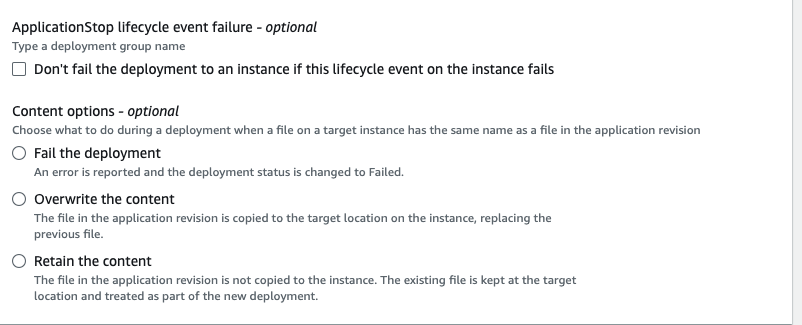
You can keep the same configuration under "Deployment group overrides" or override it for a specific deployment.
If you want to keep the "Roll back configuration overrides," choose enabled; otherwise, skip this step. Then click on "Create Deployment." Then you can track progress in status page. If would like to know details status click on "Deployment ID". Then you can view list of instances for which deployment is going.

I used a single instance to save time, but if you have multiple instances running under an autoscaling group, they will be displayed here for you to track progress. Click on "View Events" to check for any errors if the deployment fails.


For details error log you can run this command inside EC2 instance. It will help you to fix issue based on logs details.
tail -f /var/log/aws/codedeploy-agent/codedeploy-agent.log
This step is for manual deployment. However, we are here to learn about automation and avoid manual processes. GitHub Actions will assist in skipping this deployment step.
Setup Github Actions :
We require two files in your Github code repository to achieve automation.
appspecs.yml
deploy.yml under ".github/workflows" folder. If don't have folder create folder and file.
Create a appspecs.yml :
Create the
appspecs.ymlfile in the root folder. Infiles->source, specify the folder from which you want to copy files; it can be the root folder or a subfolder.In
files->destination, choose the folder where you want to move the files. In my case, since I installed an Apache server, the application folder is/var/www/html/, so I selected that. If you are running a Node server, a Go server, or any other server, choose the appropriate folder accordingly.Use the
overwriteflag if you wish to overwrite existing files.In
branch_config, select the branch you would like to deploy whenever there is a code push. Keep the same branch that we are going to use indeploy.yml.Pass parameters like
deploymentGroupNameanddeploymentGroupConfig; you can get these from Code Deploy -> Application -> Select Deployment group -> copy the name and ARN.
version: 0.0
os: linux
files:
  - source: webapp-sample/
    destination: /var/www/html/
    overwrite: true
file_exists_behavior: OVERWRITE
branch_config:
    main:
        deploymentGroupName: TestDeploymentGroup
        deploymentGroupConfig:
            serviceRoleArn: arn:aws:iam::ACCOUND_ID:role/CodeDeployTestApplication
Create a deploy.yml:
Give a name to your deployment.
Choose which lifecycle hook you want to listen to. I select to trigger this GitHub action whenever a new commit is made to the main branch. You can find a list of GitHub Actions hooks here
Under
jobsname job name whichever you wish. I gavebuild-push-deployit is customised.runs-oncan select either self hosted or ubuntu-latest.Create a GitHub environment in your repository settings because you need to store your AWS secret key and access key. You can learn how to create GitHub environment variables here. so that all variable which start from
secrets.will read from that environment.Next is defined
stepswhich you would like to setup as part of this deployment process. Checkout code is mandatory which checkout code in instance which we selected underruns-onSelect second step as "Configure AWS credentials". And pass variable values from secrets.
Next step it use CodeDeploy utility. For that instead of
nameusingidbecause we need to grab outputs values from this steps like thissteps.deploy.outputs.deploymentId. Pass variable underwith->applicationyour CodeDeploy application name.
name : Push code to EC2 imaage
on:
  push:
    branches: main
jobs:
  build-push-deploy:
    runs-on: ubuntu-latest
    environment: AWS_Environment
    steps:
      - name : Checkout Code
        uses: actions/checkout@v4
      - name : List directory
        run : ls -al
      - name: "Configure AWS Credentials"
        uses: aws-actions/configure-aws-credentials@v4.0.2
        with:
          aws-region: us-east-1
          aws-access-key-id: ${{ secrets.AWS_ACCESS_KEY }}
          aws-secret-access-key: ${{ secrets.AWS_SECRET_KEY }}
      - id: deploy
        uses: webfactory/create-aws-codedeploy-deployment@v0.2.2
        with:
              application: TestApplication
      - name : Create Code Deploy
        uses: peter-evans/commit-comment@v2
        with:
              application: TestApplication
              token: ${{ secrets.CODEDEPLOY_TOKEN }}
              body: |
                    @${{ github.actor }} this was deployed as [${{ steps.deploy.outputs.deploymentId }}](https://console.aws.amazon.com/codesuite/codedeploy/deployments/${{ steps.deploy.outputs.deploymentId }}?region=us-east-1) to group `${{ steps.deploy.outputs.deploymentGroupName }}`.
To test these changes, make adjustments in your code file and monitor progress under "Actions". You can also track the same progress in the CodeDeploy deployment.
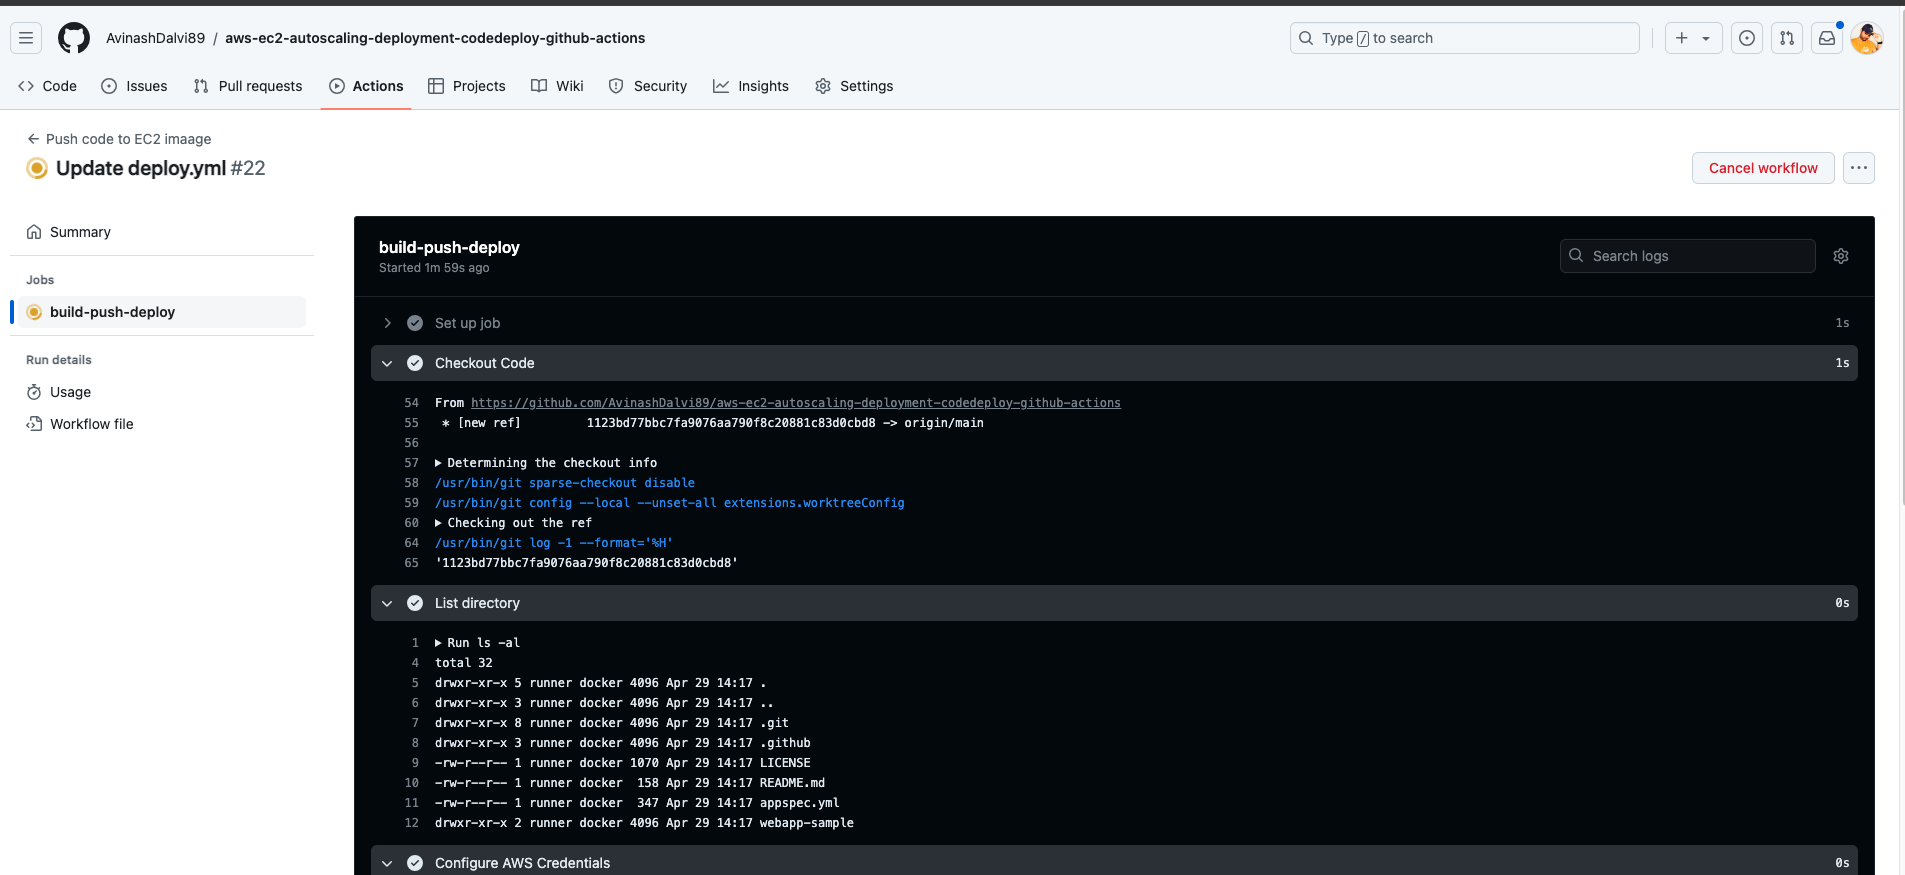

Here is a diagram for the workflow.
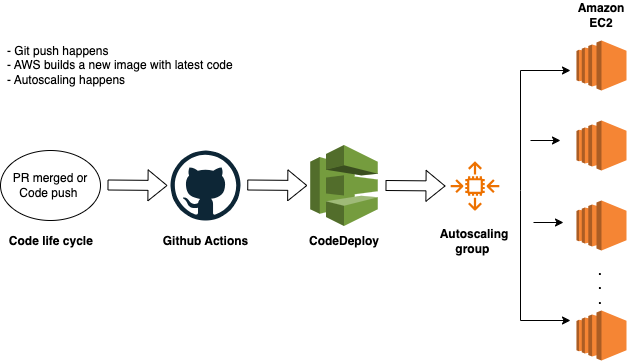
Demo code link : https://github.com/AvinashDalvi89/aws-ec2-autoscaling-deployment-codedeploy-github-actions
Thats all. We completed EC2 autoscaling deployment using CodeDeploy and GitHub Actions. Remember that this is a high-level overview, and you’ll need to adapt it to your specific use case. Feel free to explore the provided resources and customize the setup according to your project requirements.
Happy deploying! 🚀
I hope this blog helps you learn. Feel free to reach out to me on my Twitter handle @AvinashDalvi_ or leave a comment on the blog. Special thanks to Sandip Das for his video on "AWS EC2 + Autoscaling + Load Balancer + CodeDeploy | Deploy Code At Scale | DevOps With AWS Ep 5") for providing me with a hint for the solution.
References :
Subscribe to my newsletter
Read articles from Avinash Dalvi directly inside your inbox. Subscribe to the newsletter, and don't miss out.
Written by

Avinash Dalvi
Avinash Dalvi
13+ Years of experienced as Full Stack Developer. Also worked as architect for building solutions and product to help for automation. Solution-oriented and hands-on technical utility player. Having experience of more than 4 years of experience in E commerce and finance in each domain. Experience in having driving business automation, marketing using technology. Strong follower of open source technology. Used PHP, Python, AWS and Angular as technology stack to build product