Use Stable Diffusion With Docker
 Sourav Kumar

Welcome to our latest blog post! In this, we'll be exploring the concept of stable diffusion in the context of Docker. This blog is for those folks who have heard of Stable Diffusion and want to give it a try but are unable to do so because of its configuration issue or the time it requires to step or you where think I don’t have GPU and I can’t user it YES you can so start.
Prerequisites
- Docker Installed
What is Stable Diffusion?
Stable Diffusion is a cutting-edge artificial intelligence (AI) model that excels at generating realistic images from text descriptions. It emerged in 2022 and is considered a significant contribution to the field of generative AI. You provide a textual description of the image you want, and Stable Diffusion uses its deep learning capabilities to create a corresponding image. For instance, you could describe "a cat wearing a hat on a beach" and the model would generate an image matching that description.
How does Stable Diffusion work?
Understanding how stable diffusion in detail required another blog in itself but here I will touch on the basics. Stable Diffusion accomplishes its text-to-image magic through a process called a latent diffusion model. Here's a breakdown of the key steps:
Latent Space Compression:
Unlike some models that work directly with high-resolution images (millions of pixels), Stable Diffusion leverages a more efficient approach. It first compresses the image into a smaller, lower-dimensional representation called the latent space. This "latent" space essentially captures the core features and characteristics of the image in a more manageable way. Think of it like summarizing a whole book into a few key points.
Random Noise Injection:
Stable Diffusion starts by generating a random image (filled with noise) within this latent space. Imagine a static-filled TV screen – that's kind of what the initial image looks like in the latent space.
Noise Prediction and Removal (Denoising):
The core of Stable Diffusion lies in its ability to progressively remove noise from this initial image. It uses a deep learning model called a U-Net, which is particularly adept at image segmentation tasks. The U-Net takes two inputs:
The noisy latent image.
The text prompt describes the desired image (e.g., "a cat wearing a hat on a beach").
By analyzing both the noise and the text prompt, the U-Net predicts the amount of noise present in the latent image.
This predicted noise is then subtracted from the original noisy image, resulting in a slightly less noisy image in the latent space.
Iterative Refinement:
This noise prediction and removal process is repeated multiple times, with each iteration bringing the image in the latent space closer to the final desired image. It's like gradually polishing a rough stone to reveal the beautiful sculpture beneath.
Decoding the Final Image:
Once the noise reduction process is complete, the final latent image representation is then decoded back into a high-resolution image that we can see. This decoding process essentially translates the refined information in the latent space back into the visual details of the final image.
Key Advantages of Stable Diffusion:
Efficiency: Working in the latent space makes Stable Diffusion significantly faster than models working directly with pixelated images.
Text-to-Image: The ability to incorporate text prompts allows for more precise control over the generated image content.
Accessibility: Stable Diffusion's code and weights being publicly available fosters exploration and experimentation.
This is a simplified explanation, but it captures the essence of how Stable Diffusion uses latent diffusion models and noise prediction to transform textual descriptions into impressive images.
Now we will write Dockerfile and Docker Compose files to run stable diffusion in your system without going through all the processes of setting up.
Dockerfile For CPU
So first we will write for CPU Uses only if you don’t have GPU access don’t worry I got you covered. yes, you can still use stable diffusion by using your CPU but it will not be as fast as the GPU. So Let's write Dockerfile
File Name:- Dockerfile.cpu
FROM python:3.10.6-bullseye
ENV DEBIAN_FRONTEND=noninteractive \\
    PYTHONUNBUFFERED=1 \\
    PYTHONIOENCODING=UTF-8
WORKDIR /sdtemp
RUN python -m pip install --upgrade pip wheel
RUN apt-get update &&\\
    apt-get install -y wget git
RUN git clone <https://github.com/AUTOMATIC1111/stable-diffusion-webui> /sdtemp

#torch and torchvision version number refer to
#<https://github.com/AUTOMATIC1111/stable-diffusion-webui/blob/master/launch.py>
ENV TORCH_COMMAND="pip install torch==2.1.2+cpu torchvision==0.16.2+cpu --extra-index-url <https://download.pytorch.org/whl/cpu>"
RUN python -m $TORCH_COMMAND

RUN python launch.py --skip-torch-cuda-test --exit
RUN python -m pip install opencv-python-headless
WORKDIR /stablediff-web
If you have previously used docker and created dockerfile then you should understand what is going on in this file. If you don’t let explain in brie.
FROM Here we are pulling a base image in our case this python
ENV Here we have some environment variable that needs to run,
WORKDIR Here we have created a working folder
RUN With the help of the RUN command I can run the command that I want to run inside the docker container so here we are update and installing git and then pulling the automatic1111 web-ui repo.
ENV This is the environment variable where are adding the command that will run and install all dependencies.
And again with the help of RUN the command, we install all the dependencies.
Dockerfile For AMD GPU
Stable Diffusion is recommended to users of Nvidia But still, if you have an AMD GPU you can use your GPU to generate AI images. Here is the Dockerfile for that.
File Name:- Dockerfile.roc
FROM rocm/dev-ubuntu-20.04
ENV DEBIAN_FRONTEND=noninteractive \\
    PYTHONUNBUFFERED=1 \\
    PYTHONIOENCODING=UTF-8
WORKDIR /sdtemp
RUN apt-get update &&\\
    apt-get install -y \\
    wget \\
    git \\
    python3 \\
    python3-pip \\
    python-is-python3
RUN python -m pip install --upgrade pip wheel
RUN git clone <https://github.com/AUTOMATIC1111/stable-diffusion-webui> /sdtemp

#torch and torchvision version number refer to
#<https://github.com/AUTOMATIC1111/stable-diffusion-webui/blob/master/launch.py>
ENV TORCH_COMMAND="pip install torch==1.12.1+rocm5.1.1 torchvision==0.13.1+rocm5.1.1 --extra-index-url <https://download.pytorch.org/whl/rocm5.1.1>"
RUN python -m $TORCH_COMMAND

RUN python launch.py --skip-torch-cuda-test --exit
RUN python -m pip install opencv-python-headless
WORKDIR /stablediff-web
Dockerfile For Nvidia GPU
If you have access to Nvidia GPU then you are lucky because you can get the best performances and fast Image generation. So here is your Dockerfile for that
File Name:- Dockerfile.cuda
FROM nvidia/cuda:11.3.1-base-ubuntu20.04
ENV DEBIAN_FRONTEND=noninteractive \\
    PYTHONUNBUFFERED=1 \\
    PYTHONIOENCODING=UTF-8
WORKDIR /sdtemp
RUN apt-get update &&\\
    apt-get install -y \\
    wget \\
    git \\
    python3 \\
    python3-pip \\
    python-is-python3
RUN python -m pip install --upgrade pip wheel
RUN git clone <https://github.com/AUTOMATIC1111/stable-diffusion-webui> /sdtemp

#torch and torchvision version number refer to
#<https://github.com/AUTOMATIC1111/stable-diffusion-webui/blob/master/launch.py>
ENV TORCH_COMMAND="pip install torch==1.12.1+cu113 torchvision==0.13.1+cu113 --extra-index-url <https://download.pytorch.org/whl/cu113>"
RUN python -m $TORCH_COMMAND

RUN python launch.py --skip-torch-cuda-test --exit
RUN python -m pip install opencv-python-headless
WORKDIR /stablediff-web
Make sure you name you file as i have meation.
Now that you have your dockerfile ready we need one more file which is the docker-compose file. So that we can build the docker image and ans start the stable Diffusion.
Here is your docker composer file.
version: '3'

services:
  stablediff-cpu:
    build:
      context: .
      dockerfile: Dockerfile.cpu
    container_name: stablediff-cpu-runner
    environment:
      TZ: "Asia/Jakarta"
          COMMANDLINE_ARGS: "--listen --no-half --skip-torch-cuda-test"
    entrypoint: ["/bin/sh", "-c"]
    command: >
      ". /stablediff.env; echo launch.py $$COMMANDLINE_ARGS;
      if [ ! -d /stablediff-web/.git ]; then
        cp -a /sdtemp/. /stablediff-web/
      fi;
      if [ ! -f /stablediff-web/models/Stable-diffusion/*.ckpt ] && [ ! -f /stablediff-web/models/Stable-diffusion/*.safetensors ]; then
        echo 'Please copy stable diffusion model to stablediff-models directory'
        echo 'You may need sudo to perform this action'
        exit 1
      fi;
      python launch.py"
    ports:
      - "7860:7860"
    volumes:
      - ./stablediff.env:/stablediff.env
      - ./stablediff-web:/stablediff-web
      - ./stablediff-models:/stablediff-web/models/Stable-diffusion
  stablediff-rocm:
    build:
      context: .
      dockerfile: Dockerfile.rocm
    container_name: stablediff-rocm-runner
    environment:
      TZ: "Asia/Jakarta"
      ROC_ENABLE_PRE_VEGA: 1
      COMMANDLINE_ARGS: "--listen --precision full --no-half"
    entrypoint: ["/bin/sh", "-c"]
    command: >
      "rocm-smi; . /stablediff.env; echo launch.py $$COMMANDLINE_ARGS;
      if [ ! -d /stablediff-web/.git ]; then
        cp -a /sdtemp/. /stablediff-web/
      fi;
      if [ ! -f /stablediff-web/models/Stable-diffusion/*.ckpt ] && [ ! -f /stablediff-web/models/Stable-diffusion/*.safetensors ]; then
        echo 'Please copy stable diffusion model to stablediff-models directory'
        echo 'You may need sudo to perform this action'
        exit 1
      fi;
      python launch.py"
    ports:
      - "7860:7860"
    devices:
      - "/dev/kfd:/dev/kfd"
      - "/dev/dri:/dev/dri"
    group_add:
      - video
    ipc: host
    cap_add:
      - SYS_PTRACE
    security_opt:
      - seccomp:unconfined
    volumes:
      - ./stablediff.env:/stablediff.env
      - ./stablediff-web:/stablediff-web
      - ./stablediff-models:/stablediff-web/models/Stable-diffusion
  stablediff-cuda:
    build:
      context: .
      dockerfile: Dockerfile.cuda
    container_name: stablediff-runner-cuda
    runtime: nvidia
    environment:
      TZ: "Asia/Jakarta"
      NVIDIA_VISIBLE_DEVICES: all
      COMMANDLINE_ARGS: "--listen"
    entrypoint: ["/bin/sh", "-c"]
    command: >
      "nvidia-smi; . /stablediff.env; echo launch.py $$COMMANDLINE_ARGS;
      if [ ! -d /stablediff-web/.git ]; then
        cp -a /sdtemp/. /stablediff-web/
      fi;
      if [ ! -f /stablediff-web/models/Stable-diffusion/*.ckpt ] && [ ! -f /stablediff-web/models/Stable-diffusion/*.safetensors ]; then
        echo 'Please copy stable diffusion model to stablediff-models directory'
        echo 'You may need sudo to perform this action'
        exit 1
      fi;
      python launch.py"
    ports:
      - "7860:7860"
    volumes:
      - ./stablediff.env:/stablediff.env
      - ./stablediff-web:/stablediff-web
      - ./stablediff-models:/stablediff-web/models/Stable-diffusion
As you can see I have written all 3 services in one file. You can Edit as per your usage.
Let me show you.
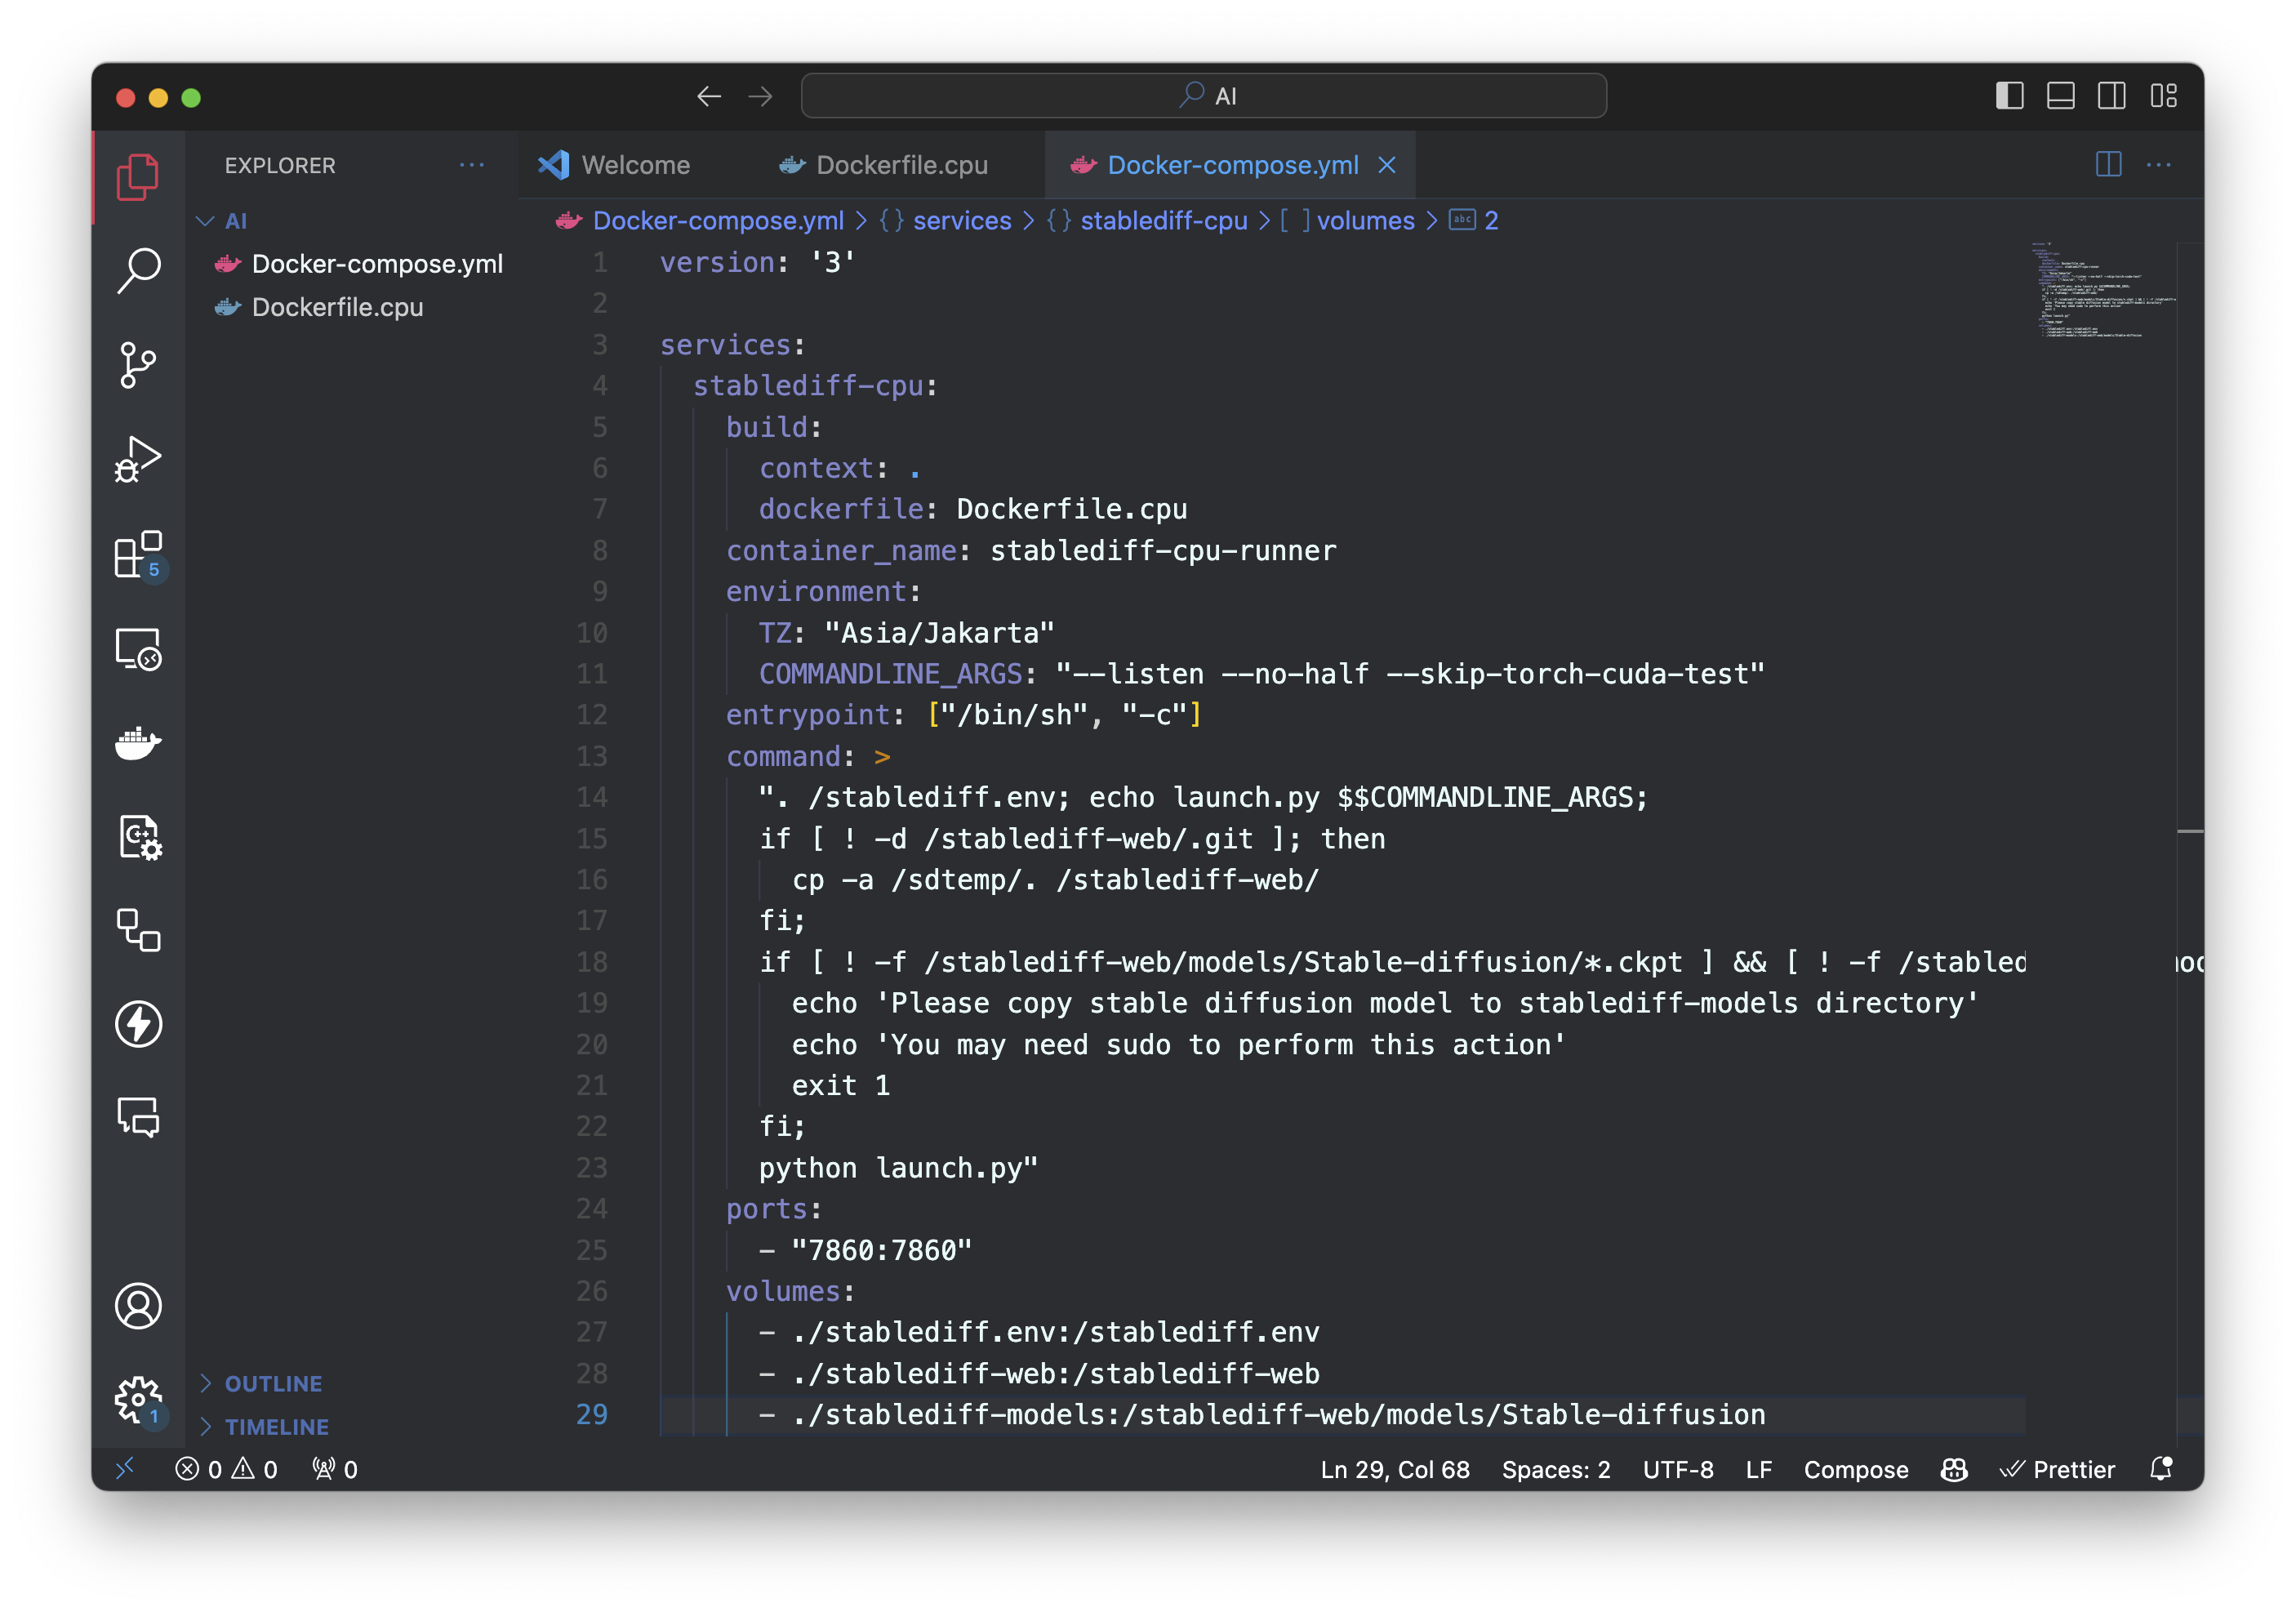
Here is how my docker-compose file looks like. You can edit as per you.
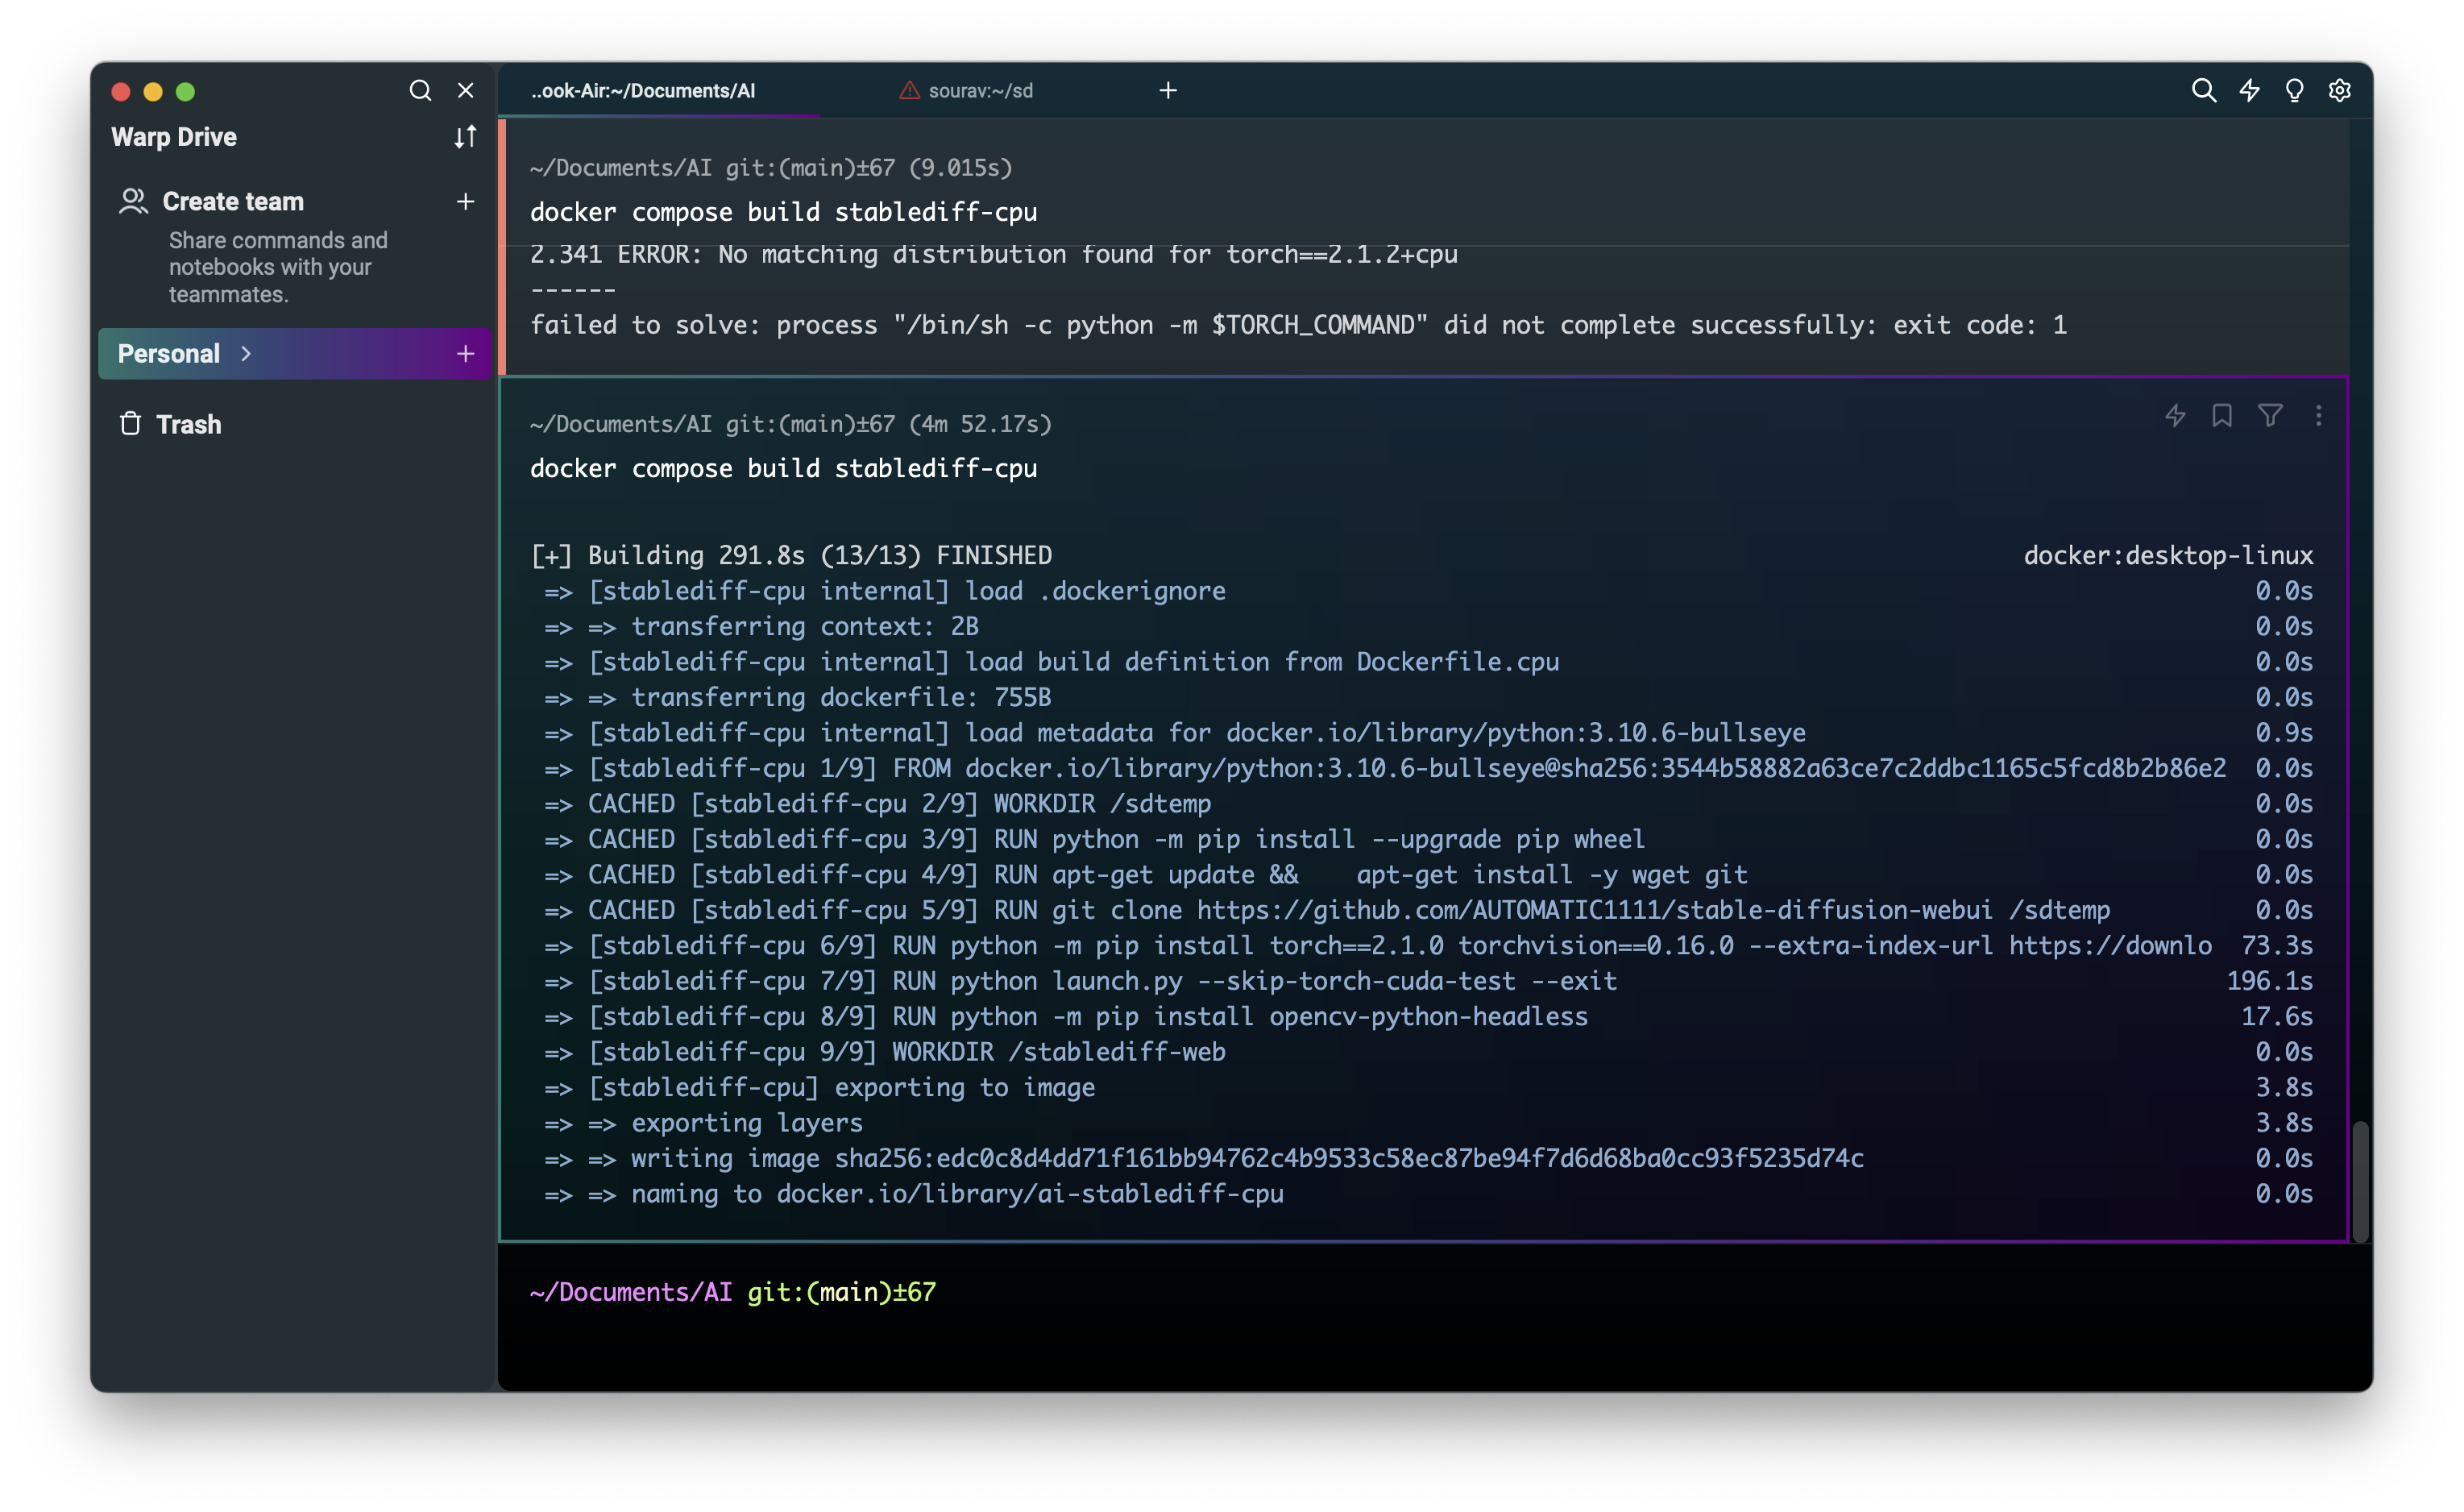
Let’s Build the docker image with this command
docker-compose build stablediff-cpu
I Have also built my docker image Hope you have also built your docker image. If you have faced any issues let me know I will be happy to help.
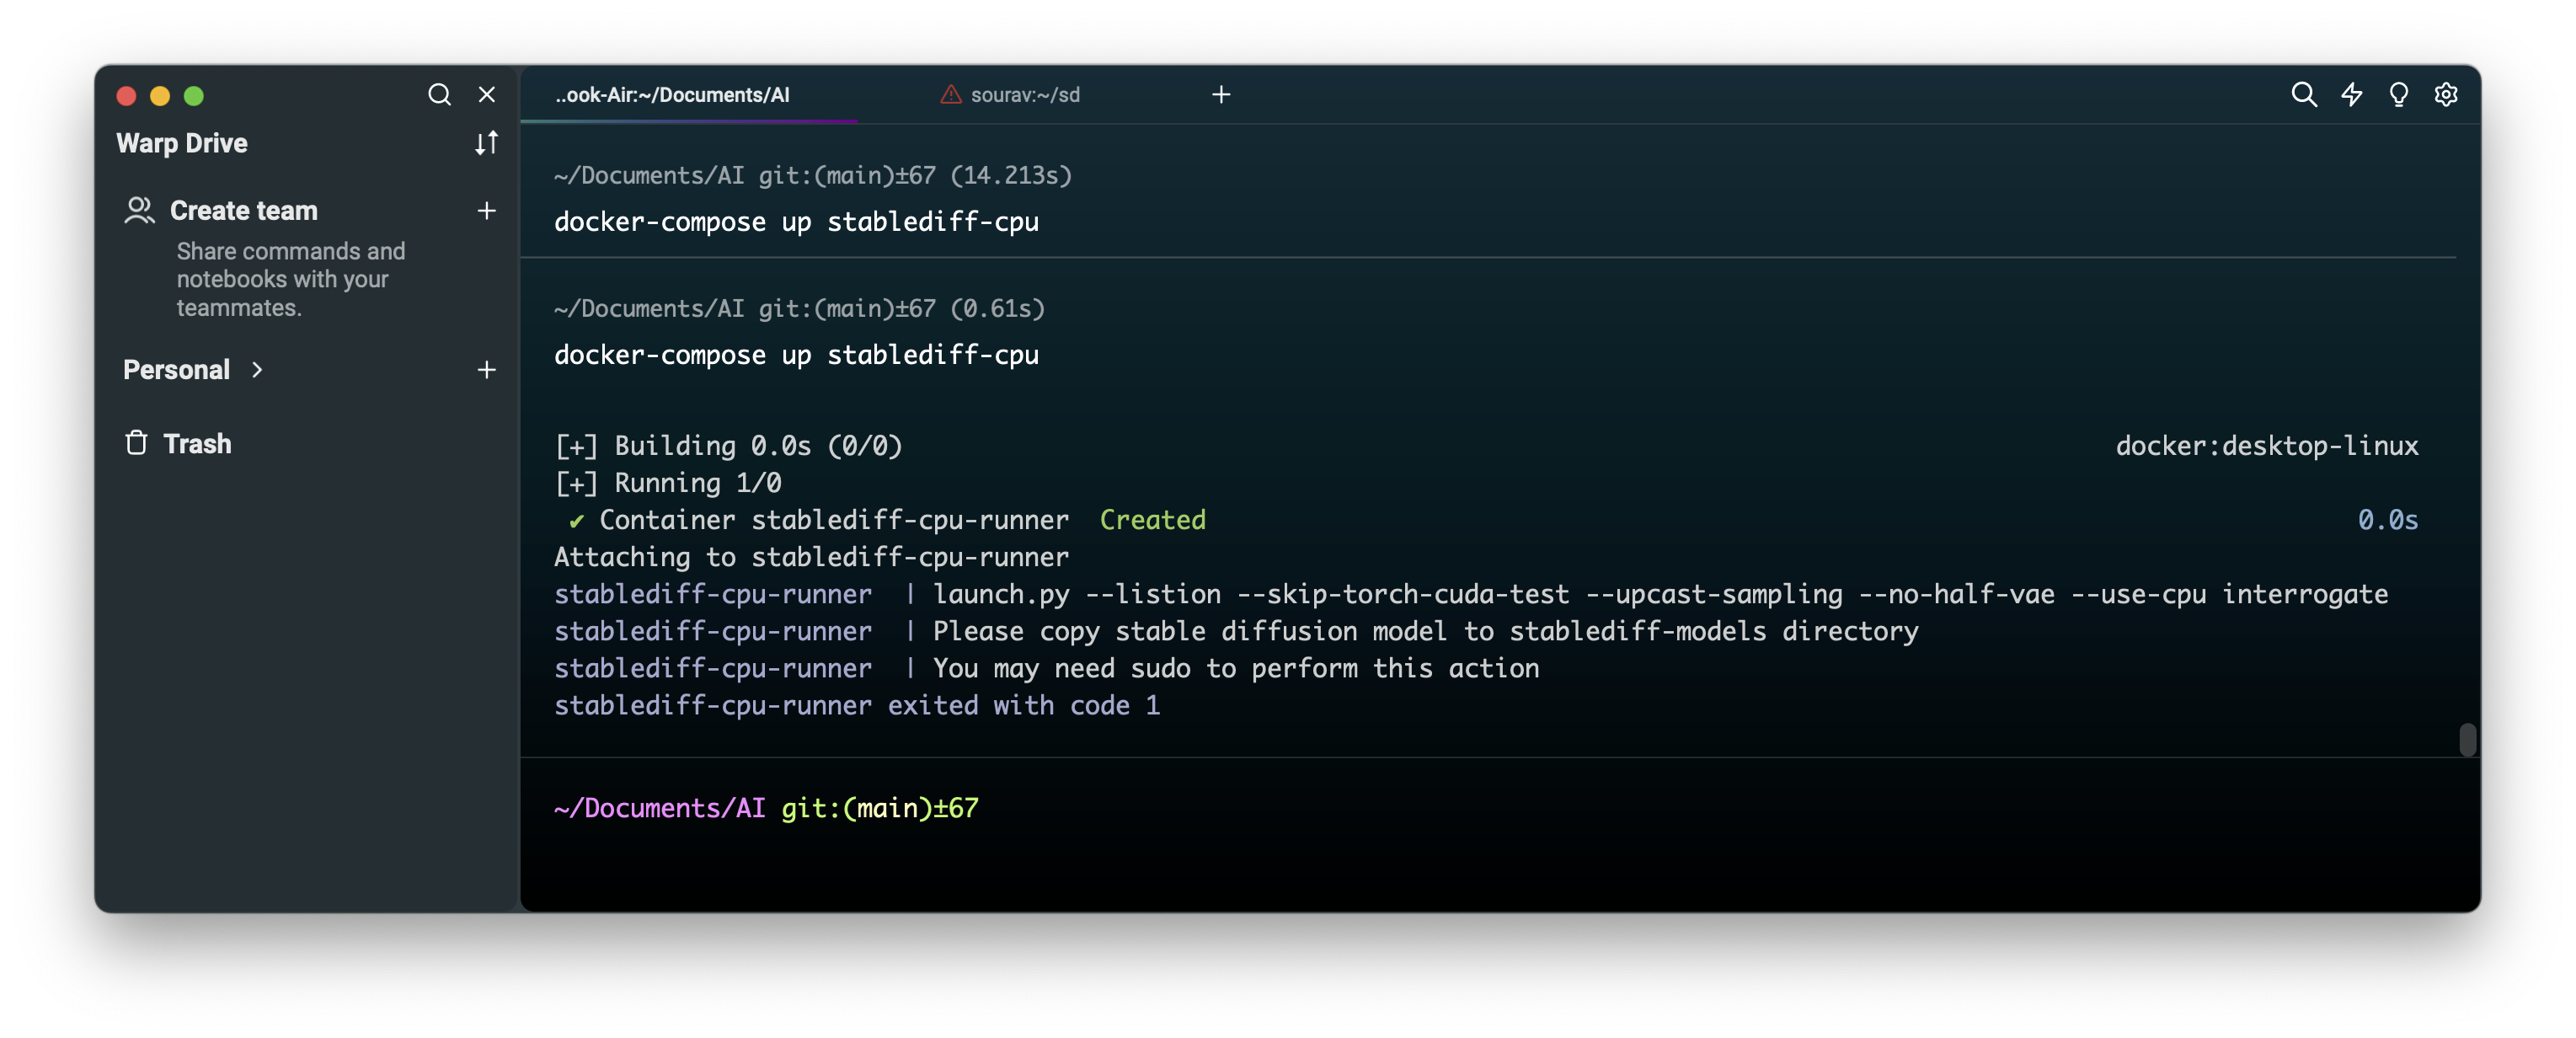
Now it is time to run the build with the docker-compose command
docker-compose up stablediff-cpu
There is a possibility that you will be running into this error message where it did not download the model and shows that you don’t have errors.
So what is the solution - if you go to where your two files are stored you will see that it has created 3 new folders
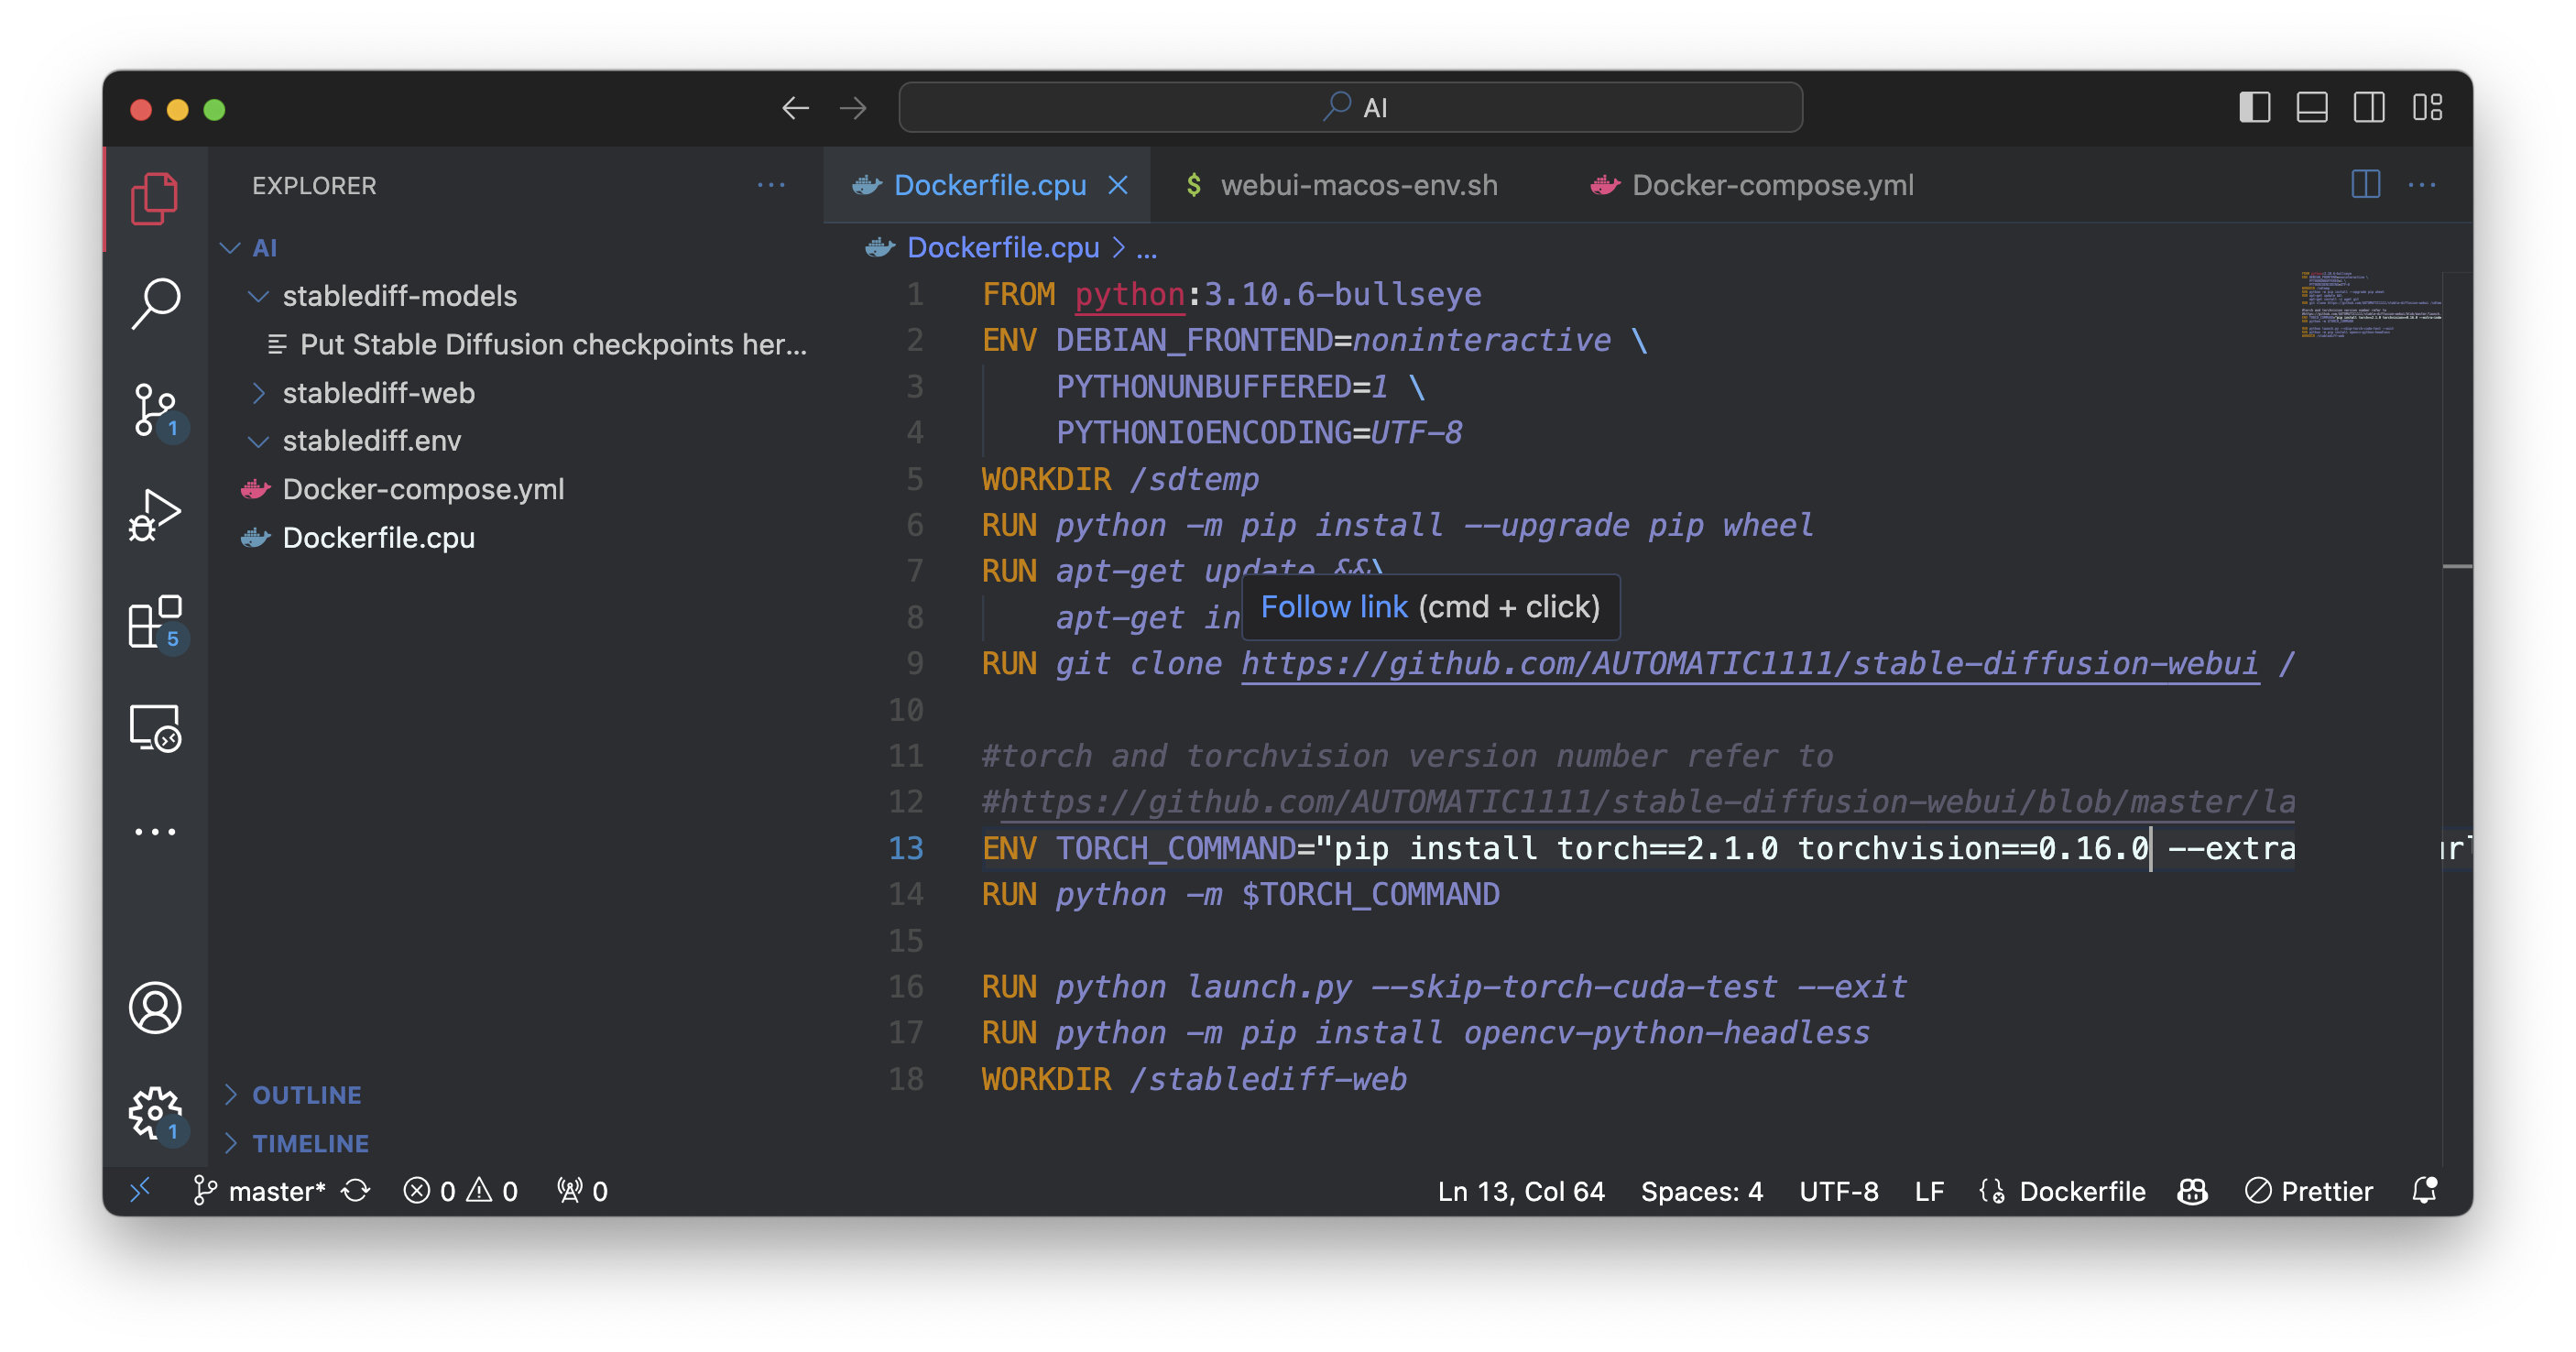
And if you look closely we can see there is no model in the model folder. So to solve this issue we have to put a model. You can go to HuggingFace and download the Stabel Diffusion model or to Civitai or Click Here to Download a model.
After Downloading the Paste Model here it needs Sudo a command. Like this, you can paste.
sudo cp ~/Download/v1-5-pruned-emaonly.safetensors .

As you can see I have put the model in the stablediff-models folder.
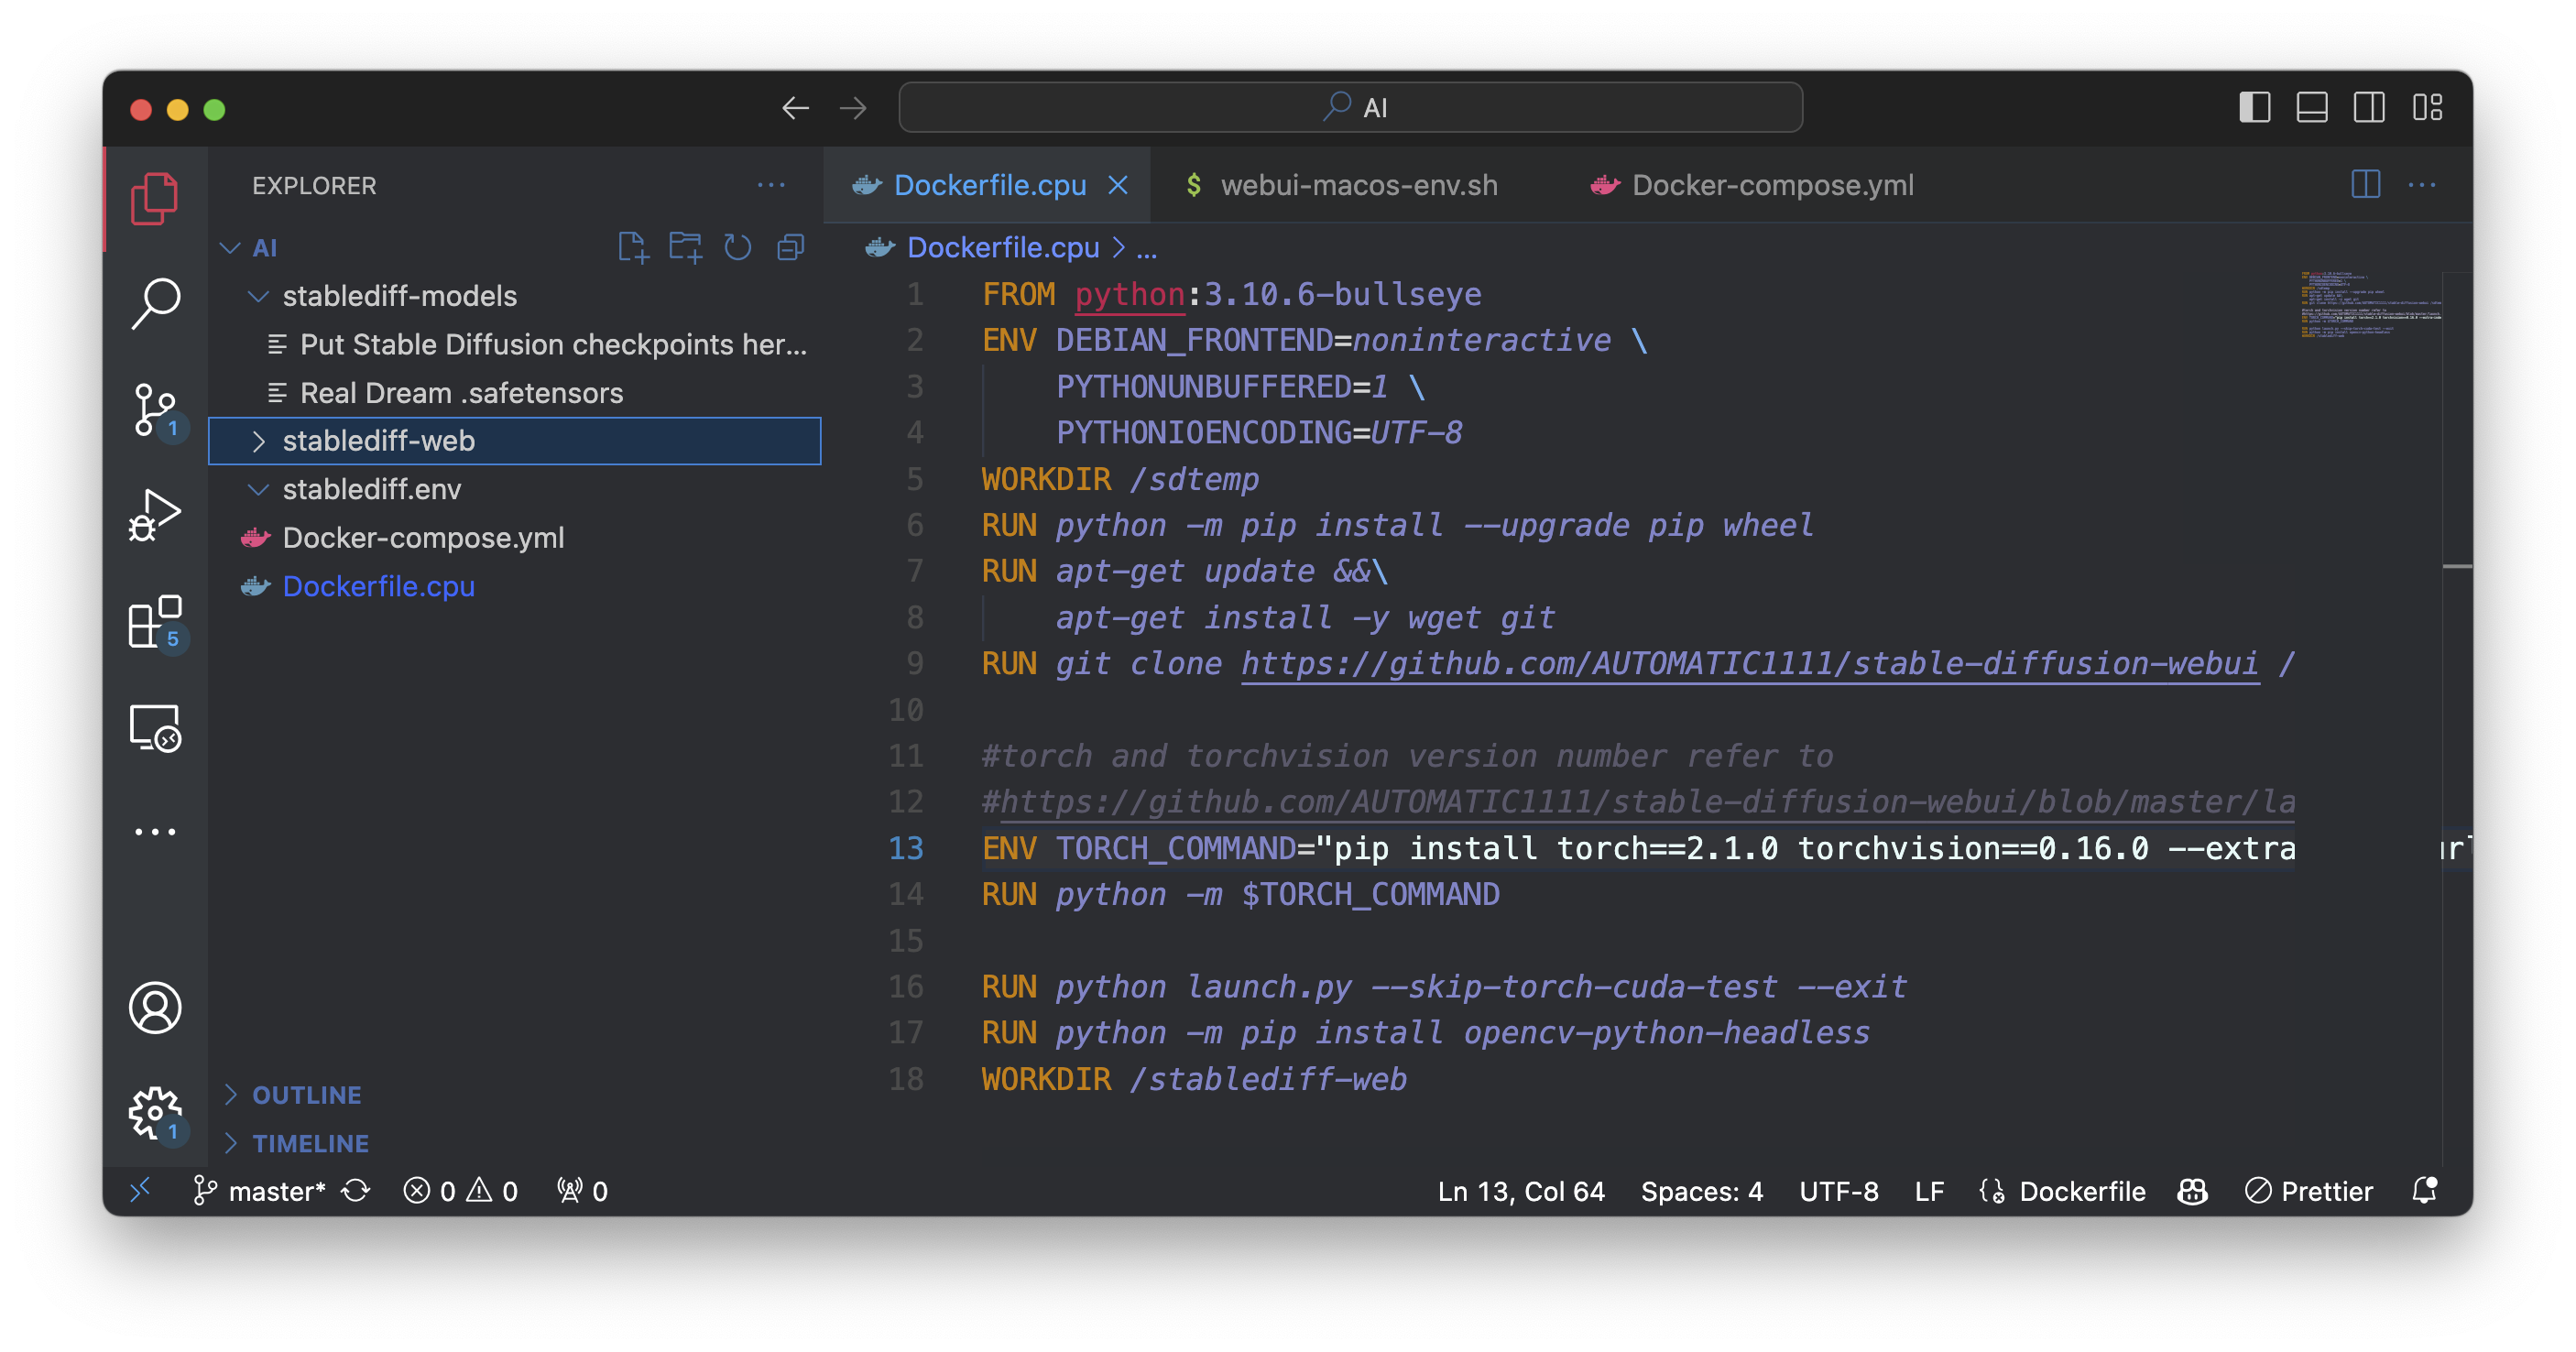
Now let’s re-run that command
docker-compose up stablediff-cpu
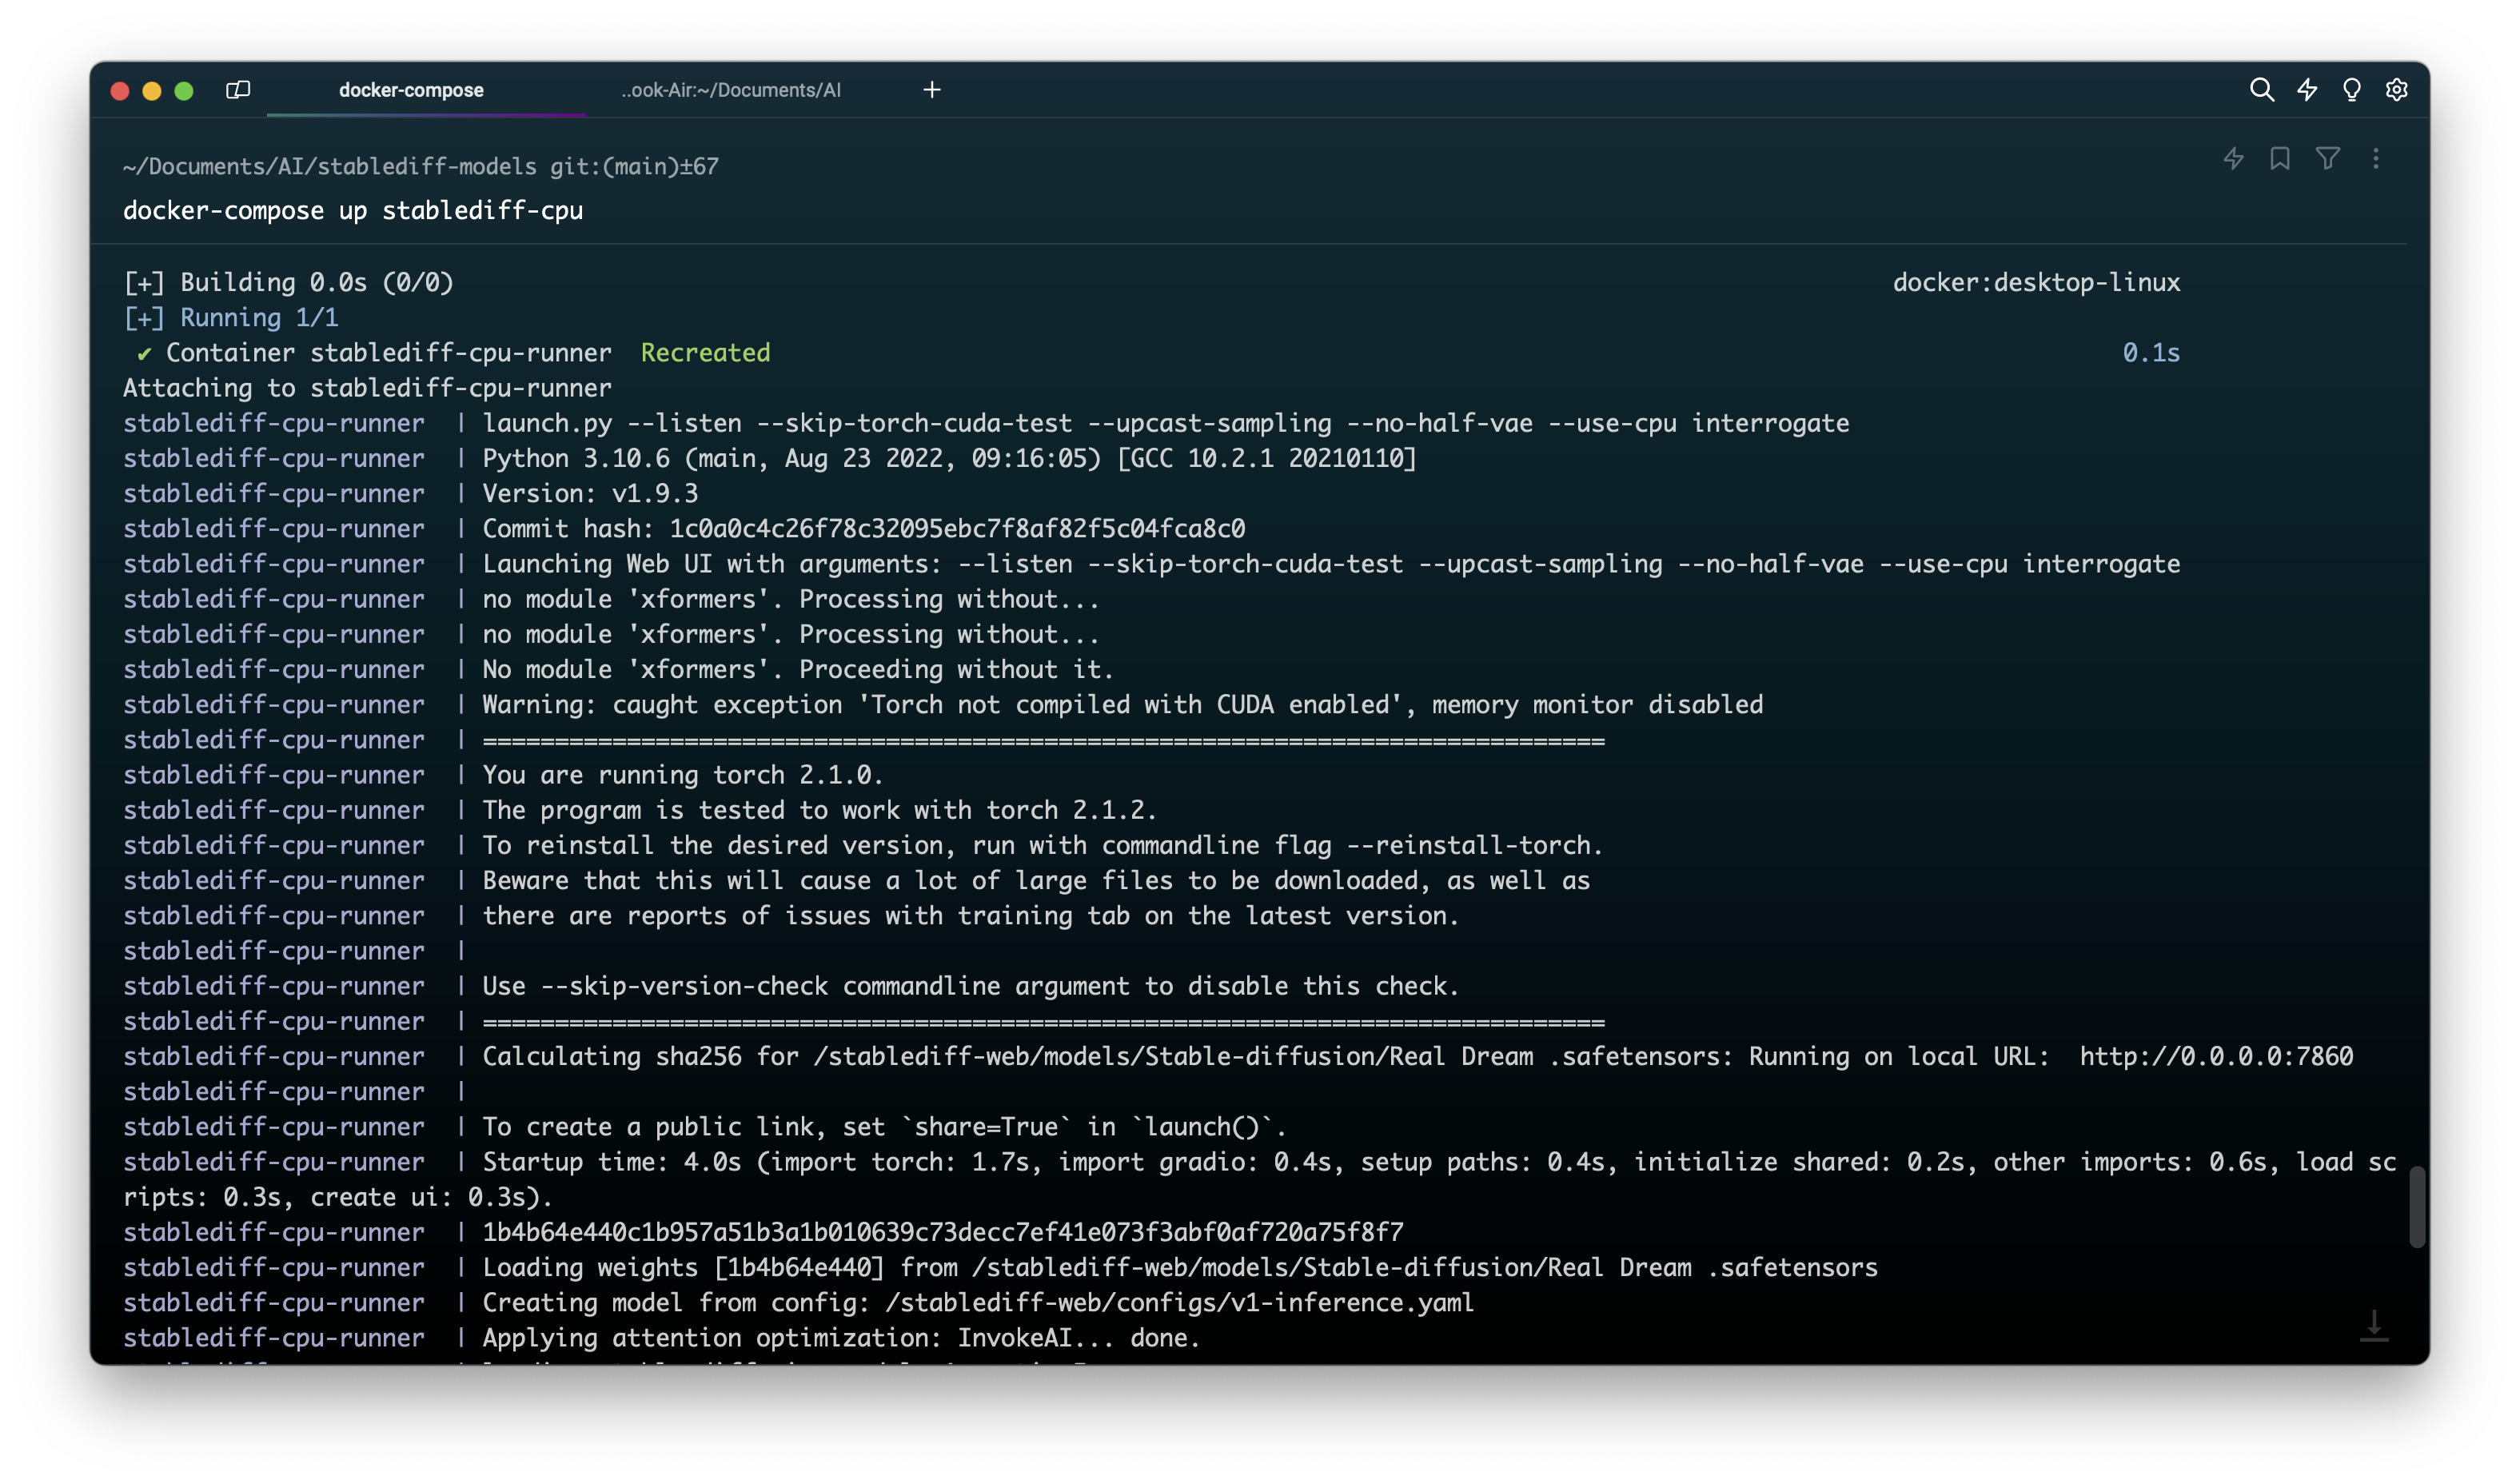
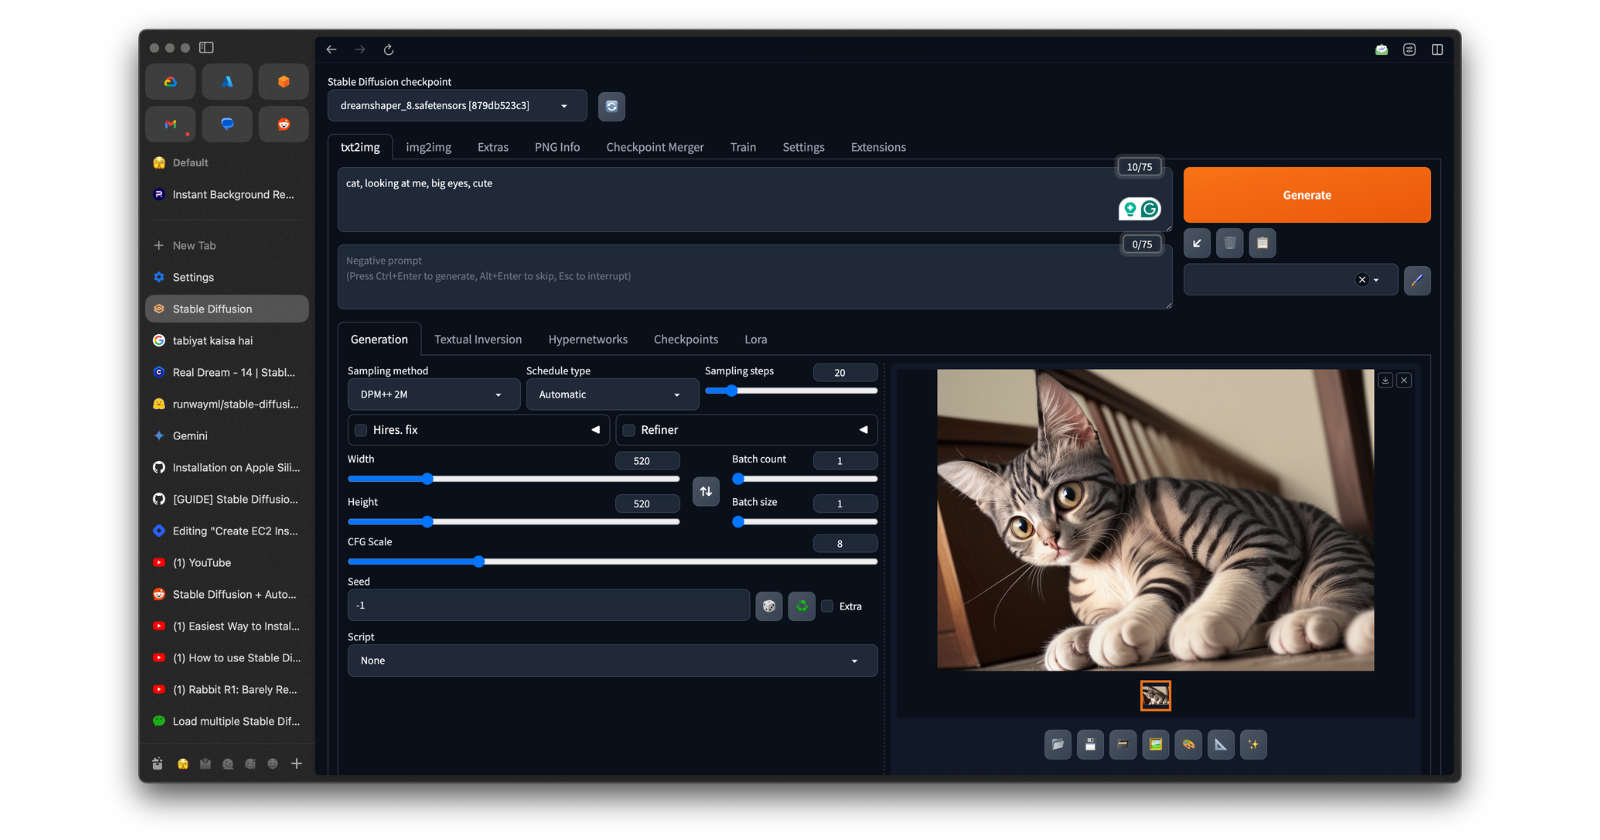
HO HO It’s running let visit the URL and generate some images.
localhost:7860
Thank You
Thank You For Reading let me know if you have any problems I will help you
Summary: The blog post explores the concept of Stable Diffusion in Docker, explaining how it generates images from text descriptions using latent diffusion models. It provides Dockerfile examples for CPU, AMD GPU, and Nvidia GPU, along with a Docker Compose file to run Stable Diffusion. The post also covers troubleshooting steps for missing models and guides on how to download and paste them.
Subscribe to my newsletter
Read articles from Sourav Kumar directly inside your inbox. Subscribe to the newsletter, and don't miss out.
Written by

Sourav Kumar
Sourav Kumar
Learning Kubernetes in DevOps journey and Sharing my Learning