Choosing the Right Path: Exploring AWS VPC Creation Options - Wizard vs Manual Setup
 Yukesh K
What is VPC?
In AWS, a Virtual Private Cloud (VPC) is a dedicated virtual network tailored to your AWS account. It empowers you to deploy AWS resources, like EC2 instances, within a network of your design. With VPC, you gain authority over the network setup, including the ability to choose your IP address range, establish subnets, and configure route tables and network gateways. This capability enables you to construct a segregated segment within the AWS Cloud, where you can deploy AWS resources in a virtual network resembling a conventional network setup often found in on-premises data centers.
Types of creating VPC
By default, the AWS VPC console offers the following two options for creating our VPC,
VPC & More - Wizard
VPC Only - Manually creating
The following illustration will aid in comprehension as we delve into creating the VPC using both methods.
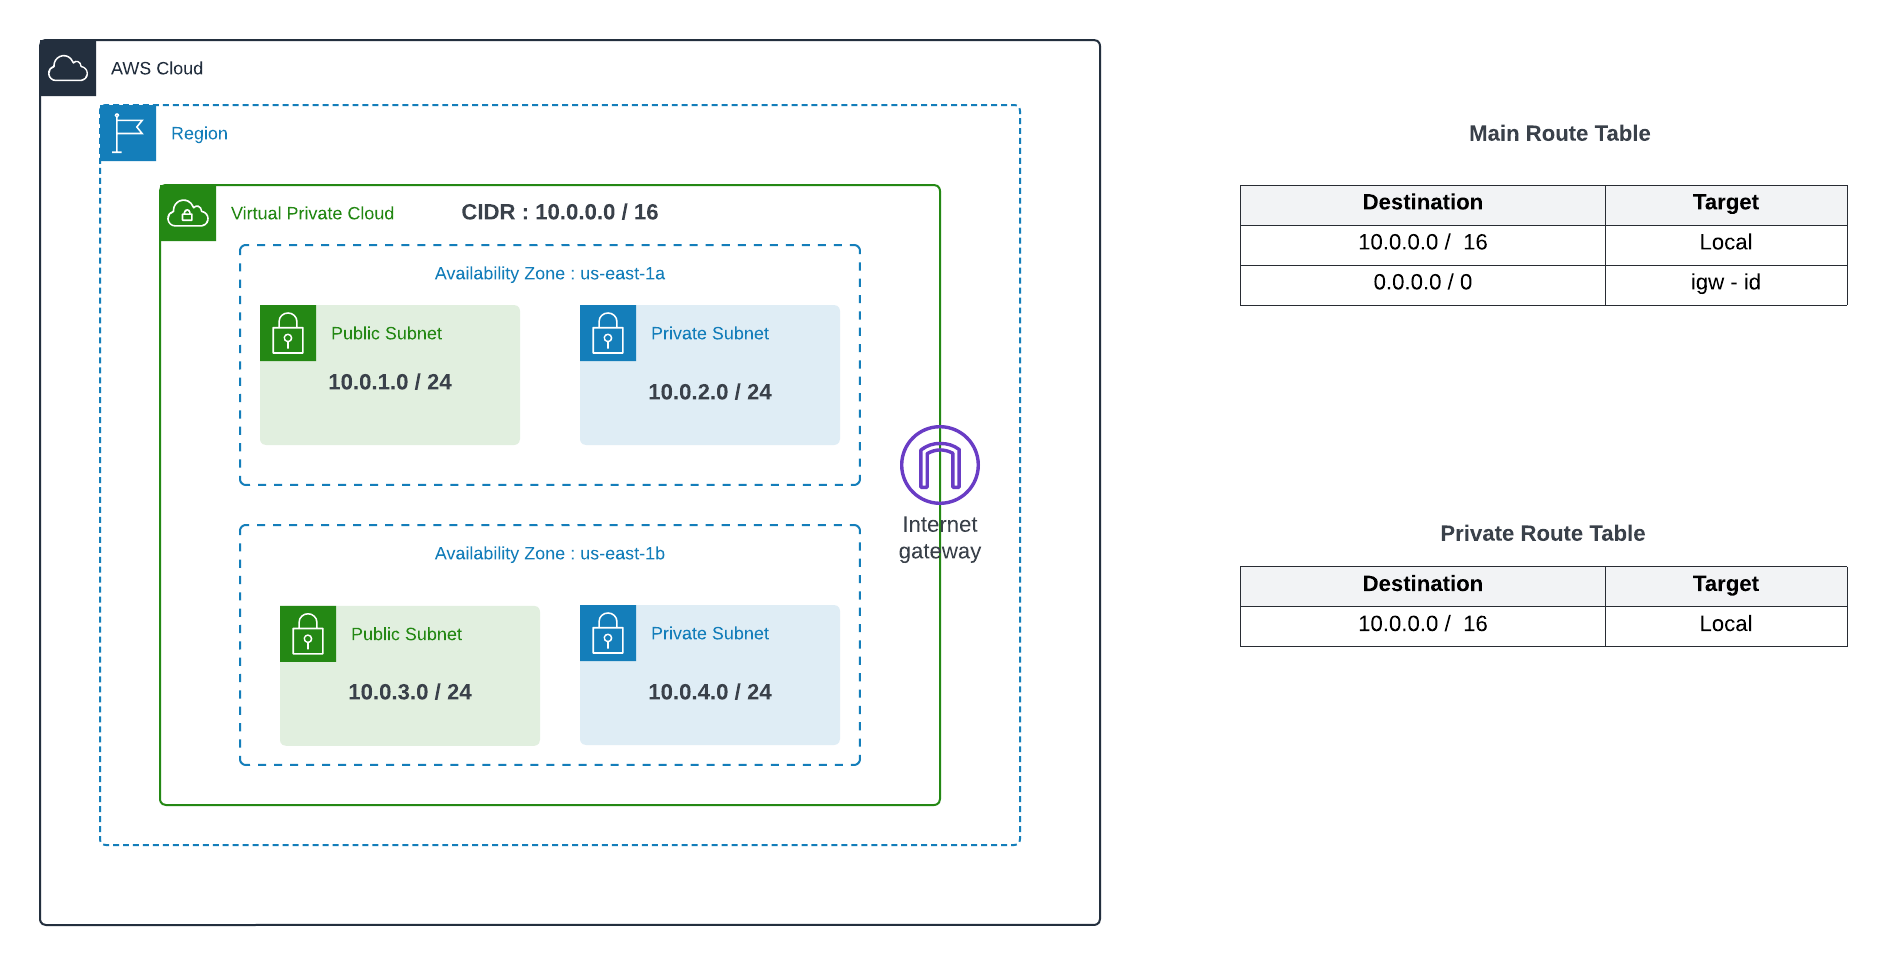
Hands-On : Creating VPC using the Wizard
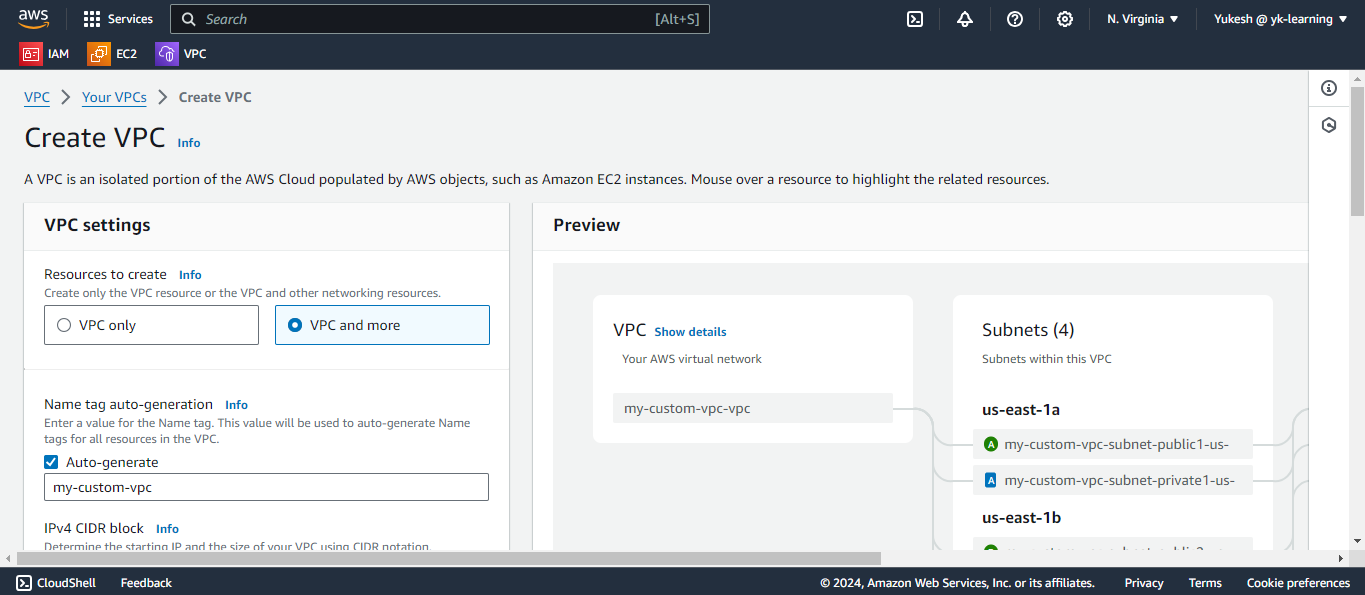
Navigate to the VPC section in the AWS console and click on the "Create VPC" button. Choose the "VPC & More" option. Then, specify the VPC name and leave the subnet settings as default.
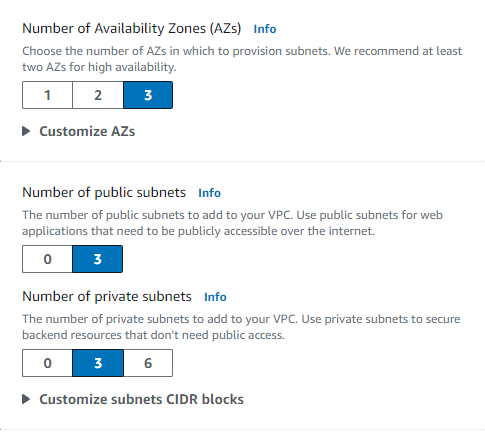
Specify the input for the quantity of Availability Zones, Public Subnets, and Private Subnets.
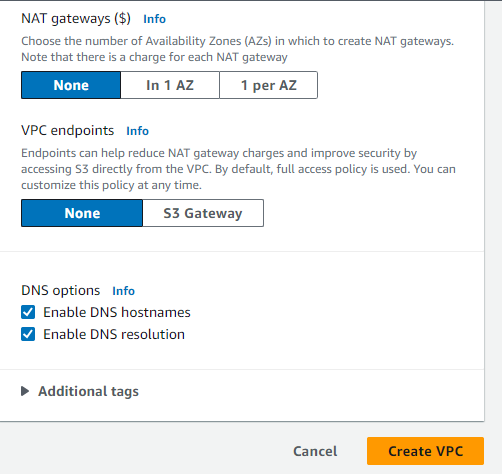
Select none with the NAT gateway option and VPC endpoints as we are not going to opt for it now and then click on the "Create VPC" button.
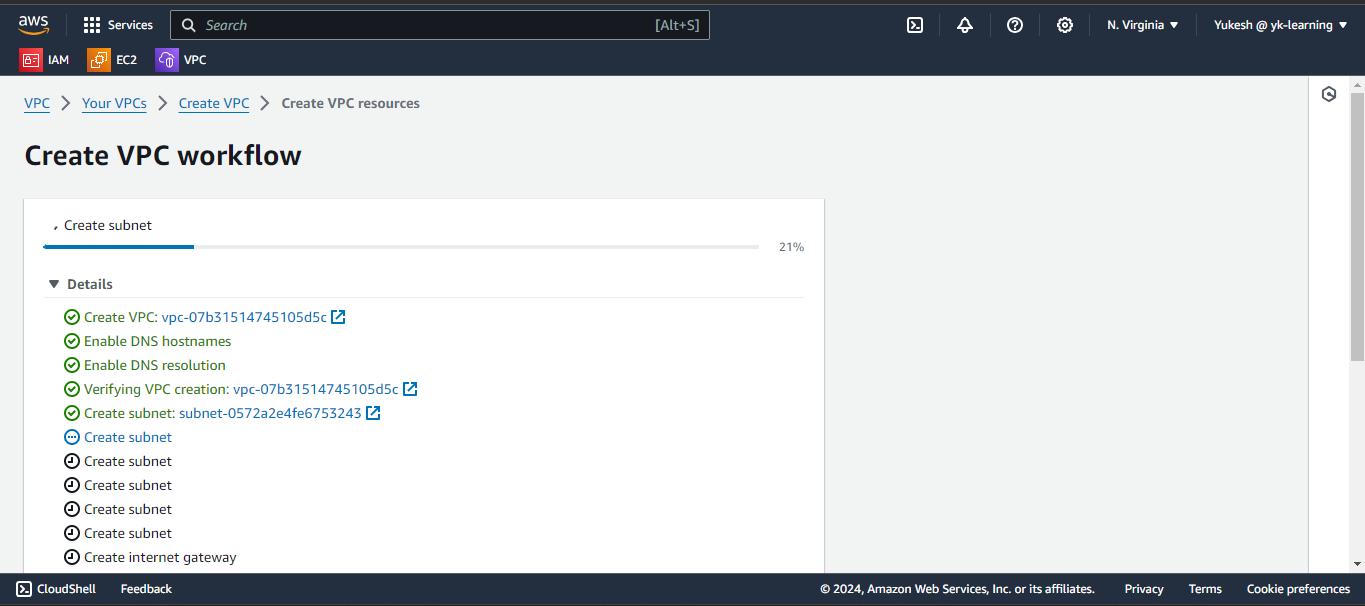
Now the requested configurations will be created.
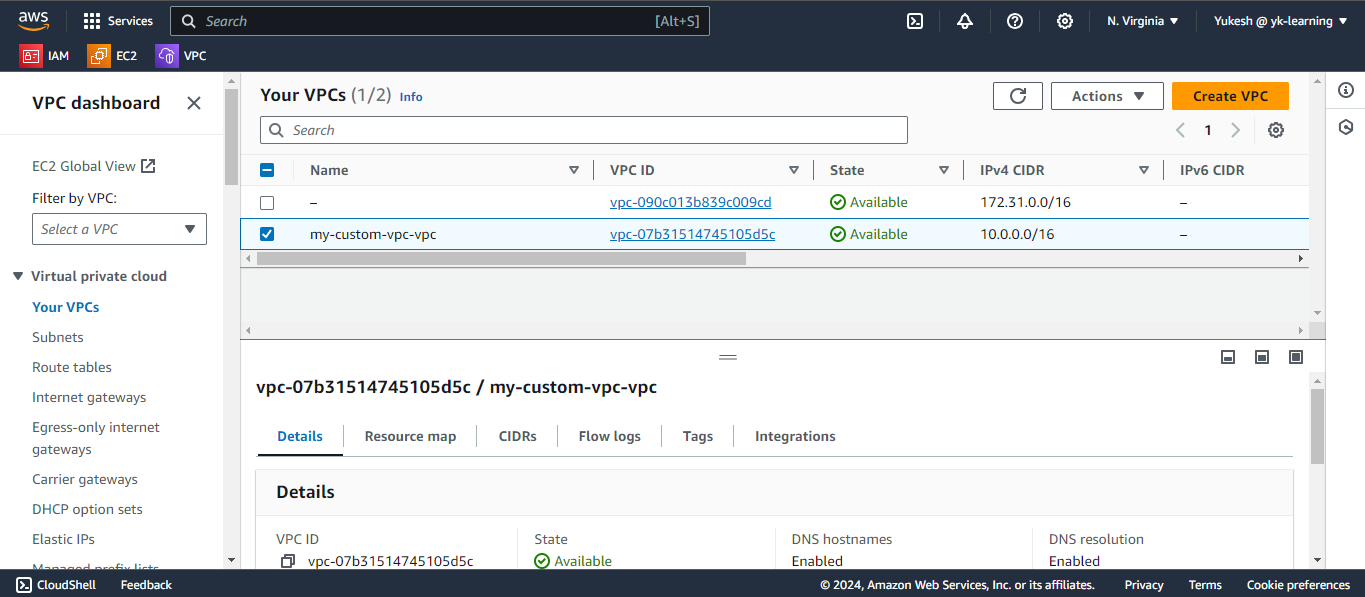
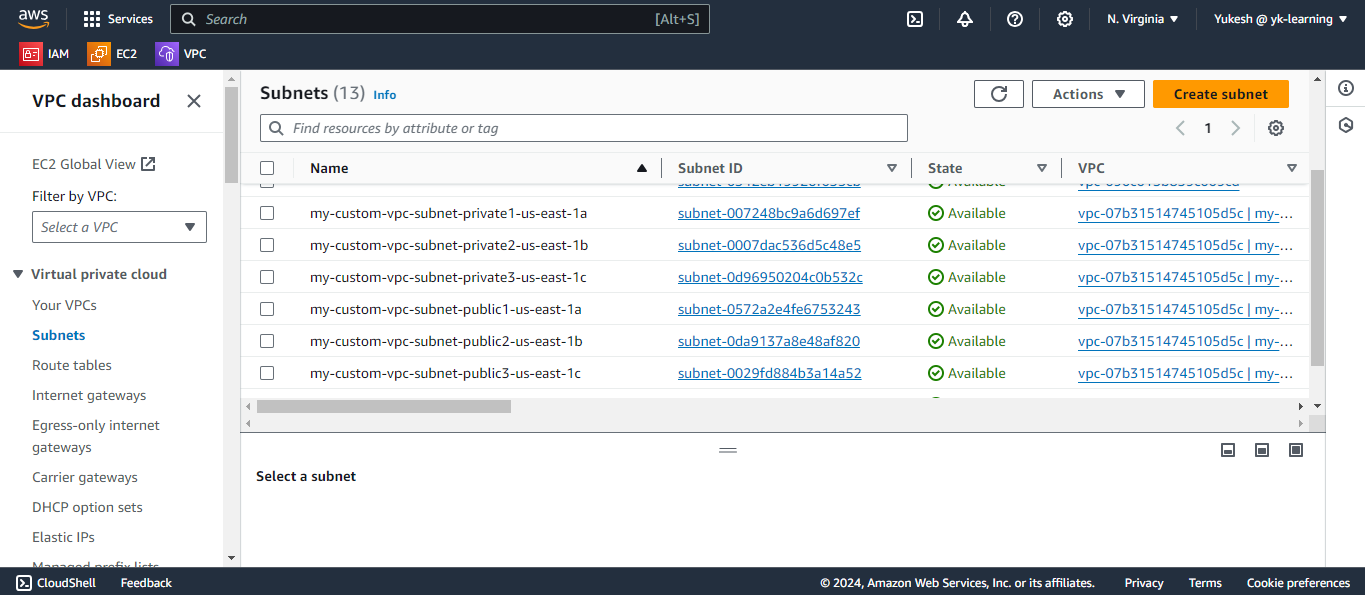
Now when navigating to the subnets, we could see the VPC wizard has created the specified public and private subnets.
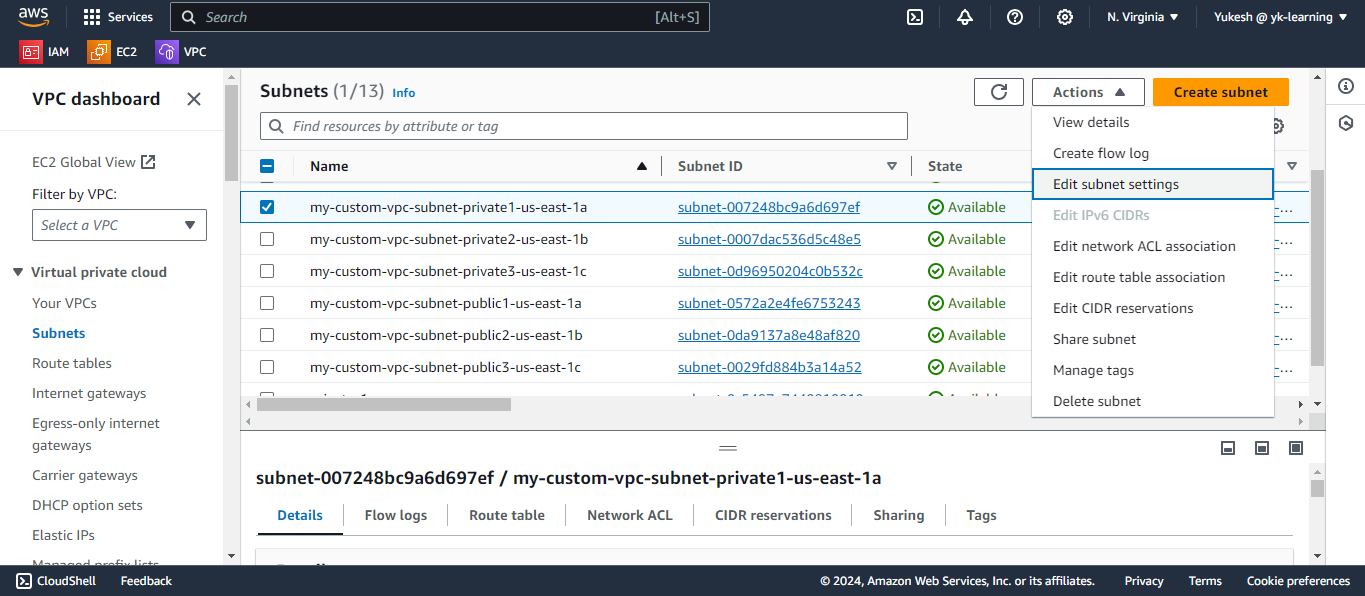
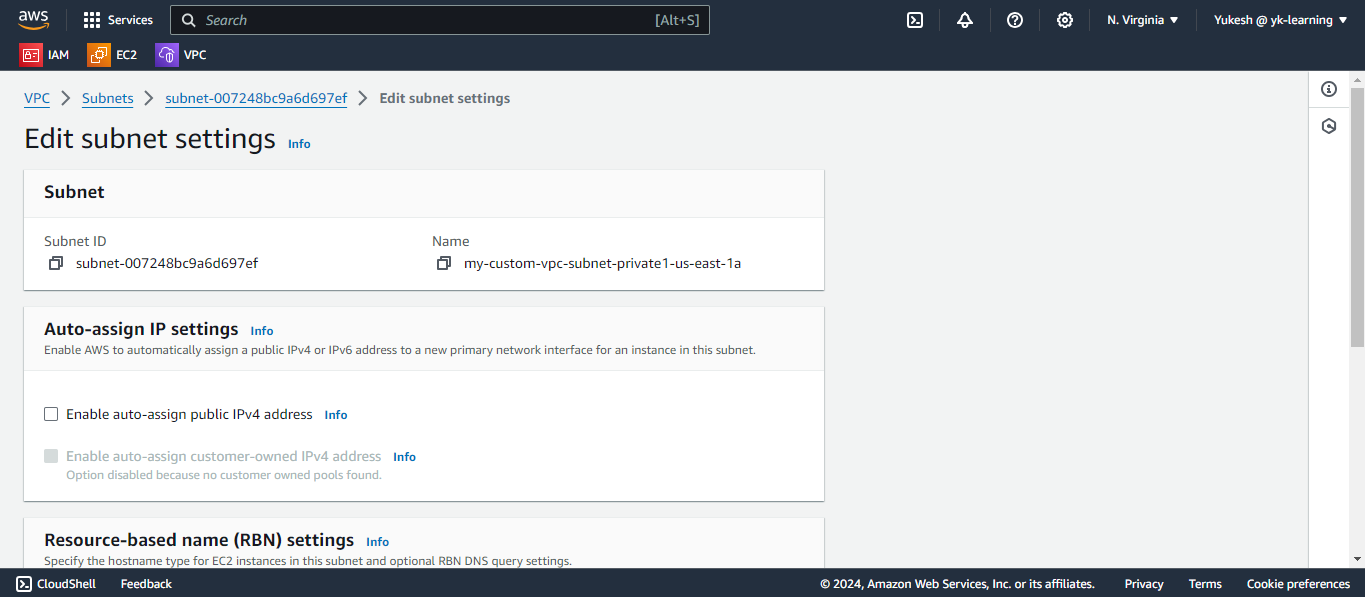
By default, public IPs are not assigned to the created subnets from the wizard. You must manually enable public IP assignment by navigating to Actions -> Edit subnet settings -> Enable Auto Assign IP V4 Address.
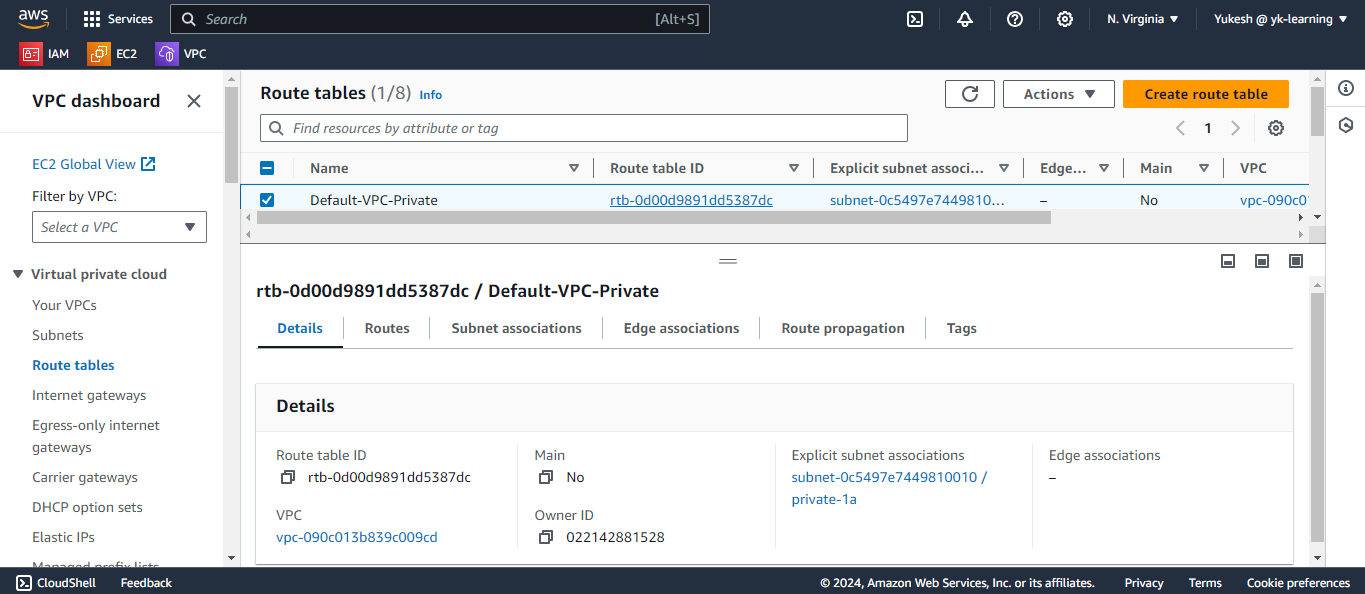
Similarly we could see the route table created by the Wizard.
Hands-On : Creating VPC Manually
The following list is utilized for creating our VPC and includes a checklist item for manual creation.
# Create VPC
Name: MyVPC
IPv4 CIDR Block: 10.0.0.0/16

# Create Public & Private Subnets

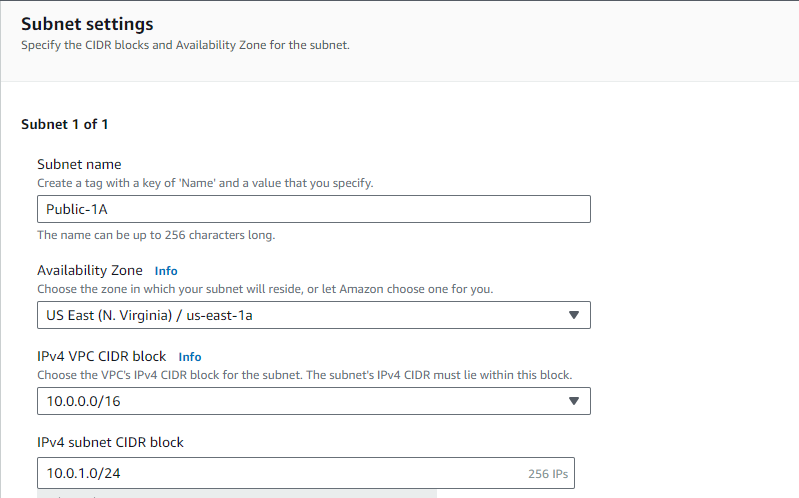
Name: Public-1A
Availability Zone: us-east-1a
IPv4 CIDR Block: 10.0.1.0/24

Name: Public-1B
Availability Zone: us-east-1b
IPv4 CIDR Block: 10.0.2.0/24

Name: Private-1A
Availability Zone: us-east-1a
IPv4 CIDR Block: 10.0.3.0/24

Name: Private-1B
Availability Zone: us-east-1b
IPv4 CIDR Block: 10.0.4.0/24

# Create private route table

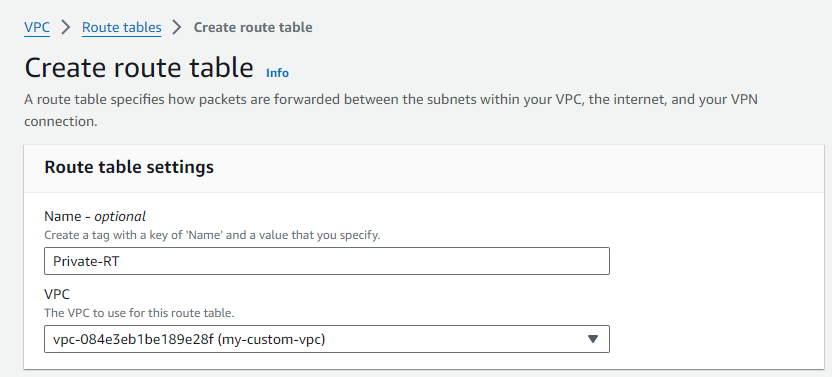
Name: Private-RT
VPC: MyVPC
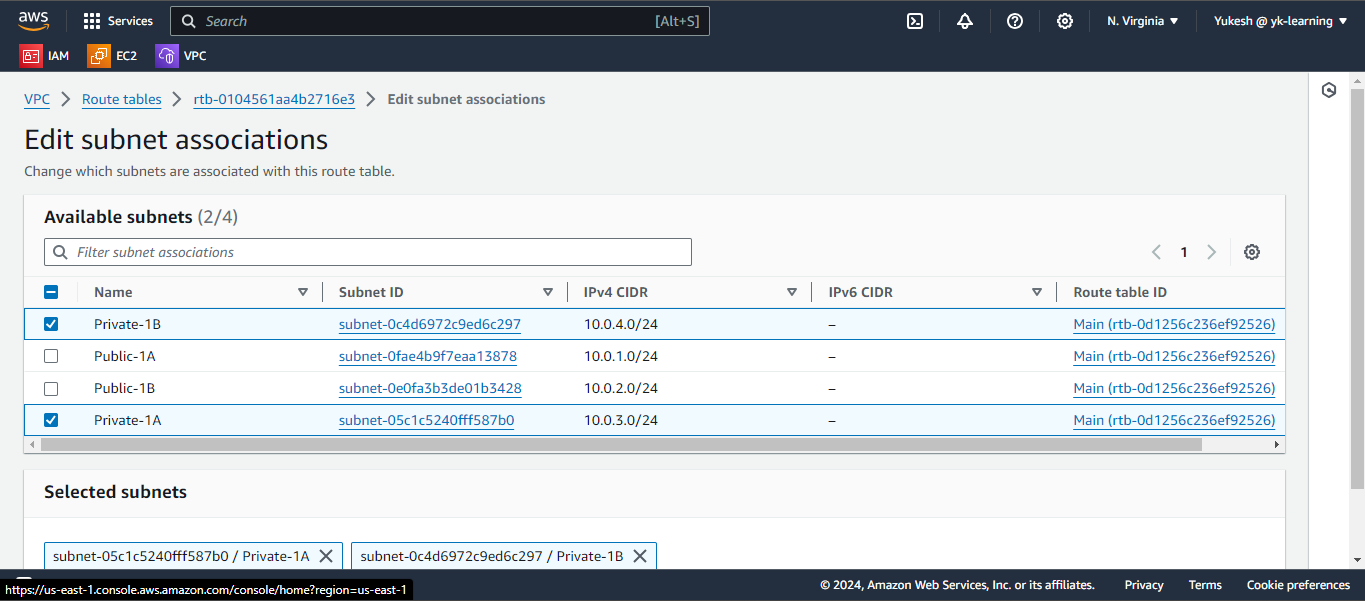
Subnet associations: Private-1A, Private-1B

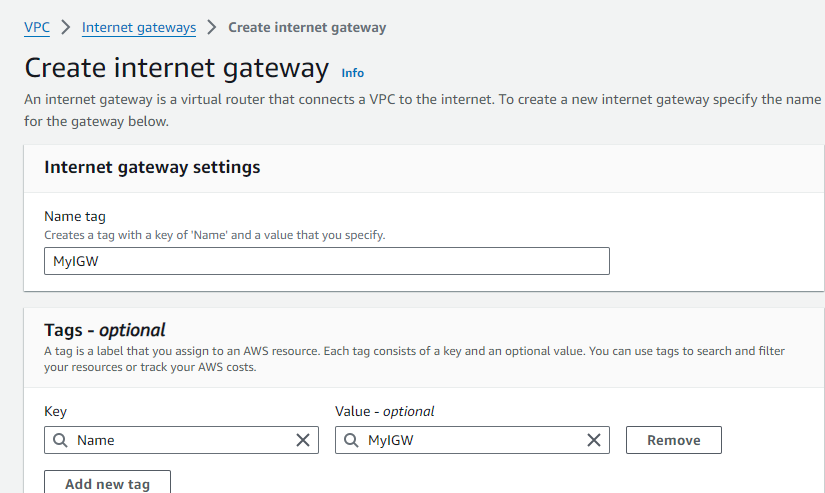
# Create Internet Gateway

Name: MyIGW
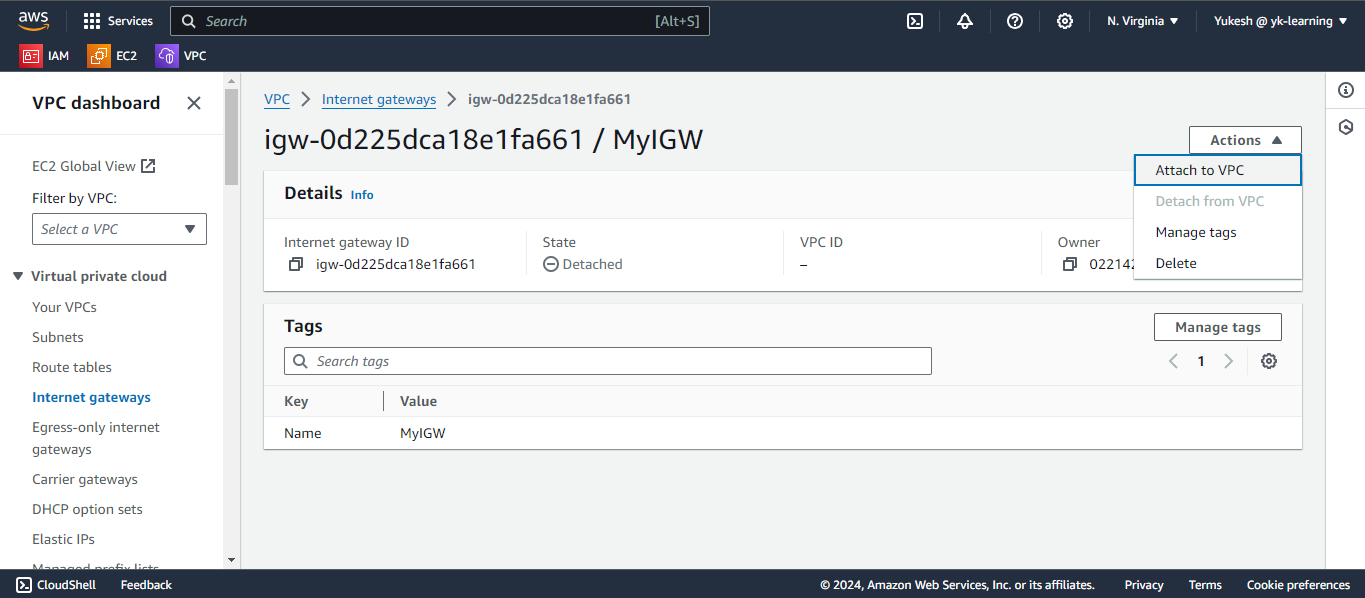
VPC: MyVPC
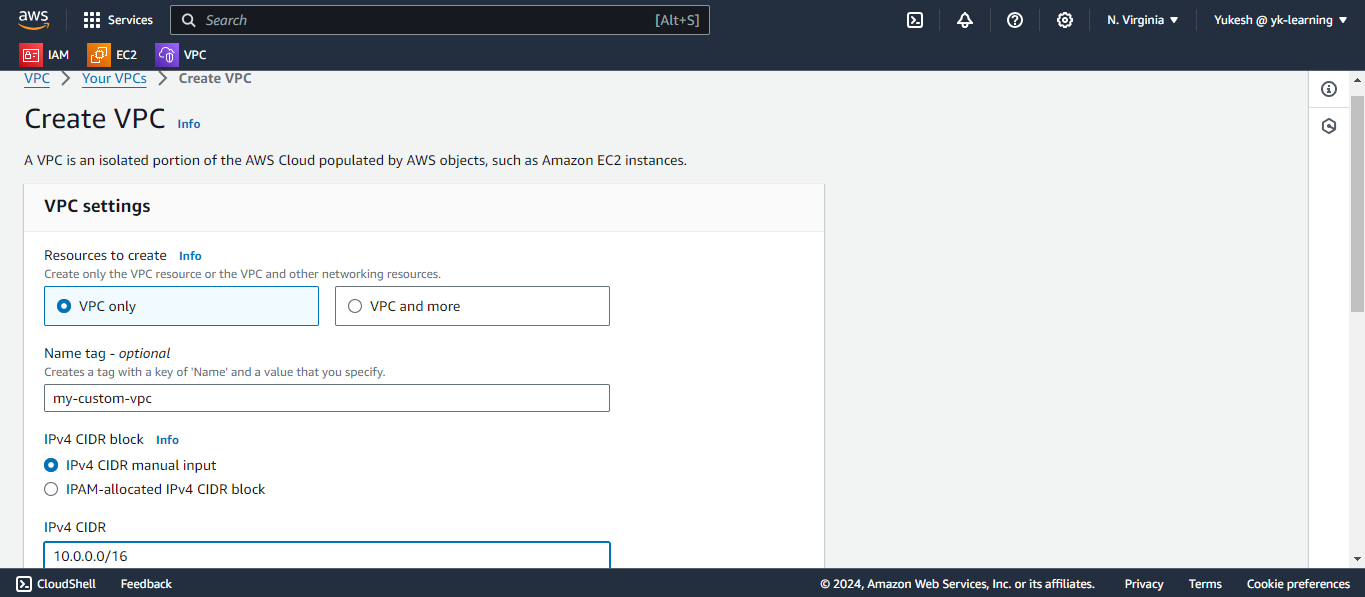
and cNavigate to the VPC section in the AWS console and click on the "Create VPC" button. Choose the "VPC only" option. Then, specify the VPC name and manually specify the IPv4 CIDR block from above reference.
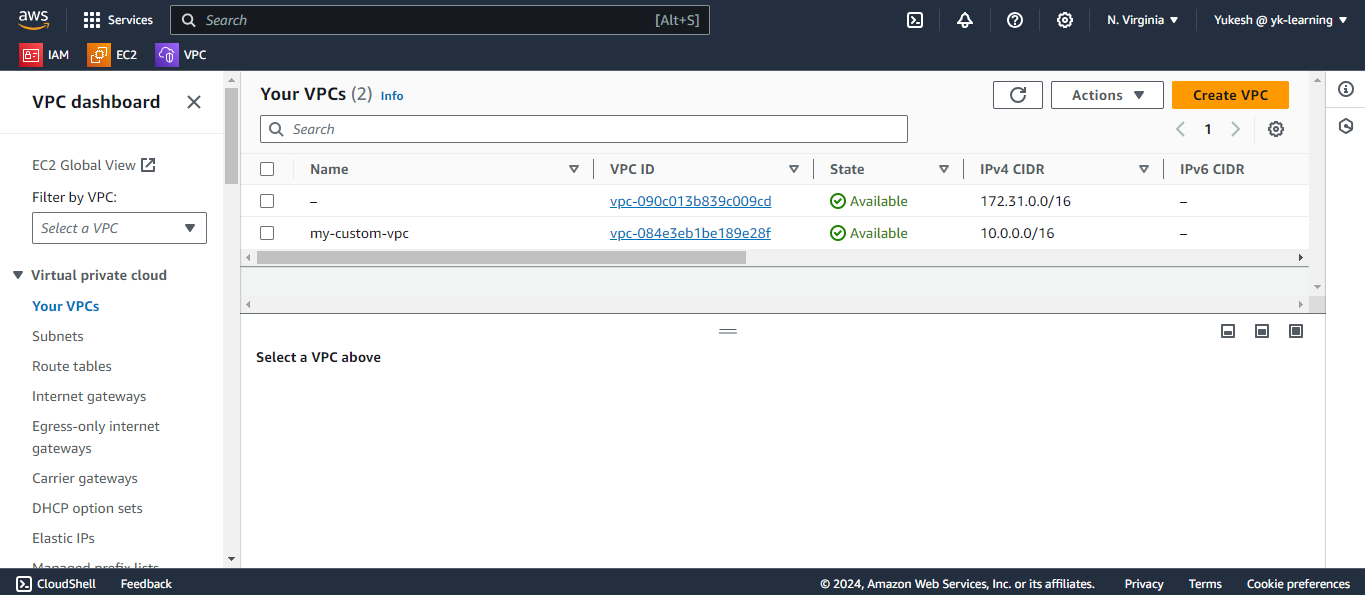
Now upon clicking on the "Create VPC" we have created our subnet.
Now create subnet with the VPC created.
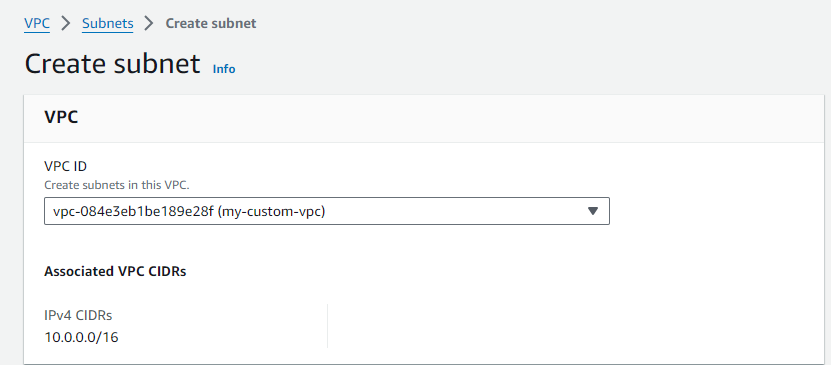
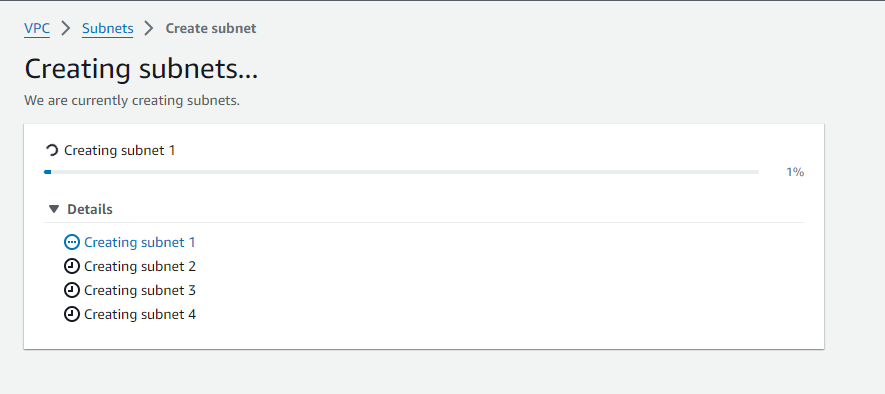
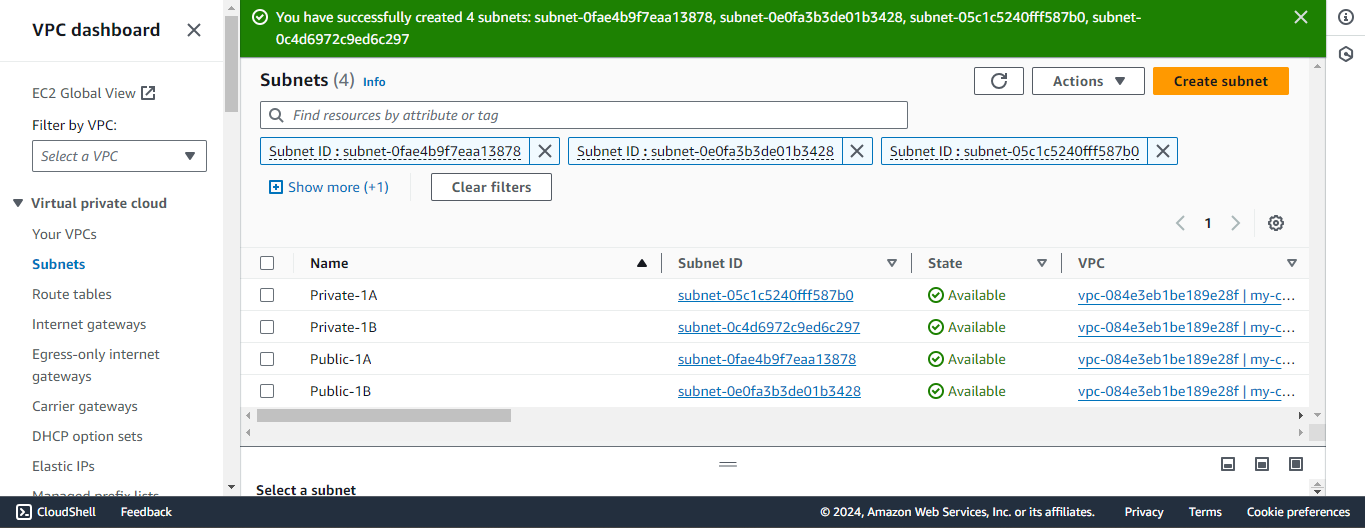
Specify the Subnet name, Availability Zone and IPv4 CIDR block from the above provided reference. The same steps must be followed to create the remaining public and private subnets.
Generate a route table for the private subnets.
Modify the subnet associations with the created route table for the private subnets. Choose the private subnet and then click on "Save Associations."
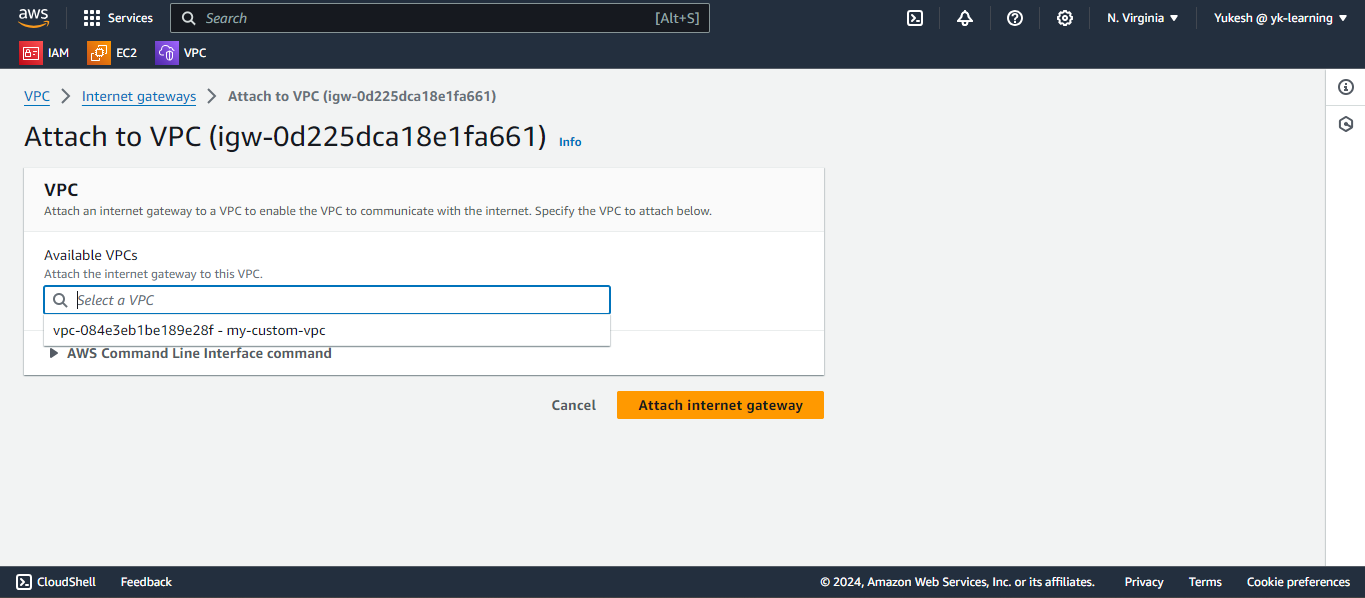
Next, generate the Internet Gateway and link it to the VPC.
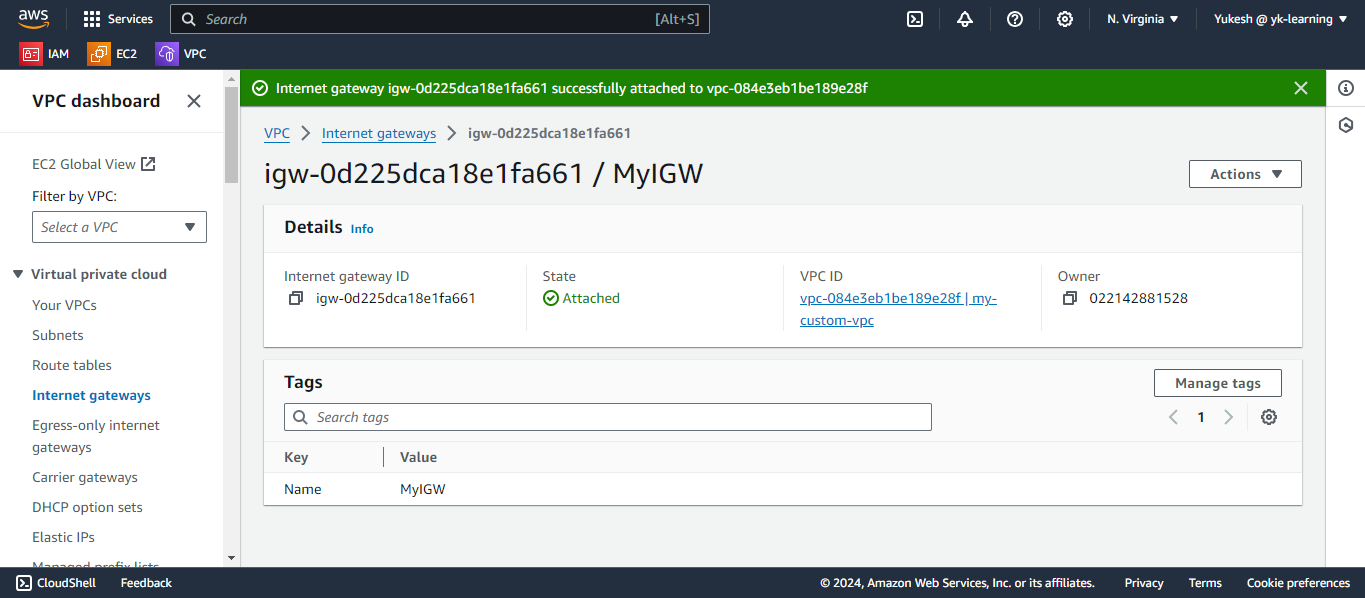
We have now successfully created the VPC using both the VPC wizard and manual configuration methods.
Subscribe to my newsletter
Read articles from Yukesh K directly inside your inbox. Subscribe to the newsletter, and don't miss out.
Written by
