Dockerising React Application using MultiStage Dockerfile
 Devarsh
Namaskaaram,
I hope you all are doing well. Today I am writing this blog to show the step-by-step guide on how I dockerized the React website I created during my 3 months of React(Frontend) Internship.
This series of Dockerizing the application is divided into 3 parts.
In this blog, I am going to show you, how to dockerize the application in different containers on the same network
In the second one, I will demonstrate how to dockerize the React application using docker-compose.
Finally, we'll be deploying it on Kubernetes and if time permits I will create a fourth blog on troubleshooting and a fifth blog on deploying the app on AWS EKS.
So, I hope I can show you the clear-cut architecture and agenda.
So now, without any further ado let's get started.
What should you expect from this?
After reading this blog, you'll get to know where to see how to debug the Dockerfile.
How to write multi-stage Dockerfile.
Getting Started
Firstly, let me show you what the registration page looks like when I run the command npm start.
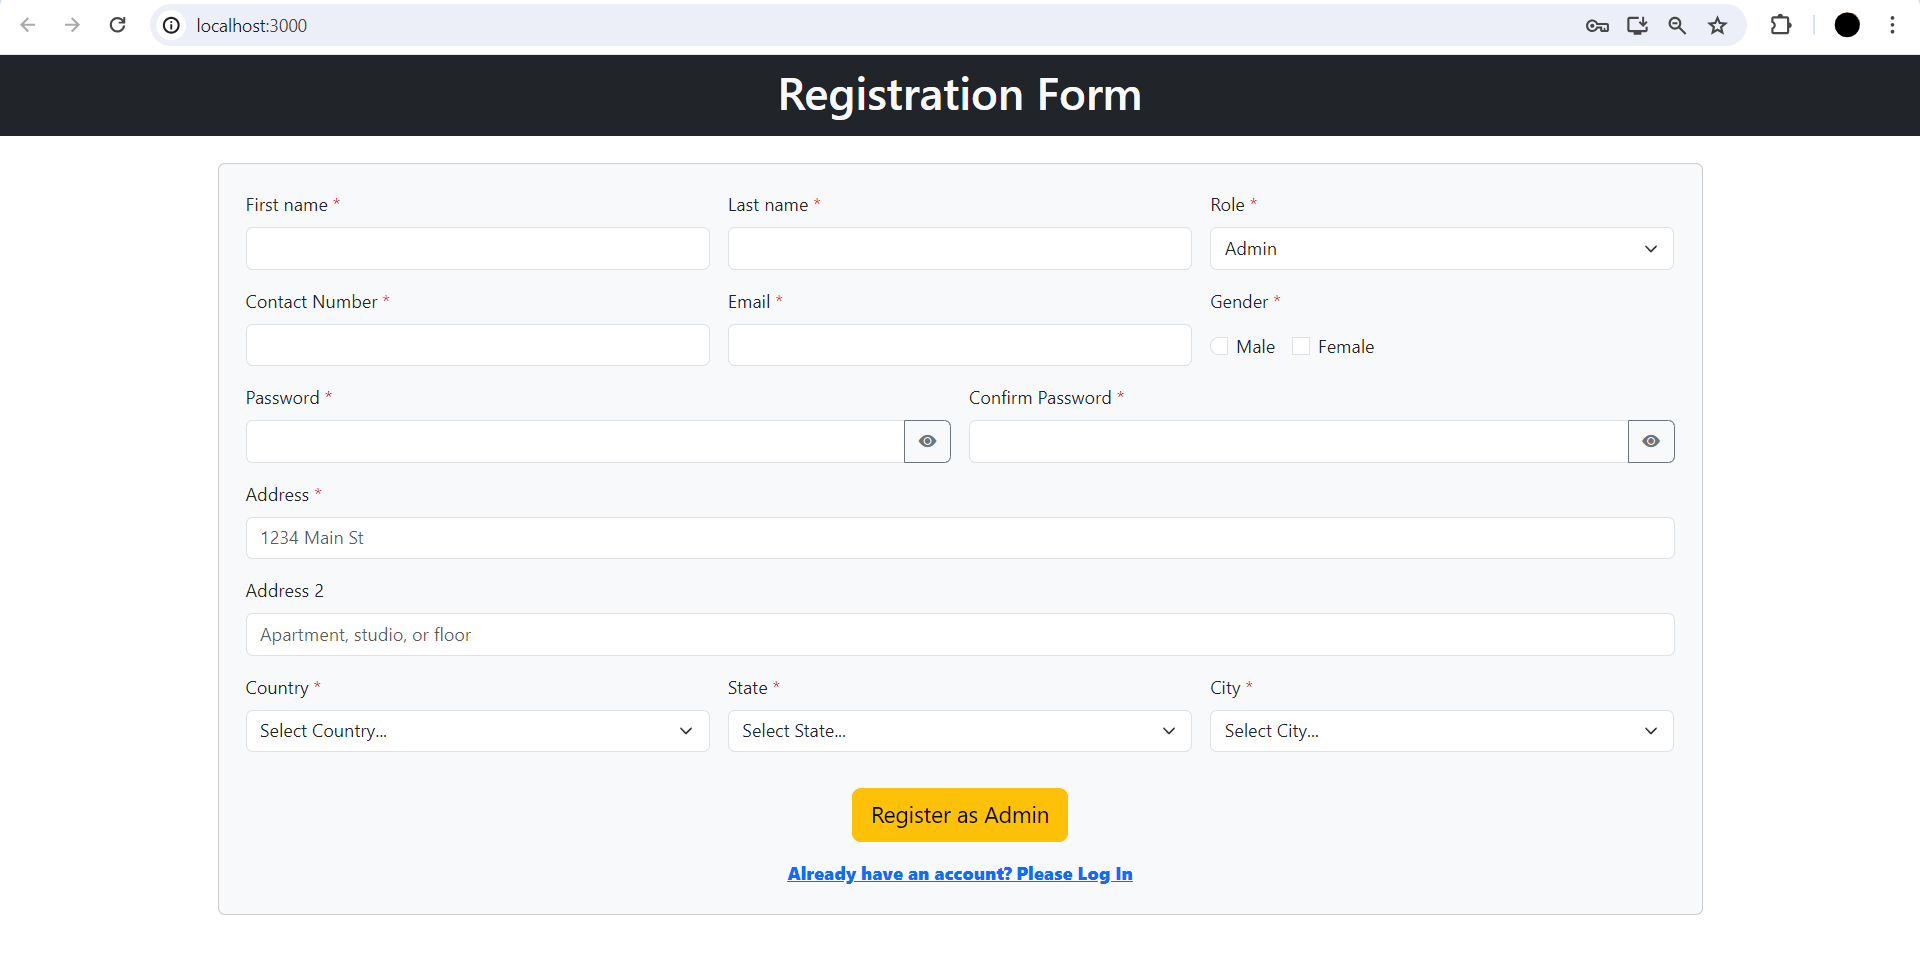
Now, let me give you some context.
Here we have our react app which is running on port 3000.
Besides we've 3 different databases, which are supposed to run on 3 different ports.
Following that, we have a Nodemailer in the backend which is responsible for sending the email to the user who forgot the password.
Hence, 3 containers are required.
My file structure
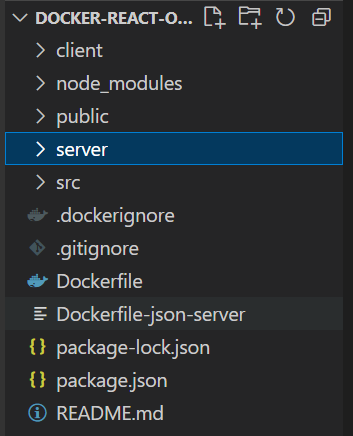
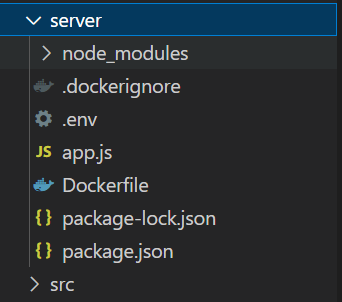
Note: Here, I have kept the Dockerfile of the frontend and the Dockerfile of the Database in the root directory, and the Dockerfile of Node.js is in the server directory. That is why I have written two ".dockerignore" files.
Dockerizing Frontend
Here, we're going to create a multi-stage dockerfile. Using the Single-stage Dockerfile may reach a GB of space which is not at all space-efficient.
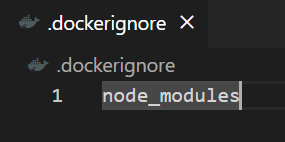
Also, keep in mind one thing. Create a '.dockerignore' file and add the directories or files that you do not want to copy to the Docker container. In our case, it is "node_modules". It looks something like this,
As you can see in the following when we use the single-stage Dockerfile. The size of the image will reach more than 1 GB. In our case, it's almost 2 GB.

Dockerfile used,
FROM node:20 AS builder

WORKDIR /app

COPY package.json .

RUN npm i

COPY . .
Now, see the following change,

Changes made,
FROM node:20 AS builder

WORKDIR /app

COPY package.json .

RUN npm i

COPY . .

FROM node:alpine

# Creating a new directory named app
WORKDIR /app

#Copying all the content copied in app to current directory
COPY --from=builder /app .

# Exposing port which will be mapped with the host's port.
EXPOSE 3000

# This will start the development server.
CMD [ "npm", "start" ]
Hence, we've saved something around 1.5 GB of Space which matters a lot when dockerizing an app in production.
Now, let us run our app in a container in a separate network.
First, create a network using the command docker network create react-net.
Now, run the establish a Docker container using the command,
docker run -d -p 3001:3000 --network react-net --name react-app <image-id>
In my case, it looks something like this,

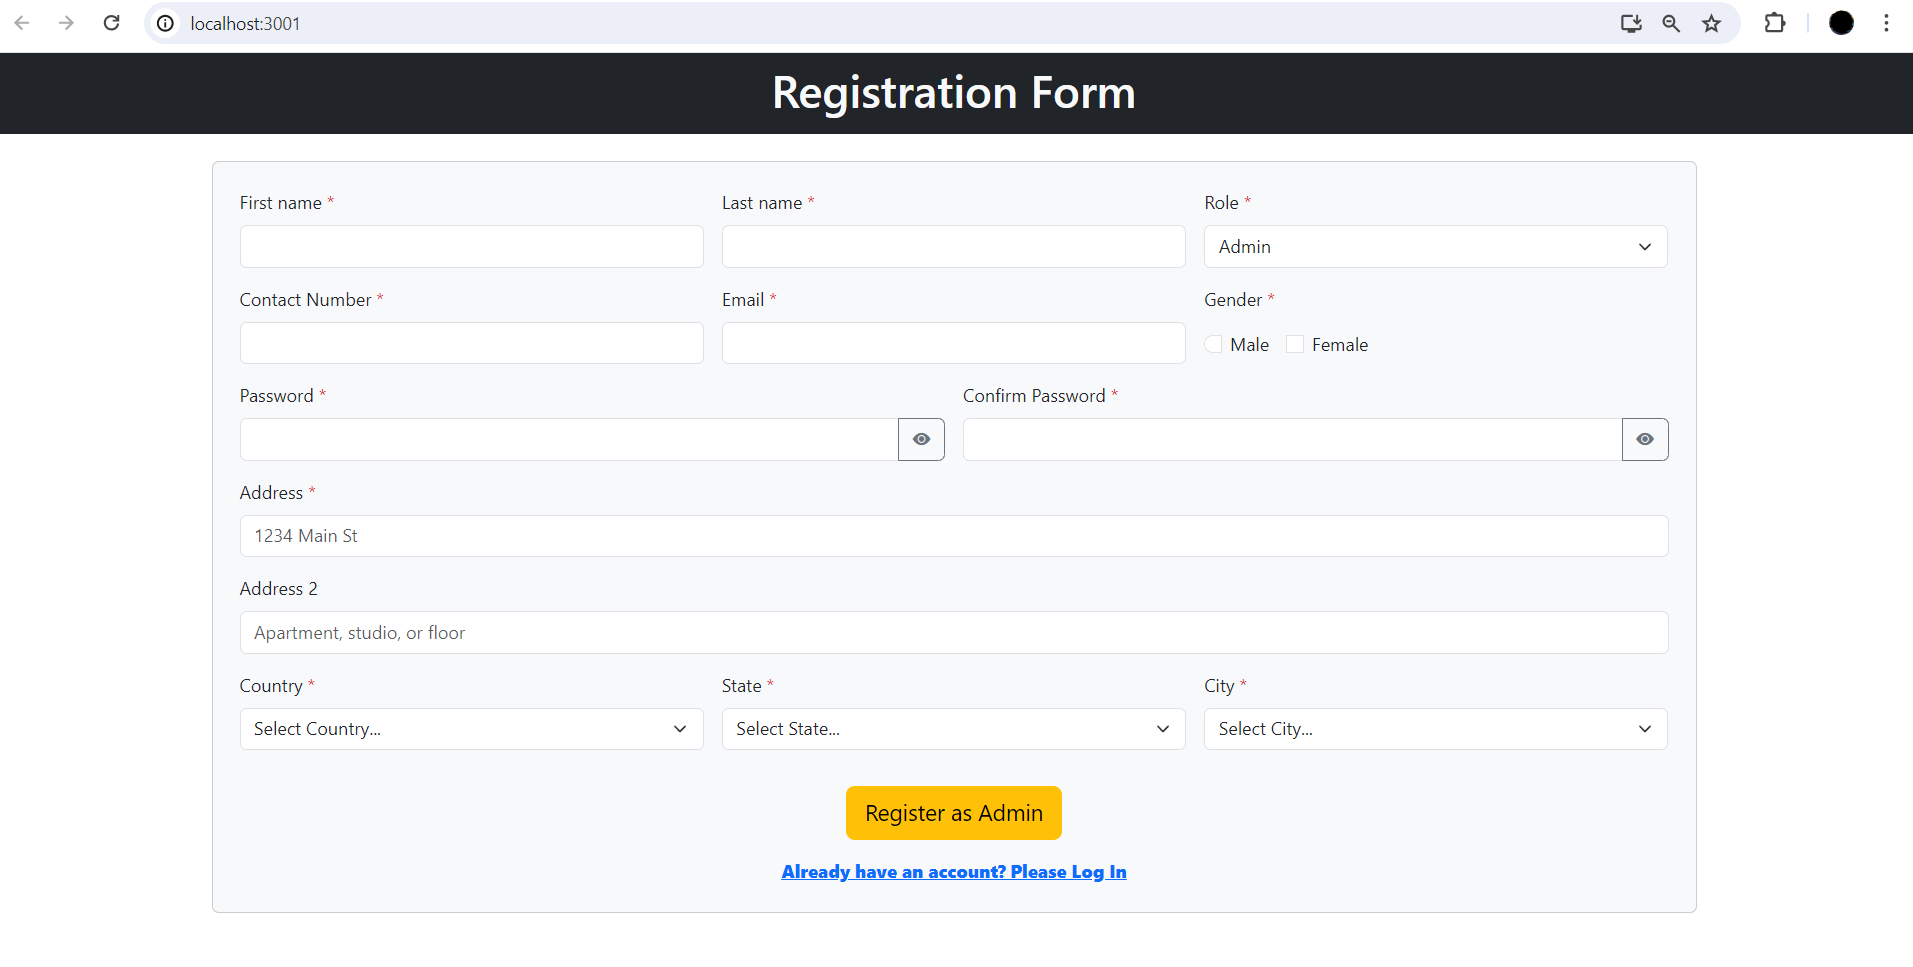
Also, all the routes configured are giving responses. That means our app is Dockerized.
Dockerizing Database
For the database, we're going to use node-slim Image. Because the slim comes with minimal packages to run a node, which is sufficient for us to run the JSON server.
As discussed earlier, we've three databases. Here's the Dockerfile we're going to use.
# Use the official Node.js image as a base
FROM node:slim

# Set a working directory
WORKDIR /app

# Install json-server
RUN npm install -g json-server

# Copy your JSON files to the working directory
COPY ./src/db.json .
COPY ./src/Components/Admin/ReferralList/db2.json .
COPY ./src/Components/Agent/Dashboard_Com/Product/db3.json .
RUN ls

# Expose the ports for each json-server instance
EXPOSE 8000
EXPOSE 8001
EXPOSE 8002

# Command to run each json-server instance when the container starts
CMD json-server --watch db.json --port 8000 --host 0.0.0.0 & json-server --watch db2.json --port 8001 --host 0.0.0.0 & json-server --watch db3.json --port 8002 --host 0.0.0.0
Here, there's a catch. We have two Dockerfiles in the same directory. So, here's the command we're going to use to build the Dockerfile.
There's nothing we just have to use the '-f' tag. The command will be like docker build -f Dockerfile-json-server -t json-dbs .

Now, let us run the database in a container.
Here's another catch. What command will you write if you've exposed multiple ports? The command will be
docker run -d -p 8000:8000 -p 8001:8001 -p 8002:8002 --name json-servers <image-id>
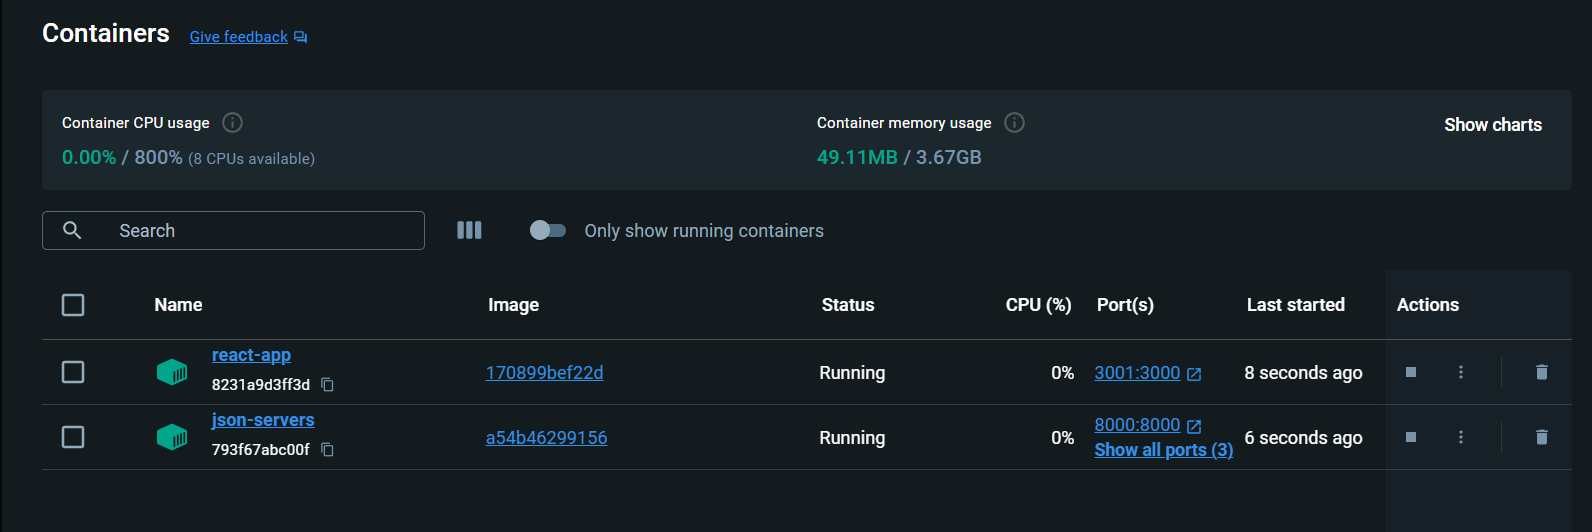
Okay. So, now we've react app and json database is running on the individual container.
Dockerizing Backend which contains Nodemailer.
Now, dockerizing Node.js' "app.js" is pretty simple.
To give the context of the code, this code consists of a Nodemailer configuration HTML, and CSS template which will be sent to send the OTP to the user who forgot the password.
Now, what will we need to run the node.js application? node or nodemon, right?
So, our Dockerfile will look something like,
FROM node:slim

WORKDIR /app

COPY package.json .

RUN npm install && \
    npm install -g nodemon

COPY . /app

EXPOSE 5000

CMD [ "node", "app.js" ]
Now, build the Docker Image by running the command docker build -t nodemailer:v1 .
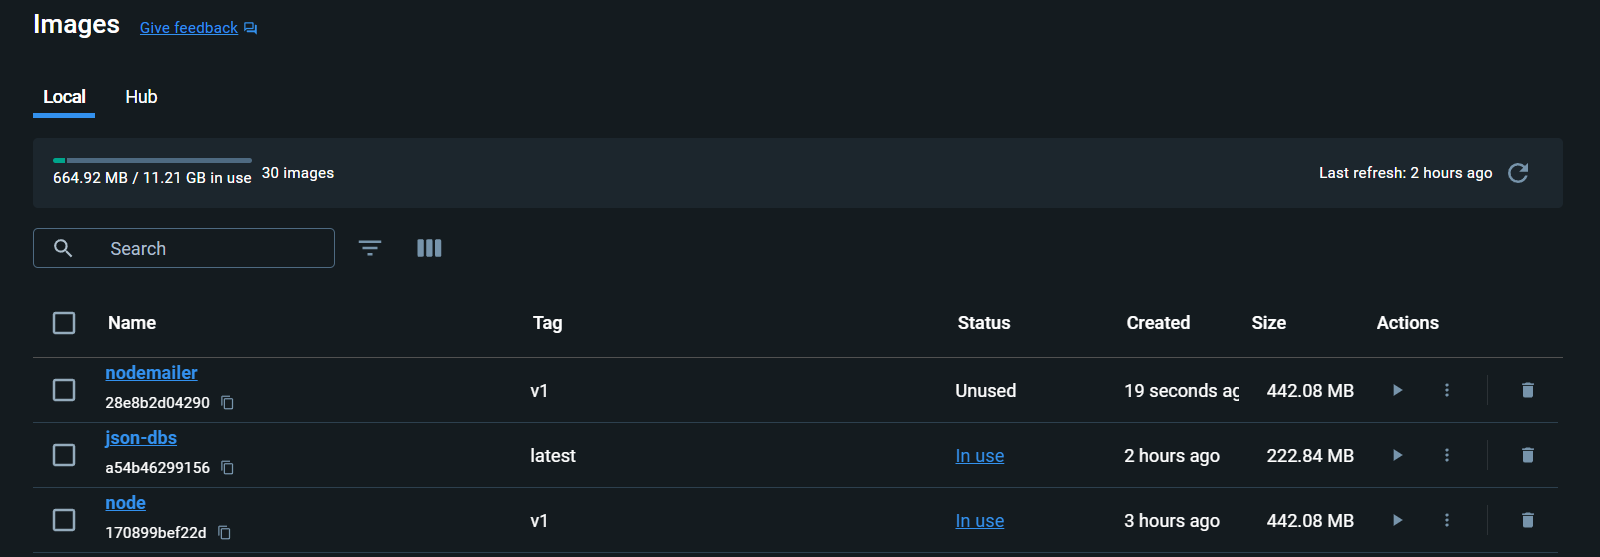
Now, running the nodemailer image in a container using the command, docker run -d -p 5001:5000 --network react-net --name nodemailer-cont <image-id>
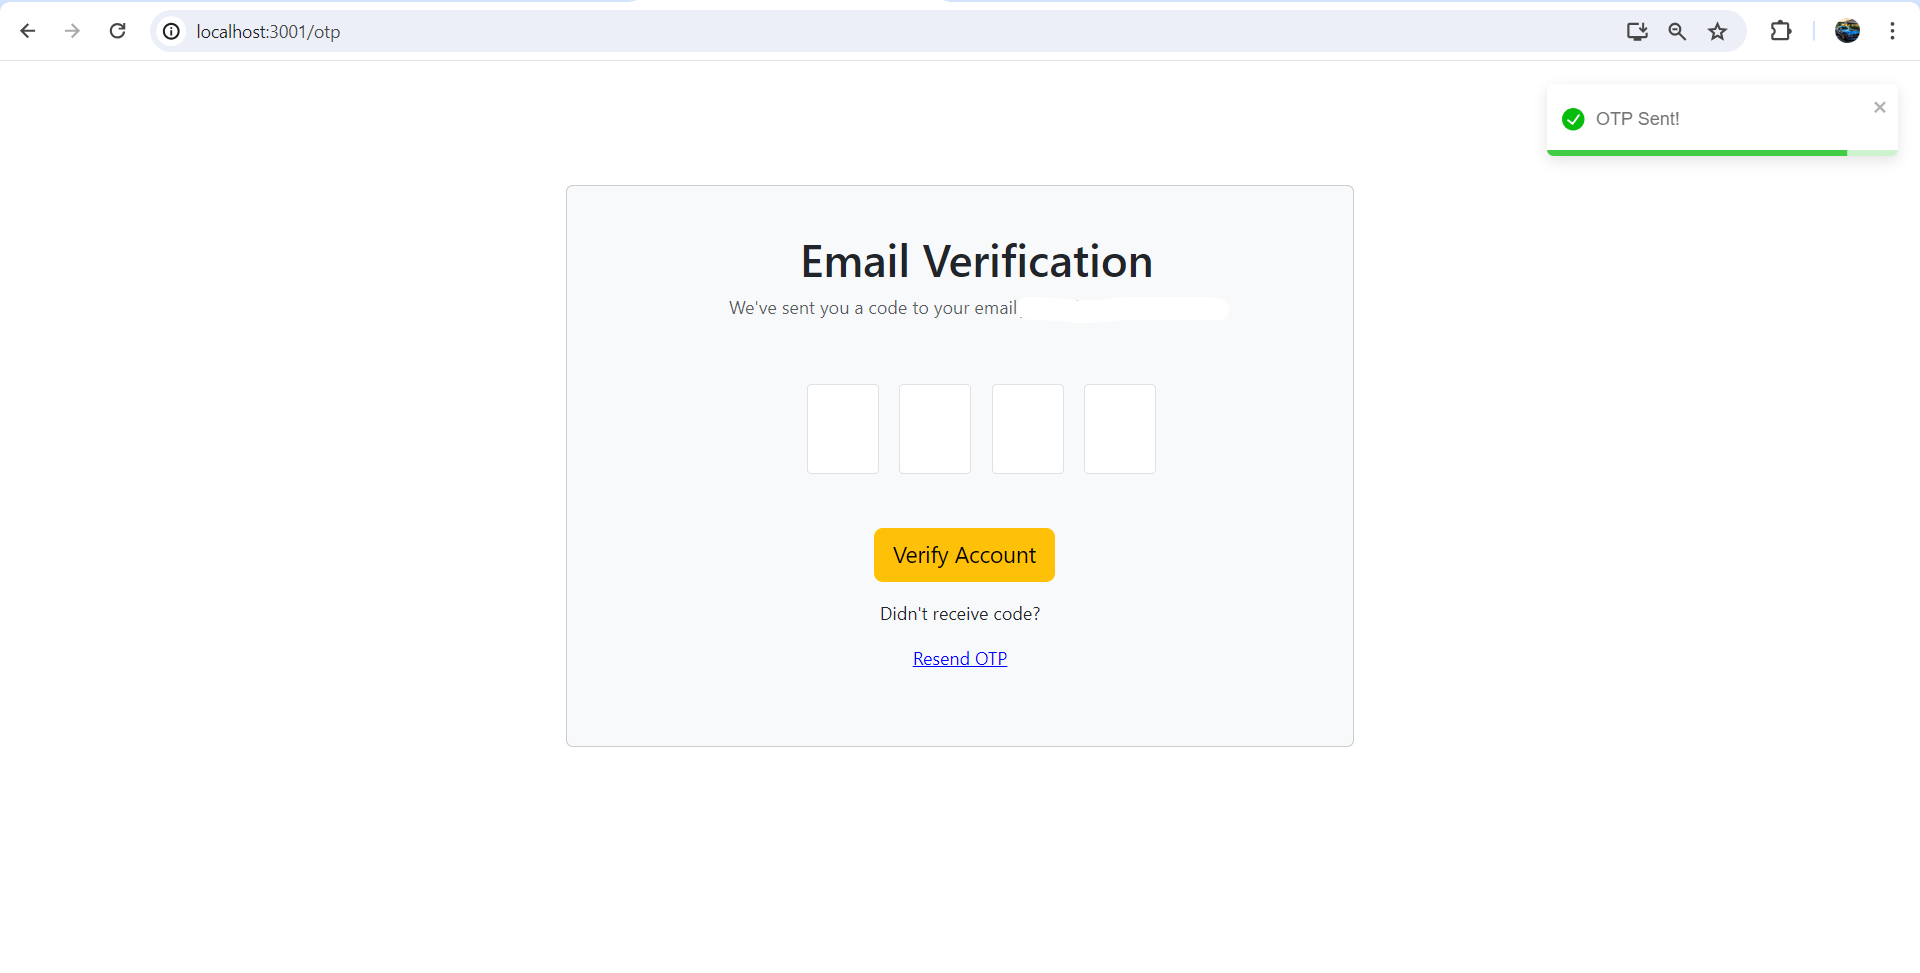
Here, the OTP is sent to the user which means the node.js is working perfectly.
Note: Here I have mapped port 3001 of the host and 3000 port of the container & in the backend, I have mapped 5001 of a host to 5000 of the container (which is not at all recommended. Because the API running in backend interacts with each other based on the ports only.)
Okay then everyone. Now, you all know how to write a multistage Dockerfile and add multiple containers in the same network.
To Debug
If your Dockerfile build fails. Then to debug what can you do is, in Docker Desktop, we've a new section named "Build".
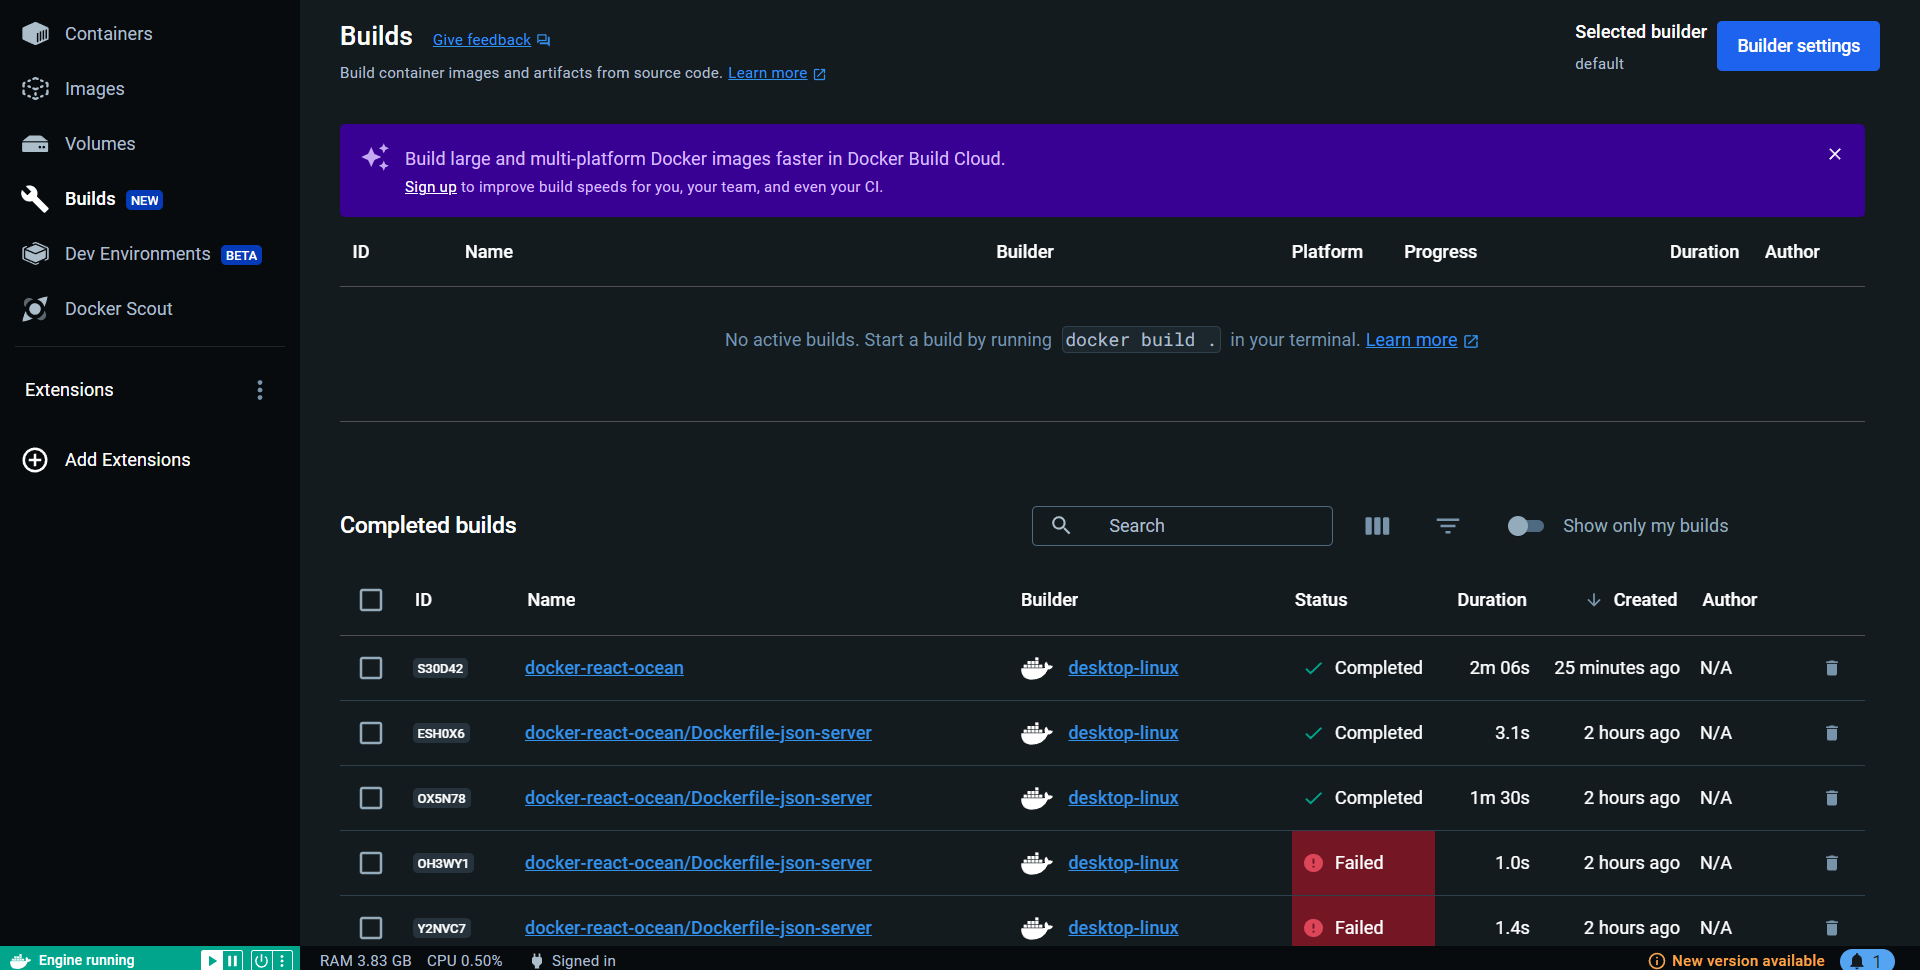
We can just click on the build that is failing,
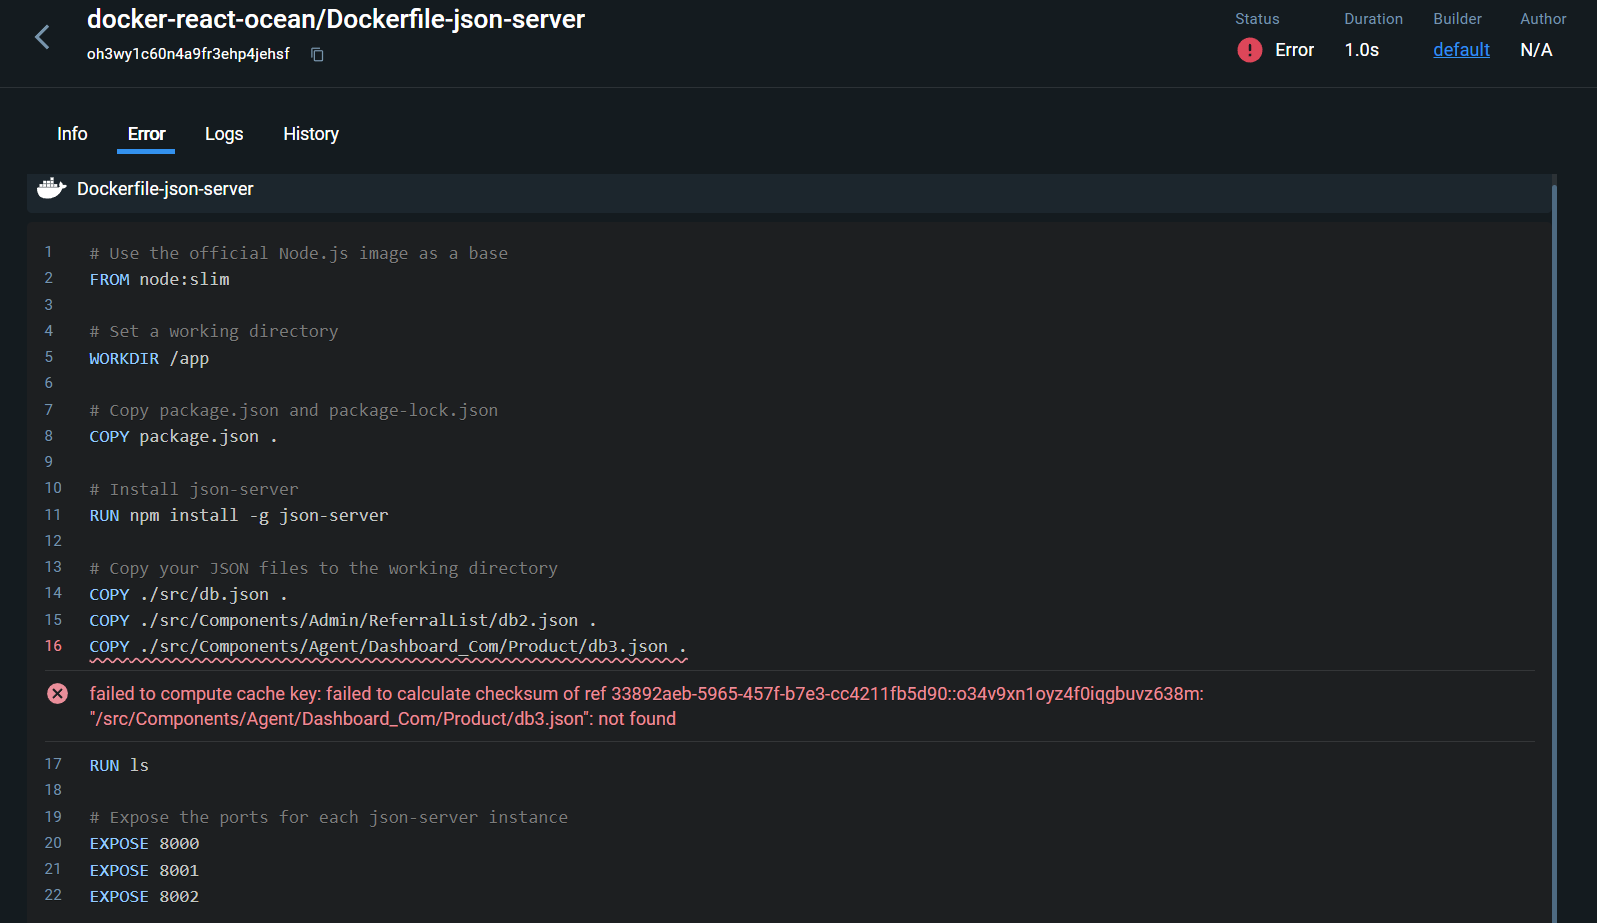
In the error section, it'll tell us what's the exact error we're facing. Though, we'll see this error when the docker build command fails. But, the build feature comes with a lot of pros.
Bonus (Want to get your hands dirty?)
Let us jump into the networking part.
When we run the command docker network ls

Let us inspect react-net using the command, docker inspect <network-id>.
Now, when we use, docker inspect react-net, we'll see the following output.
[
    {
        "Name": "react-net",
        "Id": "75db8f96dcd8e483d5af7758f7227f22ffd023abc4e636ff0b683733d052e151",
        "Created": "2024-05-02T06:41:04.575805992Z",
        "Scope": "local",
        "Driver": "bridge",
        "EnableIPv6": false,
        "IPAM": {
            "Driver": "default",
            "Options": {},
            "Config": [
                {
                    "Subnet": "172.20.0.0/16",
                    "Gateway": "172.20.0.1"
                }
            ]
        },
        "Internal": false,
        "Attachable": false,
        "Ingress": false,
        "ConfigFrom": {
            "Network": ""
        },
        "ConfigOnly": false,
        "Containers": {
            "45bad3687dc8e953188ec4ee6555e5a1503cc92263ceaecb4959bef7d57900a0": {
                "Name": "json-servers",
                "EndpointID": "8e0f23511fefc8b389e4e6baca9d06035e30cf05cce9af42a8d36f5aff31dc08",
                "MacAddress": "02:42:ac:14:00:04",
                "IPv4Address": "172.20.0.4/16",
                "IPv6Address": ""
            },
            "8231a9d3ff3d74f0e06709936bfb0cc143127f51f652e47ac25bbe129a9365b0": {
                "Name": "react-app",
                "EndpointID": "2ee55bc4302fe72bfdb1541abd4123c1255a1174285e9e166e4d8e4d38791e45",
                "MacAddress": "02:42:ac:14:00:03",
                "IPv4Address": "172.20.0.3/16",
                "IPv6Address": ""
            },
            "a05e90ce75eb5bf23bfde0a1af8c8af70892e48a49aafd55009914fdfa12d490": {
                "Name": "nodemailer-cont",
                "EndpointID": "fb097380d1d385253d686d4cc3d222f0fa5ed46d48b4ae3ac58d69ecf833f8d8",
                "MacAddress": "02:42:ac:14:00:02",
                "IPv4Address": "172.20.0.2/16",
                "IPv6Address": ""
            }
        },
        "Options": {},
        "Labels": {}
    }
]
Here, in the container section, we can see, the three containers we added in the same network.
Interview Questions
Can we write "from" instead of "FROM" and "copy" instead of "COPY"? and you get the idea.
- Answer: Yes we can write. We are just following the convention to differentiate our command from the Dockerfile Keywords. We write FROM, COPY, CMD, ENTRYPOINT, and many other keywords in caps.
How to build the Docker Image, if there exists two different Dockerfile in the same directory?
- Using the '-f' flag.
Command to inspect the network?
- docker inspect <network-name/id>
Thank You for reading this blog till here. Happy Coding.
Subscribe to my newsletter
Read articles from Devarsh directly inside your inbox. Subscribe to the newsletter, and don't miss out.
Written by
Devarsh
Devarsh
Hello Everyone, welcome to my blogging channel. Here, I simplify concepts for beginners. If you want to just follow the tutorial and clone the project for your resume, I simplify that process for you by making you understand the concepts. But, if you want to choose the other way around like you are learning skills to optimize the cost and build something. That's what an engineer would do. Please follow.