How to Build Chromium on Windows
 Sangwoo Ko
Hello, everyone! I recently bought a new Windows machine. So I thought it’d be good to show you how to build Chromium with my new windows machine from the scratch so that you can do along with me. If you prefer video, please visit here - it also contains screen recording, so you might find it easier to follow.
My new PC

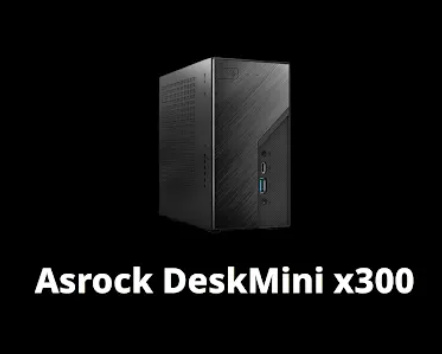
My new PC is ASRock DeskMini x300, Which has AMD5600G CPU. And it has 32GB ram and 1TB storage. It’s not that high-end machine, is it? So hopefully you can try building Chromium on your own machine. But it might take a lot of time, though.
Before start
First of all, please have this build instruction page on your side.
And If you’re using CJK or other language setting that’s not English, then I recommend you set the language to English, cuz I often saw that build failed due to unicode problem.
Prerequisites
Visual Studio
First of all, we need Visual studio. You may already have this, but please do not skip this part. Because you might be missing some required SDKs, that’ll be installed in this step. Go to Visual Studio download page and download the installer.
This is important part, don't run the installer by double-clicking it. We'll use command line instead, so that required SDKs are automatically opted it. Otherwise, you'll have to check SDKs manually.
The official document gives us this handy command line options.
$ PATH_TO_INSTALLER.EXE ^
--add Microsoft.VisualStudio.Workload.NativeDesktop ^
--add Microsoft.VisualStudio.Component.VC.ATLMFC ^
--includeRecommended

# For ARM, need more options so please refer to the official doc.
Just in case, please visit the official document so that you can keep up with the latest command. Copy the command from the document, replace PATH_TO_INSTALLER.EXE with the path you downloaded installer to, and paste it to command line prompt(cmd). In case you use PowerShell, just make it sure that you replace all ^ with ` .
Windows 11 SDK & Debugging tools

The next thing we should install is Windows11 SDK. The required version of it keeps changing, so it’d be better to check the SDK version you have and use link in the document. At this moment, it requires 10.0.22621.2428.
Depot tools
Depot tools may be new to you. Depot tools is a collection of tools that used for Chromium development. It contains git wrapper, python, clang, gn, and etc. So it covers all the process from fetching code to building.
In the official document, you’ll find a download link for depot tools. When download finishes, don’t just drag and drop the the contents of depo tools zip file. There could be hidden files. So prefer Extract All button over it. When you extract it, don't forget where you extract it, as we'll need that in the next step - env variable.
We should set some environment variable for depot tools. As Chromium development depends on a specific version of Python, clang, and so on that are included in depot tools, we always set environment variable. So add depot tools path to the PATH variable.
And please make it sure that depot tools path precede to others. This is because we want to depot tools's python or other tools used for building Chromium. so in case you already have Python locally, this is even more important.
And we need to add new env variable. Add DEPOT_TOOLS_WIN_TOOLCHAIN variable and set the value to 0. This means you don't use internal depot tools of Google. As we're all external contributors, we should set this.
If things are done correctly so far, you can try running gclient . gclient is a git wrapper for Chromium development. At first run of gclient, it'll update what it needs.
$ gclient

# When you type command above for the first time, then gclient will
# update itself.

Updating depot_tools...
Downloading CIPD client for windows-amd64 from https://chrome-infra-packages.appspot.com/client?platform=windows-amd64&version=git_revision:200dbdf0e967e81388359d3f85f095d39b35db67...

Usage: gclient.py <command> [options]
Meta checkout dependency manager for Git.
Commands are:
  config       creates a .gclient file in the current directory
  diff         displays local diff for every dependencies
  fetch        fetches upstream commits for all modules

   …

 he provided string.
                        Due to Cygwin/Python brokenness, it can't contain any
                        newlines.
  --no-nag-max          Ignored for backwards compatibility.
The next thing we should check is the Python. we're going to see if python in the depot tools is used or not.
# cmd
C:\>where python3
# C:\depot_tools\python3.bat


# PowerShell
PS C:\> get-command python3
# CommandType     Name                Version    Source
# -----------     ----                -------    ------
# Application     python3.bat         0.0.0.0    C:\depot_tools\python3.bat
Check if the command points to the the binary in depot tools. But in my case, python command was not recognized by the terminal. I had to make a shortcut to python.bat file in depot tools directory and name it python.
Get Code
Usually, we use git clone to get code, but in Chromium we don’t. We'll use depot tools.
$ fetch chrome
Then depot tools will starts to fetch code related to chromium. the document suggests additional argument like --no-history for faster fetching. But I don’t recommend it if you want to contribute to Chromium. I had trouble with branching out and submitting patches when I had the argument.
Setup the project and Build
Setup
When fetching completes, we can start setting up the project for building.
$ cd src  # src is the root directory of Chromium repo.

# This command means that a project file will be created
# under out/Default driectory.
$ gn gen out/Default
When it's done, now it's time to set up project args
# This command means that you're going to edit project arguments
# for the project under out-Default directory.
$ gn args out/Default
When you type this, text editor will popup and you can add some args.
# Set build arguments here. See `gn help buildargs`.
is_debug = true
is_component_build = true
Basically, these two argument is what I use most of times. For faster build you can add more options here. If you're interested in this, please refer to the document about this.
Build
Finally, we can start building!
# Chromium uses ninja project as a build system, and autoninja
# will add some useful argument to ninja automatically.
# So this command means that build chrome target in the project
# under out/default directory.
$ autoninja -C out/Default chrome
It took me a whole day to finish building. When it's done, you can find chrome executable under src/out/default directory. It might take seconds to launch the chromium for the first time. If you want to see logs, you can pass enable-logs argument like this.
# This will launch chrome.exe that you've build and shows logs
# in this terminal.
$ src\out\Default\chrome.exe --enable-logging
Subscribe to my newsletter
Read articles from Sangwoo Ko directly inside your inbox. Subscribe to the newsletter, and don't miss out.
Written by
