Prisma with PostgreSQL
 Krishan Kumar
"Ever wondered about a world where complex SQL queries are no longer needed to interact with databases?
Enter Prisma. With Prisma, creating tables and adding references becomes a breeze. Say goodbye to tedious SQL syntax and hello to streamlined database management.
So, what are we waiting for? Let's harness the power of Prisma to make our projects more efficient and enjoyable to work on. Ready to dive in?"
The Github repo for this is provided at the end.
Initialize Project
Initialize your project by creating a folder with a name of your choice. For example, let's call it 'prisma-with-psql'.
Next, initialize the package.json file and set up TypeScript for the project by running the following commands in your terminal:
npm init -y
npm install typescript ts-node @types/node --save-dev
npx tsc --init
After running these commands, open the tsconfig.json file and uncomment the 'rootDir' and 'outDir' options. Set them as follows:
"rootDir": "./src",
"outDir": "./dist"
The 'rootDir' option specifies the directory where you'll write your TypeScript code, while 'outDir' specifies the directory where TypeScript will compile your code to JavaScript.
Install Prisma
To use Prisma in our project, we first need to install it. Prisma can be installed with the following command:
npm prisma install
This command will install the Prisma CLI and make it available for use in our project.
Initialize Prisma
Now that we have Prisma installed, let's initialize it for our project. Run the following command in your terminal:
npx prisma init

After executing the command successfully, a folder named prisma will be created in your project directory. Inside this folder, you'll find the schema.prisma file.
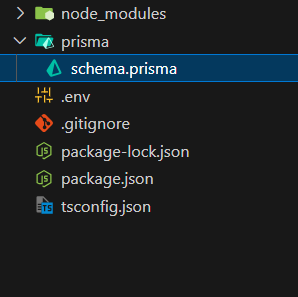
The schema.prisma file is where we define our database tables (or models). It also allows us to choose between various databases such as PostgreSQL, MongoDB, or MySQL. For this project, we'll proceed with PostgreSQL.
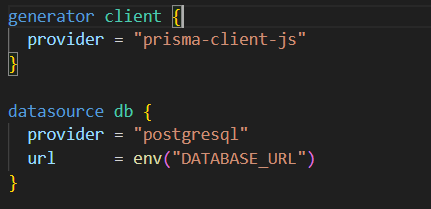
Next, we need to obtain the DATABASE_URL for our PostgreSQL database. You can use services like neon.tech, https://aiven.io/postgresql, or set up a local instance using Docker.
Once you have the DATABASE_URL, paste it into the .env file in your project directory.

Define and Create Tables
Without Prisma, creating tables in PostgreSQL requires executing complex SQL queries. For example:
CREATE TABLE users ( id SERIAL PRIMARY KEY, name VARCHAR(50), rollno VARCHAR(20) UNIQUE );
However, Prisma simplifies this process significantly. Let's define a User model in our schema.prisma file:
model User {
  id    Int    @id @default(autoincrement())
  name  String
  email String @unique
}
Finally, schema.prisma would look like this:
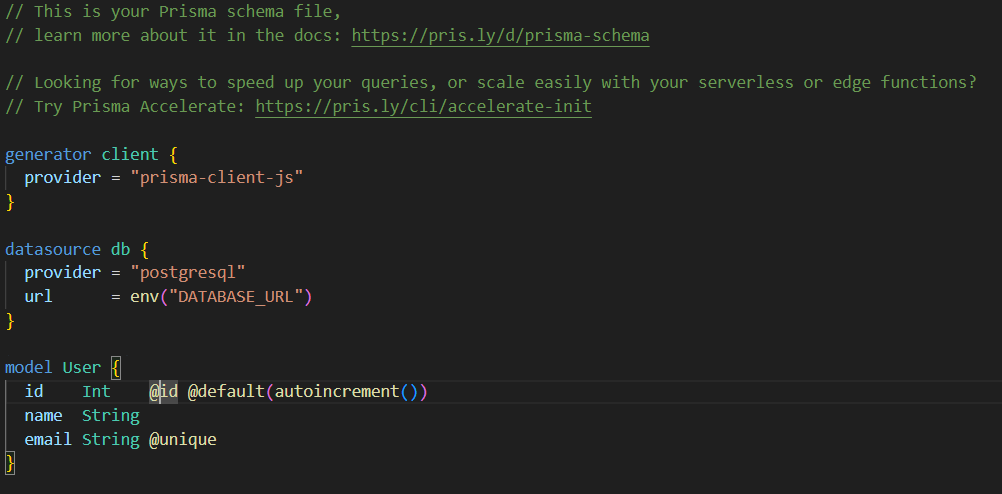
In this User model:
idis an integer type that auto-increments and serves as the primary key.nameis a string typeemailis also a string type, and we've specified it as unique.
After defining the model, we need to run migrations to create the corresponding table in the database. Migration files also help to keep track of changes made in the database, from time to time.
To do this, execute the following command:
npx prisma migrate dev --name "name_of_the_migration"
Your output in the terminal would look like this:
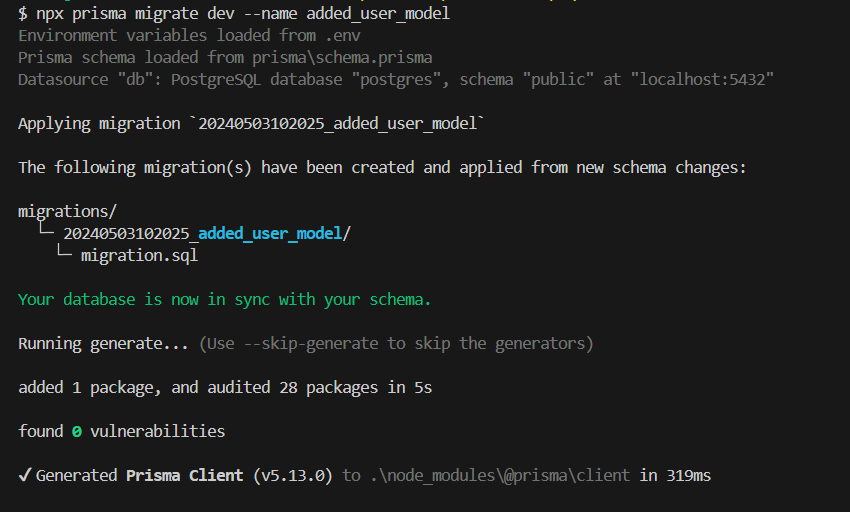
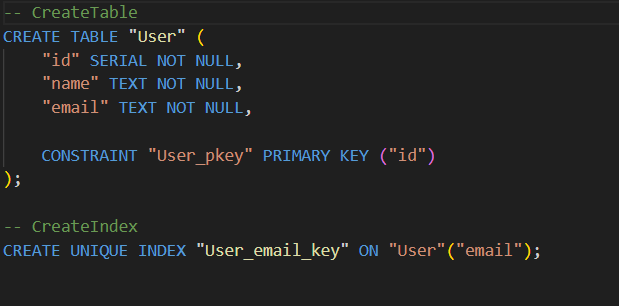
This command generates a migration file within the migrations folder of the prisma directory. Inside this file, a SQL query is written to create the User table in the database.
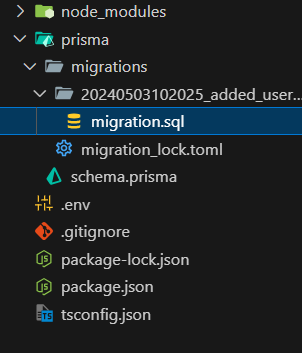
migration.sql would look like this
Once the migration is completed, you can view the User table in your database management tool or by running the command:
npx prisma studio
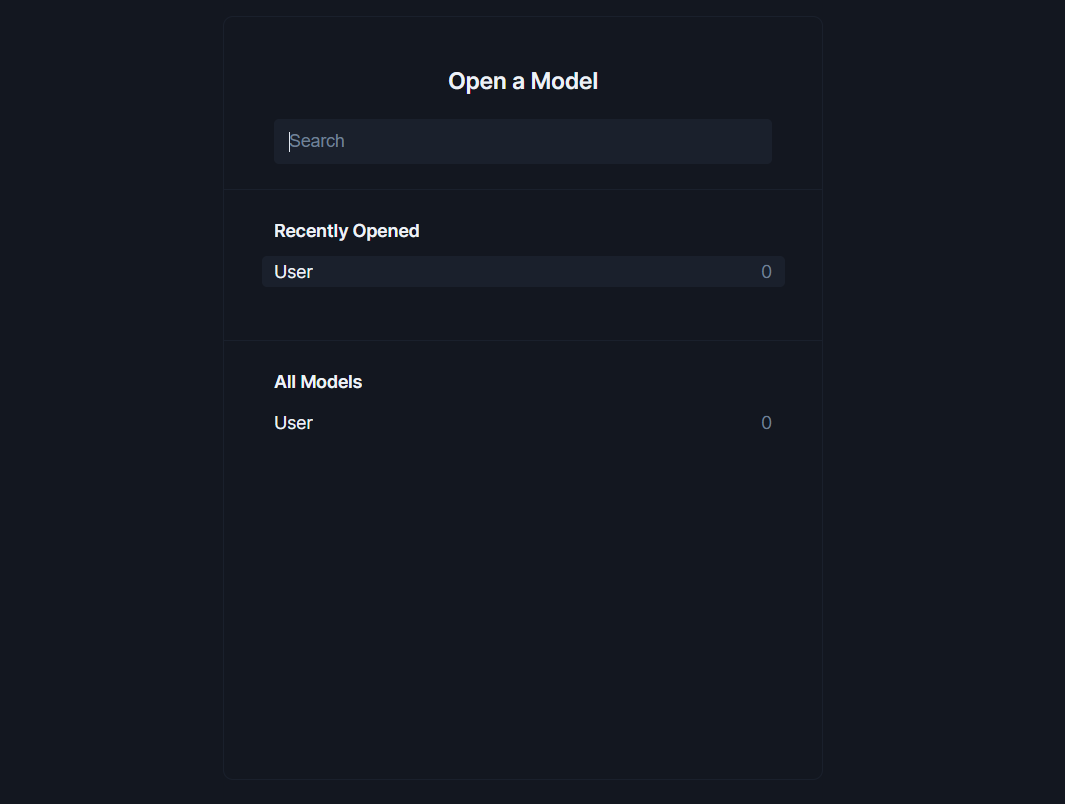
This command launches Prisma Studio, a graphical interface for interacting with your database directly from the browser.
With Prisma, defining and creating database tables becomes a seamless process, allowing for efficient database management and development.
Generate Clients
To generate Clients in Prisma, run the command:
npx prisma generate client
This command generates client libraries based on the models defined in your schema.prisma file. These client libraries provide functions for creating, reading, updating, and deleting entries in your database.
After running the command, you'll find the generated client code in the 'node_modules/@prisma/client' directory.
Making entries in DB
We have generated clients, now its time to use these, and making entries in the DB.
Create a index.ts file in src folder.
In the 'index.ts' file, import the PrismaClient:
import { PrismaClient } from "@prisma/client";
const prisma = new PrismaClient();
Create an asynchronous function to make the entry. The index.ts file will be like this:
import { PrismaClient } from "@prisma/client";
const prisma = new PrismaClient();

interface UserEntry {
    name : string,
    email : string
}

async function makeEntry(newUser : UserEntry) {
    const output = await prisma.user.create({
        data : {
            name : newUser.name,
            email : newUser.email
        }
    })
    console.log(output)
}

makeEntry({name : "Krishan Kumar", email : "random@gmail.com"})
Now, compile this file by using tsc -b command. After compilation, a dist folder will be created, containing the 'index.js' file. Run this file by node dist/index.js command.
The output would look like this:

Entry has been made to the Table User. We can check it.

Now we can add more entries to the database.
Find Records in DB
To find entries, Prisma provides various functions like findUnique, findMany, findFirst.
findMany: This function returns all the
Userrecords.findUnique: This function returns the unique record that matches the data.
findFirst: This function returns the first record that matches the data.
Create an asynchronous function for finding records in the index.ts :
FindMany:
  async function findManyRecords() {
    const output = await prisma.user.findMany();
    console.log(output);
  }

  findManyRecords();
Output would be:

FindFirst:
  async function findFirstRecord(name: string) {
    const output = await prisma.user.findFirst({
      where: {
        name: name,
      },
    });
    console.log(output);
  }

  findFirstRecord("Krishan Kumar");
Output would be:

FindUnique:
  async function findUniqueRecord(id : number) {
      const output = await prisma.user.findUnique({
          where : {
              id : id
          }
      })
      console.log(output);
  }

  findUniqueRecord(2)
Output would be:

Update Records in DB
To update records, Prisma provides functions like update and updateMany.
update: This function will find a single user and update it based on the data given.
updateMany: This function will update all the users that match the data given.
Create an asynchronous function for updating the record in index.ts file:
interface updateUser {
  name?: string;
  email?: string;
}

async function updateRecord(id: number, updateUser: updateUser) {
  const output = await prisma.user.update({
    where: {
      id: id,
    },
    data: updateUser,
  });
  console.log(output);
}

updateRecord(3, { name: "Mahadev" });
The record having Id=3 before updating:

The record having Id=3 after updating:

Delete Records in DB:
To Delete records, Prisma provides functions like delete and deleteMany.
delete: This function will delete a single user that matches the data.
deleteMany: This function can delete multiple records that matches the data, also it can delete all the records.
Create an asynchronous function for deleting the record in index.ts file:
delete:
  async function deleteRecord(id: number) {
    const output = await prisma.user.delete({
      where: {
        id: id,
      },
    });

    console.log(output);
  }

  deleteRecord(5);
Deleted Record:

Records present in the DB now:

deleteMany:
  async function deleteMany() {
    const output = await prisma.user.deleteMany({});
    console.log(output);
  }

  deleteMany();
Output would be:

You can also provide data here, to delete multiple records.
There are many other functions, that Prisma provides. You should explore them.
Github Repo: https://github.com/Crimson-03/prisma-with-psql
I hope you learned something new. Thank you, and make sure to give feedback and like.
Subscribe to my newsletter
Read articles from Krishan Kumar directly inside your inbox. Subscribe to the newsletter, and don't miss out.
Written by

Krishan Kumar
Krishan Kumar
I'm Krishan Kumar, a passionate software developer with a love for crafting clean, efficient code and building impactful projects. I thrive on challenges and enjoy exploring new technologies to expand my skill set.