Setting Up EC2 And Associating Elastic IP
 Ucheagwu Onyike
Table of contents
Deploying WordPress on an AWS EC2 instance is easy. In this series, I will guide you through the process of deploying a WordPress website on an AWS EC2 instance.
This means you will be handling the installation of the following:
Webserver: To handle HTTP requests and serve a response — the resulting webpage
Database: To store and organize data.
Runtime Application: An environment in which a program or application is executed or run.
You will also be responsible for managing the following:
Configuration files: Commands that ensure proper execution of the system.
Ports: A connection endpoint that directs data to a specific service.
Note: This tutorial will be divided into parts to make reading, understanding, and following through easier.
Requirements
That said, deploying a WordPress website on AWS EC2 requires the following;
AWS EC2 Instance (Amazon Elastic Compute Cloud)
AWS Elastic IP
Ubuntu Operating system
Apache Webserver
PHP runtime
PHP MySQL connector
MySQL Database server
AWS EC2 Instance
EC2 stands for Elastic Cloud Computing, and it is simply a virtual server service rendered by AWS over the Internet.
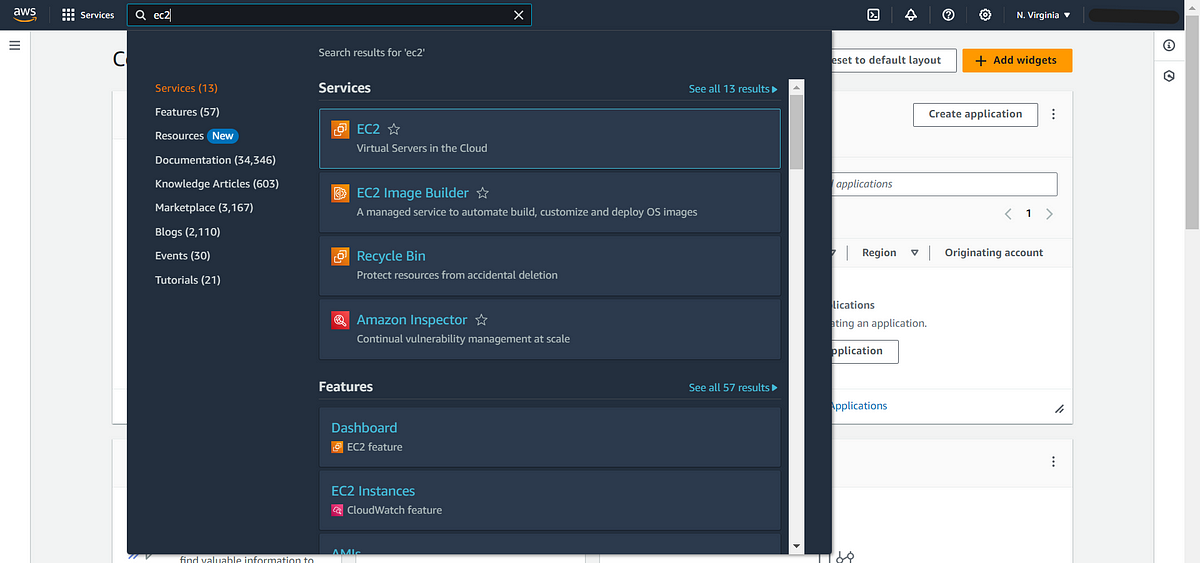
After you sign into your AWS console and select your choice of region (EC2 is available in all regions), use the search bar, search for EC2, and click on the EC2 search results under services.
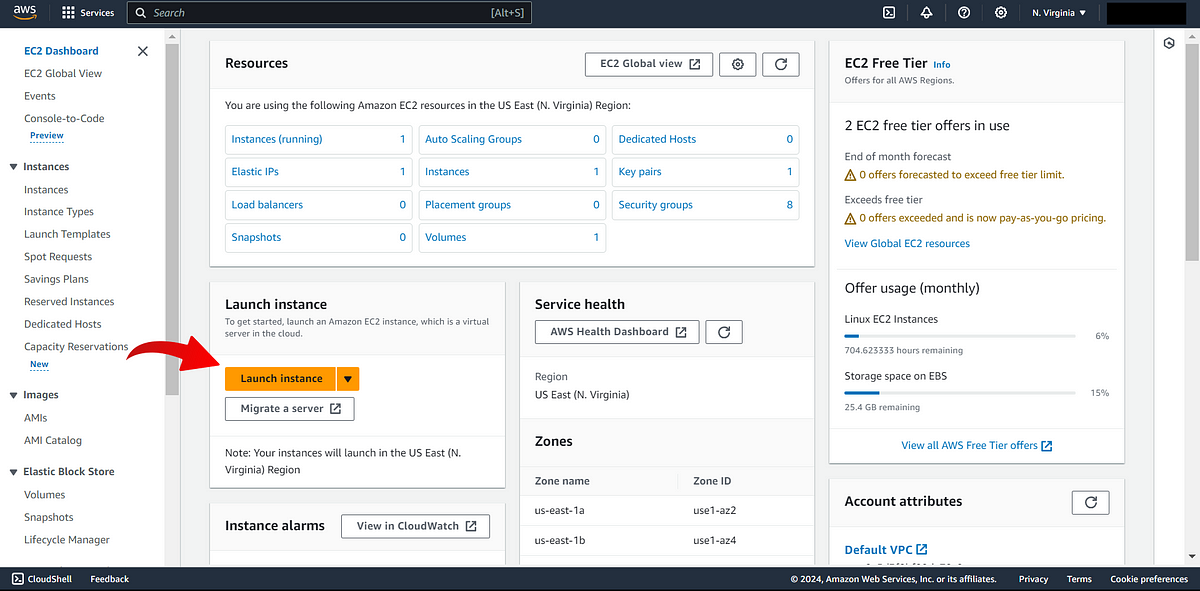
On the EC2 dashboard, you will see some overview information concerning your EC2 resources. Skip that. Click on “Launch Instance,” highlighted in an orange button.
The next screen, after “Launch Instance” is clicked the screen allows you to make some configurations about the EC2 instance you are about to launch.
Follow the steps below to complete that screen and launch the instance.
Enter an identifiable name for the instance under the “Name and tags” box.
Select the Ubuntu operating system under the “Application and OS Images (Amazon Machine Image)” box.
Select your choice of EC2 instance type. A t2.micro can do the job, but if you want more power, select a higher EC2 Instance type.
Note:
EC2 instances come with billable charges to your account. A t2.micro instance type is “free tier” eligible (winks).If you have previously created a key pair, select it in the drop-down box; otherwise, click “Create new key pair.”
The “Create new key pair” button allows you to create a new key pair that will be used for authentication via SSH. After clicking the button, enter an identifiable name for the key pair, let other already selected default options be, and click “Create key pair.”
This will download a .pem file, which you should keep securely in your local computer.Under “Network settings,” ensure that you check the following box.
* Allow SSH traffic from
* Allow HTTPS traffic from the internet
* Allow HTTP traffic from the internetAfter the Network settings, click the orange “Launch instance” button, leaving other configurations in their default setting.
Grab a coffee while AWS gets your EC2 instance up and running.
AWS Elastic IP
EC2 instances come with a public IPv4 address, which changes after a reboot.
So to avoid that, we need to assign to the EC2 instance you created a permanent IPv4 address using AWS Elastic IP service.
While your EC2 instance is “running,” we need to assign a permanent IPv4 address, which will be used to identify it and connect to it over the internet.
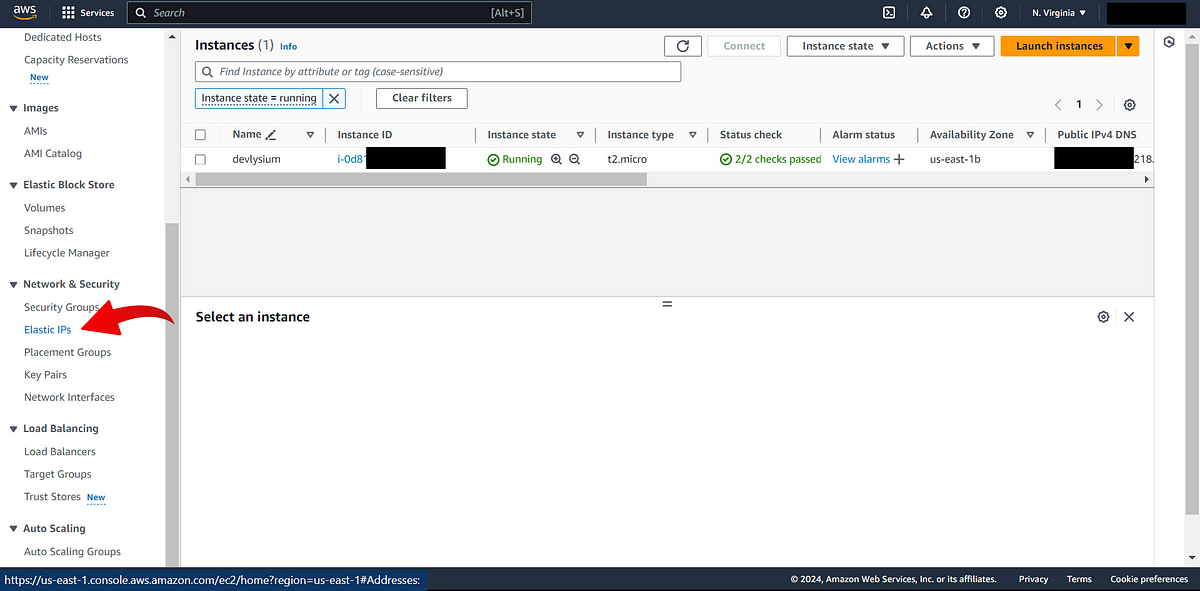
On the left sidebar of your EC2 dashboard, find the “Network and Security” drop-down menu and click “Elastic IPs.”
After clicking the Elastic IPs link, you should see the “Elastic IP addresses” dashboard. While there, click the orange “Allocate Elastic IP address” button on the top left.
The next step requires you to click the orange “Allocate” button at the bottom of the option boxes (leave all settings as default).
You will be brought back to the “Elastic IP addresses” dashboard, and you should see the new IPv4 address allocated to you from AWS’s pool of available IPv4 addresses.
Note: According to AWS, effective February 1, 2024, there will be a charge of $0.005 per IP per hour for all public IPv4 addresses, whether attached to a service or not (there is already a charge for public IPv4 addresses you allocate in your account, but don’t attach to an EC2 instance).
The next step is associating the newly allocated IPv4 address to your new EC2 instance. Here are the steps to accomplish that.
On the “Elastic IP addresses” dashboard:
Select the newly allocated IPv4 address
Click on the white “Action” button and click on the “Associate Elastic IP Address” option from the drop-down menu.
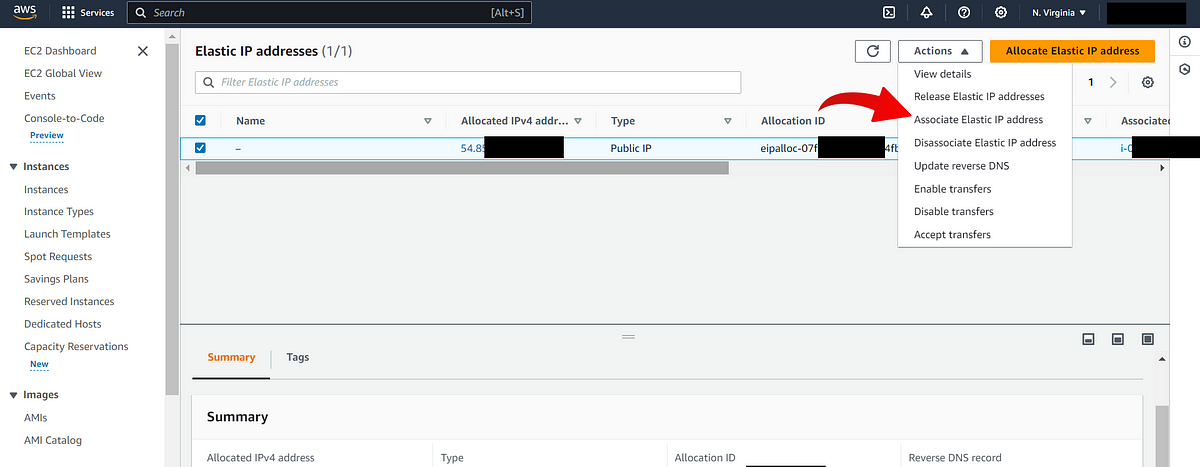
After clicking on the “Associate Elastic IP Address” option, you will be brought to a screen where you can choose the resource to associate the IP address.
Select “Instance” in the Resource type box. Select the running EC2 instance with which you wish to associate the IP.
You should be able to identify the EC2 instance by the name you gave to it during the launch.
After selecting the correct EC2 instance, click the orange “Associate” button at the bottom.
Head back to the “Instances” dashboard, which is on the left sidebar. You should see the new IPv4 address assigned to your EC2 instance.
Get your terminal skills on because you will be running some Linux commands from here on.
The next part of this tutorial will focus on installing the Ubuntu operating system and configuring the necessary services/applications on the EC2 instance.
See you in the next one!!!
Subscribe to my newsletter
Read articles from Ucheagwu Onyike directly inside your inbox. Subscribe to the newsletter, and don't miss out.
Written by
