Three Tips to Improve Your Experience with SwiftUI Previews
 Pedro Rojas
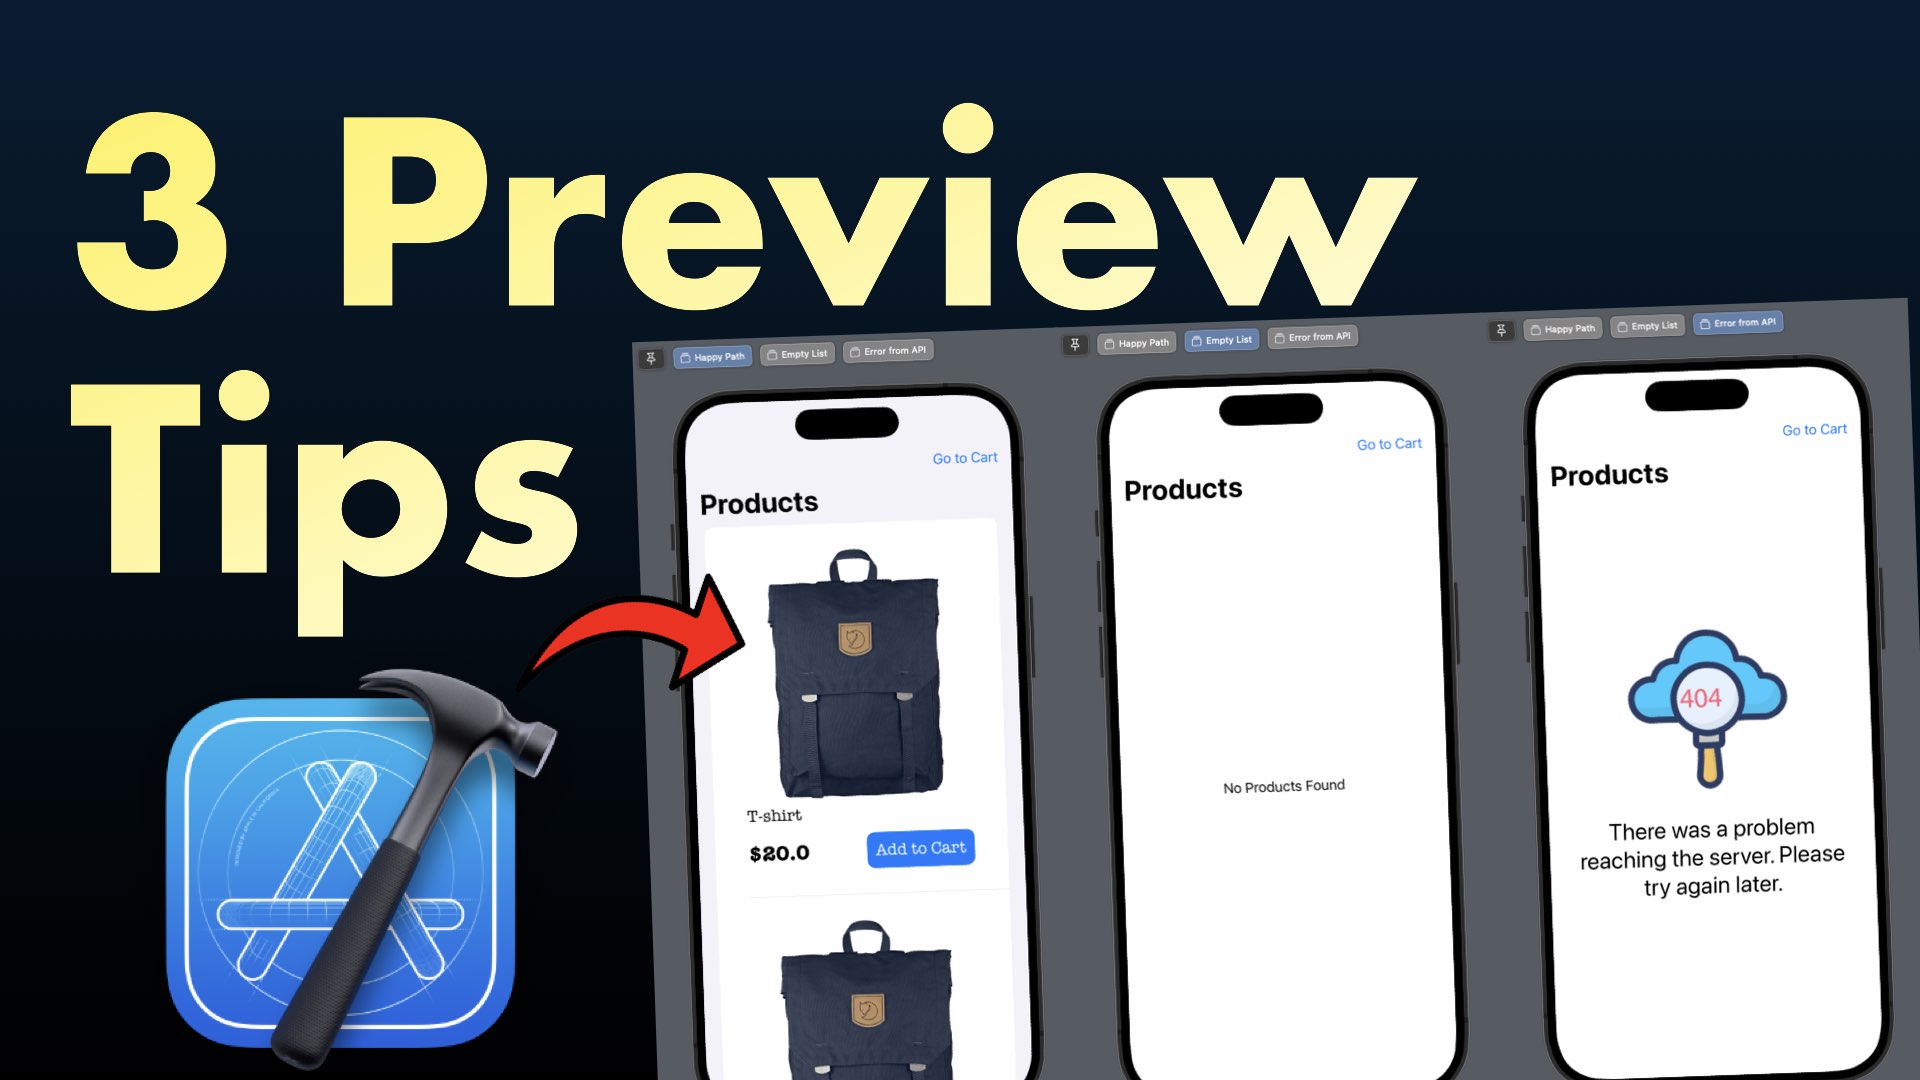
This article was created using Xcode 15.3 and iOS 17
Hi everyone, In the not-too-distant past, we primarily used UIKit to create our iOS applications. Throughout the development process, we frequently evaluated how the user interface is progressing to ensure it met the project's requirements. Unfortunately, this was not always a straightforward task, as we only had two options available to us:
We used storyboards, a tool that simplified the visualization of an app's UI. However, when it came to making code changes and collaborating with our team, it often led to a chaotic process.
Creating the UI through code, but having to run the app every time we wanted to review changes.
With the advent of SwiftUI, the days of struggling with UI changes are behind us. SwiftUI brought us Previews, a game-changer that allows us to see UI changes in real time. While it's not flawless (like this ridiculous issue that happened to me writing this article 😅), and Apple continuously enhances its performance, Previews have undeniably revolutionized our app development process.
In 2023, with the introduction of Macros in Swift 5.9, Apple simplified previews through the #Preview macro. The minimum definition is as follows:
#Preview {
    ContentView()
}
This is great! However, I've noticed that many developers tend to leave the default previews as they are without realizing their potential to enhance their work in various ways.
Today, I'd like to share three tips to improve your daily work with Xcode and SwiftUI Previews. Let's dive in!
No. 1: Preview multiple behaviors of your app
We normally use one preview to visualize the current view we are working on, but you can create as many previews as you need for the same view!
Why is that useful? Well, let's see the following example:
We are creating a View that displays a list of products, and I'm setting up my preview with mock data through .test configuration.
#Preview {
    ProductList()
        .environment(ProductStore(apiClient: .test))
        .environment(CartStore())
}
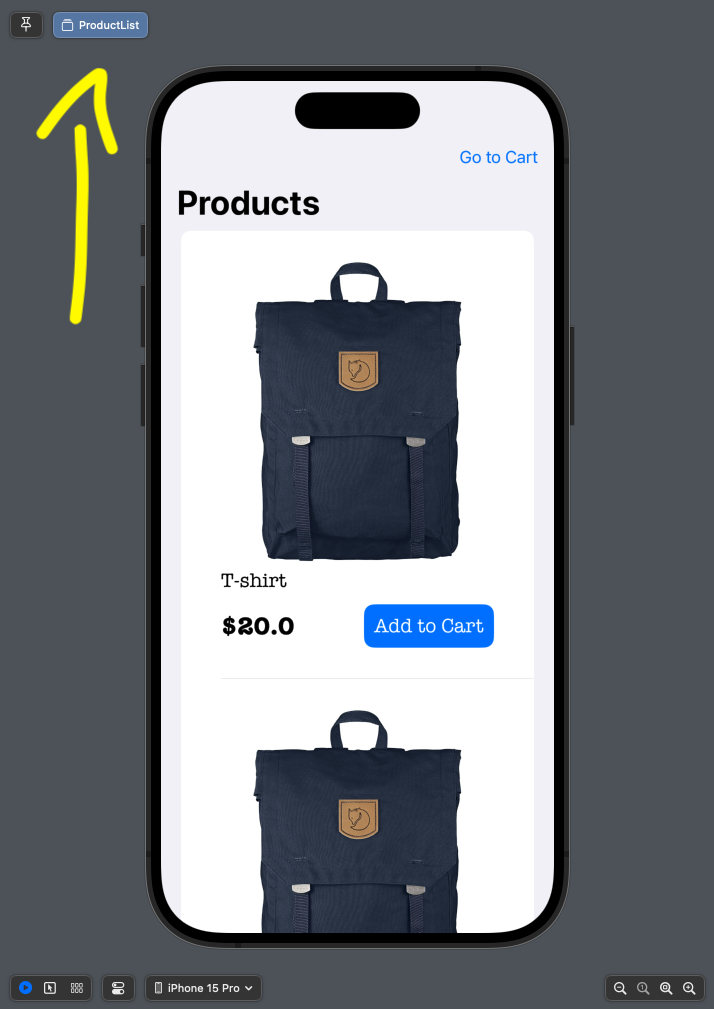
Notice how the preview's name is called "ProductList", which it's the View's name in the struct declaration. This is a default behavior, however, you can set up any name for your view. Let's proceed renaming this view to "Happy Path" using the first #Preview's parameter:
#Preview("Happy Path") {
    ProductList()
        .environment(ProductStore(apiClient: .test))
        .environment(CartStore())
}
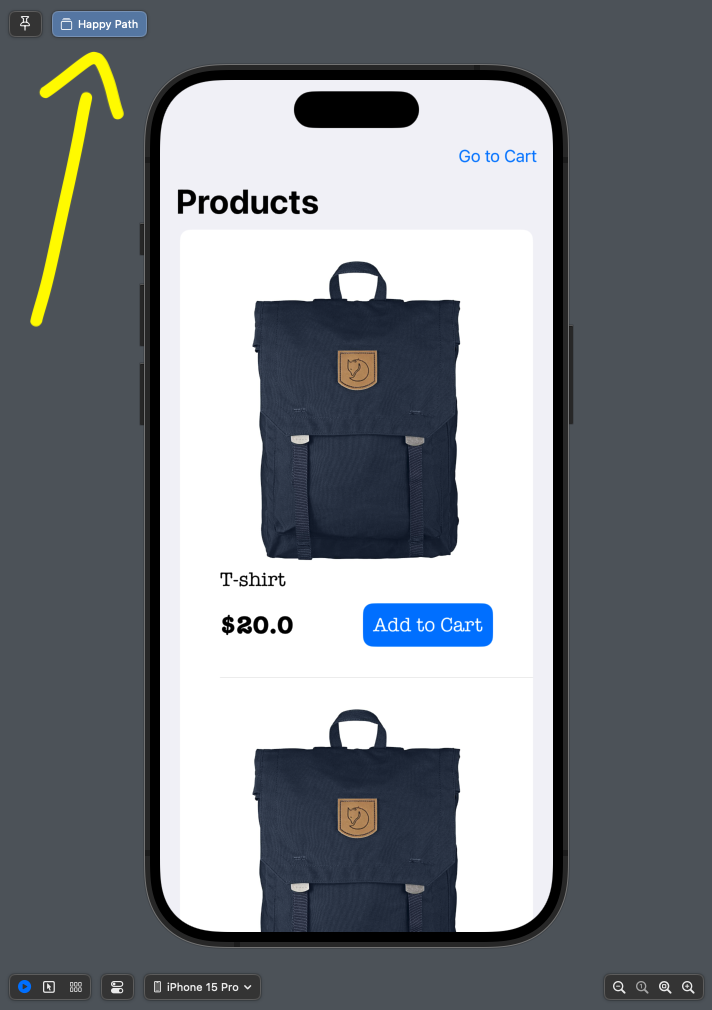
Great, renaming a preview was really easy!
Now that we are calling this preview "Happy Path", wouldn't be great to see the UI state when there's no data or we have an issue in the web API call?
For that, let's review the .test configuration's code:
struct APIClient {
    var fetchProducts: () async throws -> [Product]
    var sendOrder: ([CartItem]) async throws -> String
    var fetchUserProfile: () async throws -> UserProfile

    struct Failure: Error, Equatable {}
}

extension APIClient {
    static let live = ...

    static let test = Self(
        fetchProducts: {
            try await Task.sleep(nanoseconds: 1000)
            return Product.sample
        },
        // ...
    )
}
Those three methods define the API that we consume to fetch and send data to the web. There is a live configuration pointing to production, but I've created a test configuration for faster unit testing and preview visualization.
This test configuration will always return a "success" event with data. Let's rename it to testSuccess and create two more configurations, one for empty data and another for error:
extension APIClient {
    static let testSuccess = Self(
        fetchProducts: {
            try await Task.sleep(nanoseconds: 1000)
            return Product.sample
        },
        // ...
    )

    static let testEmpty = Self(
        fetchProducts: {
            try await Task.sleep(nanoseconds: 1000)
            return []
        },
        // ...
    )

    static let testError = Self(
        fetchProducts: {
            try await Task.sleep(nanoseconds: 1000)
            throw Failure()
        },
        // ...
    )
}
If you want to learn more about async/await and a comparison between combine and closures, check out this video.
Now, let's go back to the view and create two more previews to display the respective cases:
#Preview("Happy Path") {
    ProductList()
        .environment(ProductStore(apiClient: .testSuccess))
        .environment(CartStore())
}


#Preview("Empty List") {
    ProductList()
        .environment(ProductStore(apiClient: .testEmpty))
        .environment(CartStore())
}

#Preview("Error from API") {
    ProductList()
        .environment(ProductStore(apiClient: .testError))
        .environment(CartStore())
}
And look at the result:
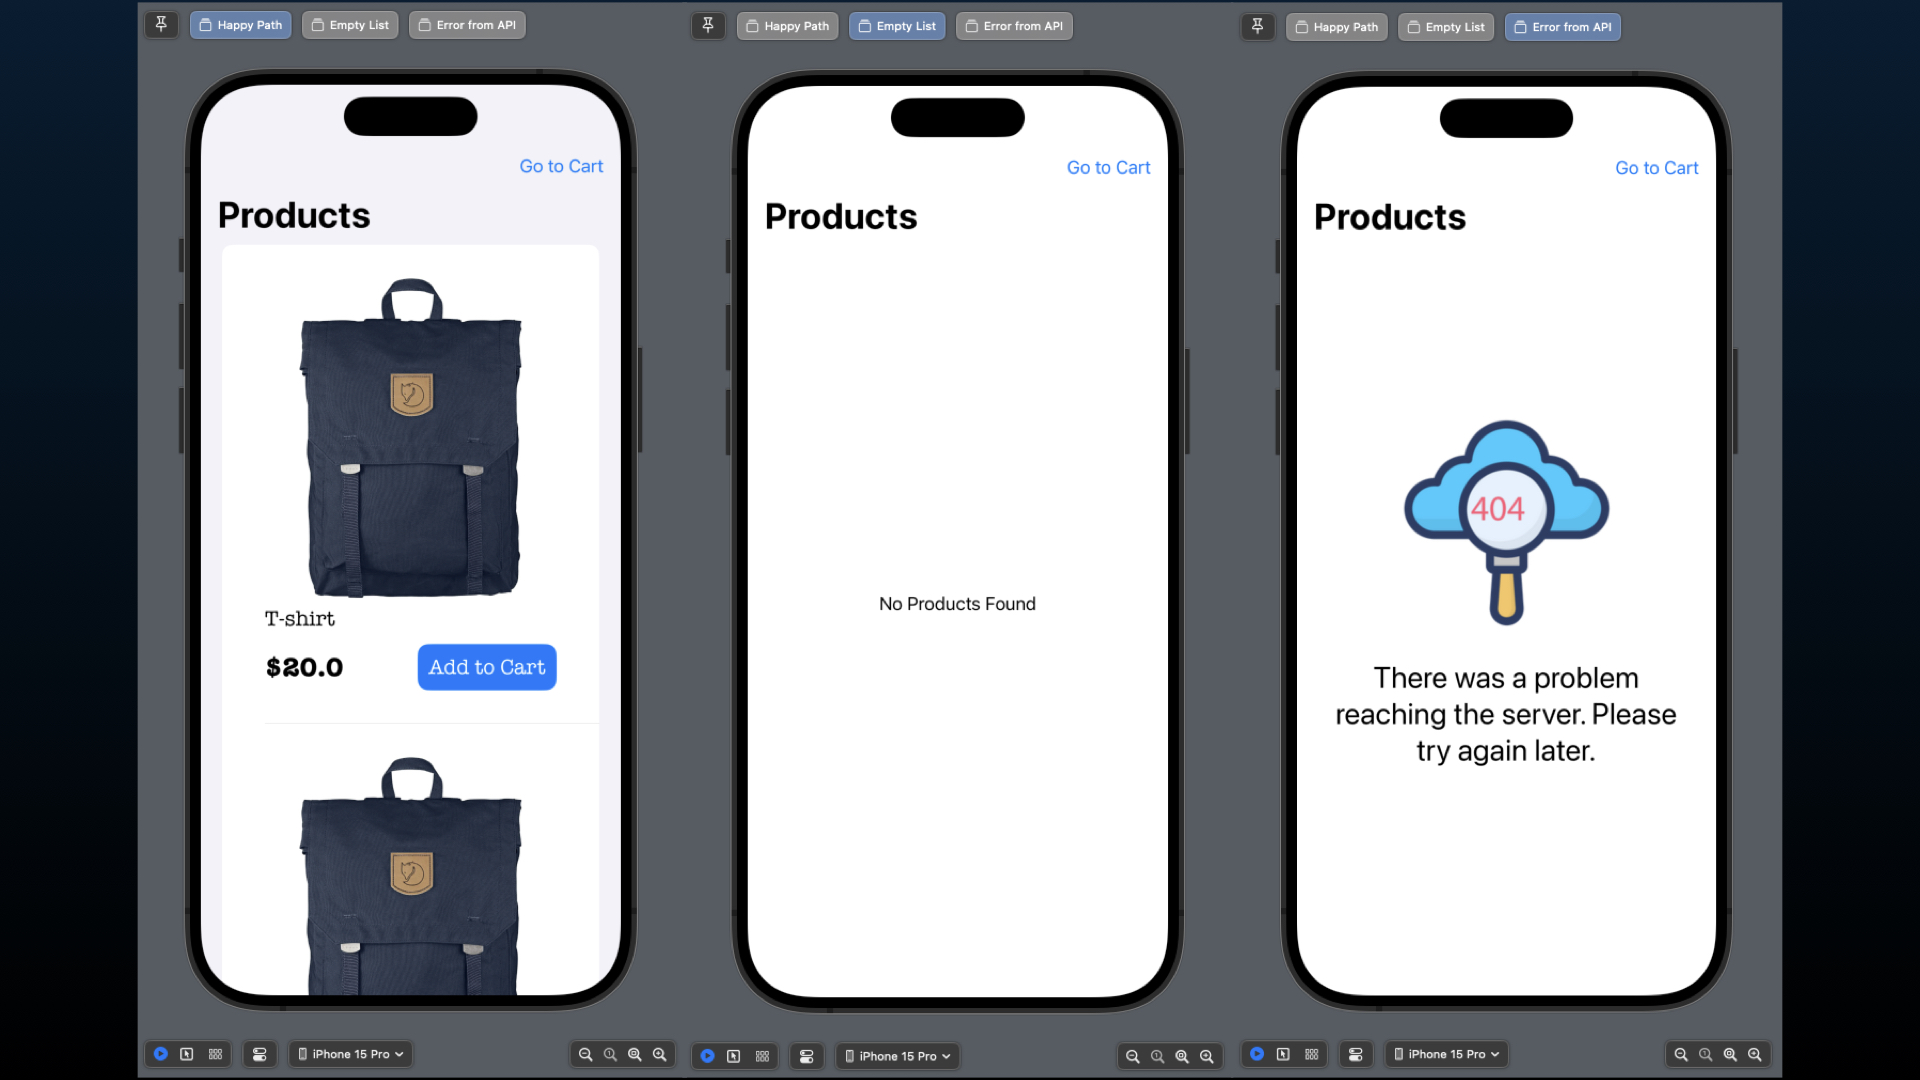
Now you can name and preview multiple states of your view based on their use case. Isn't that great? 😃
No. 2: Use mock data as part of your development assets
In your Xcode project, there is a folder called "Preview Content":
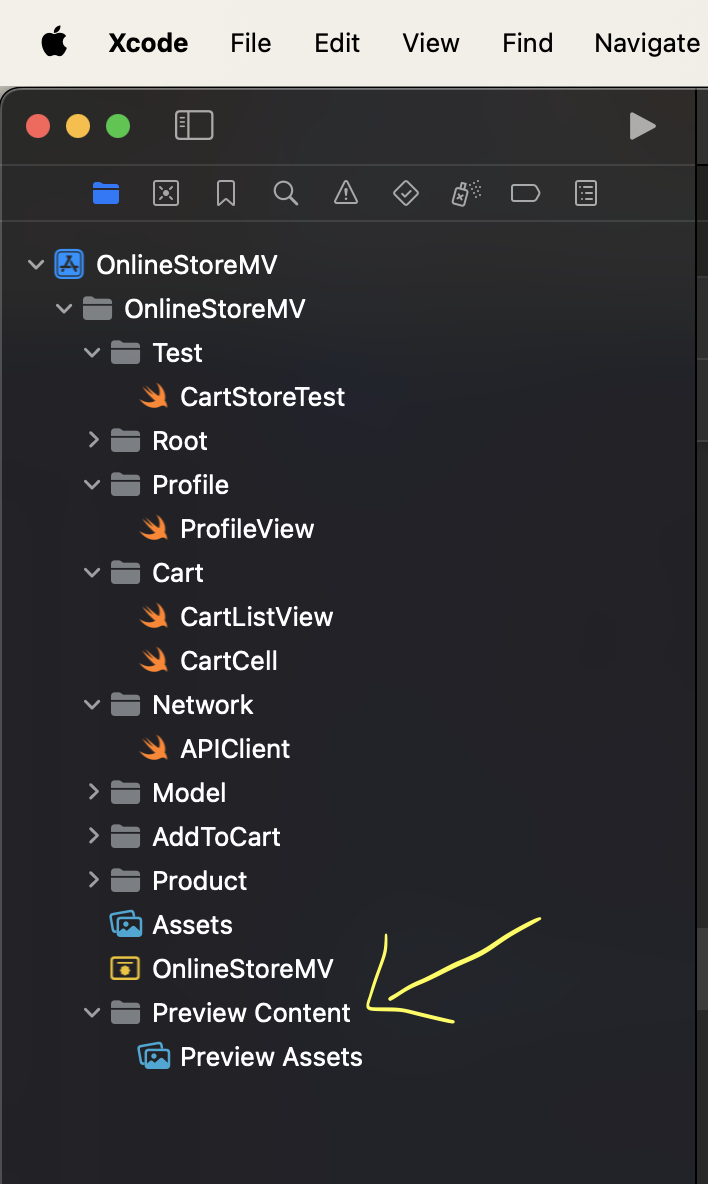
This folder contains data only for development purposes, such as placeholder images for your previews.
You can manage this reference in your Target's Build Configuration as "Development assets":

All images stored in Preview Assets will only be available in DEBUG configuration and will be removed for RELEASE.
This is a great way to avoid increasing the app size with data not visible to the end user.
However, few people know that you can also add code, such as mock data, that will be executed only in development and not in production to fill out your preview screens.
Let's see this example: I normally create sample data below my model declaration. In the code below, I created a Product struct and an extension with sample data that I can use in my previews and unit tests:
struct Product: Equatable, Identifiable {
    let id: Int
    let title: String
    let price: Double
    let description: String
    let category: String
    let imageURL: URL
}

extension Product {
    static var sample: [Product] {
        [
            Product(
                id: 1,
                title: "T-shirt",
                price: 20,
                description: "This is a description of a cool T-shirt",
                category: "SomeArticle",
                imageURL: URL(string: "https://fakestoreapi.com/img/81fPKd-2AYL._AC_SL1500_.jpg")!
            ),
            Product(...),
            Product(...),
        ]
    }
}
If the #if DEBUG condition is not added, the sample property will unnecessarily increase the final build size.
I understand that this piece of code may seem insignificant, but the accumulation of unnecessary code and assets can have a significant impact on the production build!
So, instead of using that flag directive, let's create a file in Preview Content to store this sample data:

If you run the project in DEBUG mode, the project will compile as expected, but try archiving and see how Xcode does not recognize the sample property:
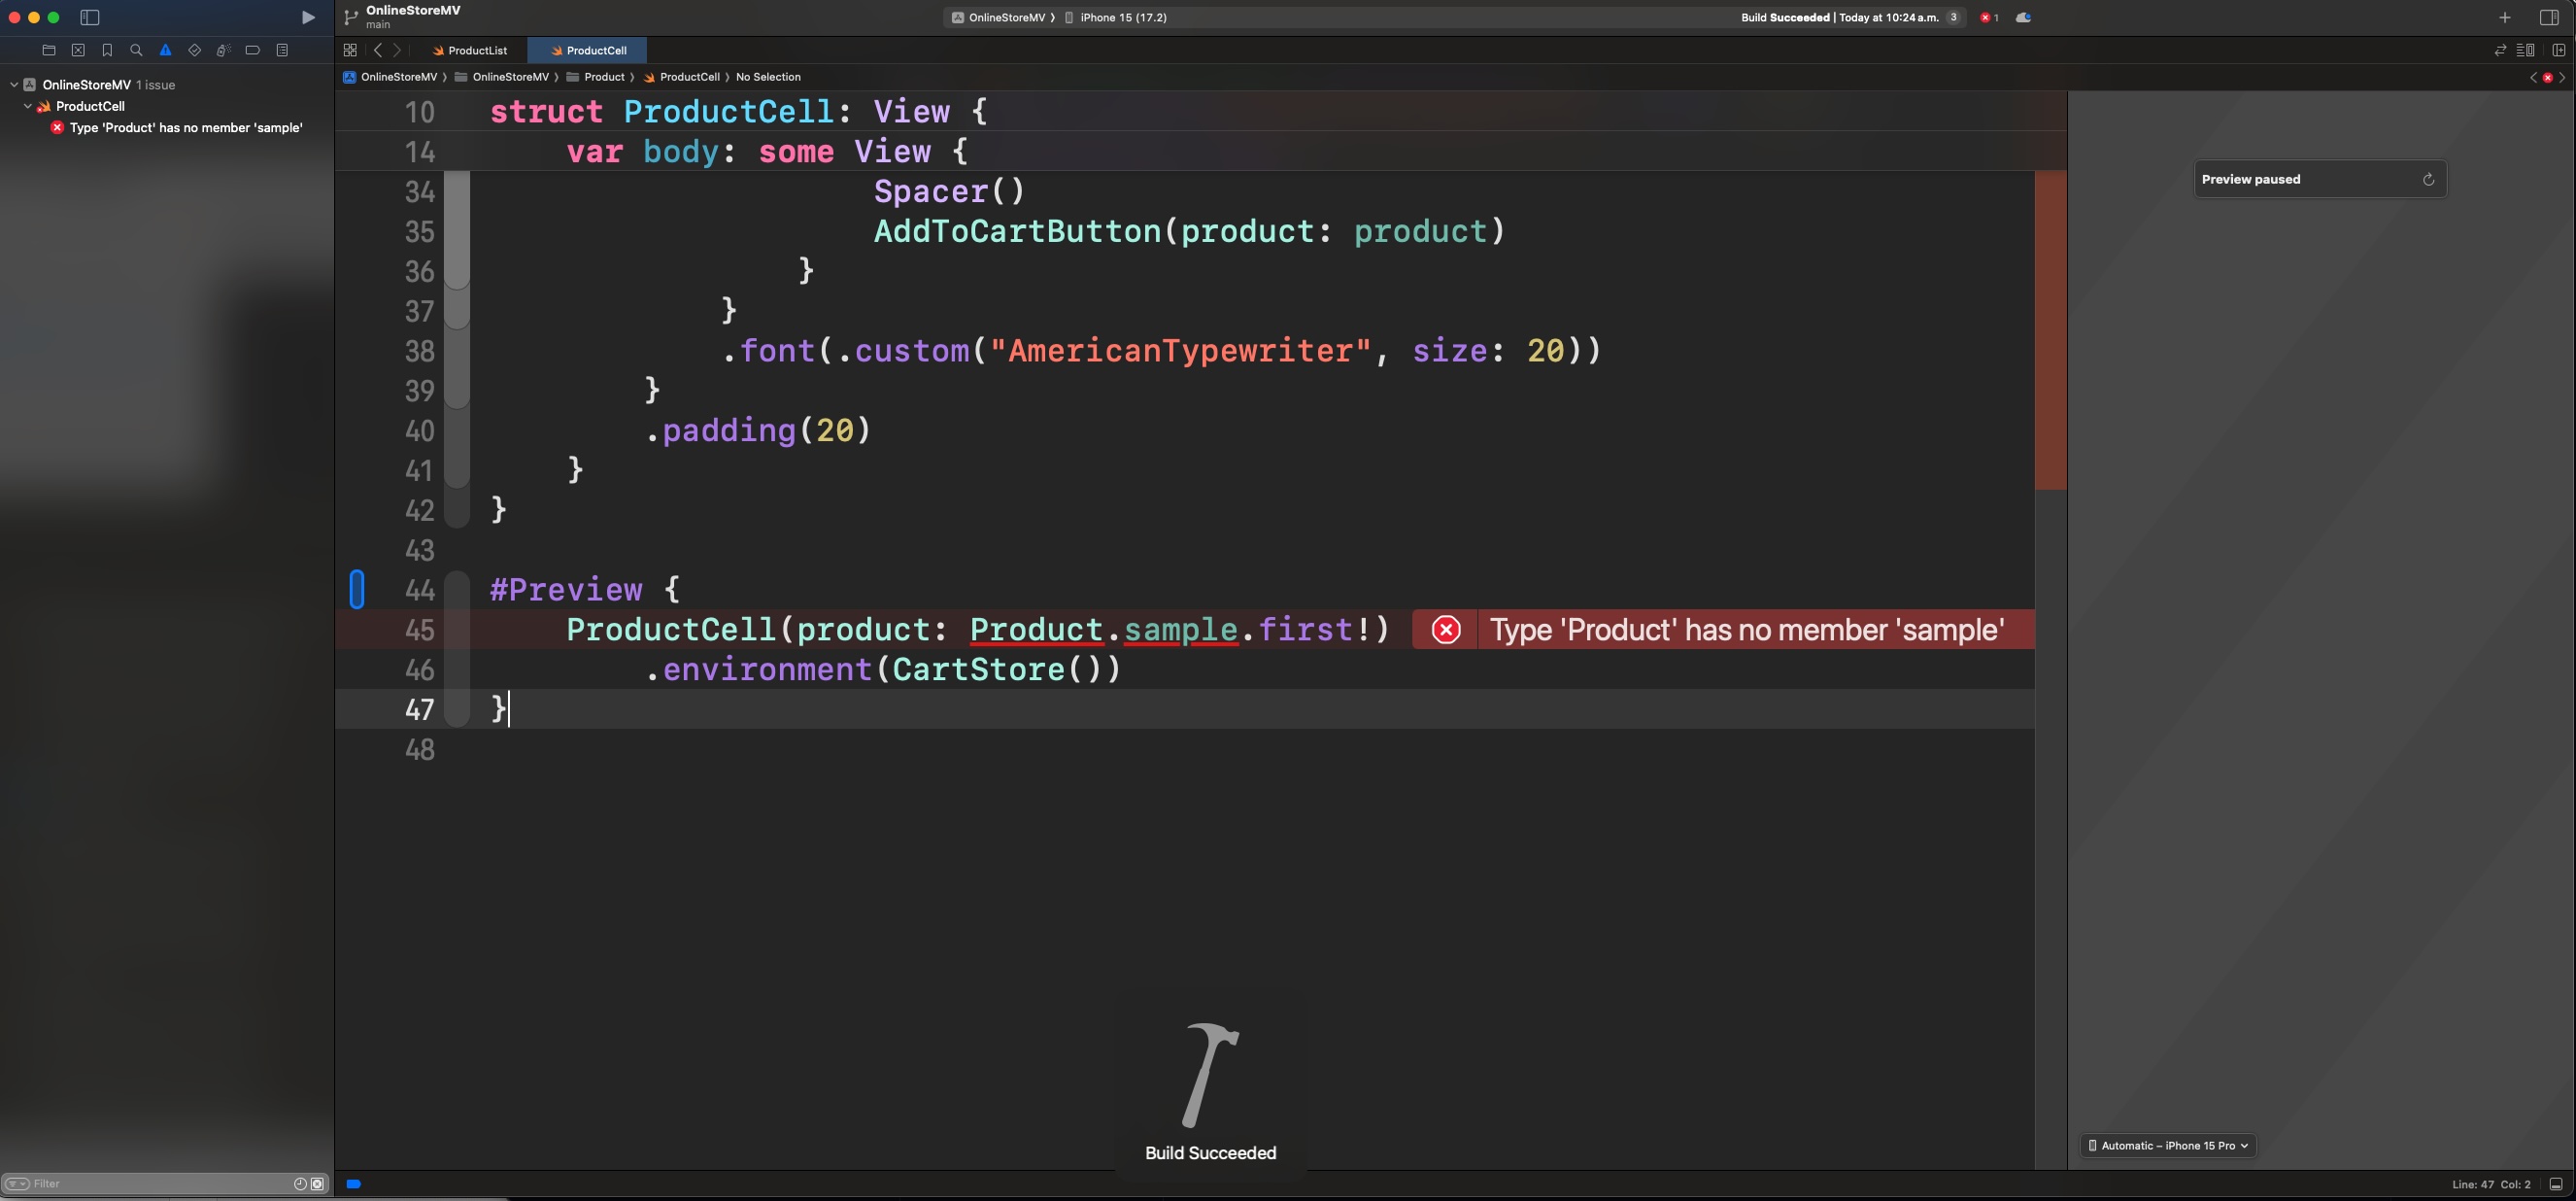
To fix this, add #if DEBUG directive to wrap this preview:
#if DEBUG
#Preview {
    ProductCell(product: Product.sample.first!)
        .environment(CartStore())
}
#endif
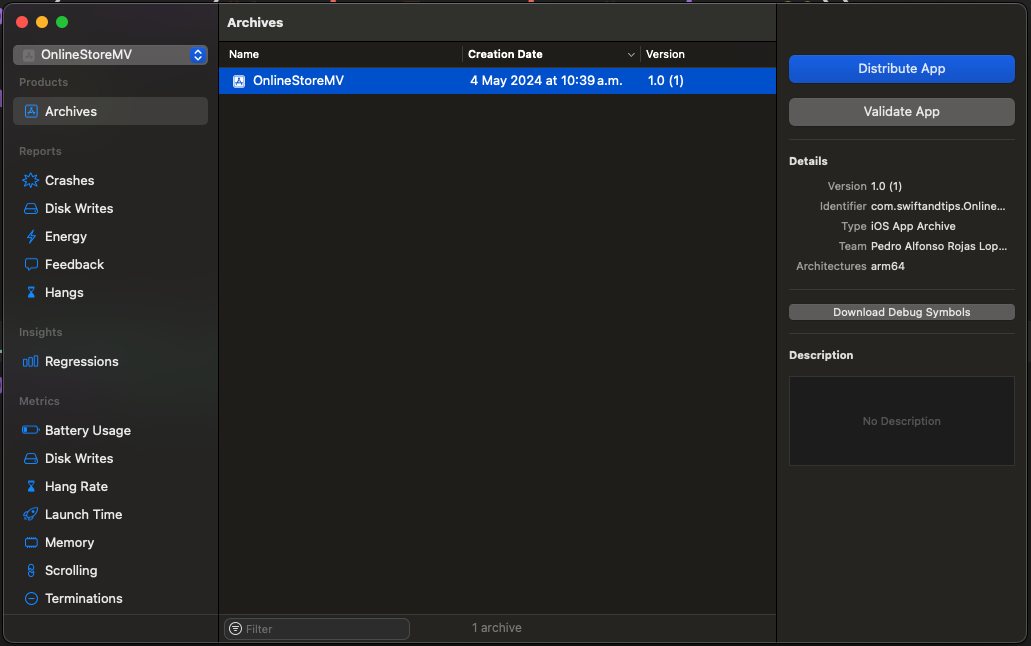
Now the archiving process is correctly executed:
There are two questions here:
If the
#if DEBUGdirective is still needed in the codebase anyway, Is it worth using development assets?"Well, it depends." Code from development assets can be very useful for separating out mock data that is only relevant in a development context.
However, if you need to keep this data in the same file as your model, using
#if DEBUGwill essentially achieve the same result. It's up to you!If the
#if DEBUGdirective is required in previews during archive, Does it mean that previews are part of your production build?The short answer is No, but let me explain what I got: Previews are required to be compiled along with all the code in the app, regardless of whether it is in DEBUG or RELEASE configuration. However, after this compilation, previews will be removed as part of the final build process.
It's difficult for me to explain this in detail because it's a "black box" process that only Apple fully understands.
If you have more information about this, feel free to share it in the comments section!
There you have it. You can use development assets not only for preview images but also to create mock data for development, which won't be included in your final build!
By the way, I created a cool macro called
@SampleBuilderto generate mock data in seconds. If you want to learn more, check out this video.
No. 3: Preview on a real device
Lastly, let's review something some of you may not remember (or don't even know). you can use your iPhone or iPad as your preview canvas.
Most of the time, we will work with the simulator previews, but if you need to review your view in a more realistic environment without fully running the app, this is a great feature!
Plug your device into your Mac and select it in the preview layout:
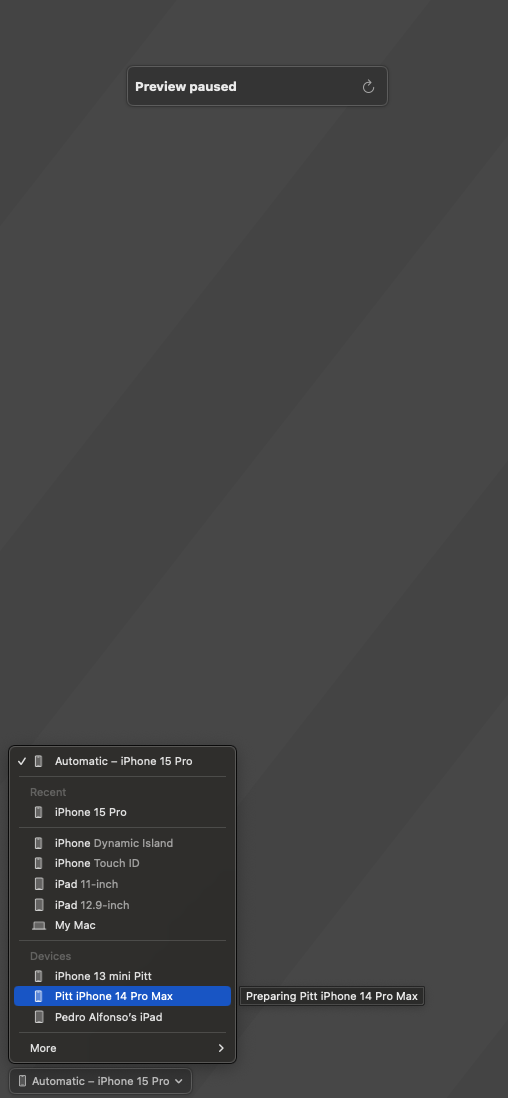
Then resume the preview, and Xcode will install an app called "Xcode Previews" on your device:
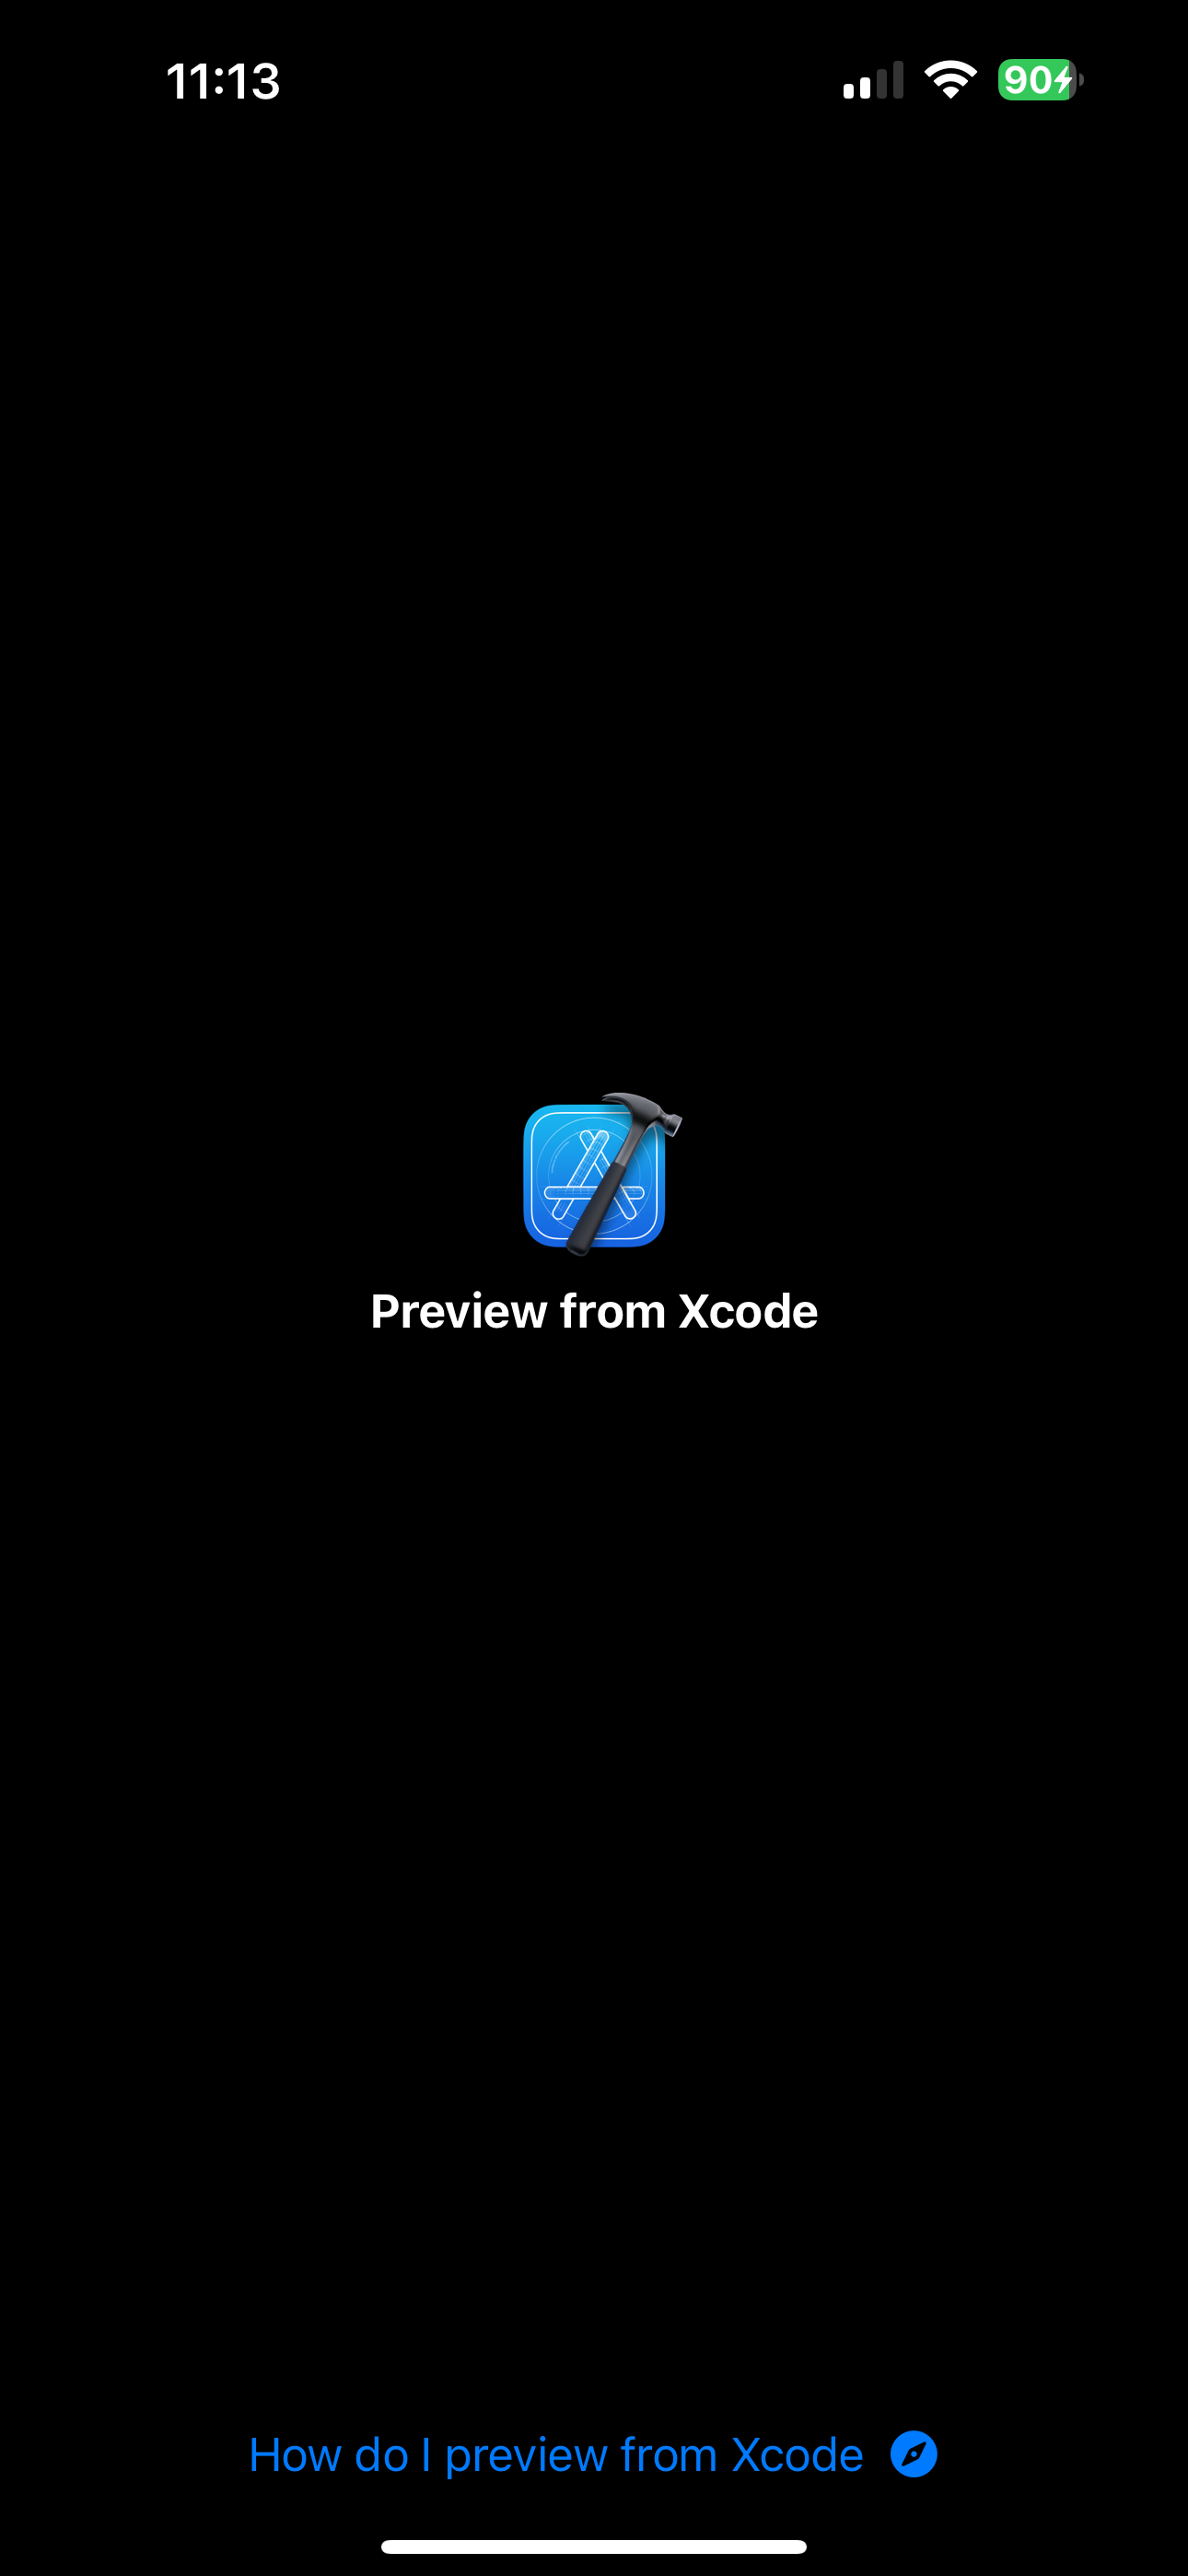
After a few seconds, your Preview will render the View on the phone:
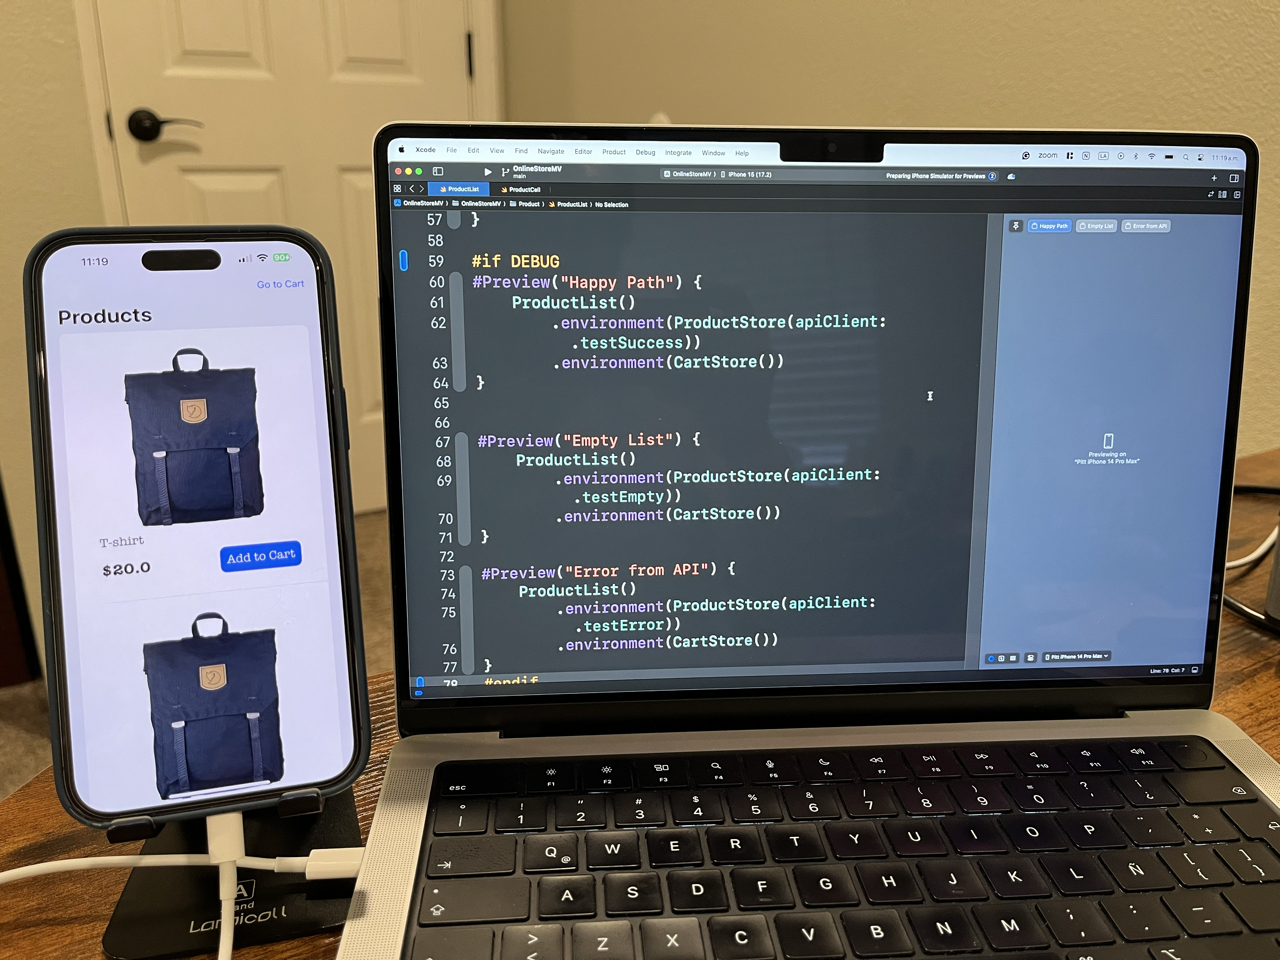
The best part is that you can see changes in real-time, such as updating text or switching between different previews 😉:
Wrap up
I hope these three SwiftUI Preview tips help improve your app development.
If you want to review the full demo, check out this link.
Would you like to learn more "Swift and Tips" 😃? Please let me know what you would like to learn next in the comment section below.
Remember, my name is Pitt, and this... this is swiftandtips.com! thanks for reading, and have a great day!
References
Subscribe to my newsletter
Read articles from Pedro Rojas directly inside your inbox. Subscribe to the newsletter, and don't miss out.
Written by
