How to make a cool GitHub README
 Hemang Yadav
Hey Folks, in this post I will tell you how to create a super cool and attractive Github profile README to get more profile visits and get hired by companies!
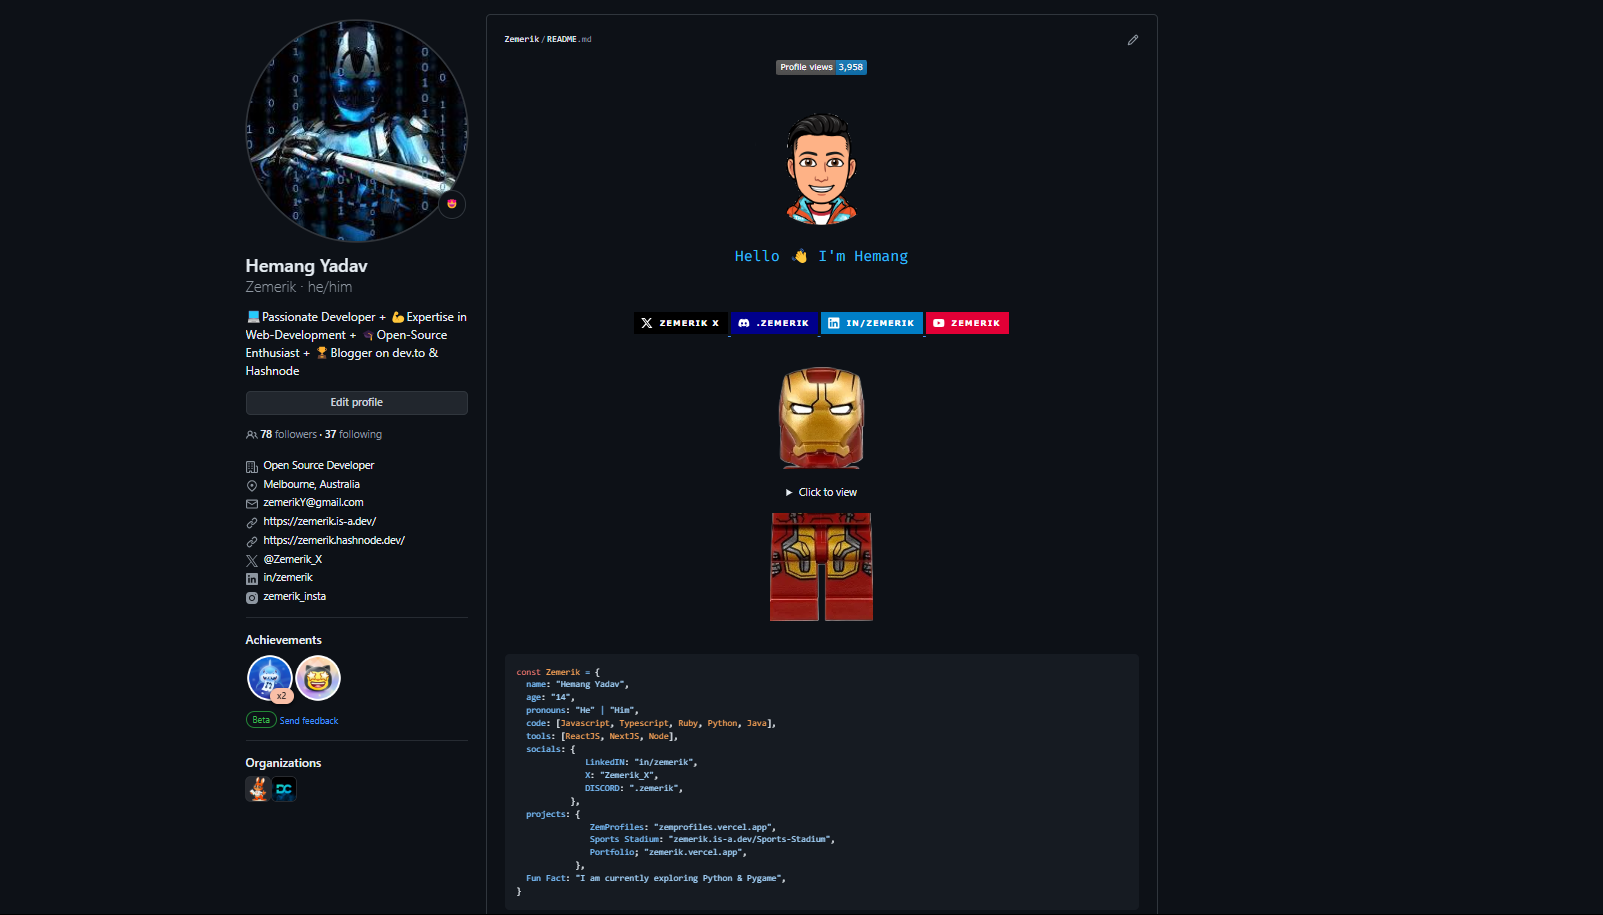
PROFILE VIEWS WIDGET:
The first thing that I have on my README, is the Profile Views widget. Although a lot of people argue against the idea of having that widget, I personally prefer having it as it allows you to track how many visitors your profile is getting!
Uploading:
- You can add the
Profile Viewswidget through the following in Markdown:

Remember to replace
YOUR_USERNAME_HEREwith your actual Github Username
Socials:
The second thing that I have decided to include in my README, are my socials. It is extremely important to have social links in your profile, so that companies/users can contact you or explore your further!

Image:

In order to attract the user, I decided to add a picture of Iron Man on my README. For you, it does not have to be Iron Man, it can be anything as long it can be split into two parts and attracts attention.
Find an image:
I would suggest using an circular image or a bitmoji, character, etc. Something that can be split into two parts as well as look fantastic!
I would prefer to have an image with a transparent background, so that the color scheme looks good on both light and dark mode.
Editing:
After saving the image, make another copy of the image. Open one of them, and crop the bottom half of the image. Only the top half should remain.
Open the other image, and crop the top half of the image, to only have the bottom half left.
Upload:
- Upload both of those files to the github Repository displaying your README.
Constructing the README:
Top Half:
- Display the top half of the image on your README through the following:

Remember to replace
IMAGE DIRECTORY HEREwith the actual directory of your image that you uploaded!
Dropdown:
- Add the following in order to create a dropdown on your profile:
<details close>
    <summary>
      Your Text here
    </summary>

!-- Add all your content here --!

</details
Remember to replace
Your Text herewith your actual text and add your content between</summary>and</details>.
Last half:
- Now that all the content has been added, you can add the bottom half of your image through the following way:

Remember to replace
IMAGE DIRECTORY HEREwith the actual directory of your image.
Support:
If you require any help or support, feel free to reach out to me through my github or by commenting on this blog!
My Github: https://github.com/Zemerik/
Credits:
- The original concept and idea of this Profile, was inspired from Priyansh Prajapat Github Profile
Thanks for Reading! Hopefully you have found this blog informative and useful!!
Subscribe to my newsletter
Read articles from Hemang Yadav directly inside your inbox. Subscribe to the newsletter, and don't miss out.
Written by

Hemang Yadav
Hemang Yadav
💻Passionate Developer + 💪Expertise in Web-Development + 🎓Open-Source Enthusiast + 🏆 Content Creator