How To Attach or Add A Data Disk To A Virtual Machine And Initialize It For Use
 DESTINY CHUKWUEBUKA SAMUEL
Today we would be learning how to create and attach a data disk to a virtual machine, and how to access the windows virtual machine and initialize the data disk for use.
It is important to understand that there is a difference between an (operating system) OS disk and a data disk. In Azure every VM is equipped with a single OS disk that is directly attached to it on default during the process of creating the VM. This disk comes with a pre-installed operating system that was chosen during the creation of the virtual machine, and the disk contains the boot volume.
On the other hand, a Data disk is a managed disk that is attached to a VM to store application data or other data you need to keep. It is just like the regular HDD (hard disk drive) that is attached to your computer or laptop.
The following steps will guide you on who to create and attach a data disk to a VM.
- The first step is to create a windows VM or any other VM you intend to attach the data disk to. I will use a Windows 11 Pro VM for the illustrate.
To create your windows virtual machine please Click Here to view my blog on step-by-step procedures on how to create a Windows 11 pro Virtual Machine.
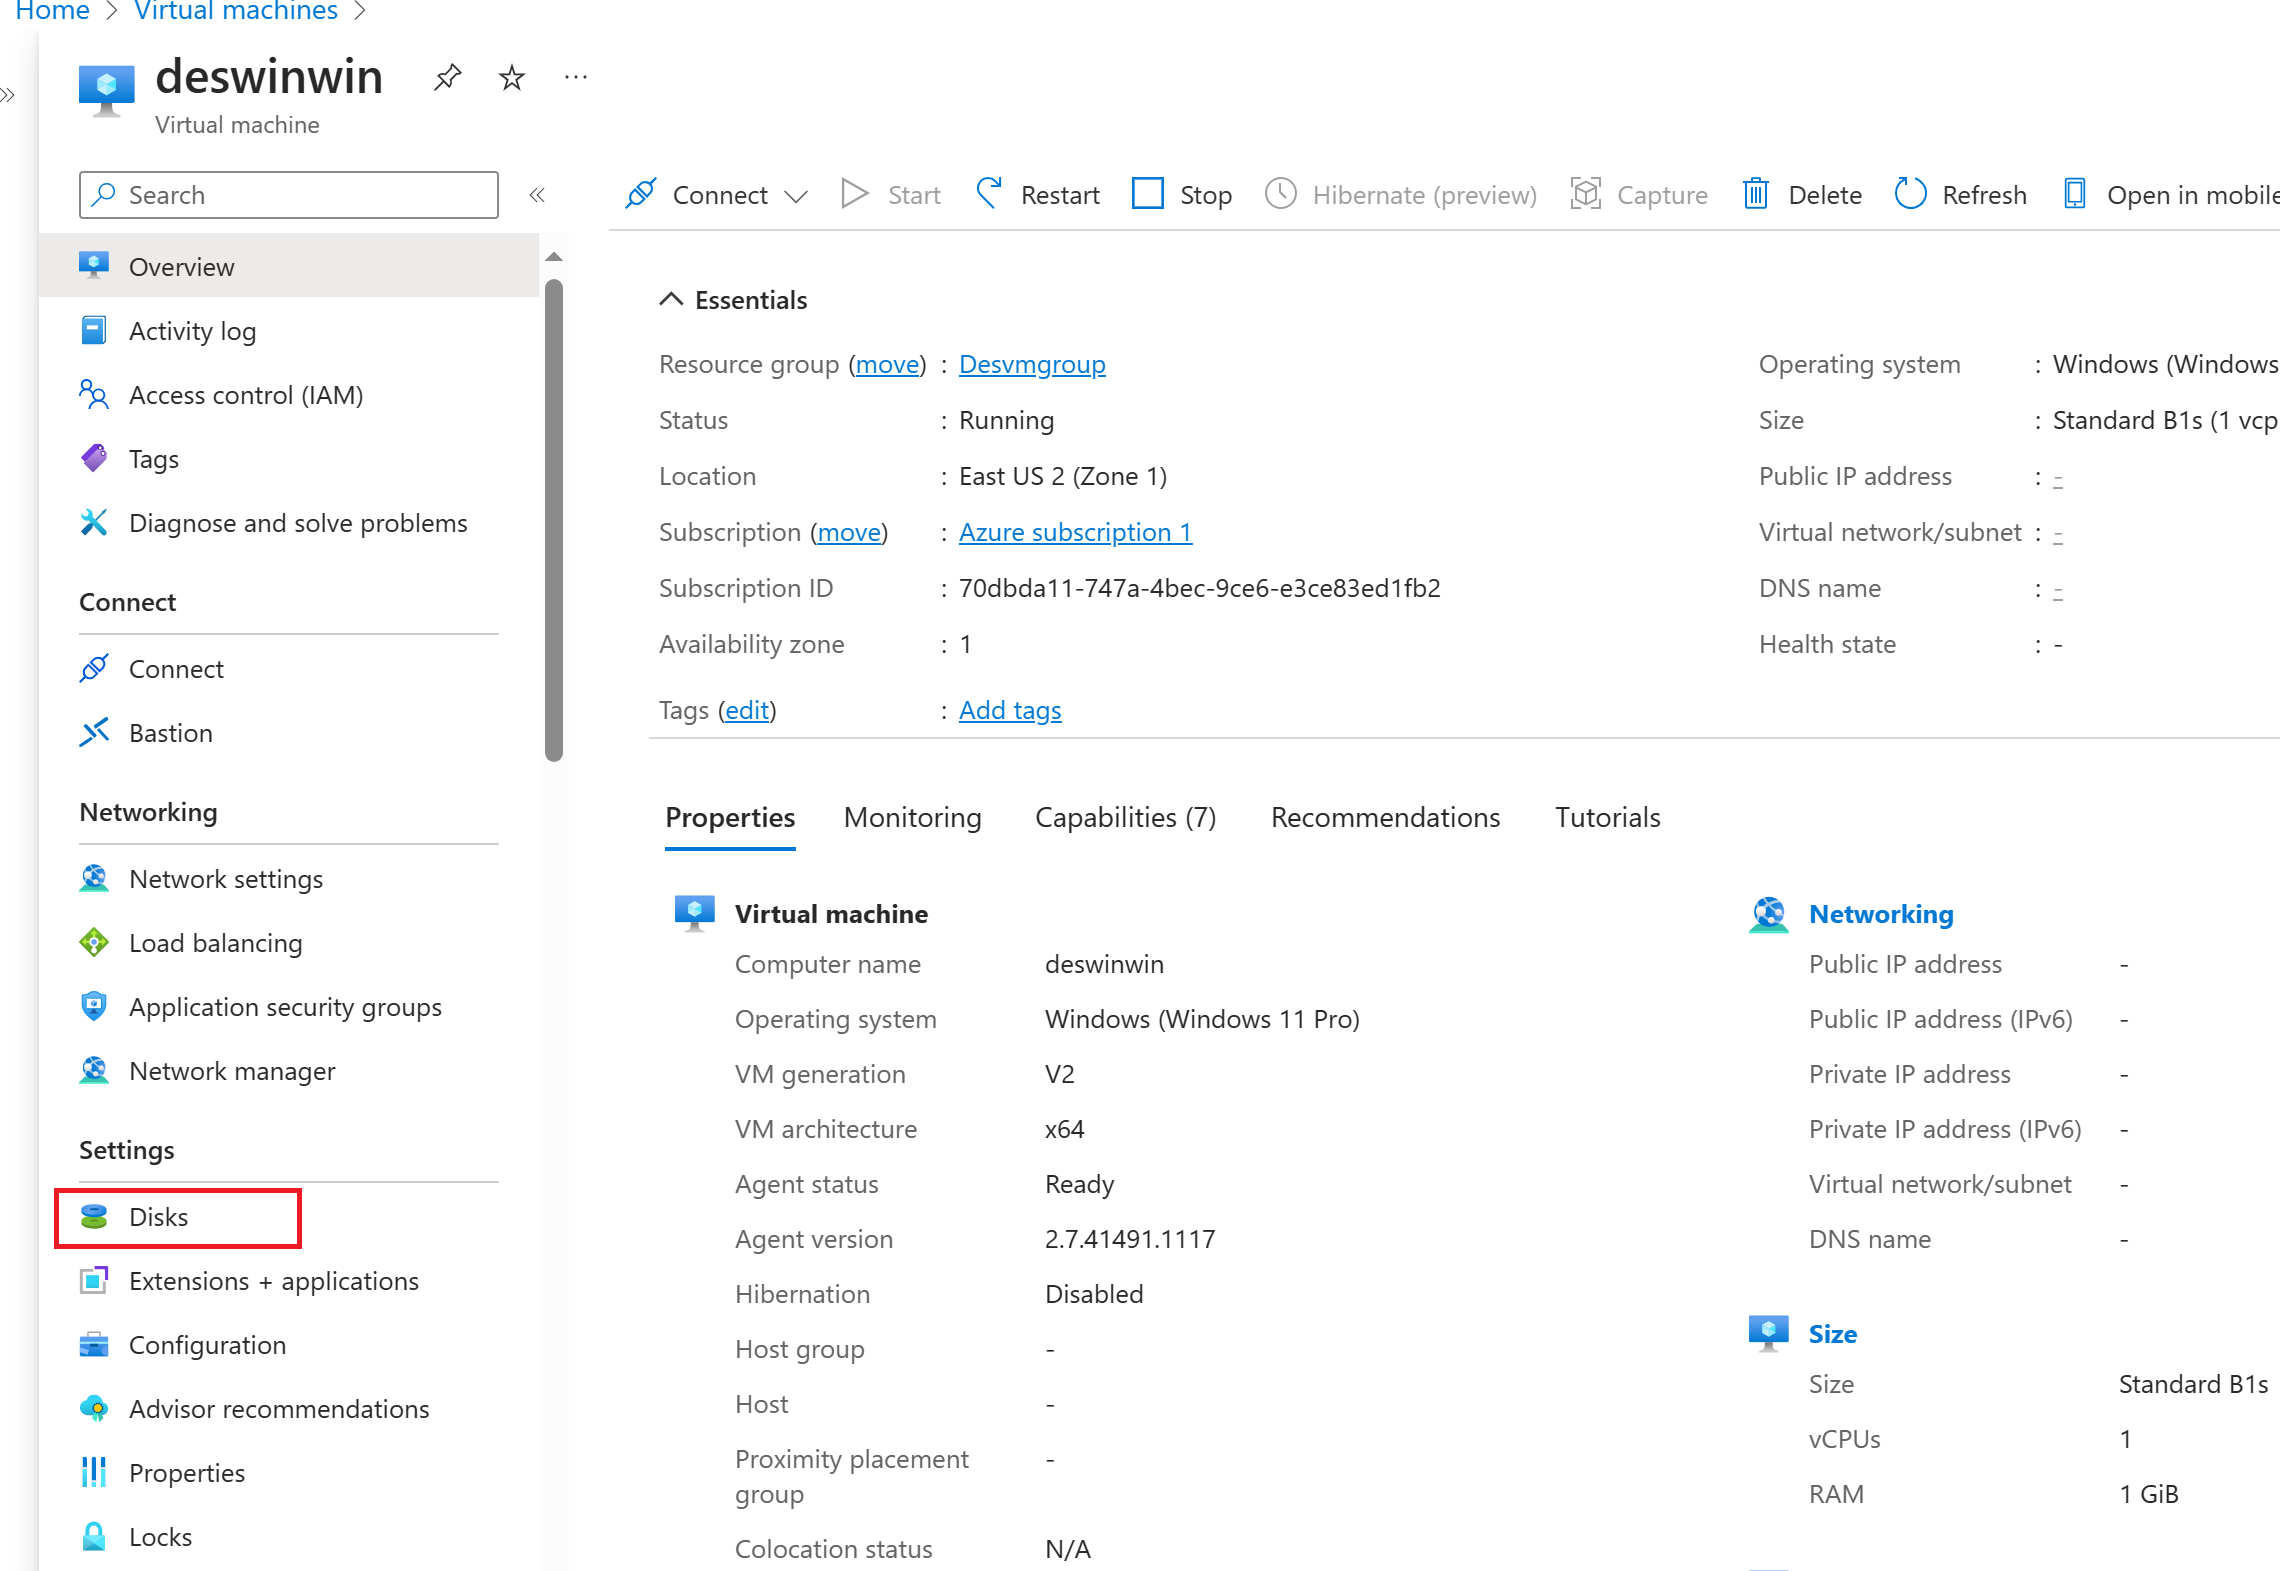
Once you've created your virtual machine click on it, and then click on disk as shown below.
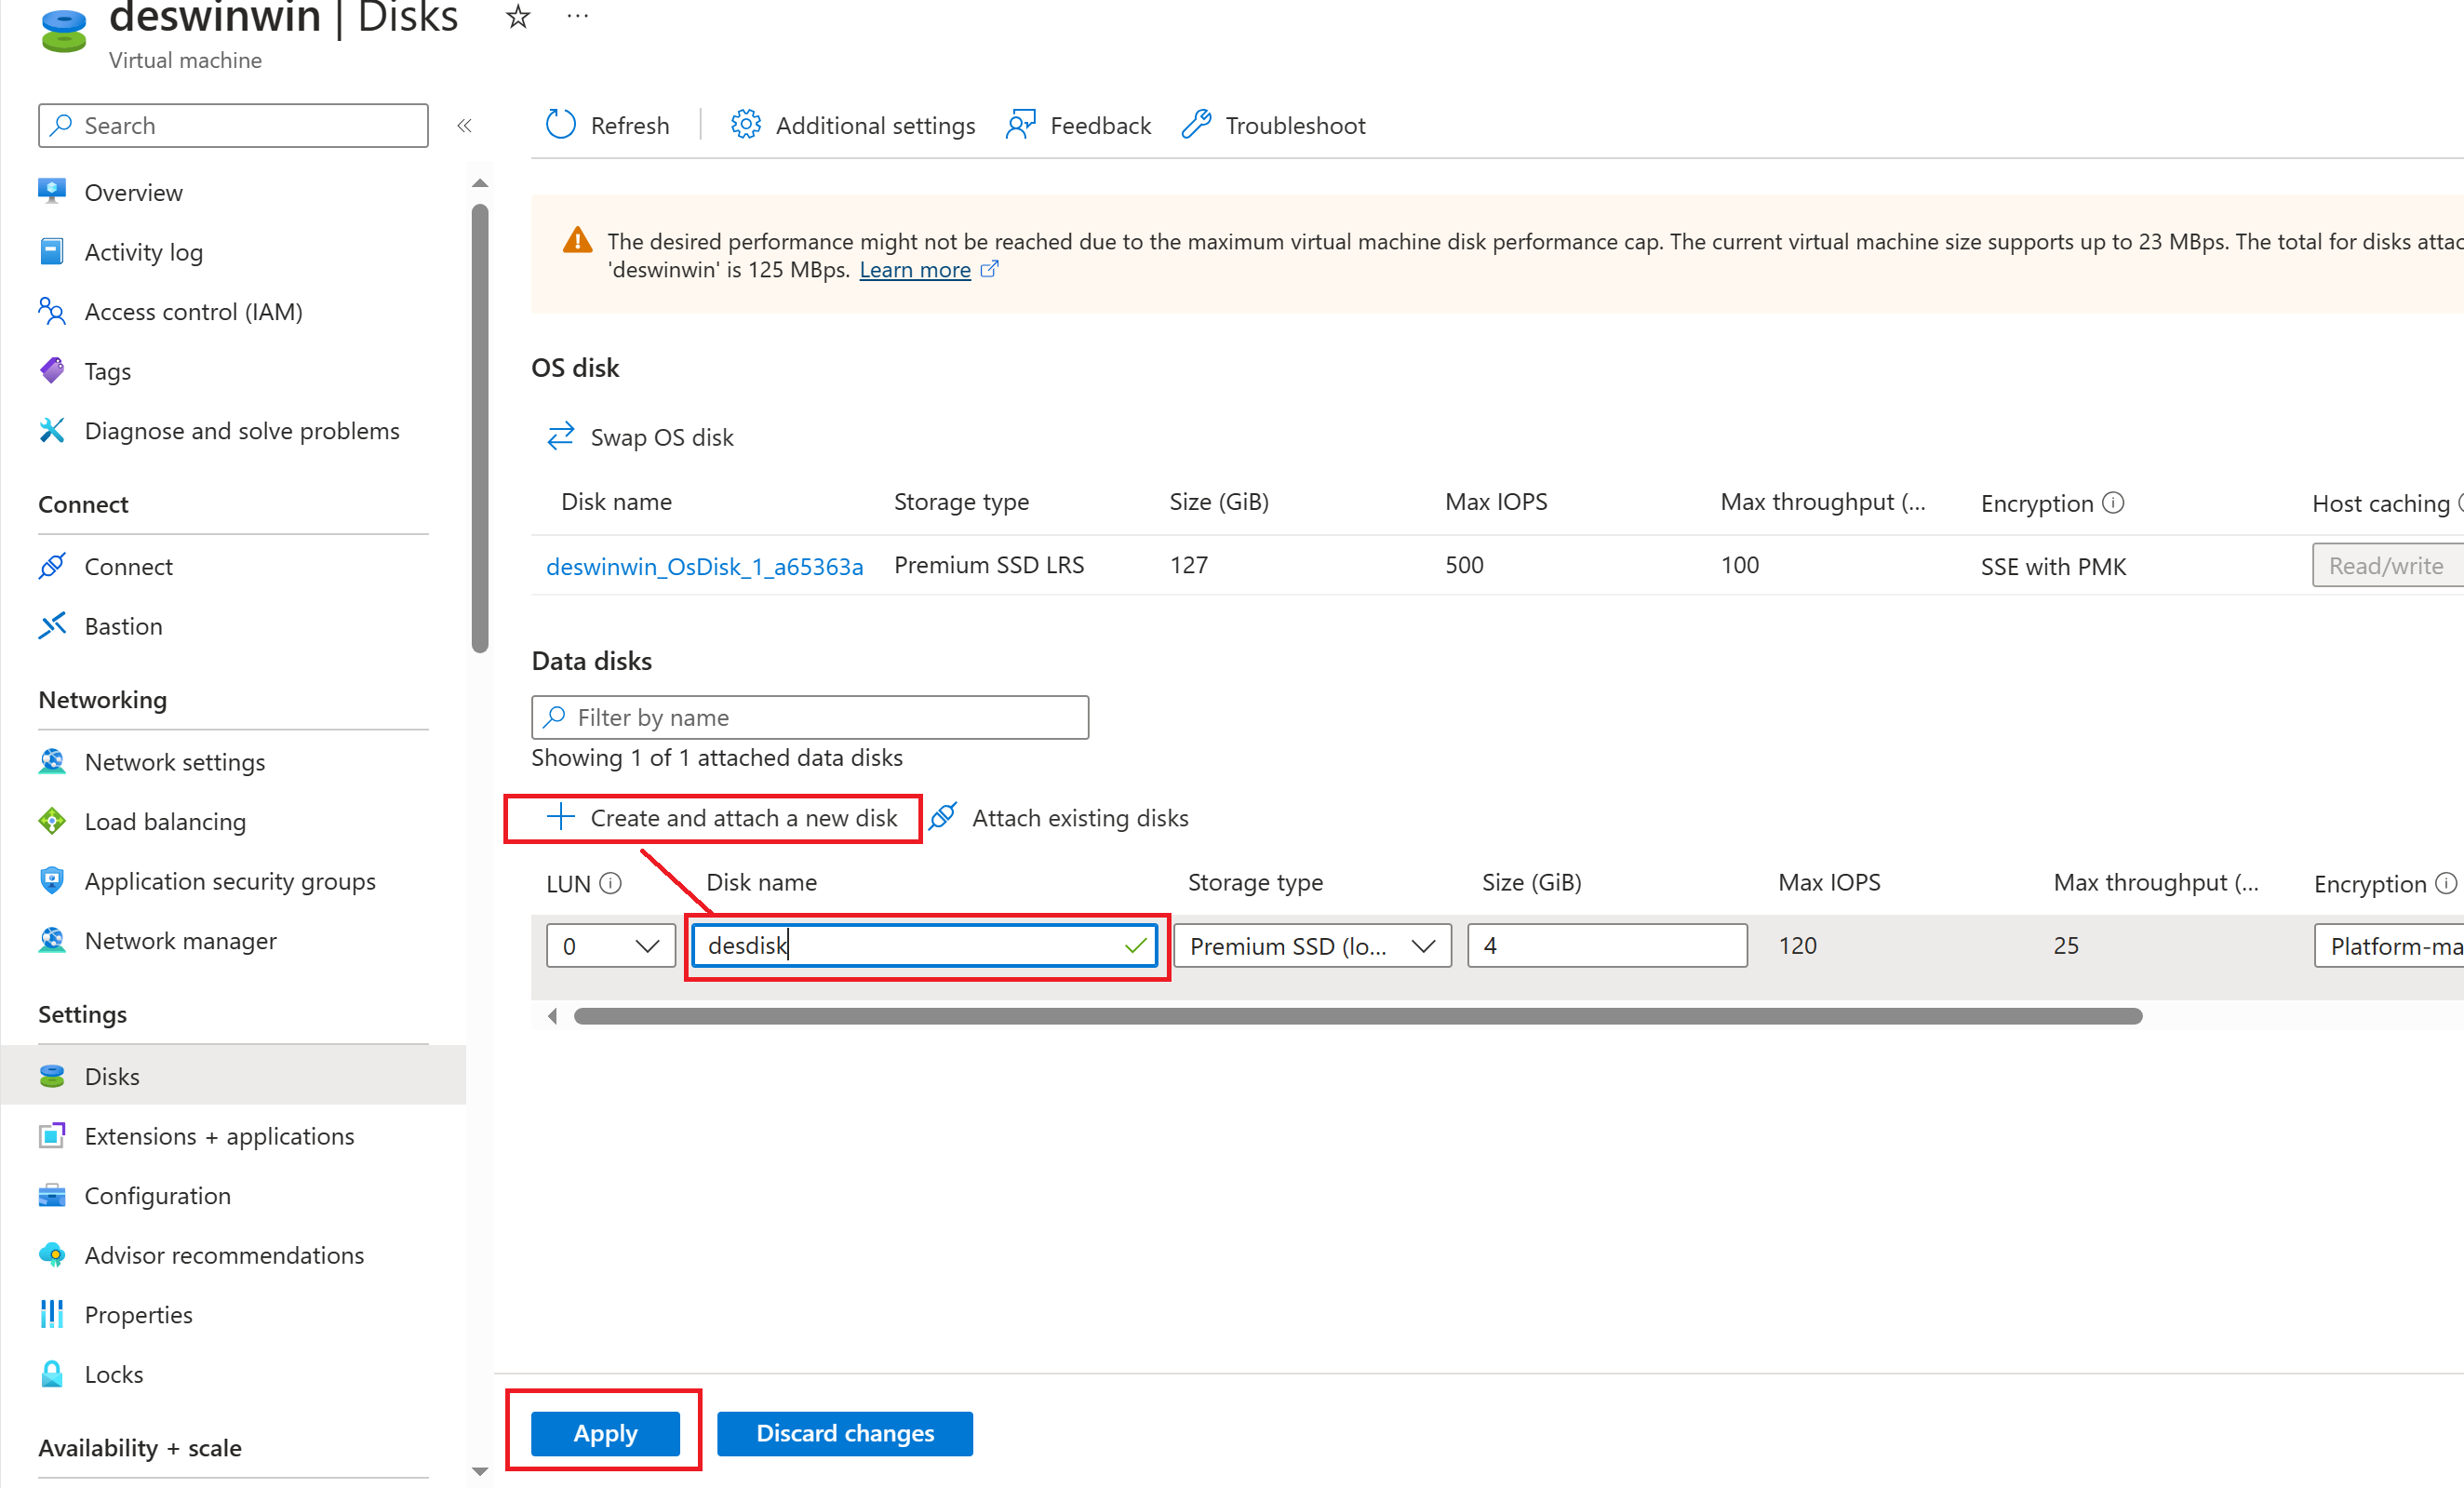
- Next, click on "Create and attach a new disk" and input your desired name for the new disk you want to create and attach, then click on "Apply".
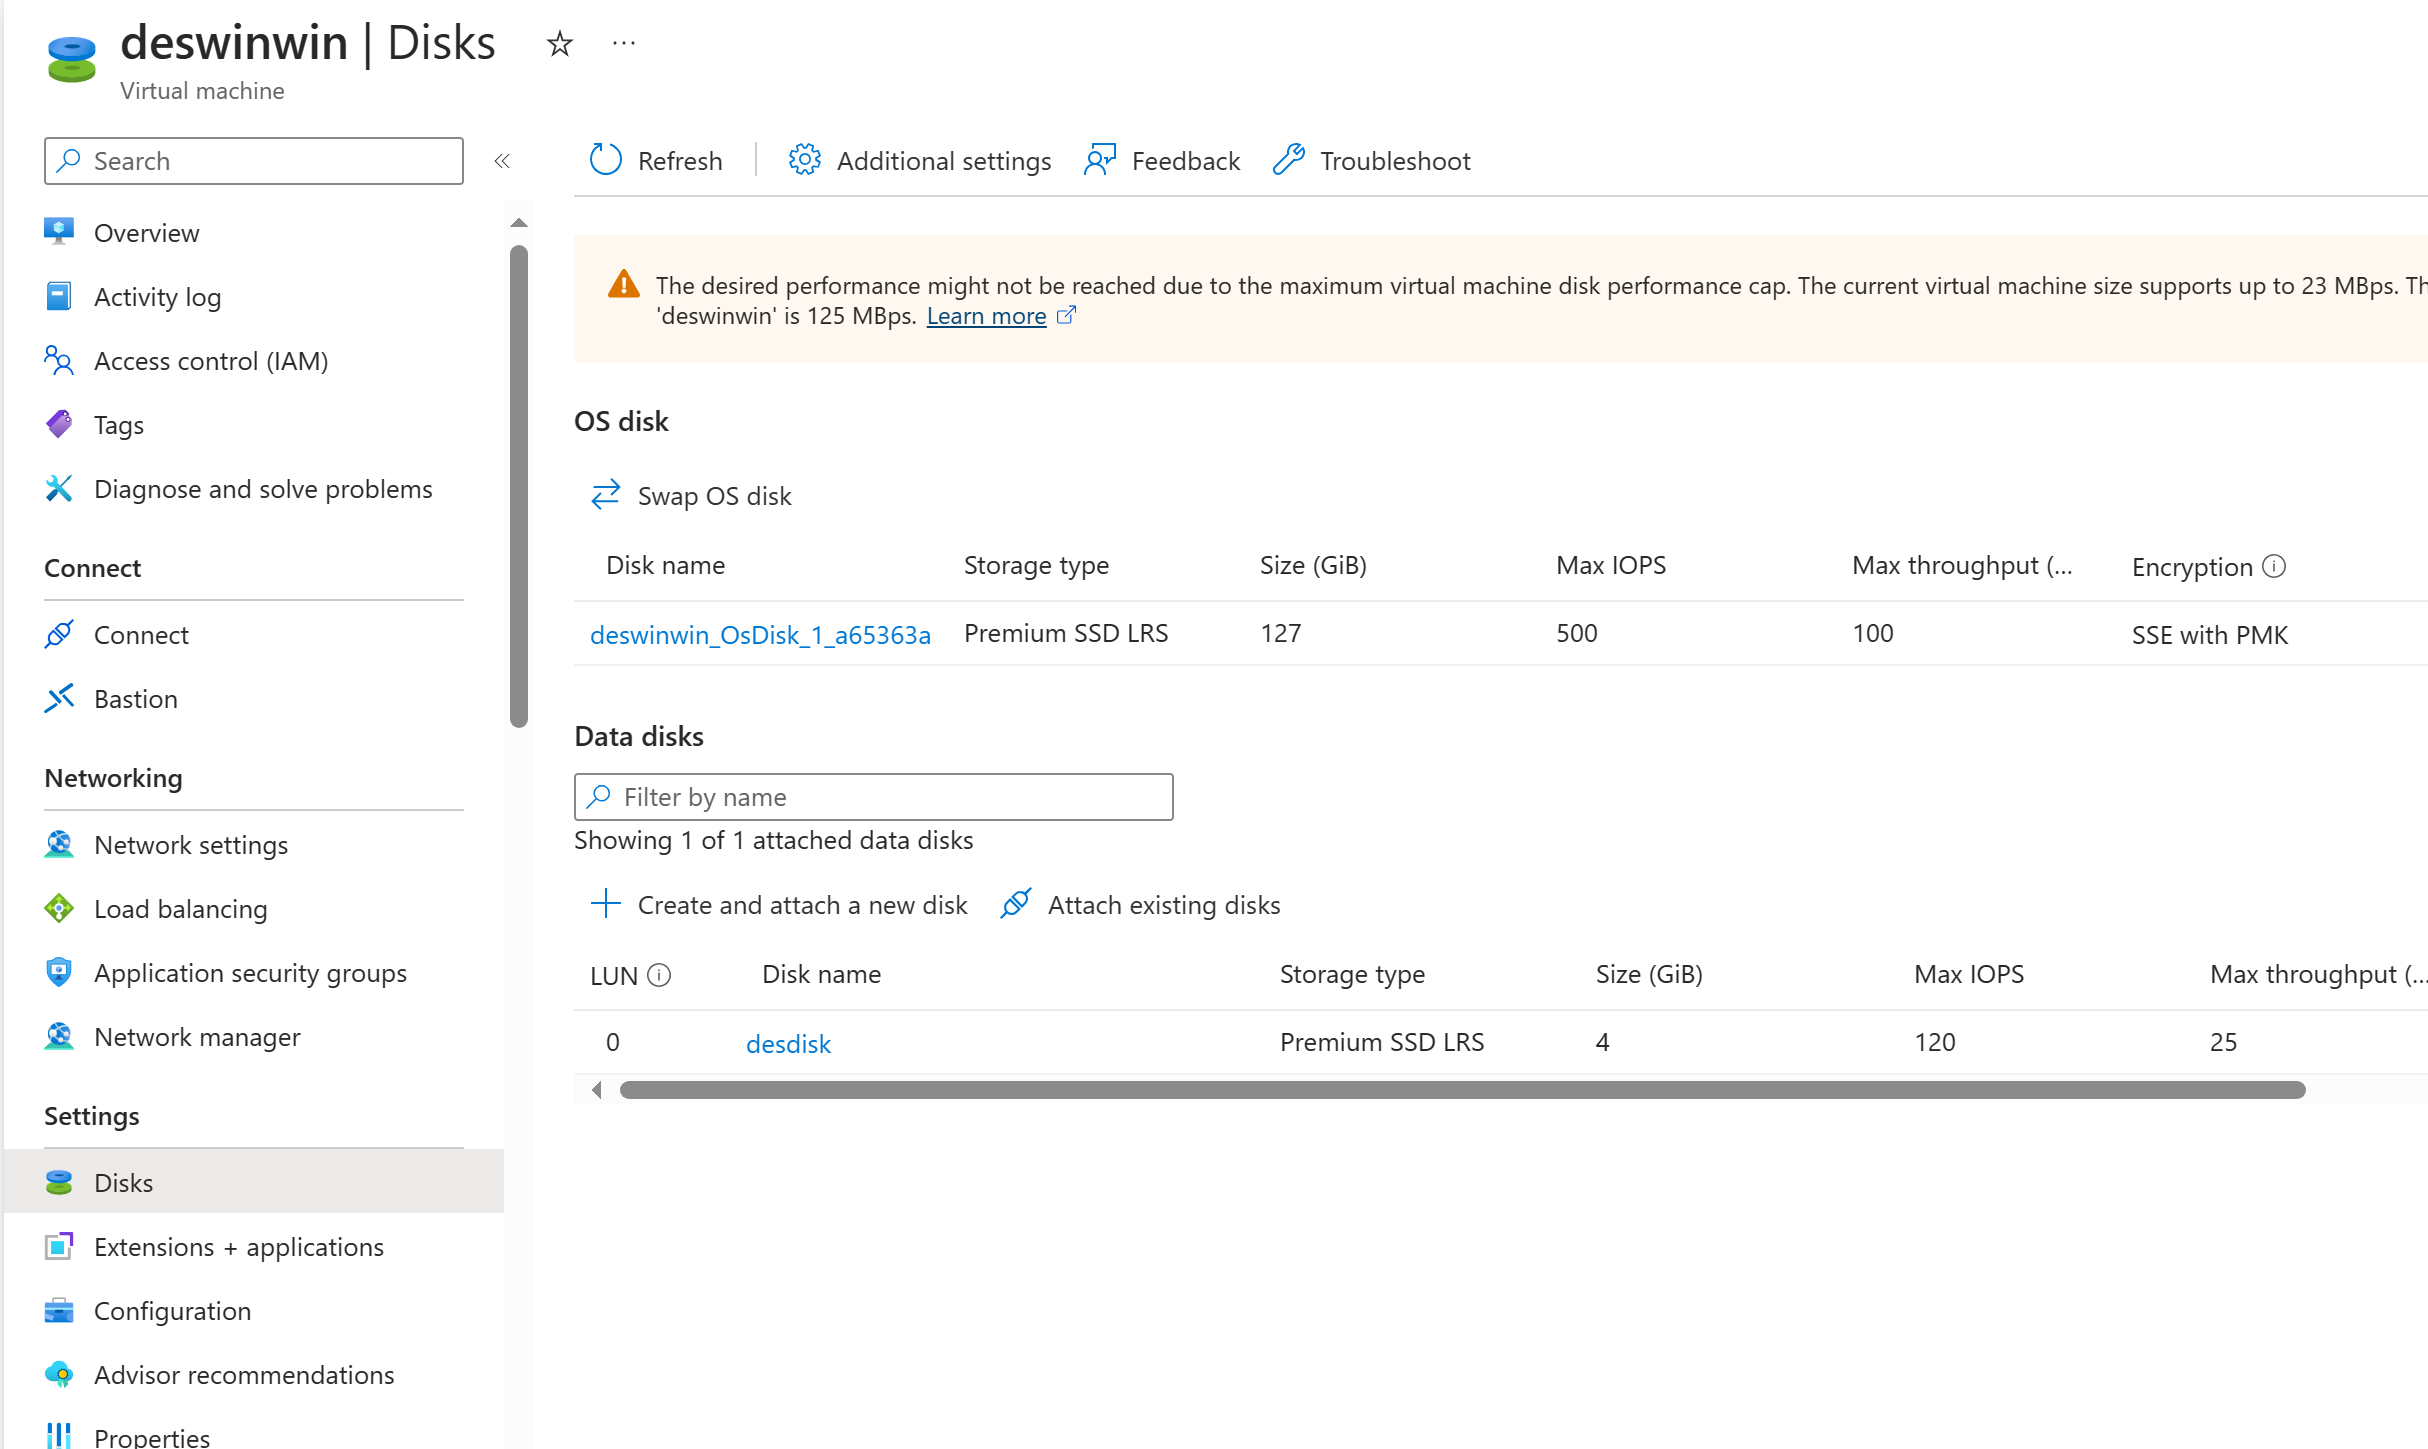
After clicking on "Apply" You should have a similar screen/interface as shown below
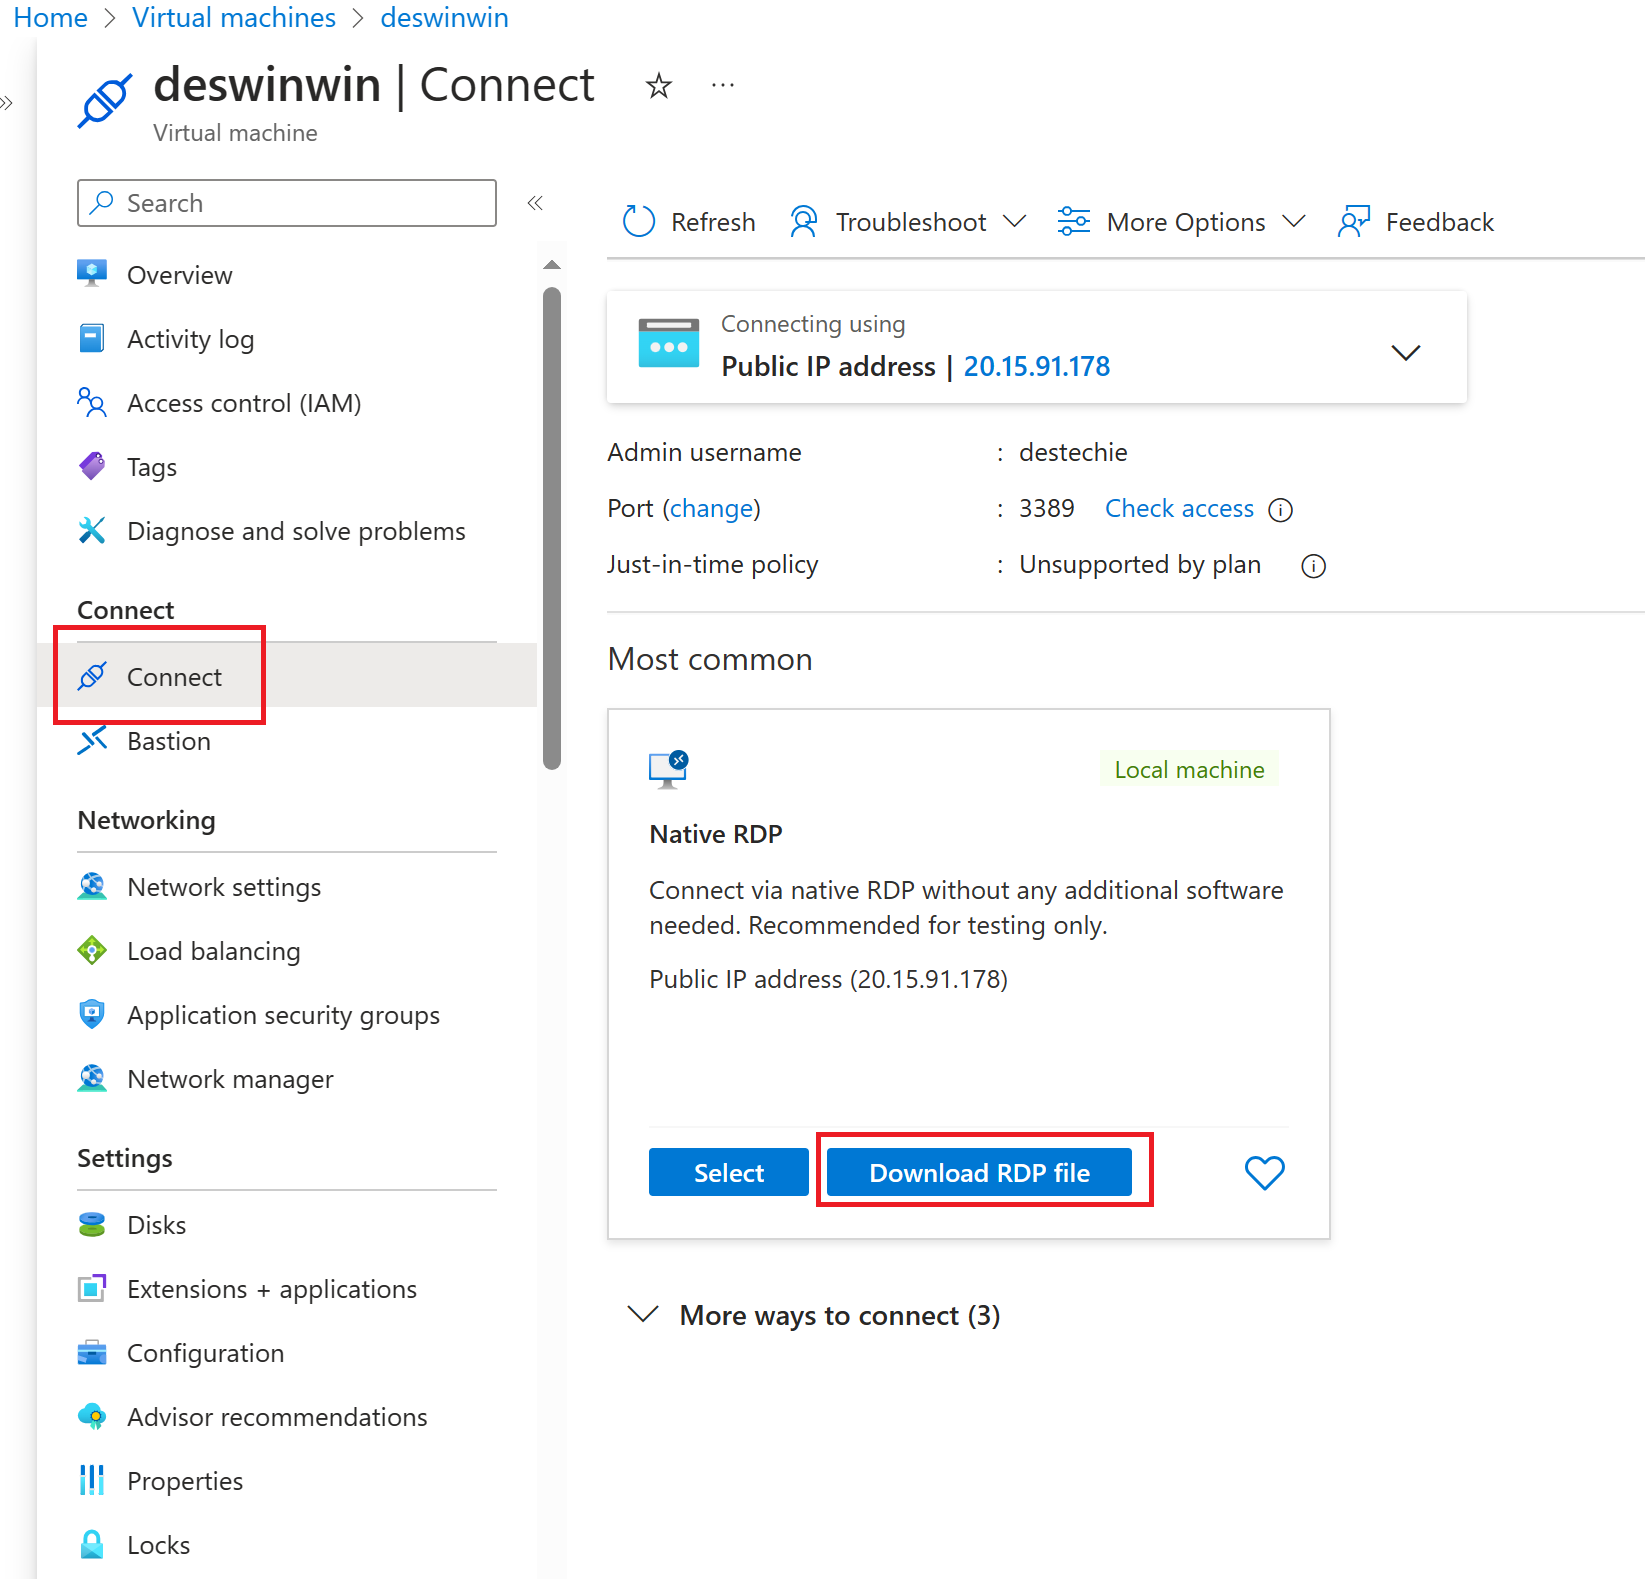
- Connect to your virtual machine; download and open the RDP file, follow the prompt, input your username and password to gain access and connect.
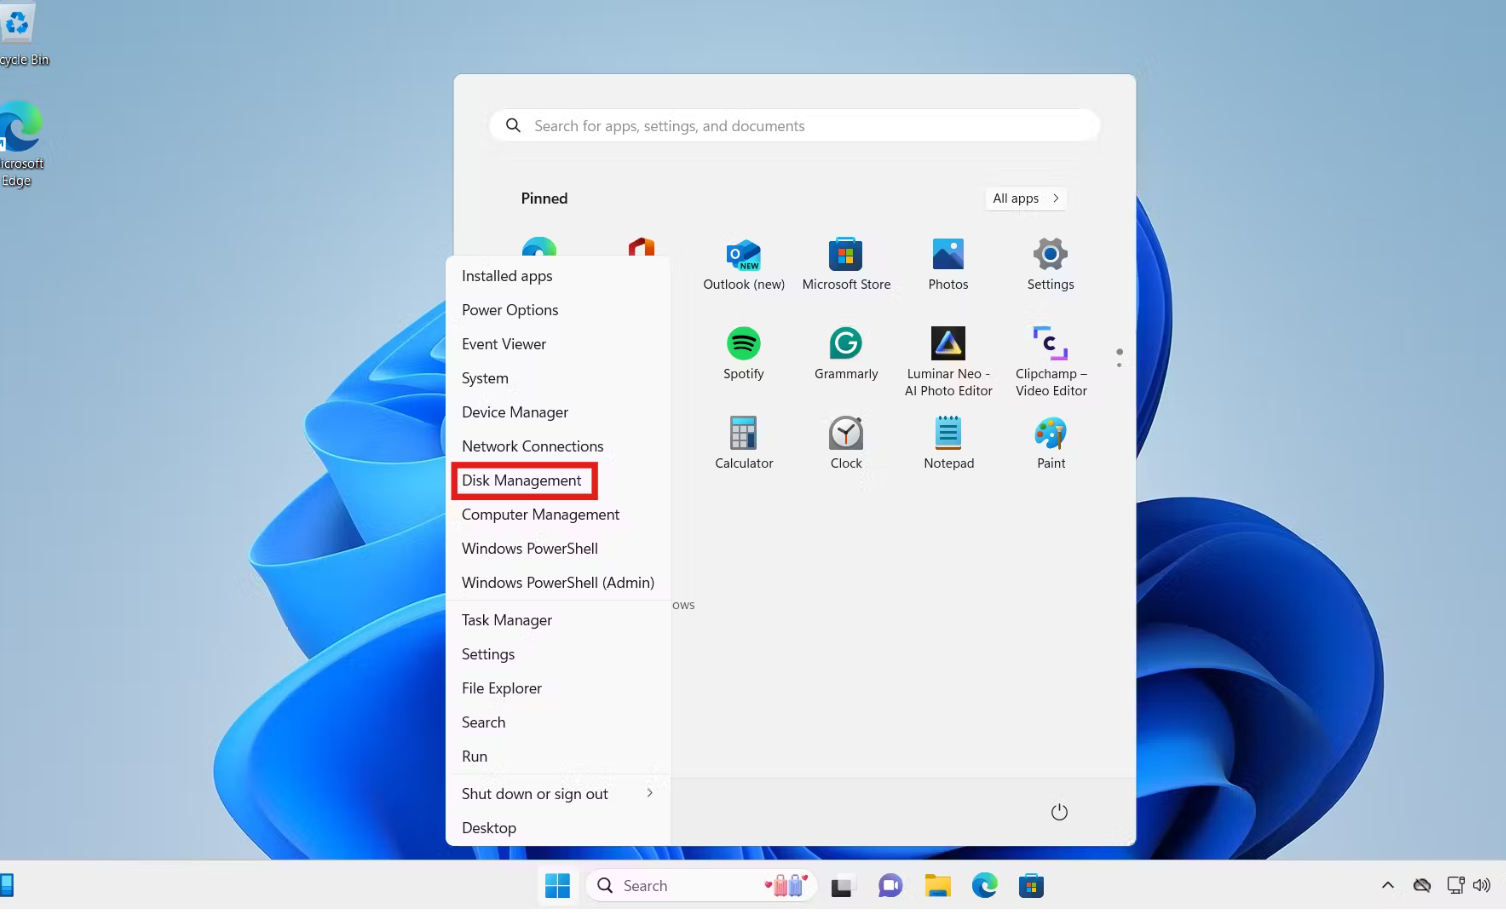
Now that you been able to gain remote access to your windows Desktop, right click on the Windows icon and click on Disk Management.
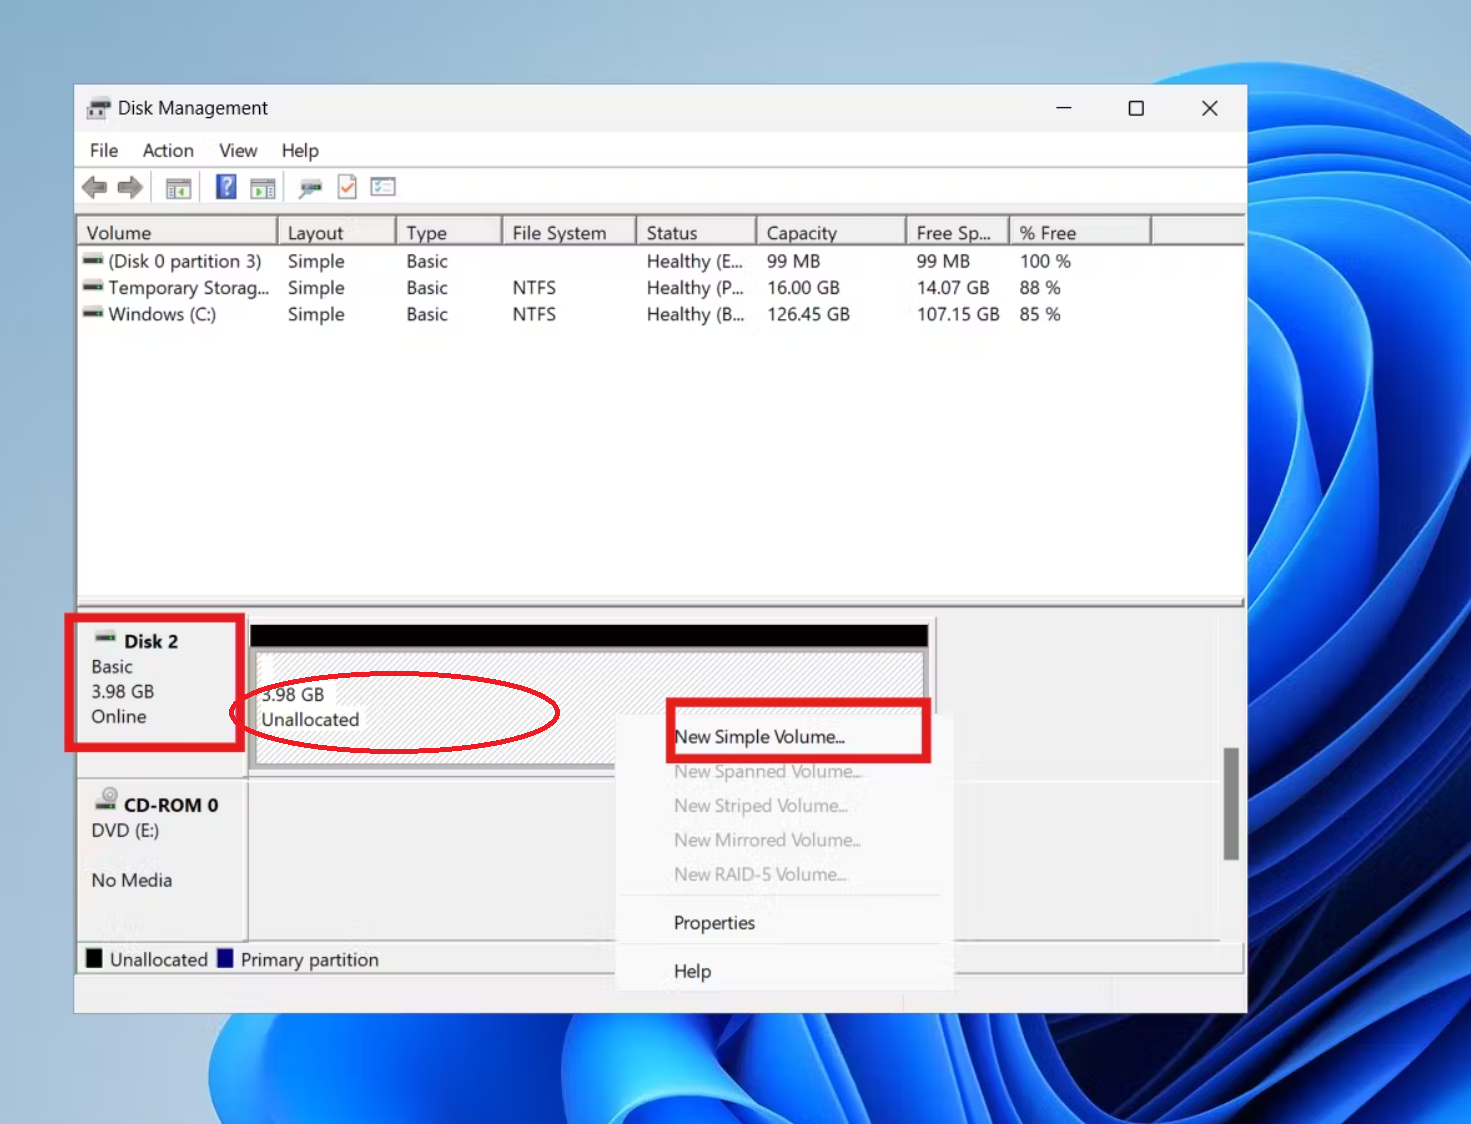
Right click on disk information pane of the disk 2 (where the red circle is) as shown below.
From the drop down click on "New simple volume".
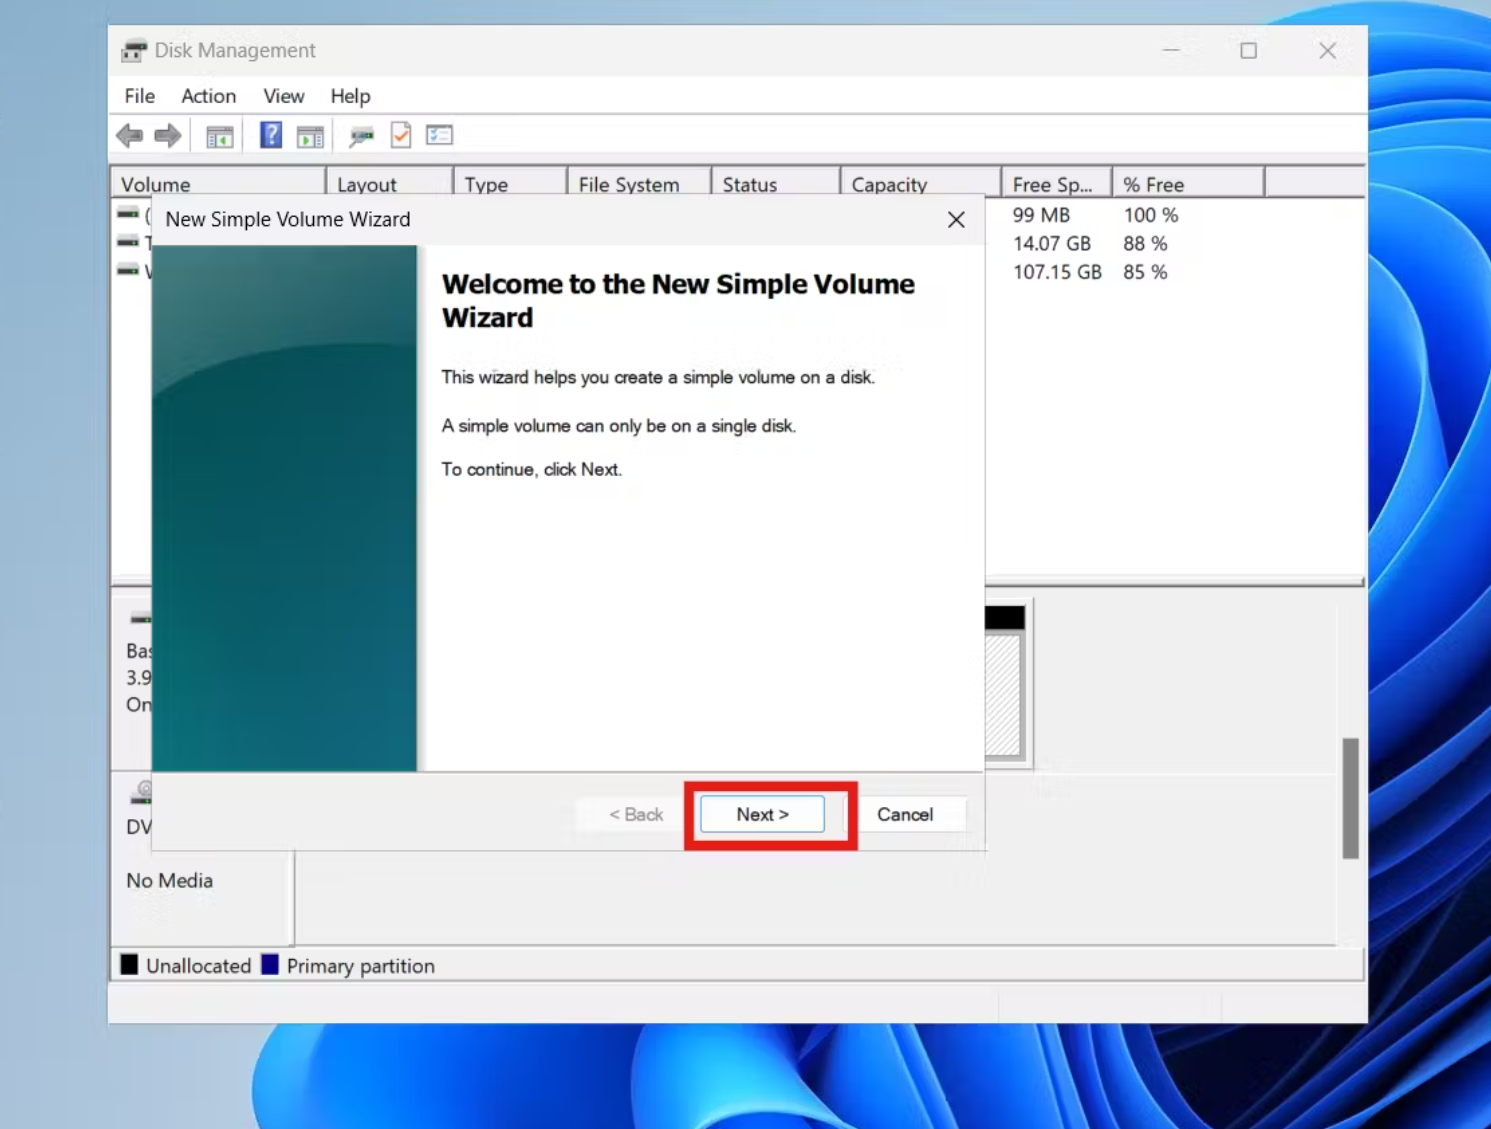
To continue click "Next" on the new simple volume wizard.
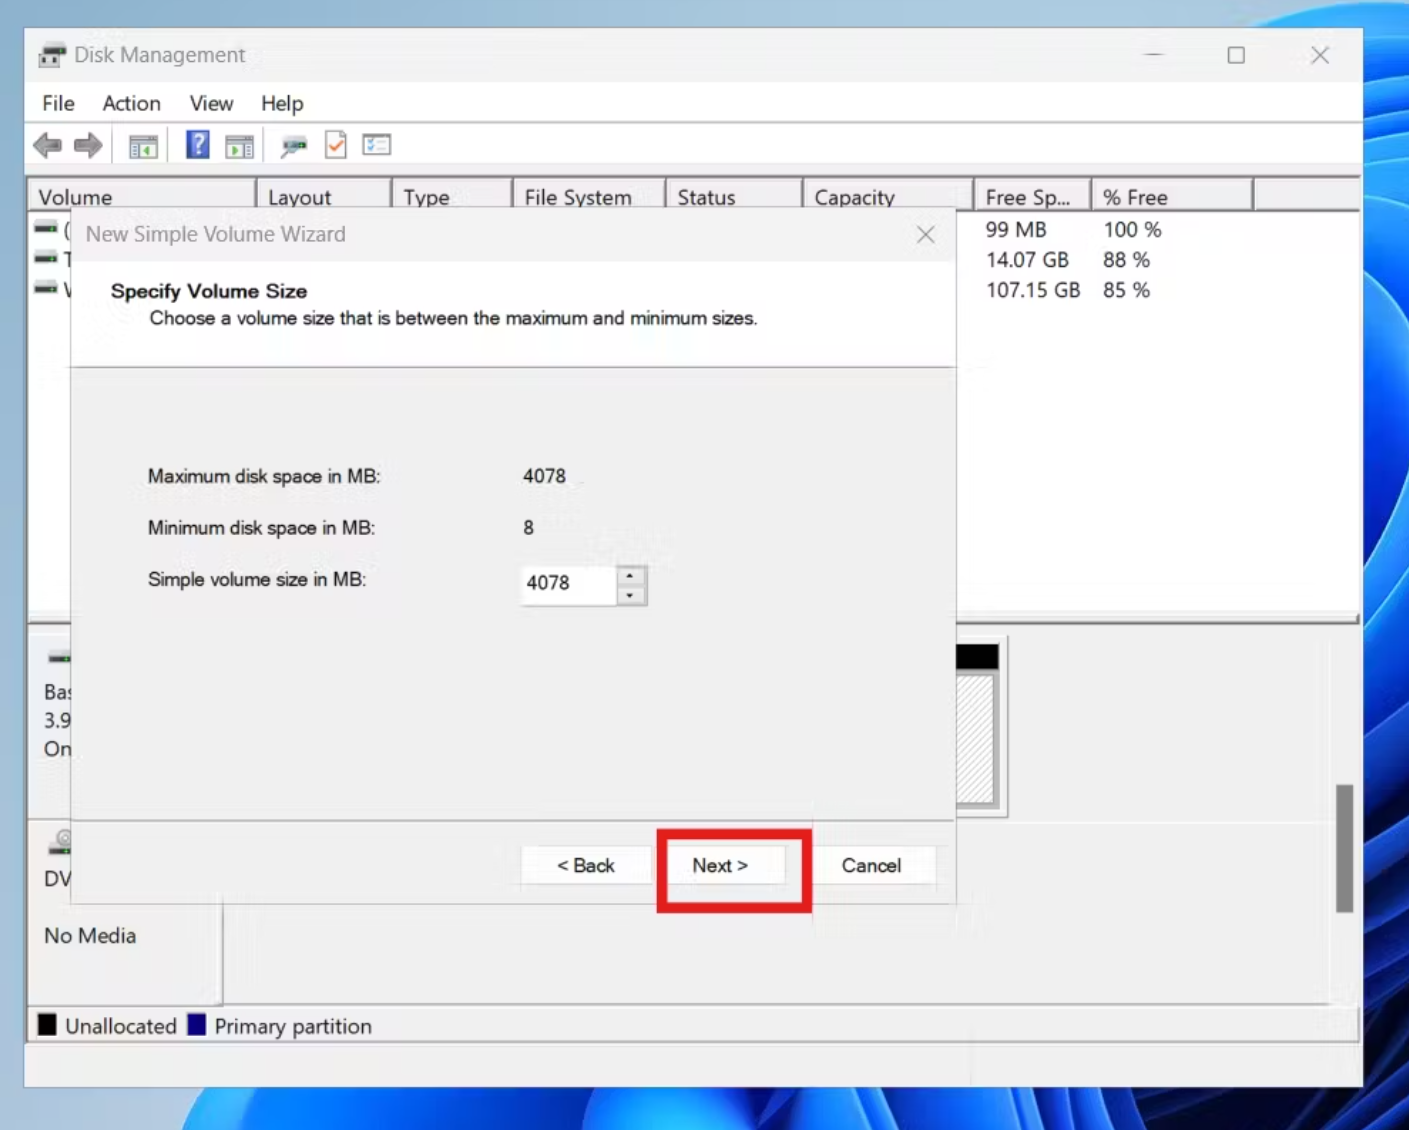
Click "Next" on the specify volume size.
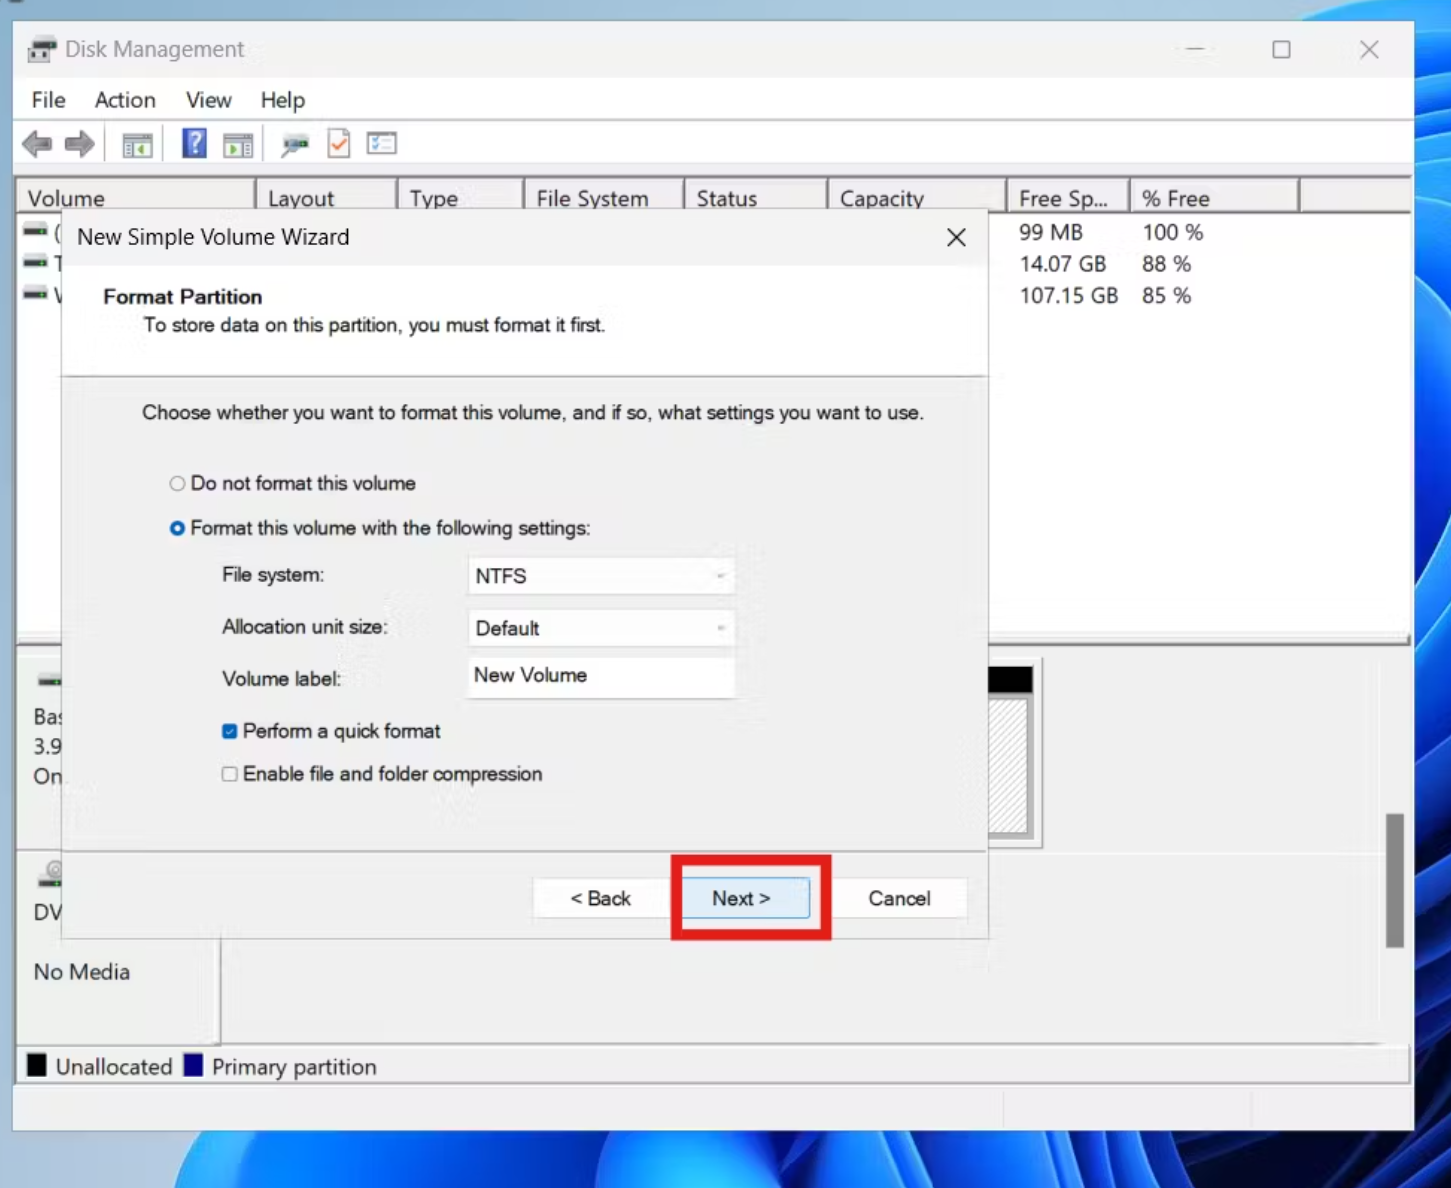
Also click "Next" on the Format Partition
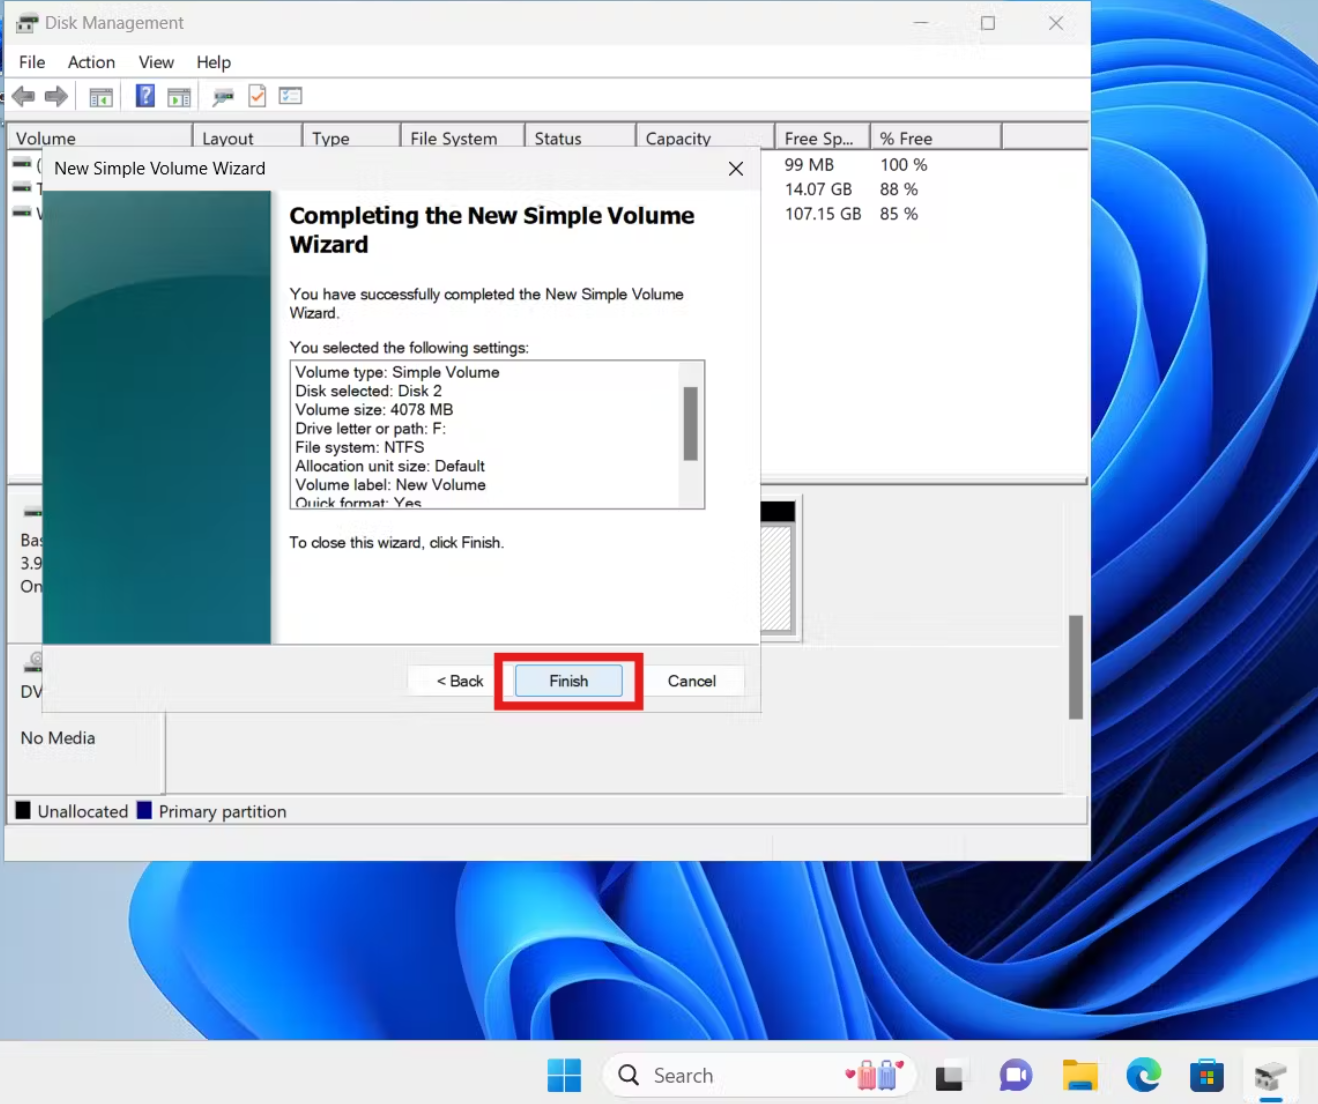
To close the wizard, click "finish"
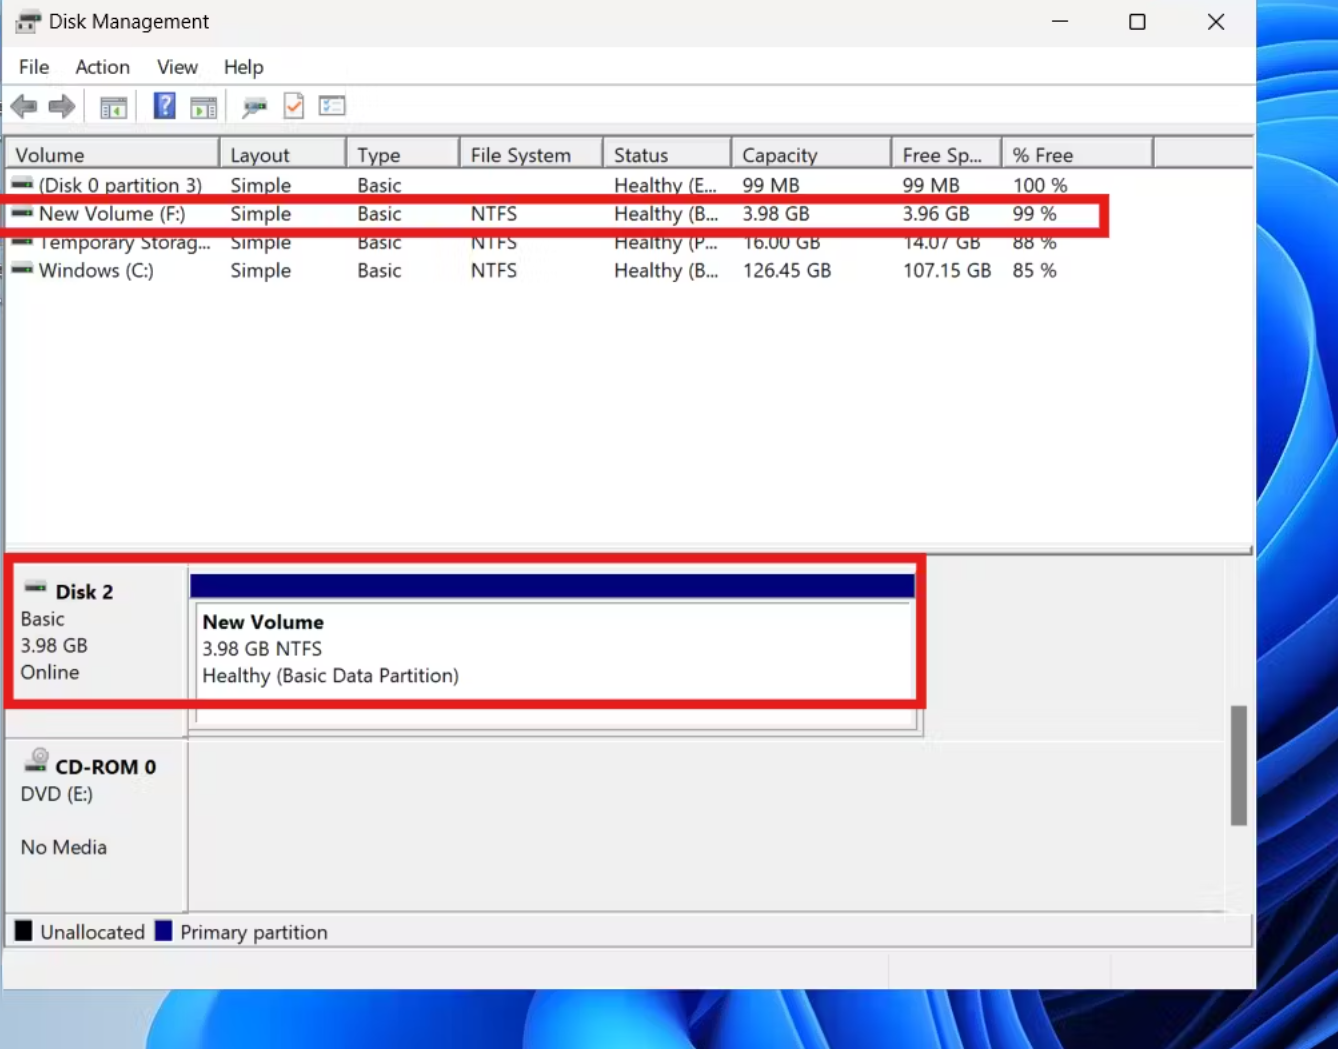
In the new volume highlighted Red, you can see that our new volume has been initialized.
Click on your new data disk "Disk 2" highlighted red.
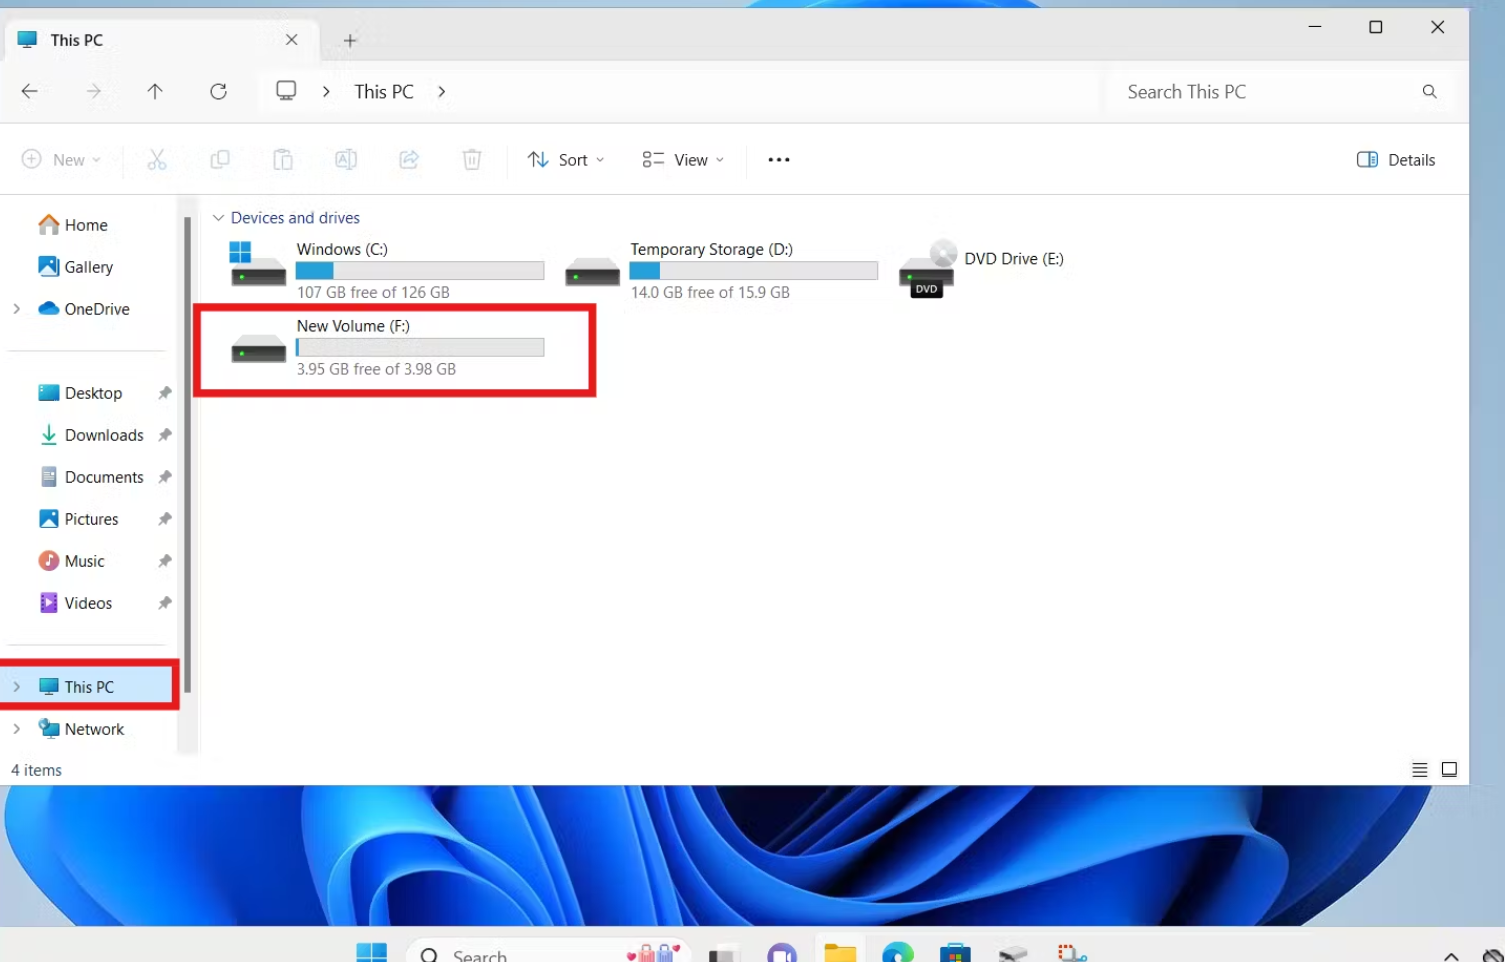
As shown below, our new data disk is available and ready for use, and this can be accessed via the file explorer.
I believe this was helpful. Thank you...
Subscribe to my newsletter
Read articles from DESTINY CHUKWUEBUKA SAMUEL directly inside your inbox. Subscribe to the newsletter, and don't miss out.
Written by
