Custom GPT powered by Azure Functions
 Andre Dominic Santacroce
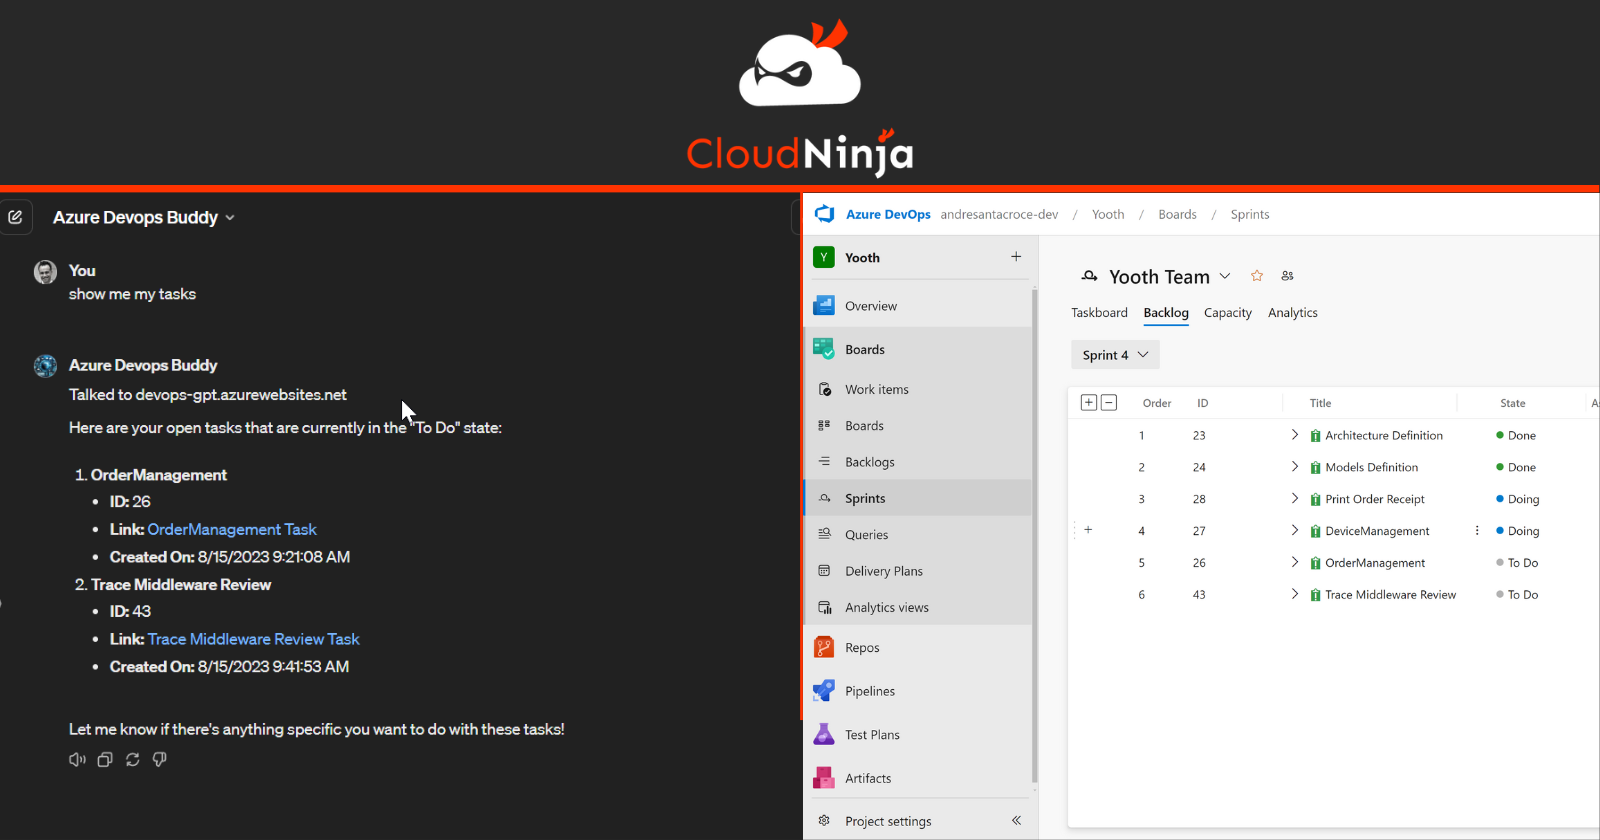
Introduction
Chat GPT's debut in November 2022 has revolutionized how we interact with AI, offering insights across countless domains. Fast forward to November 2023, OpenAI unveiled the ability to customize Chat GPT for tailored interactions and integrations with our own systems.
This post dives into leveraging this powerful capability through Azure Functions, using a hands-on example to create a Chat GPT-enhanced chatbot that enables interaction with an Azure DevOps Project Board. We will enable Chat GPT to inquire tasks allocated in Sprint, to check and modify their status and also to create new Tasks.
As we proceed describing this example Use Case, we'll explore the basics of Azure Functions. You'll learn the fundamentals of developing HTTP Endpoints using C# and how to run the same locally, finally we will also review how to deploy the Function App to Azure Cloud. I will not touch every detail in this post but I will point you to external references that go deeper on each topic. The full Azure Functions backend source code is available on my GitHub account here.
Ready to see how this integration works? Before we get started, checkout the demo at the end of the video on my you tube channel to see the potential in action:
Sections
We will go through the following topics:
1) Prerequisites: subscriptions and tools required to deploy and run this same example integration on your Azure Tenant and Chat-GPT account.
2) Architecture: I will explain the building blocks of this integration differentiating by elements that step in at Design and Run Time.
3) Azure Functions: I will analyse the key elements of the Azure Function App implemented to expose the Azure DevOps Board over Open API and provide indications on how to provision the same on your Azure Tenant.
4) GPT Creation: We will walk though the main steps involved in creating a custom GPT connected to the backend hosted on Azure and indications on how to provide Instructions that guide our BOT in using the APIs exposed.
1) Prerequisites
Azure Subscription: we will need this to host the backend, the resources we create from BICEP scripts are Serverless which produce close to zero consumption. In any case, what ever workload you run on Azure (even if 100% free), a subscription is required. You can create your subscription at this link
Azure DevOps Account: this is required to create a Project and interact with it's Sprint Board. You can create an account at this link and it's 100% free.
AZ CLI: we will use this to create resources on the Azure Subscription. In addition we will install BICEP from the CLI to enable infrastructure deploy based on templates. Download azure cli from this link
Visual Studio Community: this is the recommended SDK to develop C# Azure Functions. Download the free version from this link
Azure Function Tools: we will use this to deploy the solution to our Azure Function App provisioned by BICEP. You can download the Core Tools from this link
2) Architecture
For every project we kickoff as a first step we should always take time to understand what is the Architecture behind our solution. Here we will analyse the basic components that interact from Chat GPT to Azure DevOps considering two main stages of Design and Run Time.
Design Time
At design, which means when we create the Custom GPT from the UI Builder, we will connect to an the OpenAPI specification as exposed by the Azure Function integration point:

Chat GPT will interpret the specification and connect the endpoint to our GPT chatbot in the form of available actions:
| Action | Capability |
| GetWorkItem | retrieve a list of work items in Sprint |
| CreateWorkItem | create a new work item |
| ResolveWorkItem | resolve a work item in Sprint by provide a "comment" |
We will see detailed steps on how to create this connection in the last section of the tutorial ("Create the Custom GPT")
Run Time
In this stage we have Chat GPT that is interacting with our Azure Function in the moment he intercepts the need for a "Function Call".

Function Calling flow
Here is the technical flow of how Chat GPT will distinguish a prompt that does not require a function call, thus return a response generated only from his internal knowledge base, from one that instead requires an external interaction. GPT will pull data from the external source (in our case the Azure Functions implemented for this study) and merge the data obtained externally with the overall response provided to the end user's prompt.
3) Azure Function App
The backend APIs are the key ingredient that enables the integration of the Azure DevOps Board with Chat GPT. These apis are implemented using Azure Functions which are a great choice for building RESTful endpoints capable of OpenAPI exposure.
In Azure Functions all interactions with external systems are provided by defining Triggers which bind our logic indicating how and when it should be executed. Specifically for a HTTP Restful definition we use Http Triggers, you will find as class file for each endpoint defined:
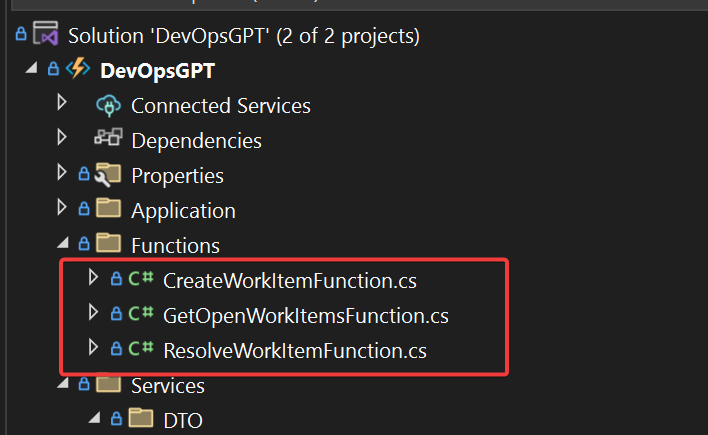
For a detailed reference of HTTP Triggers you can follow this guide.
For a full overview of all the supported Triggers that we may integrate in our Azure Function App solution and specific configuration check this guide.
Integration points
The key integration points of our Function App are the following:
Open API: this is the key external integration point in terms of metadata provided to Chat GPT which enabled Function Calling which then materializes in specific HTTP Endpoint calls.
Azure DevOps: this is the data source of our solution, thus a lower level dependency of our functions
In the following sections we will further explore these two key points explaining how they work and which nuget packages have been used to support the implementation.
Open API
As defined in the Architectural view of the solution, Chat GPT requires a definition of the APIs exposed based on the Open API specification.
OpenAPI is an open standard for defining and documenting RESTful APIs. It enables developers to describe an API on all aspects required by an integrating client, which includes: endpoints, operations, and parameters, in a format that’s both human-readable and machine-processable.
This is the key connection point with a custom GPT, he will use his capability of interpreting the specification and will expose it at the Conversational layer respecting the Service Contracts and descriptions given for each endpoint. This will then binding the Function Calling capability of an LLM which enabled Content generation that mixes LLM knowledge base together with outputs as received by the function call.
Azure Functions supports Open Api definitions by using the following NuGet package:
Install-Package Microsoft.Azure.Functions.Worker.Extensions.OpenApi -Version 1.5.1
With the package installed in our Function project we can then "decorate" our apis using OpenApi specific attributes (Operation, Security, Response, Parameter):
[Function(Const.Functions.GET_WORK_ITEM)]
[OpenApiOperation(operationId: Const.Functions.GET_WORK_ITEM, tags: new[] { Const.Functions.AREA_WORKITEMS }, Description = "Returns the list of Open Work Items in Sprint")]
[OpenApiSecurity(Const.Functions.OPENAPI_FUNC_KEY, SecuritySchemeType.ApiKey, Name = Const.Functions.OPENAPI_CODE, In = OpenApiSecurityLocationType.Query)]
[OpenApiResponseWithBody(HttpStatusCode.Created, Const.Functions.APPLICATION_JSON, typeof(IList<WorkItemDTO>))]
[OpenApiParameter(name: "state", In = ParameterLocation.Query, Required = true, Type = typeof(string), Description = "The state of the Work Item. Possibile values: Doing, To Do, Done")]
public async Task<IActionResult> Run(
    [HttpTrigger(
    AuthorizationLevel.Anonymous,
    Const.Functions.METHOD_GET,
    Route = Const.Functions.ROUTE_TASKS)] HttpRequest req)
{
    _logger.LogInformation("C# HTTP trigger function processed a request.");

    var state = req.Query["state"];

    var tasks = await _service.QueryTasks(state);

    return new OkObjectResult(tasks);
}
To expose the Open Api metadata document we will use the HostBuilder extention method ConfigureOpenApi()
var host = new HostBuilder()
    .ConfigureFunctionsWebApplication()
    .ConfigureAppConfiguration((hostingContext, config) =>
    {
        var env = hostingContext.HostingEnvironment;

        config.AddJsonFile("local.settings.json", optional: true, reloadOnChange: true);
        config.AddJsonFile("secret.settings.json", optional: true, reloadOnChange: true);

        // Additional configuration sources as needed
    })
    .ConfigureOpenApi()
    .ConfigureServices(services =>
    {
        services.AddApplicationInsightsTelemetryWorkerService();
        services.ConfigureFunctionsApplicationInsights();
        ConfigureAppServices(services);
    })

    .Build();

host.Run();
In addition we can further customize the Open Api document by providing an Implementation for the IOpenApiConfigurationOptions interface:
services.AddSingleton<IOpenApiConfigurationOptions>(_ =>
{
    var options = new OpenApiConfigurationOptions()
    {
        Info = new OpenApiInfo()
        {
            Version = DefaultOpenApiConfigurationOptions.GetOpenApiDocVersion(),
            Title = $"{DefaultOpenApiConfigurationOptions.GetOpenApiDocTitle()}",
            Description = DefaultOpenApiConfigurationOptions.GetOpenApiDocDescription(),
            TermsOfService = new Uri("https://andresantacroce.com"),
            Contact = new OpenApiContact()
            {
                Name = "Andre Santacroce",
                Email = "info@andresantacroce.com",
                Url = new Uri("https://andresantacroce.com"),
            }
        },
        Servers = DefaultOpenApiConfigurationOptions.GetHostNames(),
        OpenApiVersion = OpenApiVersionType.V3,
        IncludeRequestingHostName = DefaultOpenApiConfigurationOptions.IsFunctionsRuntimeEnvironmentDevelopment(),
        ForceHttps = DefaultOpenApiConfigurationOptions.IsHttpsForced(),
        ForceHttp = DefaultOpenApiConfigurationOptions.IsHttpForced()
    };

    return options;
});
Setting the OpenApiVersion to V3 is a key point as Chat GPT will not accept previous versions.
Once all is connected and defined you will also have access to the Swagger UI that enables a smart interaction point with the endpoints defined:
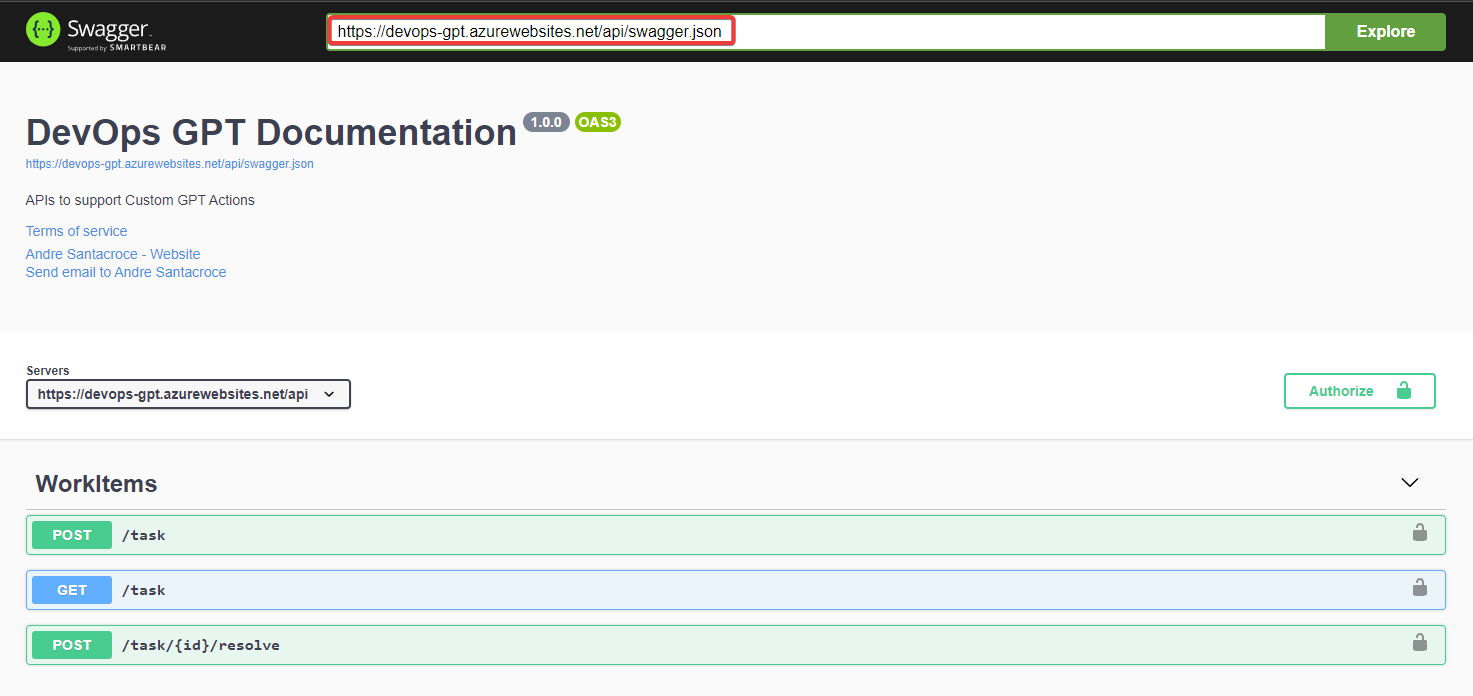
The OpenAPI document, which is the entry point for connecting ChatGPT to our backend, in this specific case is exposed at:
https://devops-gpt.azurewebsites.net/api/swagger.json
We will provide this endpoint when Importing the Actions in the Custom GPT Design page.
Azure DevOps
To integrate Azure DevOps from C# I used the following package provided as a NuGet:
Install-Package Microsoft.TeamFoundationServer.Client -Version 19.225.1
PAT Access Token
A key setting, required to interact with the SDK Client service, is the Azure DevOps PAT (Personal Access Token).
You would create this in Azure DevOps by accessing the User Settings area:

We will then assign the value of the key generated by Azure DevOps to our application setting DevOpsPatToken (--SECRET--):
{
    "IsEncrypted": false,
    "Values": {
      "AzureWebJobsStorage": "UseDevelopmentStorage=true",
      "FUNCTIONS_WORKER_RUNTIME": "dotnet-isolated",
      "OpenApi__DocTitle": "DevOps GPT Documentation",
      "OpenApi__DocDescription": "APIs to support Custom GPT Actions",
      "DevOpsPatToken": "--SECRET--",
      "DevOpsOrganization": "andresantacroce-dev",
      "DevOpsProject": "Yooth"
    }
}
Additional keys are then required to map the specific Azure DevOps Organization that hosts the Project for whom we will be interacting with the Backlog. These are values you would easily retrieve from your basic Azure DevOps setup based on your specific case.
WIQL - Work Item Query Language
We use this domain specific language to extract from Azure DevOps the specific list of Tasks from the current Sprint.
Here an example of the query definition:
    private async Task<string> BuildQuery(string state)
    {
        var currentSprint = await GetLatestSprint();

        StringBuilder builder = new StringBuilder();

        builder.Append($@"
SELECT [Id]
FROM WorkItems
WHERE [System.TeamProject] = '{devOpsConfig.Project}'
AND[System.IterationPath] = '{currentSprint}'
AND[System.WorkItemType] <> 'Epic'
");

        if (!string.IsNullOrEmpty(state.Trim()))
        {
            builder.Append($"AND [System.State] = '{state}'");
        }

        builder.Append("ORDER BY [State] ASC, [Changed Date] DESC");

        return builder.ToString();
    }
Full specs of the query language are available at this link: WIQL Language
Azure Function Local Run
To run the project locally we will follow these steps:
- Clone the repository
git clone https://github.com/asantacroce/DevOps-GPT.git
- Navigate to the project directory
cd DevOpsGPT
- Run the Functions App in emulator
func start
Azure Function Deploy
To deploy the Azure Function you will need the following:
Login
az login --tenant <tenantId>
Parameters:
- tenant: tenant ID required when, for the given account, you have access to more than a single Azure Tenant
Create Resource Group
az group create --name <resGroupName> --location <azureLocation>
Parameters:
name: name assigned to the resource group you are creating
location: specifies the Azure region where the resource group will be created. For a list of possibile locations use the command
az account list-locations --output table
Deploy Infrastructure
az deployment group create --resource-group <resGroupName> --template-file main.bicep --parameters devOpsOrganization=<orgName> devOpsProject=<projectName>
Parameters:
resource-group: name of the resource group that will host the provisioned resources
template-file: path to the BICEP file that describes the infrastructure to be provisioned
parameters: set of parameters injected at command line in the form
parameter-name=parameter-valueseparated by space
Deploy Function App
func azure functionapp publish <funcAppName>
4) Custom GPT Creation
At this point we have a backend integration with Azure Boards exposed over Open API and Deployed to our Azure Subscription ready to be consumed.
This is where the Custom Chat GPT Builder steps in enabling the creation of our dedicated chatbot that will consume the APIs exposed to provide responses on the status of the DevOps tasks and also enable actions on the same (for example closing a task by providing a resolution comment as a Chat input).
Create a new GPT
To activate the Custom GPT Builder we follow these steps:
We access ChatGPT (chat openai)
From the top left bar we navigate to the "Explore GPTs"
We select "Create" action

Now Chat GPT will provide two areas (Create/Configure) which enable basic setup of the chatbot together with extensive configuration of the Knowledge Base (data files) and Integration capabilities (OpenAPI for our example) of our bot.
Create
Here the basic setup provided to assign a "Description" and a "Name" for the new chatbot which is acquired by ChatGPT after following a basic conversation.
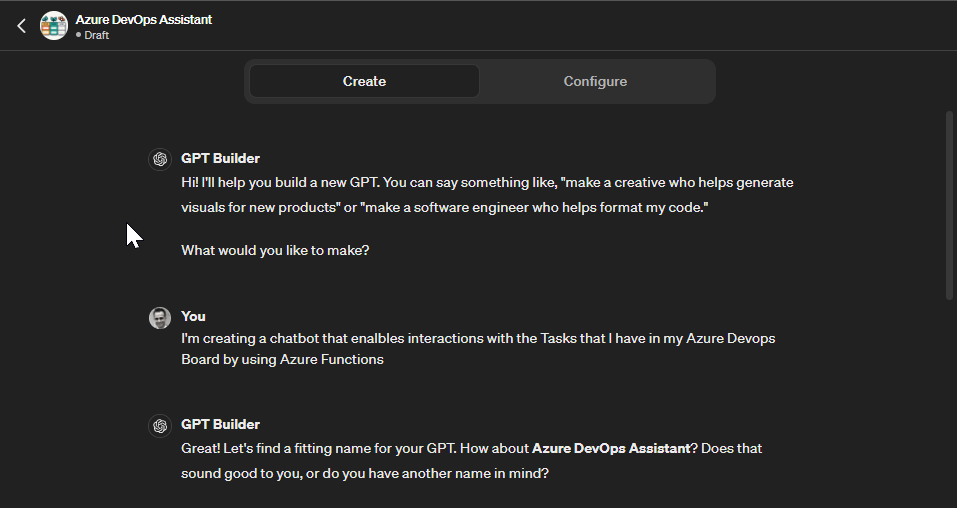
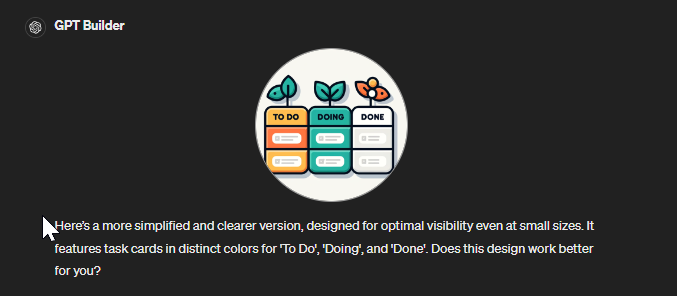
GPT will also support us with assigning a Profile picture for the chatbot defined, here in my conversation after a couple of refinements I landed on this one which is clearly aligned with the functional scope exposed:
Configure
The basic configuration defined in the previous step will be reflected under the detailed Configuration area in the top section:
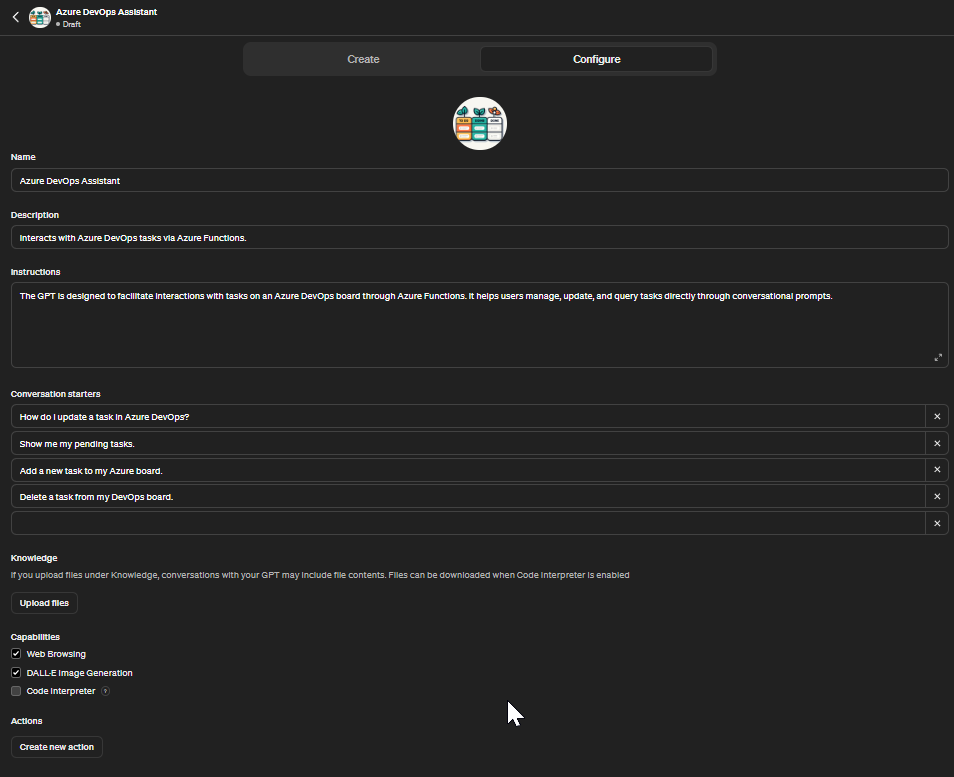
We can now configure the additional sections, specifically we will bind our Azure Functions API from the last section (Actions):
Instructions: we can use this section to provide detailed indications on how the AI should respond to specific requirements or constraints of our application domain
Conversation starters: these enable a guided conversation flow by defining the key topics of our chatbot. Also these will render as "buttons" in the ChatGPT UI which makes them easily accessible
Knowledge: here we can provide additional data that can further enrich the chatbot's knowledge. PDF files are great for this area
Capabilities: this defines the specific functions, tasks, or actions that the AI system is designed to perform
**Actions:**this is where our specific integration steps in, in the following section we will see how we connect our Azure Functions definition to the Custom GPT opening the integration with Azure DevOps.
Actions
From this section we can connect Chat GPT to our backend, the key Artifact that enables this integration is the OpenAPI document that describes our API, this may be provided from an exposed URL or by copy-pasting the definition:
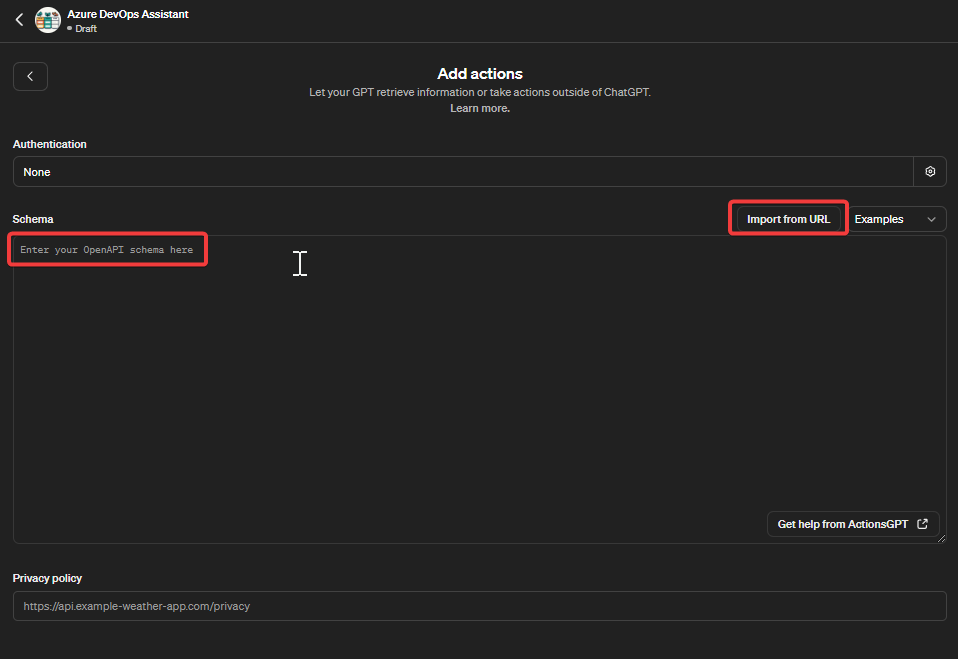
For this example I will provide the OpenAPI document as exposed by the endpoint related to the published Function App:
https://devops-gpt.azurewebsites.net/api/swagger.json
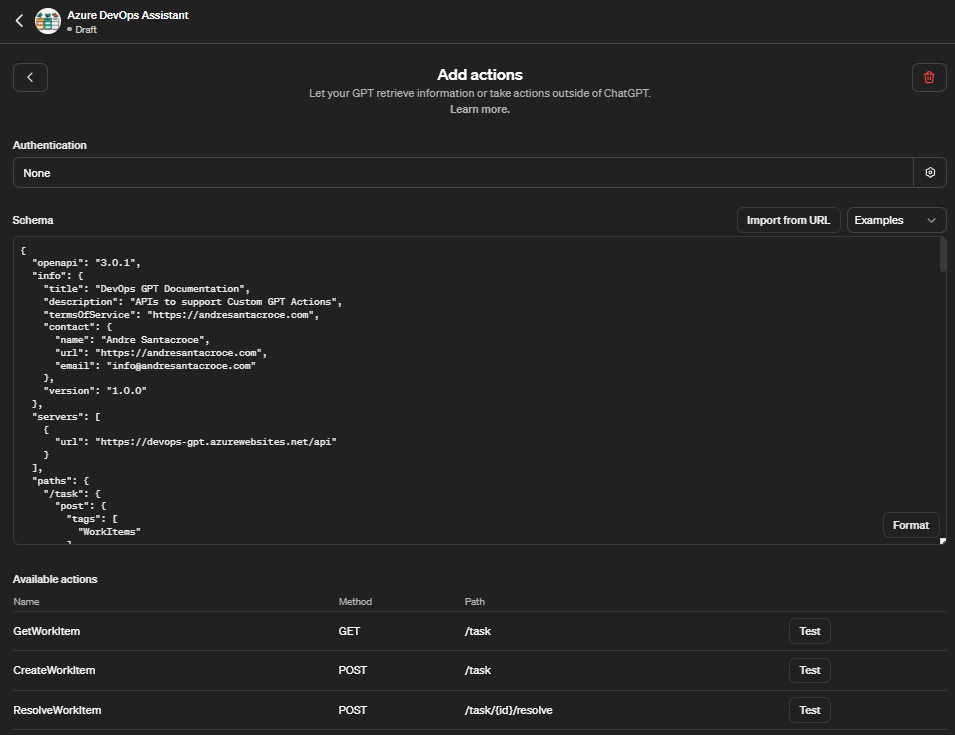
As a result Chat GPT will identify the single Actions as exposed by the OpenAPI definition, here we see the 3 key actions identified:
GetWorkItem
CreateWorkItem
ResolveWorkItem
Summary
Hope you enjoyed this post, having reached this stage you should:
Understand how easy and powerful it can be to Integrate Chat GPT with existing data and actions of a backend system
Understand how this can be achieved with Azure Functions which does a great job in supporting quick development of HTTP Rest APIs exposed with OpenAPI and also how we deploy the same to Azure Cloud with minimal efforts
Reach out to the Git Hub Repository related to this project and learn more on the specific DevOps integration that has been implemented to support this scenario
Finally, the most important point, reach out to your Chat GPT account and start creating Custom GPT connected to you systems
Feel free to contact me on LinikedIn to further discuss this integration or other topics related to Integration using Microsoft Azure.
Subscribe to my newsletter
Read articles from Andre Dominic Santacroce directly inside your inbox. Subscribe to the newsletter, and don't miss out.
Written by
