Host Website on Windows EC2 Instance Using IIS
 jeeva B
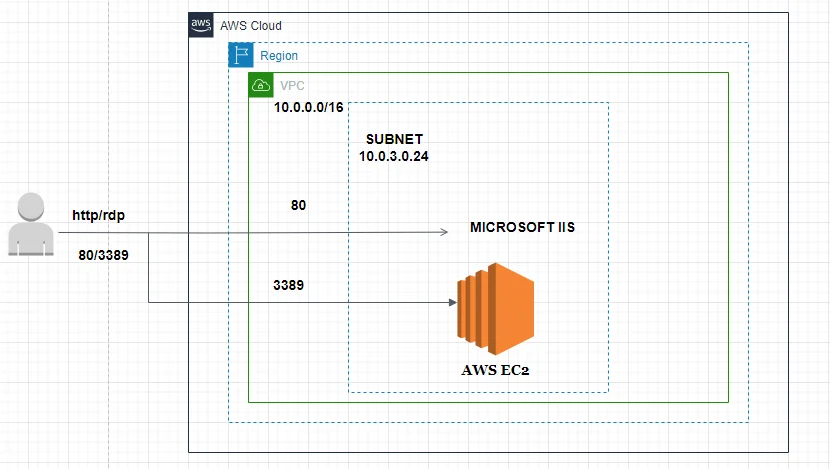
Amazon EC2 simplifies web-scale computing by offering resizable compute capacity in the cloud. Its user-friendly interface allows quick configuration of resources. EC2 reduces server instance provisioning time to minutes, facilitating easy capacity scaling.
EC2 Windows Server integrates seamlessly with AWS services like Amazon EBS, CloudWatch, Load Balancing, and Elastic IPs across multiple Availability Zones.
Internet Information Services (IIS) is Microsoft’s versatile web server for Windows PCs, facilitating HTML page serving and communication via HTTP and HTTPS protocols.
To create a Windows EC2 Instance:
Access the Amazon EC2 dashboard.
Choose "Launch Instance."
Select Windows Server as the operating system.
Configure instance details like type, size, and storage.
Configure security groups and key pairs.
Launch the instance.
Real-world applications of Amazon EC2, Windows EC2 Instances, and IIS include:
Web Hosting: Businesses can use EC2 instances with IIS to host websites and web applications, providing a scalable and reliable platform for online presence.
Application Development: Developers can utilize EC2 instances to build, test, and deploy applications in a flexible and cost-effective manner. With support for various programming languages and frameworks, EC2 facilitates agile software development.
Data Processing: EC2 instances are commonly used for data processing tasks such as batch processing, data analytics, and machine learning. The ability to quickly provision compute resources enables efficient processing of large datasets.
Content Delivery: By deploying EC2 instances with IIS in multiple regions, businesses can create content delivery networks (CDNs) to distribute content to users worldwide with low latency.
Enterprise IT: Enterprises can leverage EC2 for running business-critical applications, virtual desktops, and backend infrastructure, enhancing agility and scalability while reducing IT overhead.
Overall, Amazon EC2, Windows EC2 Instances, and IIS offer a powerful combination of scalability, flexibility, and cost-effectiveness, making them indispensable tools for modern businesses across various industries.
1.1 Launch a Windows Instance
- Log in to your AWS Management Console.
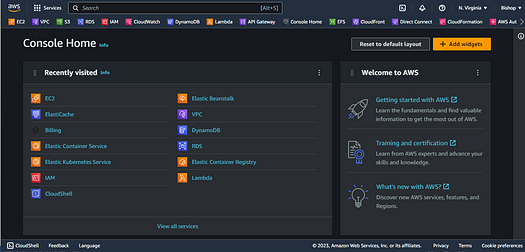
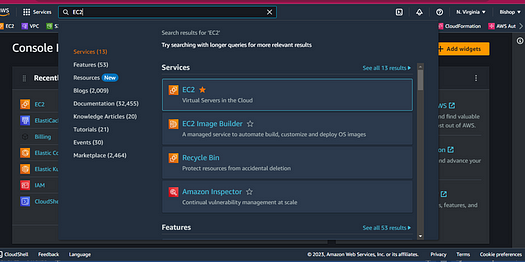
2. Search for EC2 in the search box and click on it to open it.
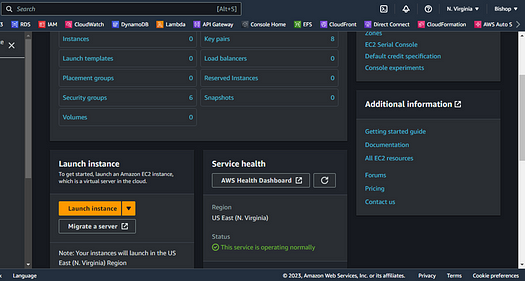
3. Once you are at the EC2 Dashboard, click on Launch to launch an instance.
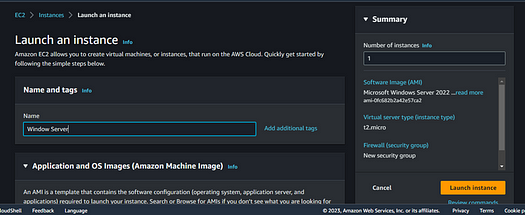
4. In the Name and Tags step you can add tags to an instance, here tags help you to enable categorize AWS resources in different ways, for example, by owner, environment, or purpose.
5. In Select Windows under QuickStart and Select Microsoft Windows Server 2022 Base AMI. You can also select other AMI as per your need but here we are launching a Windows Server, so we have to select the Windows Server 2022 Base AMI.
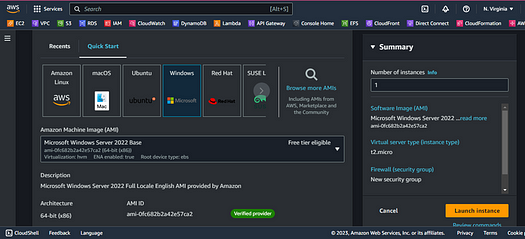
6. Select the t2.micro instance type, if you want you may select another instance type but they are chargeable so we choose the t2.micro instance type which is eligible for the free tier and limited resources.

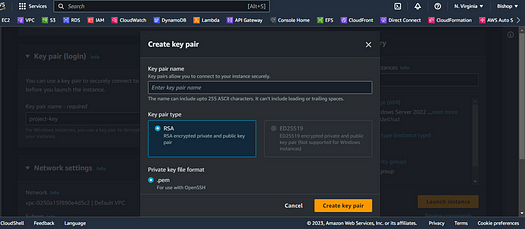
7. Select an existing key pair or create a new one, we will Create a new one, enter the name of the Key-pair as Windows-Key and Create the Key Pair.

8. Since it is a Windows Instance, we will require RDP on port 3389 which is selected by default. Also, for accessing the web page we will add HTTP rule by clicking on Add Rule.
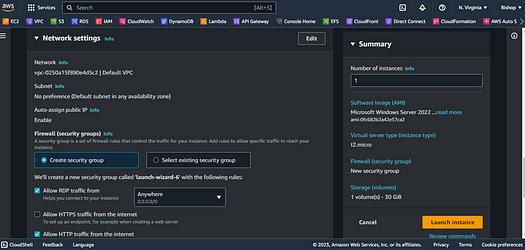
9. Now keep everything as it is and click on Launch Instance.

10. Now click on View all Instances.
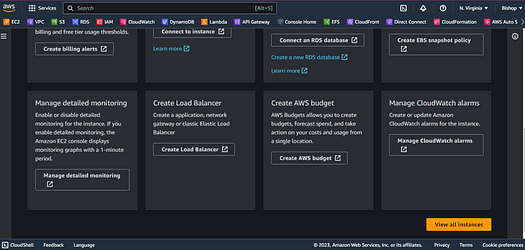
11. Refresh and you shall see your instance is Up and Running, and the Status check has changed to 2/2 checks.
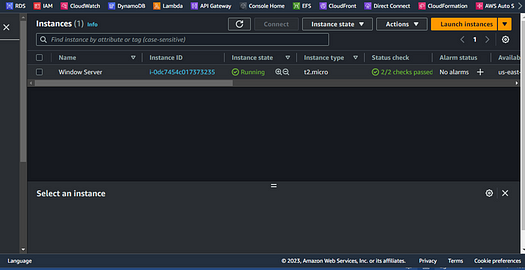
1.2 Connect to the Windows Instance
Note: In this section we will be providing detailed steps for connecting to our Windows Instance using Remote Desktop Connection.
- Select the Windows Instance we just created and click on Connect
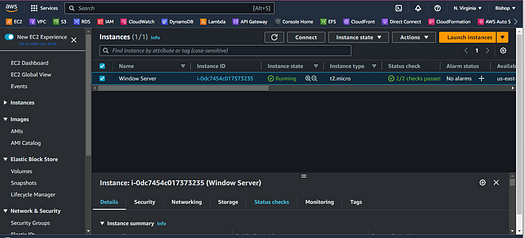
2. Here we have to select the RDP (Remote desktop protocol) Client and then Download the RDP File and save it somewhere safe then, and we need a password to access the RDP file, so click on Get Password.
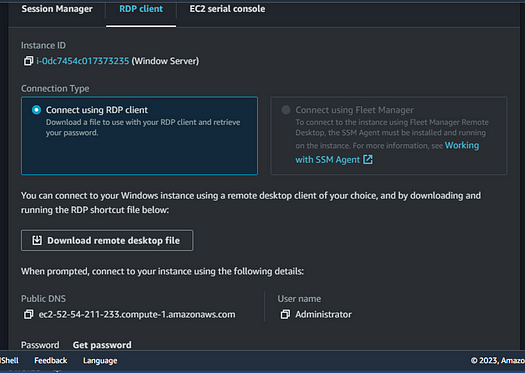
3. Once you click on the Get Password, click on Upload private key file and select the key pair we just created at the time of instance launching.
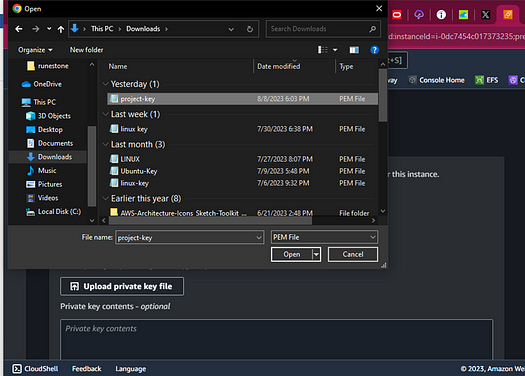
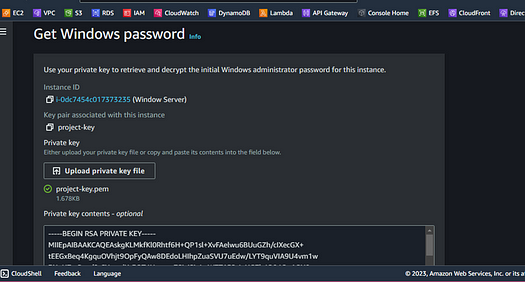
4. Click on Decrypt Password
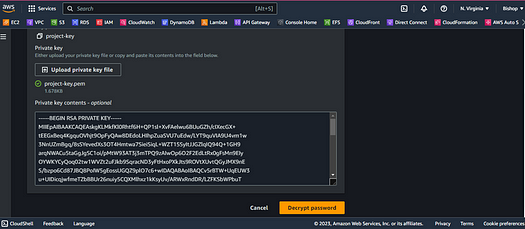
5. After this you will get the decrypted password for the instance.
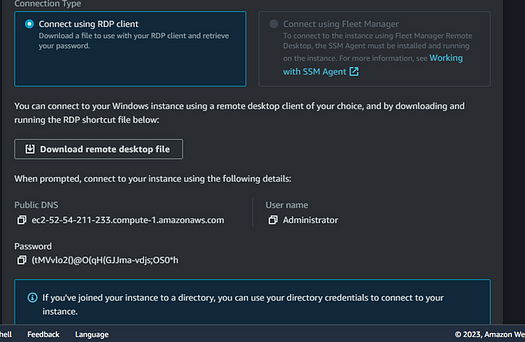
Note: Make a note of this Username and Password as we will be using this password for connecting to the Windows Instance.
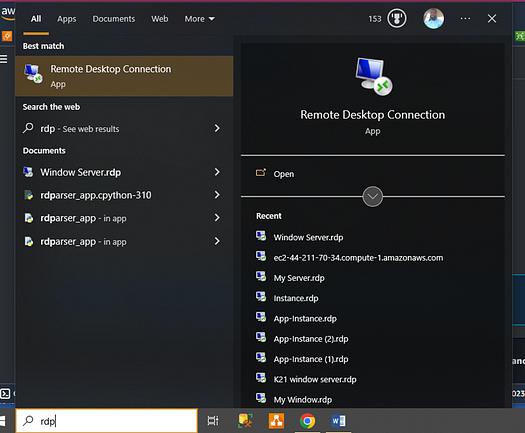
6. To connect to the instance again, search for RDP in the Start menu and open it.
7. Now copy the Public IP of the Windows Instance and paste it and click on Connect
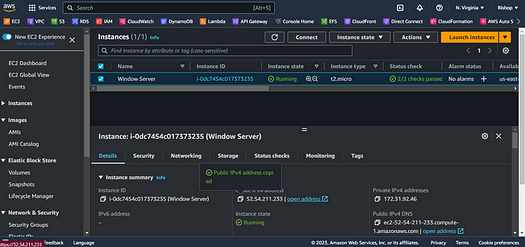
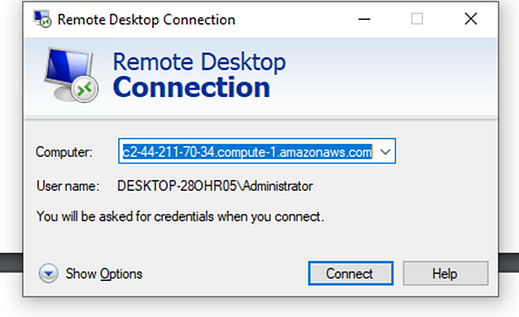
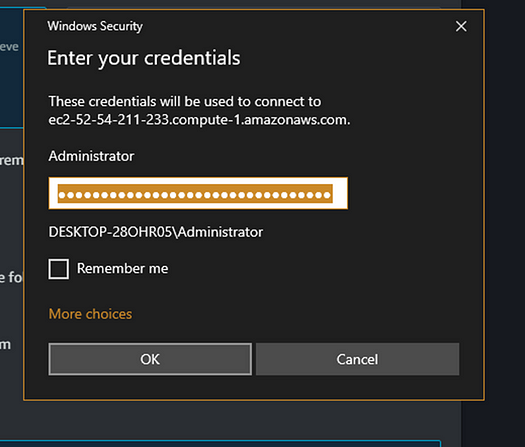
8. Now enter the Username (Administrator by default) and the Password that you had decrypted earlier.
9. Click on Yes.
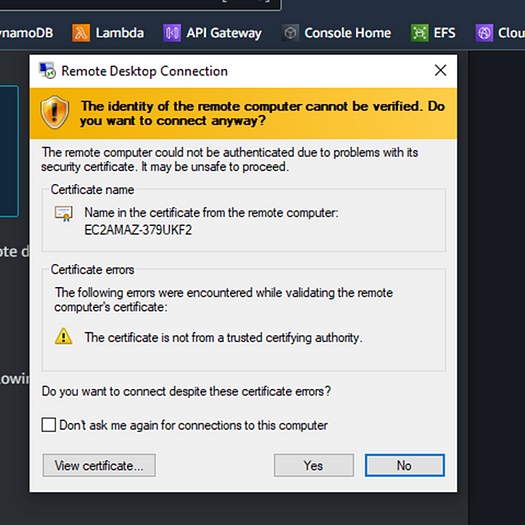
10. You will be logged in to the Windows Instance.
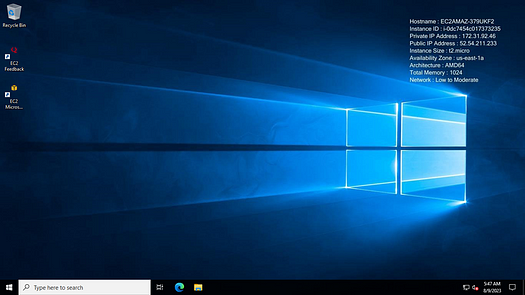
Thus, we have successfully logged in to the Windows Instance
2. INSTALL WEB SERVER (IIS) ON WINDOWS EC2 INSTANCE
Internet Information Services (IIS, formerly Internet Information Server) is an extensible web server software created by Microsoft for use with the Windows NT family. IIS is used to host ASP.NET web applications and static websites. It can also be used as an FTP server, host WCF services, and be extended to host web applications built on other platforms such as PHP. There are built-in authentication options such as Basic, ASP.NET, and Windows auth.
1. Once logged in to the Windows Instance, click on Start button and then click on Server Manager.
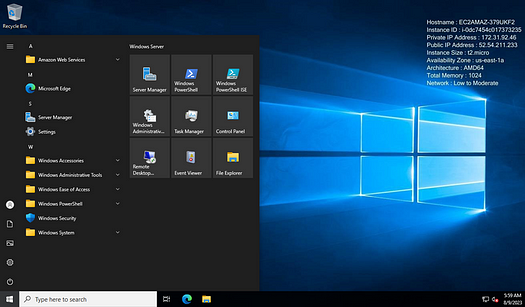
2. Click on Add roles and features
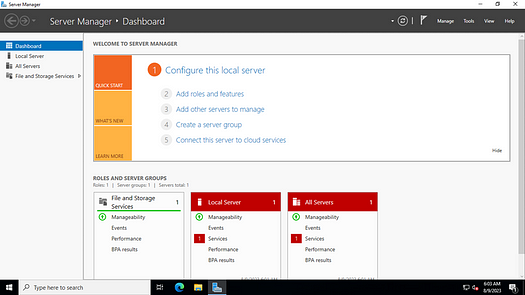
3. Click on Next.
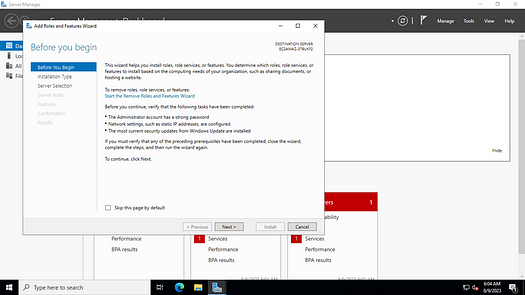
4. Click on Role based or feature based Installation and then click on Next
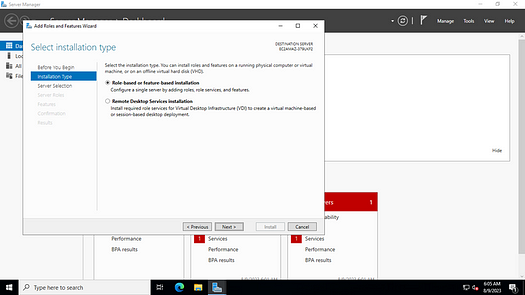
5. Keep everything default and click on Next
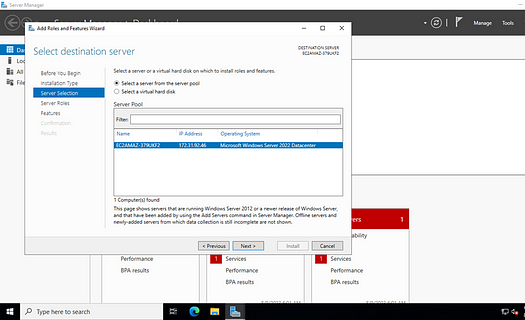
6. Scroll down a bit and click on Web Server (IIS)
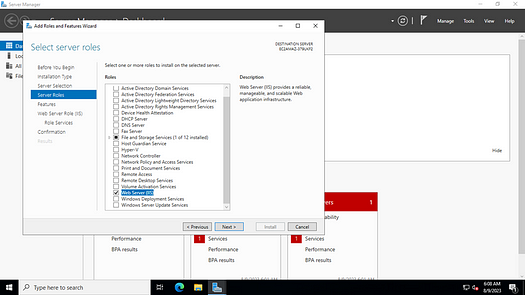
7. As you click on Web Server (IIS), a small dialog box will open. Click on Add Features
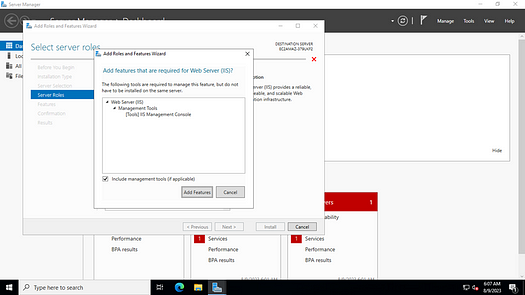
8. Now click on Next again.

9. Now keep clicking on Next till you reach Install dialog box.
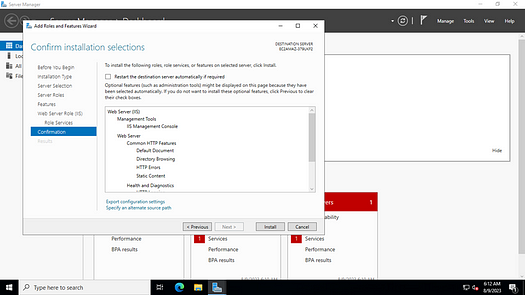
10. The installation will start as shown below.
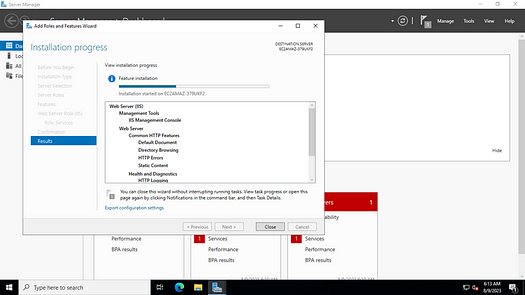
Note: The feature installation will take some time (approx. 5 minutes) to complete. Please be patient
11. The installation is complete now.
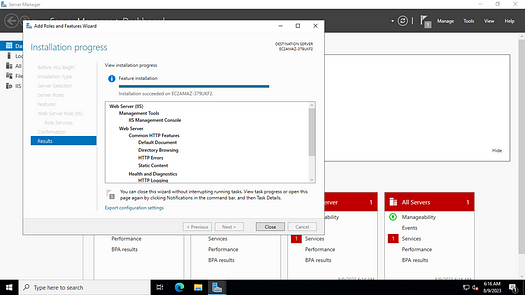
Thus we have successfully installed IIS on our Windows Instance.
3. ACCESS WEB PAGE THROUGH SERVER MANAGER
In this section we will be providing detailed steps as to how you can access the web page after you have installed IIS on your Windows virtual machine.
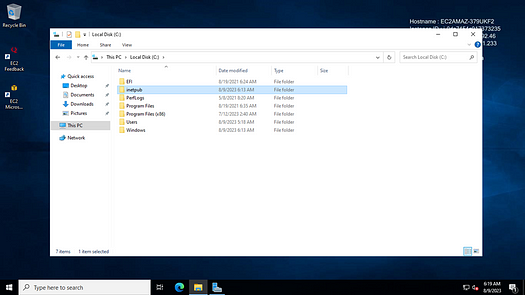
- Navigate to the local disk of your Windows Virtual machine. You will see a folder by the name inetpub created in your local disk. Double click to open it.
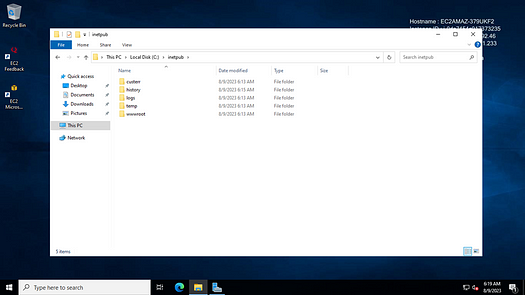
2. Once you have opened it, now double click on wwwroot folder to open it.
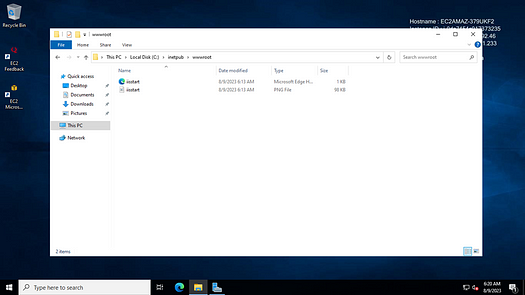
3. You will find an HTML document inside by the name iisstart. This will be the home page of your web server
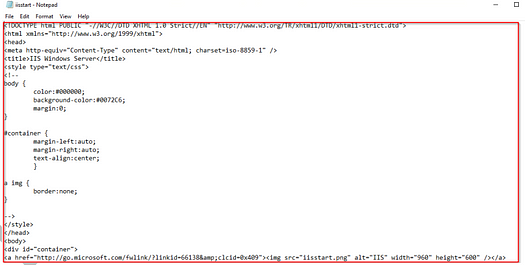
4. Right click on this file and open with Notepad. It contains a HTML code as shown below.
4. Now to make our web page look a bit attractive. We will edit this HTML code by erasing everything in it and write our own HTML code and Save it.
Note: If you don’t want to edit the existing HTML code and want to keep it as it is you can skip this step and follow the next step
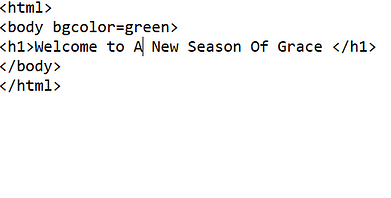
Note: Don’t forget to save it by clicking on File at the top left corner and then click on Save. If you don’t save the changes will not appear on the web page
6. Switch to the EC2 console, select the Windows Instance and copy its Public IP.

7. Now try hitting this Public IP of the Windows Instance in your Browser.
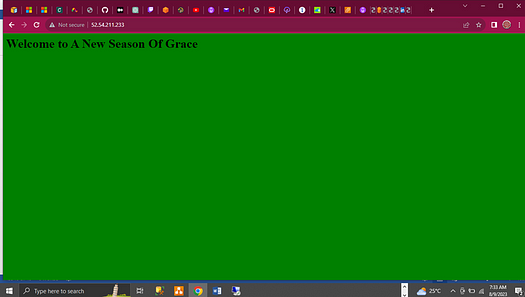
3.0 DELETE RSOURCES In this section, we will delete all the resources that we used in the lab as keeping them running will charge us. So, all the resources must be deleted once you do not require them in order to be in free tier limit.
3.1 Stop the Windows Instance Note:
This section will cover steps to terminate the windows instance
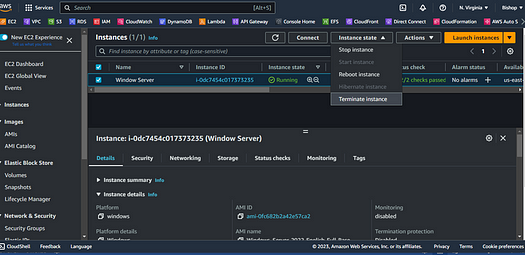
Go to your Instance and select the Windows Instance. Click on Instance State and click on terminate Instance.
2. Click on Terminate to terminate the Instance
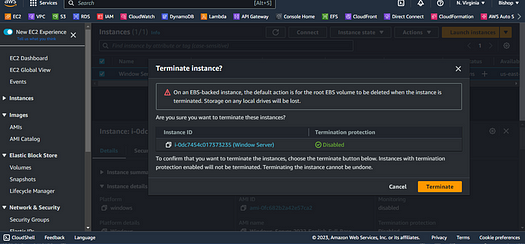
3. The Instance will be deleted
Thank you!!
Subscribe to my newsletter
Read articles from jeeva B directly inside your inbox. Subscribe to the newsletter, and don't miss out.
Written by

jeeva B
jeeva B
👋 Hey there! I'm Jeeva, a passionate DevOps and Cloud Engineer with a knack for simplifying complex infrastructures and optimizing workflows. With a strong foundation in Python and PySpark, I thrive on designing scalable solutions that leverage the power of the cloud. 🛠️ In my journey as a DevOps professional, I've honed my skills in automating deployment pipelines, orchestrating containerized environments, and ensuring robust security measures. Whether it's architecting cloud-native applications or fine-tuning infrastructure performance, I'm committed to driving efficiency and reliability at every step. 💻 When I'm not tinkering with code or diving into cloud platforms, you'll likely find me exploring the latest trends in technology, sharing insights on DevOps best practices, or diving deep into data analysis with PySpark. 📝 Join me on this exhilarating ride through the realms of DevOps, Cloud Engineering where we'll unravel the complexities of modern IT landscapes and empower ourselves with the tools to build a more resilient digital future. Connect with me on LinkedIn: https://www.linkedin.com/in/jeevabalakrishnan