How To Create A Group And Onboard New Users With Azure Role Assigned
 Iweka somto
Introduction
This article shows how to create a group and users and assign those users in that group. It also shows how an azure role Global Administrator can be assigned to a user upon creation and how the new user was able to onboard new user with that Global Administrator Azure role. But first let's understand the two different roles in Azure.
Difference Between Azure AD Roles And Azure Roles
What Is Azure AD Roles?
Azure Active Directory (Azure AD) roles are focused on managing access and permissions for Azure AD resources. These roles are used to control user access to Azure AD itself, including user management, authentication, and authorization. Some commonly used Azure AD roles include:
Global Administrator: Full access to manage all aspects of Azure AD and other Azure services.
User Administrator: User management and password reset capabilities.
Application Administrator: Managing application registrations and service principals.
Security Administrator: Managing security-related settings and configurations.
Azure AD roles are primarily concerned with managing users, groups, applications, and other identity-related resources within Azure AD.
What is Azure Roles
Azure roles, also known as RBAC (Role-Based Access Control) roles, are used to manage access and permissions for Azure resources such as virtual machines, storage accounts, databases, and more. Azure roles allow fine-grained control over Azure resources and can be assigned to users, groups, or service principals. Some commonly used Azure roles include:
Owner: Full access to manage all aspects of a resource, including granting access to others.
Contributor: Can manage and operate the resource, but cannot grant access to others.
Reader: View-only access to the resource.
Azure roles are used to define what actions can be performed on Azure resources and at what scope (subscription, resource group, or individual resource). They help enforce the principle of least privilege by granting only the necessary permissions to perform specific tasks.
Steps To Creating Users and Assigning Azure AD Roles
Login to your Azure portal and search for Microsoft Entra ID on the search bar and click on it.

Click on Users

Click on New user button

In this page we specify the user principal name, the name that azure will display and the password the new user will use to login. Click on Next: properties button to proceed to next tab

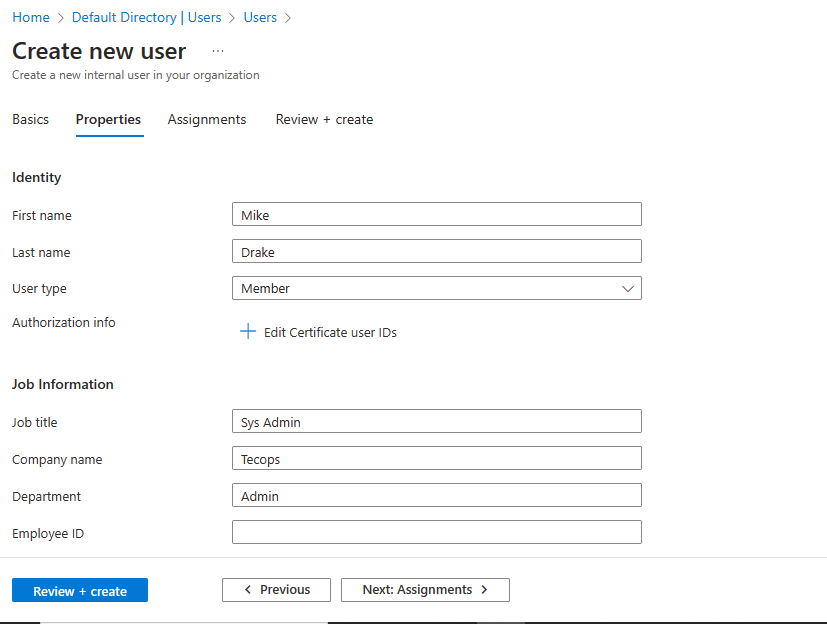
Here the details of the new user is entered in this page. Click on next button to proceed to assigning Azure AD roles
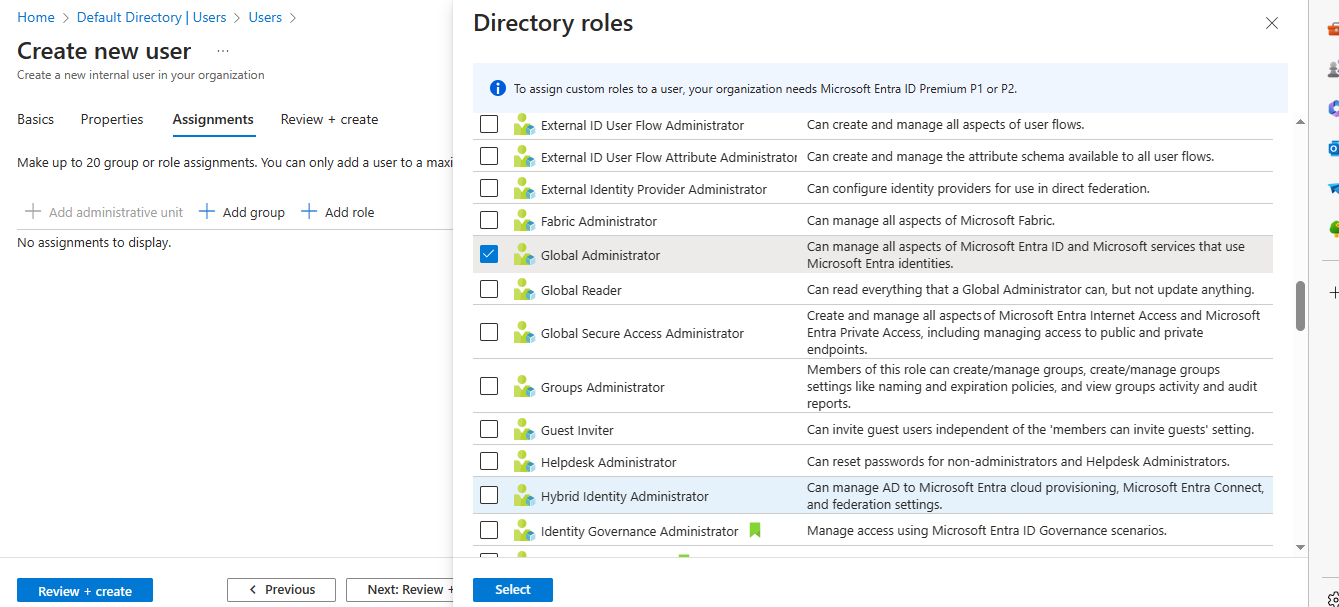
We specify the kind of permission that will be granted to the new user Mike by selecting from the list of Azure AD roles. Here we grant it the Global Administrator role. This role will grant Mike full access to manage all aspects of Azure AD.
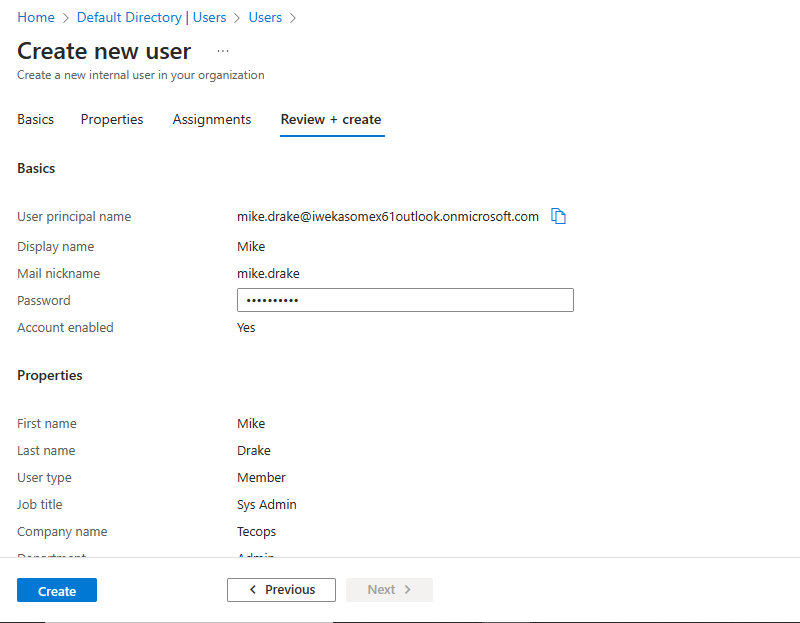
Next tab is where we review the configuration details of Mike and click on the Create button to create the new user Mike
Following the same process, the user Rose was also created for demonstration purposes

Steps To Creating Group And Adding Users To It
To create a new group for Administrators and add the admin users to it, the following outlines the steps:
On the same Microsoft Entra ID page, click on groups

On the Groups page, click on New Group button

Fill in the details of the new group to be created, in this case we are creating group for admin users so we name it Administrative-dept group and click on the Create button to create the group.

To add the new users created to the group. From the Groups page click on the Administrative-dept group

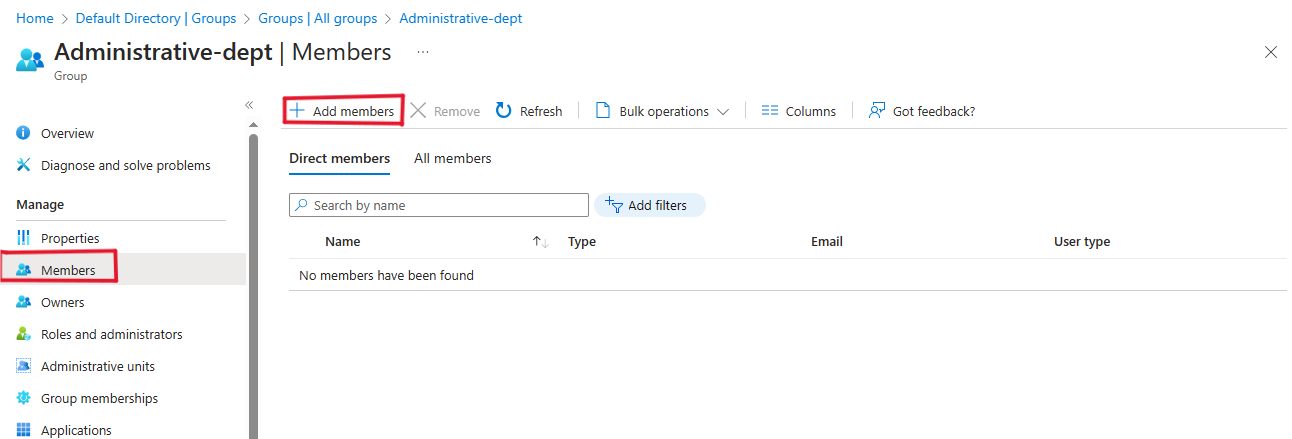
Click on Members and then Add members button
Click on Users tab to go to list of users and select the users to add. In this case we selected Mike and Rose as the Admin users that ought to be in the Administrative-dept group. Then click on the Select button below to add the users selected to the group.

Creating New User With The Admin User
This section shows how Mike the new user created initially, onboards a new user by virtue of the Global Administrator Azure AD role that was assigned to it.
Log out from the azure portal to be able to login with the new user
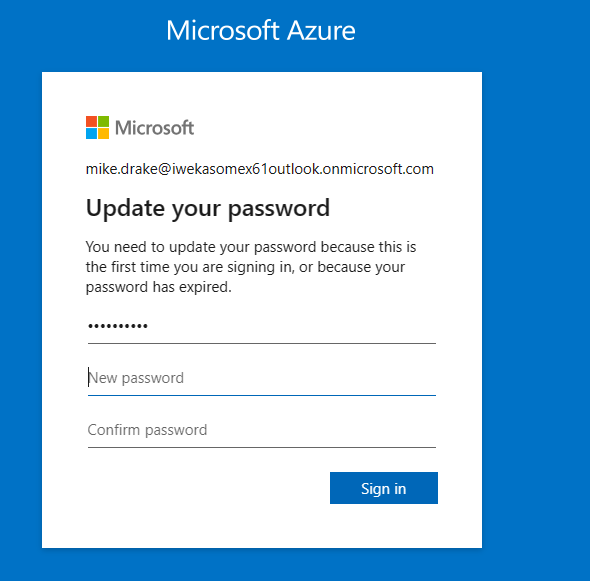
Then click on sign in with a different account and input the user principal name of Mike. We will be asked to change password upon signing in for the first time. Then click on Sign in button.
Upon successful Sign in, Go to Microsoft Entra ID page and click on the User button by the side.
Click on New user and select Create New User from the drop-down

Then enter the login details of the new user to be created and fill in the user's identification on the next tab as we have done initially. Then review the details on the review + create tab and click on the Create button.
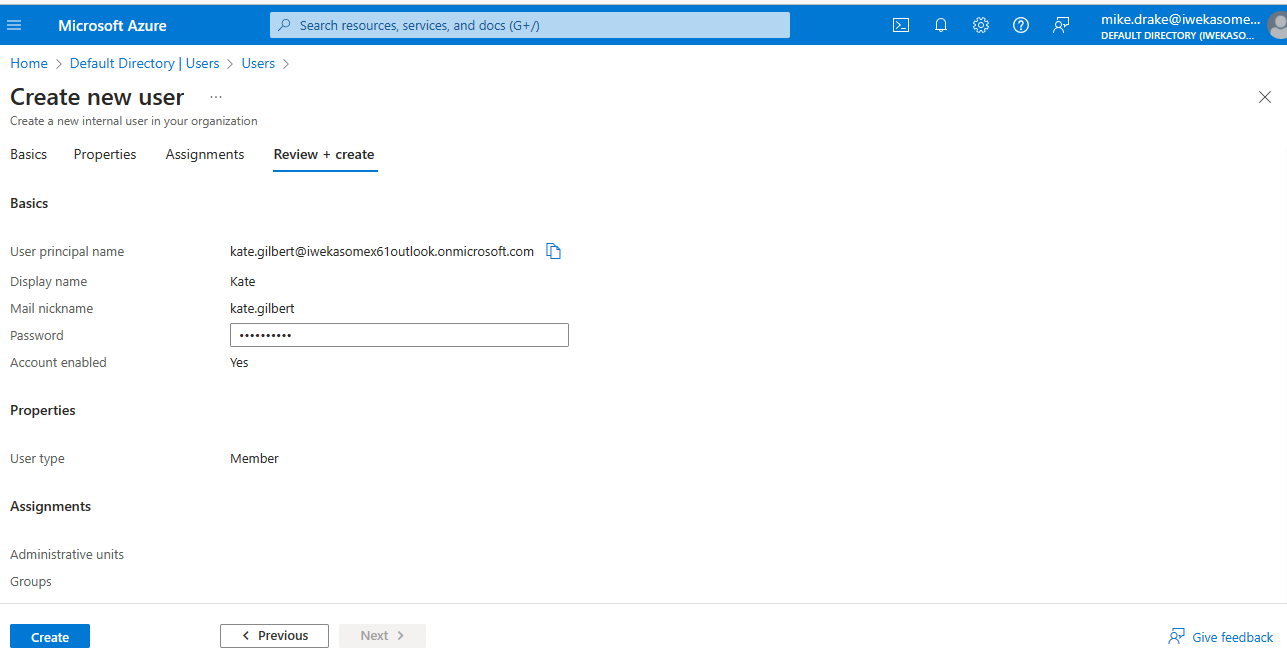
Then going back to the User page you can see the new user Kate has been created successfully.

Subscribe to my newsletter
Read articles from Iweka somto directly inside your inbox. Subscribe to the newsletter, and don't miss out.
Written by
