Next-Level Engagement: Push Notifications with Next.js and FCM
 Monu Shaw
Introduction
Have you ever wished your web app could reach out to users even when they're not actively browsing? Push notifications offer a powerful way to engage your audience, deliver real-time updates, and boost user retention. But integrating push notifications into a Next.js application can seem daunting.
This blog post will be your guide to unlocking the power of Google Firebase Cloud Messaging (FCM) for push notifications in your Next.js projects. We'll walk you through the step-by-step process, from setting up FCM to handling notifications on both the client-side and server-side (if needed).
Why FCM and Next.js?
Here's why FCM is an excellent choice for push notifications in your Next.js app:
Cross-Platform Support: FCM works seamlessly across web browsers and mobile devices, ensuring your notifications reach users regardless of their platform.
Scalability and Reliability: FCM boasts a robust infrastructure capable of handling millions of notifications simultaneously.
Ease of Integration: FCM provides well-documented APIs and tools for a smooth integration experience in your Next.js app.
Cost-Effectiveness: FCM offers a free tier with generous usage limits, making it ideal for startups and growing applications.
By the end of this blog post, you'll be equipped to:
Set up FCM in your Next.js project.
Implement push notifications on the client-side, handling permission requests, subscriptions, and received notifications.
(Optional) Send push notifications from your Next.js server-side code for targeted messaging.
Ready to take your Next.js application to the next level of user engagement? Let's dive into the world of FCM and push notifications!
Setting Up FCM in Next.js
Project Setup:
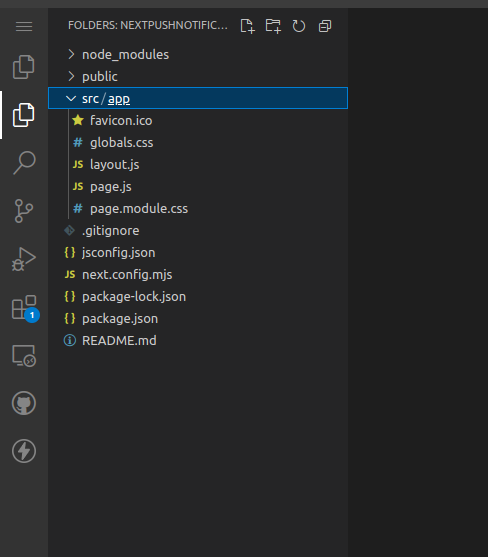
Create a Next.js project .
cd nextpushnotification
npx create-next-app nextpushnotification
Firebase Configuration:
Create a Firebase Project:
Head over to the Firebase console: https://console.firebase.google.com/
Click on "Add project" or select an existing project if you have one.
Give your project a descriptive name and click "Continue."
Enable FCM:
In the Firebase console project overview, navigate to the "Project settings" section (gear icon).
Under "Your apps," click "Add app" and choose "Web" as the platform.
Register your Next.js app by providing a Firebase project nickname and (optionally) your app's debug signing certificate SHA-1 (if applicable).
Click "Register app" to download the
google-services.jsonfile. You'll need this file later in your Next.js app.
Generate a Web Application Client Configuration File:
In the Firebase console project settings, under "Your apps," click on the web app you just created.
In the "Firebase SDK snippet" section, copy the code snippet provided. This code will be used to initialize Firebase in your Next.js app.
Client-Side Integration
Install Firebase and react-toastify
In your Next.js project directory, use npm or yarn to install the required libraries:
Bash
npm install firebase react-toastify
Initialize Firebase in Next.js:
import firebase from "firebase/compat/app";
import "firebase/compat/messaging";


const firebaseConfig = {
  apiKey: process.env.NEXT_PUBLIC_apiKey,
  authDomain: process.env.NEXT_PUBLIC_authDomain,
  projectId: process.env.NEXT_PUBLIC_projectId,
  storageBucket: process.env.NEXT_PUBLIC_storageBucket,
  messagingSenderId: process.env.NEXT_PUBLIC_messagingSenderId,
  appId: process.env.NEXT_PUBLIC_appId,
  measurementId: process.env.NEXT_PUBLIC_measurementId,
};

export const app = firebase.initializeApp(firebaseConfig);
export const messaging = firebase.messaging()
Important: Replace the placeholder firebaseConfig with your actual Firebase project configuration obtained from the console. I created .env.local file in root of project folder. If you notice you will find, I used NEXT_PUBLIC_ prefix with every variable loaded from env file in order to securely load this variable on build time. you cn learn more about it here
Request Push Notification Permission :
Create FCMprovider.js file in root folder
In your Next.js components, import the messaging object from the initialized Firebase:
import React, { useEffect, useState } from "react";
import { messaging } from "./firebase"; // Replace with your Firebase initialization file path
Use the useEffect hook to request permission from the user to receive notifications:
"use client"
import React, { useEffect, useState } from "react";
import { messaging } from "./firebase";

export default FCMProvider=({children})=>{

    useEffect(() => {
        const requestPermission = async () => {
          const status = await Notification.requestPermission();
          if (status === "granted") {
            console.log("Notification permission granted");
            // Get the FCM token for this device
            const token = await messaging.getToken({
              vapidKey: process.env.NEXT_PUBLIC_VAPIDKEY,
            });
            console.log("Your token:", token);
            // Send this token to your server for further processing
          } else {
            console.log("Notification permission denied");
          }
        };

        requestPermission();
      }, []);

      return children
}
Replace the placeholder vapidKey with your VAPID key. This key is required for secure communication between your server and FCM.
Handle background notification :
create firebase-messaging-sw.js in your public folder
importScripts("https://www.gstatic.com/firebasejs/8.10.0/firebase-app.js");
importScripts("https://www.gstatic.com/firebasejs/8.10.0/firebase-messaging.js");


  const defaultConfig = {
    apiKey: true,
    projectId: true,
    messagingSenderId: true,
    appId: true,
  };


  firebase.initializeApp(defaultConfig);

  const messaging = firebase.messaging();

  messaging.onBackgroundMessage((payload) => {
    const notificationTitle = payload.notification.title;
    const notificationOptions = {
      body: payload.notification.body,
      icon: payload.notification.image,
    };

    self.registration.showNotification(notificationTitle, notificationOptions);
    self.addEventListener(
      "notificationclick",
      (event) => {
        event.notification.close();
        if (event.action === "archive") {
          clients.openWindow("/?unknown");
        } else {
          clients.openWindow("/");
        }
      },
      false,
    );
  });
The above code handle background notifications
Handle Received Notifications :
Use the onMessage event listener from messaging to handle incoming notifications inside app/page.js or page.ts :
JavaScript
"use client"

export default function Home() {
  useEffect(() => {
    const onMessageListener = (message) => {
        console.log("New message received:", message);
        toast.success(message)
      };
    messaging.onMessage(onMessageListener);
    return ()=>{
      messaging.deleteToken(onMessageListener)
    }
  }, []);
// Rest of code
keep the rest of page as it is.
Sending Push Notifications:
Now send push notification from firebase console.
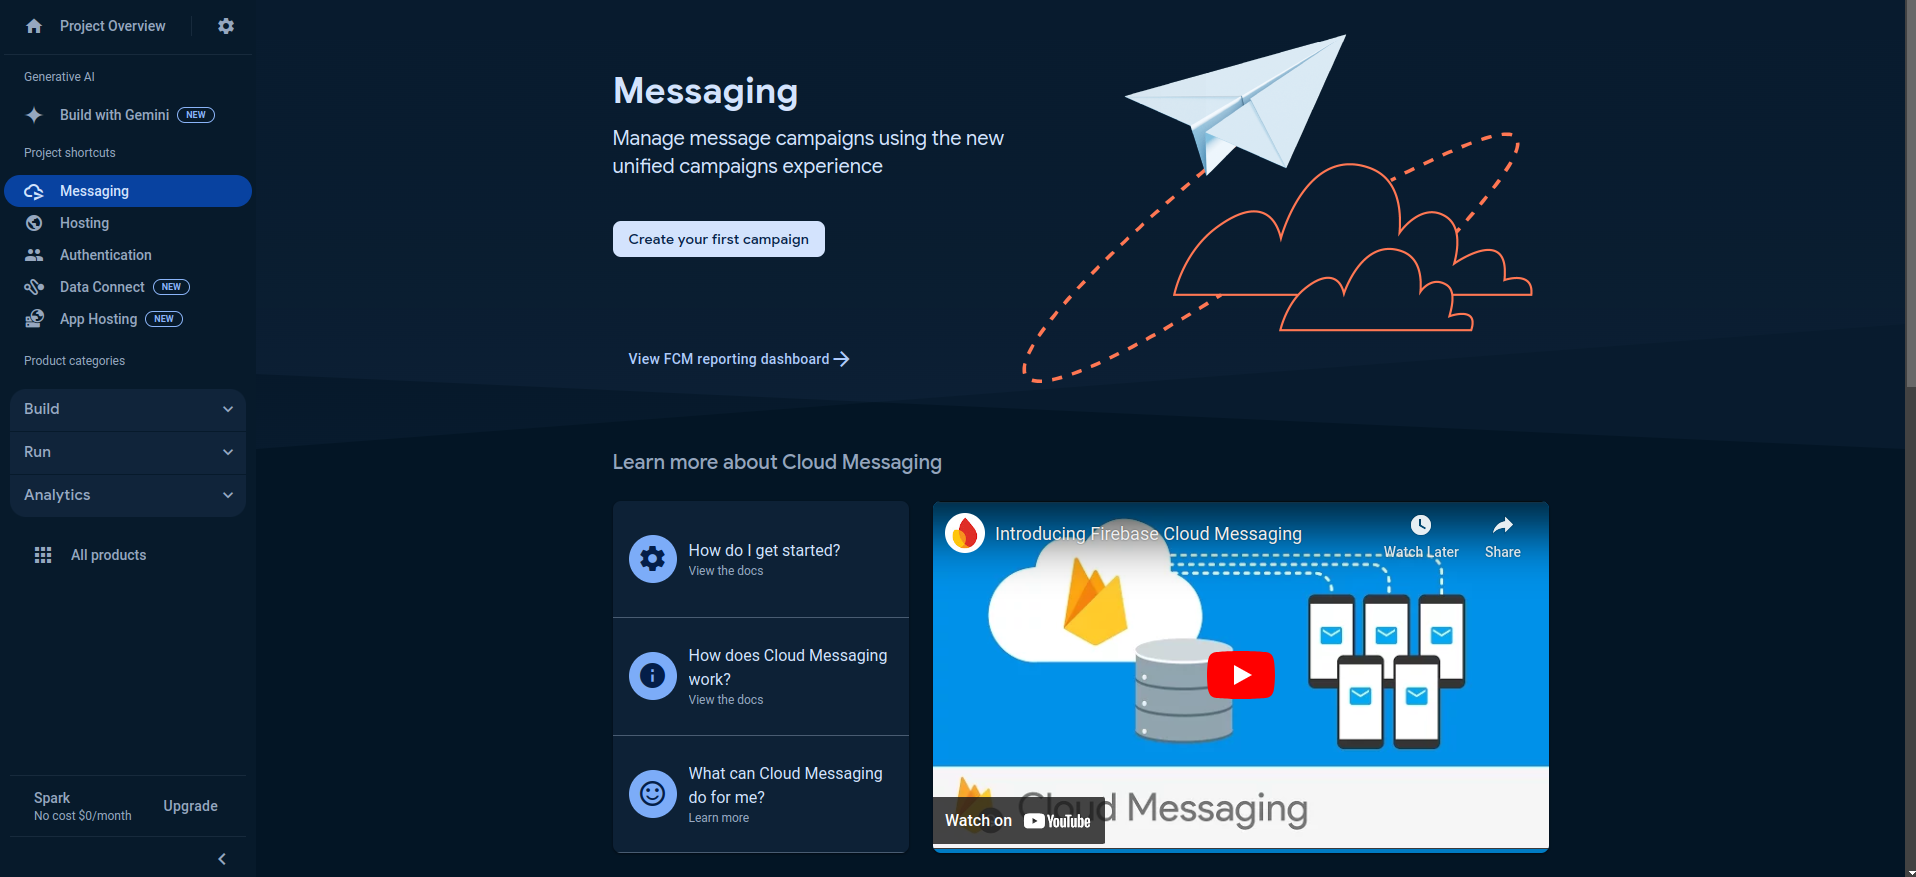
Click on Creat Your First Campain button
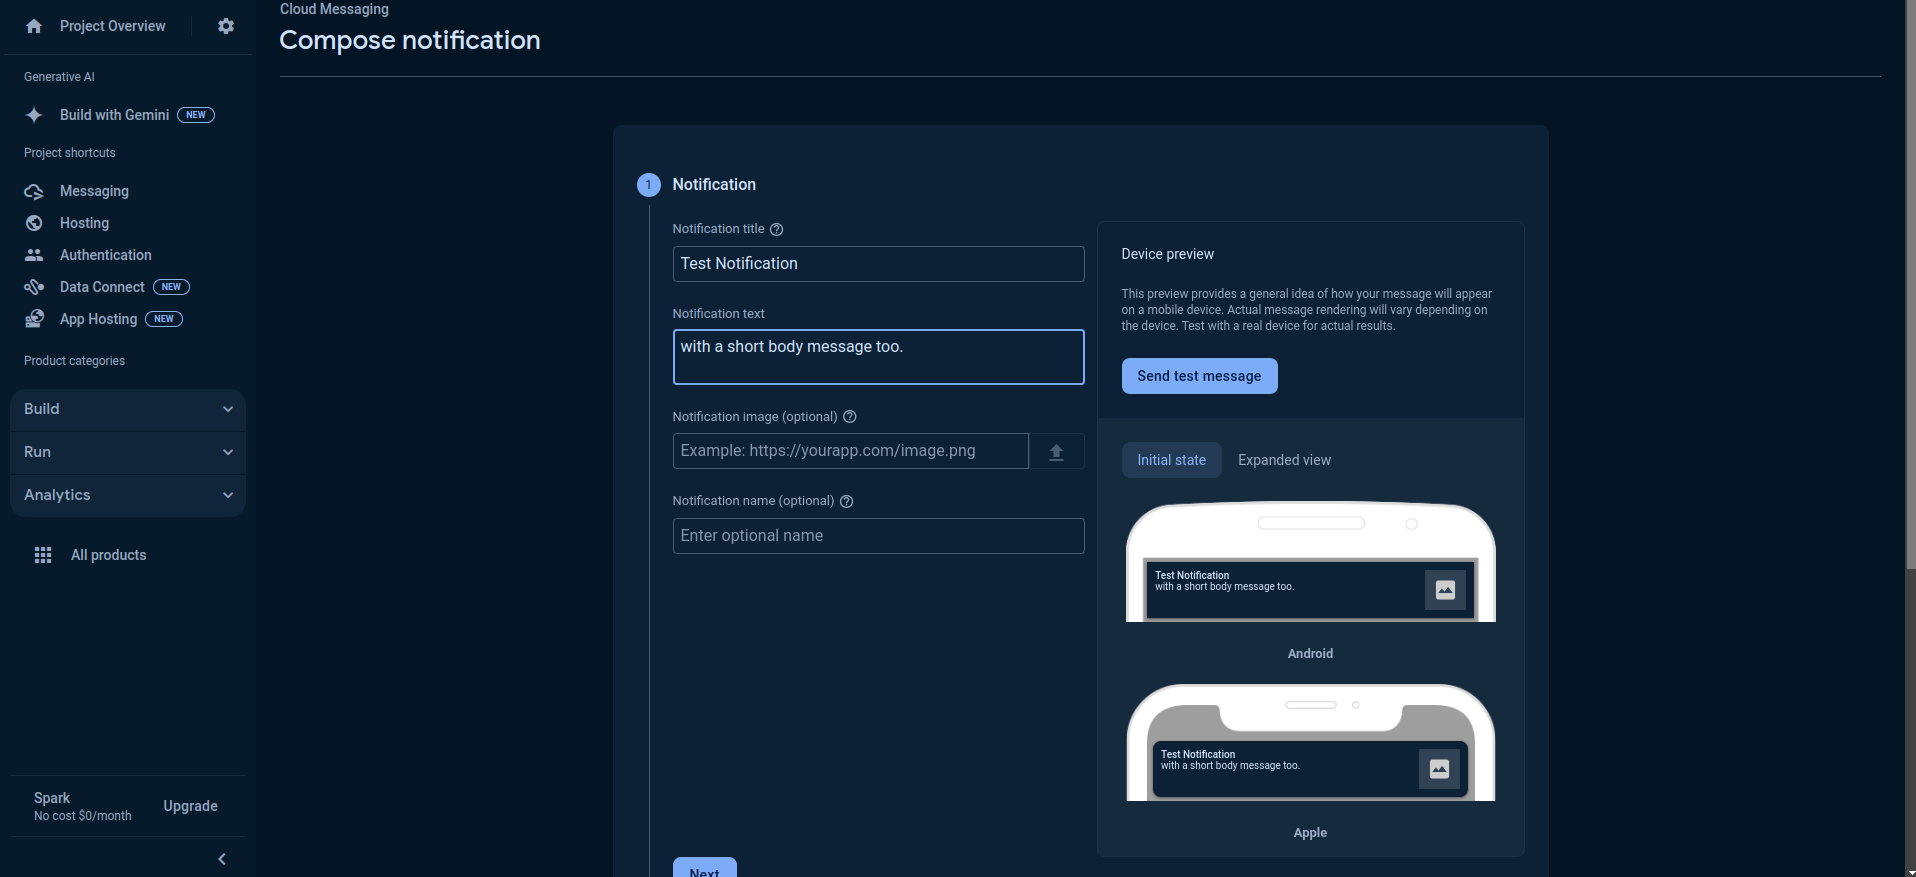
Fill Notification Title and Body ,and Click on Send Test Message button
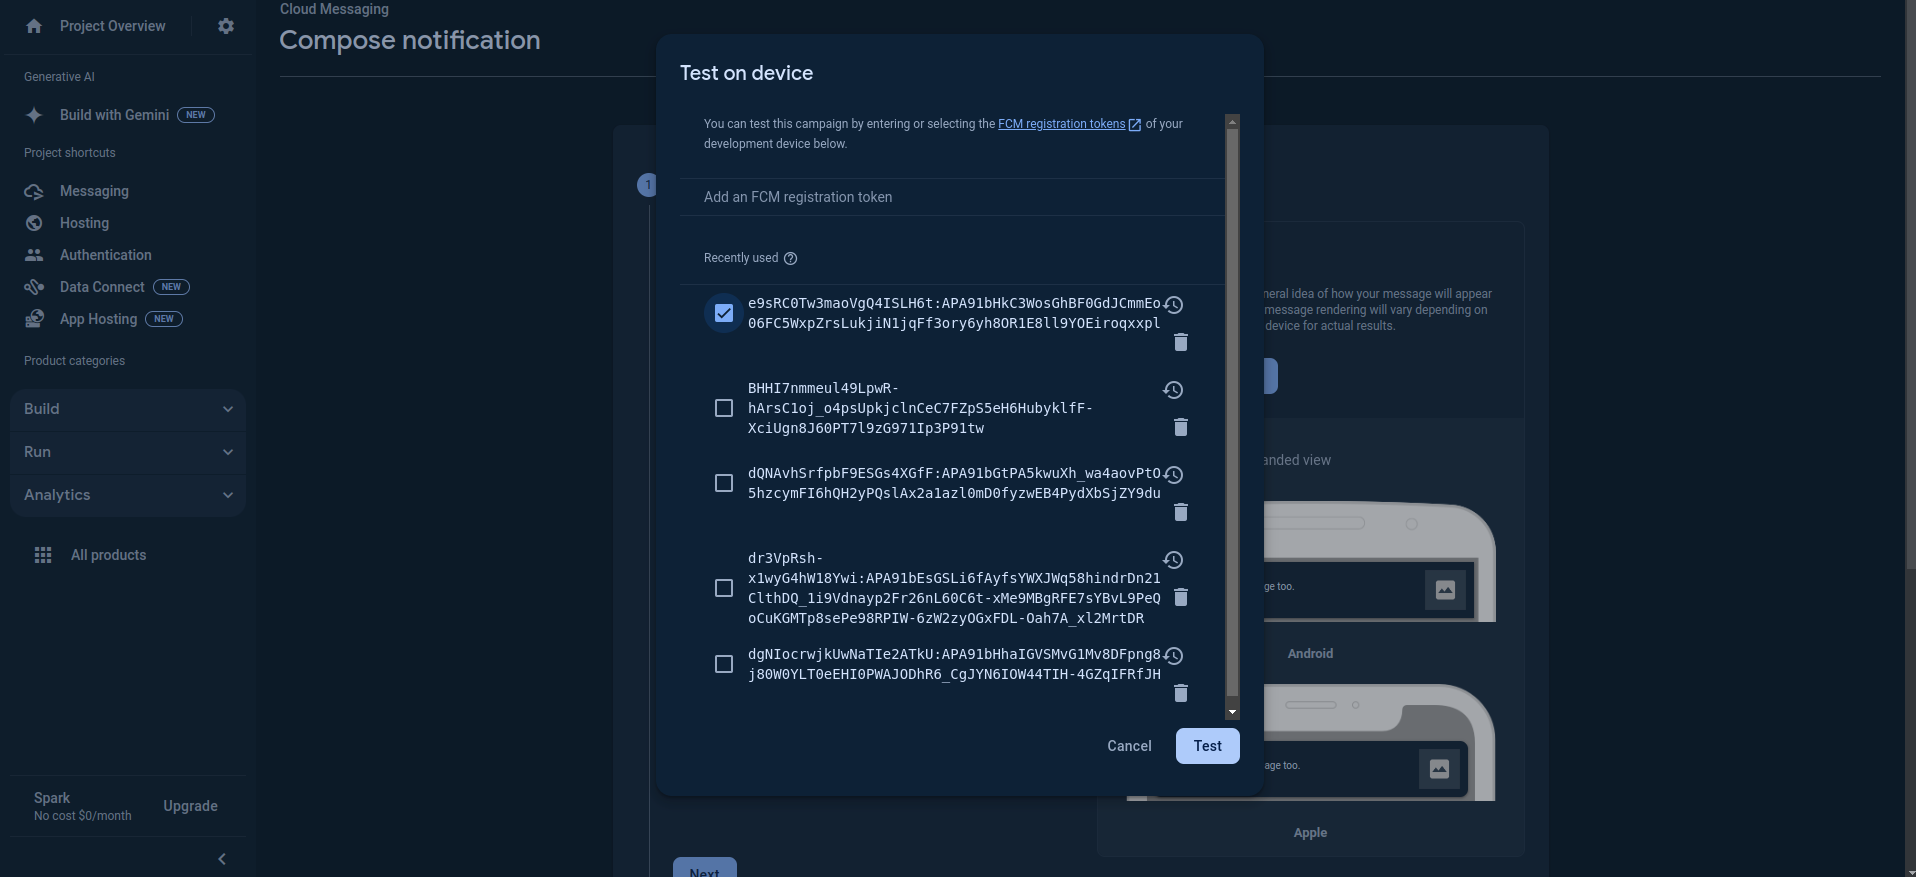
Click on Test button
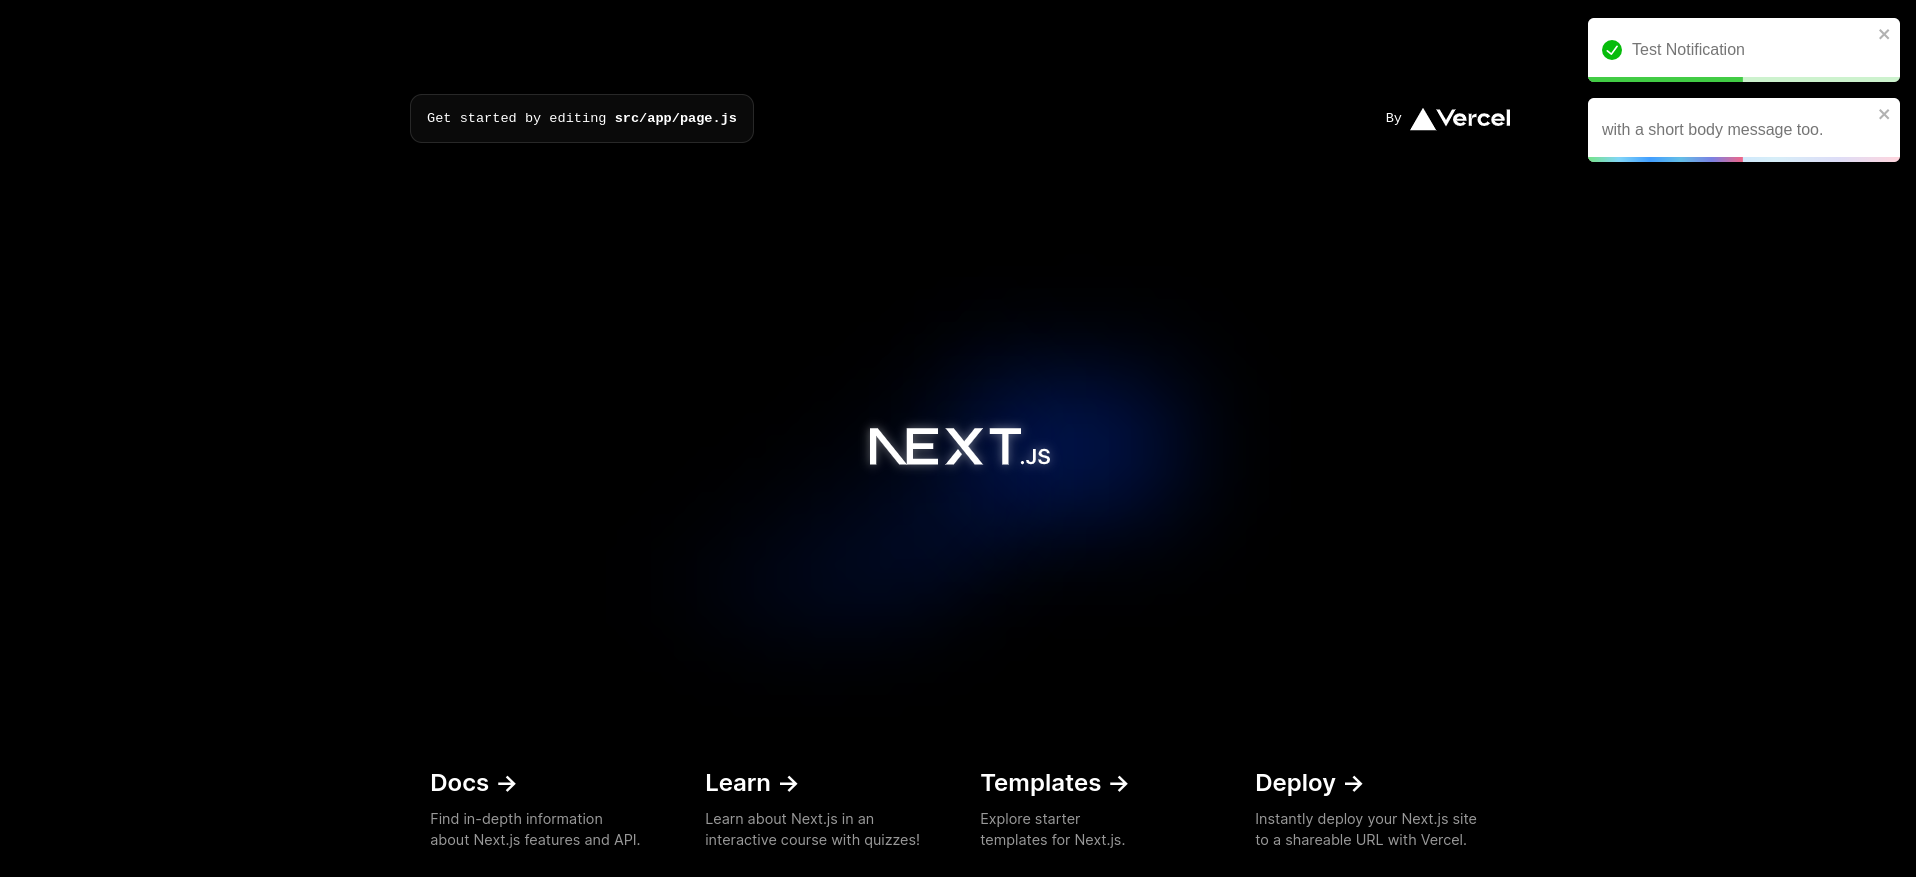
You will able to Notification in your app now.
Conclusion: The Power of FCM for Next.js Push Notifications
Firebase Cloud Messaging (FCM) shines as a compelling solution for integrating push notifications into your Next.js applications. Here's a recap of the key benefits you'll enjoy:
Enhanced User Engagement: Reach users even when they're not actively browsing your app, keeping them informed and engaged with timely updates, reminders, or special offers.
Cross-Platform Compatibility: FCM seamlessly delivers notifications across various platforms, including web browsers, Android, and iOS devices. This ensures a unified user experience regardless of the device they use.
Simplified Development: The intuitive FCM platform streamlines the development process, providing well-documented APIs and libraries for both client-side and server-side integration.
Cost-Effectiveness: FCM offers a free tier with generous usage limits, making it a cost-conscious choice for startups and growing businesses.
Alternative Push Notification Services
While FCM excels in many areas, here are some alternative push notification services to consider:
Amazon Simple Notification Service (SNS): A robust offering from Amazon Web Services (AWS) that caters to a wider range of message types beyond push notifications.
OneSignal: A popular choice known for its ease of use and affordability, particularly suitable for smaller-scale projects.
Pushwoosh: Provides a comprehensive push notification solution with advanced features like A/B testing and analytics.
Remember, the best choice depends on your specific project requirements and budget.
Resources for Further Exploration
Dive deeper into FCM and unlock its full potential with these valuable resources:
Firebase Push Notification Documentation:https://firebase.google.com/docs/cloud-messaging
Firebase Developer Console: Manage your Firebase projects and explore additional features: https://console.firebase.google.com/
Bonus Section: Real-Time Updates with FCM Push Notifications
Imagine a Next.js application for a live stock trading platform. Here's how FCM can add immense value:
Server-side: When a stock price fluctuates significantly, your Next.js server can trigger an FCM notification.
Client-side: The user's browser receives the notification, even if they're not actively on the platform.
User Action: Clicking the notification could redirect the user to the platform, allowing them to react to the price change in real-time.
This is just one example of how FCM empowers you to deliver critical updates and enhance the user experience in your Next.js applications. With a little creativity, the possibilities are endless!
Explore the Code and My Portfolio:
Source Code: Dive deeper into the code's intricacies on GitHub: https://github.com/monu-shaw/nextpushnotification
Portfolio: Visit my portfolio to discover more of my projects: https://monu-shaw.github.io/portfolio/
Subscribe to my newsletter
Read articles from Monu Shaw directly inside your inbox. Subscribe to the newsletter, and don't miss out.
Written by

Monu Shaw
Monu Shaw
My small changes of today will bring the great revolution of tomorrow. Love to hold hand and always ready to learn or share my knowledge.