Solving Size Issues with Print Statements in Flutter
 Ultra Wide Turbo Devs

Printing your way out of a sizing issue is not the common way to go. But, it’s fast and efficient. Most of the time. So let me tell you how I use a simple extension method to give me feedback and information with just a single line of code.
"Like a torch in the dark, print statements illuminate the path of errors. Embrace their guidance, for through understanding our faults, we attain wisdom." ~ Debuctetus
Size Reporter
Let’s start with the sizing widget. This widget was made and introduced to me by my Flutter mentor @kavantix back in the day. The SizeReporter holds your widget as a child after which it passes the sizing information through a debouncer into a callback.
💡 Disclaimer: using this widget to constrain or resize your child widget is inefficient because it will trigger an unwanted rebuild. However, it’s ideal for debugging purposes.
class SizeReporter extends SingleChildRenderObjectWidget {
  const SizeReporter({Key? key, required Widget child, required this.onSizeChanged})
      : super(key: key, child: child);
  final void Function(Size size) onSizeChanged;

  @override
  _SizeReporterRenderObject createRenderObject(BuildContext context) =>
      _SizeReporterRenderObject(onSizeChanged);

  @override
  void updateRenderObject(BuildContext context, covariant _SizeReporterRenderObject renderObject) {
    renderObject.onSizeChanged = onSizeChanged;
  }
}

class _SizeReporterRenderObject extends RenderProxyBox {
  _SizeReporterRenderObject(this.onSizeChanged);
  void Function(Size size) onSizeChanged;

  Size? _oldSize;

  final _debouncer = Debouncer();

  @override
  void performLayout() {
    super.performLayout();
    if (size != _oldSize) {
      _debouncer.run(() {
        _oldSize = size;
        onSizeChanged(size);
      });
    }
  }
}
💡 If you don’t have a Debouncer in your project use this one:
class Debouncer {
  Debouncer({
    Duration duration = const Duration(milliseconds: 300),
  }) : _duration = duration;

  final Duration _duration;
  Timer? _timer;

  void run(VoidCallback voidCallback) {
    tryCancel();
    _timer = Timer(
      _duration,
      () {
        voidCallback();
      },
    );
  }

  void tryCancel() => _timer?.cancel();
}
Widget Extension
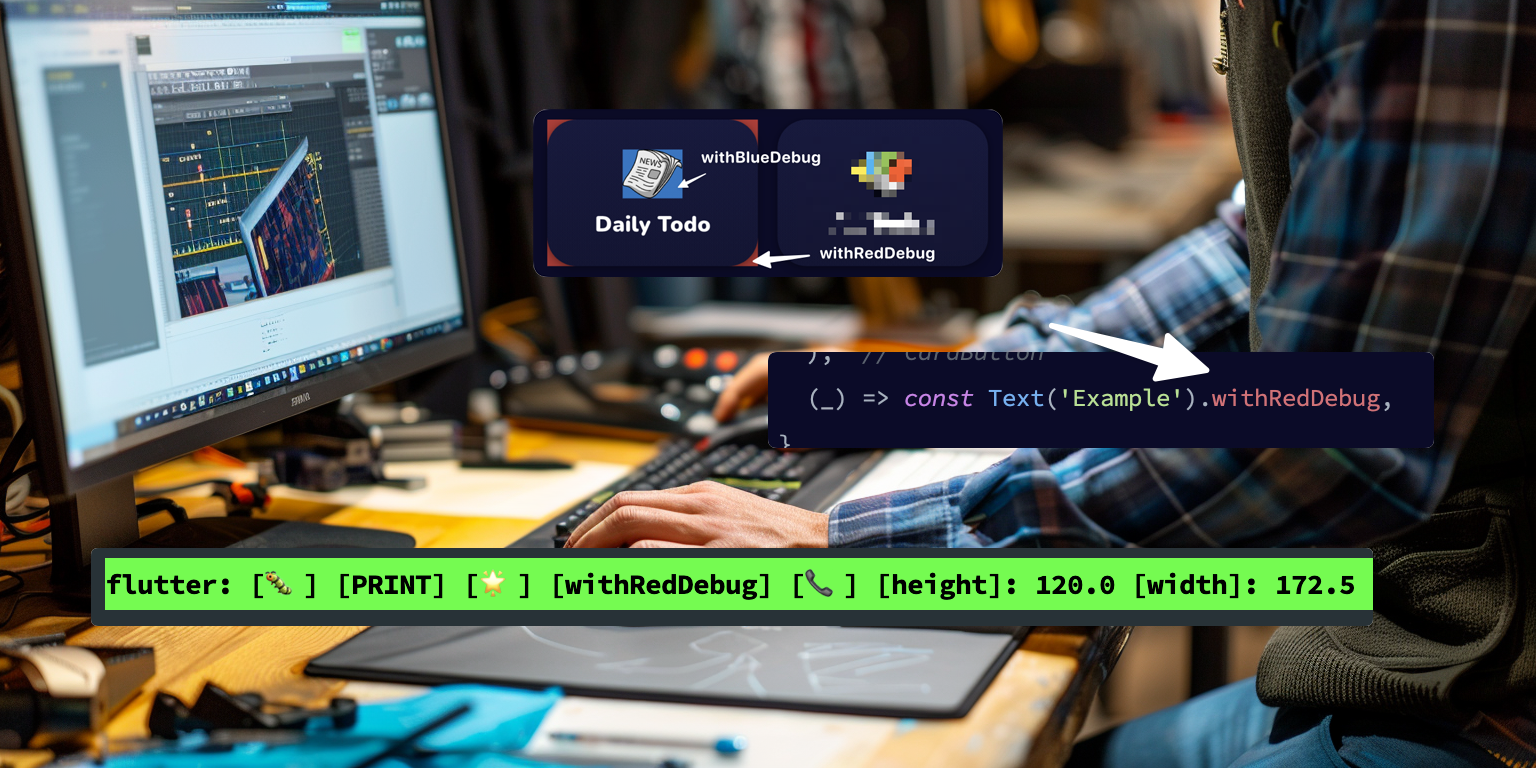
Now comes the fun part. Using a widget extension, we can easily wrap this builder around any widget to give you the right size information.

But that's not all. It also has a coloured container around it so we can easily see how much space the widget takes up in the UI. This is ideal for situations where we are not quite sure how the UI is structured.

You can also combine these to provide yourself with even more information without ever opening the Flutter Inspector.

The extension is down below, edit it to your liking. My print statements tend to be a bit too much for most people 😄.
extension WidgetExtension on Widget {
  Widget get withRedDebug => withDebug(color: Colors.red, label: 'Red');
  Widget get withGreenDebug => withDebug(color: Colors.green, label: 'Green');
  Widget get withBlueDebug => withDebug(color: Colors.blue, label: 'Blue');
  Widget get withYellowDebug => withDebug(color: Colors.yellow, label: 'Yellow');
  Widget get withPurpleDebug => withDebug(color: Colors.purple, label: 'Purple');
  Widget get withOrangeDebug => withDebug(color: Colors.orange, label: 'Orange');
  Widget get withPinkDebug => withDebug(color: Colors.pink, label: 'Pink');
  Widget get withCyanDebug => withDebug(color: Colors.cyan, label: 'Cyan');
  Widget get withTealDebug => withDebug(color: Colors.teal, label: 'Teal');

  Widget withDebug({Color? color, String? label}) => Container(
        color: (color ?? Colors.blue).withOpacity(0.75),
        child: SizeReporter(
          child: this,
          onSizeChanged: (size) {
            if (kDebugMode) {
              print(
                '''[🐛] [PRINT] [🌟] [with${label}Debug] [📞] [height]: ${size.height} [width]: ${size.width}''',
              );
            }
          },
        ),
      );
}
Happy debugging! The screenshots used are from my personal app called Float Note. Float Note is a task management app built for people with ADHD, busy professionals and other busy bees a like. You can download it here. Give it a try! I’m sure you’ll like it 😁 And if you want, use code “HASHNODE50“ for 50% off your subscription when the time comes. Thank you for reading this far, until next time 🙏.
👋 About me: I am an independent developer with ADHD and the creator of Float Note. Float Note is an ADHD power tool that gives busy minds the ability live a stress free life. Features include an AI scheduling tool, priority poker and unique mechanism to quickly capture and organize the many thoughts and ideas we have on a daily base.
🎫 It would mean the world to me if you gave it a try and let me know what you think through one of my socials. You can try it for free for 7 days and when the time comes, use code "DEVLIFEOFBRIAN" to get over 70% off your lifetime subscription.
📲 Download it here or click the link in my bio (Android/iOS/web) ➡️ floatnote.com/download
Thank you for reading this far 🫡 stay focused! 🤙
#flutterdev #buildinpublic #adhdtool #productivity #indiedev
Subscribe to my newsletter
Read articles from Ultra Wide Turbo Devs directly inside your inbox. Subscribe to the newsletter, and don't miss out.
Written by

Ultra Wide Turbo Devs
Ultra Wide Turbo Devs
Tools · Prompts · Templates · Systems · Tutorials · Hacks · Resources