Supercharge Your CLI: Interactive File Searching with ripgrep and fzf
 Naman Lad
Prerequisites
bat(optional) - acatclone with syntax highlighting
rg is a search tool that recursively searches for a regex pattern in a given directory. It is similar to the grep command but with extra features.
You can use this command in the following way:
rg 'configurations' ~/Documents
This will recursively search for the pattern 'configurations' in all files in the ~/Documents directory.
The potential problems
Now, to get to one specific instance of your search term, you have to scroll through the output of thergcommand which is not practical if the output is very long.
Enter fzf to the rescue again! In my previous blog, I showcased how fzf can be used to go through a list of fonts to choose from easily. Similarly, we can take the output of the search query from thergcommand and pipe it intofzf.
However, first, we need to see how to get the output of the search term to see if we need to make any changes.
Exploring the solutions
First, I created a script called rgf that I can run anywhere. As you can see, it takes an argument, which is the term to search for.
#!/bin/bash

rg "$1" .
The output of this command, as expected, will be as follows:

(By the way, this is a sneak peek at my custom prompt, using starship. I will share my starship config in a future blog.)
The problem I talked about will be visible now. What if there are many instances of the text "hello" across all the files in the current directory? We have to pipe this output into fzf to search for the occurrence of "hello" that we want.
For that, first, we have to make some modifications to this output before piping it into fzf.
#!/bin/bash

rg \
  --with-filename \
  --line-number \
  --hidden \
  --no-ignore \
  --no-heading \
  --color=always \
  --smart-case \
  "$1" .
--with-filename: This flag will print the filename for every line in the output.
--line-number: This flag will show line numbers in the search output.
--hidden: This flag will tell rg to search in the hidden files as well.
--no-ignore: This flag will make rg not respect the ignore files in your directory. For example, it will not respect the .gitignore file and will search for the pattern in the files mentioned in the .gitignore file too.
--no-heading: By default, the rg command will print the filename above the search output. This flag will make it print the filename in the same line as the search output.
--color=always: This flag will make the output colorful.
--smart-case: This flag will tell rg to search case insensitively if the pattern is all lowercase, else search case sensitively.
(Feel free to experiment with these flags or add new ones.)
The output of the above command becomes:

Great! Now we just need to pipe this into fzf. But now after looking at this output, don't you think we can type "hello" intofzfitself? This way, we can search for any term by typing it out.
Final solution
#/bin/bash/

rg \
  --with-filename \
  --line-number \
  --hidden \
  --no-ignore \
  --no-heading \
  --color=always \
  --smart-case \
  . $@ | \

fzf \
  --ansi \
  --delimiter : \
  --nth=3.. \
  --preview 'bat --color=always {1} --highlight-line {2}' \
  --preview-window 'right,60%,+{2}+3/3,~3'
--ansi: This flag will accept the incoming lines as having ansi codes for colors in them and render them properly on the screen.
--delimiter :: This flag will tell fzf to use : as the delimiter for each line when dealing with fields.
--nth=3..: This flag will limit the search to only the 3rd field onwards in every line (Because the 1st field is the filename and the 2nd field is the line number, we don't want to consider them when searching).
--preview: This flag will help specify a command to use for previewing each line. Here, we use the bat command with syntax highlighting (--color=always) and also highlighting the line matching the query (--highlight-line {2}).
--preview-window: This flag will set the properties of the preview window. Currently, the preview window is made to show up on the right of the fzf screen with 60% width. Additionally, it will scroll to three lines after the specified line (+{2}+3) and place the line at one-third height of the total preview window height (/3). Since we are using the bat command, it uses the first three lines of the output to display the filename. We don't want that to vanish as we scroll, so we fix the top three lines (~3).
(fzftruly is a powerful tool!)
I made some changes to the rg command too. Now it will search for ".", meaning it will now return every line in all the files in the current directory, and feed the output to fzf where we can type our search query. Another change I made is that the command will still take an argument, but it will be the directory. This means that multiple directories can be passed simultaneously and the script will run the search on all files in all the specified directories! So you can run rgf /path/to/folder1 /path/to/folder2 /path/to/folder3 and this script will run the search on all three directories.
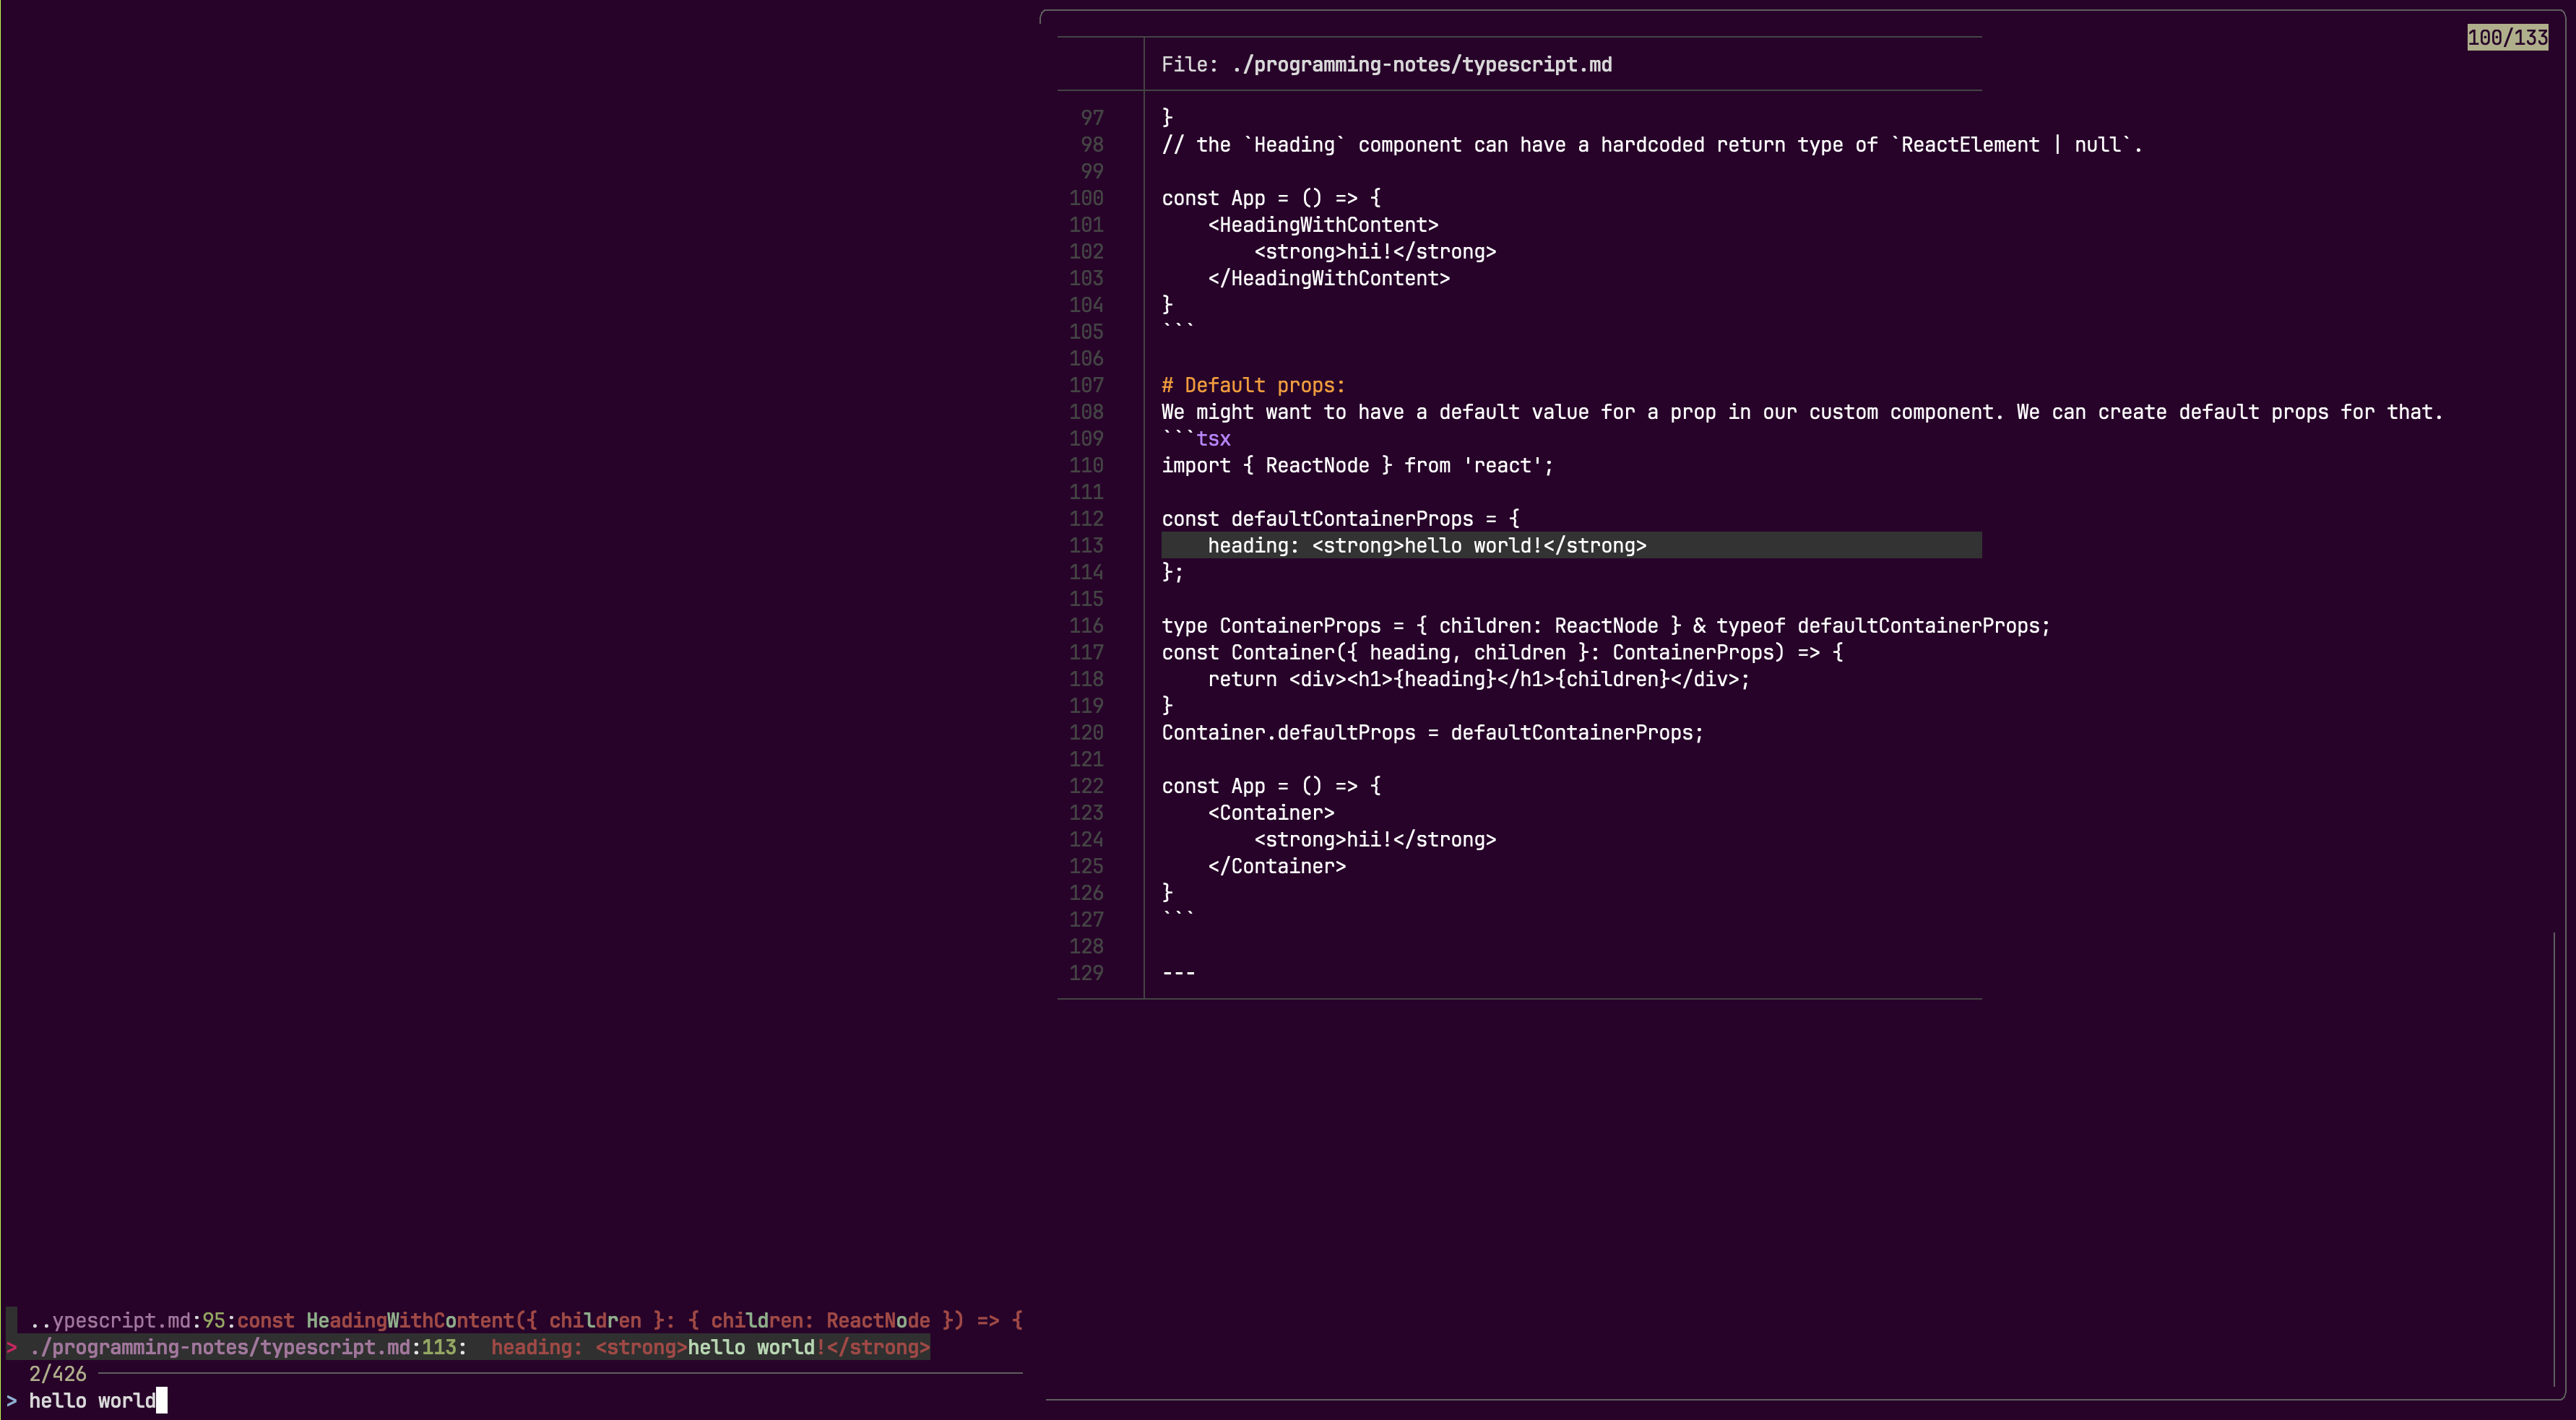
Running this command in the terminal will bring this screen where you can now type your search term.

Conclusion
By combining the powerful search capabilities of ripgrep and the features of fzf, we've crafted a versatile and efficient script for interactive file searching. This script highlights the efficiency and adaptability of command-line tools, showcasing how they can streamline workflows and enhance productivity in a CLI environment. Experiment with these tools, tailor the script to meet your specific needs and unlock the full potential of your command-line experience.
Subscribe to my newsletter
Read articles from Naman Lad directly inside your inbox. Subscribe to the newsletter, and don't miss out.
Written by
