Amazon S3 and CloudFront: How to Configure Your Static Website
 ARPIT GUPTA
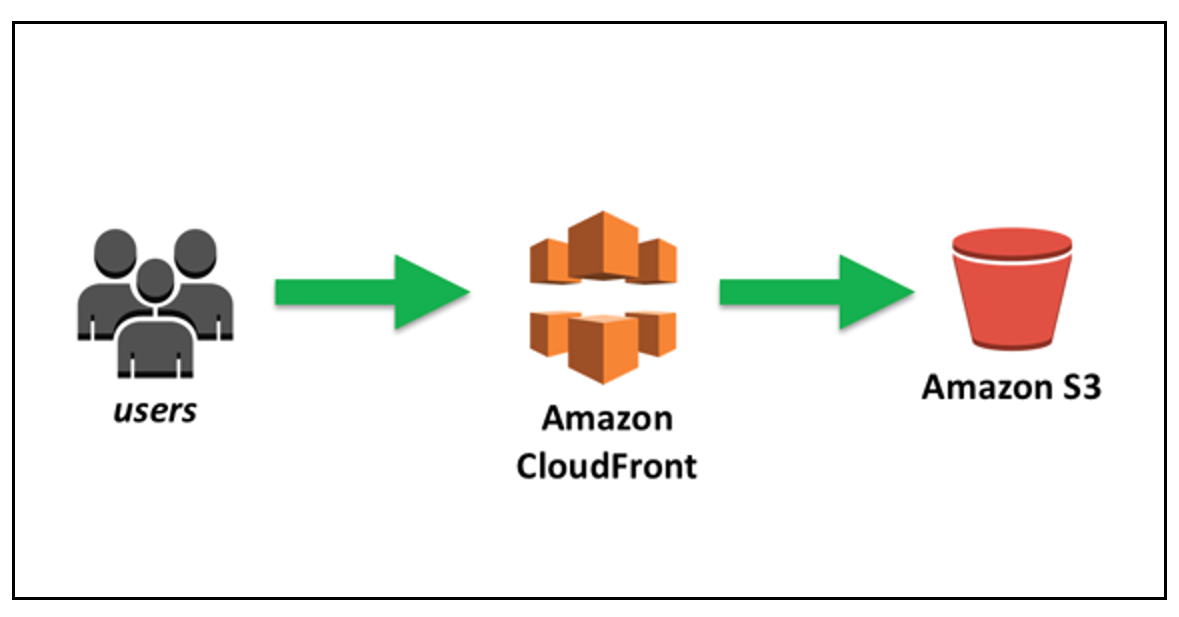
Setting up a static website using Amazon S3 and CloudFront is a cost-effective and scalable solution. This guide will walk you through the steps to configure a static website using these AWS services.
Prerequisites
AWS Account
Basic understanding of AWS Management Console
Static website content (HTML, CSS, JavaScript files)
Step 1: Create an S3 Bucket
Log in to AWS Management Console: Navigate to the S3 console.
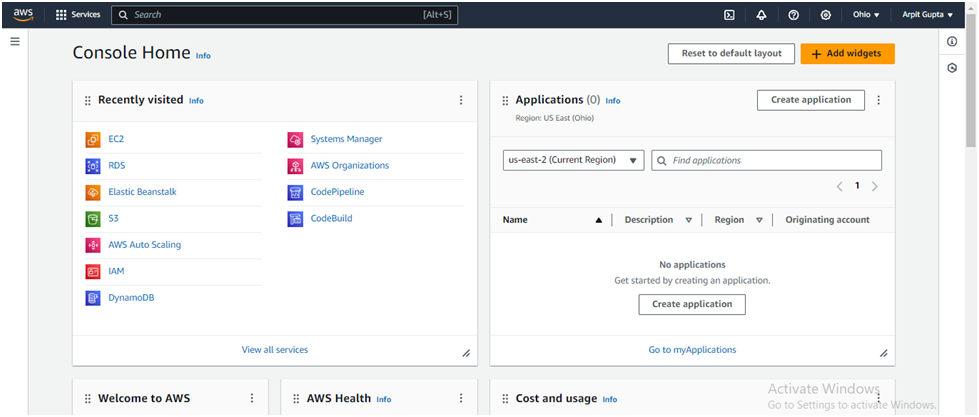
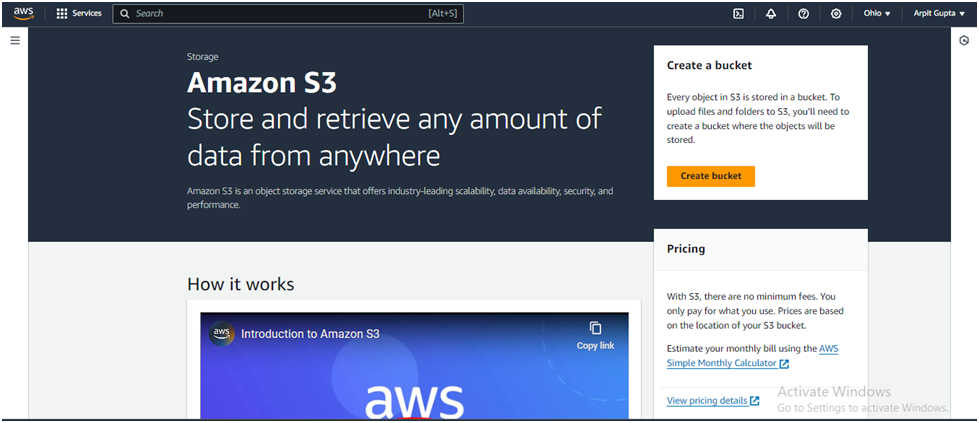
Create a Bucket:
Click on Create bucket.
Enter a unique bucket name (e.g.,
my-static-website-bucket).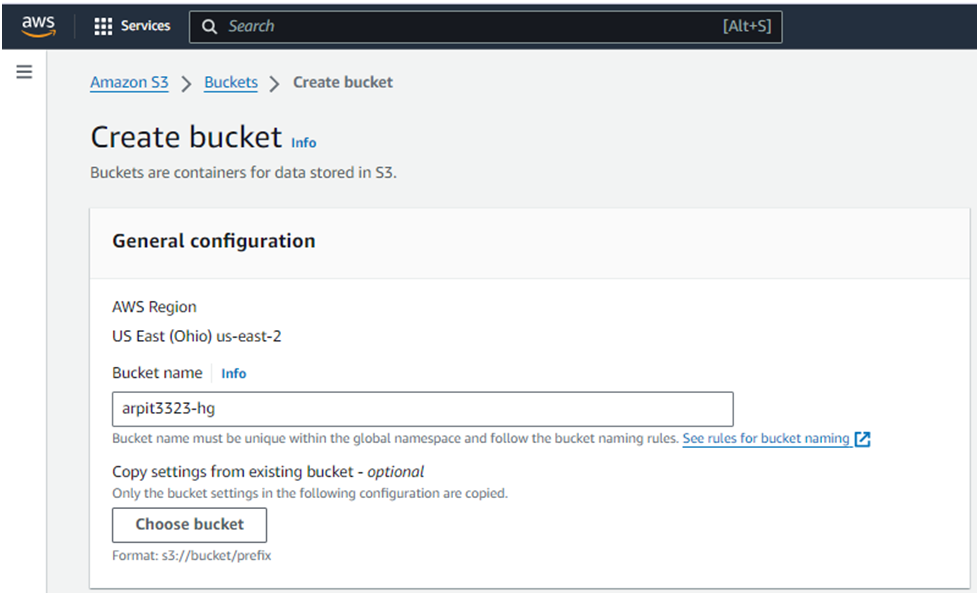
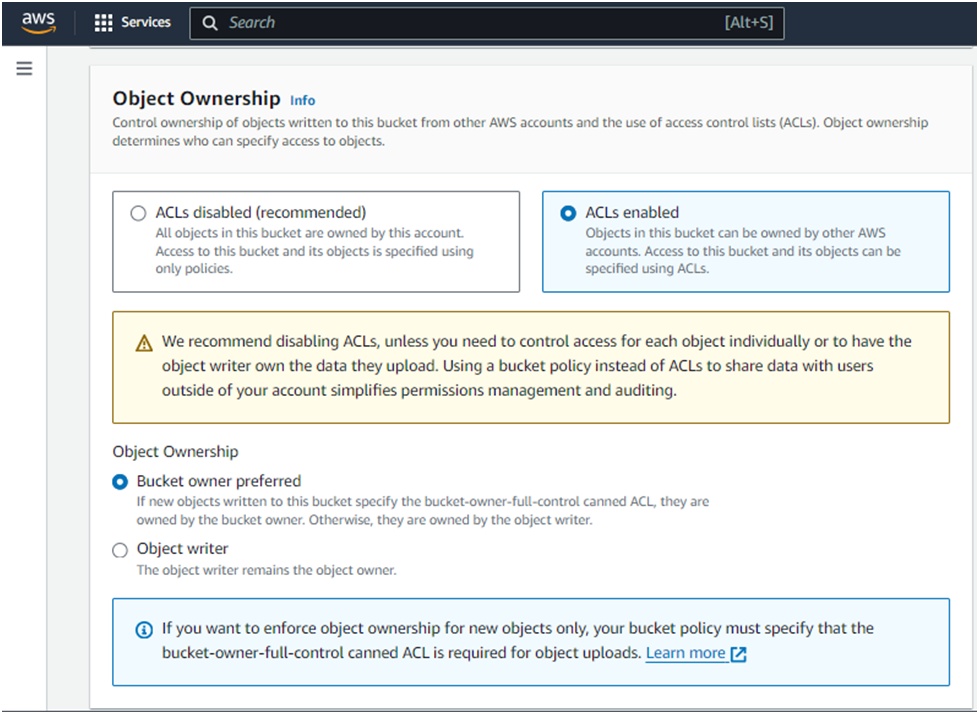
Select Acls enabled
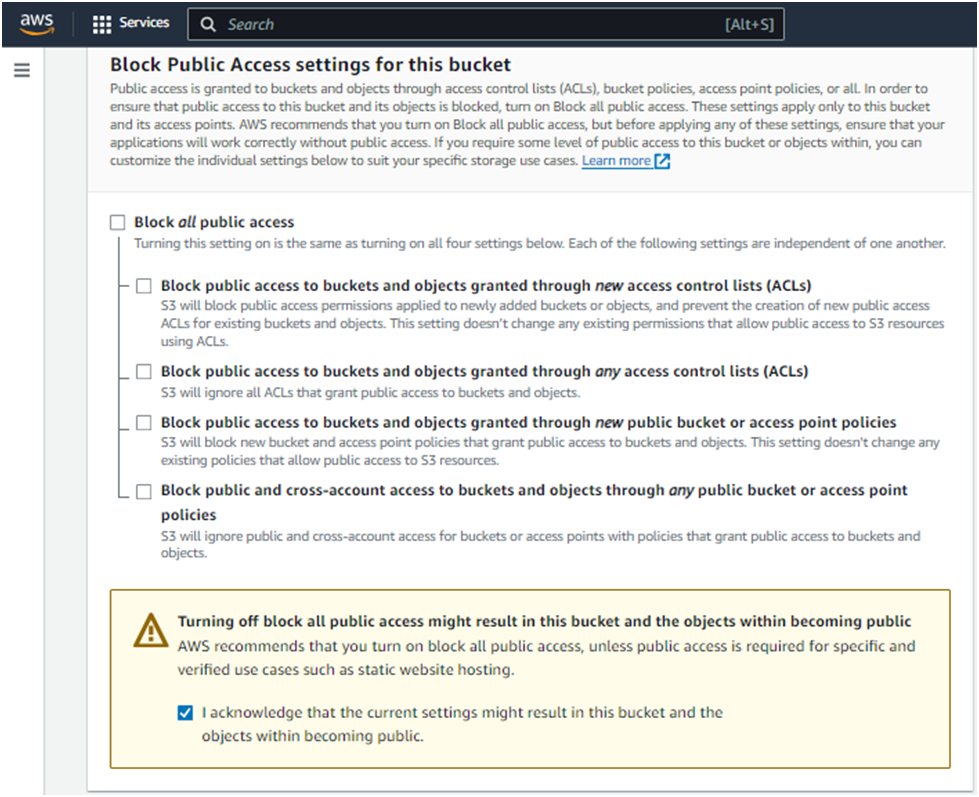
you’ll see the Block all public access settings. By default, all options under this setting are checked to prevent public access.
Uncheck the Block all public access option. This action will automatically uncheck all related options beneath it.
A warning message will appear, emphasizing the risks associated with making your bucket publicly accessible. Below this message, you’ll find an acknowledgment checkbox.
Check the acknowledgment box to confirm that you understand the consequences of enabling public access to your bucket.
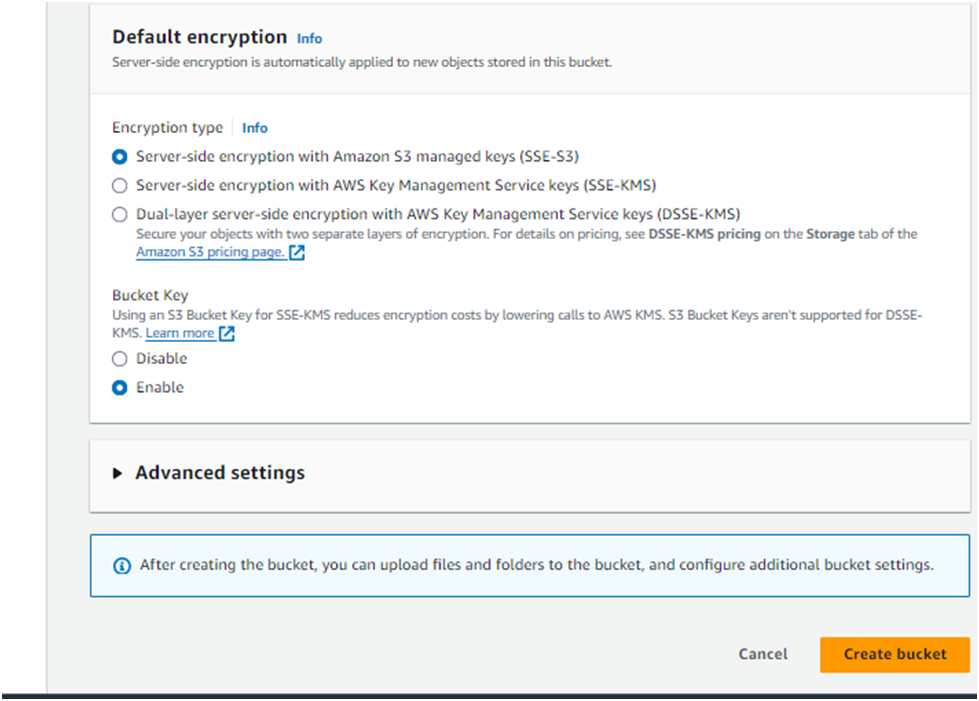
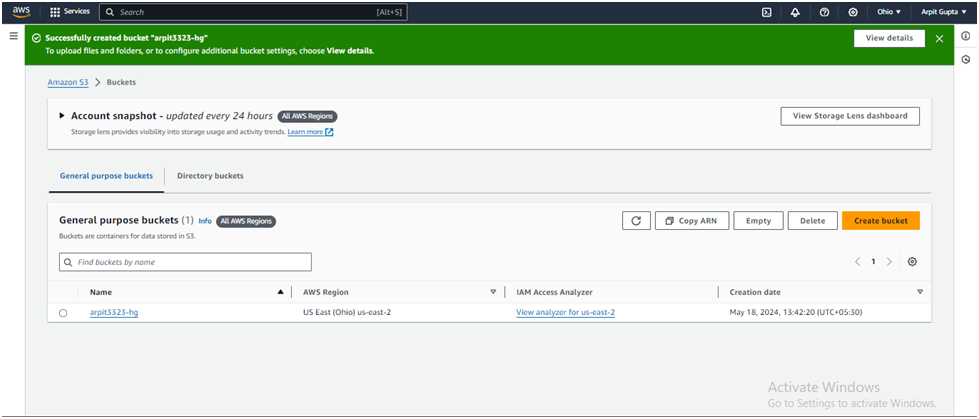
Click Create bucket.
To allow public access, you’ll need to add a bucket policy explicitly granting such permissions. In the S3 dashboard, click on your newly created bucket’s name.
Go to the Permissions tab.
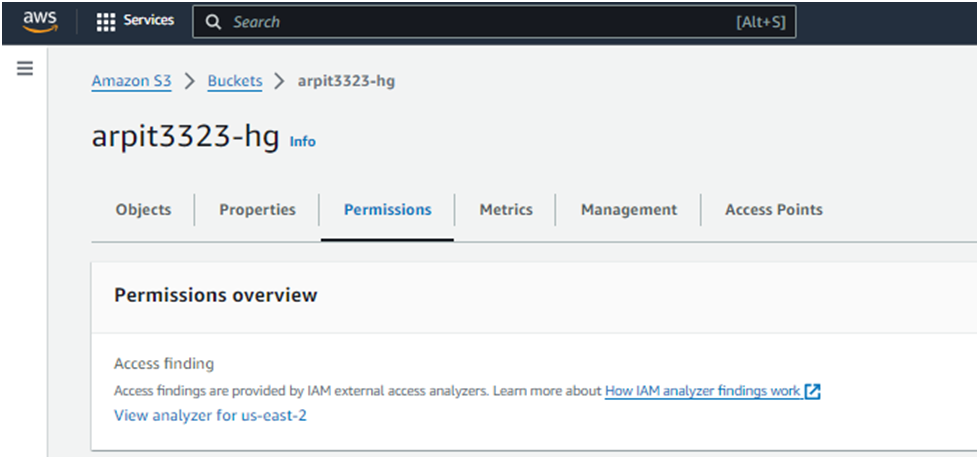
Scroll to the Bucket policy section and click Edit
In the Policy editor, copy and paste the following and replace YOUR_BUCKET_NAME with the name of your S3 bucket:
  {
    "Version": "2012-10-17",
    "Statement": [
      {
        "Sid": "AddPerm",
        "Effect": "Allow",
        "Principal": "*",
        "Action": "s3:GetObject",
        "Resource": "arn:aws:s3:::YOUR_BUCKET_NAME/*"
      }
    ]
  }
This policy will allow public access to all objects in your S3 bucket.
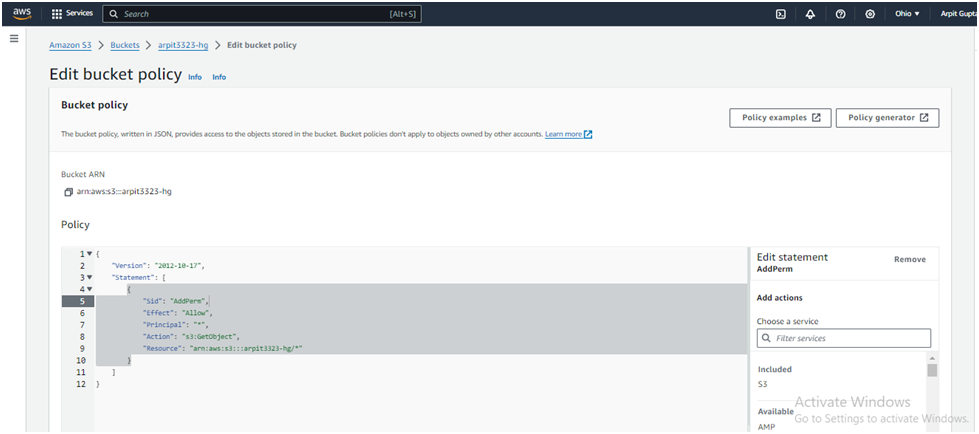
To save your bucket policy, at the bottom of the page, click Save changes.
The bucket overview page will load and you will see a notification that the policy has been edited.
Note: If you see an error, ensure the bucket name has been entered into the policy correctly.
Configure Bucket for Static Website Hosting:
Select your newly created bucket.
Go to the Properties tab.
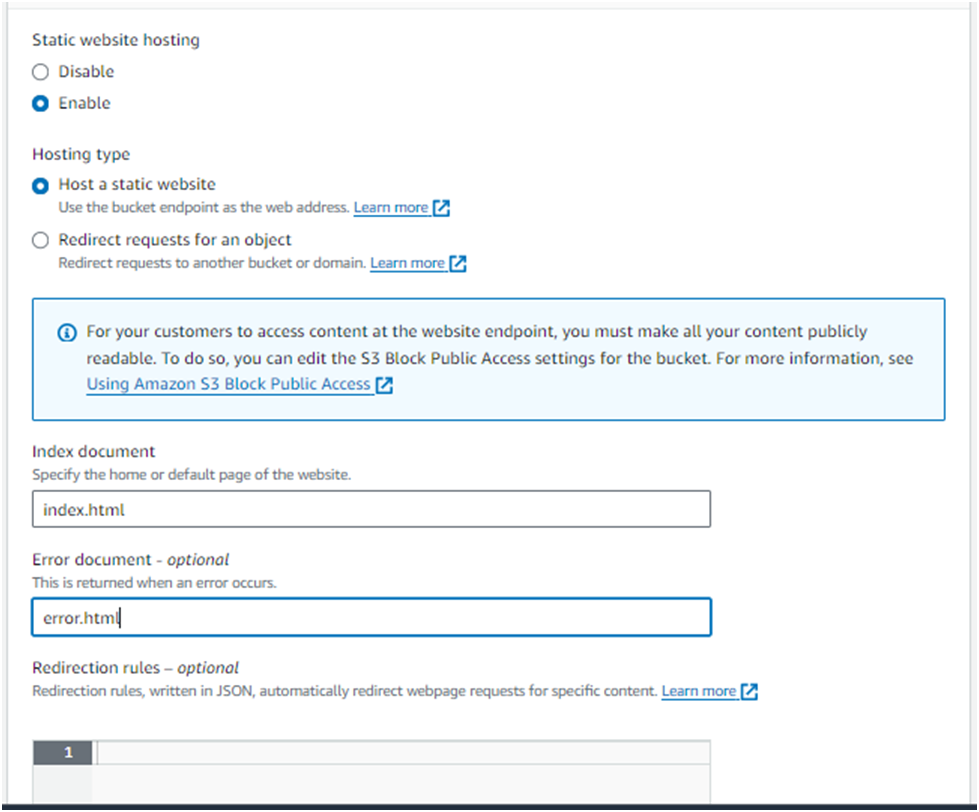
Scroll down to the Static website hosting section and click Edit.

Select Enable to enable static website hosting &
Choose Host a static website. Here, you’ll be prompted to enter:
Index document: The name of your homepage document (e.g., index.html). This is the file served when visitors access the root URL of your website.
Error document (optional): The name of the HTML file to show when an error occurs (e.g., error.html). This is not mandatory but recommended for handling HTTP errors gracefully.
(Optional) If you have a custom error document, fill in the Error document field.
Click Save changes.
Step 2: Upload Website Files to S3
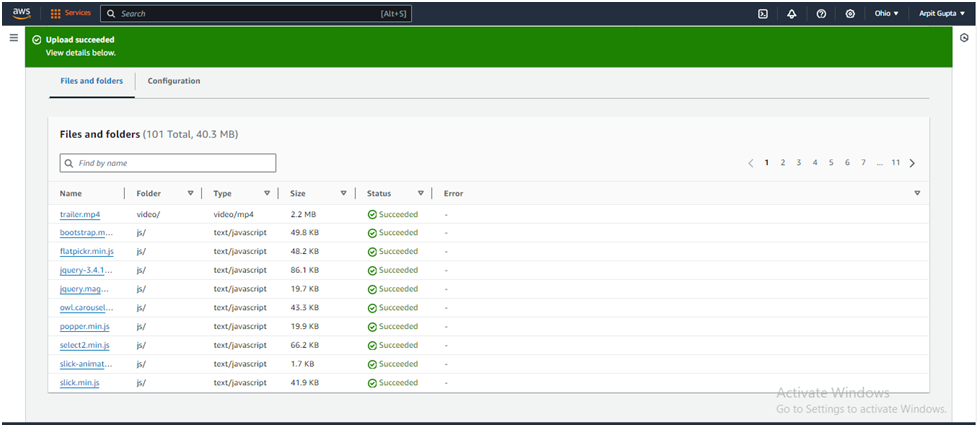
Upload Files:
Go to the Objects tab in your bucket.
Click Upload.
Drag and drop your website files (HTML, CSS, JavaScript) or click Add files.
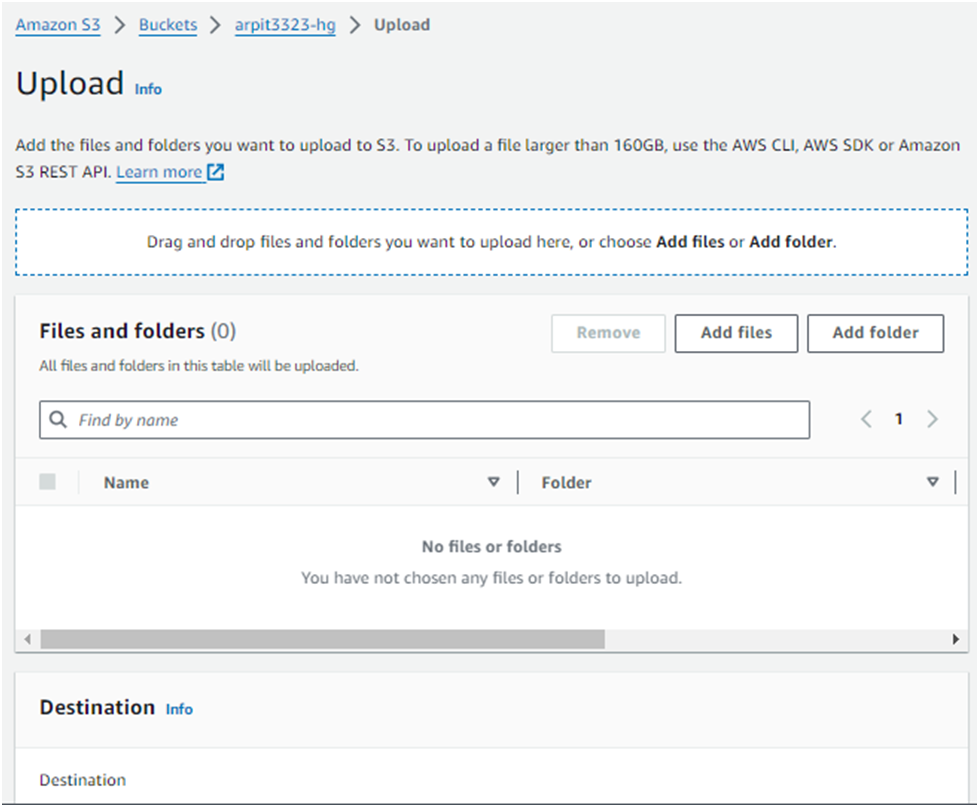
Click Upload.
Access Website in Your Web Browser
Go back to the Properties tab and scroll down to the Static website hosting section.

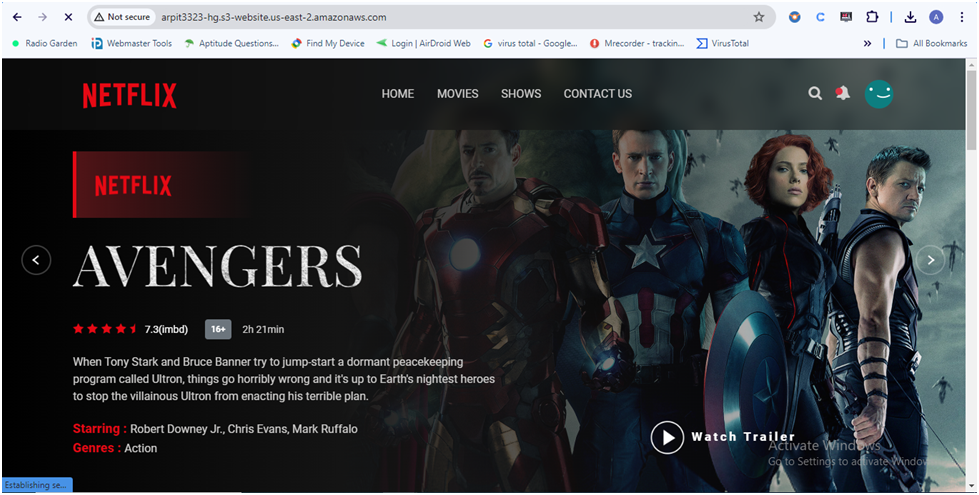
You’ll see a Bucket website endpoint URL. This URL is the public address of your static website.

Paste the endpoint into the address bar of a new browser tab.
You will see a website load that looks like this:
Step 3: Set Up CloudFront Distribution
AMAZON CLOUDFRONT
Amazon CloudFront is a global Content Delivery Network (CDN) that delivers data securely and efficiently. CloudFront pulls your website out to the edge of the network, reducing latency when accessed from different global locations.
In this lab step, you will set up an Amazon CloudFront distribution for your static site hosted in your Amazon S3 bucket, update the bucket policy to allow access to the CloudFront distribution, and update permissions to block public access to the S3 bucket.
Instructions
Open CloudFront Console: Navigate to the CloudFront console.
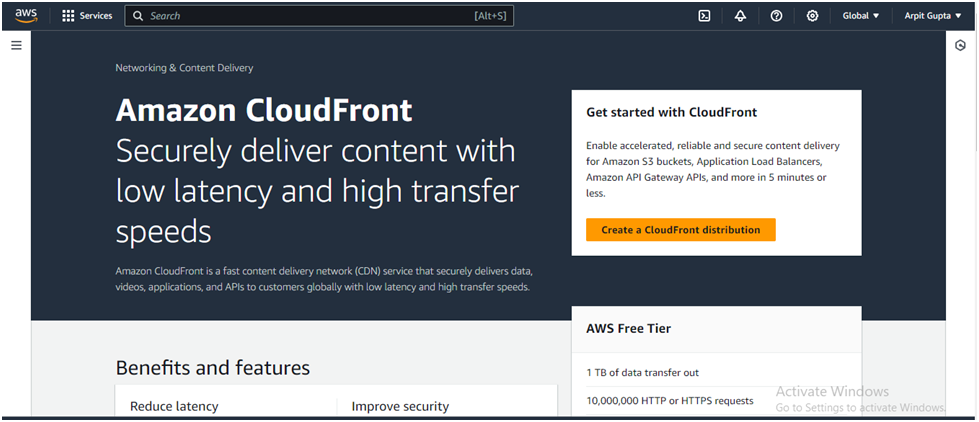
Create a Distribution:
Click on Create Distribution.
Choose Web as the delivery method and click Get Started.
Configure Distribution Settings:
Origin Domain Name: Select your S3 bucket from the dropdown list.
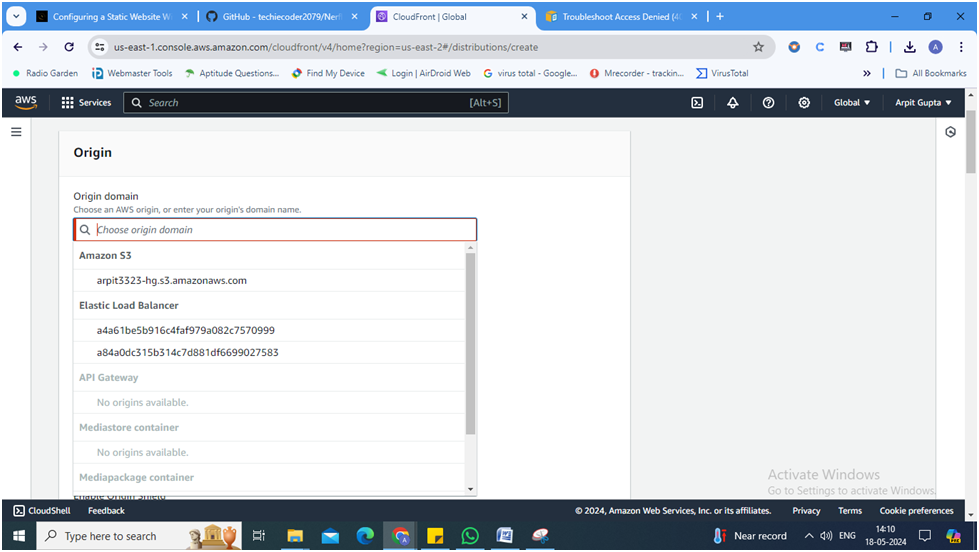
- Warning: If you don’t see the S3 bucket in the origins list, manually enter the following: <name_of_the_bucket>.s3.amazonaws.com
Under Origin, in the Origin access, select Origin access control settings and click Create new OAC:
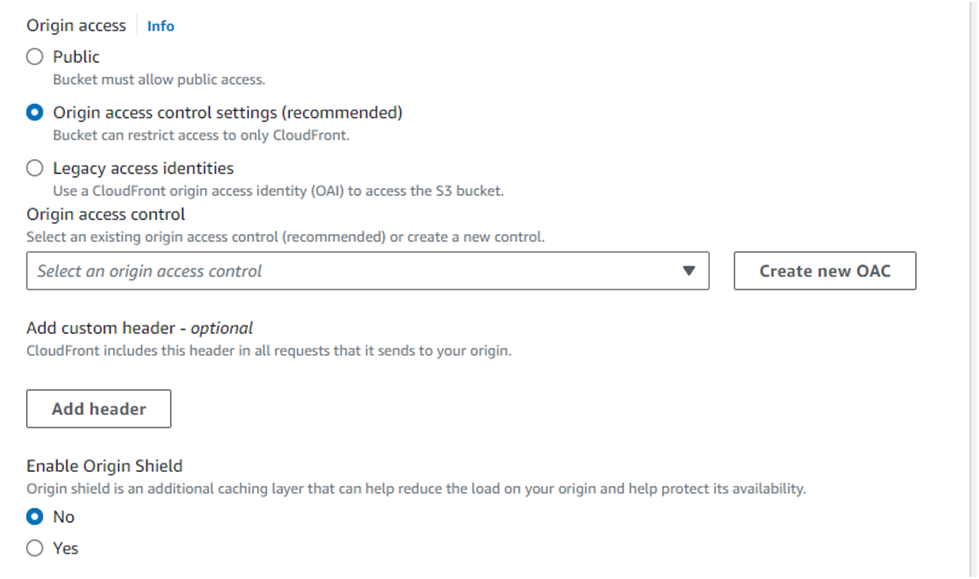
Under Create control setting, enter the following values:
Name: by Default it will have
Signing behavior: Ensure Sign requests is selected
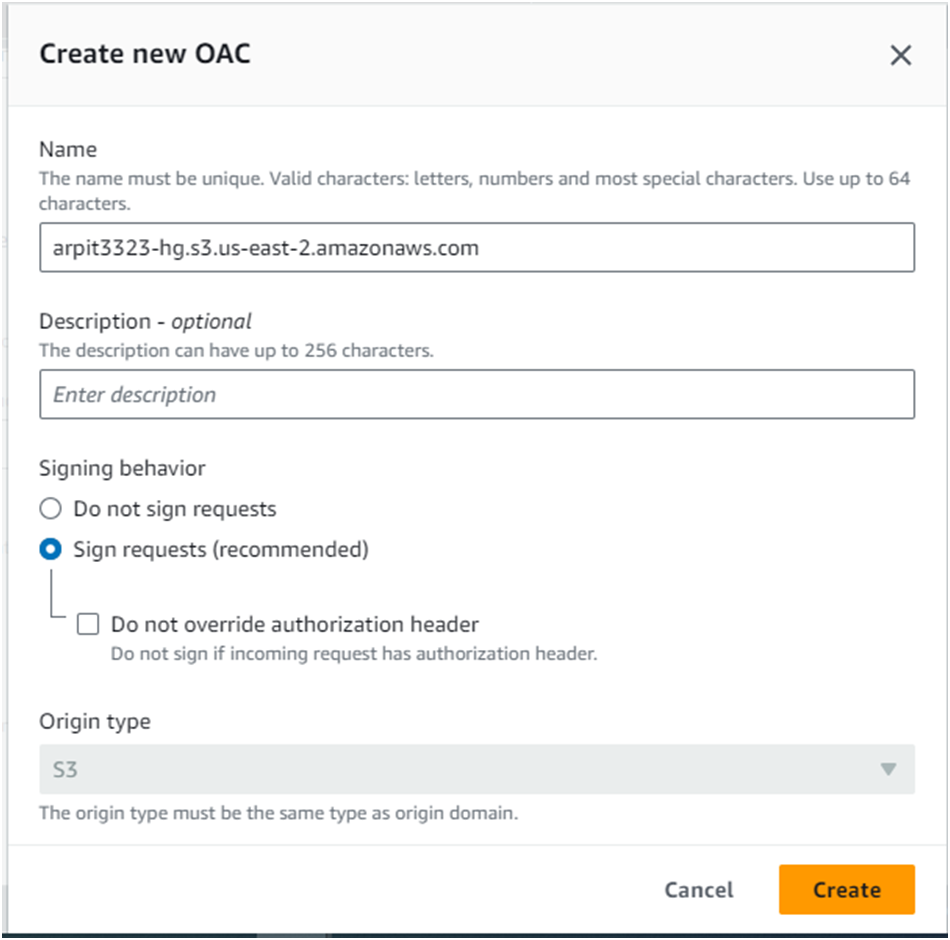
Origin access control secures S3 origins by allowing access to only designated distributions.
This follows AWS best practice of using IAM service principals to authenticate with S3 origins.
Click Create
Leave all other fields in this section as well as the Default cache behavior section as their default values.
Select Do not enable security protections under Web Application Firewall (WAF):
Note: You can safely ignore the Custom SSL Certificate error
Scroll down to Settings, and in the Price class selection, select Use only North America and Europe
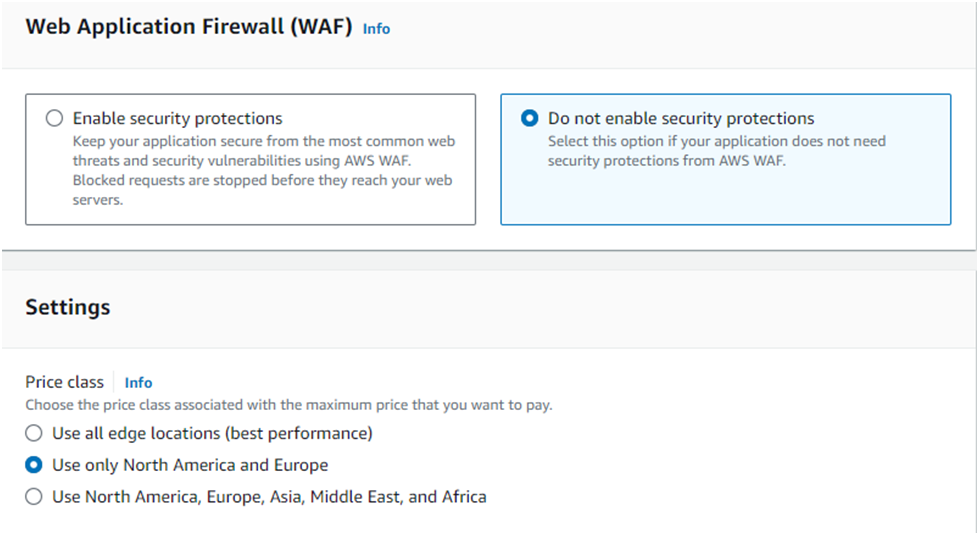
In the Default root object field, enter index.html.
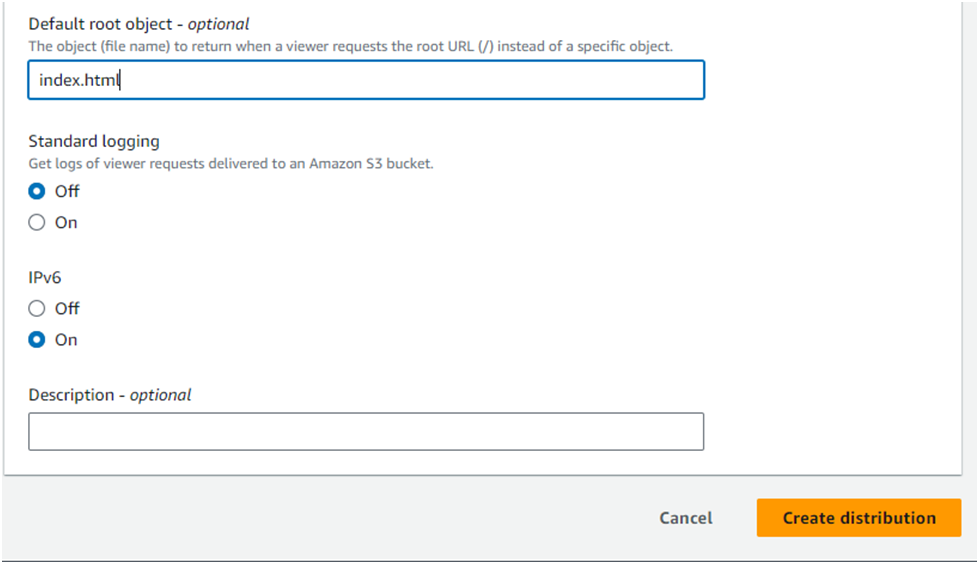
CloudFront will serve the default root object when the base distribution URL is requested.
You are setting this field because Amazon CloudFront doesn’t always transparently relay requests to the origin.
If you did not set a default root object on the distribution you would see an AccessDenied error when you access the CloudFront distribution’s domain later in this lab step.
To finish configuring your distribution, at the bottom of the page, click Create distribution:
You will be brought to the distribution details page.
CloudFront automatically assigns an ID (top of the page) and a Distribution domain name to the distribution and starts updating the edge locations to serve your content:
Click Copy policy at the top of the page:
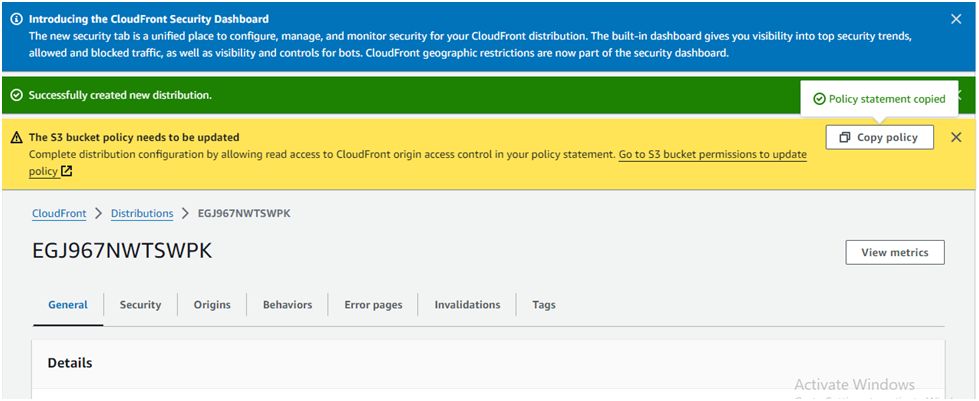
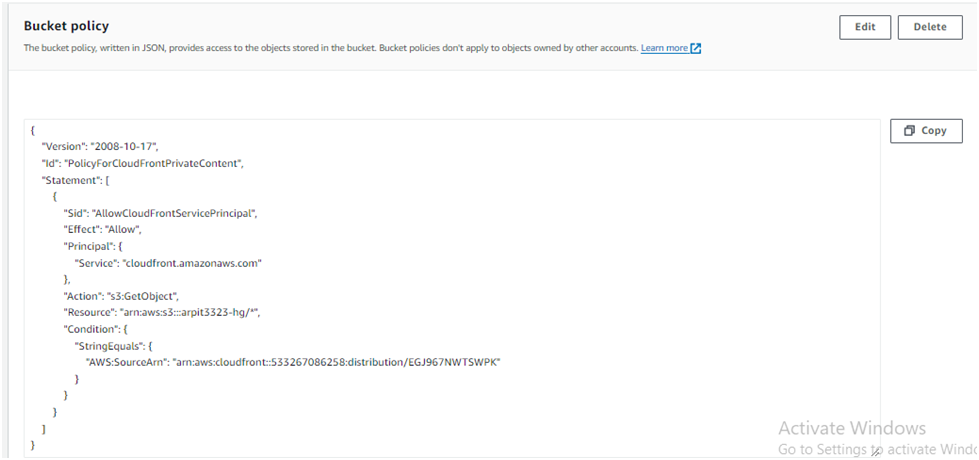
This policy provides a new bucket policy that provides the s3:GetObject permission to the distribution.
This allows for blocking all public access to the S3 bucket while maintaining access to the website via the distribution.
To implement the policy, return to the bucket you created, click the Permissions tab, scroll down to the Bucket policy section, click Edit, paste the policy you copied, and click Save changes
Open S3 in new tab and Select Your S3 bucket
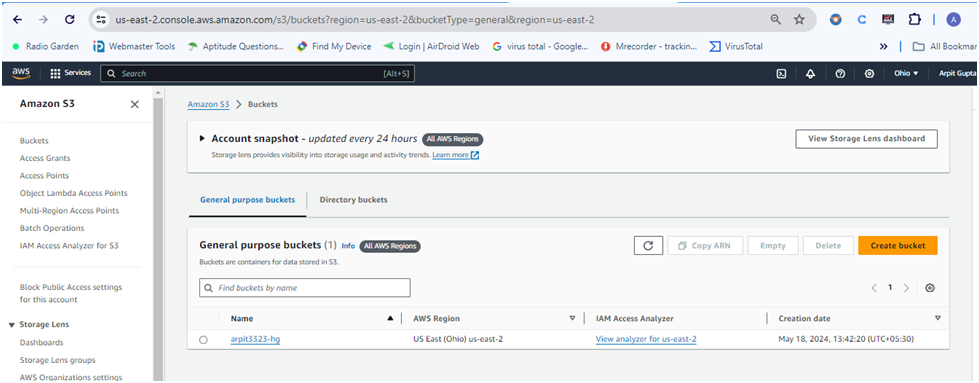
Click on Permissions tab inside Bucket

Go to Bucket policy & click on Edit and
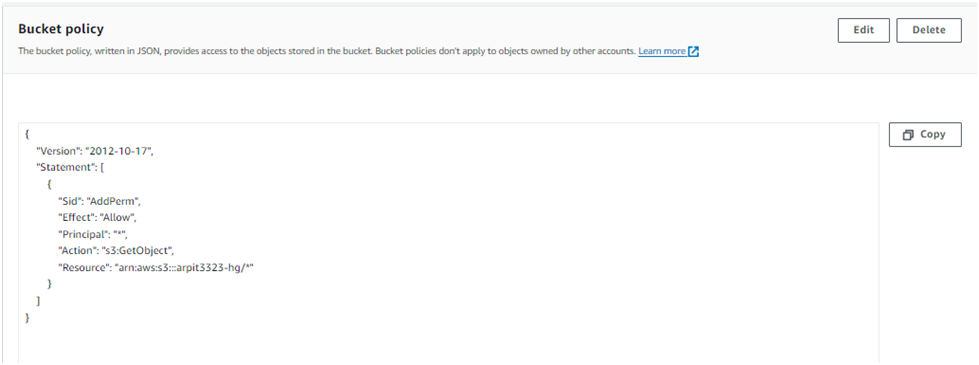
Update the Copied Policy from Cloudfront & click on Save Changes
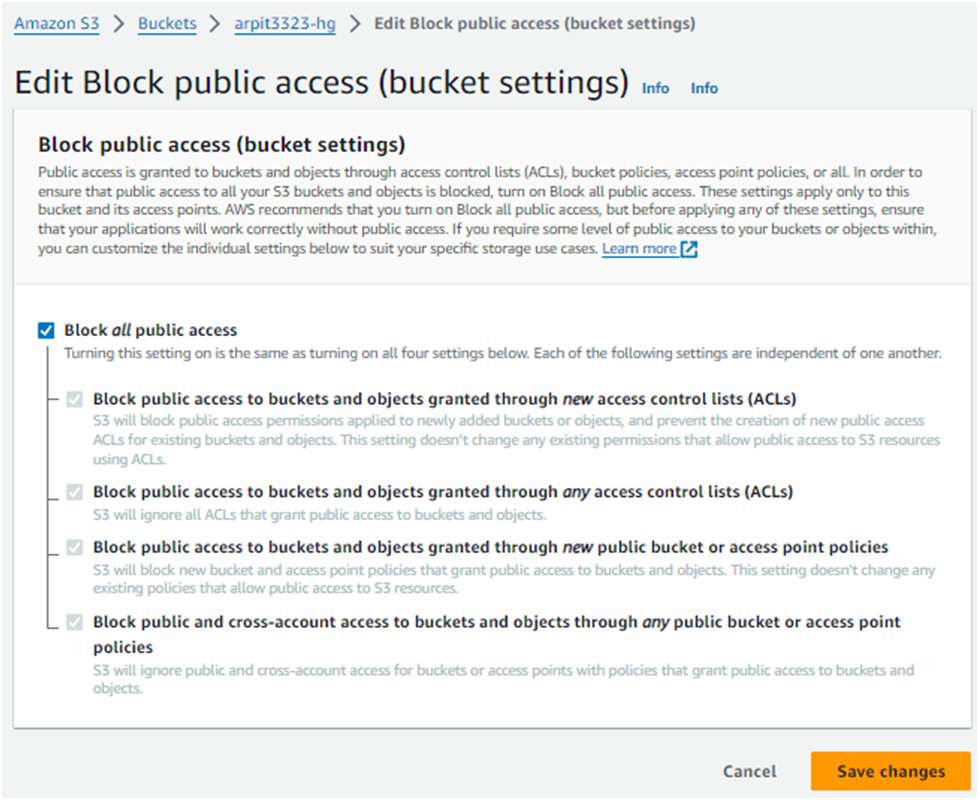
Under the Block public access (bucket settings) section click Edit,

select the Block all public access box, click Save changes,
enter confirm into the field, and click Confirm:
Step 4: Test Your Website
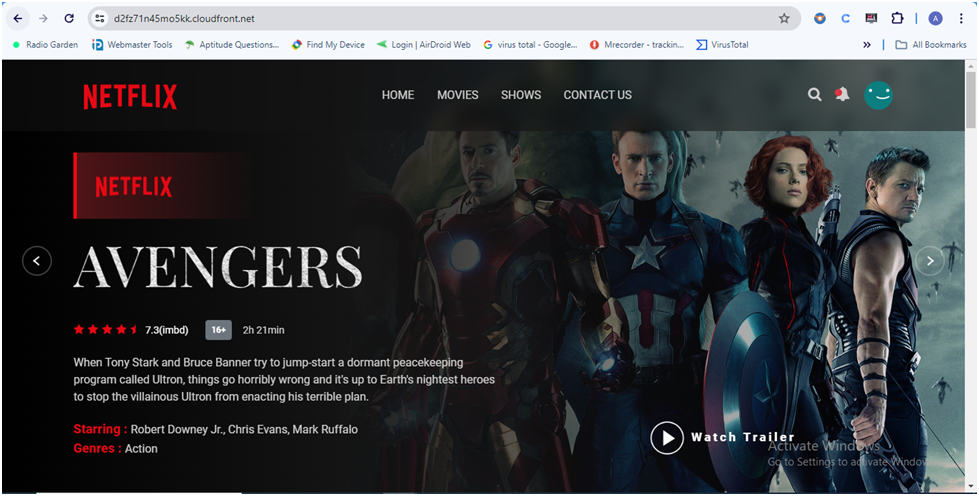
Return to the CloudFront Distributions and Enter into Cloudfront Distributions to copy the Domain name

- Paste the domain name into the address bar of a new browser tab.
You will see the website that you uploaded to your Amazon S3 bucket display:
Additional Considerations
Enable HTTPS: CloudFront provides SSL/TLS certificates by default. Ensure your CloudFront distribution is configured to use HTTPS.
Cache Invalidation: If you update your website content, you may need to invalidate CloudFront cache to reflect changes immediately. This can be done in the CloudFront console under the Invalidations tab.
Monitoring and Logging: Enable logging for your S3 bucket and CloudFront distribution to monitor traffic and access patterns.
By following these steps, you can successfully host and serve a static website using Amazon S3 and CloudFront, ensuring high availability and low latency for your visitors.
Subscribe to my newsletter
Read articles from ARPIT GUPTA directly inside your inbox. Subscribe to the newsletter, and don't miss out.
Written by

ARPIT GUPTA
ARPIT GUPTA
Hey there! 👋 I'm Arpit Gupta, a DevOps enthusiast with a passion for all things AWS and technology. Currently embarking on a journey of learning and growth, I'm excited to share my experiences and insights into the world of cloud computing and DevOps through my blogs. 🛠️ My main focus? Harnessing the power of AWS services, refining CI/CD pipelines, and delving into the realm of infrastructure as code. Whether you're a fellow enthusiast or just curious about DevOps, let's embark on this journey together and thrive in the dynamic DevOps landscape. 🌐 Feel free to reach out to me for friendly discussions, exchanging experiences, and learning opportunities. Here's to embracing the learning process and flourishing in the ever-evolving world of AWS and DevOps technology!