Setting Up and Testing a React Application with Vitest
 Oluwafemi Sosanya
Welcome to the first part of our detailed series on setting up and testing a React app. Configuring and testing a React app can be daunting, especially when it comes to ensuring that your components, hooks, and utilities work as expected.
In this article, we will guide you through setting up Vitest, a modern and fast testing framework, along with React Testing Library to create a robust testing environment for your React application. This is the first part of a series where we will cover various aspects of testing in React, including component testing, hook testing, unit testing helpers, simulating timer events, and testing components and hooks under different routes.
Prerequisites
You should have a React app running but if you'd like to follow through with this post you can initiate a new VITE React Typescript App.
vitestis the test runner itself@testing-library/reactprovides utilities for testing React components@testing-library/jest-domadds custom Jest matchers for asserting on DOM nodesjsdomis a JavaScript implementation of the WHATWG DOM and HTML standards, used for simulating a browser environment
yarn add -D @testing-library/dom @testing-library/jest-dom @testing-library/react jsdom vitest
Configuring Vitest
Create a setupTest.ts file in the root of the app so that Vitest expect method can incorporate the matchers from this package @testing-library/jest-dom. This way Vitest key assertion methods will have access to assertion methods like toHaveTextContent() | toHaveTextContent() .
import "@testing-library/jest-dom/vitest";
Next, create a vitest.config.ts file in the root of your application an update as below
import { defineConfig } from "vite";

export default defineConfig({
    test: {
        globals: true,
        environment: "jsdom",
        setupFiles: "./setupTest.ts",
        css: true,
        pool: "forks",
        include: ["**/__tests__/**/*.[jt]s?(x)", "**/?(*.)+(spec|test).[jt]s?(x)"],
    },
});
Writing Test
With the setup complete, you can start writing tests for your React components, hooks and functions.
Testing a React Component
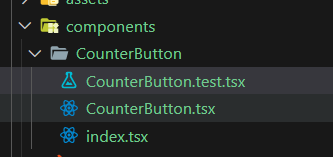
Create a component to test with. We'll be creating a simple CounterButton.tsx and CounterButton.test.tsx files inside a folder titled CounterButton.

In CounterButton.tsx, we have a component with a simple functionality whenever the button is clicked, the count increases
// CounterButton.tsx
import { useState } from "react";

const CounterButton = () => {
    const [count, setCount] = useState(0);

    return (
        <button data-testid="counter-button-test-id" onClick={() => setCount((count) => count + 1)}>
            count is {count}
        </button>
    );
};

export default CounterButton;
In CounterButton.test.tsx , We are ensuring that the <CounterButton /> component renders correctly with the initial count value of 0, and the count increments when the button is clicked, including multiple times. It uses the React Testing Library's render function to render the component and fireEvent to simulate user interactions. The assertions are made using Jest's expect statements and the provided matchers from the React Testing Library, such as toBeInTheDocument() and toHaveTextContent().
// CounterButton.test.tsx
import { fireEvent, render, screen } from "@testing-library/react";
import CounterButton from "./CounterButton";

describe("CounterButton", () => {
    test("Renders conponent correctly with initial value.", () => {
        render(<CounterButton />);

        const counterBtnElement = screen.getByTestId("counter-button-test-id");
        expect(counterBtnElement).toBeInTheDocument();
        expect(counterBtnElement).toHaveTextContent("count is 0");
    });

    test("increments count when button is clicked", () => {
        render(<CounterButton />);
        const counterBtnElement = screen.getByTestId("counter-button-test-id");
        fireEvent.click(counterBtnElement);
        expect(counterBtnElement).toHaveTextContent("count is 1");
    });

    test("increments count correctly multiple times", () => {
        render(<CounterButton />);
        const counterBtnElement = screen.getByTestId("counter-button-test-id");
        fireEvent.click(counterBtnElement);
        fireEvent.click(counterBtnElement);
        expect(counterBtnElement).toHaveTextContent("count is 2");
    });
});
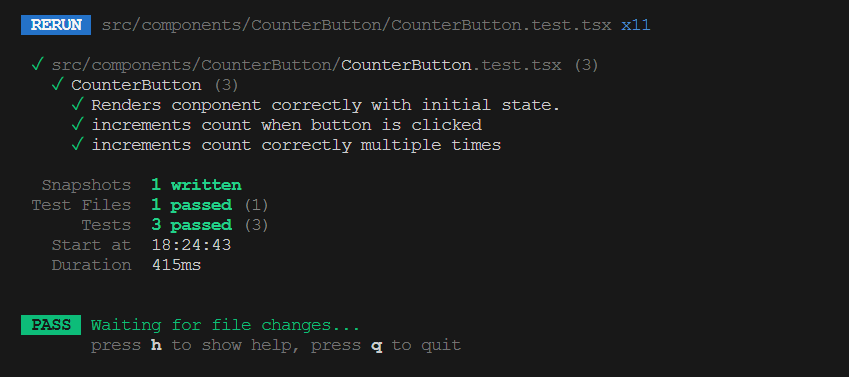
Run yarn vitest in your terminal and you should get a successful response like the image below

Testing a React Hook
Create a custom hook to test with. We'll be creating a simple useCounter.tsx and useCounter.test.tsx files inside a folder titled useCounter.
useCounter.tsx provides a simple counter functionality. It manages a state variable count and exposes two functions, increaseCountHandler and decreaseCountHandler, to increment and decrement the count value, respectively.
// useCounter.tsx
import { useState } from "react";

const useCounter = (initialCount = 0) => {
    const [count, setCount] = useState(initialCount);

    const increaseCountHandler = () => {
        setCount((prevCount) => prevCount + 1);
    };

    const decreaseCountHandler = () => {
        if (count > 0) {
            setCount((prevCount) => prevCount - 1);
        }
    };

    return { count, increaseCountHandler, decreaseCountHandler };
};

export default useCounter;
useCounter.test.tsx aims to ensure the correct behaviour of the useCounter() hook by testing the initialization of the count with different initial values, incrementing the count, and decrementing the count while handling edge cases like preventing the count from going below 0.
import { renderHook } from "@testing-library/react";
import { act } from "react";
import useCounter from "./useCounter";

describe("useCounter", () => {
    test("should initialize count with the initial value", () => {
        const { result } = renderHook(() => useCounter(5));
        expect(result.current.count).toBe(5);
    });

    test("should initialize count with default value of 0", () => {
        const { result } = renderHook((useCounter) => ());
        expect(result.current.count).toBe(0);
    });

    test("should increase count by 1", () => {
        const { result } = renderHook(() => useCounter(5));
        act(() => {
            result.current.increaseCountHandler();
        });
        expect(result.current.count).toBe(6);
    });

    test("should decrease count by 1", () => {
        // Rest of the code...
    });

    test("should not decrease count below 0", () => {
        // Rest of the code...
    });
});
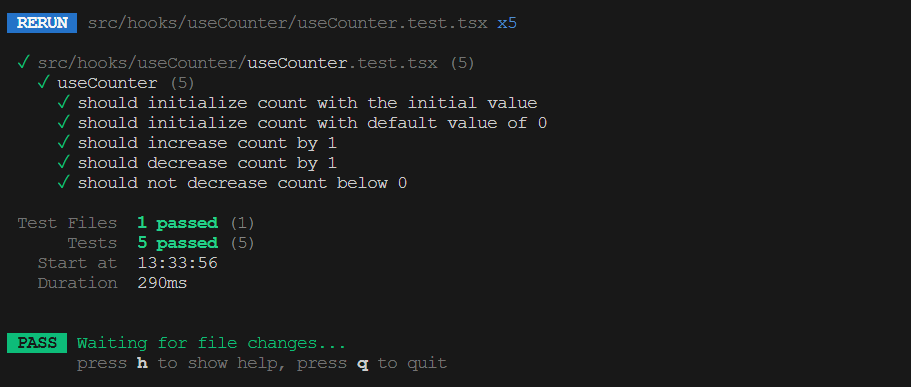
And the result should be like the image below

Unit Testing Helpers
Create a helper function to test with. We'll be creating a simple helpers.ts and helpers.test.ts files inside a folder titled helpers.
// helper.ts
export const formatDate = (date: Date) => {
    const year = date.getFullYear();
    const month = (date.getMonth() + 1).toString().padStart(2, "0");
    const day = date.getDate().toString().padStart(2, "0");

    return `${day}/${month}/${year}`;
};
write a unit test for formartDate() function expected to return any date passed in the parameter in DD/MM/YYYY format
import { formatDate } from ".";

describe("Helper functions", () => {
    test("formatDate() to DD/MM/YYYY format", () => {
        const date = new Date("2023-05-18T10:00:00Z");
        expect(formatDate(date)).toBe("18/05/2023");
    });
});
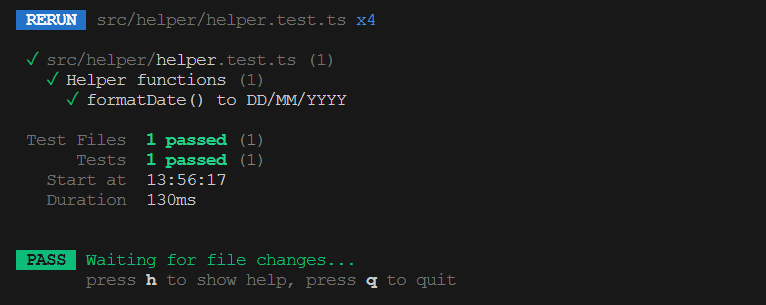
You should have a result like the one below

Congratulations! By following these examples, you can effectively test your React components, hooks, and utilities using Vitest, simulating various scenarios and ensuring your application works as expected.
Thank you for following along with this first part of our series on testing React applications. We hope you've found this guide informative and easy to follow.
Stay tuned for the next articles in this series, where we will dive deeper into advanced testing techniques and best practices to ensure your React application is thoroughly tested and maintainable.
Subscribe to my newsletter
Read articles from Oluwafemi Sosanya directly inside your inbox. Subscribe to the newsletter, and don't miss out.
Written by

Oluwafemi Sosanya
Oluwafemi Sosanya
I'm a trained Teacher, Sound Engineer and a Detail-oriented Software Developer