What are Web Push Notifications? And How do they work?
 Pradip Chaudhary
Table of contents

Introduction
In this article, I will answer some prominent questions on web push notifications.
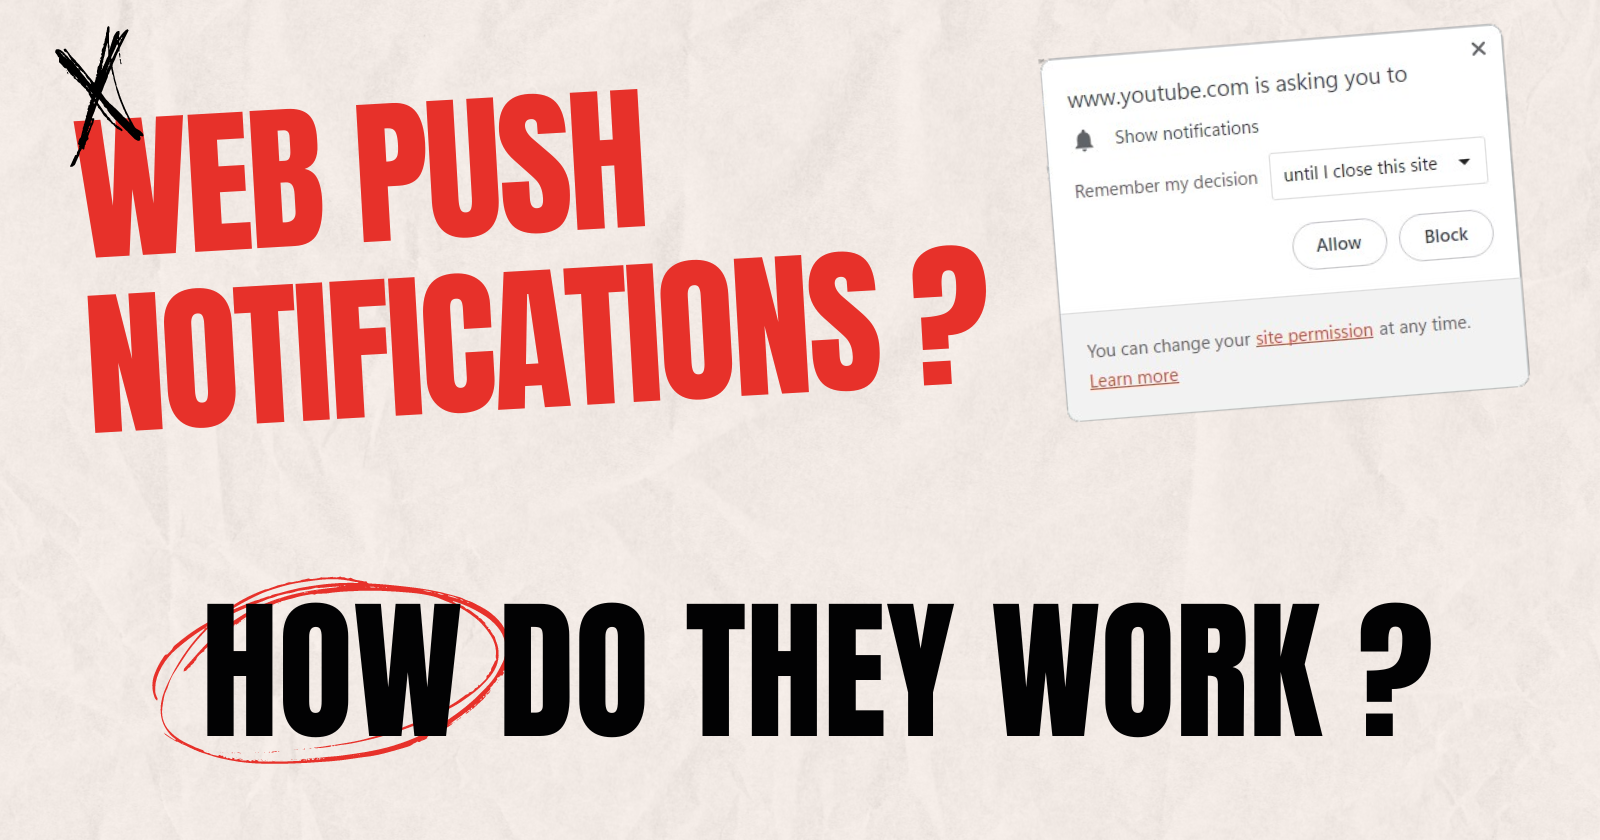
Web Push Notifications (aka Browser Push Notifications) is a way to send some message to users even when they are not actively using the website. This provides a very convenient way for website owners to increase user engagement on the website.
Web push notifications are shown to the user differently based on what platform, device, and browser the user is using.
Push Messages and Notifications are two separate but complementary browser technologies that work hand in hand to enable Web Push Notifications for websites. Push messages are a way for your server to send messages to the users' browsers. The notifications are what display that message to the user. It's possible to show the notifications without receiving the push message when the user is using your website. However, browsers currently don't support sending just a push message (silent push) to the user. You have to show the notification for the message you are sending to the user.
First, let's learn how Web Push Notifications differ from App Push Notifications. They drive people people crazy when they don't work as per people's expectations.
Difference between Web Push Notifications and App Push Notifications
Apps use their own or any third-party Push Notifications server which maintains the connection with their app on users' devices and can send Push Notifications. The user receives a notification for the apps even when the app is closed.
However, our website doesn't have the power to keep a connection with any server when they are closed. So, it has few limitations as compared to apps. For the websites, the browser companies maintain a Push Service or may use any other third-party push service. The website needs to send the notification that they want to show to users to these Push Services through Web Push Protocol. I will explain the Web Push Protocol in detail in the next article of this series.
How do Web Push Notifications work?
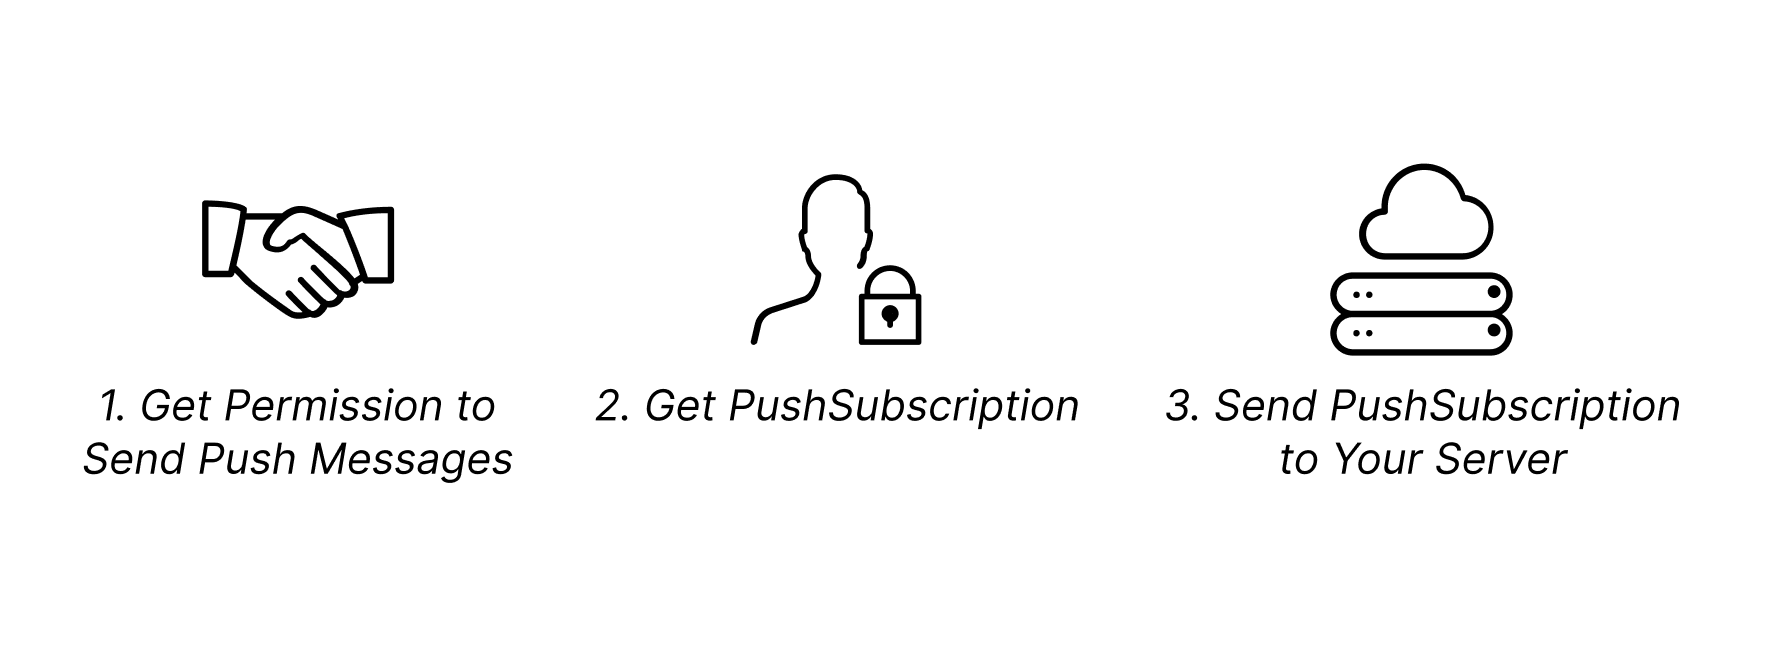
At a high level, the key steps for implementing push notifications are:
Adding frontend logic to ask the user for permission to send push notifications and then sending the unique client identifier to the server for storage.
Adding backend logic to send push messages to the user through the browser's push service.
Adding frontend logic to receive messages and display them as notifications.
I will create a complete code guide for sending push notifications in the upcoming articles. For now, let's understand step-by-step the overview of how push notifications are sent.
Get permission to send push notifications
First, your website needs a user's permission to send push notifications. To get the user notification, you need to call the Notification.requestPermission() function which will prompt the user for permission. However, this function should only be called on some user actions like a button click (which is also called the soft ask method) because most browsers don't allow certain actions without any user interaction and the notifications permission is one of them.
Subscribe the client to push notifications
After getting the permission, your website needs to subscribe the user for the push notifications. This is done through the Push API of browsers. You'll need to provide a public key during the subscription process (more on that later). The browser will then contact the push service for the subscription and return a PushSubscription object. This object data has to be stored by your server to send the push notifications afterward.

Send a push message
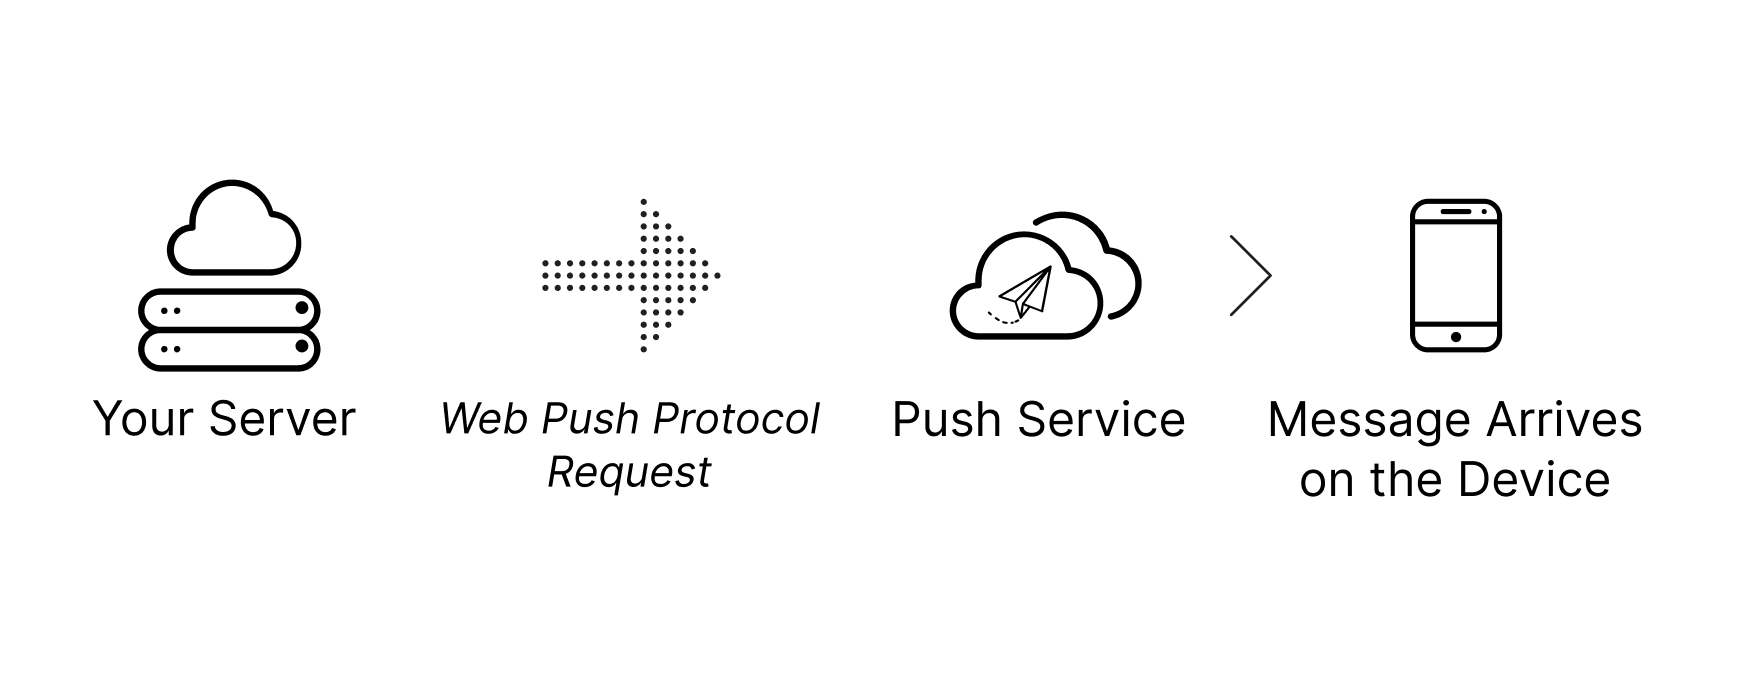
Your server doesn't directly send messages to the user. It has to send the message to the push service which is controlled by the users' browser vendor. The request that your server sends to the push service is called a web push protocol request. It should include:
what is the data to be sent
to which user the data has to be sent
Instructions to the push service on how it should deliver the push message. For example, you can specify that the push service should stop attempting to send the message after 10 minutes.
Your server doesn't have to construct the raw web push request itself. Some libraries can handle that for you, such as the web-push-libs.

The push service receives the request, authenticates it, and then sends it to the appropriate client (user). If the client's browser is offline, the push service will queue the message and wait for the browser to come online.
You need to make sure you send the push message request to the correct push service (this is also taken care of by web-push-libs). The PushSubscription data that the browser returned to you during the subscription process provides this information. This is what a PushSubscription object looks like:
{
  "endpoint": "https://fcm.googleapis.com/fcm/send/c1KrmpTuRm…",
  "expirationTime": null,
  "keys": {
    "p256dh": "BGyyVt9FFV…",
    "auth": "R9sidzkcdf…"
  }
}
The domain of the endpoint is essentially the push service, and the endpoint's path is the client identifier using which the push service determines which client to send the message. The keys are used for encryption.
Encrypt the push message
The data that you send to the push service must be encrypted using the keys provided in the PushSubscription. It prevents the push service from reading the data. The browser might be using a third-party push service which can be unsafe or insecure. So it's best to encrypt your messages.
Sign your web push protocol requests
So, now what prevents others who get to know your users' PushSubscription's endpoint. That's where signing a request comes into the picture. This is only necessary in Chrome right now but other browsers may also require this in the future.
This authentication works as follows:
You generate a public and private key once for your server. These are also called the application server keys. You might also see them referred to as VAPID keys. VAPID is the spec that defines this authentication process.
Every time you subscribe a client to push notifications, you provide your public key. The push service associates this public key with the endpoint it generated for the device.
When you send a web push protocol request, you sign some JSON data with your private key.
When the push service receives the request, it uses the stored public key to authenticate the signed information. If the signature is valid then the push service knows that it has indeed come from your server (Make sure your Private key is not leaked otherwise anyone can sign requests on your behalf).
Customize the delivery of the push message
The web push protocol request specification also includes parameters that allow you to customize the push service's message delivery attempts to the client. For instance, you can modify:
The Time-To-Live (TTL) of a message, indicating how long the push service should try to deliver a message.
The message urgency, which is beneficial if the push service is conserving the client's battery life by only delivering high-priority messages.
The message topic, which replaces any pending messages of the same topic with the most recent message.
Receive and display the pushed messages as notifications
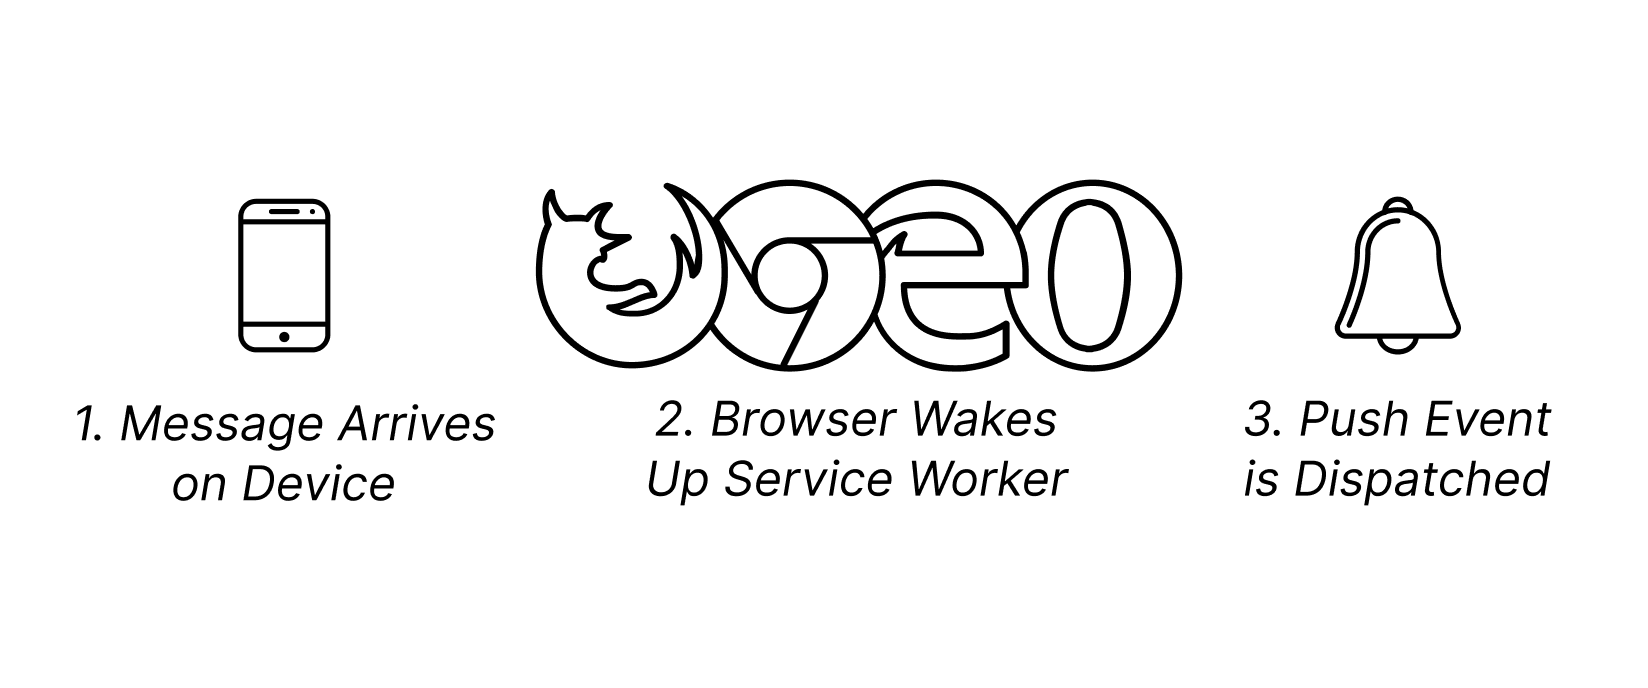
The push service delivers the message to the user as soon as he is online. When a client's browser receives the message, it decrypts the message and dispatches a push event to your service worker. A service worker is just a javascript code that can run in the background even when your website is not open.
In the push event handler of your service worker, you need to call ServiceWorkerRegistration.showNotification() to display the message as a notification. The SeviceWorkerRegistration can be accessed through self.registration.

Conclusion
We've covered a lot of ground in understanding how web push notifications work under the hood. From getting permission to subscribing the client, encrypting the message, authenticating requests, customizing delivery, and finally handling the push event to display the notification - it's a multi-step process that might seem daunting at first.
But don't worry, in the upcoming articles, I'll provide a complete code walkthrough to implement web push notifications step-by-step. We'll dive into the nitty-gritty details, explore some helpful libraries, and get our hands dirty with code examples.
By the end, you'll be a web push notification ninja, ready to engage your users even when they're not actively browsing your website. Just remember to use this power responsibly and avoid going overboard with spam notifications that'll send your users running for the hills.
So stay tuned, grab a cup of coffee (or beverage of choice), and get ready to level up your web game with the magical world of push notifications!
Subscribe to my newsletter
Read articles from Pradip Chaudhary directly inside your inbox. Subscribe to the newsletter, and don't miss out.
Written by
