How to Buy a Shared Hosting Plan: A Simple Guide for Beginners.
 Joan
Joan
Are you thinking about starting a website but feel overwhelmed by all the tech talk?
Don't worry; I'm here to help you understand how to buy a shared hosting plan in a friendly and straightforward way with Cloudnetvox.
What is Shared Hosting?
First off, let's clarify what shared hosting is. Imagine living in an apartment building where you share amenities like the pool, parking lot, and playground with your neighbors. Shared hosting is similar. Your website will live on a server shared with other websites. It's cost-effective and perfect for small to medium sites, blogs, or small businesses.
Step 1: Assess Your Needs
Before you jump into buying, think about what you need. Not all websites require the same amount of resources. Consider these points:
Traffic: How many visitors do you expect?
Website Type: Is it a blog, a portfolio, or a small online store?
Tech Needs: Will you need special software for your website?
Knowing this will help you choose a plan that fits like a glove.
Step 2:Choose Cloudnetvox.
There are tons of hosting providers out there but Cloudnetvox is the best there is.
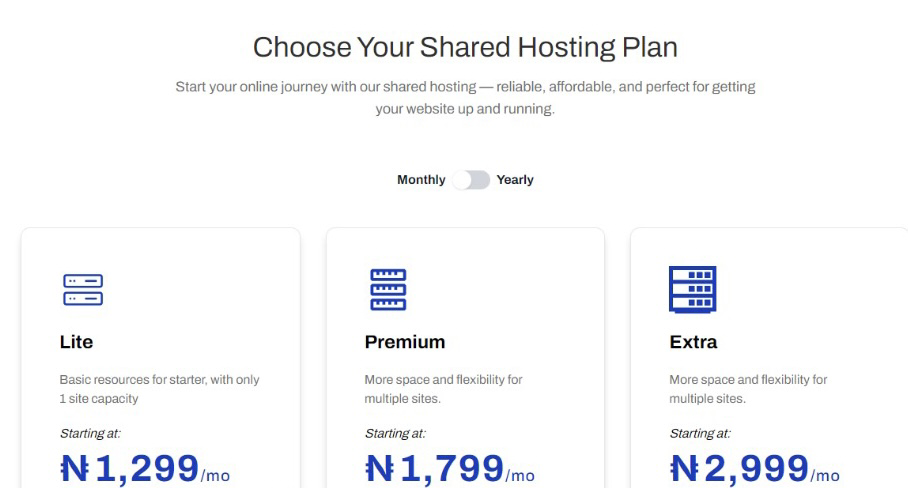
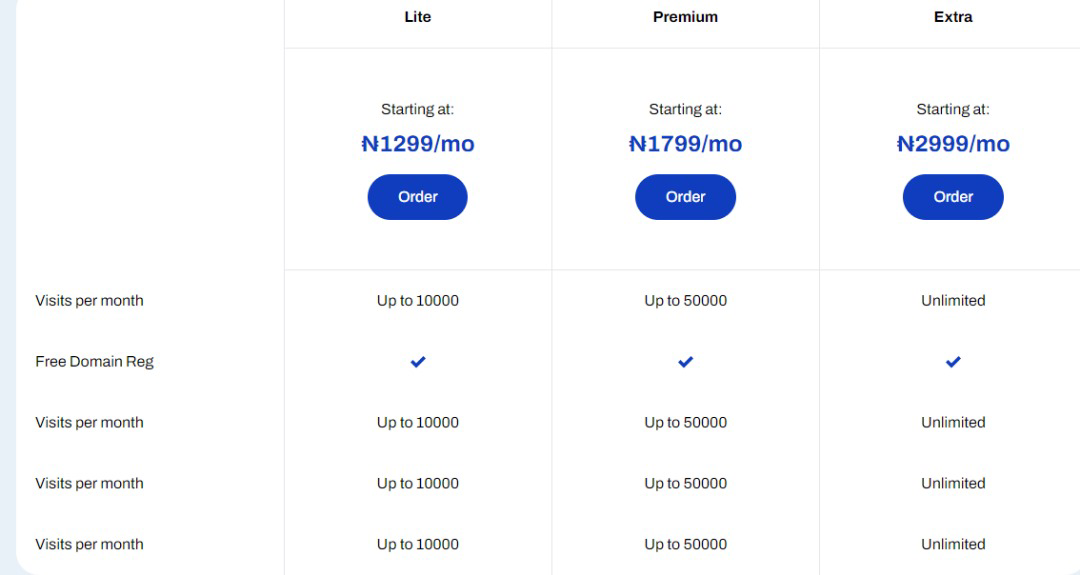
Step 3: Compare Hosting Plans

Here’s what to look out for:
Storage: How much space you get to store your website files.
Bandwidth: The amount of data transfer allowed each month.
Email Accounts: How many email addresses specific to your domain.
Support: 24/7 support is ideal, especially if you're starting out.
Step 4: Check for Extras.

We've got extras curated to make your hosting experience a breeze. These include:
Domain name: If you want to purchase one, check out or article on how to get a domain name.
SSL Certificate: Essential for security, especially if you handle sensitive information.
Backup: Regular backups can save your skin in case of data loss.
Step 5: Sign Up
Found the perfect plan? Great! Now, it’s time to sign up. This usually involves creating an account, choosing your plan, and making a payment.
You'll typically be guided through the process of setting up your website.
Step 6: Set Up Your Website.
After purchasing your plan, you can start setting up your site. We offer a control panel like cPanel, which makes it easy to install WordPress or other content management systems with just a few clicks.
Step 7: Launch and Go Live
Once everything’s set up, and you’ve tested your site to make sure everything works, it’s time to launch. Publish your content, and share your site with the world!
Buying a shared hosting plan doesn’t have to be complicated. Take it one step at a time, and don’t rush your decision. With the right plan, and with Cloudnetvox, your website can flourish without breaking the bank.
Feel free to drop a question in the comments if you need more help or want to share your hosting experiences. Happy hosting!
Subscribe to my newsletter
Read articles from Joan directly inside your inbox. Subscribe to the newsletter, and don't miss out.
Written by
