Streamlining E-Commerce Operations with Robust Data Handling via Amazon S3
 Sri Durgesh V
Table of contents

Introduction:
Welcome back to our journey through the cloud-based elements that power our e-commerce platform Today, we're delving into how we leverage Amazon S3 to streamline the management of order details. Let's explore how S3's features empower us to securely store and quickly access vital order information, thereby ensuring a smooth and uninterrupted shopping experience for our customers.
Boosting E-commerce Performance with Secure Data Handling
Amazon Simple Storage Service (S3) plays a crucial role in our data management approach, offering a dependable and scalable platform for managing order details. Our utilization of S3 is tailored to meet the unique demands of our e-commerce operations, focusing on the secure storage and efficient access of crucial order information.
Upon every order placed on our platform, we meticulously record and archive essential details such as the items purchased, the customer's name, delivery address, and the precise transaction time within Amazon S3. This strategic deployment ensures that our data is safeguarded and readily accessible, facilitating swift retrieval whenever required, thus enhancing the overall efficiency and reliability of our e-commerce services.
Unlocking Efficiency with Amazon S3:
Scalability : Amazon S3 adapts seamlessly as our platform expands, ensuring we can store growing volumes of order data without limits.
Reliability: S3's robust system guarantees constant availability of our order details, streamlining processes for both users and our team.
Security: With S3's advanced security measures, including encryption and access control, we protect user data from unauthorized access, prioritizing privacy and trust.
Seamless Integration of Amazon S3 into Our E-Commerce Application
Integrating S3 with Our Application:
Incorporating Amazon S3 into our e-commerce platform was a straightforward process. Here's how we accomplished it:
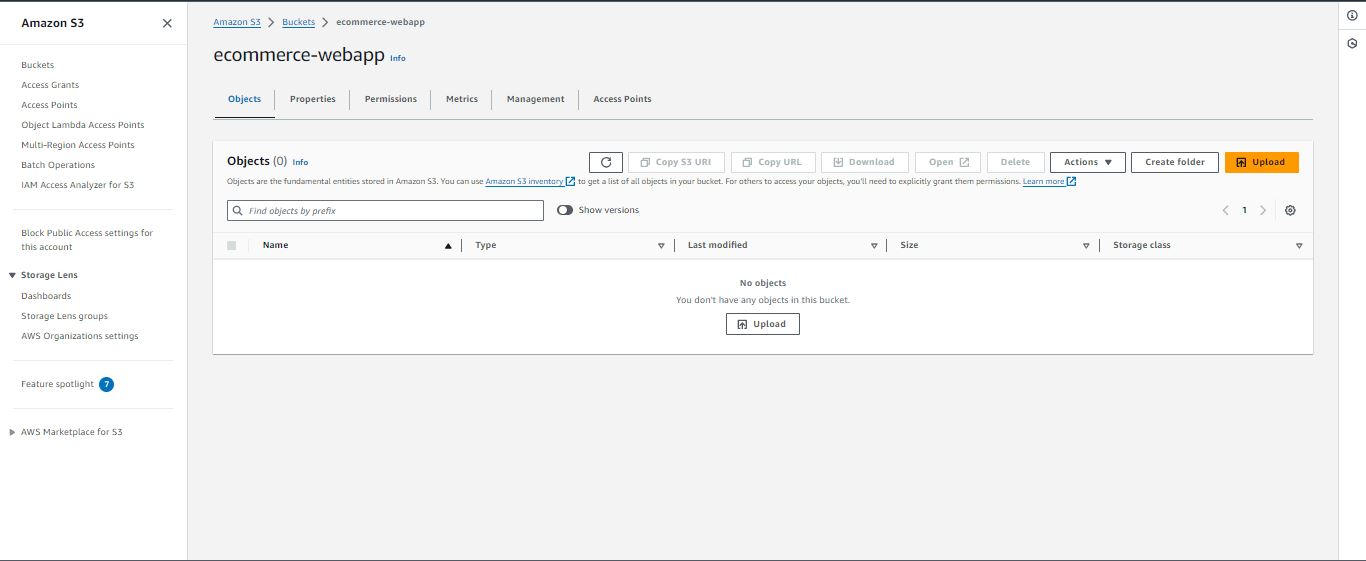
Create an S3 Bucket: We started by creating an S3 bucket dedicated to storing order details. This bucket serves as the central repository for all order-related data.

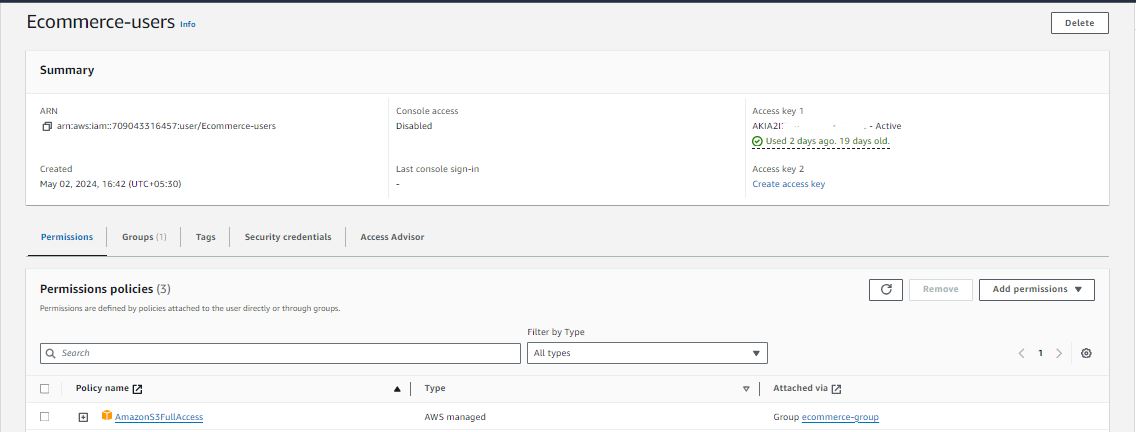
Set Up IAM Roles: To ensure secure access, we configured IAM roles and policies that grant our application the necessary permissions to read from and write to the S3 bucket.

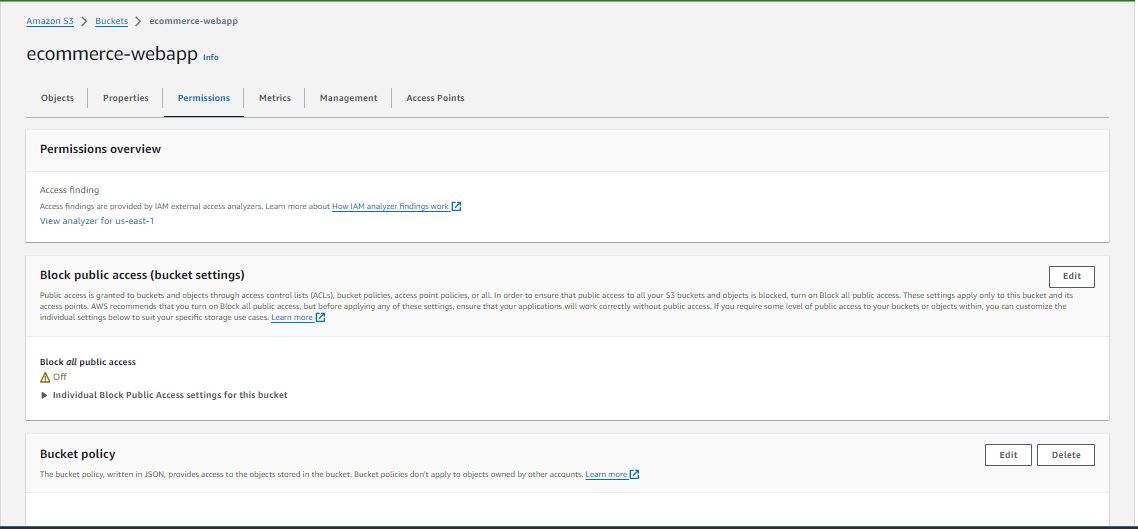
Bucket Policy: A bucket policy enables making a whole bucket or a specific directory within a bucket public. Another method to grant public access involves using a bucket policy, which I prefer. Here's how to create one, with detailed instructions.
Understanding CORS in S3 Permissions: CORS (Cross-Origin Resource Sharing) settings in S3 bucket permissions control access to resources from different origins. Configure CORS to define which web domains can access your S3 resources securely. Ensure seamless data exchange while maintaining security protocols with precise CORS configurations.
Follow these straightforward steps to set up CORS in your S3 bucket's permissions settings.
Navigate to the project-specific bucket you've set up and select the Permissions tab.

Navigate to CORS settings and select
Edit.
Insert this JSON file into the edit form.
 [
     {
         "AllowedHeaders": [
             "*"
         ],
         "AllowedMethods": [
             "GET",
             "PUT",
             "POST",
             "DELETE"
         ],
         "AllowedOrigins": [
             "your-allowed-origin-here"
         ],
         "ExposeHeaders": []
     }
 ]
Replace "your-allowed-origin-here" with the specific origins you want to allow access to your S3 resources from. (Ex : http://localhost:3000)
Integrating AWS SDK for JavaScript into My React E-Commerce Application
In this segment, I delve into the process of transferring order data to Amazon S3 and subsequently retrieving it to present user order details within my React-based e-commerce web application. I begin by providing a broad overview of the foundational concepts, transitioning into detailing the project-specific integration and utilization of AWS cloud services.
Leveraging Amazon S3 for Order Data Management
In this section, we will explore how to transfer order data to Amazon S3 and subsequently retrieve it to display user order details within our React-based e-commerce web application.
Setting up AWS SDK and S3 Integration
Configure AWS SDK: Before interacting with AWS services, we need to configure the AWS SDK with our AWS credentials and other settings. This involves providing our Access Key ID, Secret Access Key, and the desired AWS region.
 AWS.config.update({
   accessKeyId: 'YOUR_ACCESS_KEY_ID',
   secretAccessKey: 'YOUR_SECRET_ACCESS_KEY',
   region: 'us-east-1',
   endpoint: 'https://s3.amazonaws.com',
 });
Create S3 Instance: After configuring the AWS SDK, we create an instance of the AWS.S3 service, which provides methods and functionality for interacting with Amazon S3.
const s3 = new AWS.S3();
Uploading Order Data to Amazon S3
To upload order data to Amazon S3, we utilize the s3.upload method, which takes an object with parameters such as the bucket name, object key (file name), object data, and content type.
const params = {
  Bucket: 'your-bucket-name',
  Key: 'your-file-key.json', // Use a suitable key as the file name
  Body: orderDetailsJson, // Data in JSON format
  ContentType: 'application/json', // Content type
};

try {
  await s3.upload(params).promise();
  console.log('File uploaded successfully');
  // Perform additional actions after successful upload
} catch (error) {
  console.error('Error uploading file to Amazon S3:', error);
  // Handle the error
}
Project-Specific Implementation
Now, let's dive into the project-specific code snippets related to uploading order details to Amazon S3 and fetching order history.
Uploading Order Details to S3:
Prepare Order Details: Generate a unique order ID, create an
orderDetailsobject containing information such as order ID, cart items, user data, timestamp, and user ID, and convert it to a JSON string.const orderId = uuidv4(); const orderDetails = { orderId, items: cartItems, userData, timestamp: new Date().toISOString(), userId: profile.username, }; const orderDetailsJson = JSON.stringify(orderDetails);Upload to S3: Construct the
paramsobject with the bucket name, file name derived fromorderId, order details JSON string, and content type. Then, initiate the upload usings3.uploadand handle the success or error scenarios accordingly.const params = { Bucket: 'ecommerce-webapp', Key: `${orderId}.json`, Body: orderDetailsJson, ContentType: 'application/json', }; try { await s3.upload(params).promise(); console.log('Order details uploaded to Amazon S3'); // Clear the cart clearCart(); // Update user attributes in Cognito // ... setShowConfirmationModal(true); } catch (error) { console.error('Error uploading order details to Amazon S3:', error); // Handle the error }
Fetching Order History from S3:
Initialize AWS SDK and Fetch Order History: In the
OrderHistory.jsfile, we initialize the AWS SDK with credentials, fetch the order history from an S3 bucket, and filter the orders based on the current user's ID or email.import AWS from 'aws-sdk'; useEffect(() => { if (!profile) { window.location.href = '/login'; return; } AWS.config.update({ accessKeyId: 'YOUR_ACCESS_KEY_ID', secretAccessKey: 'YOUR_SECRET_ACCESS_KEY', region: 'Your-region', }); const s3 = new AWS.S3(); // ... } const fetchOrderHistory = async () => { try { const response = await s3.listObjectsV2({ Bucket: 'your-bucket-name', }).promise(); const orderFiles = response.Contents || []; const orders = await Promise.all( orderFiles.map(async (file) => { const orderKey = file.Key; if (orderKey.endsWith('.json')) { try { const orderData = await s3.getObject({ Bucket: 'your-bucket-name', Key: orderKey, }).promise(); const orderDetails = JSON.parse(orderData.Body.toString()); if (orderDetails.userId === profile.username || orderDetails.userData.email === profile.email) { return orderDetails; } else { return null; } } catch (error) { console.error('Error parsing JSON data:', error); return null; } } else { return null; } }) ); const filteredOrders = orders.filter((order) => order !== null); setOrderHistory(filteredOrders); setLoading(false); } catch (error) { console.error('Error fetching order history from Amazon S3:', error); setLoading(false); } }; fetchOrderHistory();Fetch and Filter Orders: The
fetchOrderHistoryfunction retrieves order histories from Amazon S3 by listing all objects in the specified bucket and filtering for.jsonfiles containing order data. It fetches each relevant file's data, parses it, and checks against the current user's ID or email. Orders matching the criteria are added to an array, cleaned of null entries, and stored in thefilteredOrdersarray.Update State and UI: Finally,
setOrderHistoryupdates the state withfilteredOrders, andsetLoadingsignals the completion of data fetching. This function is called within auseEffecthook, triggered by changes to theprofilevalue.
Conclusion :
I incorporated Amazon S3 into our e-commerce app to enhance scalability and security for managing orders. Using the AWS SDK, I set up smooth data uploading and downloading processes, boosting the platform's dependability and speed. This move notably enhanced user satisfaction and streamlined operations, leading to better system performance.
Implementing an advanced order management system enhanced my e-commerce platform's scalability and security. By optimizing and integrating with AWS S3, I ensured reliable order data handling. This strategy boosts user satisfaction and efficiency, demonstrating our dedication to a flawless, secure online shopping experience.
Subscribe to my newsletter
Read articles from Sri Durgesh V directly inside your inbox. Subscribe to the newsletter, and don't miss out.
Written by

Sri Durgesh V
Sri Durgesh V
As a Cloud Enthusiast, this blog documents my journey with Amazon Web Services (AWS), sharing insights and project developments. Discover my experiences and learn useful information about different AWS cloud services.