EC2 For Beginners : An Introduction to AWS Services
 manvendra singh
What is AWS ?
"AWS, short for Amazon Web Services, is essentially a vast cloud platform offering a multitude of services". But what does that mean ? 🤔
An simple way to understand is to think of AWS as this Big Mall 🏬l that have these various shops and each of these shops provide different services such as EC2 , S3, IAM and Lambda for small to big start ups and business's all around the world, They come here to get these services. These Services help these start ups to scale operations up or down at an instant level and give them better mobility - as they seem fit.
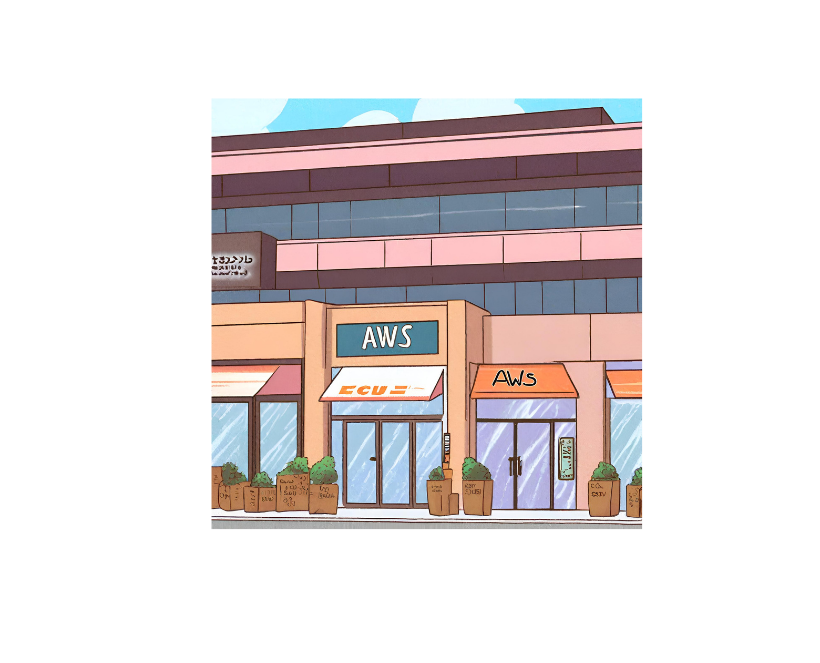
EC2 : 🌥️
Now, just like all those other shops inside the mall, there's this famous one, known as EC2 (Elastic Computer Cloud)🌥️ its an IaaS (Infrastructure as a Service) and what is does is it provide service by allowing you to choose over 750 different types of EC2 ('instances') and all of these are different from one another (based on O.S, RAM, etc..).
Instances are these virtual server set up by AWS so that we can run our application on cloud which is simply someone's else computers 🖥️ . An great way to remember these different instances types is - FIGHT DR MCPXZ AU [Ignore it if you dont get it]
F – FPGA
I – IOPS
G – Graphics
H – High disk throughput
T – cheap general purpose
D – Density
R – RAM
M – Main choice general purpose apps
C – Compute
P – Picture (graphics)
X – eXtreme memory
Z – Z-factor. Extreme memory and CPU
A – ARM based instances
U – Bare meta
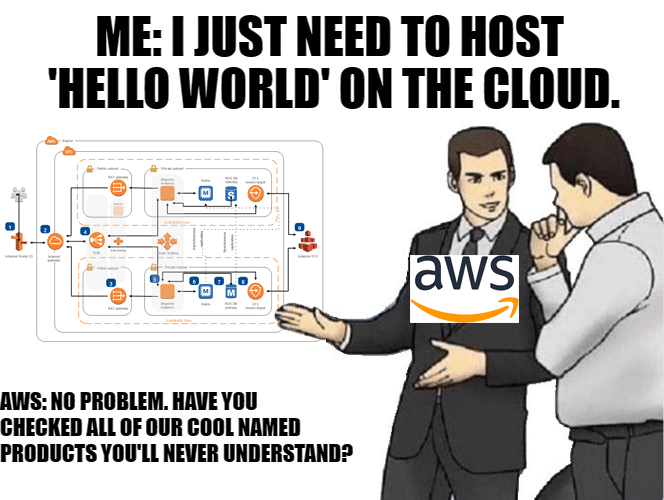
Now, Time to understand EC2 better on a ground level.
Why EC2 ? 💡
Now that we know what EC2 is, time to understand why do we actually need it, EC2 is like your go to guy when you dont have the infrastructure to run your application. Another big reason would be, the scalability option that come with it. For a company to go from 20 to 200 Vms( virtual machines) would hardly take any time rather than setting up all these Vms one by one by them self "Physically" 🏗️.
You only pay for the thing that you use and chance of any miscellaneous expense are real low. You have control of every resources that come under it. Another reason to why prefer EC2 is that it provide a great amount of Security for our virtual Machines🔒.
Billing 💸
EC2 expenses are like a sneaky thief in the night—ignore them, and they'll quietly steal away your budget. While EC2 does provide great services for you to run your web application, It is priced on number of hour, Storage, data transfer and network your web app consumes 💰. Within each hour you are charged a some of amount based on the various services you pick.

Although these bills can pile up to a huge number due to some necessary component, there still are various method that we can perform to Optimize these costs. (more - https://bit.ly/4drspsP).
Getting Started : 💪
We covered the basics of AWS and a little bit about EC2. Now its Time to check it out, with hands on practise and see how can we make an EC2 instance of our own.
First you'll need to make an Free AWS Account that will help you get started without any service cost (except some services) and for up to 12 months.
[Link -https://aws.amazon.com/free/]
You Can find tutorial on how to make one on YouTube if you come across any problem .
Making An EC2 Instance : 🖥️
Console Home : After signing and setting up our account well start by going to the console. A similar home page will appear, This is our home window where we can access all the services that are offered by AWS for our use 🏠.
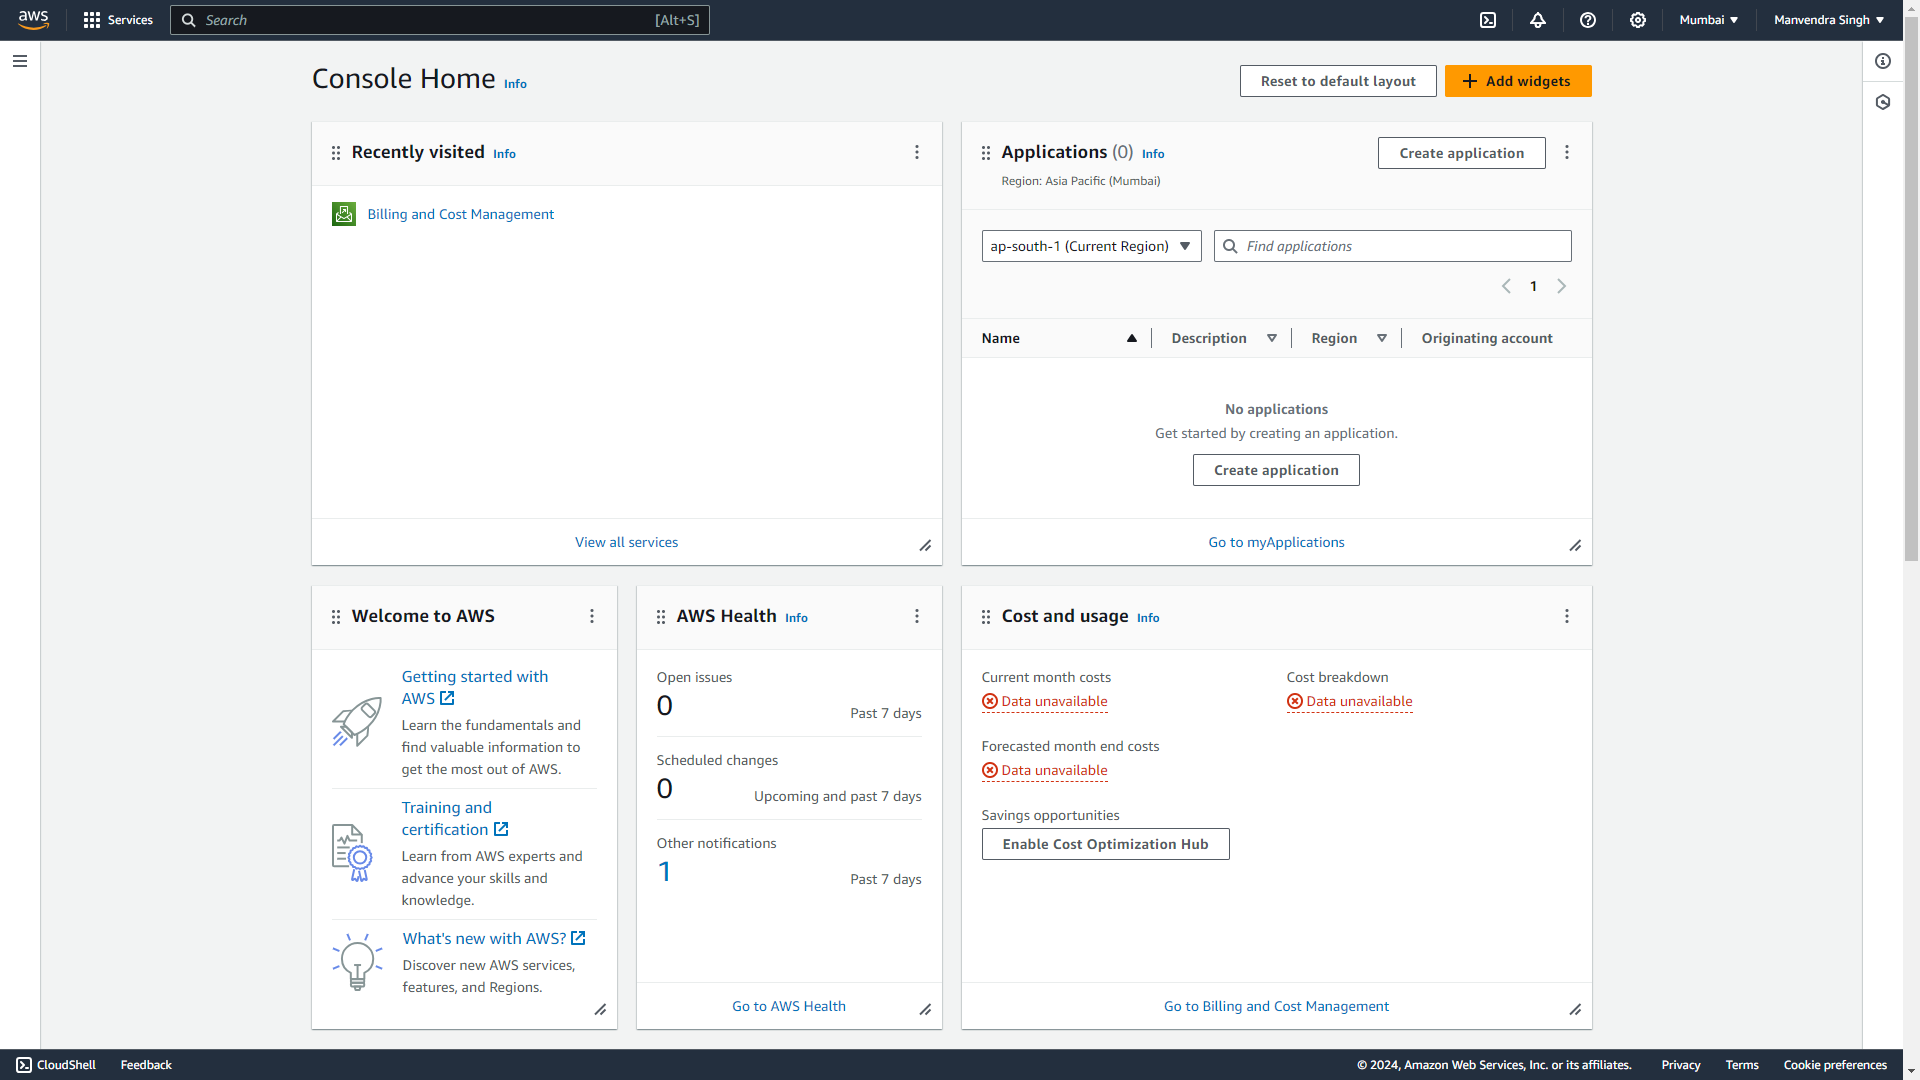
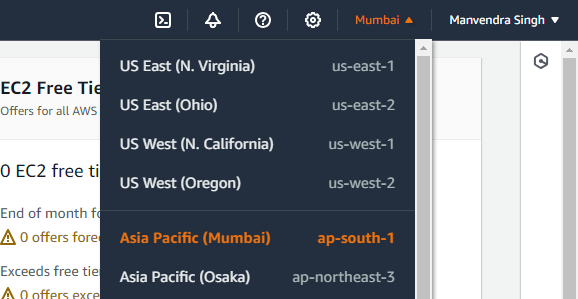
Regions : Now we'll select our regions, These regions are set up all around the world🌍, and they are set up in such a way to ensure redundancy and low latency. Pricing can also vary between Regions as well.
So Always make sure to pick the region closest to you, this is a good set of practice to have. In this case "Mumbai" is the closest one to me and you can see all the other regions that are available as well.
EC2 : On To Step 3 , Start by Searching up For "EC2" in the search bar and click on it.
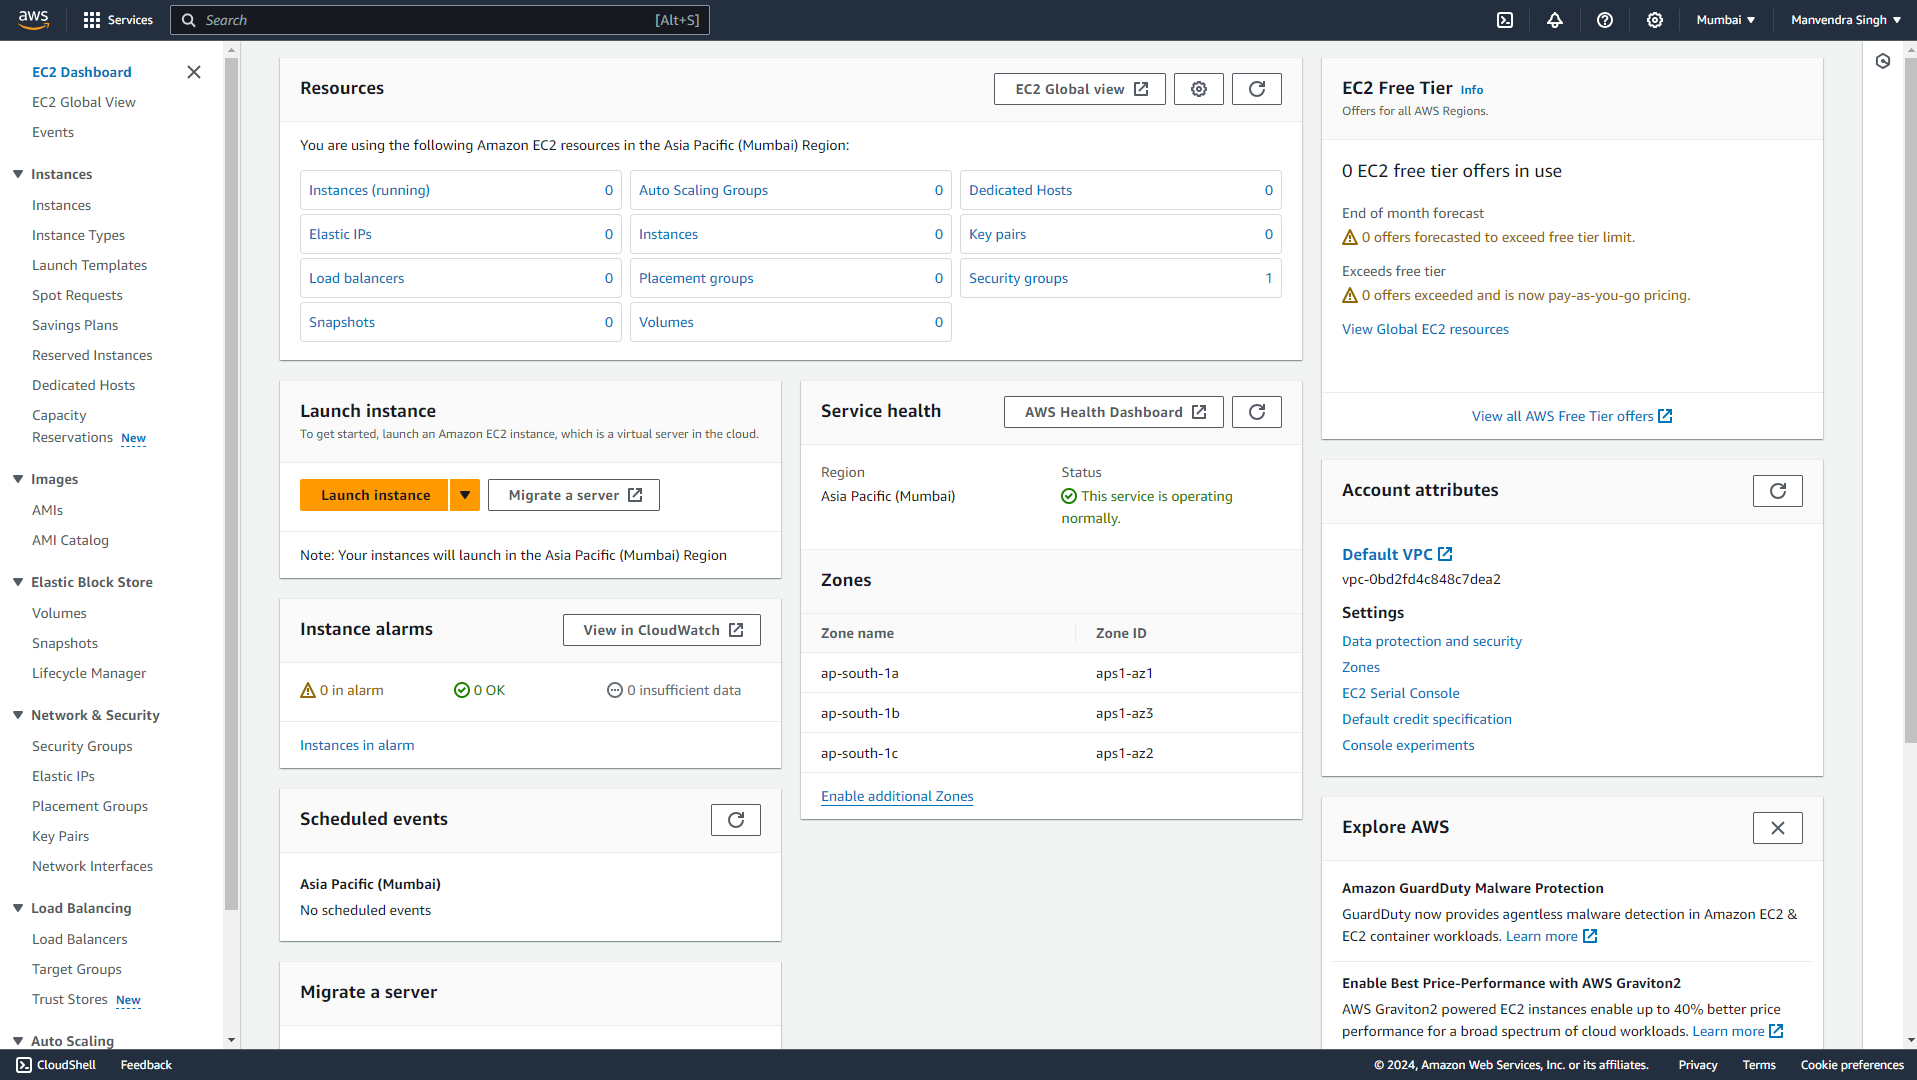
The following window will pop up, this is where we'll make an instance and make any modification for our instance,
The "Instances (running)" shows all the instances that are running right now, you will be able to see every detail about all the instances that are running, See how theres 0 in front of the "Instances (running)" this show that no instances are running right now, cause we still haven't created one yet. I'll get into it in just a minute.
Click on the "Launch Instance" in the yellow window.
Launching : Here Starts the magic✨, We'll simply Type the name of our instance that we'll be creating in - "Name and tag".
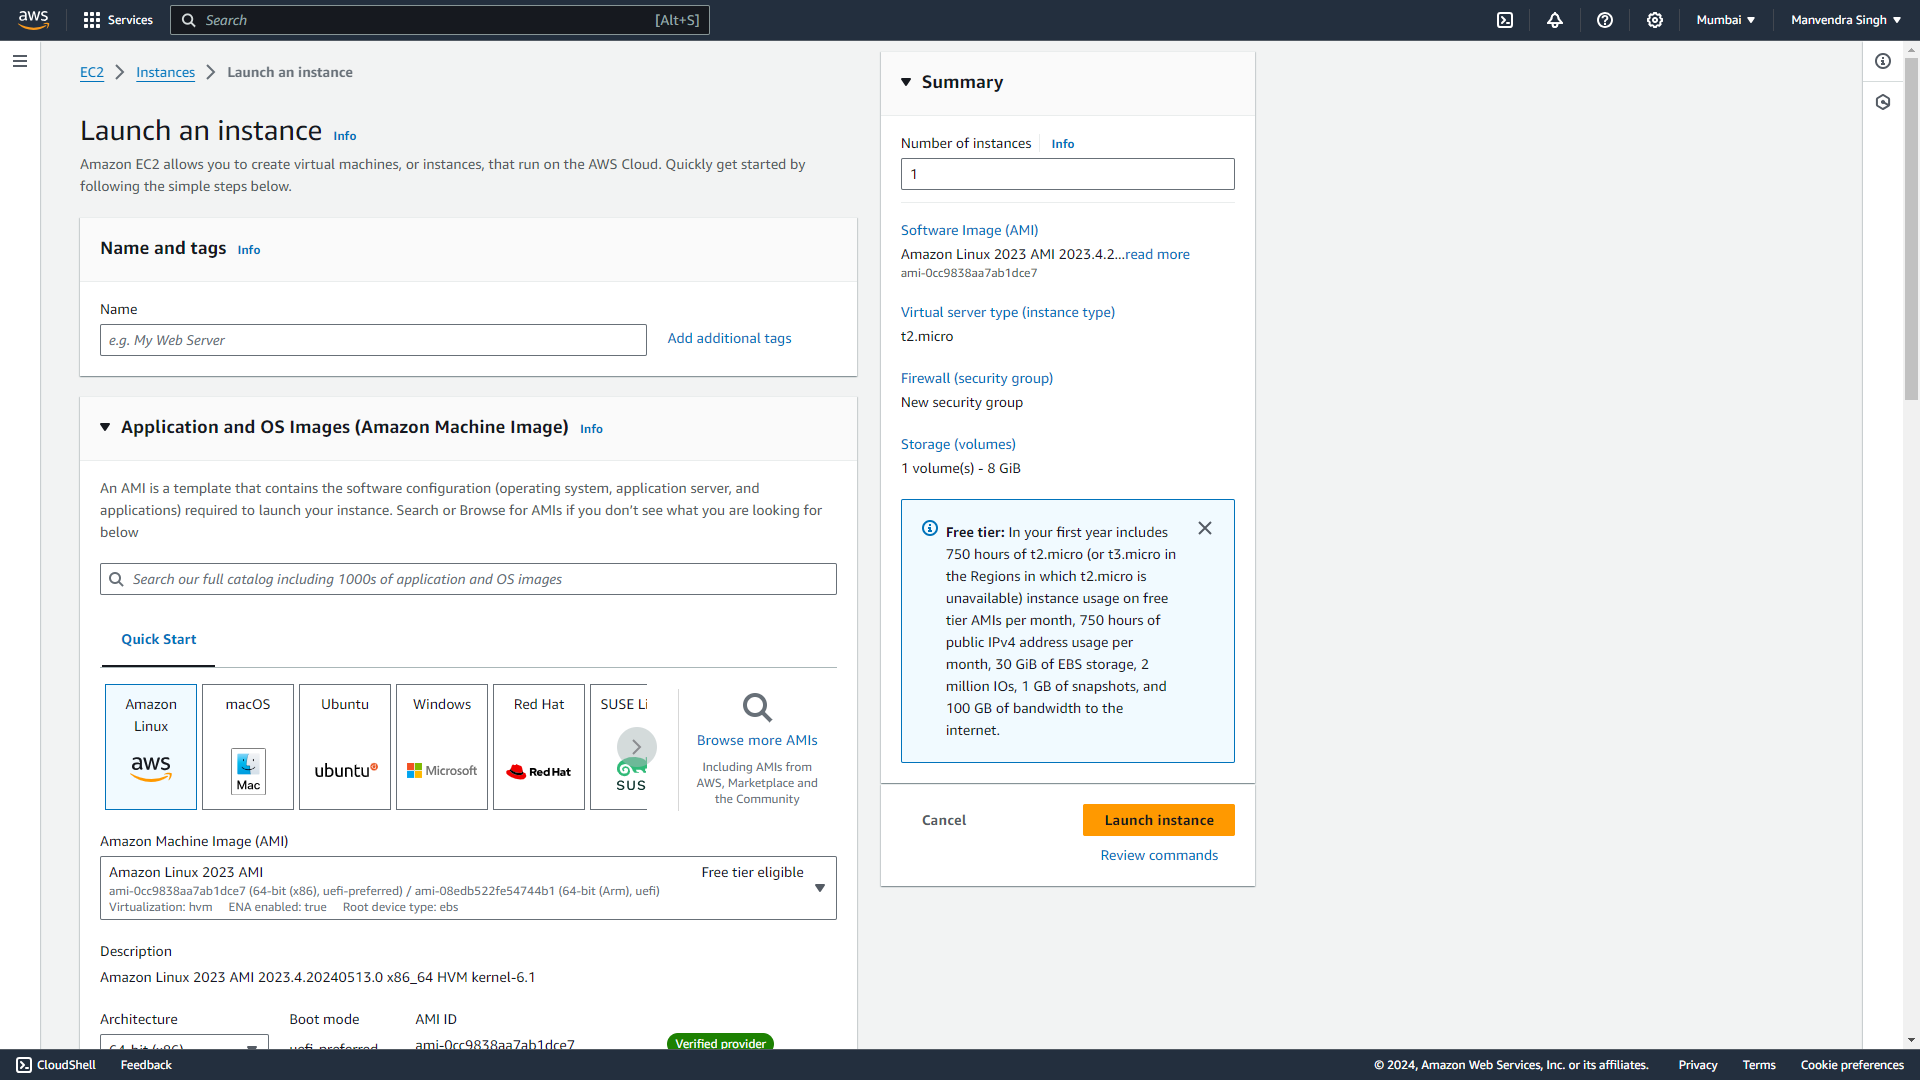
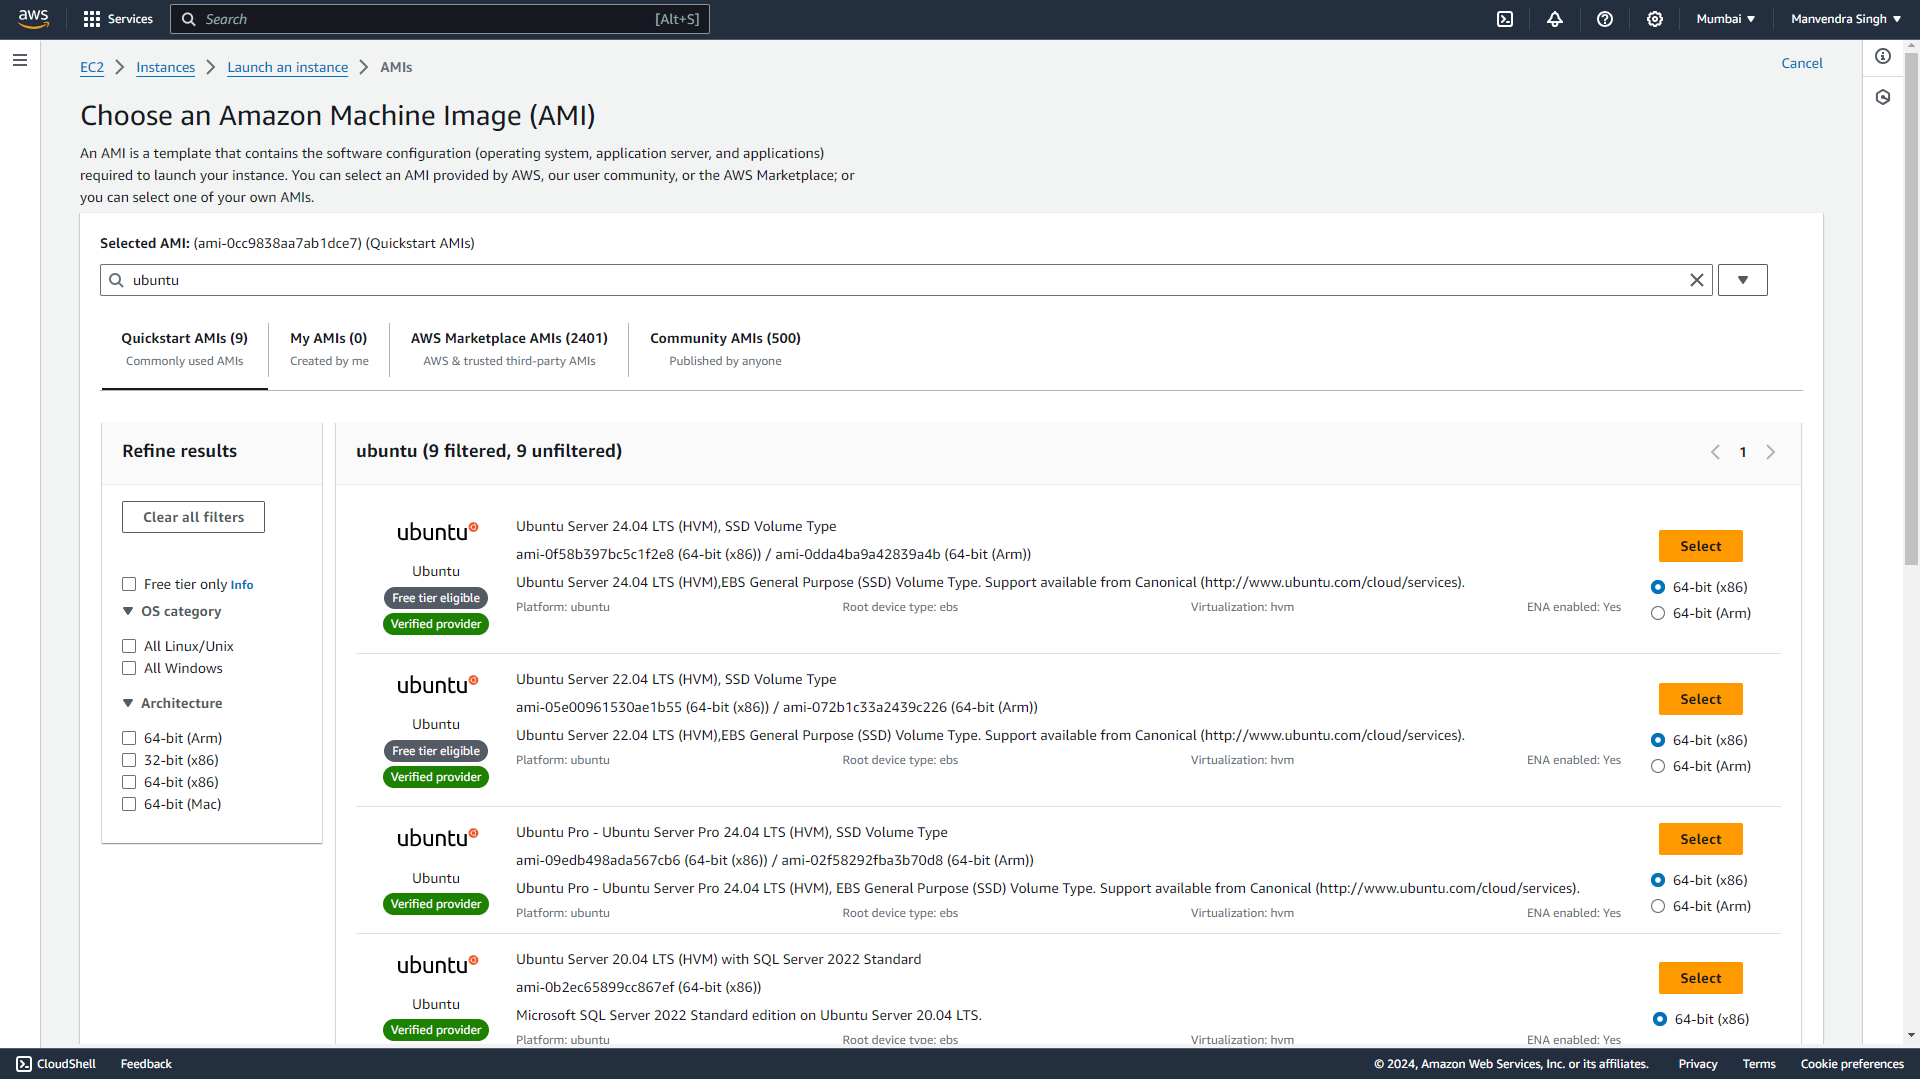
Machine Image : In the application and OS images section we can find Various Operating system that we can choose from latest to old versions. Lets say I want an Linux based operating system, so we'll go to "Browse more AMIs". We can search the operating system we want , Here I searched for "Ubuntu" in the search bar and we can see a list of operating system that has been released till now, you can select any one you like and your instance will run on it.
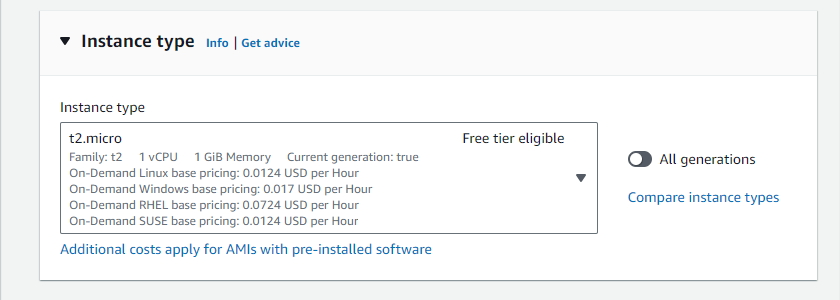
Instance Type : On to the next one, the instance types will help us select the specification of our instance. From CPU to Memory. The t2.micro is a free tier eligible so we'll go with it, but you can also checkout other types as well.
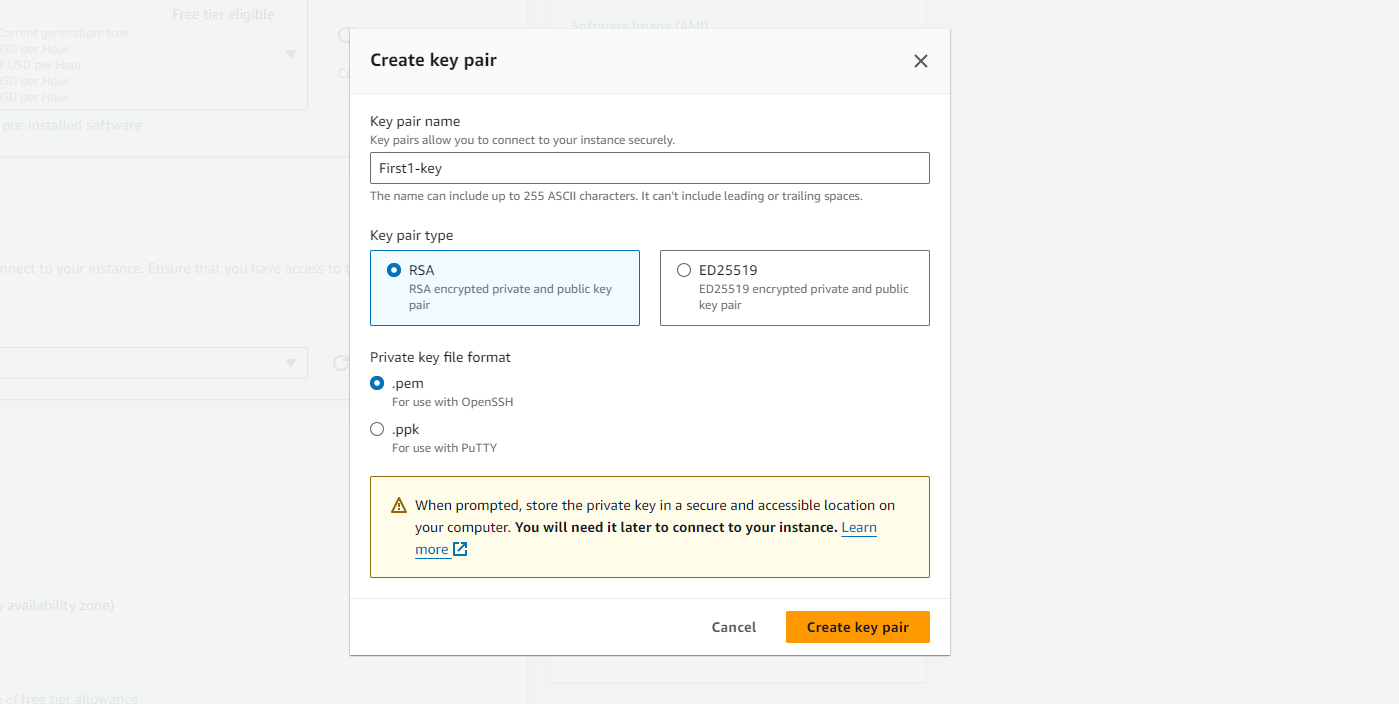
Key Pair : Since we are creating an instance in cloud, we just can't put it out there so that any one can access it. We need an "SSH key" 🔑, the public key of this will go to our instance and the private one will be with you. So that you can access this instance from anywhere.
We will start by clicking on "Create new Key pair". So that we can create our own SSH key,

Create Key Pair : Since we haven't created any instances till now we will start by creating our first key, Here I have used "First1-key" as my key name and in the format type we have gone with .pem but if you have lower version of window , lower than window 10 then you should go with .ppk. You can also convert them, but this will do for now.
Click on "Create key pair" and an file with your key name and extension of .pem will be downloaded.
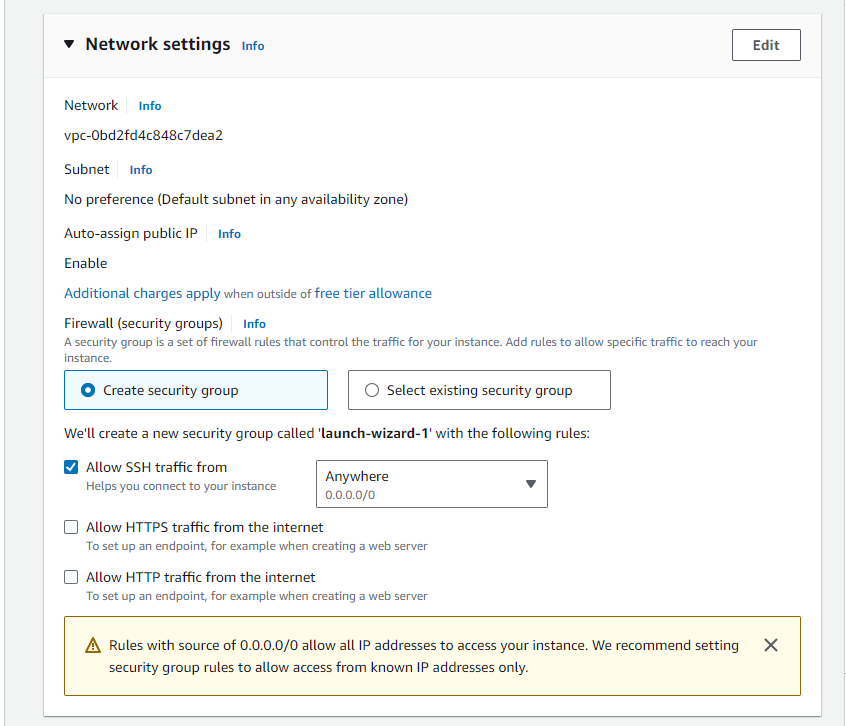
Network Settings : Here we can issue "security groups", since its our first instance and we haven't made any group till now - we will keep it default.
Another one is "Allow SSH traffic from", it allow you to access your instance from anywhere with the help of Anywhere option just right to it. You can also set it your own IP meaning only your device with - your IP can access it and theres also an option for custom as well, The other 2 options (HTTP) helps you to run your web Server.
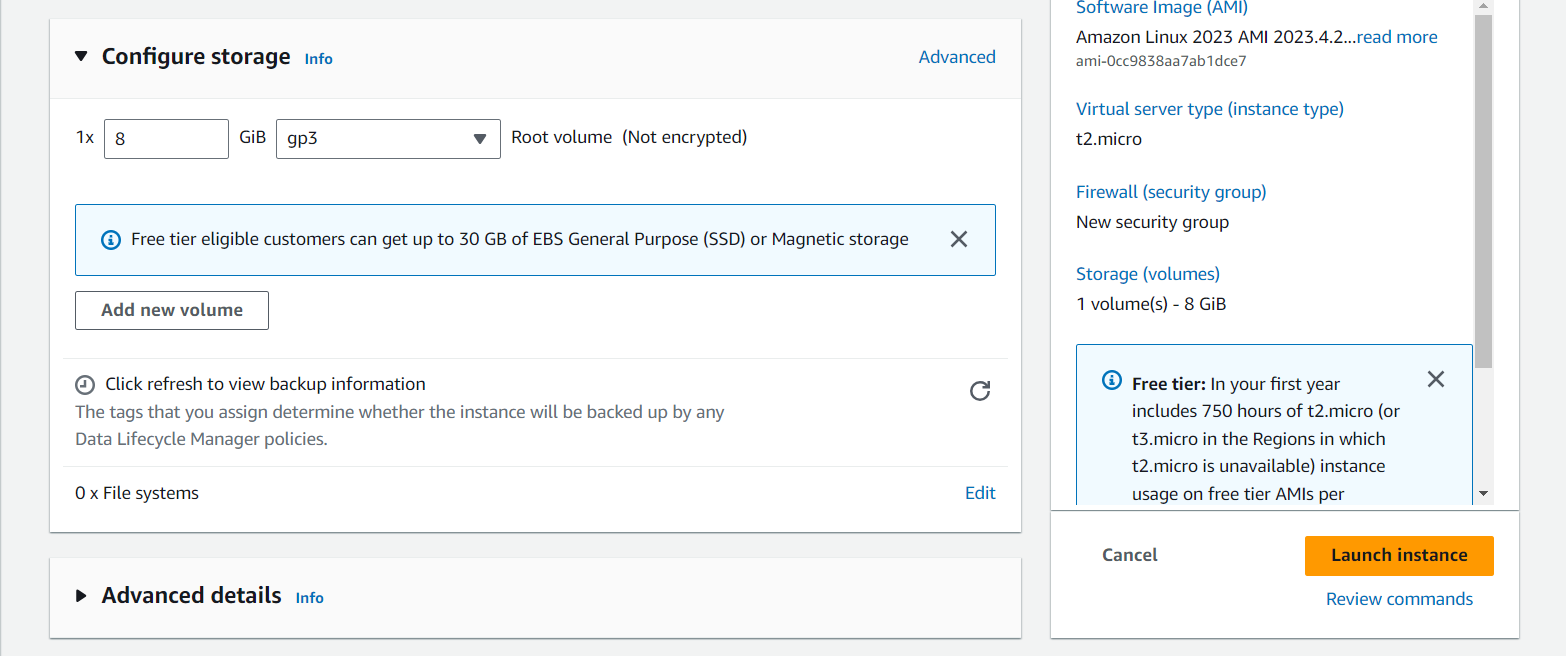
Configure Storage : When you set up your windows, the C-Drive holds a certain amount of memory, like that we can also set up the size of our C-Drive using the configure window option.
Now 👀, we finally launch our instance by going on Launch instance and see our instance getting started.
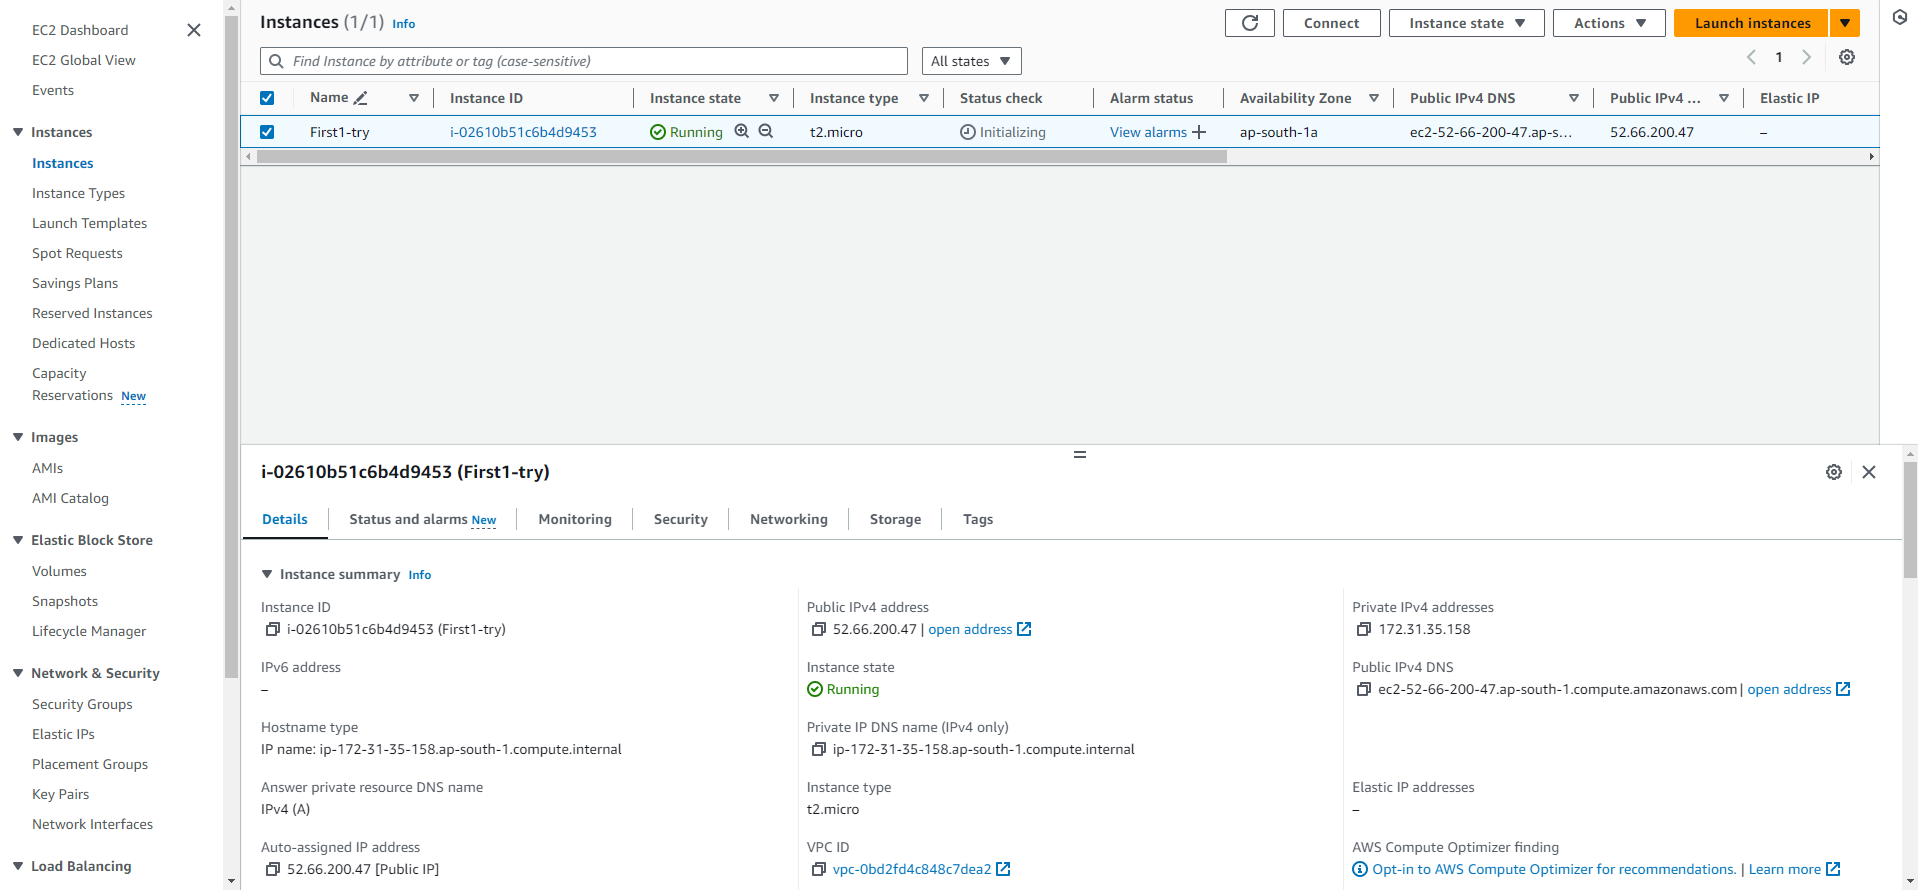
Launching Instance : It will hardly take 2 min to start your instance and the following window will pop up.
This means your Instance is generating and It will be active within 5 minutes.

First1-try : At last our instance is active and you can see every little detail about, from IPv4, Security, Networking etc. We can see our Public and Private IP Address as well.
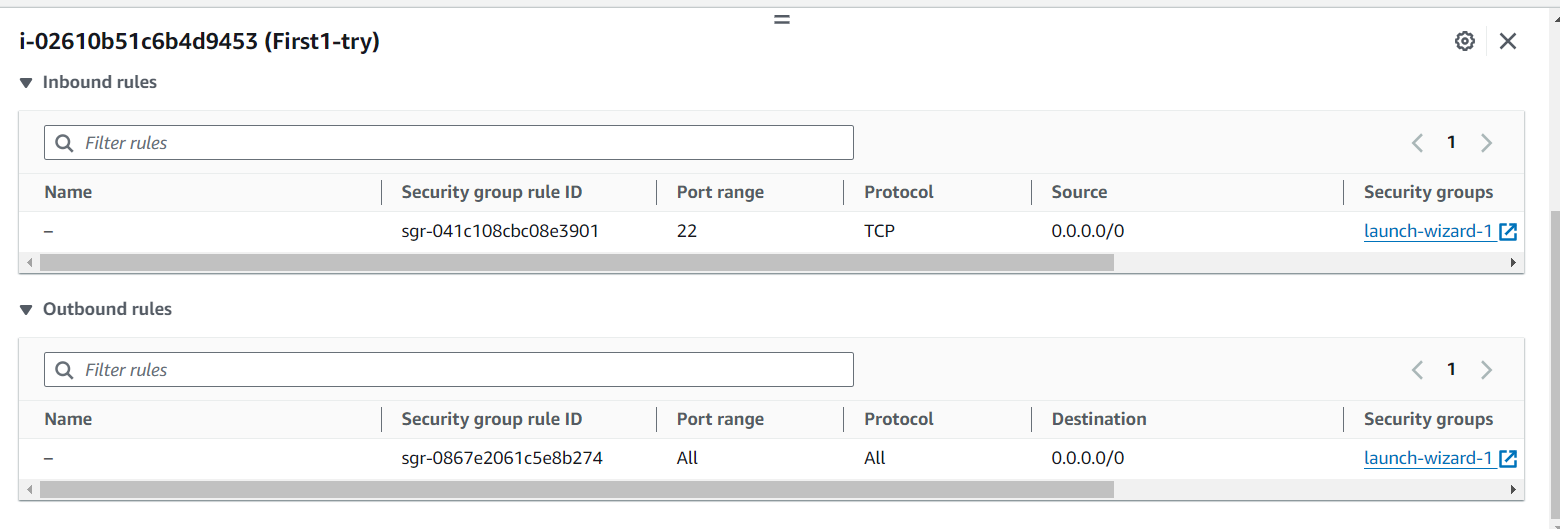
In security Group you can see the port number assigned to your instance as well.
There are 2 rules here that you should be aware of, First :
Inbound Rule : When you send any type of traffic to the server it will listen to a specific port (22) number assigned to it. This is know as the Inbound Rule.
Outbound Rule : It gives the access to the things our instance can access like for ex -
Web Server, Internet.. etc. This is know as the Outbound Rule. Simply meaning things that our instance access.
That is all basic things that you need to know on how to create an instance. We can also connect this instance using "cmd" as well.
If you loved the blog make sure to like it and connect to me on my socials as well.
Thank you for reading till the end ! 🙇♂️
Subscribe to my newsletter
Read articles from manvendra singh directly inside your inbox. Subscribe to the newsletter, and don't miss out.
Written by

manvendra singh
manvendra singh
Hey Everyone 🙋♂️! Hope you guys enjoy the blogs and get some value out of it, and Make sure to connect with me on my other social platforms as well 👨💻. p.s - May the Force be with you ✨