How to Set Up Web Interface for Orthanc PACS Server
 Abdulazeez Alao
Why Web interface for Orthanc PACS server
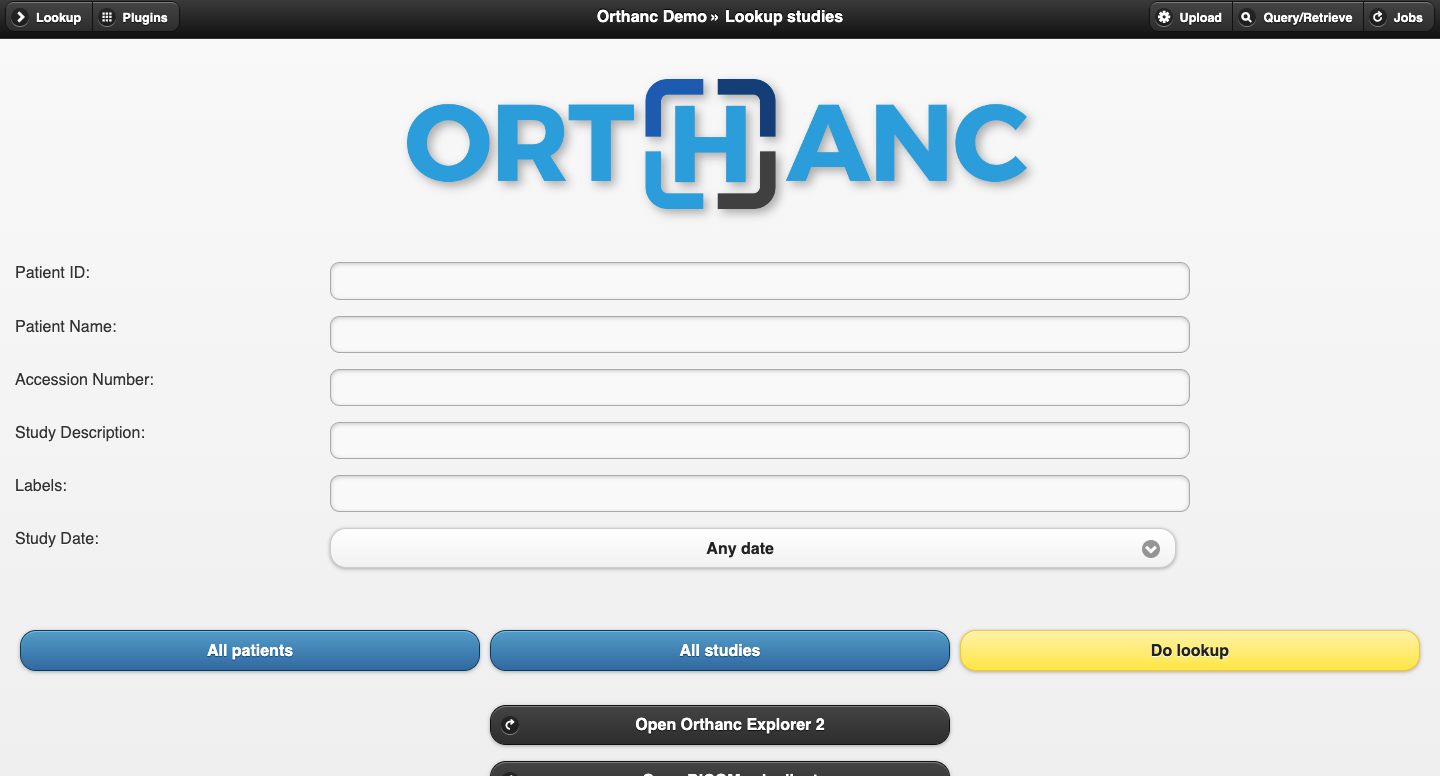
Orthanc’s web interface is a powerful tool for managing, visualizing, and interacting with DICOM images and related data. Setting up and accessing this web interface allows users to leverage Orthanc’s full potential from any web browser. This article covers how to access the Orthanc web interface and provides an overview of its features and navigation.
Accessing the Orthanc Web Interface
Ensure Orthanc is Running:
Before accessing the web interface, make sure the Orthanc server is running. You can start the server using the following command, depending on your operating system:
  # On Windows
  Orthanc.exe

  # On Linux
  sudo systemctl start orthanc

  # On macOS
  ./Orthanc
Open a Web Browser:
- Open your preferred web browser (e.g., Chrome, Firefox, Safari).
Navigate to the Orthanc URL:
Enter the URL to access the Orthanc web interface. By default, Orthanc runs on port 8042. Therefore, you can access it using:
http://localhost:8042If you have configured Orthanc to use a different port or host, replace
localhostand8042with your specific configuration.
Login (if required):
- If you have enabled user authentication in the
Orthanc.jsonconfiguration file, you will be prompted to enter a username and password. Use the credentials you have set up (e.g.,adminandpassword).
- If you have enabled user authentication in the
Overview of the Web Interface Features and Navigation
The Orthanc web interface is designed to be intuitive and user-friendly, offering a range of features to manage and view DICOM images effectively. Here’s a detailed overview of its primary features and navigation:
Dashboard:
The main dashboard provides an overview of the Orthanc server status, including storage usage, number of patients, studies, series, and instances.
It also displays recent activities and notifications about the server.
Patient List:
This section lists all patients stored in the Orthanc server.
You can search for patients using various criteria such as patient ID, name, or other attributes.
Clicking on a patient’s name opens detailed information, including their studies and series.
Study List:
Displays all studies available in the Orthanc database.
You can filter studies by date, modality, and other attributes.
Selecting a study reveals detailed information about the series and instances it contains.
Series and Instances:
Within each study, the series and instances (individual images) are organized.
You can view thumbnails of images and access detailed metadata for each instance.
Image Viewer:
Orthanc includes a built-in DICOM viewer that allows you to visualize medical images directly in the browser.
Features of the image viewer include zoom, pan, window leveling, and annotations.
You can also switch between different series and instances within a study.
Plugins:
The web interface supports plugins to extend Orthanc’s functionality.
Installed plugins are accessible through the web interface, providing additional tools and features.
Configuration:
The configuration section allows administrators to adjust server settings, including user management, network settings, and storage parameters.
Any changes made in the web interface configuration are reflected in the
Orthanc.jsonfile.
Query and Retrieve (Q/R):
Orthanc’s web interface supports DICOM Query/Retrieve operations, allowing you to query other PACS servers and retrieve studies.
You can configure remote PACS servers and use the web interface to initiate Q/R operations.
Export and Import:
The interface allows exporting studies, series, and instances to various formats (e.g., DICOM, JPEG).
You can also import DICOM files directly into the Orthanc server via the web interface.
Logs and Monitoring:
Access server logs to monitor activities, errors, and debug information.
This section is crucial for troubleshooting and ensuring the server operates smoothly.
Conclusion
Setting up and accessing the Orthanc web interface is essential for efficiently managing and visualizing medical imaging data. The web interface provides a comprehensive set of tools and features designed to streamline workflows in healthcare environments. From basic patient and study management to advanced image viewing and server configuration, the Orthanc web interface is a powerful resource for medical professionals and administrators alike. By familiarizing yourself with its features and navigation, you can fully utilize Orthanc to enhance your medical imaging operations.
Subscribe to my newsletter
Read articles from Abdulazeez Alao directly inside your inbox. Subscribe to the newsletter, and don't miss out.
Written by
