How to Connect PACS Server and imaging modality using localhost host Network.
 Abdulazeez Alao
For this article, I will use MRI as a imaging modality type and I will use Orthanc as a PAC server.
To ensure that the Orthanc server and the MRI machine are on the same network or can communicate with each other within local host network, you need a reliable network setup. Here’s how you can achieve this:
Using Wired Ethernet Network (Preferred for Stability and Performance)
Network Switch:
- Use an Ethernet switch to connect both the Orthanc server and the MRI machine. Ethernet switches provide reliable and high-speed network connectivity, which is crucial for handling large medical image files.
Wired Connections:
Connect the Orthanc server to the Ethernet switch using an Ethernet cable.
Connect the GE MRI machine to the Ethernet switch using another Ethernet cable. Continue reading . I will talk more on this in the next few paragraphs.
Static IP Addresses:
Assign static IP addresses to both the Orthanc server and the MRI machine to ensure consistent communication.
For example:
Orthanc server:
192.168.1.100MRI machine:
192.168.1.101
Ensure the subnet mask is the same for both devices (e.g.,
255.255.255.0).
Network Configuration on Devices:
Configure the network settings on the Orthanc server to use its assigned static IP address.
Configure the network settings on the MRI machine to use its assigned static IP address and set the Orthanc server's IP as the DICOM destination.
Using a Wi-Fi Router (If Wired Connection is Not Feasible)
Wi-Fi Router with Ethernet Ports:
- Use a Wi-Fi router that has Ethernet ports for wired connections. This setup allows you to connect devices via both Ethernet and Wi-Fi.
Wired and Wireless Connections:
Connect the Orthanc server to the Wi-Fi router using an Ethernet cable.
Connect the GE MRI machine to the Wi-Fi router using an Ethernet cable if possible. If the GE MRI machine supports Wi-Fi and a wired connection is not feasible, connect it via Wi-Fi.
Static IP Addresses:
Assign static IP addresses to both the Orthanc server and the GE MRI machine as described above.
Ensure the Wi-Fi router assigns these static IP addresses based on the devices’ MAC addresses, if necessary.
Network Configuration on Devices:
- Configure the network settings on both the Orthanc server and the GE MRI machine to use their assigned static IP addresses.
Steps to Verify Connectivity
Ping Test:
From the Orthanc server, ping the MRI machine’s IP address to ensure network connectivity.
ping 192.168.1.101From the GE MRI machine, ping the Orthanc server’s IP address to verify the connection.
DICOM Echo (C-ECHO) Test:
- Use the DICOM C-ECHO command to verify DICOM communication between the GE MRI machine and the Orthanc server.
Firewall Configuration:
- Ensure that any firewall settings on the Wi-Fi router, Orthanc server, and GE MRI machine allow traffic on the necessary ports (e.g., 4242 for Orthanc).
Since wired Ethernet connections is preferred, I will talk more on it :
Using Wired Ethernet Network (More explanation)
Let us assume you want to connect Orthanc server and GE MRI machine using wired Ethernet connections to ensures a stable and high-speed network setup. This my guide will walk you through the process :
Step 1: Gather Required Equipment
Equipment Needed:
Ethernet switch
Ethernet cables (at least two)
Orthanc server (computer or dedicated server)
MRI machine
Step 2: Set Up the Ethernet Switch.
Unbox the Ethernet Switch:
- Unbox your Ethernet switch and place it in a central location accessible to both the Orthanc server and the GE MRI machine.
Power the Ethernet Switch:
- Connect the power adapter to the Ethernet switch and plug it into a power outlet. Ensure the switch is powered on, and the status lights are active.
Step 3: Connect the Orthanc Server.
Locate an Ethernet Port on the Orthanc Server:
- Identify the Ethernet port on your Orthanc server.
Connect the Ethernet Cable:
- Plug one end of the Ethernet cable into the Ethernet port on the Orthanc server.
Connect to Ethernet Switch:
- Plug the other end of the Ethernet cable into an available port on the Ethernet switch.

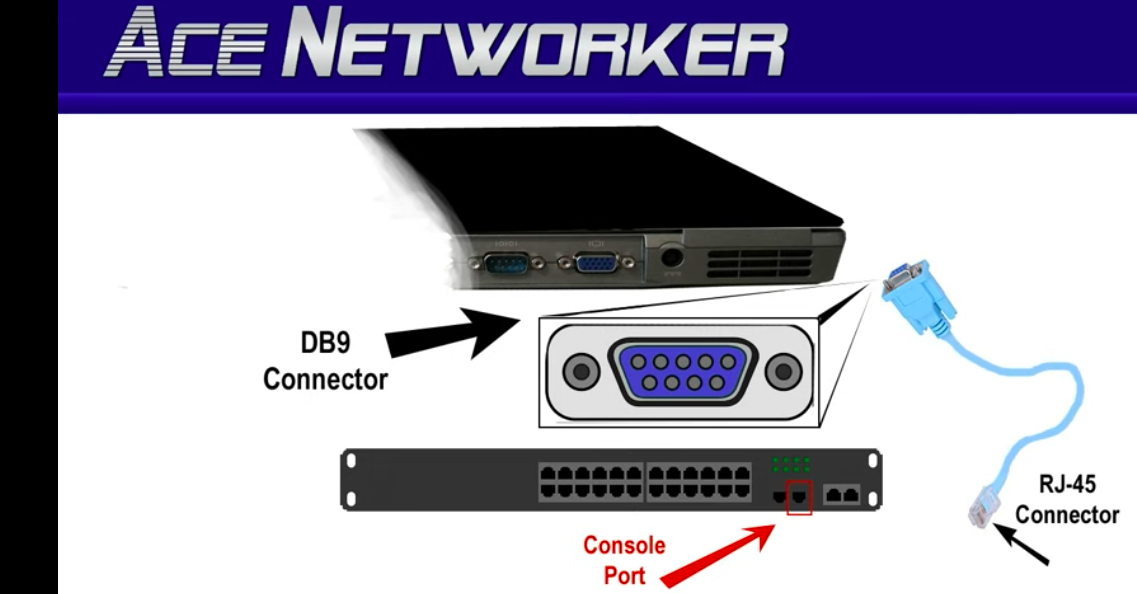
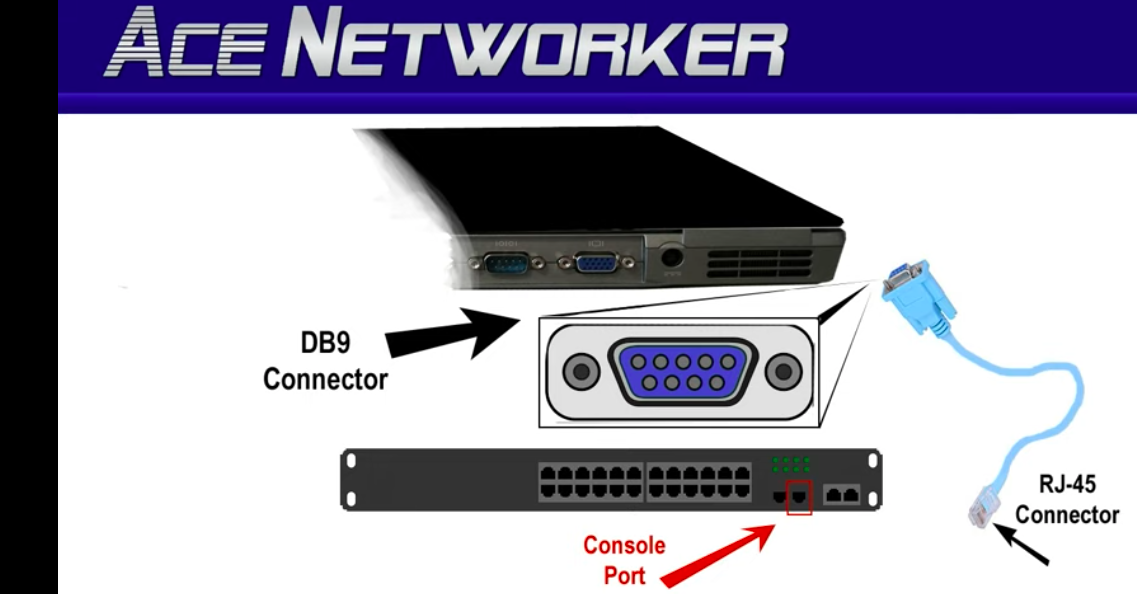
(Computer housing Orthanc server connected to Ethernet switch through DB9 Connector )
Step 4: Connect the GE MRI Machine
Locate an Ethernet Port on the GE MRI Machine:
- Identify the Ethernet port on your GE MRI machine. This might be located at the back or side of the machine, depending on the model.
Connect the Ethernet Cable:
- Plug one end of the Ethernet cable into the Ethernet port on the GE MRI machine.
Connect to Ethernet Switch:
- Plug the other end of the Ethernet cable into another available port on the Ethernet switch.

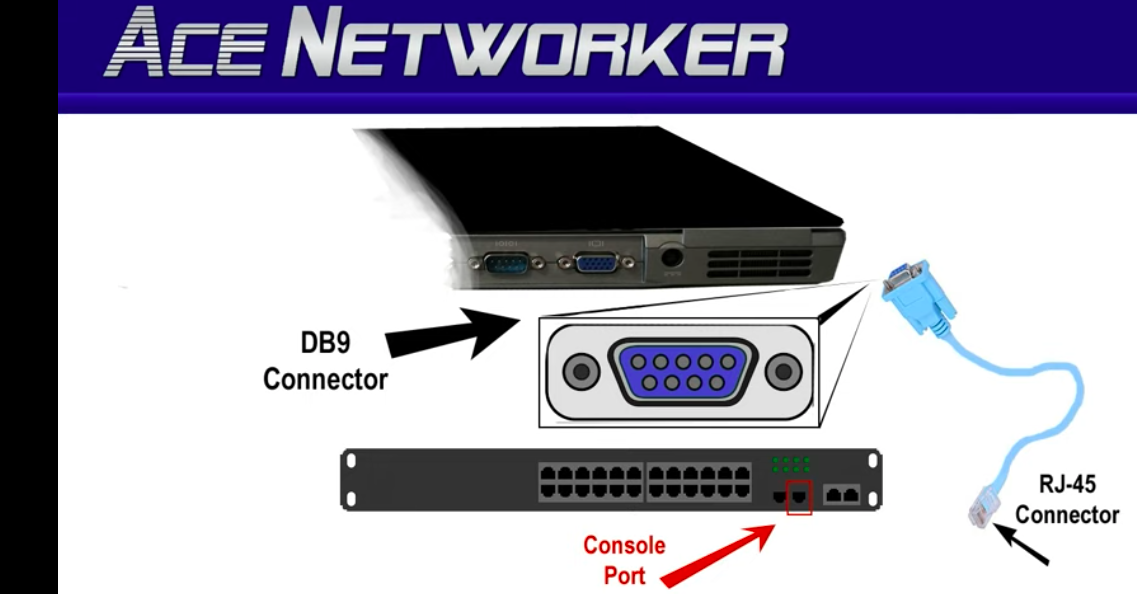
(MRI machine's computer console connected to Ethernet switch through its DB9 Connector)
Step 5: Verify Connections
Check Ethernet Switch Indicators:
- Look at the LED indicators on the Ethernet switch. There should be lights corresponding to the ports where the Orthanc server and the MRI machine are connected. These lights typically indicate active connections.
Test Network Connectivity:
On the computer housing Orthanc server, open a command prompt or terminal and ping the IP address of the MRI machine to verify connectivity:
ping 192.168.1.101Similarly, on the MRI machine, ping the IP address of the Orthanc server.
Summary
Using an Ethernet switch and Ethernet cables to connect your Orthanc server and MRI machine ensures a reliable and high-speed network connection.
Just make sure you followed the entire steps I explained in this article and try to verify the network connectivity, and ensure both devices are on the same network for seamless DICOM communication.
By using wired connections, you eliminate potential interference and connectivity issues commonly associated with wireless networks, ensuring stable and efficient data transfer essential for managing large medical imaging files.
If you still have question to ask me , Click here .
Subscribe to my newsletter
Read articles from Abdulazeez Alao directly inside your inbox. Subscribe to the newsletter, and don't miss out.
Written by
