A Developer's Intro to Huddle01 SDK + Ideas to Build
 Tanu Shree
In the dynamic world of internet, effective real-time communication is paramount. Huddle01 steps in to revolutionize this space by utilizing blockchain technology to create a robust, secure, and scalable communication solution. In this blog, we'll delve into Huddle01, explore its key features, and brainstorm innovative applications one can develop using its SDK.
What is Huddle01?
Huddle01 empowers developers to create real-time communication features within their applications. As the world's first DePIN tailored for dRTC, Huddle01 transforms how we connect and interact online. What sets Huddle01 apart is its focus on dRTC, offering significant advantages over traditional methods.
Let's break technical jargons
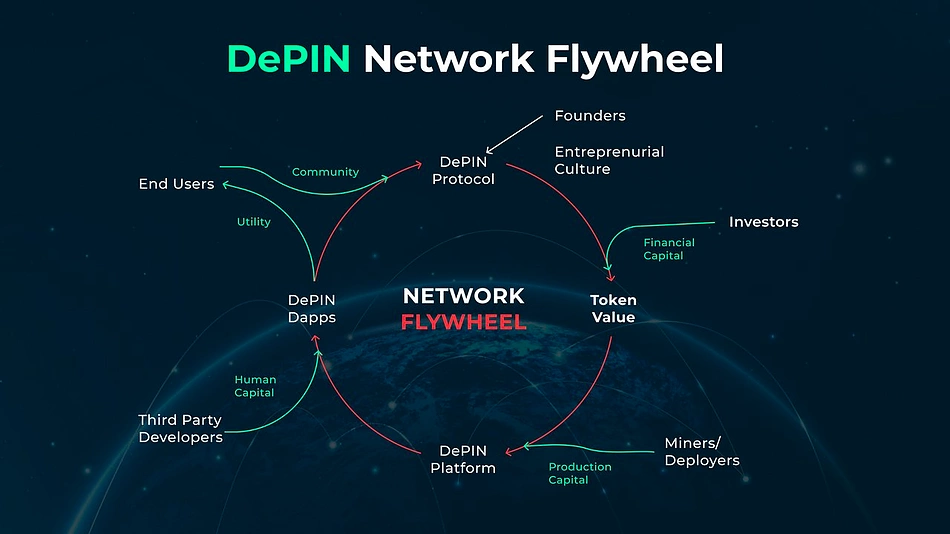
What is DePIN?
DePIN stands for Decentralized Physical Infrastructure Network. Imagine a large organization where each employee contributes their skills and is rewarded based on their performance. In a DePIN, each participant (node) offers resources to the network and is incentivized with crypto tokens. Unlike a traditional, centralized company, DePIN operates in a decentralized manner, where control is distributed among the community members.

Where does dRTC come in?
At the core of Huddle01 lies the concept of dRTC(Decentralized Real-Time Communication). Unlike traditional video conferencing solutions it leverages a peer-to-peer network powered by users’ internet connection. dRTC enables direct peer-to-peer communication between users' devices without relying on centralized servers.
| Feature | dRTC (Decentralized RTC) | Traditional RTC |
| Server Dependency | Uses peer-to-peer network | Relies on centralized servers |
| Latency | Reduced latency due to direct peer-to-peer communication | Higher latency due to routing through central servers |
| Privacy | Enhanced privacy, data travels directly between users | Privacy dependent on central server security |
| Scalability | Improved scalability, no central bottleneck | Limited scalability, server resources are a bottleneck |
This approach, often titled “people-powered network”, supports the key features of Huddle01.
High-Fidelity A/V Communication: Huddle01 SDK ensures high-quality audio and video calls, delivering clear and crisp communication experiences.
Token-Gated Access: Huddle’s DK supports token-gated access, allowing developers to control who can join communication channels based on token holding.
Zero-Downtime Experience: User experience is the priority. SDK offers zero-downtime functionality ensuring that users do not experience disruptions during system failures or high traffic periods.
Selective Consuming On Huddle
Huddle01 facilitates the feature of selective consuming, allowing us to regulate who we receive media streams from. This helps us to accept media only from the peers we want. We can mute audio or turn off incoming video from someone for just ourselves, without affecting others.
Huddle01 SDK at its core
Huddle doesn’t ask for much. It’s SDK integrates seamlessly into your usecase — be it a web app, React app or a full-fledged software! The underlying pipeline that governs this all is peer-to-peer connections, which Huddle’s SDK manages very well.
Huddle Concepts
Now, let’s cover a couple of new concepts in the latest SDK that you will see throughout in the tutorial. Feel free to skip over to the tutorial.
Room: A Huddle01 room is where you can host/attend meeting sessions. Each room is recognized by a unique roomID that is generated when you enter a room. A room never expires and you can have multiple sessions at a time inside the room.
Room states: These represent the states of operation of a room - idle, connecting, failed, left, closed
Peer: A peer is a participant inside a room. In programming jargon, it is an object containing all media streams of a peer in a room. Each peer is recognized by a peerID.
MediaStream: It represents a stream of media content associated with a peer. Streams can be audio or video or both.
MediaStreamTrack: It represents a single media track, which can be either audio or video.
Local: These are functions related to your peer (i.e. yourself), prefixed with ‘local’.
localPeer - Your Peer object
localAudio - Your Audio stream
localVideo - Your Video stream
Remote: These are functions associated with other peers in the same room, prefixed with ‘remote’. Performing any of these would require you to pass the peerID of that peer.
remotePeer - Another participant
remoteAudio - Their Audio stream
Remote VIdeo - Their Audio stream
Data Message: Peers can exchange messages with each other in text form, not exceeding 280 characters.
Hooks are methods that can be called from the imported Huddle packages (which we will see later on). The major hooks of the latest SDK version include:
useRoom - joining, leaving, closing the room
useLobby - as admin, control peers waiting in the lobby who can enter a locked room
usePeerIds - returns peerIDs of all peers in a room
useLocalAudio / useRemoteAudio - control your audio / interact with peer audio
useLocalVIdeo / useRemoteVideo - control your video / interact with peer video
useLocalScreenShare / useRemoteScreenShare - control your screenshare /
Let's get Building
Familiarizing with Huddle’s SDK is a walk in the park. Let’s get started on some technical jargon before integrating DePIN into your decentralized application (dApp).
Installing required Huddle SDK packages
Note: Before getting started on Huddle’s SDK for any project, make sure that you havenodejsinstalled on your computer.
Run either of these commands in your terminal:
npm i @huddle01/react @huddle01/server-sdk
pnpm i @huddle01/react @huddle01/s
yarn add @huddle01/react @huddle01/server-sdk

Create an App
Run the following command in your terminal:
npm create next-app@latest
Setting up the project
Huddle01's API Key will help you access the Huddle01 infrastrcuture. Before generating an API key, set up an ethereum wallet. Metamask and Coinbase are gotos. Head over here and connect your wallet to your Huddle01 account, which will be used to authorize you to access Huddle01 infrastructure.
Generate your API key and Project ID and save it in the .env file in the root directory.
NEXT_PUBLIC_PROJECT_ID=
API_KEY=
Creating an instance of the Huddle Client
Create an instance of Huddle Client and pass it in Huddle Provider.
(This would go into yourlayout.tsxpage)
import type { Metadata } from "next";
import { Inter } from "next/font/google";
import "./globals.css";
import HuddleContextProvider from "@/context/HuddleContextProvider";
import { Web3Modal } from "@/context/Web3Modal";
import { HuddleClient, HuddleProvider } from "@huddle01/react";

export const metadata: Metadata = {
  title: "Scribble",
  description: "Collaborative Jamboard",
};

const huddleClient = new HuddleClient({
   projectId: process.env.NEXT_PUBLIC_PROJECT_ID!,});
Generating RoomID
To create a room, we need a roomId, which is called from the server-side using the create-room API. Howeverless, this can also be performed in a less safe, serverless manner.
(Create a file in utils/createRoom.ts)
"use server";

export const createRoom = async () => {
  const response = await fetch("https://api.huddle01.com/api/v1/create-room", {
    method: "POST",
    body: JSON.stringify({
      title: "Huddle01 Room",
    }),
    headers: {
      "Content-type": "application/json",
      "x-api-key": process.env.API_KEY!,
    },
    cache: "no-cache",
  });

  const data = await response.json();
  const roomId = data.data.roomId;
  return roomId;
};
Generating Access Token
To join a new or already existing room, an accessToken must be generated.
(This would go into the token/route.ts)
import { AccessToken, Role } from '@huddle01/server-sdk/auth';
export const dynamic = 'force-dynamic';

const createToken = async (
  roomId: string,
  role: string,
  displayName: string
) => {
  const access = new AccessToken({
    apiKey: process.env.API_KEY!,
    roomId: roomId as string,
    role: role,
    permissions: {
      admin: true,
      canConsume: true,
      canProduce: true,
      canProduceSources: {
        cam: true,
        mic: true,
        screen: true,
      },
      canRecvData: true,
      canSendData: true,
      canUpdateMetadata: true,
    },
    options: {
      metadata: {
        displayName,
        isHandRaised: false,
      },
    },
  });
  const token = await access.toJwt();
  return token;
};
Joining and Leaving Rooms
Now that we have the roomId and accessToken, we can use the joinRoom method from the useRoom hook to join or leave a room.
import { useRoom } from '@huddle01/react/hooks';

const App = () => {
  const { joinRoom, leaveRoom } = useRoom({
    onJoin: () => {
      console.log('Joined');
    },
    onLeave: () => {
      console.log('Left');
    },
  });
  return (
    <div>
      <button onClick={() => {
        joinRoom({
          roomId: 'ROOM_ID',
          token: 'ACCESS_TOKEN'
        });
      }}>
        Join Room
      </button>
      <button onClick={leaveRoom}>
        Leave Room
      </button>
    </div>
  );
};
Outgoing Audio and Video
We use the useLocalAudio, useLocalVideo, useLocalScreenShare hooks to control our audio, video and screenshare streams, respectively:
import { useLocalVideo, useLocalAudio, useLocalScreenShare } from '@huddle01/react/hooks';

const App = () => {
    const { stream, enableVideo, disableVideo, isVideoOn } = useLocalVideo();
    const { stream, enableAudio, disableAudio, isAudioOn } = useLocalAudio();
    const { startScreenShare, stopScreenShare, shareStream } = useLocalScreenShare();

  return (
   <div>
     {/* Webcam */}
      <button
        onClick={() => {
          isVideoOn ? disableVideo() : enableVideo()
        }}>
        Fetch and Produce Video Stream
      </button>
      {/* Microphone */}
     <button
        onClick={() => {
          isAudioOn ? disableAudio() : enableAudio();
        }}>
        Fetch and Produce Audio Stream
      </button>

      {/* Screenshare */}
      <button
        onClick={() => {
          shareStream ? stopScreenShare() : startScreenShare();
        }}>
        Fetch and Produce Screen Share Stream
      </button>
    </div>
  );
};
Or you can use the useLocalMedia hook which aggregates all hooks into one:
import { useLocalMedia } from '@huddle01/react/hooks';
  const App = () => {
  const { fetchStream } = useLocalMedia();

  return (
    <div>
      {/* Webcam */}
      <button
        onClick={() => fetchStream({ mediaDeviceKind: 'cam' })} >
        Fetch Cam Stream
      </button>

      {/* Microphone */}
     <button
        onClick={() => fetchStream({ mediaDeviceKind: 'mic' })} >
        Fetch Mic Stream
      </button>

    </div>
  );
};
Incoming Audio and Video
We use the useRemoteAudio, useRemoteVideo, useRemoteScreenShare hooks to modulate peer audio, video and screenshare streams, respectively:
import {
  usePeerIds,
  useRemoteVideo,
  useRemoteAudio,
  useRemoteScreenShare
} from '@huddle01/react/hooks';
import { Audio, Video } from '@huddle01/react/components';
import { FC } from 'react';

interface RemotePeerProps {
  peerId: string;
}

const RemotePeer: FC<RemotePeerProps> = ({ peerId }) => {

  const { stream: videoStream } = useRemoteVideo({ peerId });
  const { stream: audioStream } = useRemoteAudio({ peerId });
  const { videoStream: screenVideoStream, audioStream: screenAudioStream } = useRemoteScreenShare({ peerId });

  return (
    <div>
      {videoStream && <Video stream={videoStream}>}
      {audioStream && <Audio stream={audioStream}>}
      {screenVideoStream && <Video stream={screenVideoStream}>}
      {screenAudioStream && <Audio stream={screenAudioStream}>}
    </div>
  )
}

const ShowPeers = () => {
  const { peerIds } = usePeerIds({ roles: [Role.HOST, Role.CO_HOST] }); // Retrieves peerIds of the Host and Co-Host

  return (
    <div>
      {peerIds.map(peerId => {
        return <RemotePeer peerId={peerId}  />
      })}
    </div>
  )
}

export default ShowPeers;
Your first Huddle01 project: An Audio Space
Now that you understand the basics of the Huddle SDK, we can move on to building a simple project: Audio Spaces. Fortunately, the developers at Huddle have already published a GitHub repo to help us. Let's get started.
Cloning and setting up local dependencies
Clone the repo:
git clone https://github.com/Huddle01/Audio-spaces-example-app-v2
Install dependencies with any one of the following commands:
npm i
pnpm i
yarn
.env file
Remember the API Key and Project ID we generated a while back? Create a .env in the root directory of the cloned repo and copy those keys to the fields below:
NEXT_PUBLIC_API_KEY=YOUR_API_KEY
NEXT_PUBLIC_PROJECT_ID=YOUR_PROJECT_ID
Running the app
Execute any one of these commands in the terminal:
npm run dev
pnpm run dev
yarn run dev
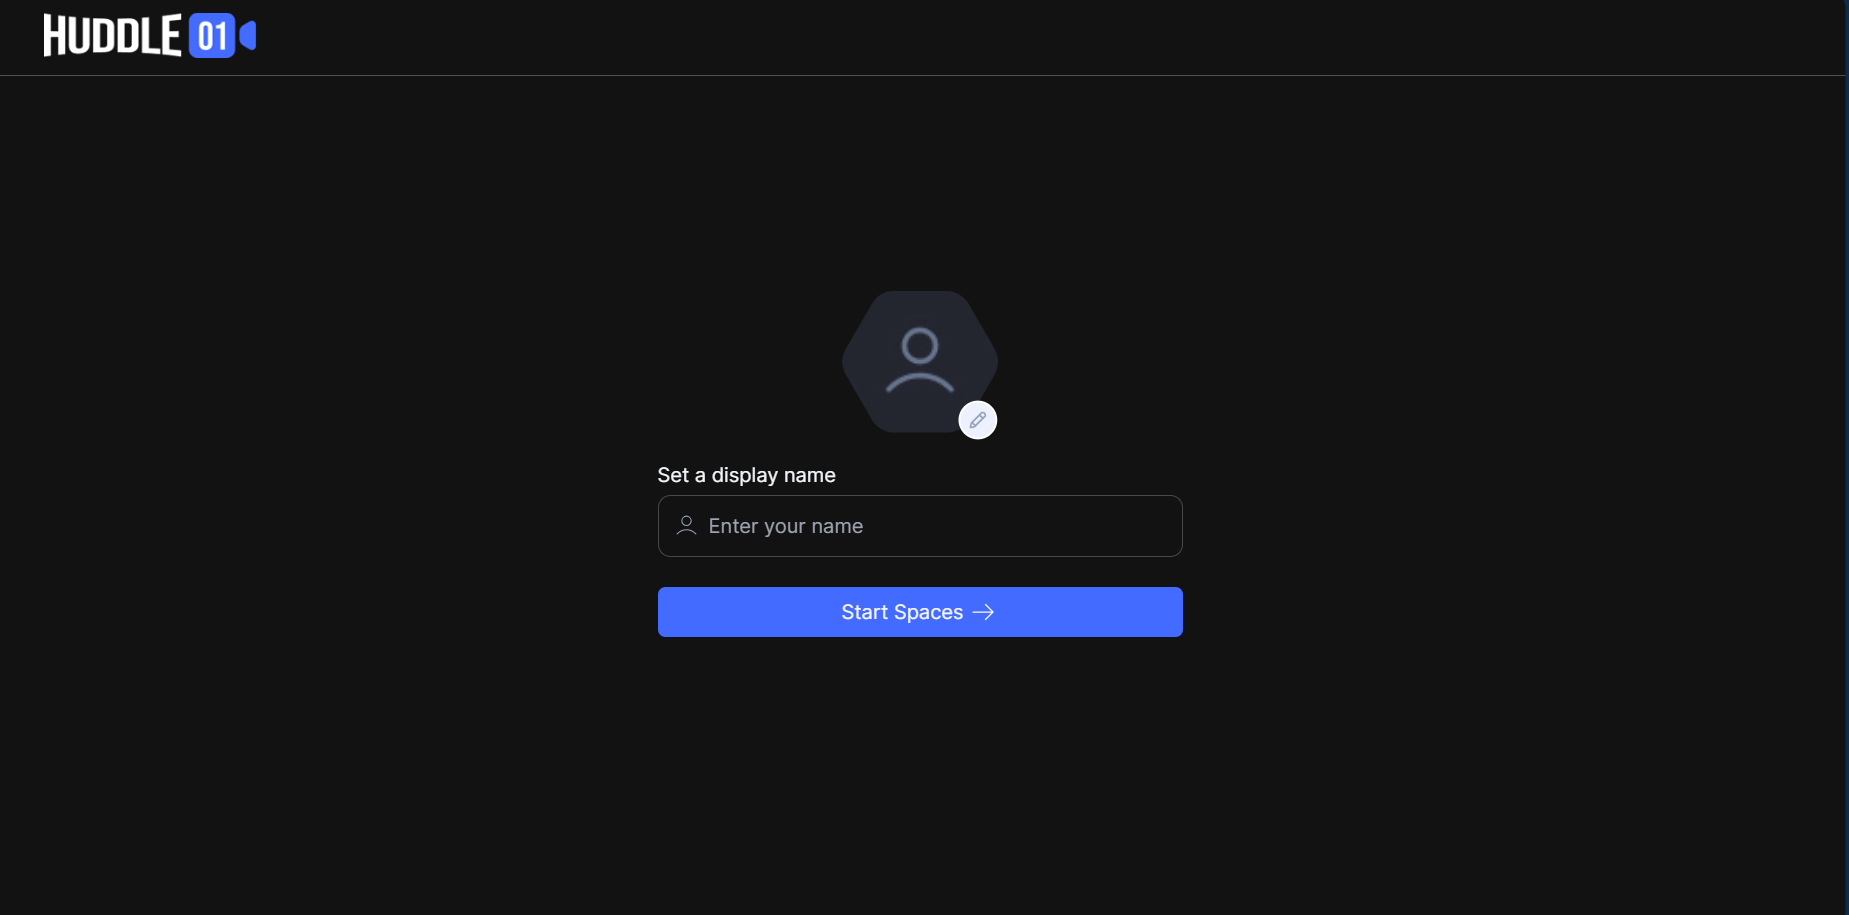
You'll receive a link to the locally running instance of the repo in your terminal. It directs you to the lobby screen:


Type in your display name and hit 'enter'. You can share the Audio Space link with friends and colleagues and let them join as well.
At this point, you are the host a.k.a admin of the session. You have full control over each participant's roles. Speaking of roles, Audio Spaces currently has four roles:
HOST: The first person to join a room will be assigned this role. They have full authority over the room and validate other roles for peers.
CO-HOST: A step below Host, Co-Hosts can assign Speaker and Listener roles to peers
SPEAKER: Peers who are allowed to speak in the room.
LISTENER: Peers who are limited to listening in and sending reactions.
Recording/Livestreaming
The Recording and Livestreaming features is handled by the ServerSDK module.
Huddle has already built a Telehealth Sample App repo to test this feature out. Huddle has used the latest version, v2, to create this. But anyway, let's get into the BTS.
Install the ServerSDK if you haven't already by running any of these terminal commands:
npm i @huddle01/server-sdk
pnpm i @huddle01/server-sdk
yarn add @huddle01/server-sdk
Recording
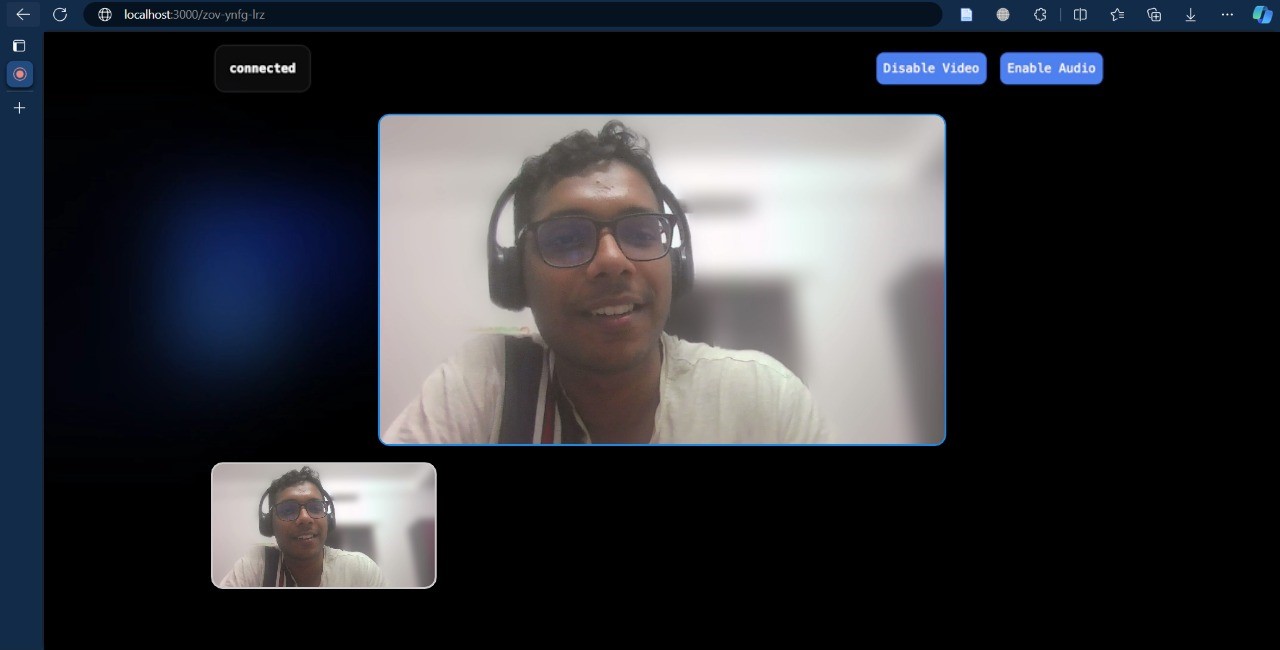
The initial state of the app when you join the room looks like this:

To start and stop recording, you can create a file called Recording.ts and import the following code:
'use server';

import { AccessToken, Role } from '@huddle01/server-sdk/auth';
import { Recorder } from '@huddle01/server-sdk/recorder';

export const startRecording = async (roomId: string) => {
  const token = new AccessToken({
    apiKey: process.env.API_KEY!,
    roomId: roomId,
    role: Role.BOT,
    permissions: {
      admin: true,
      canConsume: true,
      canProduce: true,
      canProduceSources: {
        cam: true,
        mic: true,
        screen: true,
      },
      canRecvData: true,
      canSendData: true,
      canUpdateMetadata: true,
    },
  });

  const accessToken = await token.toJwt();

  const recorder = new Recorder(
    process.env.NEXT_PUBLIC_PROJECT_ID!,
    process.env.API_KEY!
  );

  const record = await recorder.startRecording({
    roomId,
    token: accessToken,
    // options: {
    //   audioOnly: true,
    // },
  });

  return record;
};

export const stopRecording = async (roomId: string) => {
  const recorder = new Recorder(
    process.env.NEXT_PUBLIC_PROJECT_ID!,
    process.env.API_KEY!
  );

  const record = await recorder.stop({
    roomId,
  });

  if (record.msg === 'success') {
    console.log('Recording stopped');
  }

  return record;
};
To start and stop the recording individually, you can find two route.ts files under \src\app\rec\startRecording and \src\app\rec\startRecording folders respectively. You can call the startRecording method to start recording and call stopRecording method to stop recording.
By simply calling these APIs from client-side, you can easily start and stop the recording.
Livestreaming
Just as we did in Recording, we can perform livestreaming by calling the startLivestream method by passing the roomID. It accepts an array of rtmpUrls in which rtmpUrl consists of STREAM_URL and STREAM_KEY. To stop the livestream, you can call the stop method on the Recorder instance:
import { Recorder } from '@huddle01/server-sdk/recorder';
import { AccessToken, Auth } from '@huddle01/server-sdk/auth';

const recorder = new Recorder("PROJECT_ID", "API_KEY");

const generateToken = async (roomId: string) => {
  const token = new AccessToken({
    apiKey: process.env.API_KEY!,
    roomId: roomId as string,
    role: Role.BOT,
    permissions: {
      admin: true,
      canConsume: true,
      canProduce: true,
      canProduceSources: {
        cam: true,
        mic: true,
        screen: true,
      },
      canRecvData: true,
      canSendData: true,
      canUpdateMetadata: true,
    },
  });

  const accessToken = await token.toJwt();

  return accessToken;
}

const token = await generateToken("YOUR_ROOM_ID");

// Start Livestreaming
recorder.startLivestream({
    roomId: 'YOUR_ROOM_ID',
    token,
  rtmpUrls: [`${"<STREAM_URL>"}/${"<STREAM_KEY>"}`] //passing the RTMP URL
})

// Stop Livestreaming
recorder.stop({
    roomId: 'YOUR_ROOM_ID',
})
Selective Consuming
So far, we have touched upon the major features of Huddle SDK. Selective Consuming is a new highlight that gives you control over whose media stream you want to receive, without it affecting other peers.
To enable this feature, you can call the consume method on the localPeer object:
import { useHuddle01, usePeerIds } from '@huddle01/react/dist/hooks';

const { huddleClient } = useHuddle01();
const { peerIds } = usePeerIds();

async function selectivelyConsume() {
  await huddleClient.localPeer.consume({
    peerId: peerIds[0], //peerID of the remote peer you want to consume mediastream from
    label: "video", //"video" or "audio"
    appData: {},
  });
}
If you don't want to receive media streams from any peer, you can pass autoConsume: false inside Options when you first initialize the HuddleClient.
import { HuddleClient } from '@huddle01/react';

const huddleClient = new HuddleClient({
  projectId: env.NEXT_PUBLIC_PROJECT_ID,
  options: {
    activeSpeakers: {
      size: 8,
    },
    autoConsume: false
  },
});
This sets you up to not receive any media streams from any peer automatically.
Use Cases for Huddle01 SDK
Huddle01 SDK is versatile, opening up a wide range of possibilities for developers. Here are some use cases to get you started:
- Token Gated Community Events
Build exclusive communication channels for token holders, enhancing community engagement through token-gated access. Whether it's hosting AMA sessions, VIP webinars, or private networking events, token-gated community events can incentivize token ownership and promote active participation within the community.
- Decentralized Collaboration Platforms
Help teams and communities working from remote areas collaborate on their task seamlessly. Develop tools for remote teams that feature secure video meetings, file sharing, and real-time messaging, all powered by Huddle01’s dRTC infrastructure. Features such as secure video meetings, file sharing, and real-time messaging can facilitate efficient collaboration and productivity.
- Virtual-Study Group Platform
Allow students from all parts of the world to come together for collaborative learning. Through real-time discussions, study groups, and peer-to-peer learning sessions, students can enhance their understanding of various subjects and topics. Features such as screen sharing, document collaboration, and video conferencing can facilitate interactive learning experiences.
- Decentralized Language Exchange Network
Build a decentralized platform where language learners can connect with native speakers for language exchange sessions and cultural exchange experiences. Users can find language partners based on their interests, proficiency levels, and language learning goals, and engage in one-on-one or group language exchange sessions via video calls.
Start Building with Huddle01
Huddle01's SDK empowers you to create immersive communication experiences. Here's how to get started:
Huddles01 Documentation: https://docs.huddle01.com/docs
Huddle01's Official GitHub Repository: https://github.com/Huddle01
Huddle01's Official YouTube channel: https://www.youtube.com/@huddle0174
Other blogs:
Build a web3 Clubhouse using the Huddle01SDK: https://huddle01.hashnode.dev/build-a-web3-clubhouse-using-the-huddle01-sdk
Video Demo:
Building a Web3 Clubhouse Using Huddle01SDK: https://youtu.be/9FEuY8pywuo?si=xonnkCFqkjcStOKR
To know more about Huddle01, connect on:
Twitter(X): https://x.com/huddle01com
Website: https://huddle01.com/
Conclusion
Huddle01 is set to transform real-time communication by harnessing the power of blockchain technology. Its decentralized approach ensures robust security, scalability, and resilience, making it an ideal choice for a wide range of applications. tart exploring the possibilities with Huddle01 today and be a part of the next evolution in real-time communication technology.
Subscribe to my newsletter
Read articles from Tanu Shree directly inside your inbox. Subscribe to the newsletter, and don't miss out.
Written by
