How to Deploy Applications on Azure Cloud: Step-by-Step Guide
 Nitin
Nitin
Heads up: This is the second article in the series 'Deploy Your App on Azure Without Spending a Dime'. If you haven't checked out the first article yet, you can find it here.
Prepare Our App to Publish to Azure
Open the app in VS Code.
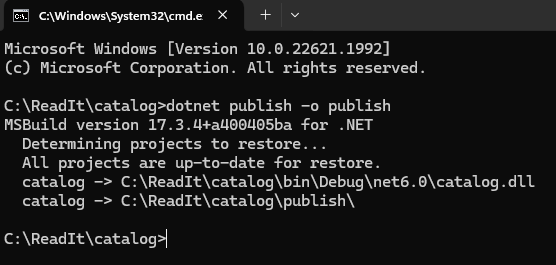
Open the terminal in VS Code and run the
dotnet publish -o publishcommand.
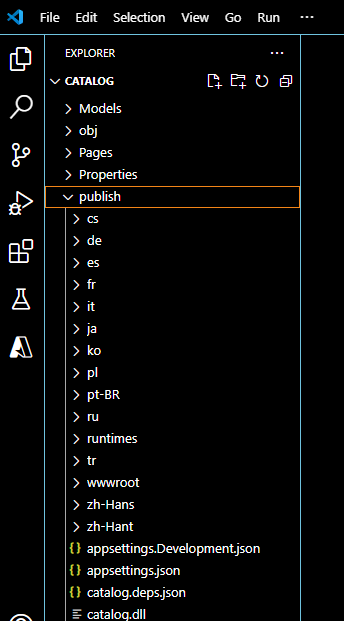
Let's check if a ‘publish’ folder is created in our app folder opened in VS Code.
Create VM on Azure
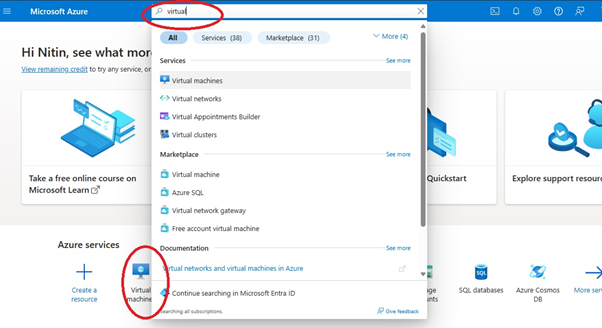
You can either create a VM by searching for "Virtual machine" in the search bar OR click on the Virtual Machine option shown on the Home page of the Azure portal.
You will land on a page as shown below.
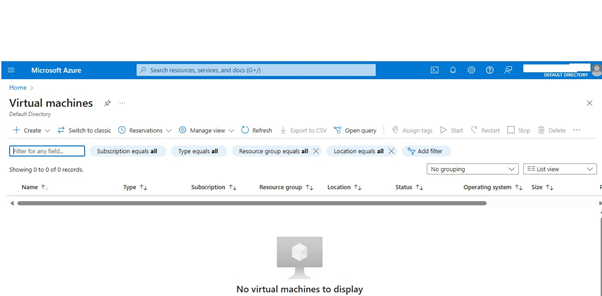
Click on the Create option and select ‘Azure Virtual Machine’ from the list.
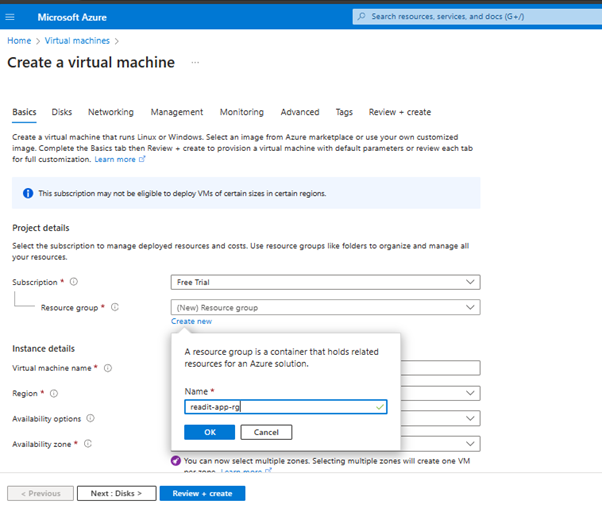
Create a new ‘Resource group’.
Choose the region and other required details.
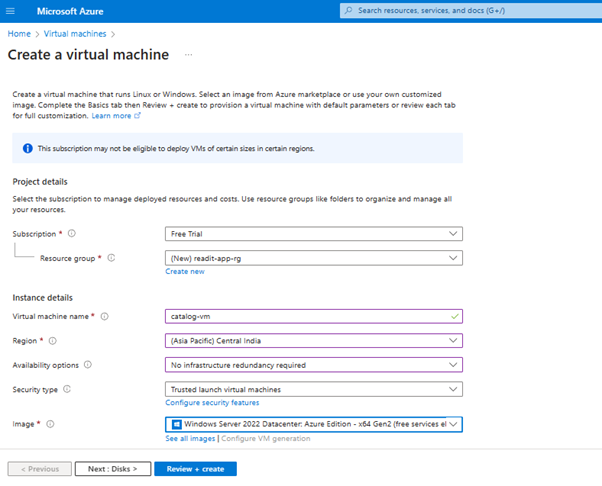
I chose the nearest region from my location and required other details that are enough for my app on Azure.
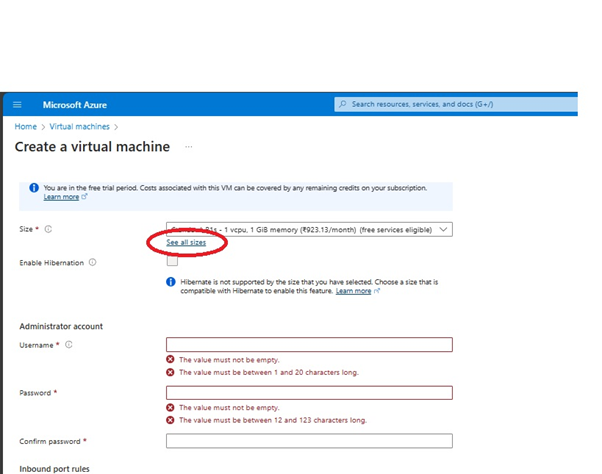
Select the size for VM – to do that, click on the ‘See all sizes’ hyperlink.
Refer to the different options and their prices.
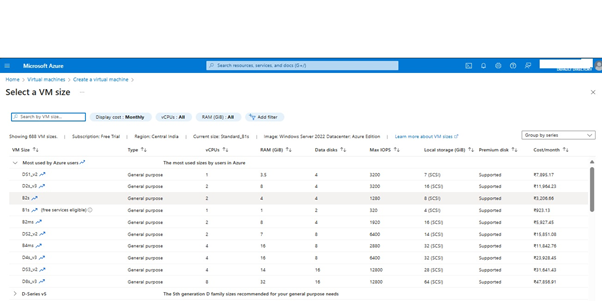
I am going to choose B2ms as these kinds of machines will not be up 24*7 but used periodically and are suitable for my case. Also, note the price for it.
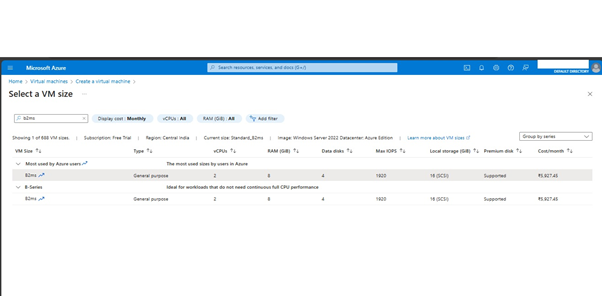
Select the item in the list and click the ‘Select’ button.
Enter admin and password details, and make sure the port is RDP.
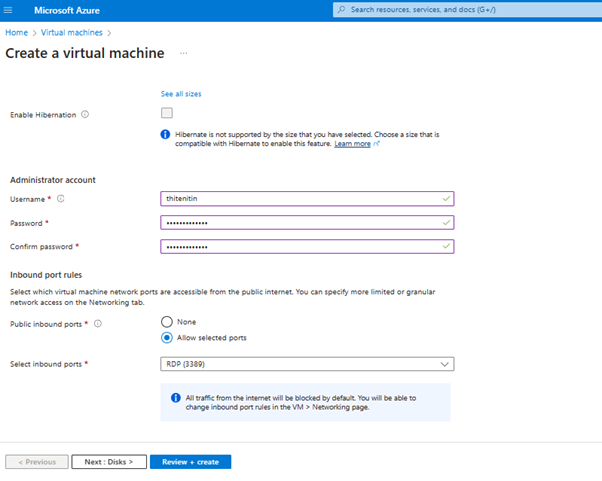
Click Next to configure the disk.
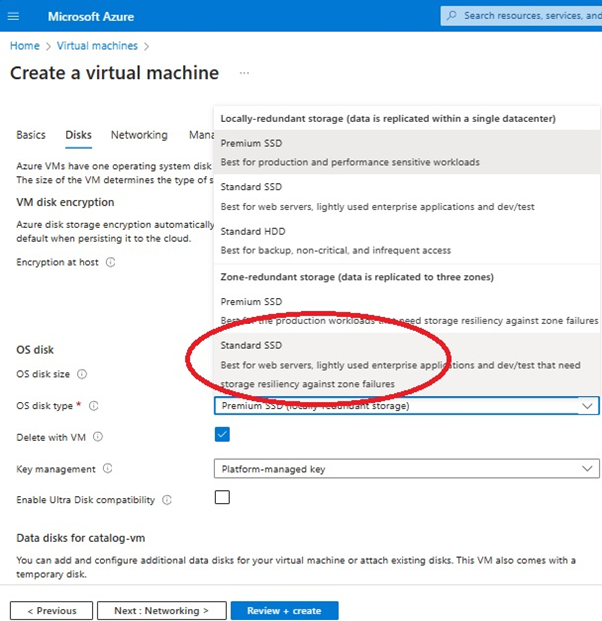
Reasons to select SSD:
It fits the requirement.
It’s cheaper in price than premium.
Select and click ‘Next’ to configure network settings.
In the virtual network, Azure will generate names automatically for the IP and network, but we can rename them to what we want.
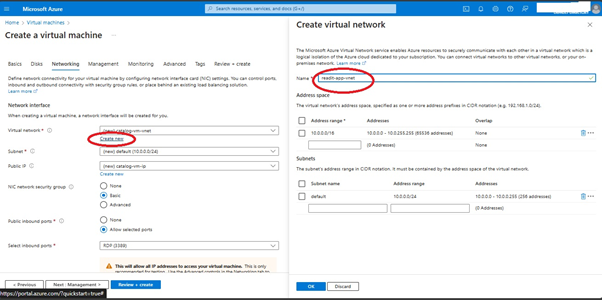
I want to keep the IP static, so I can use it always to connect and while configuring the load balancer in steps further.
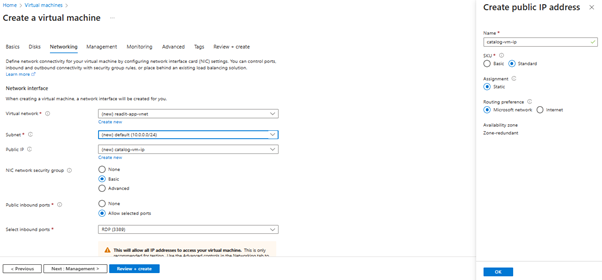
Click on OK for the Create IP address pane and click on the Review + Create button.
And I got successful validation on the 2nd try. As in the first, it gave me an error but without changing anything – I clicked on the Review + Create button after 2 minutes – GOT SUCCESS.
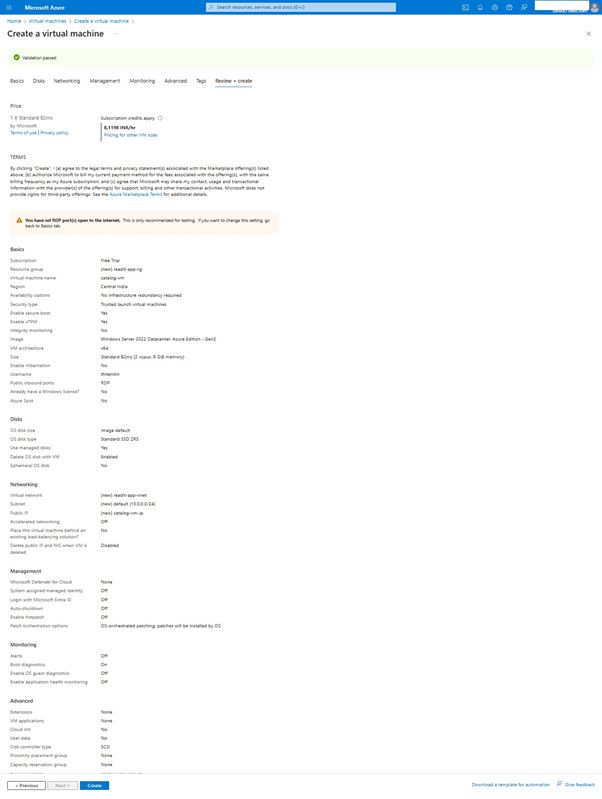
Click on the ‘Create’ button as the final step towards creating the VM.
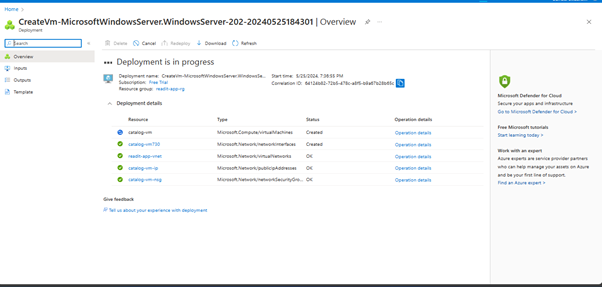
Let's wait for Azure to deploy the VM.
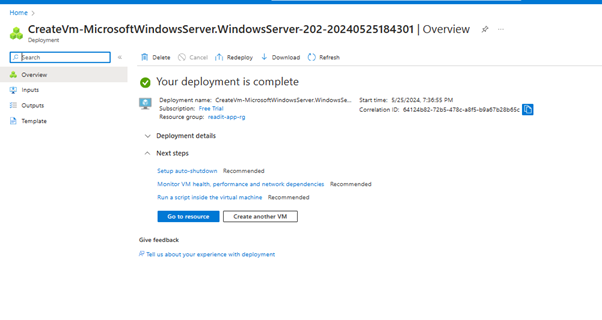
NOW – let's connect to it and configure it to run the Catalog app.
Click on ‘Go to resource’.
Let's review if it has all as configured.
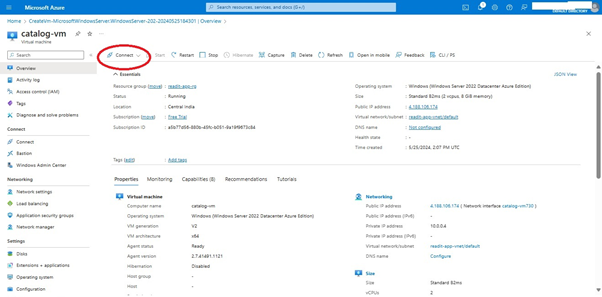
Click on the ‘Connect’ icon as highlighted in the screenshot above and select ‘Connect’ from the dropdown that would display.
Click on the ‘Select’ button on the ‘Native RDP’ displayed and click on the ‘Download RDP file’ button.
(RDP is Remote Desktop Protocol.)
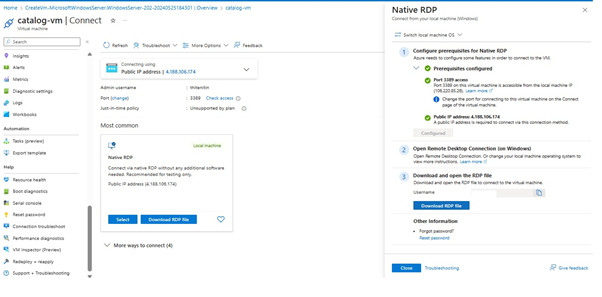
Download and double-click on the file.
You should see a window like the below screenshot.
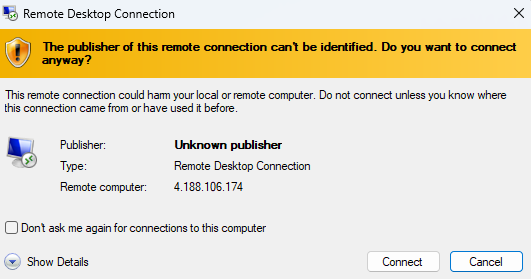
Click ‘Connect’.
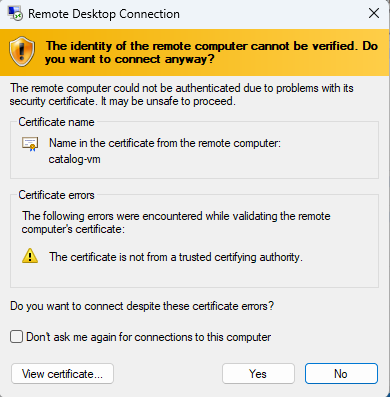
It will ask to enter the credentials – enter the details you set while configuring the VM.
Click on ‘Yes’ to connect to the remote desktop.
The following screen will be displayed.
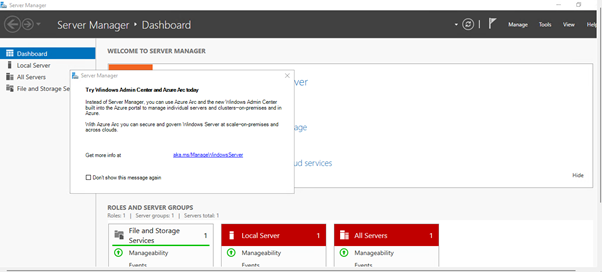
NOW let's configure by going through step-by-step as shown in the image below.
Click on ‘Add roles and features’.
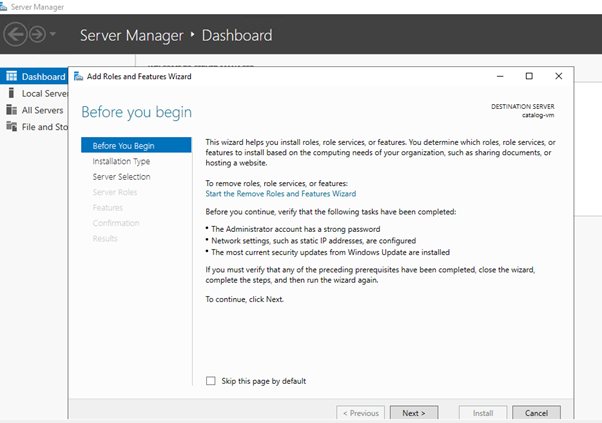
Click ‘Next’.
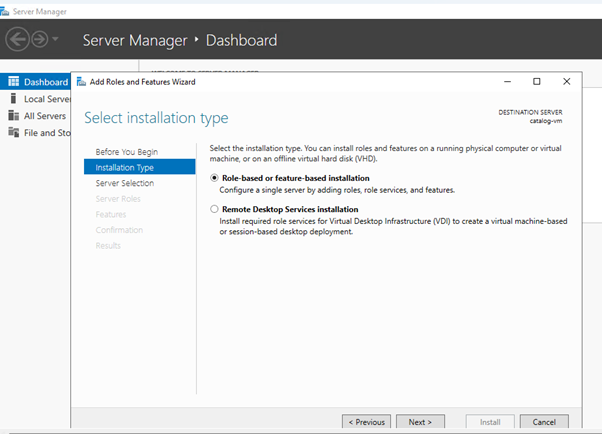
Click ‘Next’.
Select the VM to make it a server – as of now I have only one and I will use the same for the purpose.
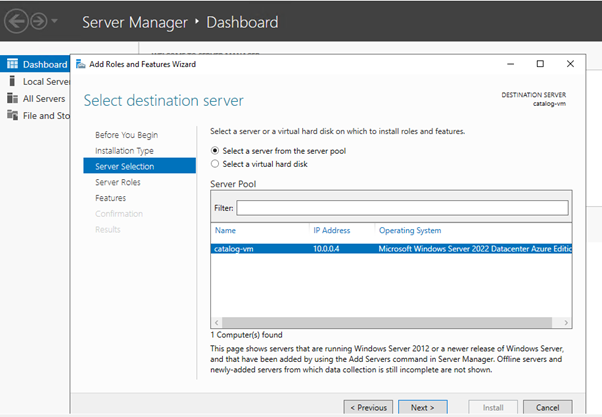
Click ‘Next’.
Select the highlighted option to add the respective role and features.
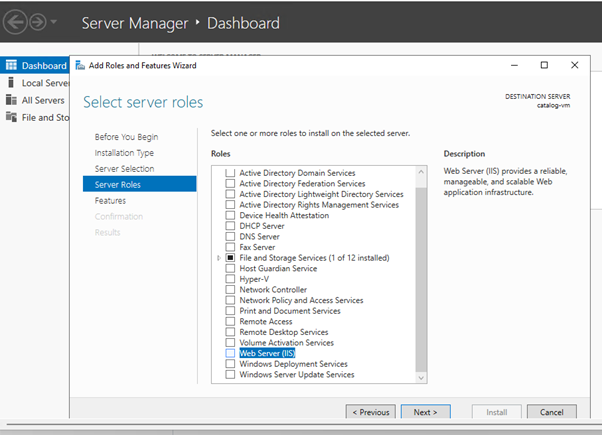
Click on ‘Add Features’.
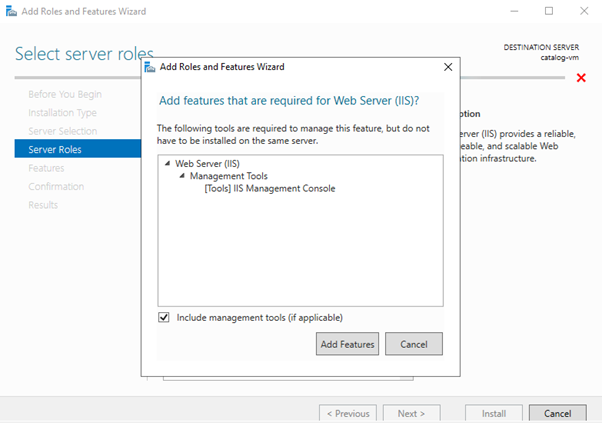
Click ‘Next’.
No changes required as of now.
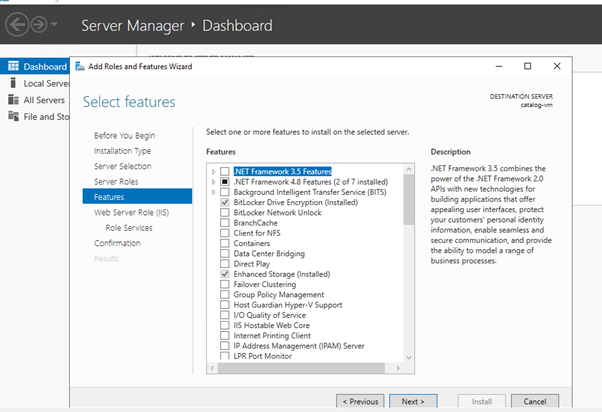
Click ‘Next’.
Click ‘Next’.
For Role Services – select ‘Custom Logging’ and ‘Logging Tools’.
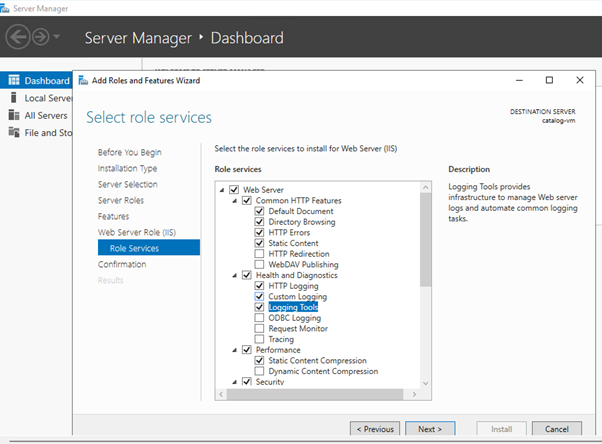
Click ‘Next’.
Click on ‘Install’.
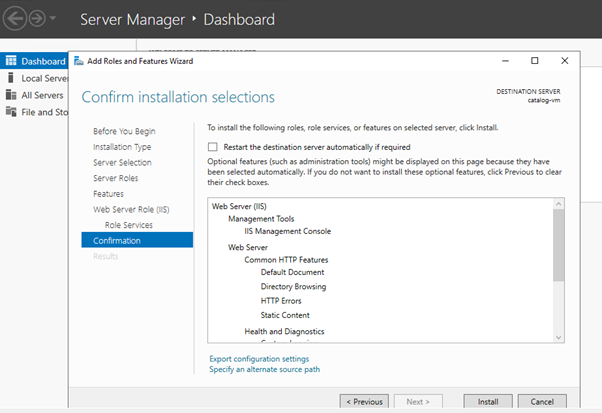
Let the installation complete.
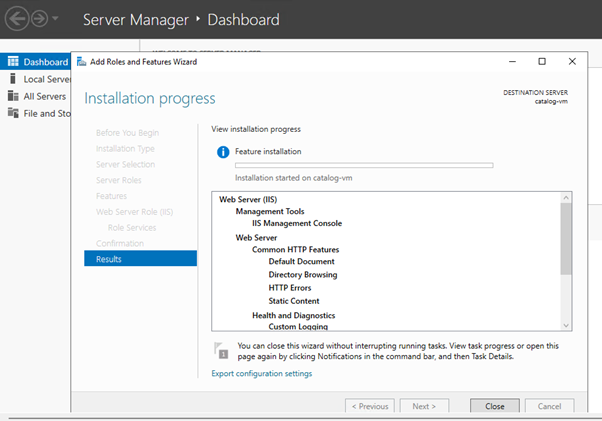
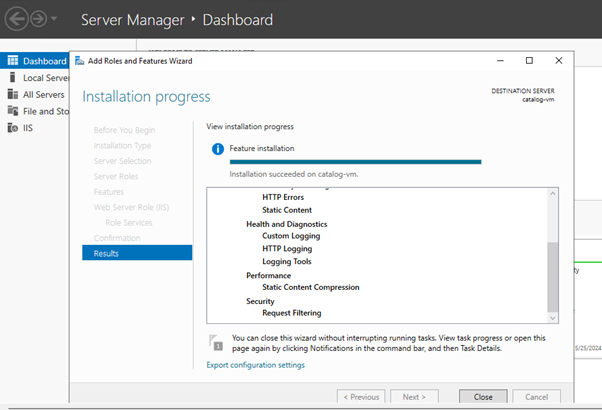
Installation is complete, click ‘Close’.
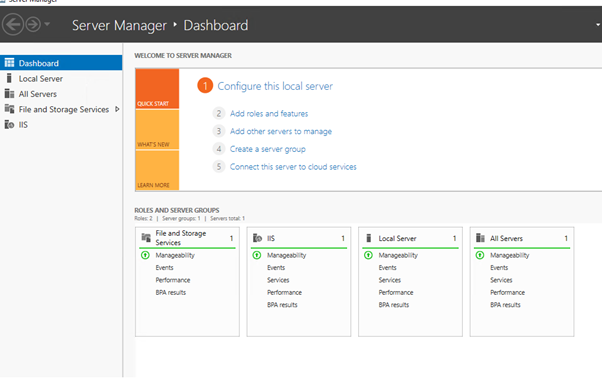
The dashboard post-installation.
Now, Edge would have automatically opened for you – continue without syncing data and type ‘localhost’ and hit enter.
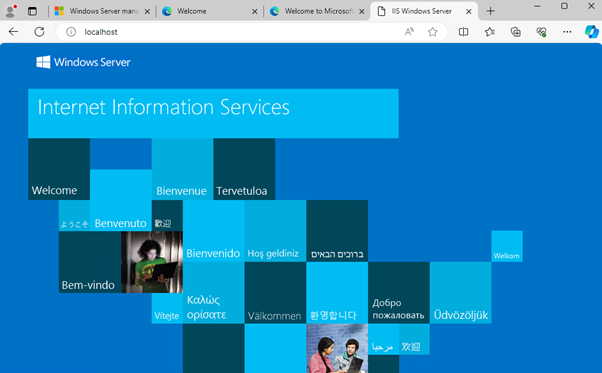
So – the localhost is working for me; this means the machine is successfully configured as a web server.
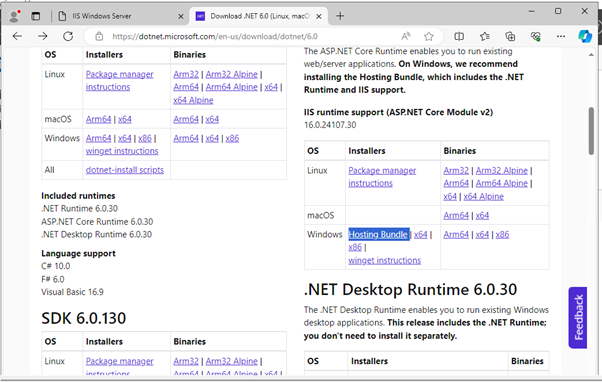
NOW let's install the hosting bundle 'dot net 6' which is required for my app to run on this server.
Download from https://dotnet.microsoft.com/en-us/download/dotnet/6.0 > SDK > relevant SDK installer > download and install.
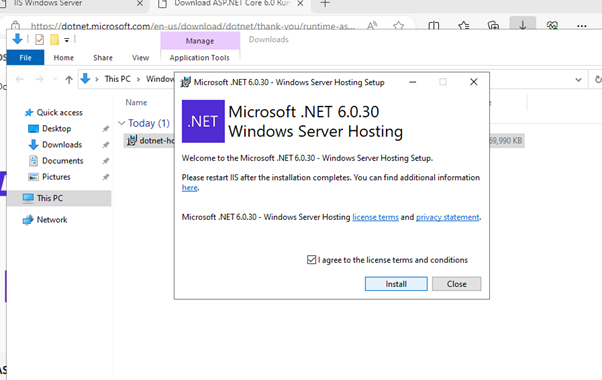
Installation successfully completed.
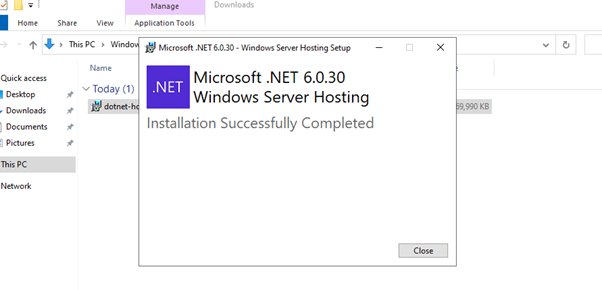
The web server is ready to host my app.
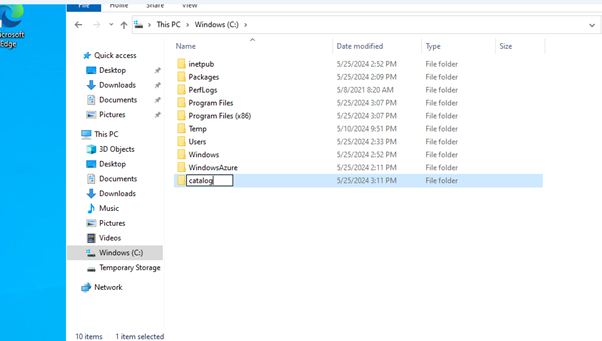
Let's go to the C drive to create the folder for app files.
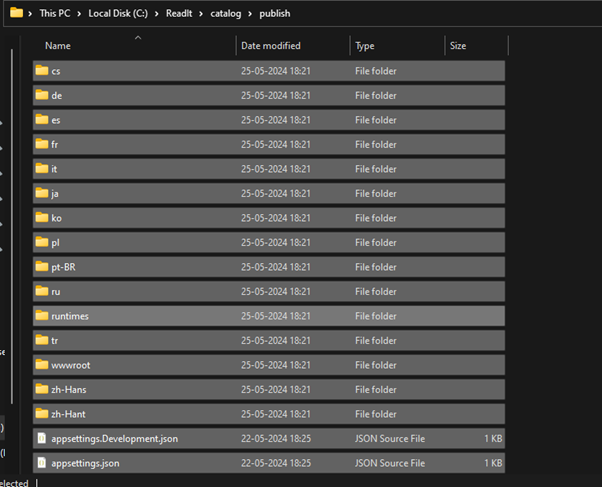
Let's go back to the local computer and open the ‘publish’ folder from the app folder. Copy all of the contents of the ‘publish’ folder.
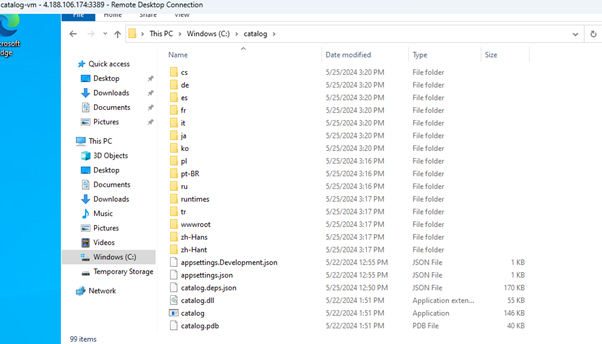
AND paste them under the ‘catalog' folder on the remote machine.
Copy is complete on the remote machine.
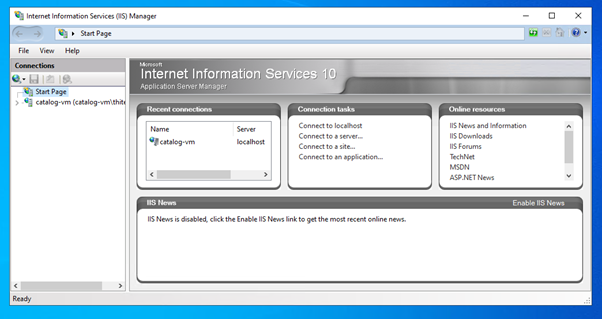
Let's go to the Windows search bar, type IIS, and open the only option that appears in the search results.
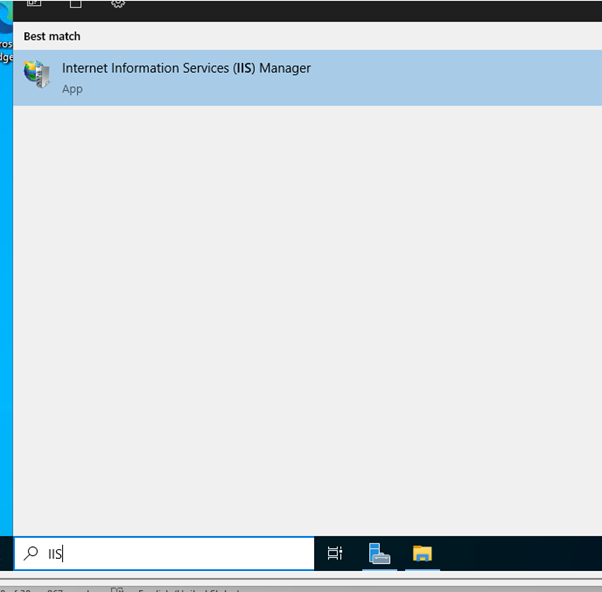
Results as below:
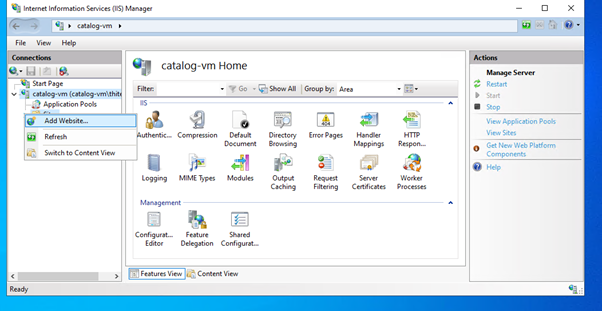
I have to create a website for the catalog app. Expand the ‘catalog-vm’ option and click on the ‘Add Website’ option.
Enter the site name.
Select the ‘catalog’ folder from the file storage of the remote machine.
Enter the port ‘8080’.
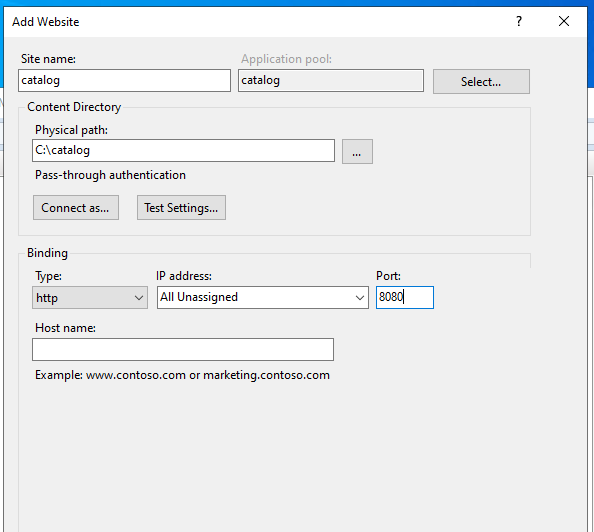
And click ‘Ok’.
Click on the URL highlighted in the screenshot below to open the app on localhost.
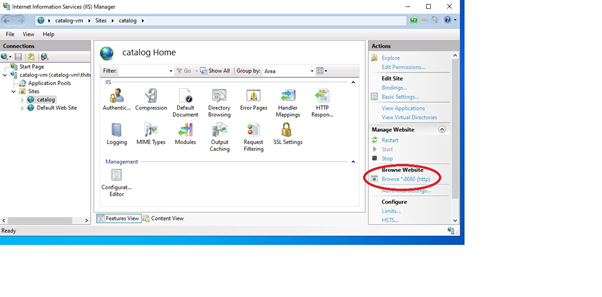
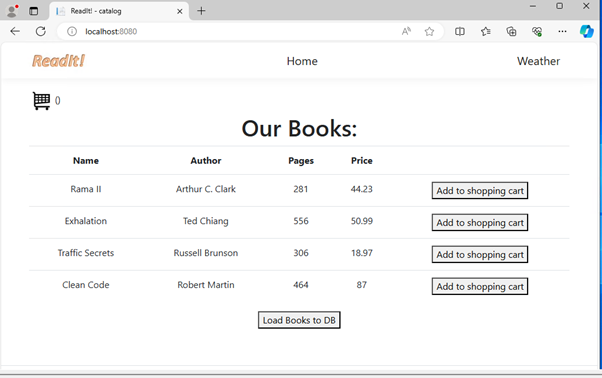
GREAT – the app is now opened on the remote machine as well.
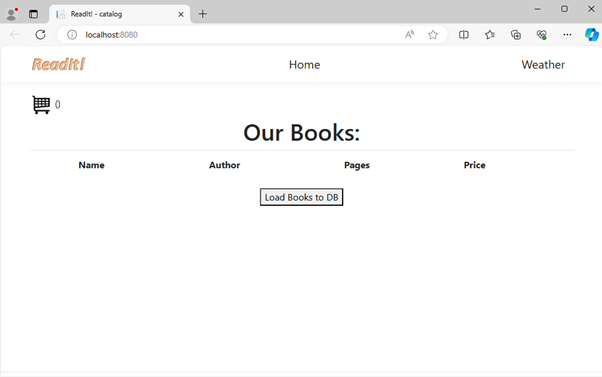
Functioning as expected.
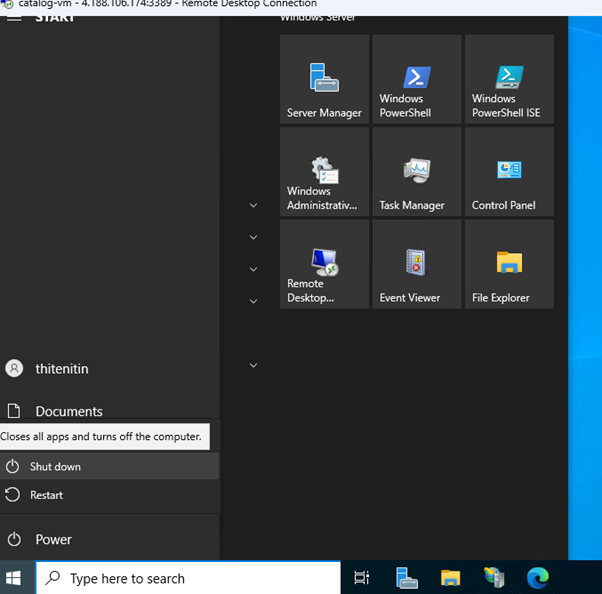
A QUICK IMPORTANT REMINDER – ALWAYS SHUT DOWN THE VM WHEN NOT IN USE
Hope this helps you.
Subscribe to my newsletter
Read articles from Nitin directly inside your inbox. Subscribe to the newsletter, and don't miss out.
Written by

Nitin
Nitin
A Seasoned gate keeper for software quality (Manual / Automation (Web + Mobile native + API) / Performance test) with 13 years of experience, An automation🤖 lover and a continuous📚 learner. A test automation geek and a DevOps engineer using and exploring cloud☁️. Looking for opportunities in Cloud DevOps for mutual growth. (Working remotely since last 5 years with teams in Europe / USA and Canada)