Project: Implementing Auto Scaling in AWS with AWS WAF for Enhanced Application Availability and Security
 SWATHI PUNREDDY
Table of contents
Objective
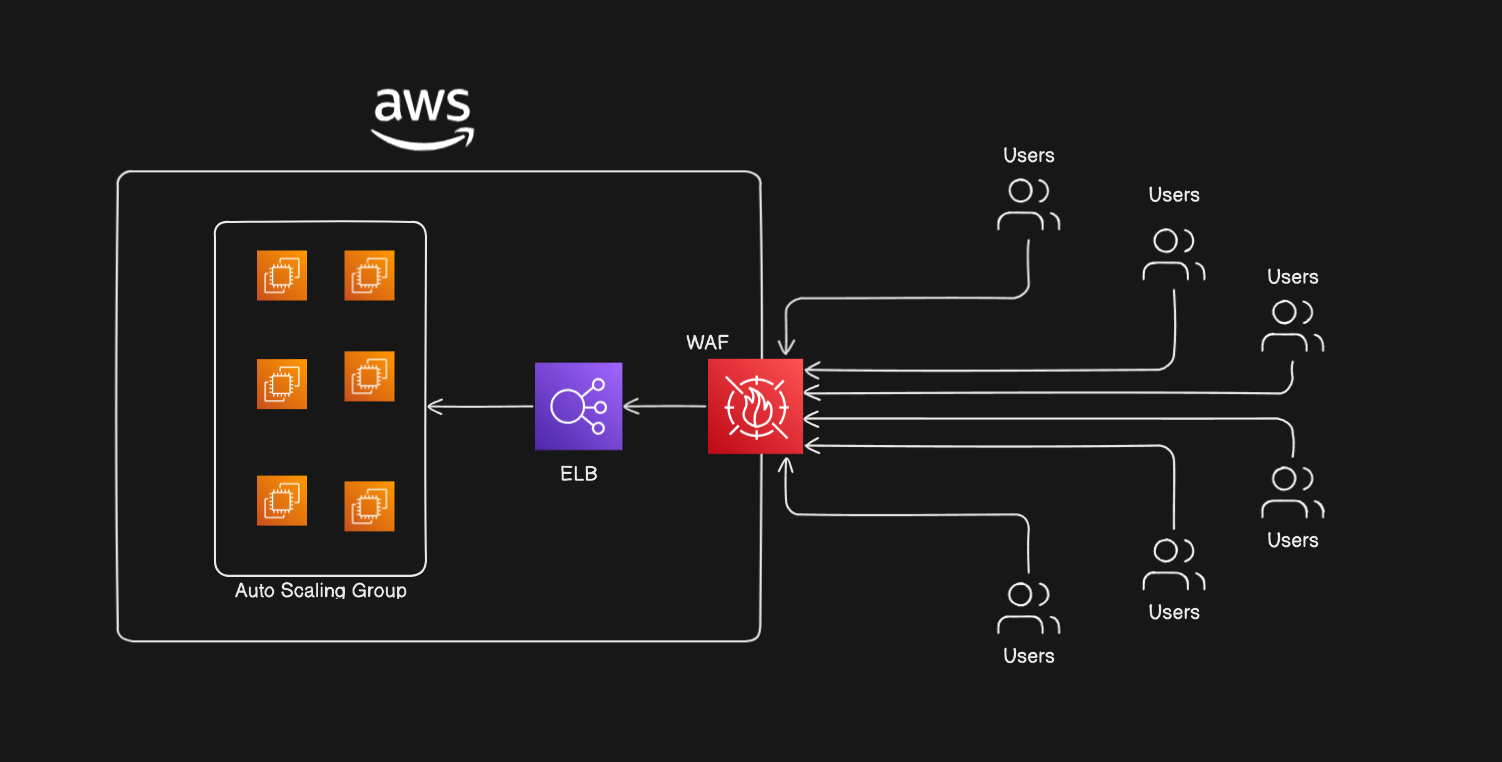
The objective of this project is to implement AWS Auto Scaling to ensure high availability and optimal performance of a web application. Additionally, the project integrates AWS Web Application Firewall (WAF) to enhance the security of the application by protecting it from common web exploits and bots.
Step-by-Step Implementation
Step 1: Create an Auto Scaling Group
Navigate to Auto Scaling Groups
Open the AWS Management Console.
Go to the Auto Scaling section.
Create Auto Scaling Group
Click on Create Auto Scaling group.
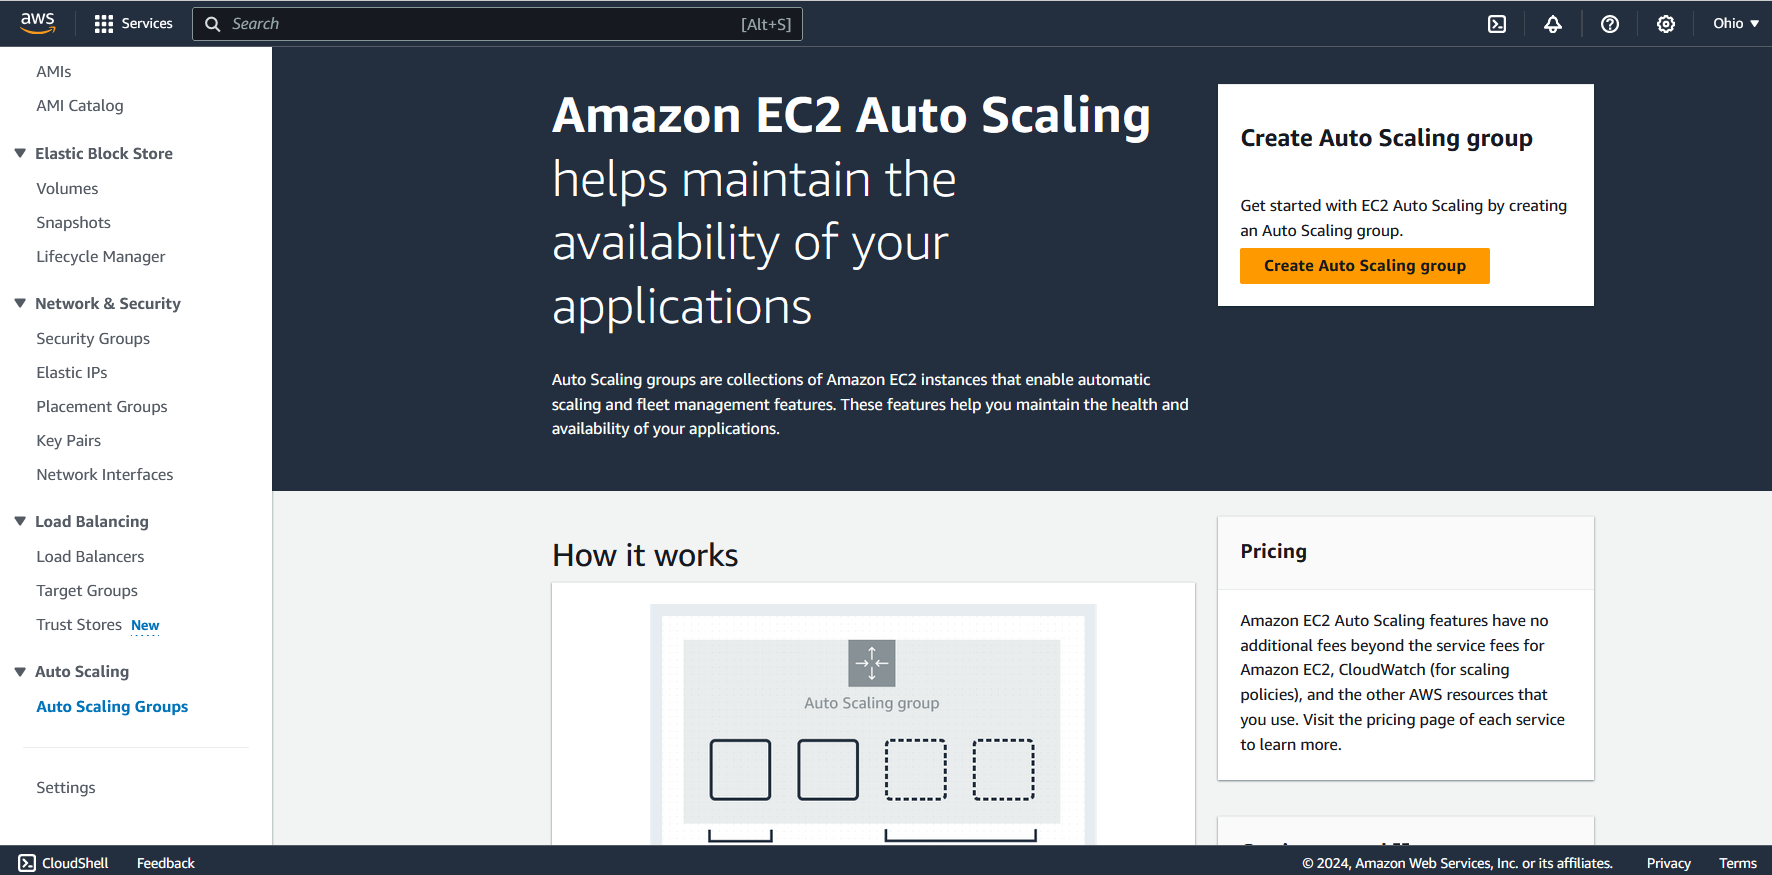
Provide a name for your Auto Scaling group.
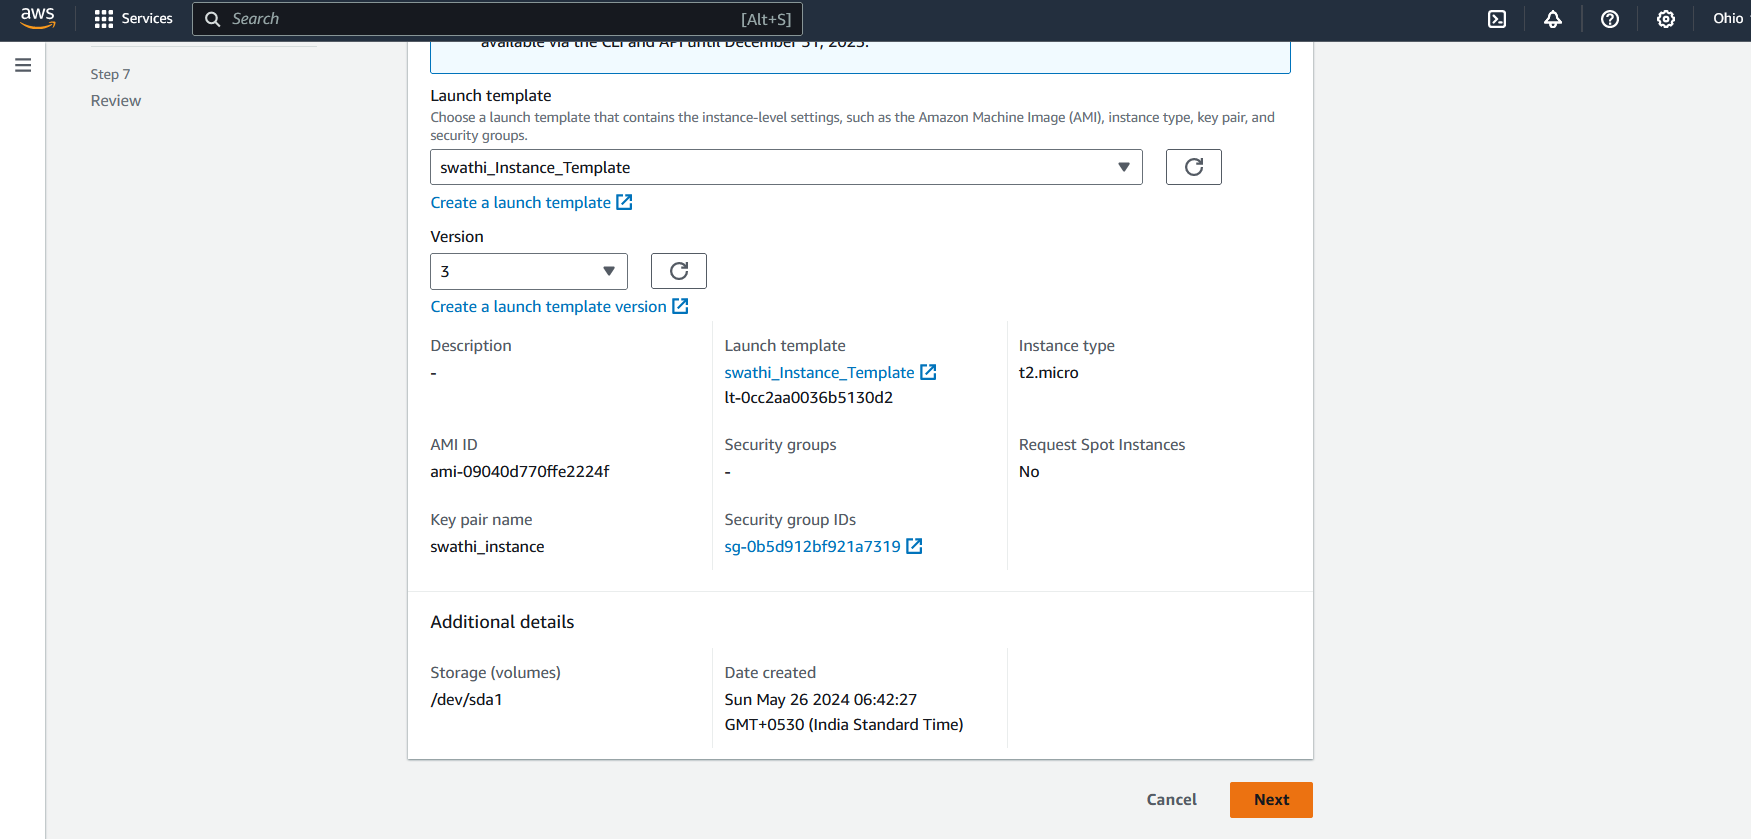
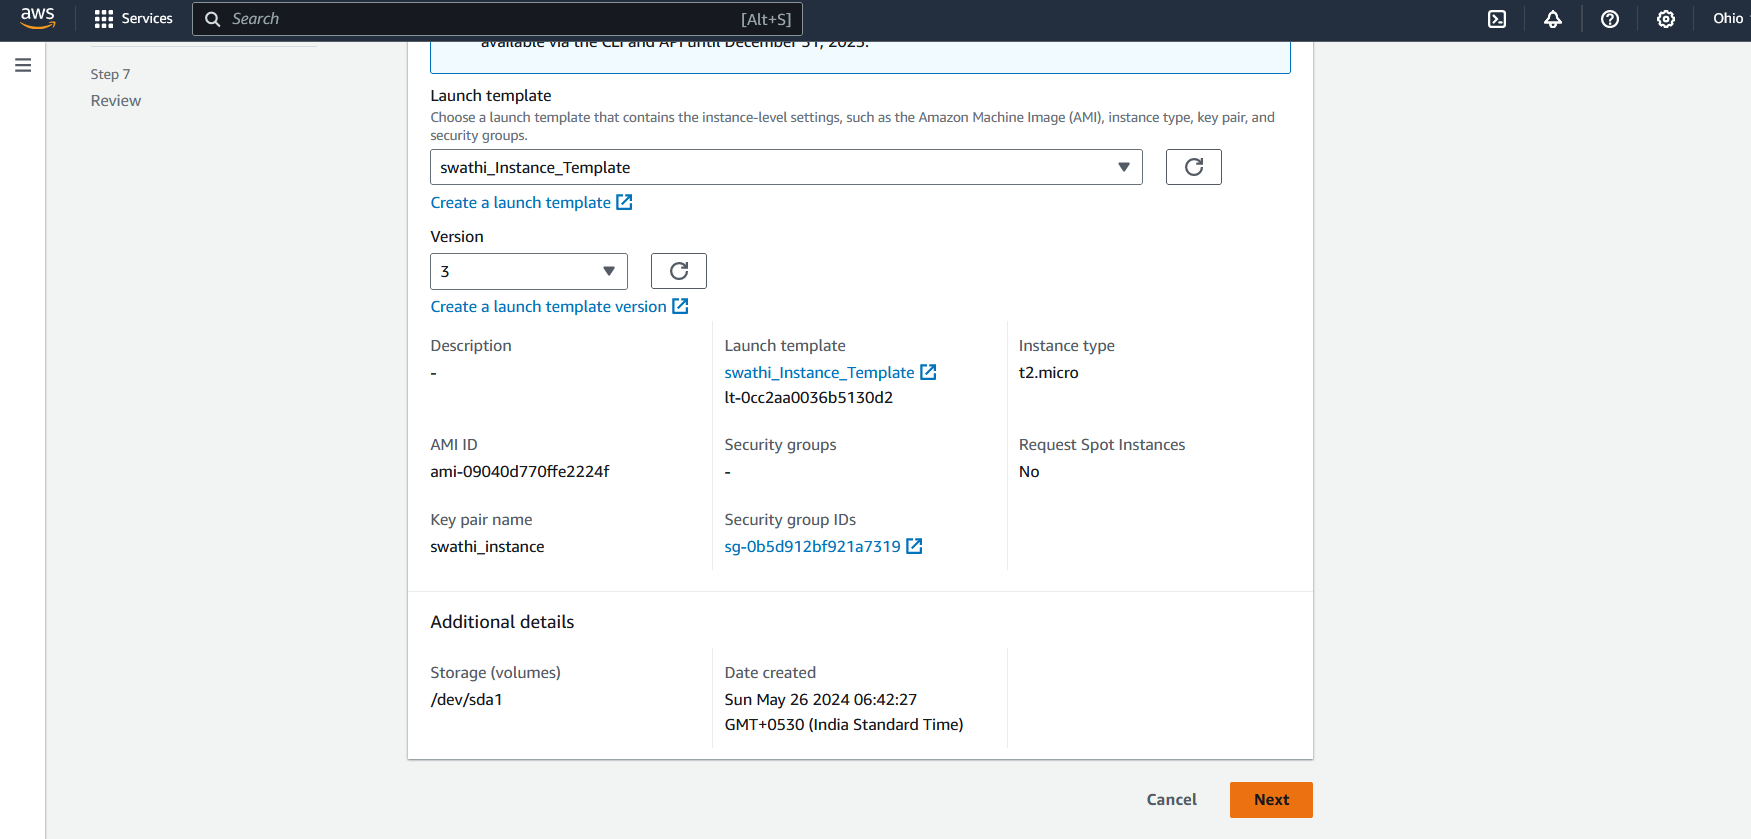
Select the launch template for your instance. (If you need help creating a template, refer to my previous blog post on creating a launch template for an instance.)(https://hashnode.com/discussions/post/6652a5fb1440d3a85c713410?source=discuss_feed_card_button)
Choose the desired version and click Next.
Step 2: Configure Network and Load Balancer
Network Selection
Select the appropriate VPC and Availability Zones for your instances.
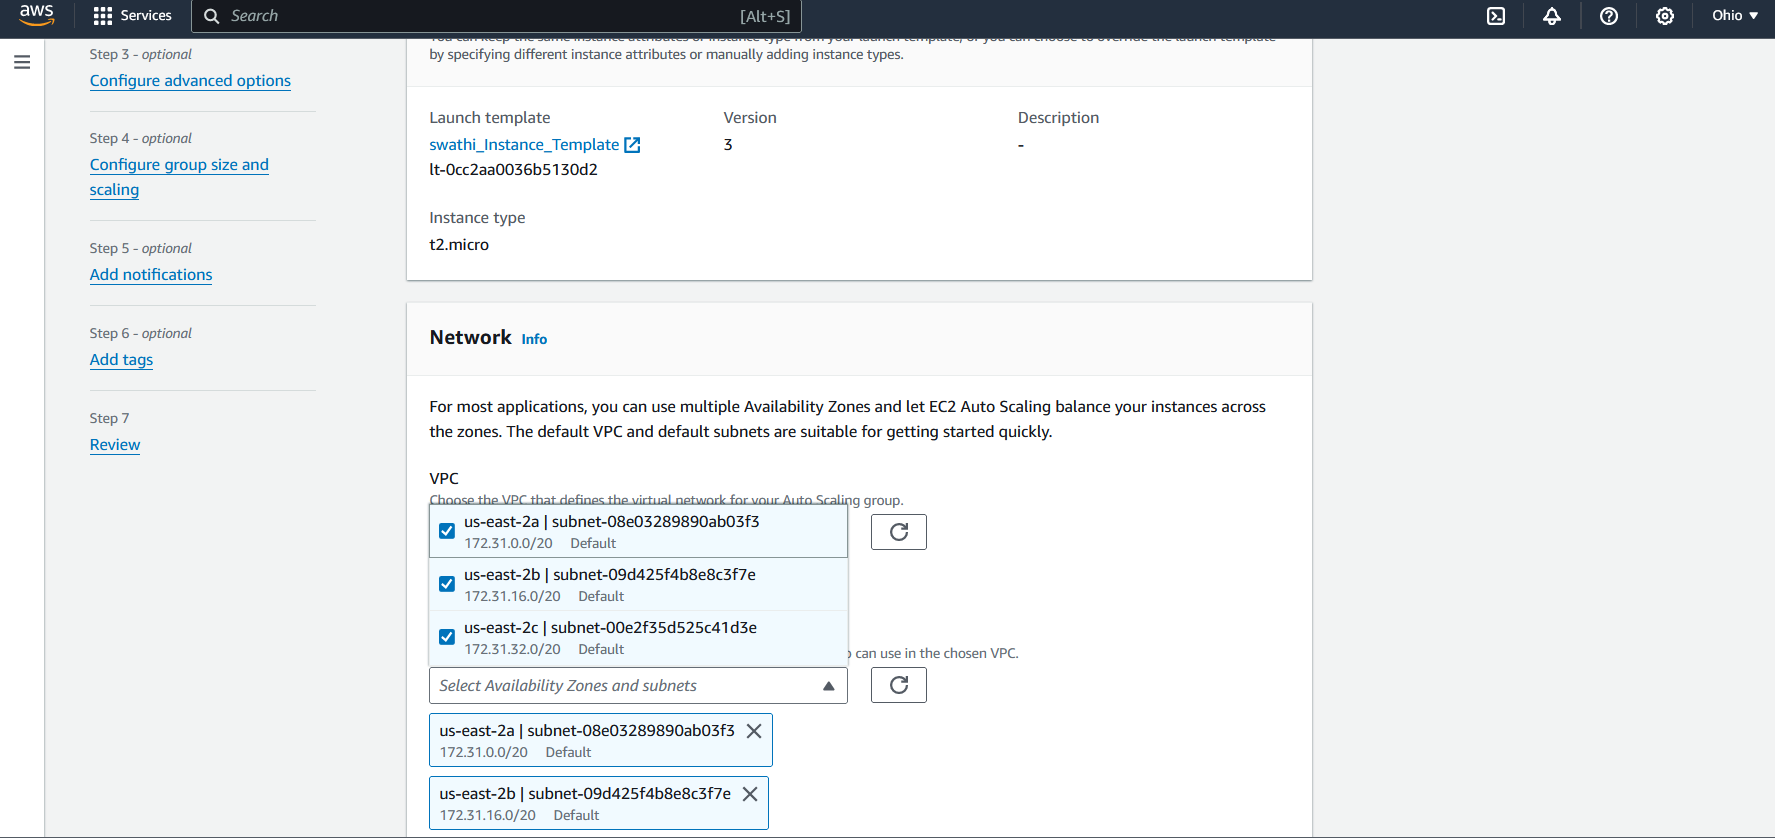
Click Next.
Attach to Load Balancer
Select Attach to a new load balancer.
Choose Application Load Balancer as the load balancer type.
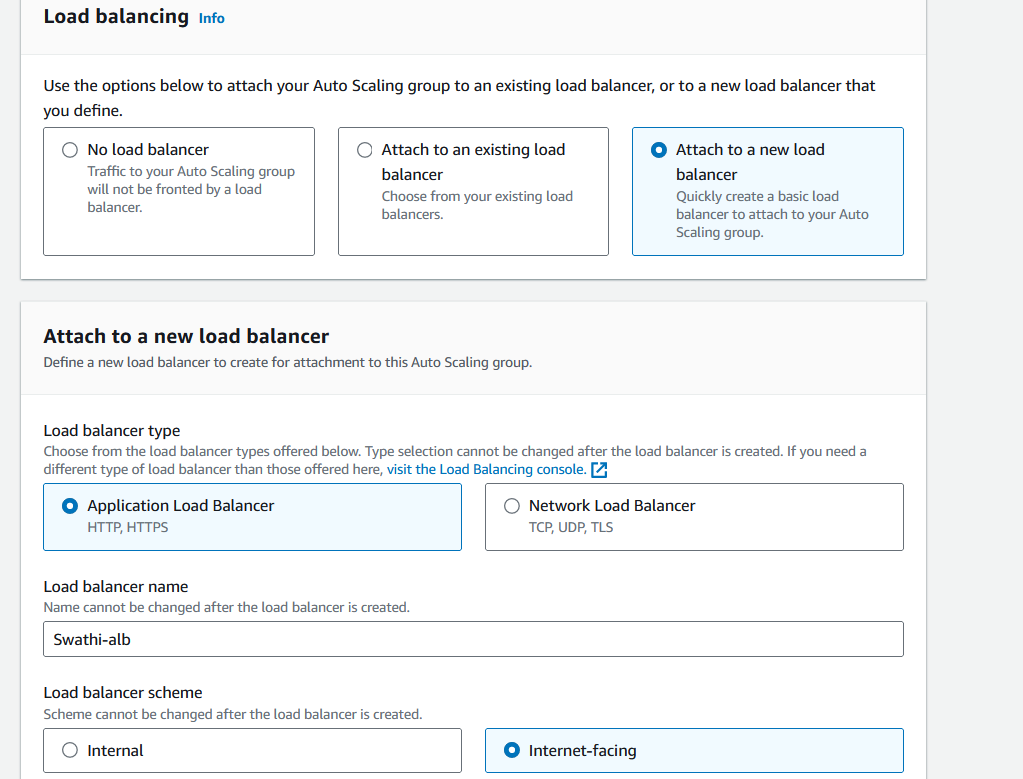
Set the load balancer scheme to Internet-facing.
Configure listeners and routing for your load balancer.
Enable health check
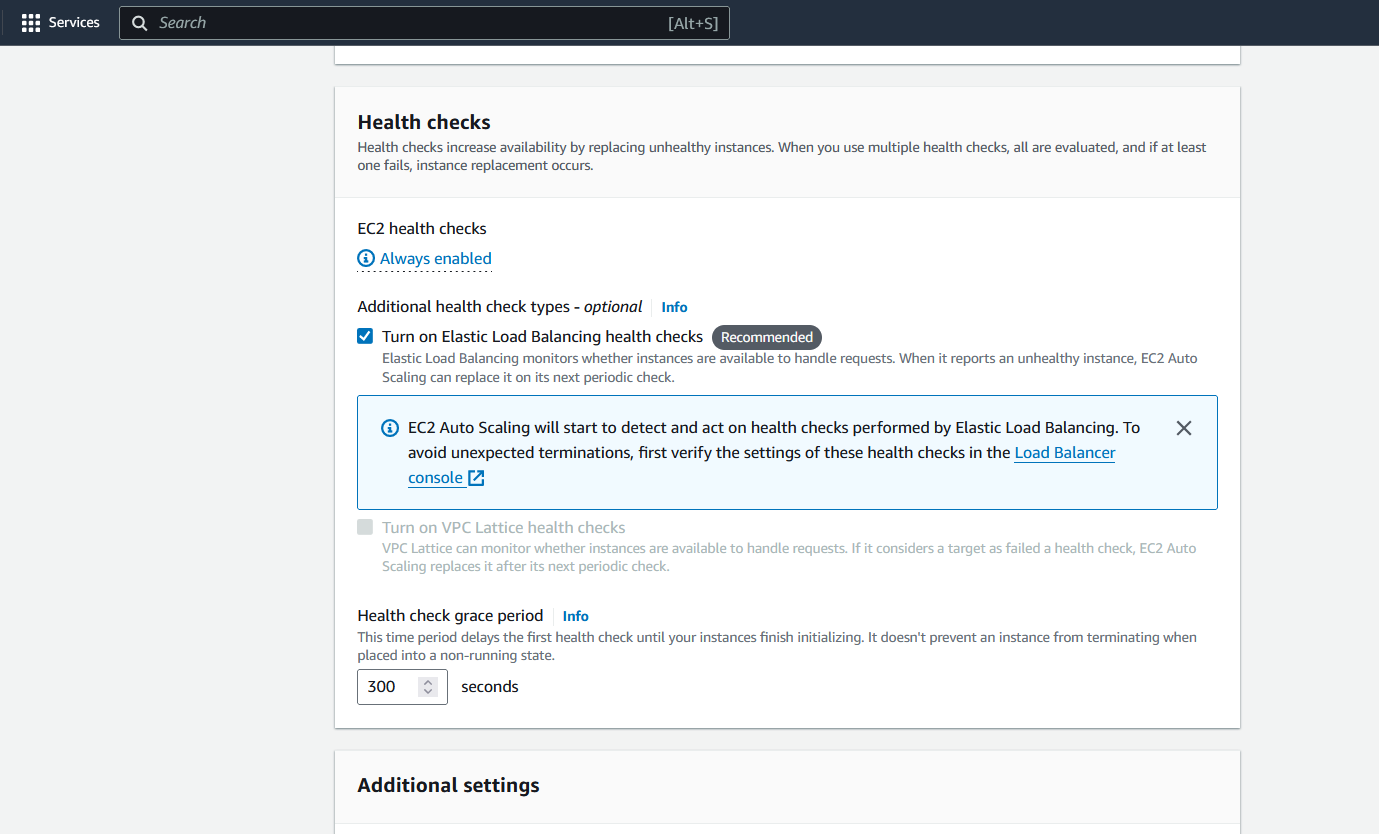
Enable group metrics collection within CloudWatch.
Click Next.
Step 3: Set Desired Capacity and Scaling Policies
Desired Capacity
Set the desired capacity, minimum capacity, and maximum capacity for your instances.
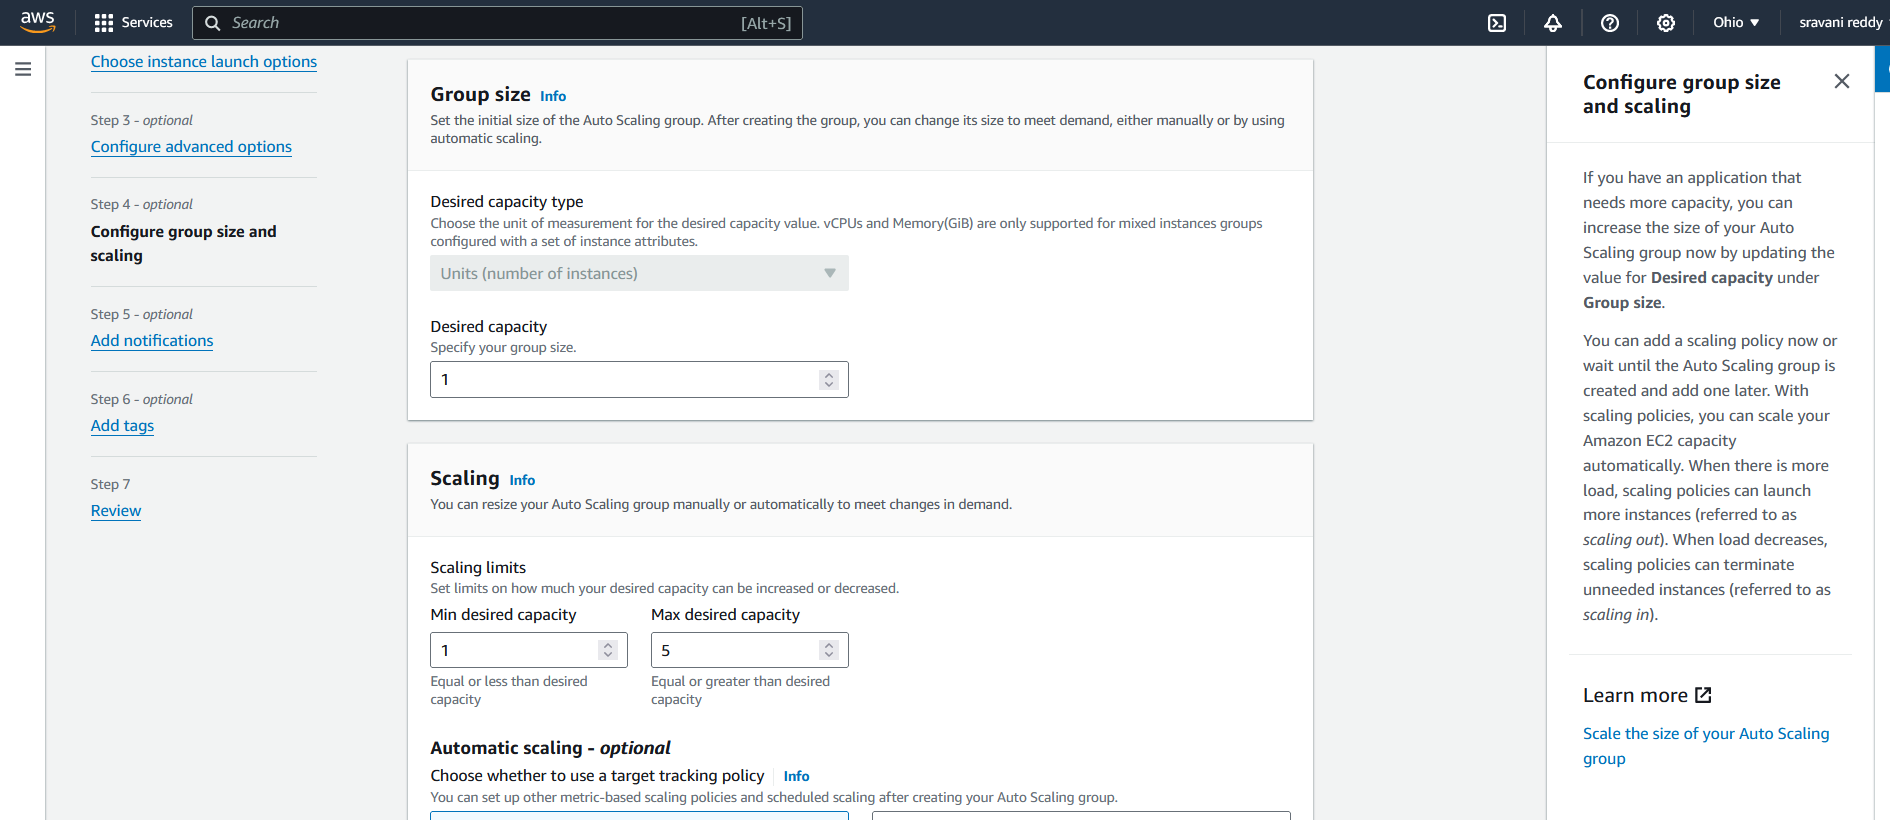
Click Next.
Scaling Policy
Select the Target tracking scaling policy.
Choose Average CPU utilization as the metric type.
Set the target value to 50%. This means a new instance will launch when CPU utilization reaches 50%.
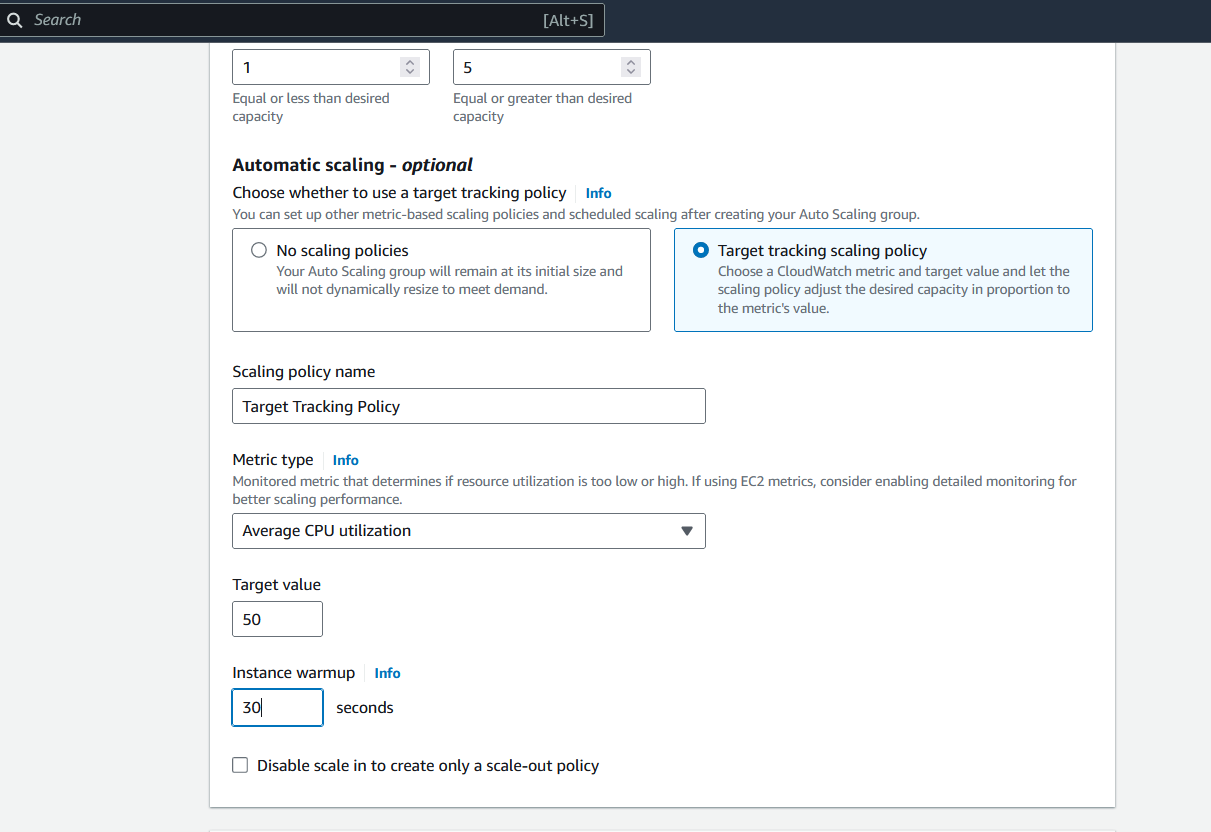
Set the instance warmup time to 30 seconds. This allows the new instance to warm up for 30 seconds before handling traffic.
Instance maintenance policy: Select No policy.
Click Next.
Step 4: Add Tags and Review
Add Tags
Provide key and value pairs for tagging your instances, e.g.,
Name: MyServer.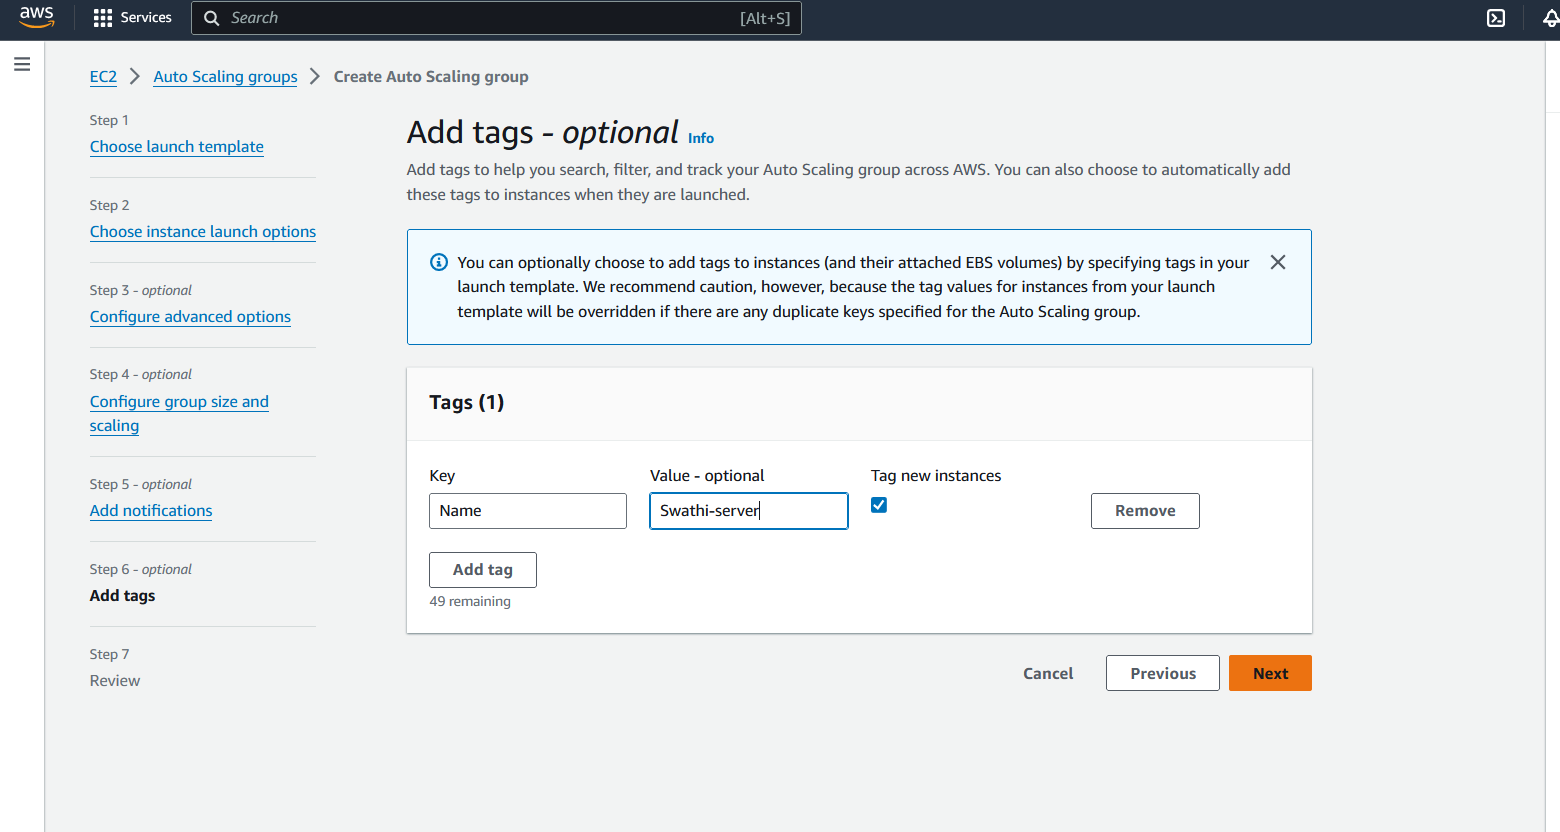
Click Next.
Review and Create
Review all the options you have configured.
Click Create Auto Scaling group.
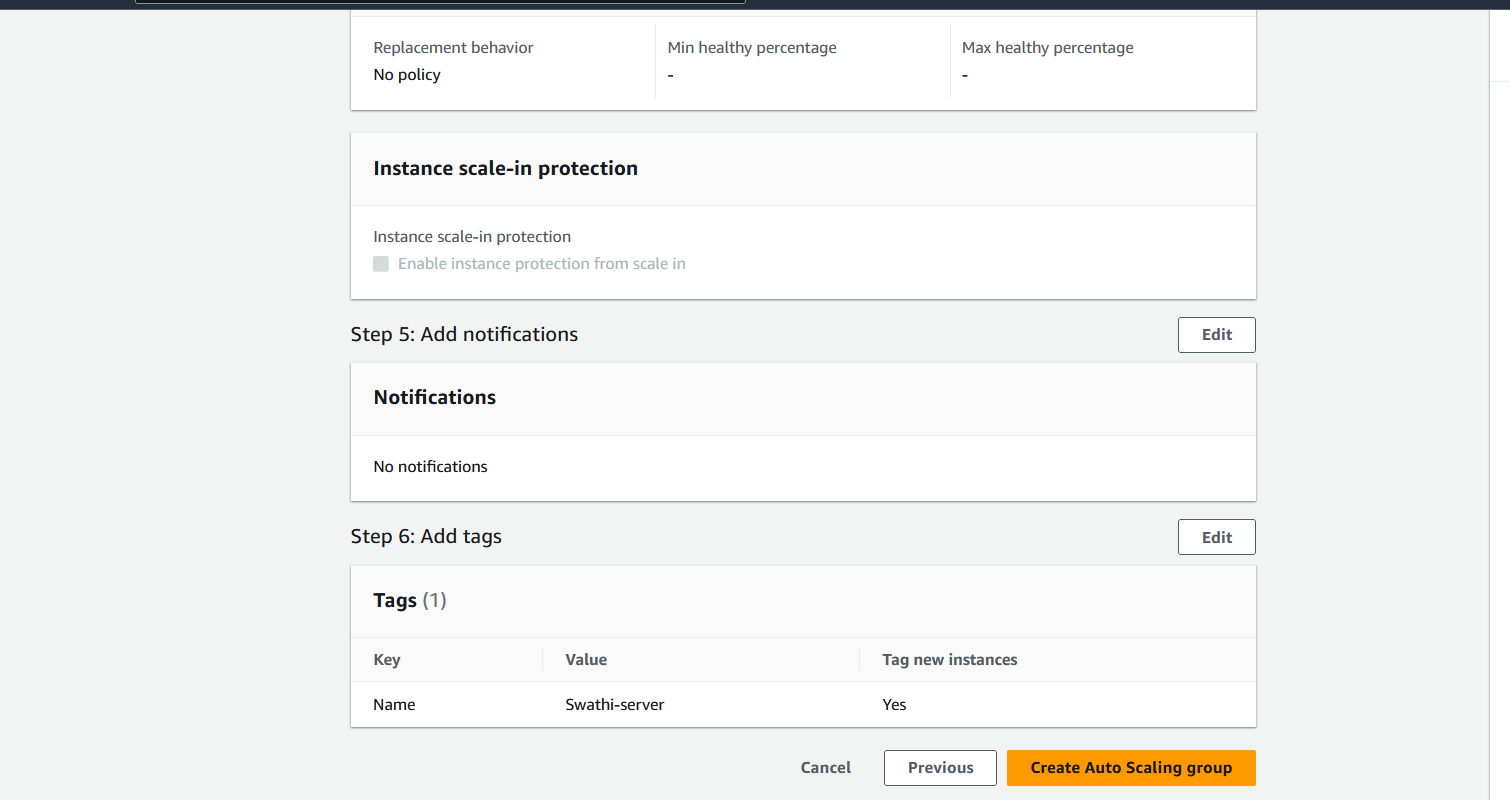
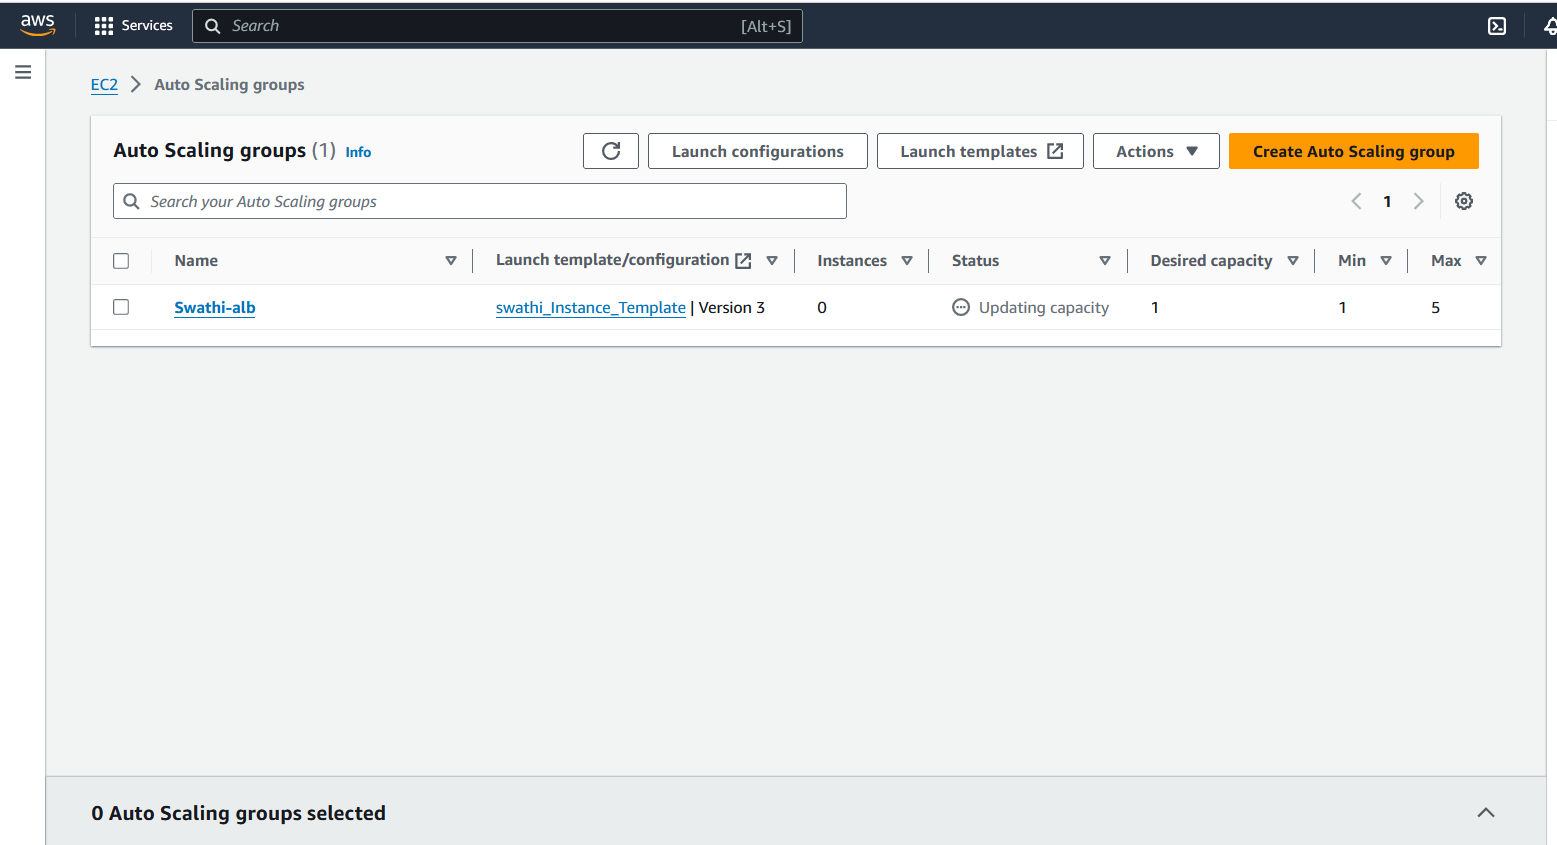
Step 5: Verify Instance and Load Balancer
Instance Verification
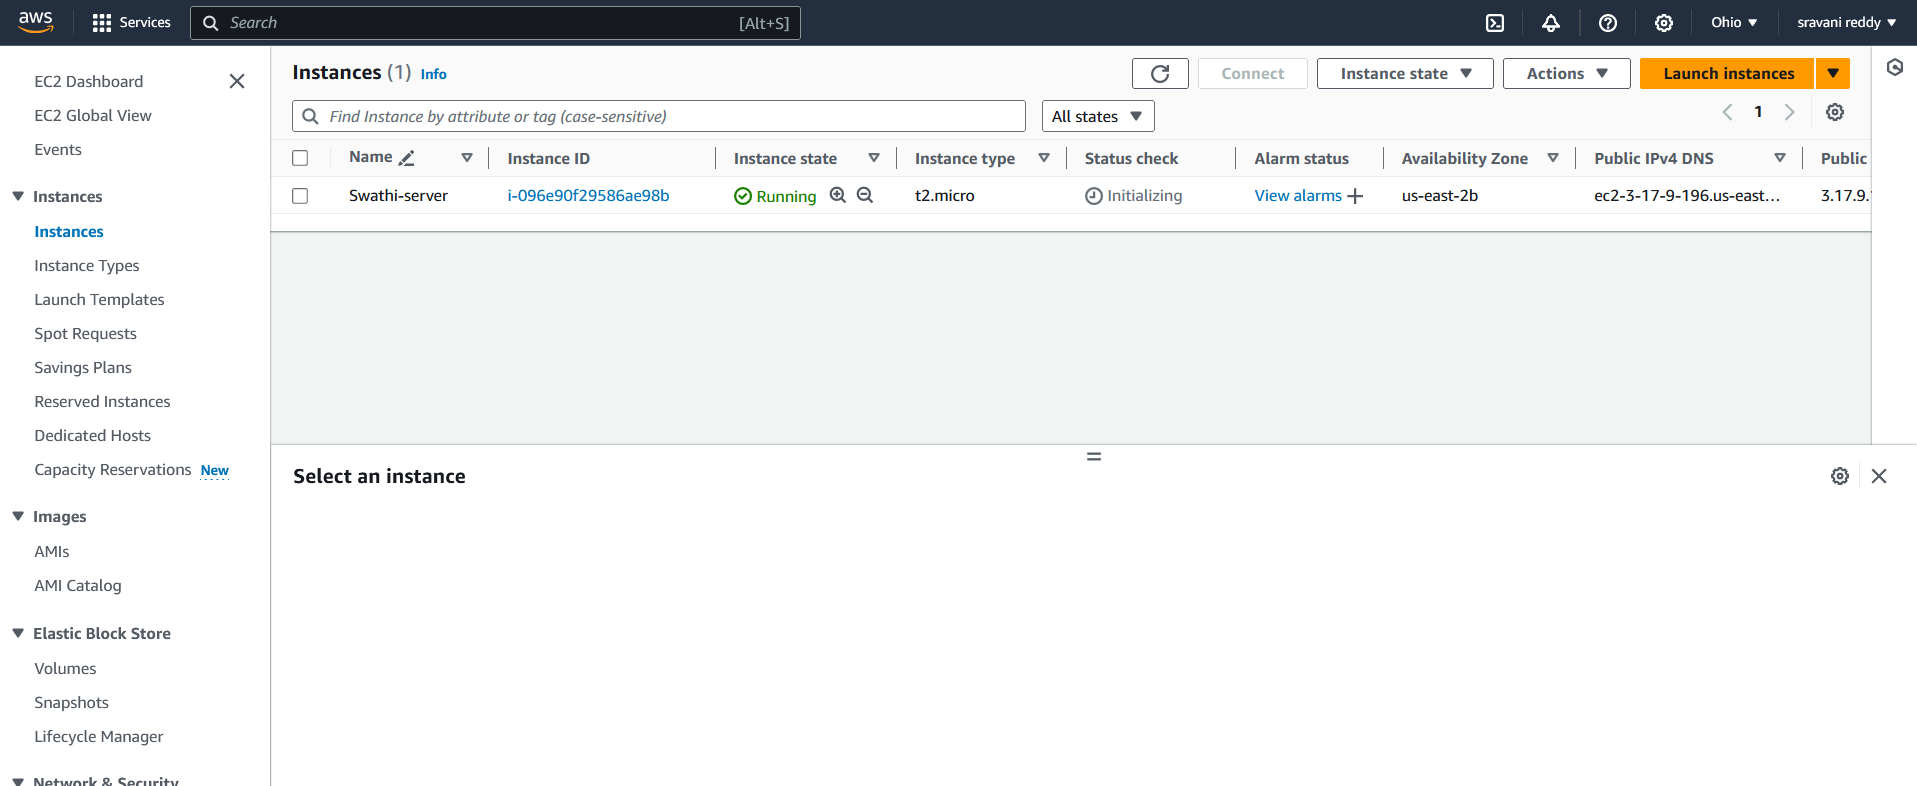
Go to the EC2 Dashboard to verify that a new instance has launched according to the specified settings.
Ensure that the default number of instances is set to 1.
Load Balancer Verification
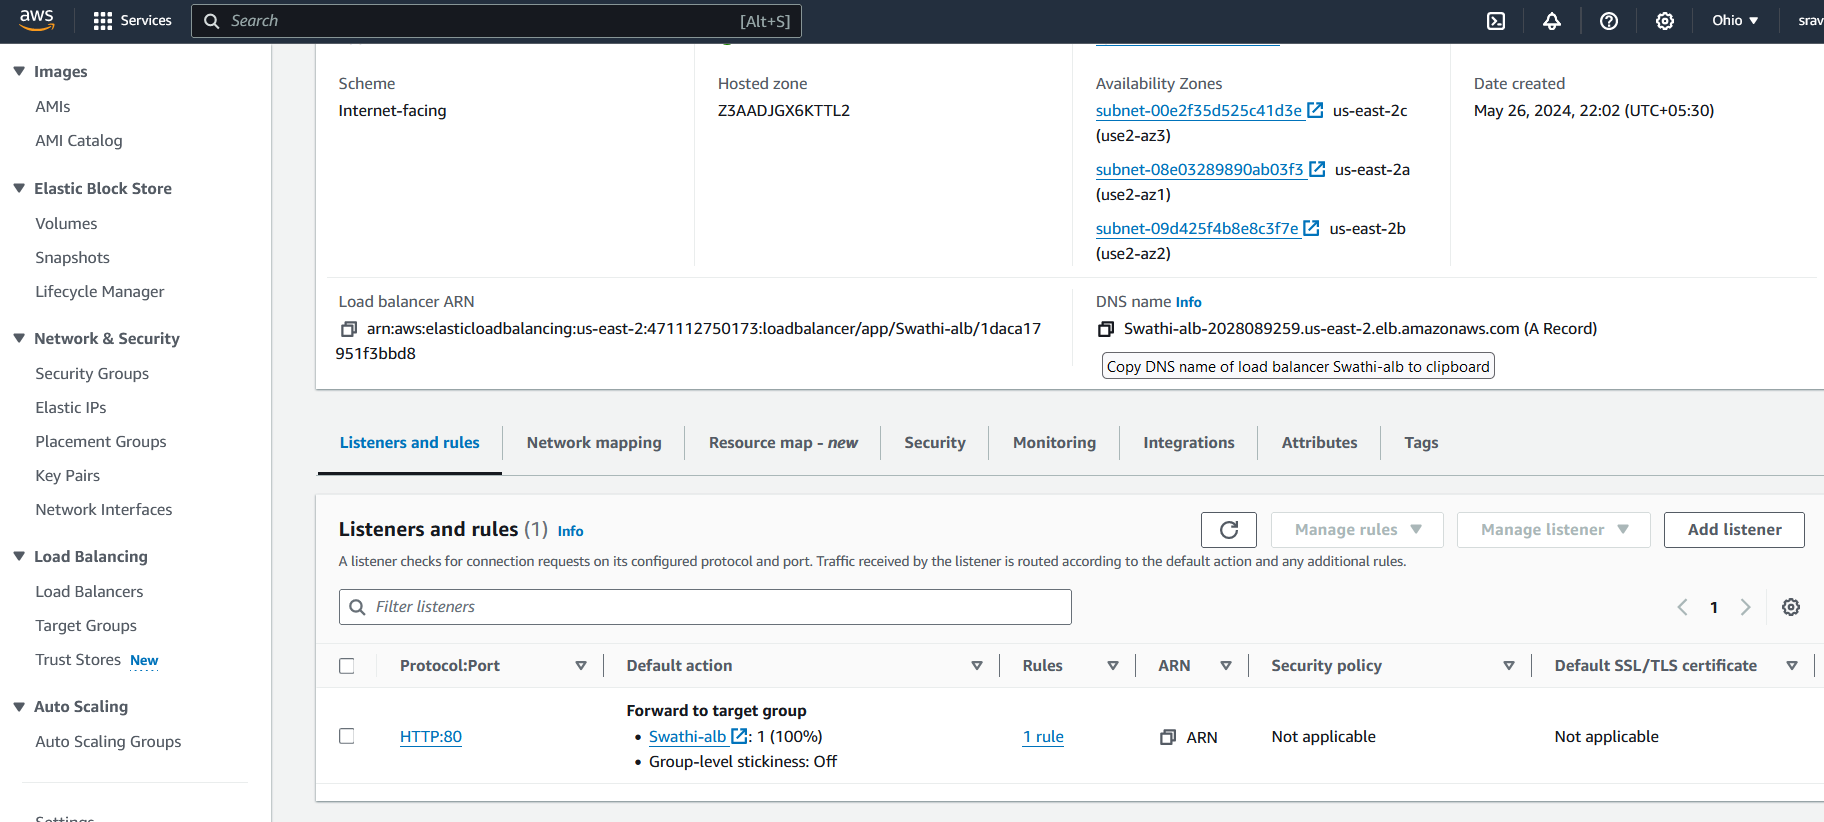
Navigate to the Load Balancers section.
Select your load balancer and copy its DNS name.
Paste the DNS name into your browser to confirm that your application is running.
Step 6: Test Auto Scaling
Terminate an Instance
Manually terminate an instance from the EC2 Dashboard.
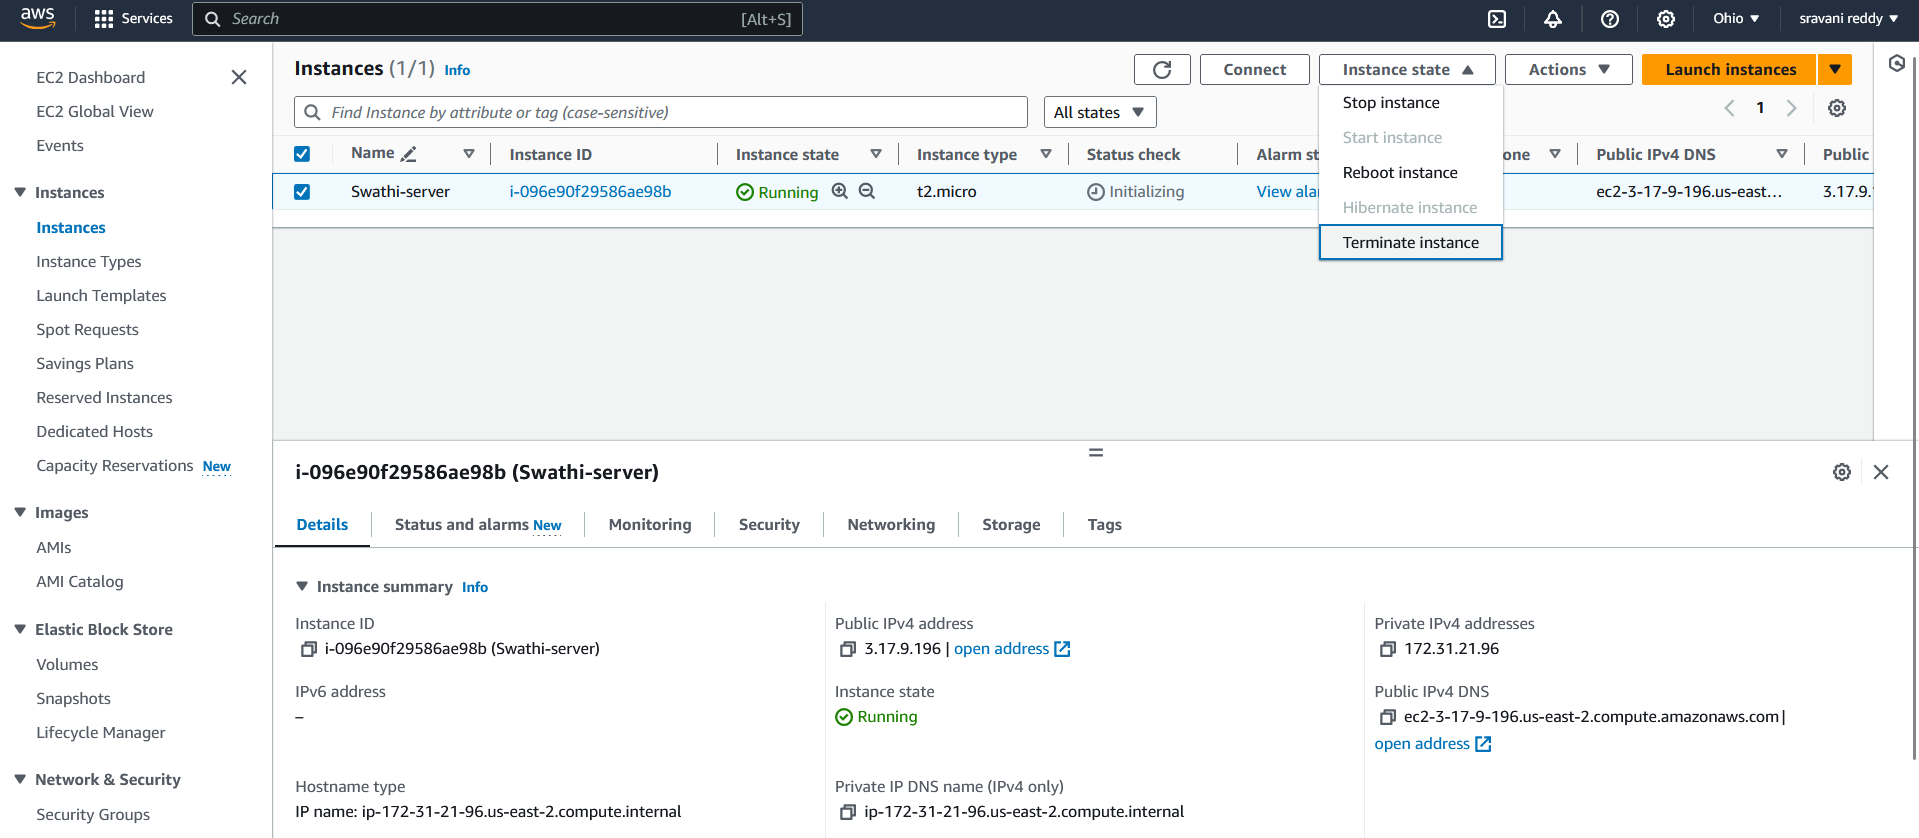
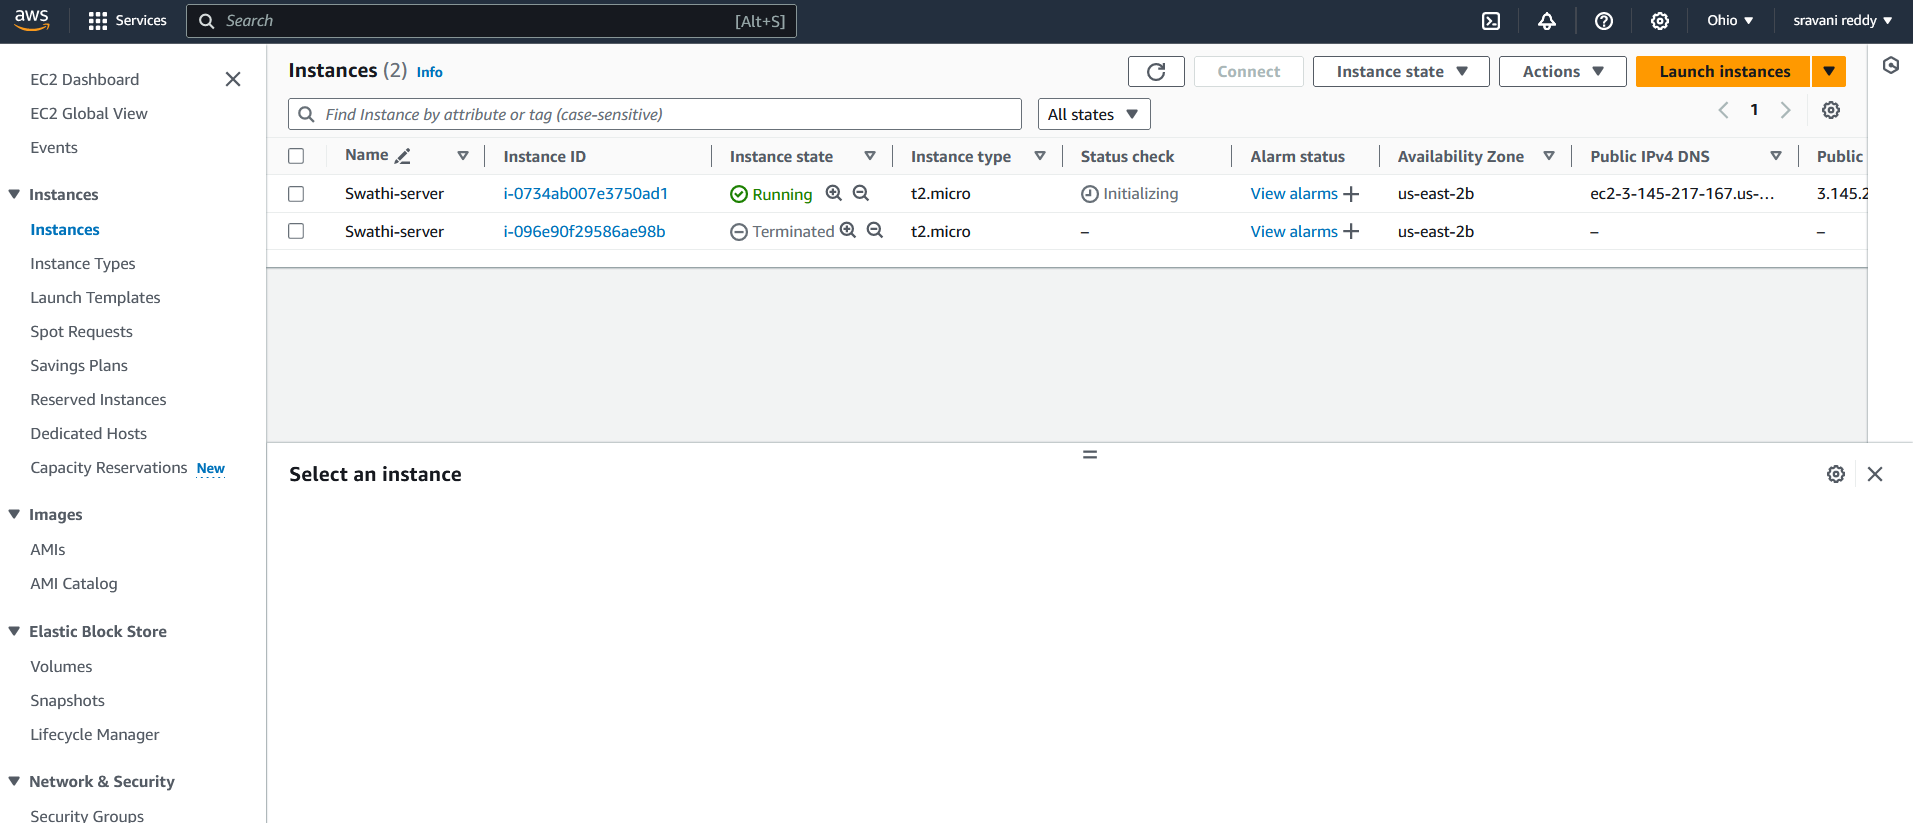
Verify that a new instance launches automatically to replace the terminated instance.
Confirm that additional instances launch when CPU utilization exceeds 50%.
Step 7: Enhance Security with AWS WAF
Configure AWS WAF
Search for WAF in the AWS Management Console.
Select WAF & Shield.
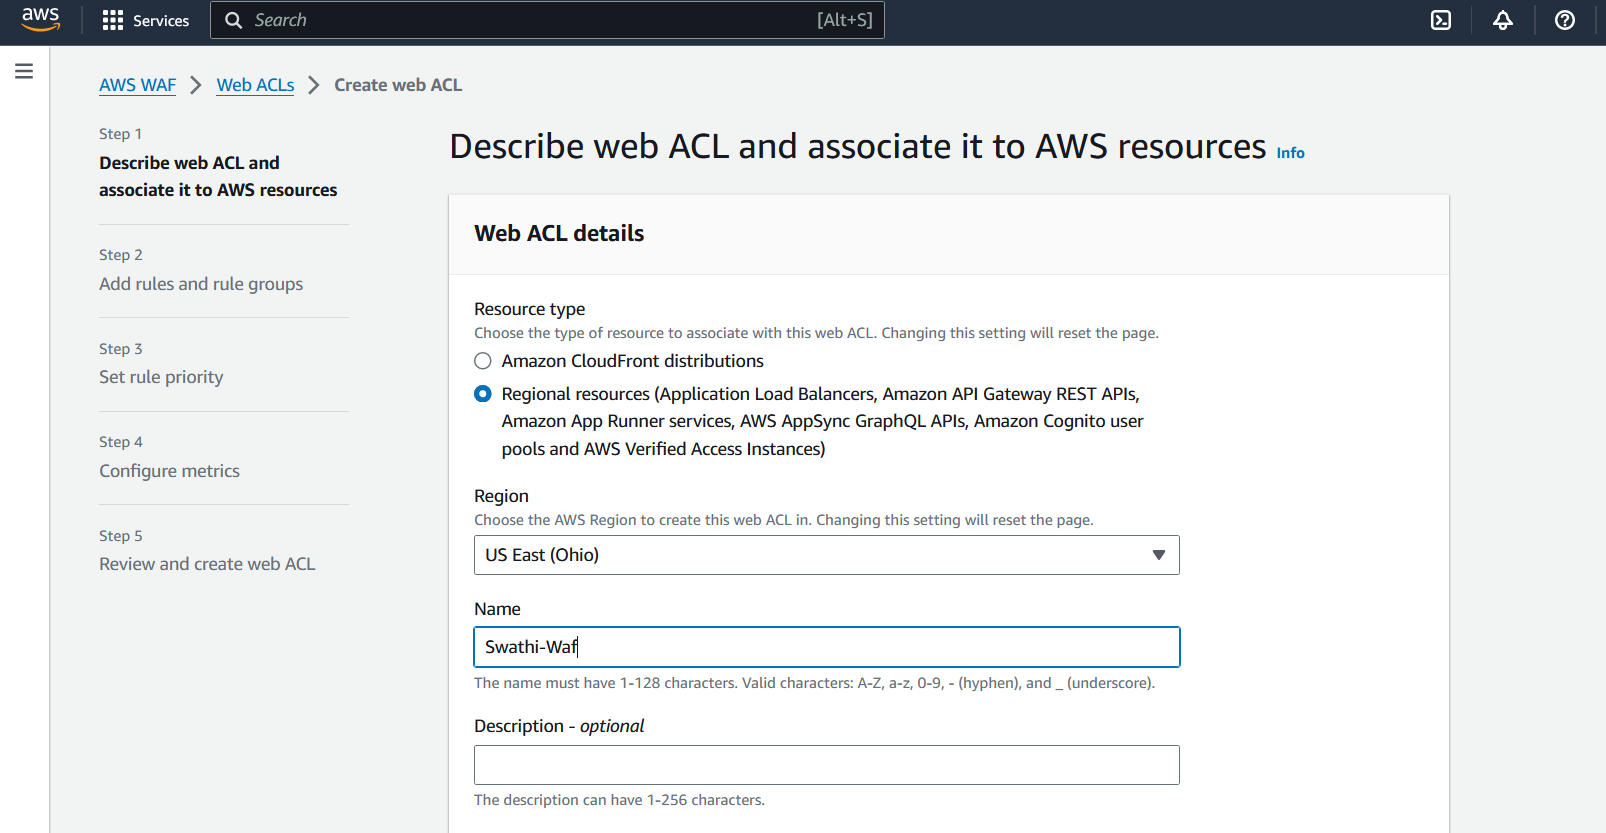
Click on Create web ACL.
Choose the region and provide a name for the web ACL.
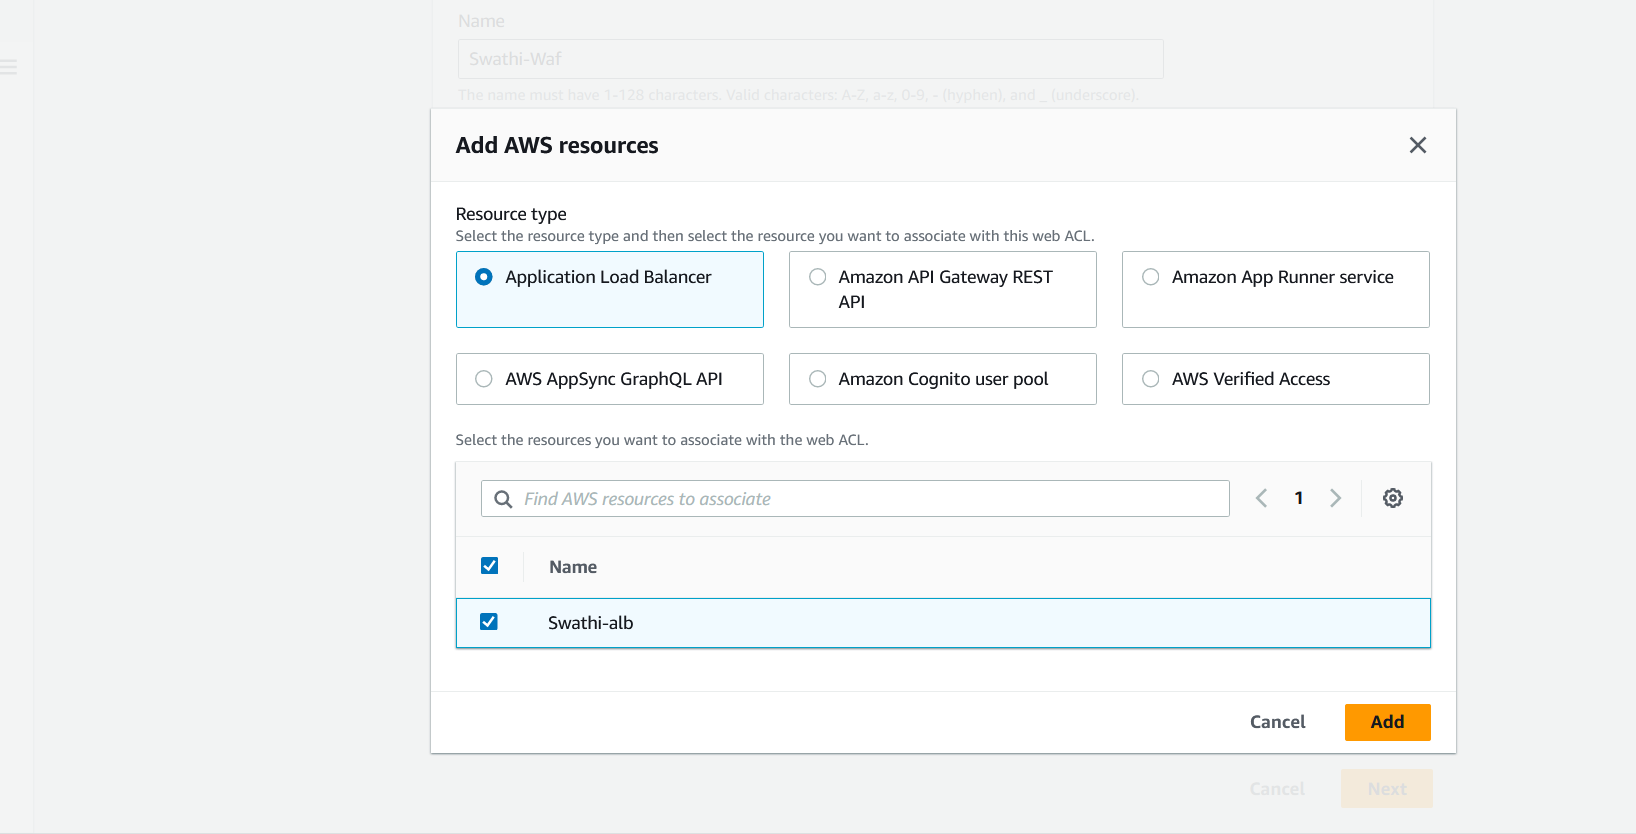
In Associated AWS resources, click Add AWS resources.
Select your Application Load Balancer and click Add.
Click Next.
Add Rules to Web ACL
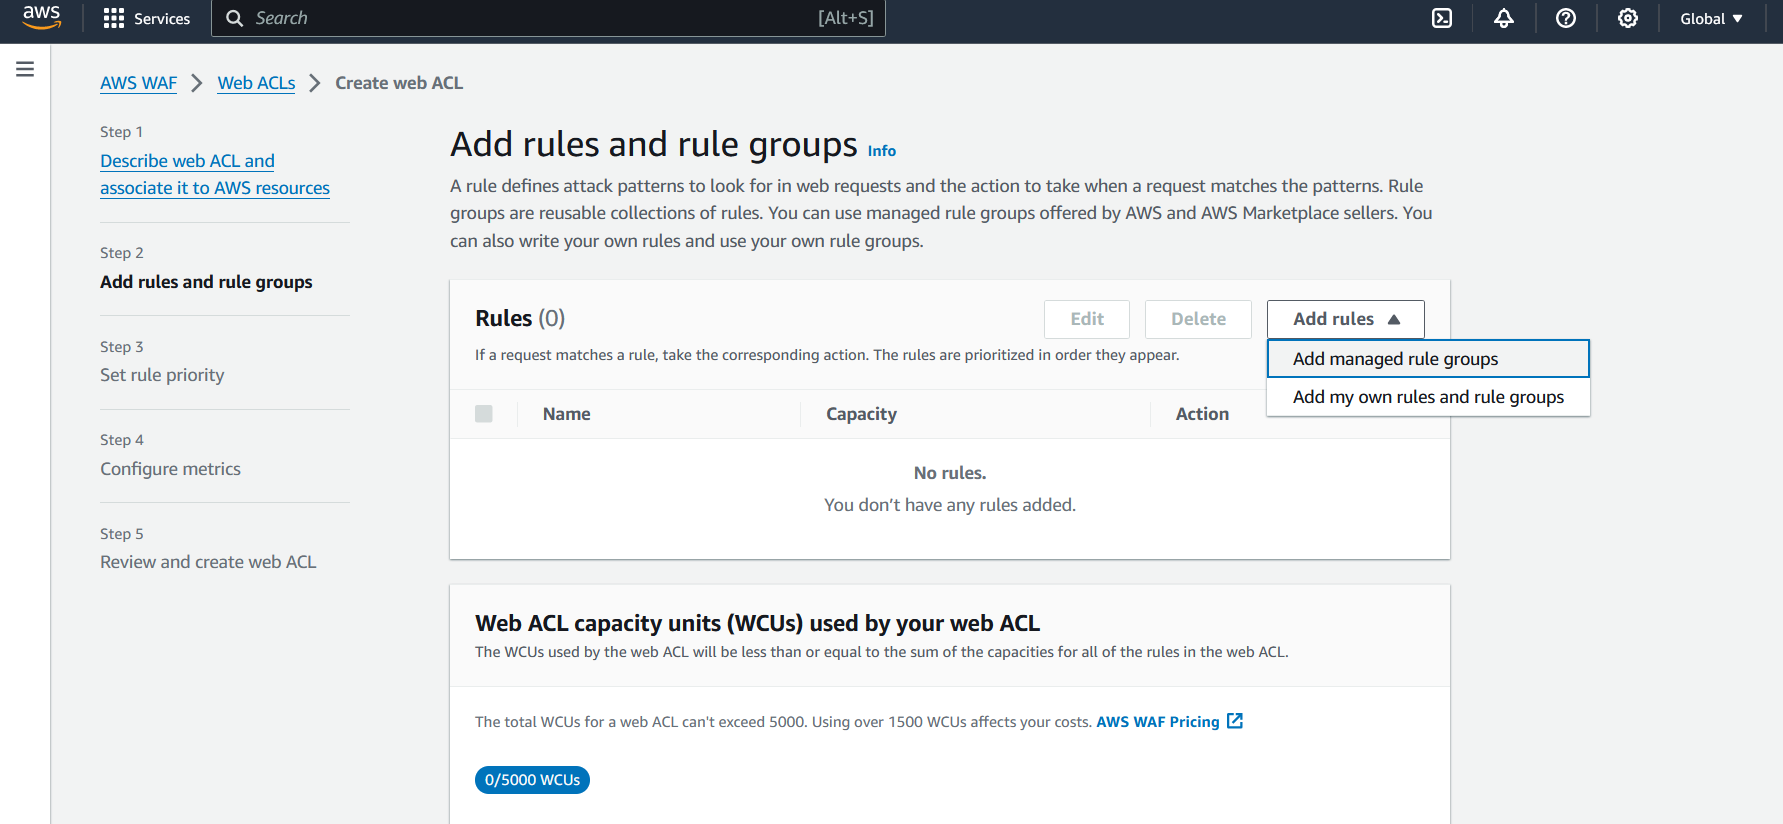
Choose to add managed rule groups or create your own rules. For this guide, we will add managed rule groups.
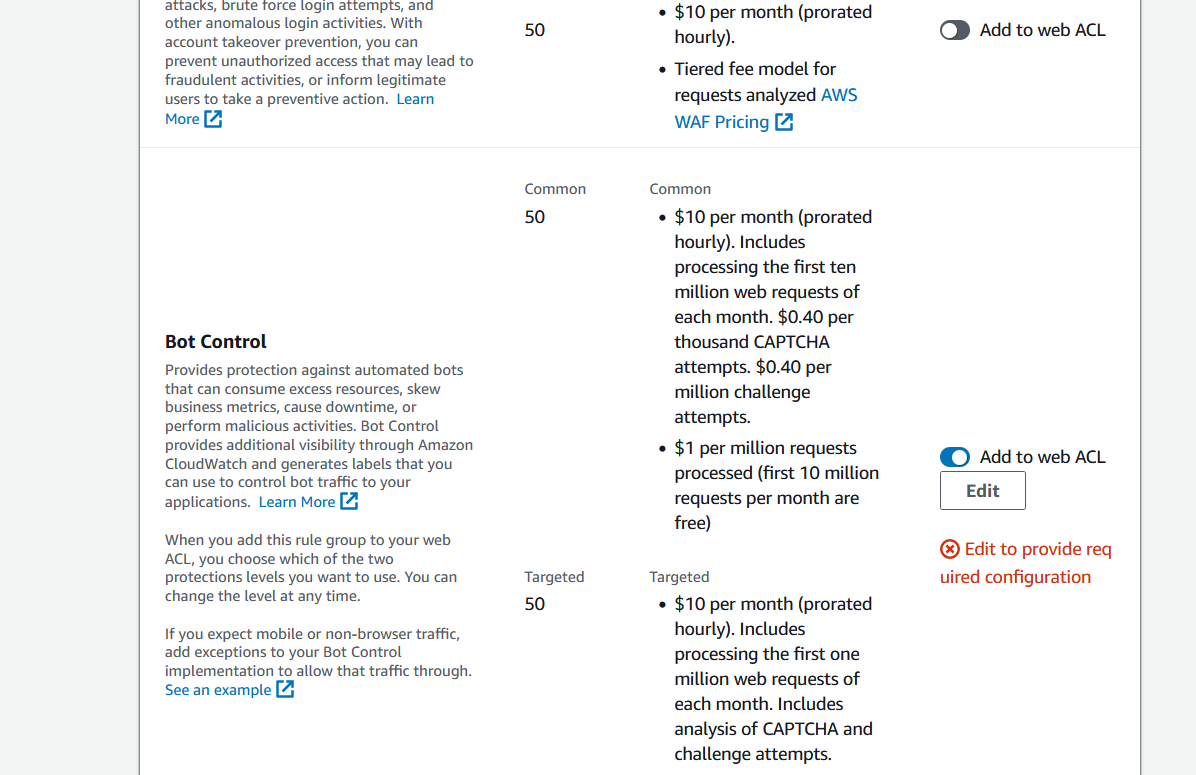
Enable Bot Control to prevent bots from accessing your application.
Click Add rules, then Next.
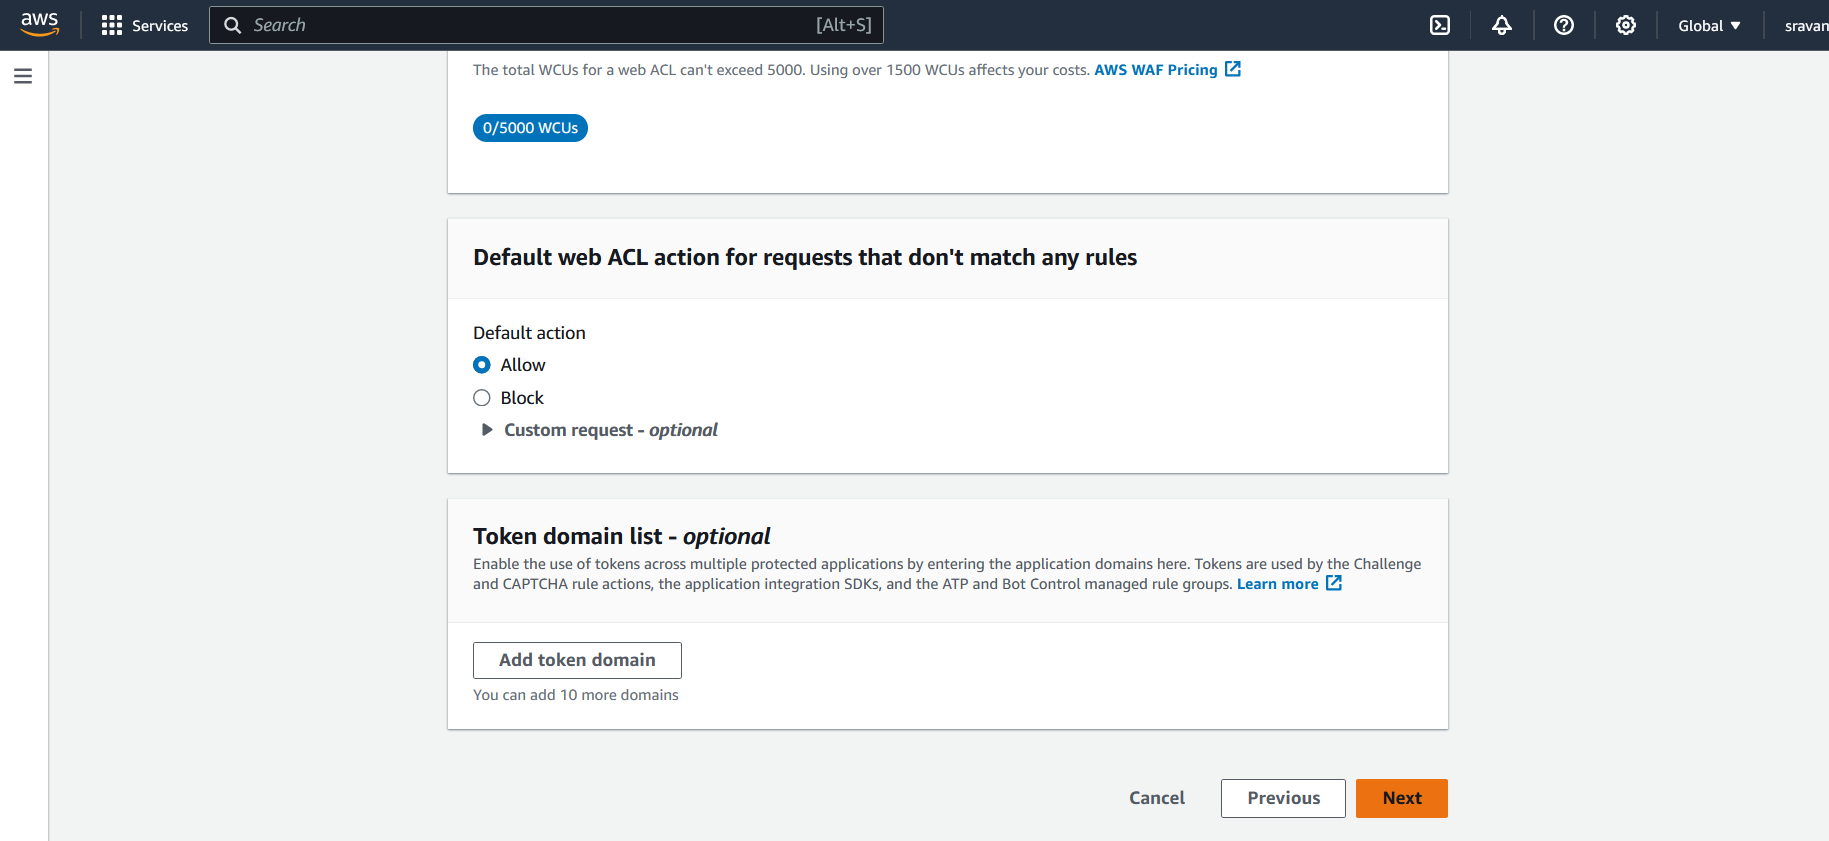
Click Create Web ACL.
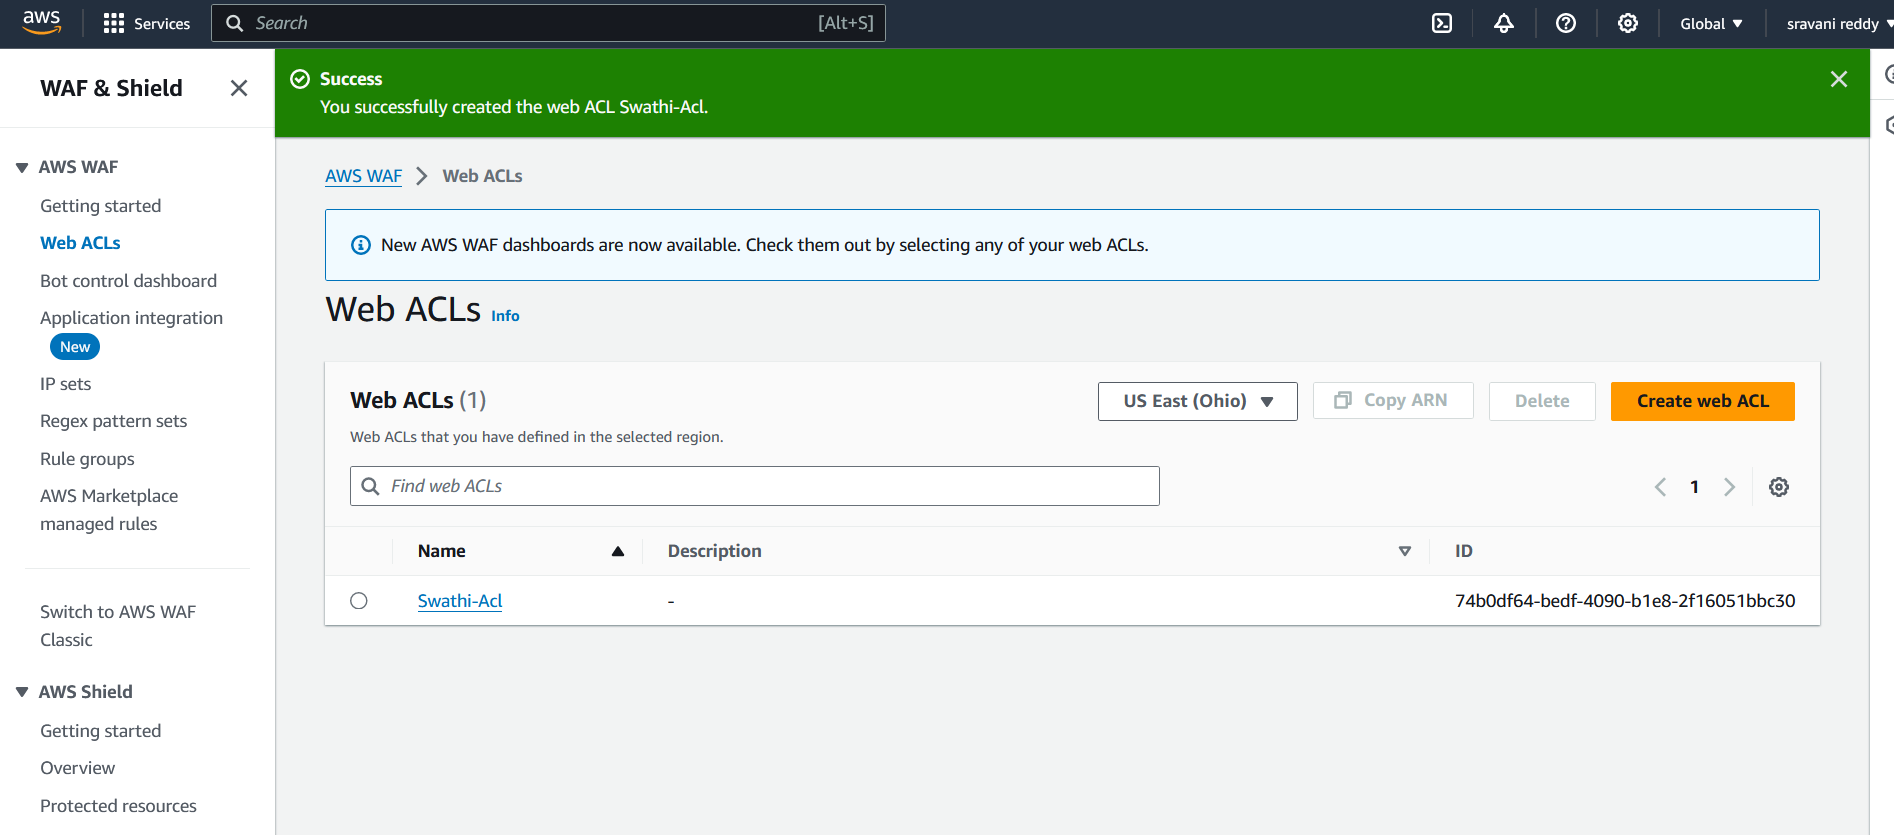
Step 8: Deleting the Auto Scaling Group
Delete Auto Scaling Group
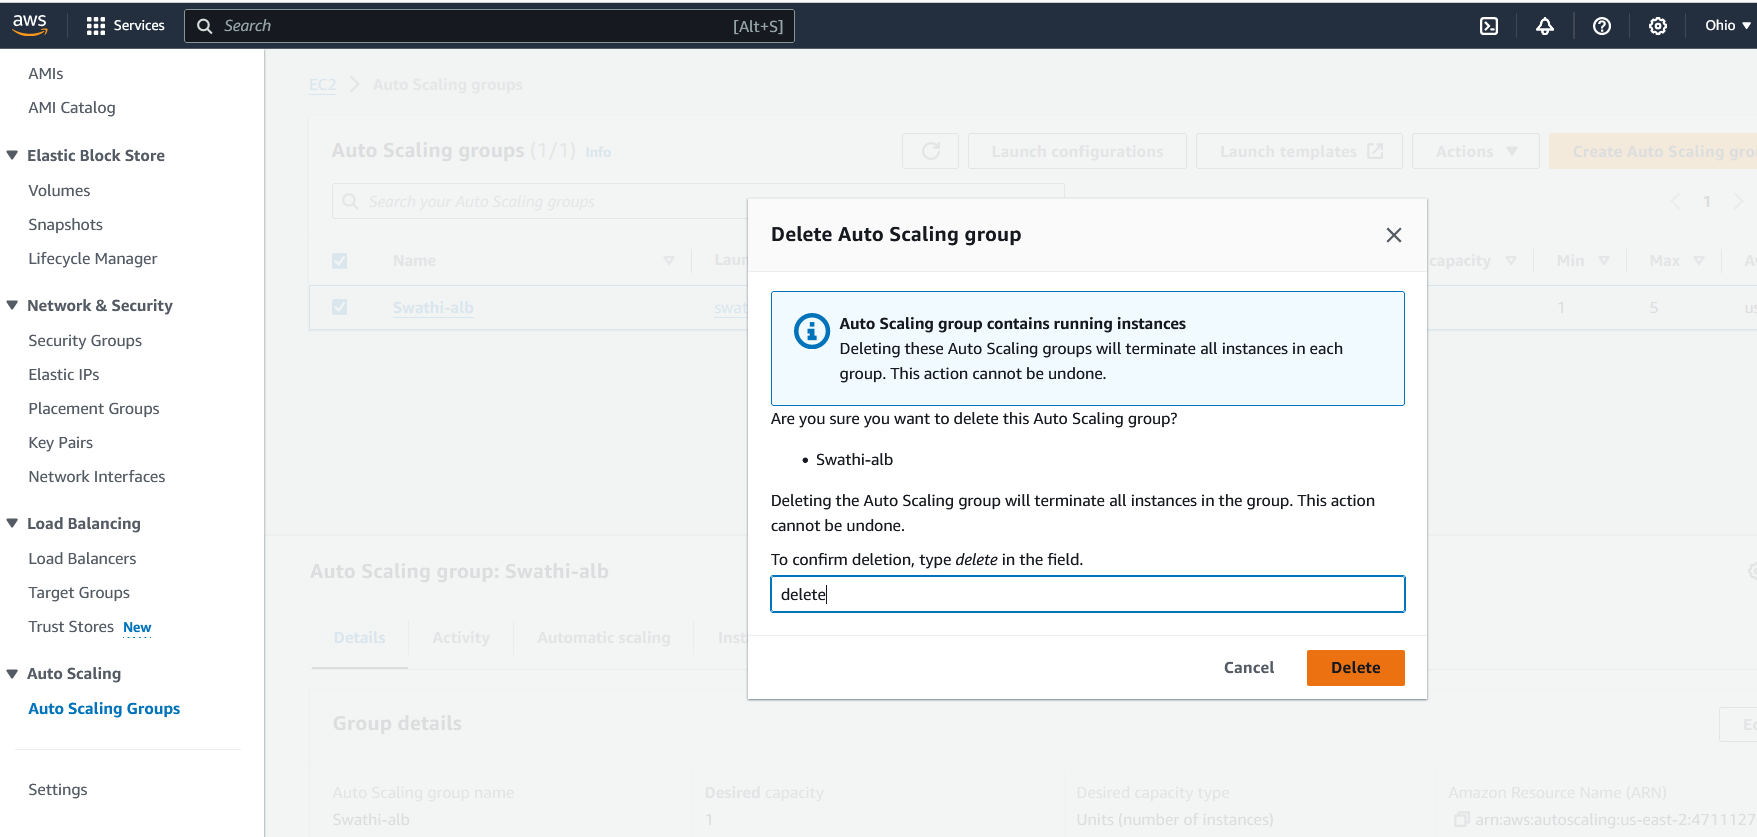
To stop your Auto Scaling service, go to the Auto Scaling Groups section.
Select the group you want to delete.
Choose Group actions and then Delete.
By following these steps, you can set up a robust Auto Scaling group in AWS, ensuring high availability and optimal performance for your application. Additionally, integrating AWS WAF helps protect your application from unwanted traffic, enhancing its security posture.
Subscribe to my newsletter
Read articles from SWATHI PUNREDDY directly inside your inbox. Subscribe to the newsletter, and don't miss out.
Written by
