Seamless Data Flow: Fetching from AWS RDS to S3 with Apache Airflow
 Rajdeep Pal
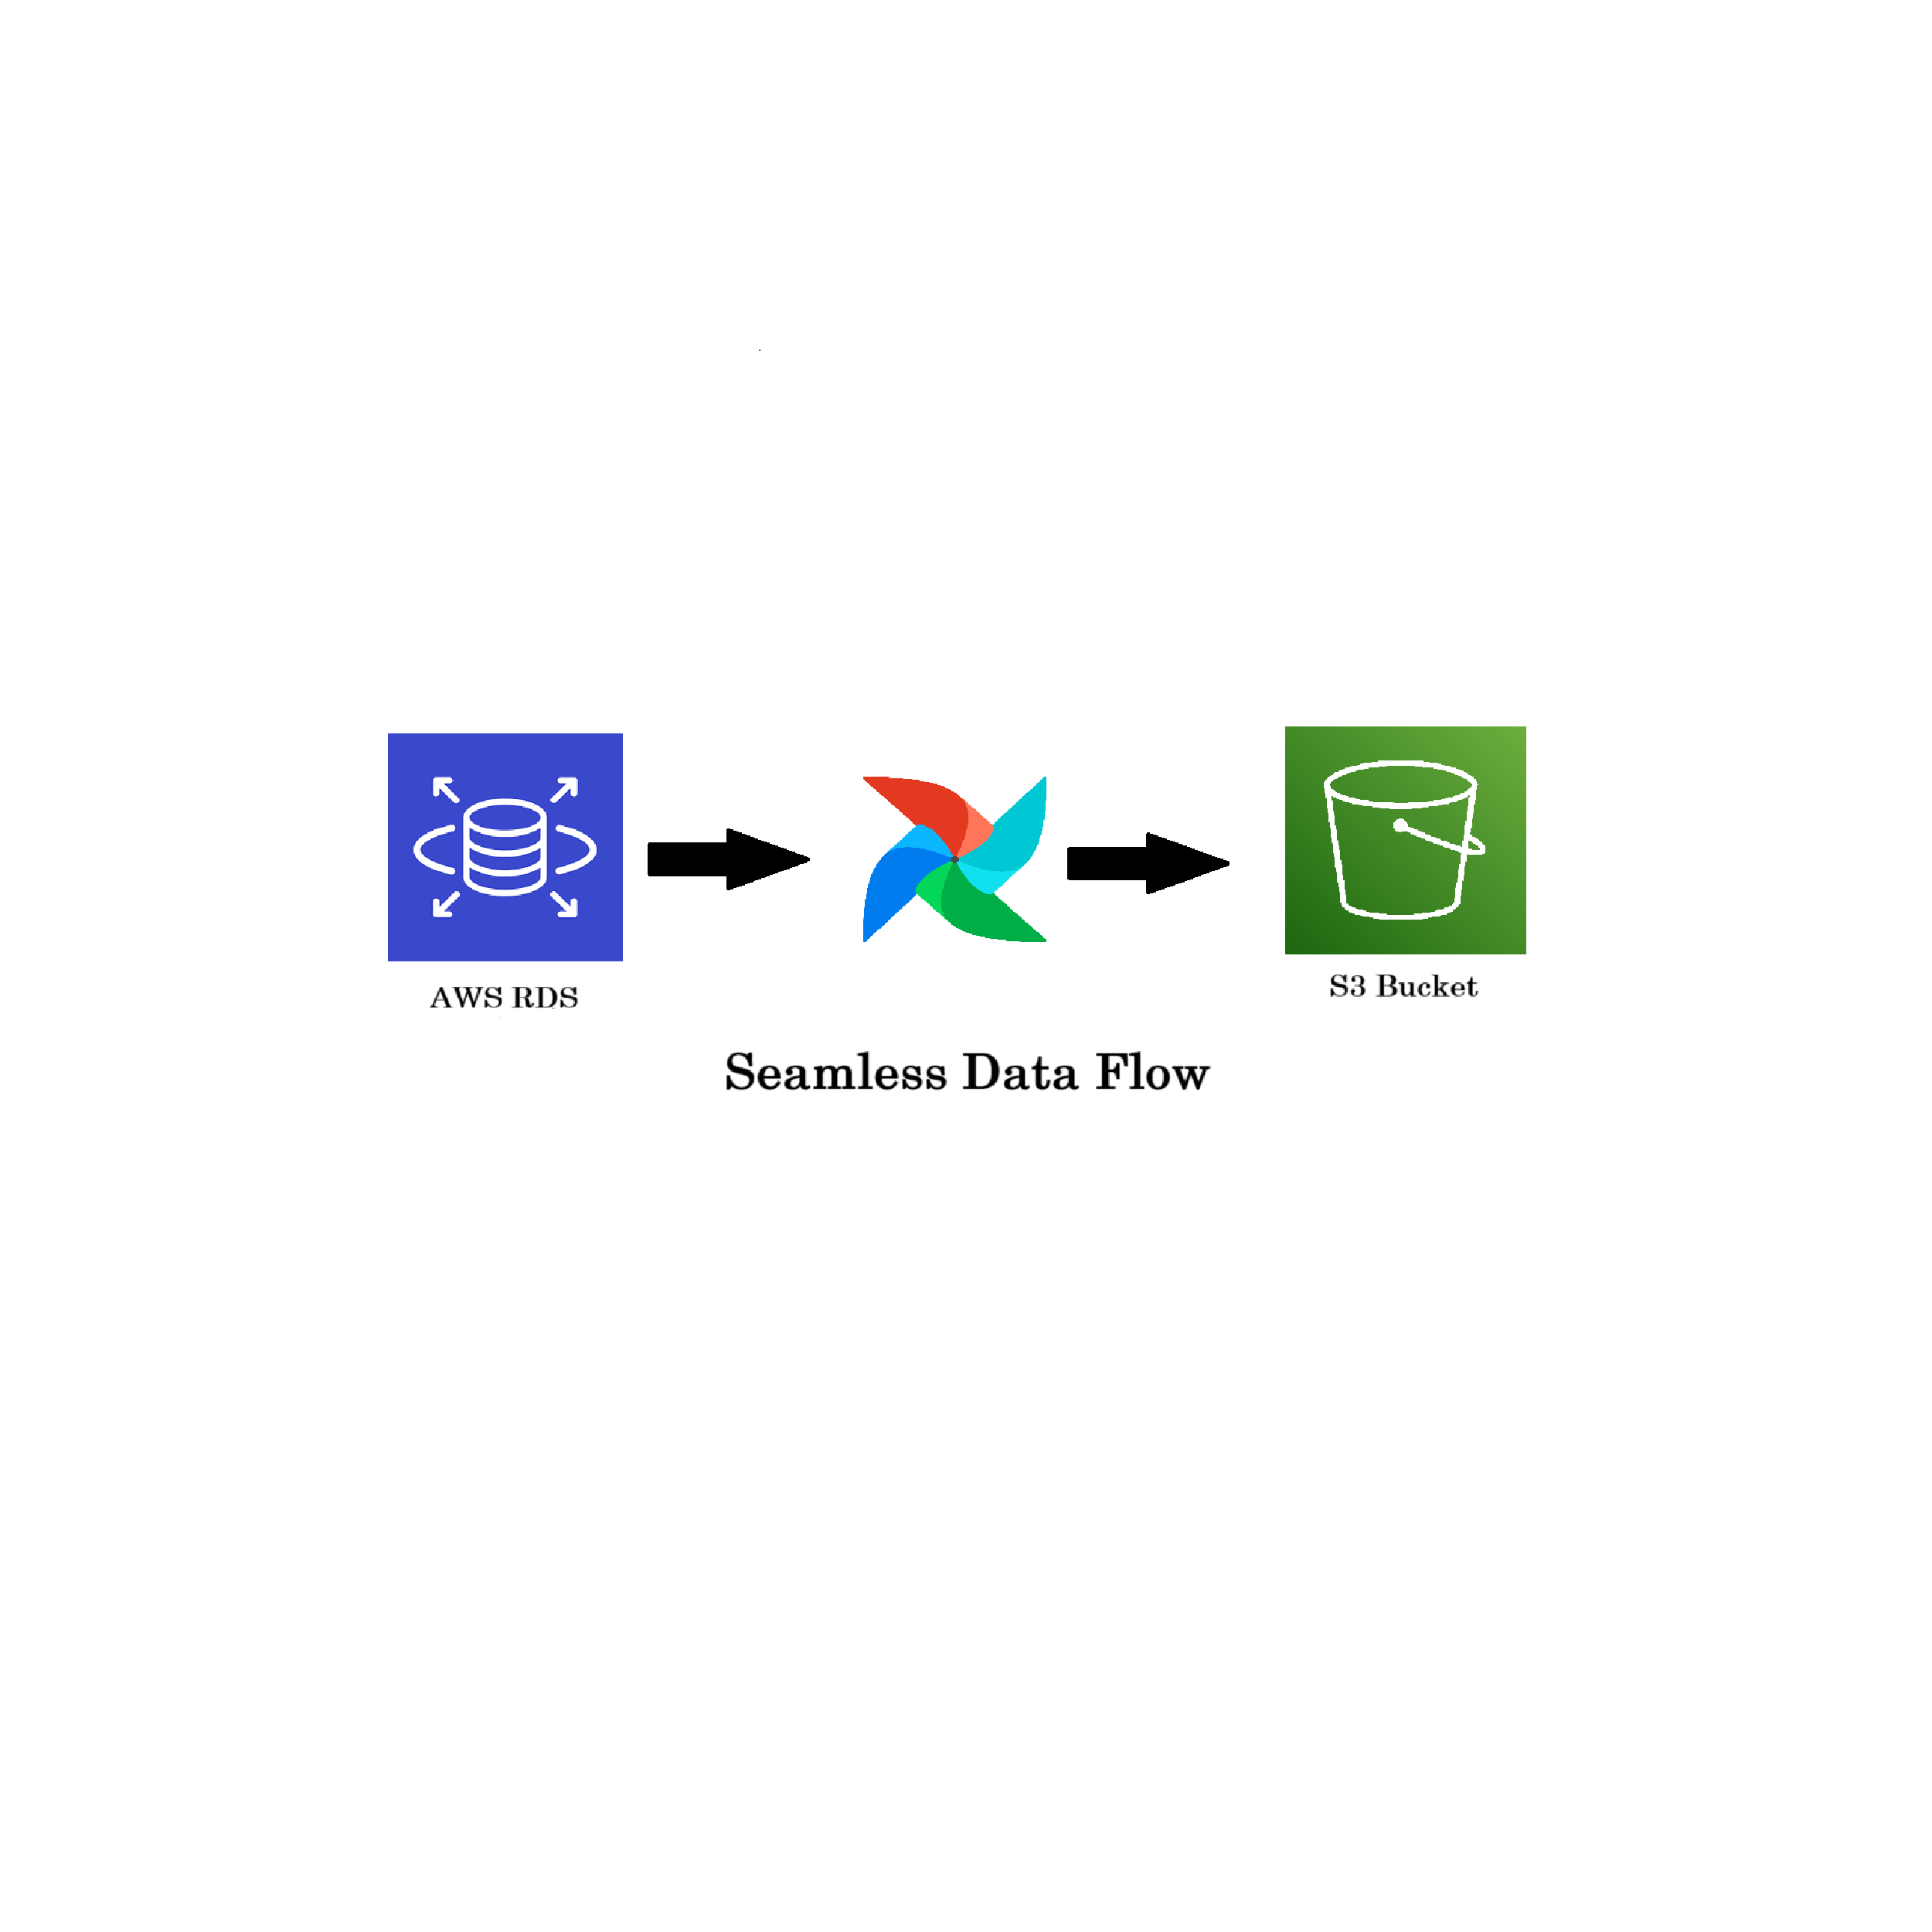
This blog aims to demonstrate the process of fetching data from your Amazon RDS MySQL Database and storing it in an S3 bucket.
Setting up the Database
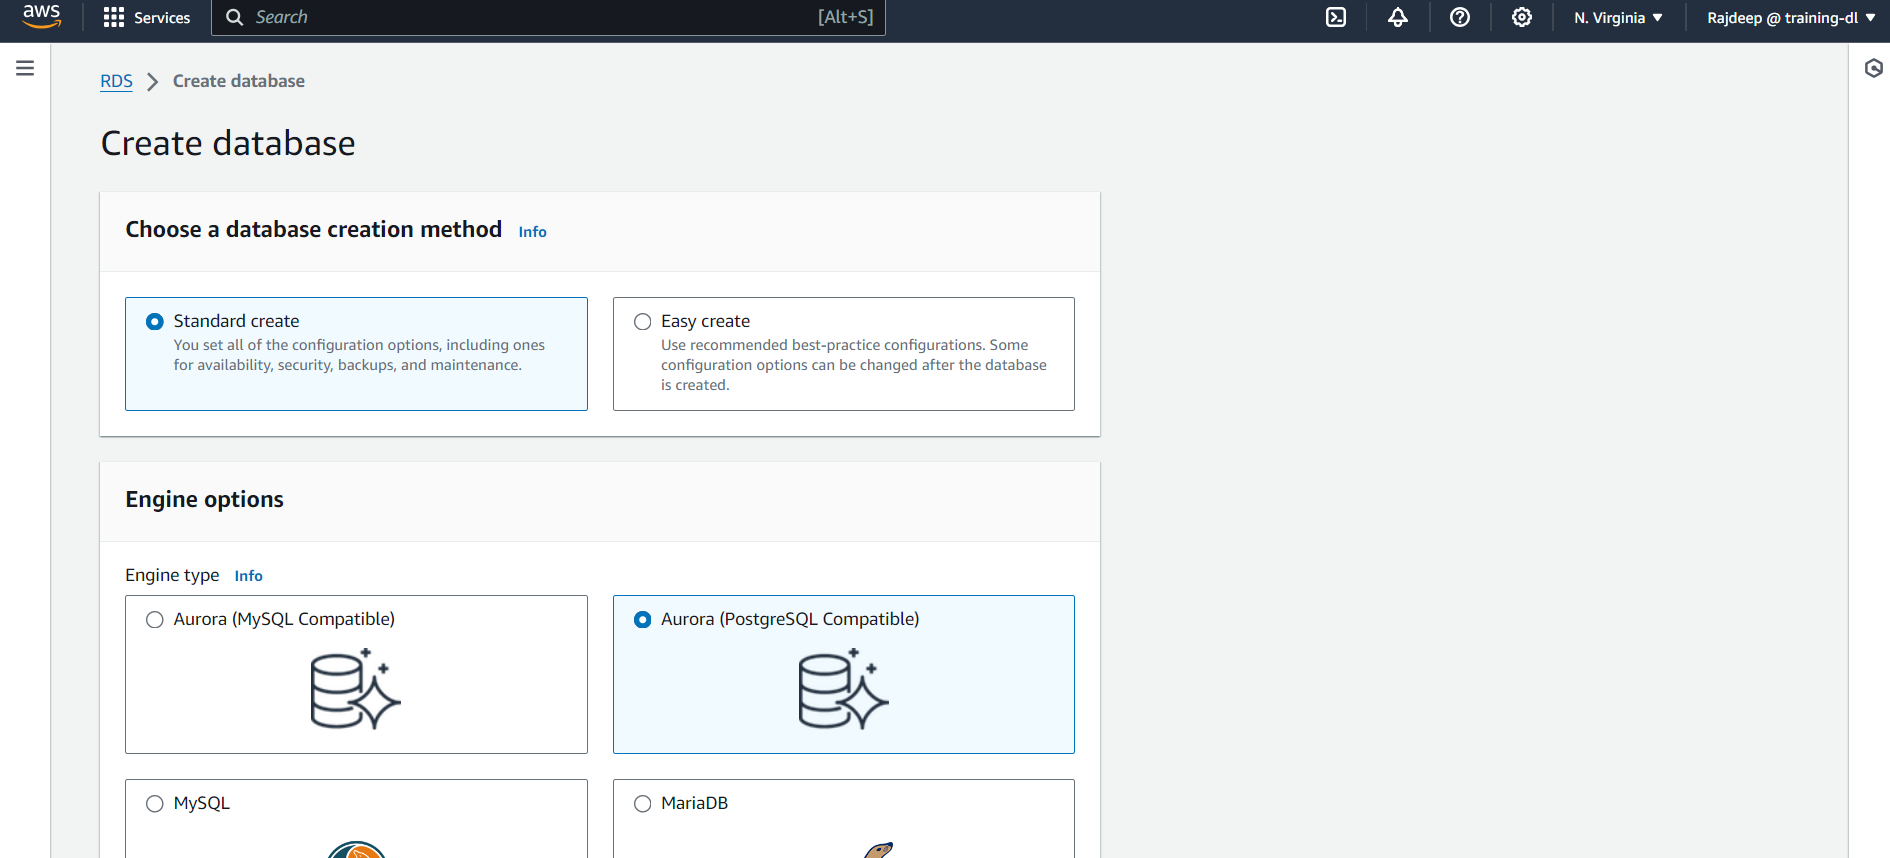
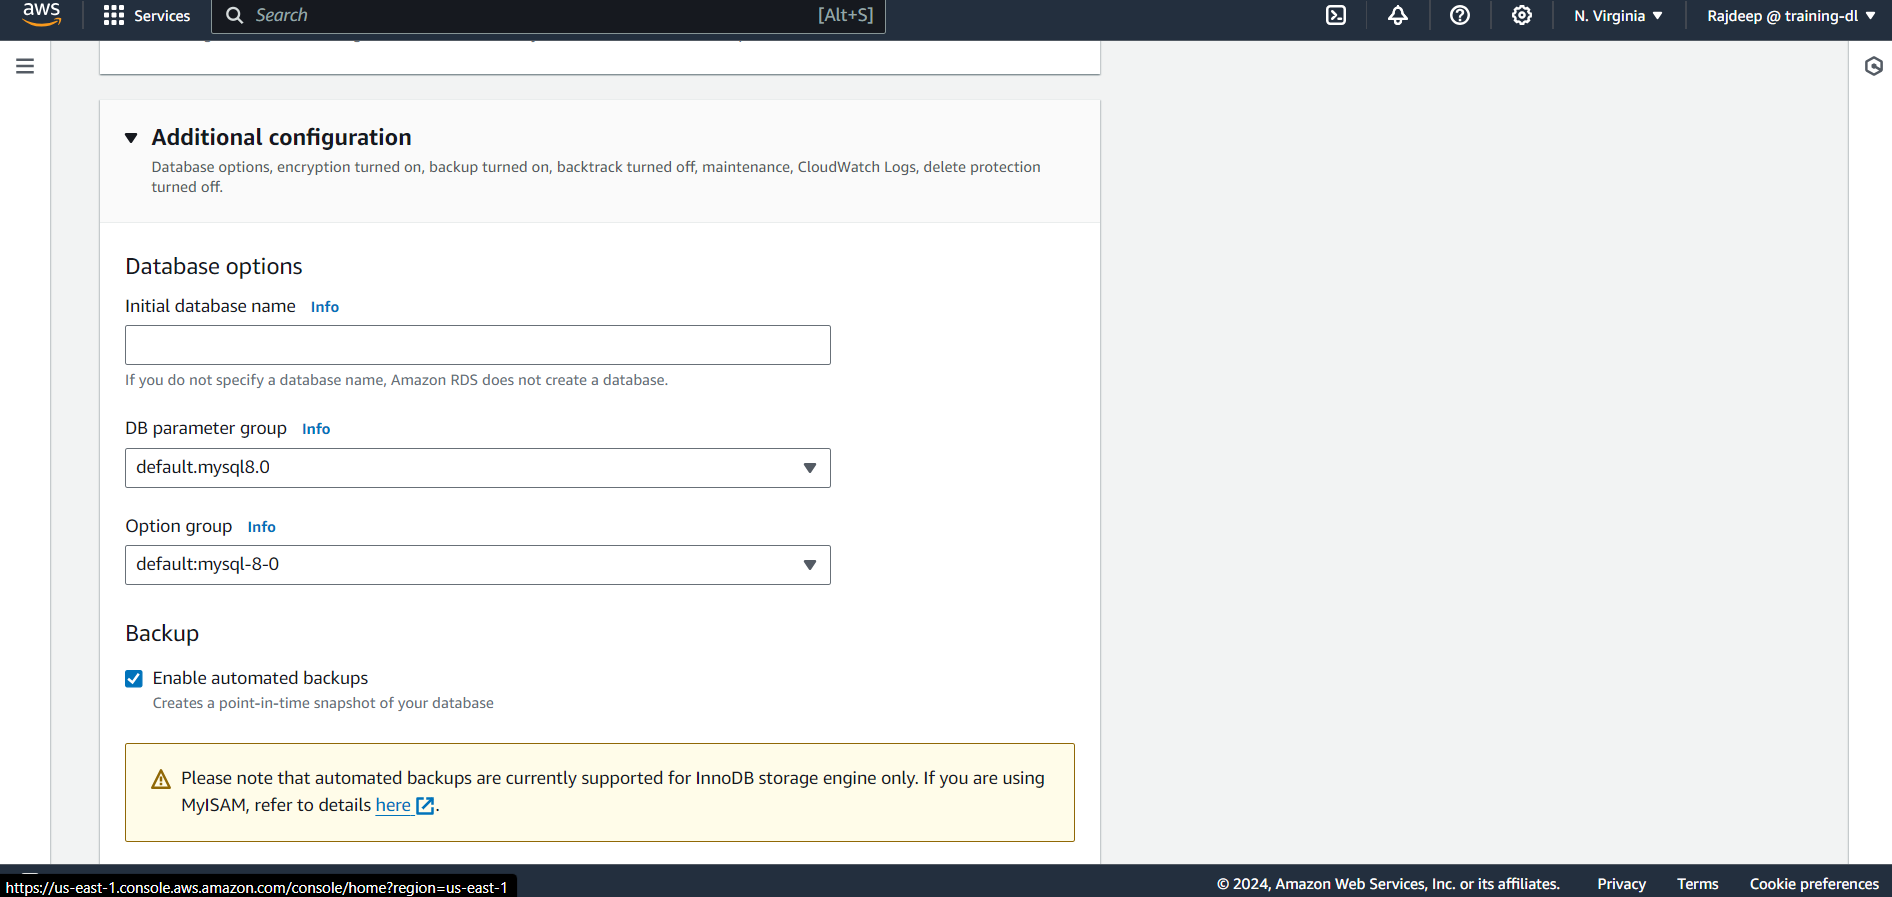
Let's get started by creating an RDS instance using the AWS Management Console. To stay within the free tier, you might use the following settings. Select "MySQL" as the Engine Option and ensure you are using the latest version of the Engine.
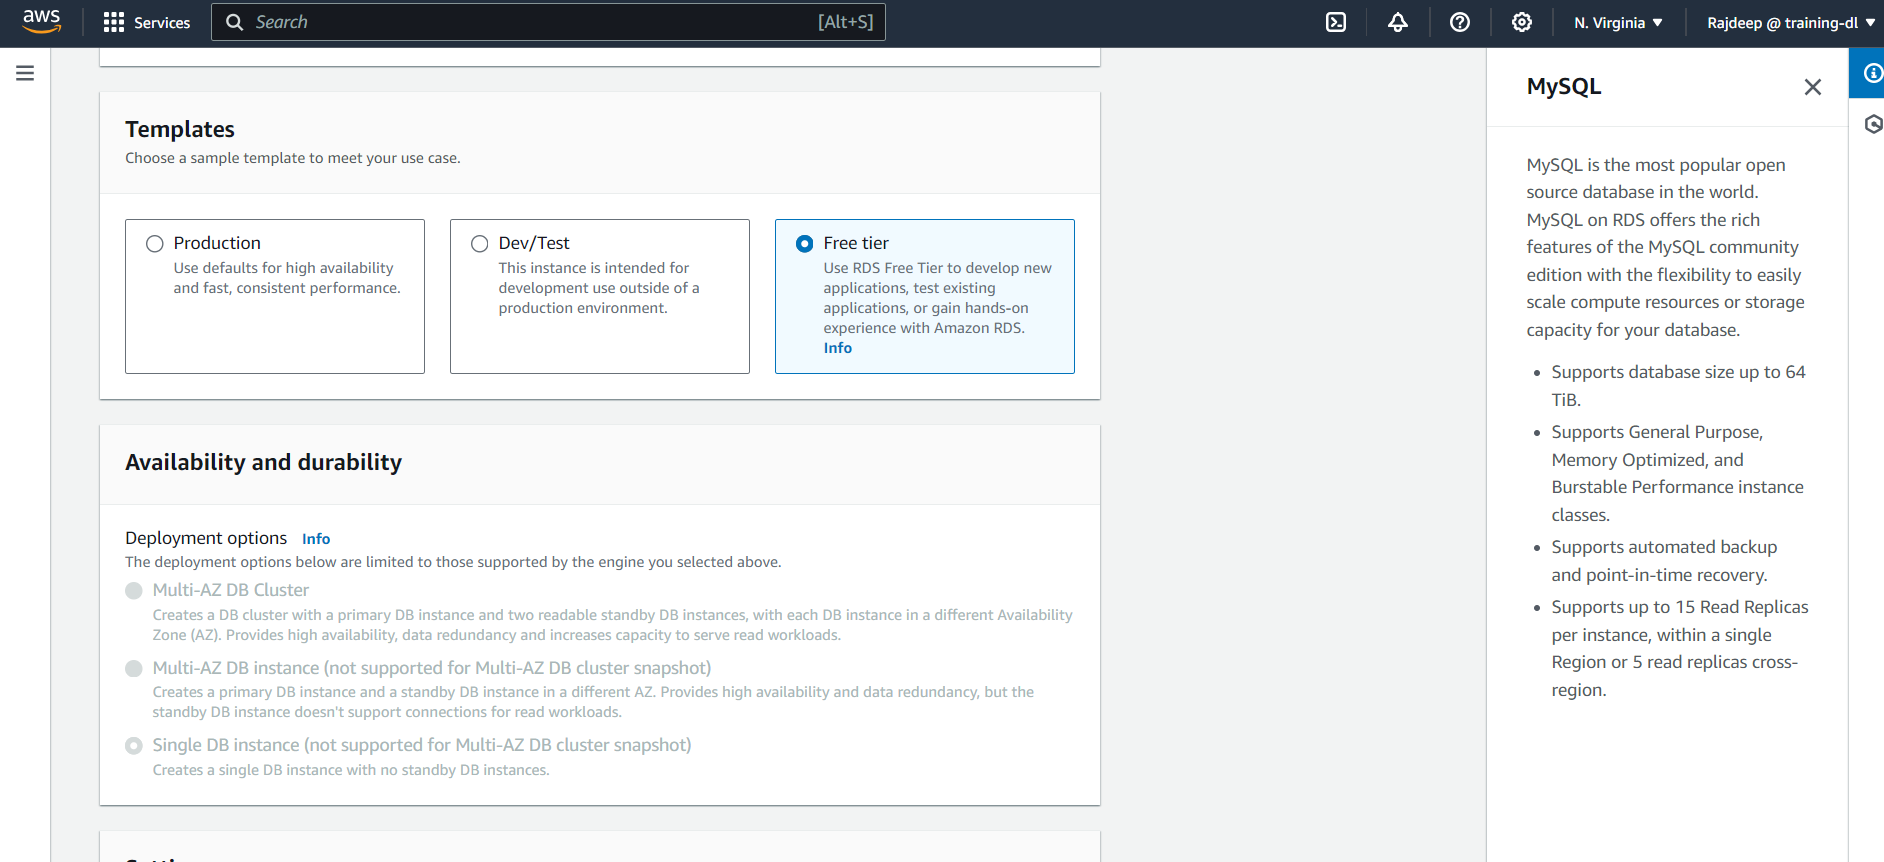
You need to select the Template as "Free Tier" and all the other things can be left as default. Also, remember to provide a password for your Self-Managed Database and enable "Public Access" under Connectivity.
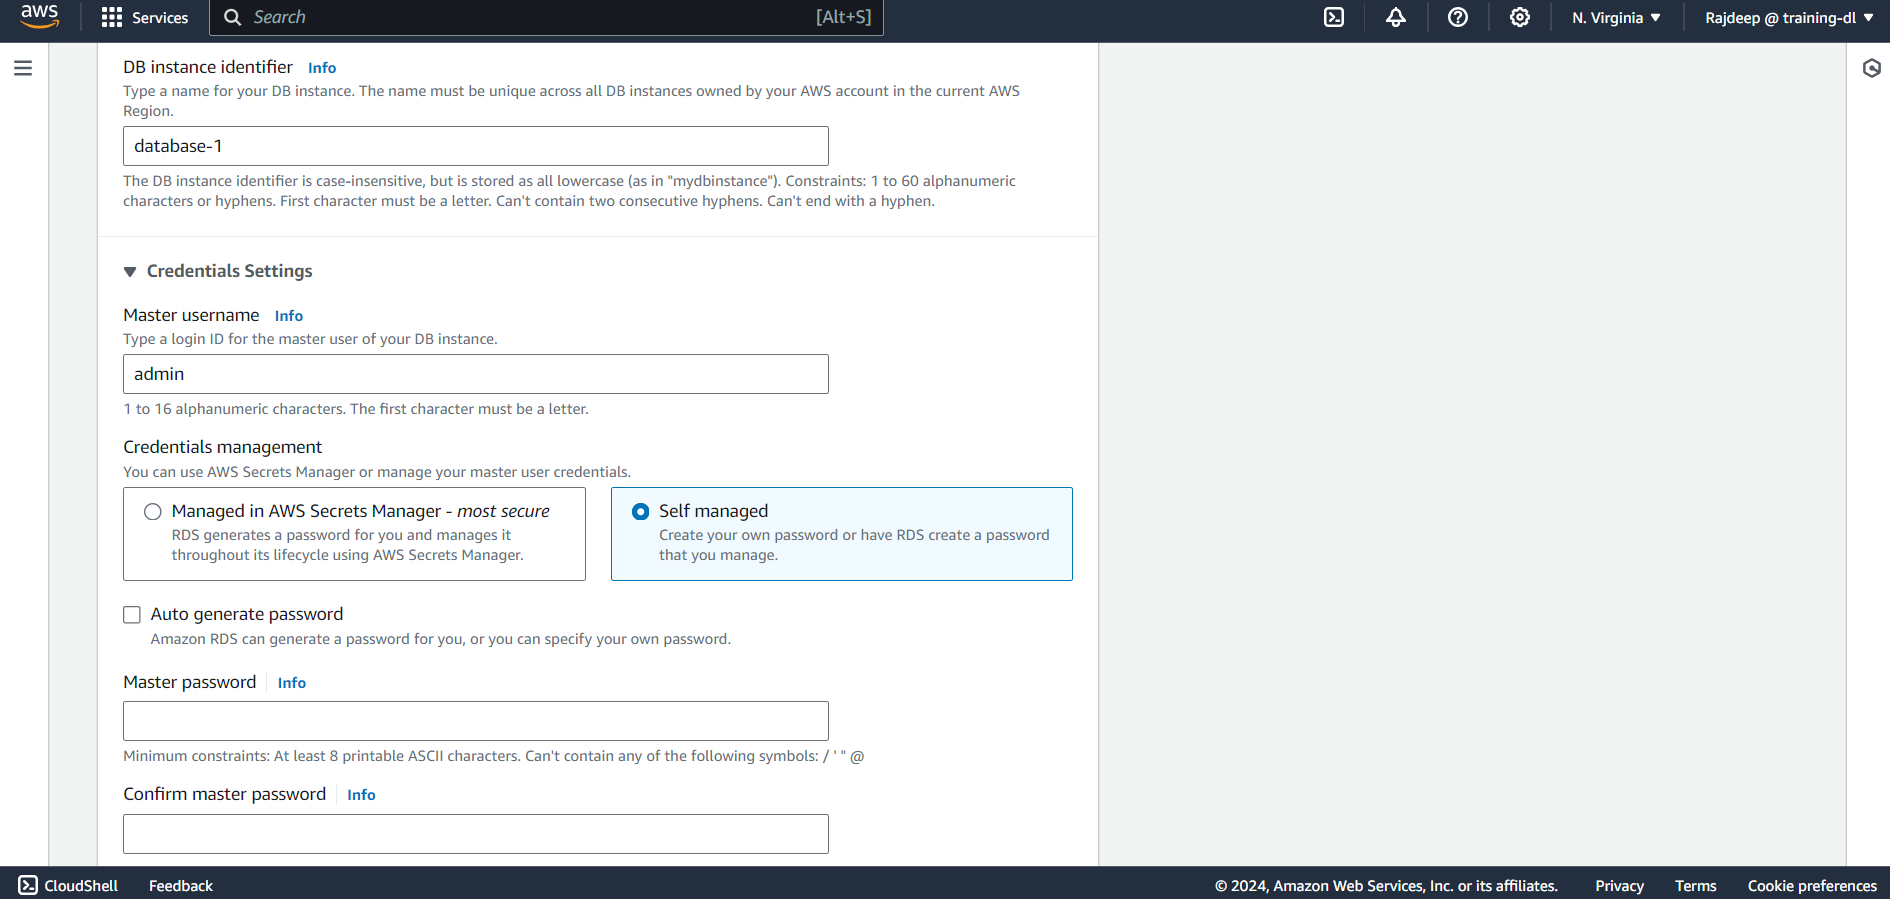
Lastly, click on Additional Configuration, provide an initial database name, and hit Create. It will take some time for the database to be up and running.
Next, we need to download Sqlectron to connect to our database. Sqlectron is a free, open-source database management application that supports MySQL, MariaDB, PostgreSQL, and various other relational databases.
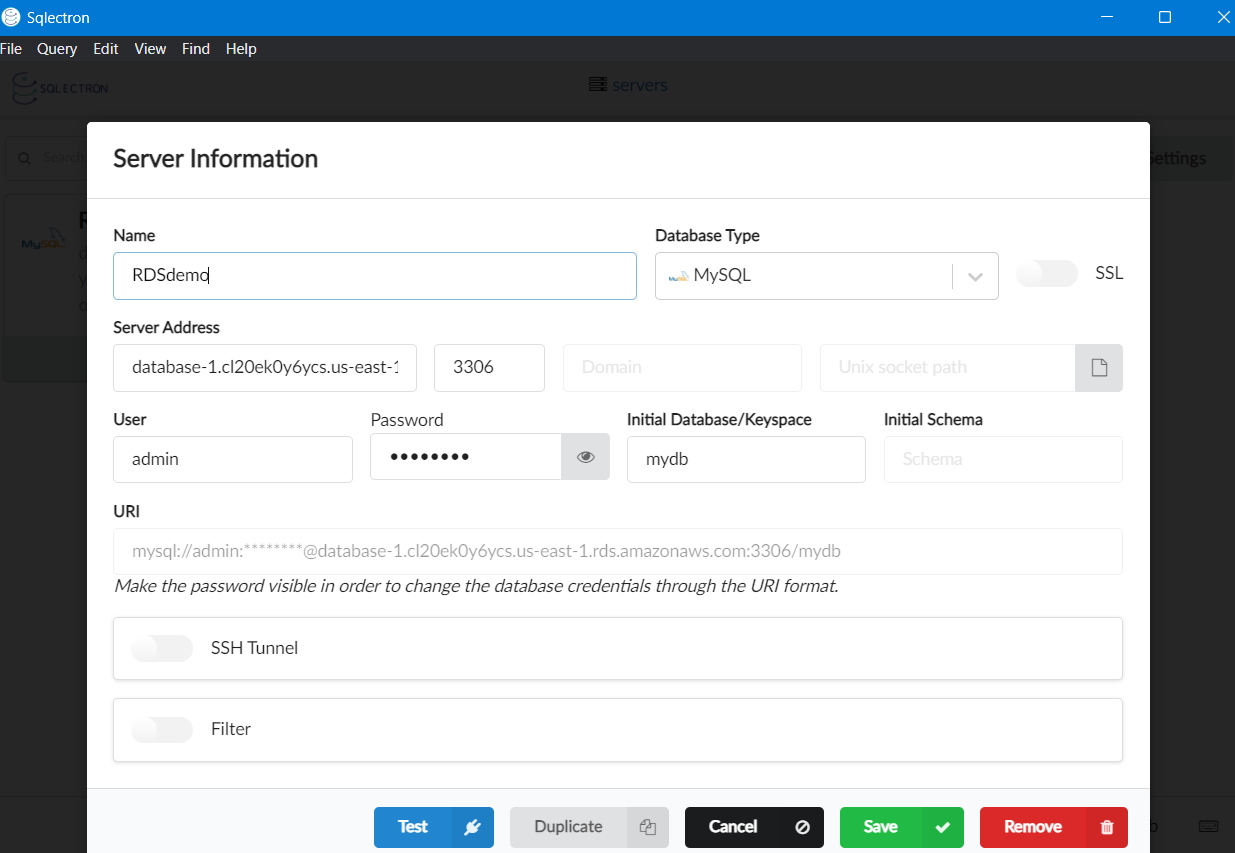
Once the download is complete, provide the details of your database in Sqlectron, save the configuration, and connect to your database.
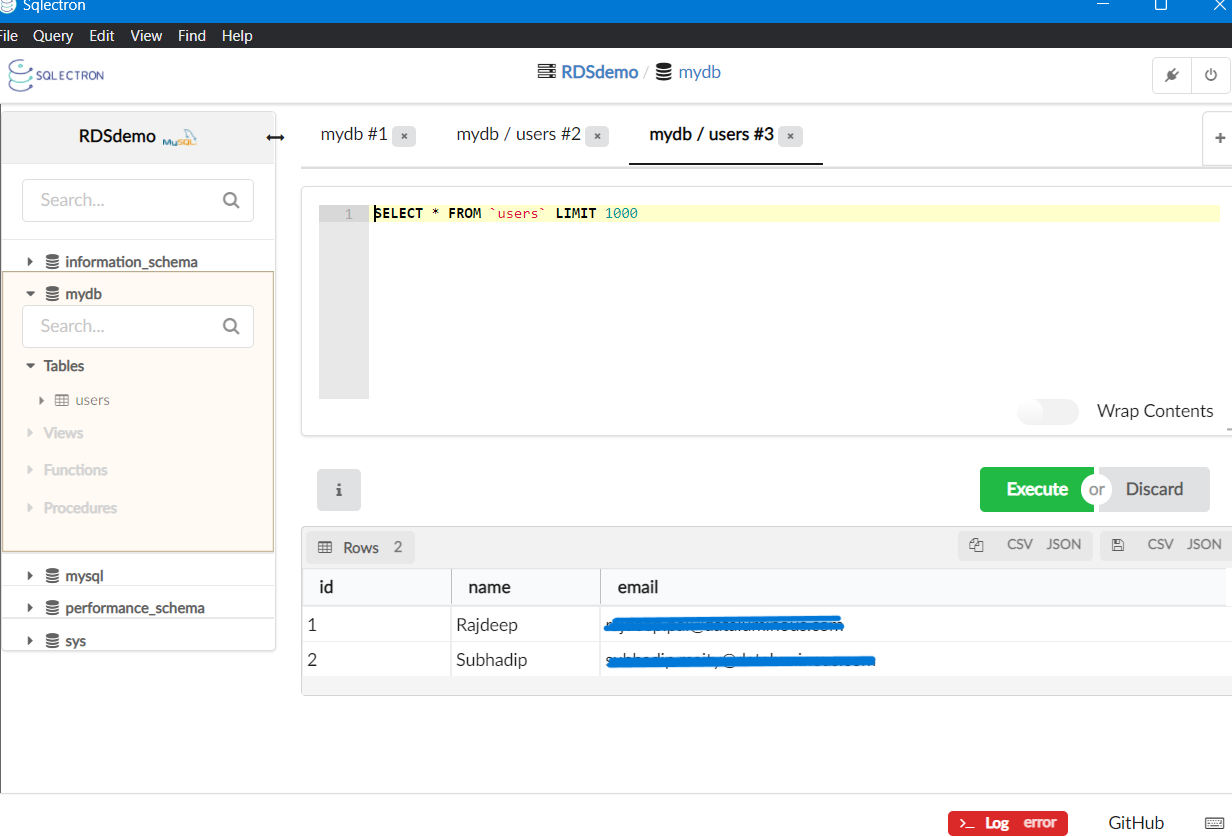
We need to use a query to create a table and enter some data into the MySQL database. To create a table, you can use the following query:
CREATE TABLE users (
    id INT AUTO_INCREMENT PRIMARY KEY,
    name VARCHAR(100),
    email VARCHAR(100)
);
INSERT INTO `users` (`id`, `name`, `email`)
 VALUES (?, ?, ?);
Creating the S3 Bucket
To create an S3 bucket, go to the AWS Management Console and search for S3. Give a globally unique name for your S3 bucket and create the bucket.
Writing the DAG and setting up Airflow
Now, finally, we need to connect all the components so that Airflow can orchestrate the pipelines with ease. To do so, we need to set up the connections in Airflow UI but if you haven't set up Airflow earlier, you can check out my blog on getting started with Airflow.
Configure Connections in Airflow
MySQL Connection:
Go to the Airflow UI (
http://localhost:8080).Navigate to
Admin>Connections.Add a new connection:
Conn Id:
my-sql-defaultConn Type:
MySQLHost: Your MySQL host
Schema: Your MySQL database name
Login: Your MySQL username
Password: Your MySQL password
Port:
3306(default MySQL port)
AWS Connection:
Similarly, add a new connection for AWS if it doesn't already exist:
Conn Id:
aws_defaultConn Type:
Amazon Web ServicesLogin: Your AWS Access Key ID
Password: Your AWS Secret Access Key
Create a DAG file:
You can use this DAG file as an example:
 from airflow import DAG
 from airflow.providers.amazon.aws.hooks.s3 import S3Hook
 from airflow.providers.mysql.hooks.mysql import MySqlHook
 from airflow.operators.python_operator import PythonOperator
 from airflow.utils.dates import days_ago
 import pandas as pd
 import io

 default_args = {
     'owner': 'airflow',
     'depends_on_past': False,
     'email_on_failure': False,
     'email_on_retry': False,
     'retries': 1,
 }

 def fetch_data_from_mysql(**context):
     # Create a MySQL hook
     mysql_hook = MySqlHook(mysql_conn_id='my-sql-default')

     # Define the SQL query
     sql = "SELECT * FROM table_name"

     # Fetch data from MySQL
     df = mysql_hook.get_pandas_df(sql)

     # Push the DataFrame to XCom
     context['task_instance'].xcom_push(key='data_frame', value=df.to_dict())

 def upload_to_s3(**context):
     # Pull the DataFrame from XCom
     df_dict = context['task_instance'].xcom_pull(task_ids='fetch_data_from_mysql', key='data_frame')
     df = pd.DataFrame.from_dict(df_dict)

     s3_hook = S3Hook(aws_conn_id='aws_default')
     bucket_name = 'your-bucket-name'
     key = 'your-file-name.csv'

     # Convert DataFrame to CSV
     csv_buffer = io.StringIO()
     df.to_csv(csv_buffer, index=False)
     csv_buffer.seek(0)

     # Upload CSV to S3
     s3_hook.load_string(
         csv_buffer.getvalue(),
         key,
         bucket_name,
         replace=True
     )

 with DAG(
     'mysql_to_s3_dag',
     default_args=default_args,
     description='A simple DAG to fetch data from MySQL and store in S3',
     schedule_interval='@daily',
     start_date=days_ago(1),
     catchup=False,
 ) as dag:

     fetch_data = PythonOperator(
         task_id='fetch_data_from_mysql',
         python_callable=fetch_data_from_mysql,
         provide_context=True
     )

     upload_data = PythonOperator(
         task_id='upload_to_s3',
         python_callable=upload_to_s3,
         provide_context=True
     )

     fetch_data >> upload_data
This Airflow DAG (Directed Acyclic Graph) automates a workflow that involves fetching data from a MySQL database and uploading it to an S3 bucket on AWS. Here's a breakdown of what this DAG does:
DAG Definition and Default Arguments:
The DAG is named
'mysql_to_s3_dag'.It uses some default arguments like the owner is
'airflow', no email notifications on failure or retry, and it retries once on failure.The DAG runs on a daily schedule and starts from one day ago (
days_ago(1)).
Task 1 -
fetch_data_from_mysql:This task uses a
PythonOperatorto execute thefetch_data_from_mysqlfunction.Inside this function, a MySqlHook is used to connect to a MySQL database (using the connection ID
'my-sql-default').It runs an SQL query to select all data from the table.
The resulting data is converted into a Pandas DataFrame.
This DataFrame is then pushed to XCom (Airflow's cross-communication system) to be used for other tasks.
Task 2 -
upload_to_s3:This task uses another
PythonOperatorto execute theupload_to_s3function.It retrieves the DataFrame from XCom (produced by the previous task).
The DataFrame is then converted to a CSV format using an in-memory buffer (
io.StringIO).An S3Hook is used to connect to an S3 bucket (using the connection ID
'aws_default').The CSV data is uploaded to the specified S3 bucket with the key.
Task Dependencies:
- The
upload_to_s3task depends on the successful completion of thefetch_data_from_mysqltask, ensuring that data fetching happens before uploading.
- The
In summary, this DAG performs the following:
It extracts data from a MySQL table.
It transforms the data into a CSV file format.
It loads the CSV file into an S3 bucket on AWS.
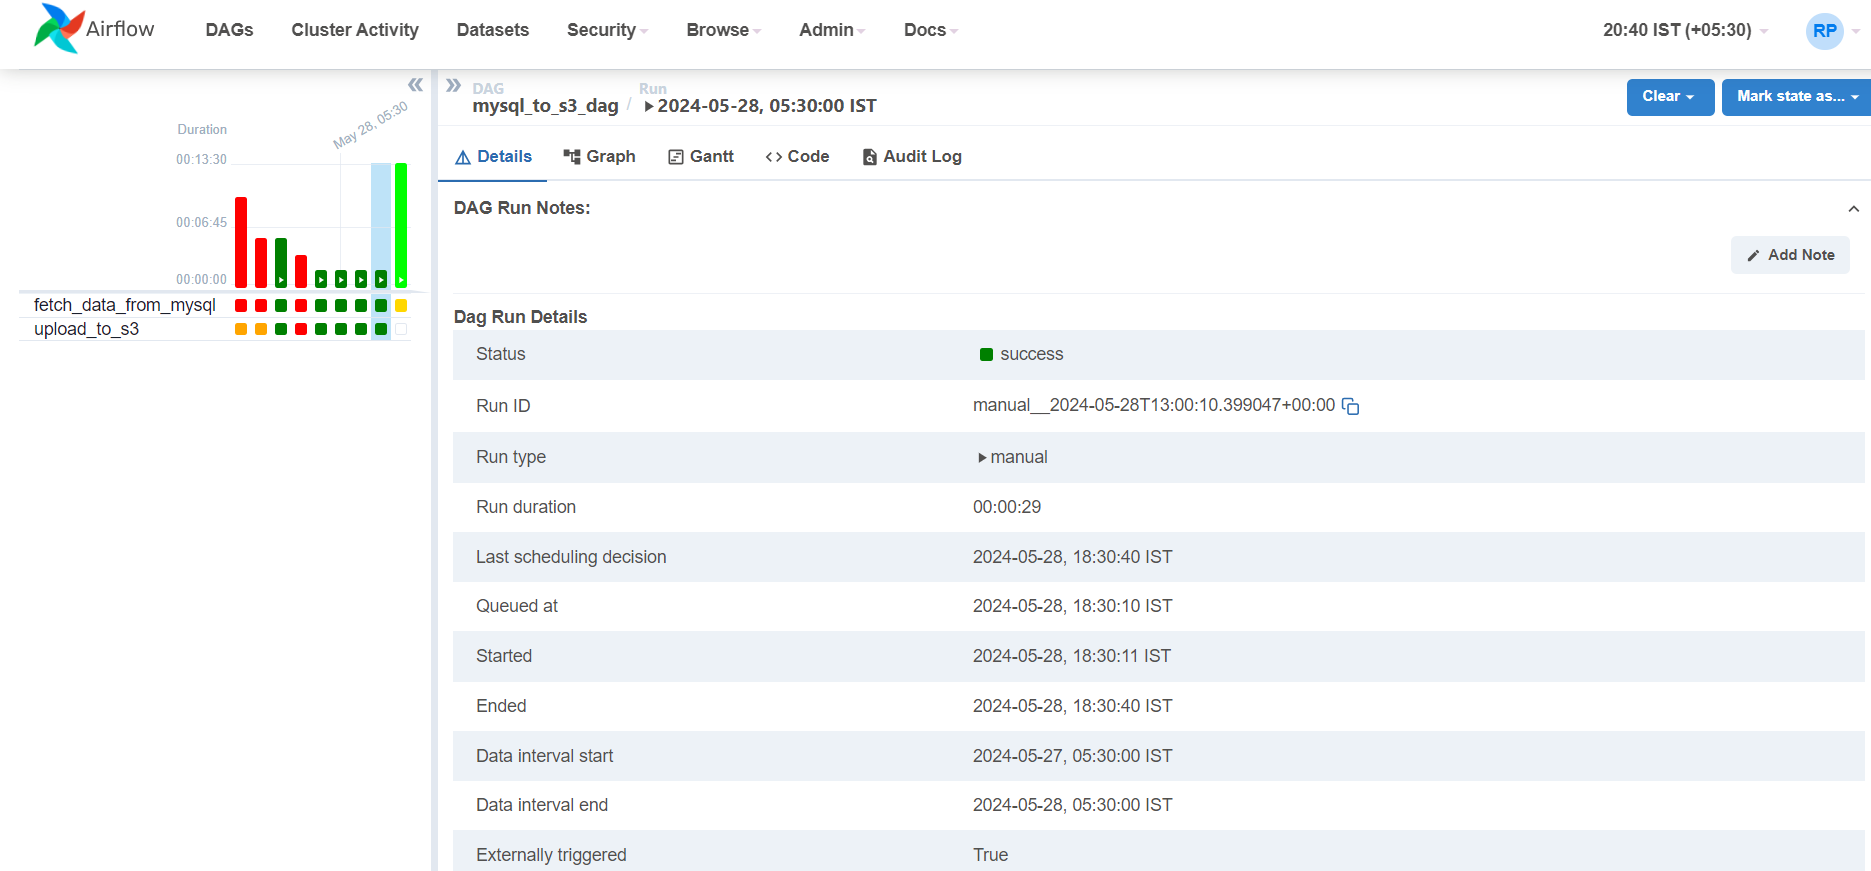

If you look at the time of the last scheduling of the DAG and upload of test.csv. So, I hope I could help you in successfully deploying a DAG in Airflow
Subscribe to my newsletter
Read articles from Rajdeep Pal directly inside your inbox. Subscribe to the newsletter, and don't miss out.
Written by

Rajdeep Pal
Rajdeep Pal
I am a student learning different DevOps tools, exploring opportunities, connecting with people, and learning while doing.