How to Automate Audit Evidence in Drata with Make.com
 James Perkins
Table of contents
Introduction:
⚖️ Compliance automation tools like Drata are great for collecting and generating evidence to support your audits. But these tools can't connect to every piece of software out there.
In this tutorial, I will cover how we can use a no-code solution Make.com to collect information from a visitor management system (SignInApp.com), generate evidence with that information and save it against an appropriate control in our compliance tool Drata.
There are detailed instructions below, but if you prefer to watch content, the same information is included in the following video:
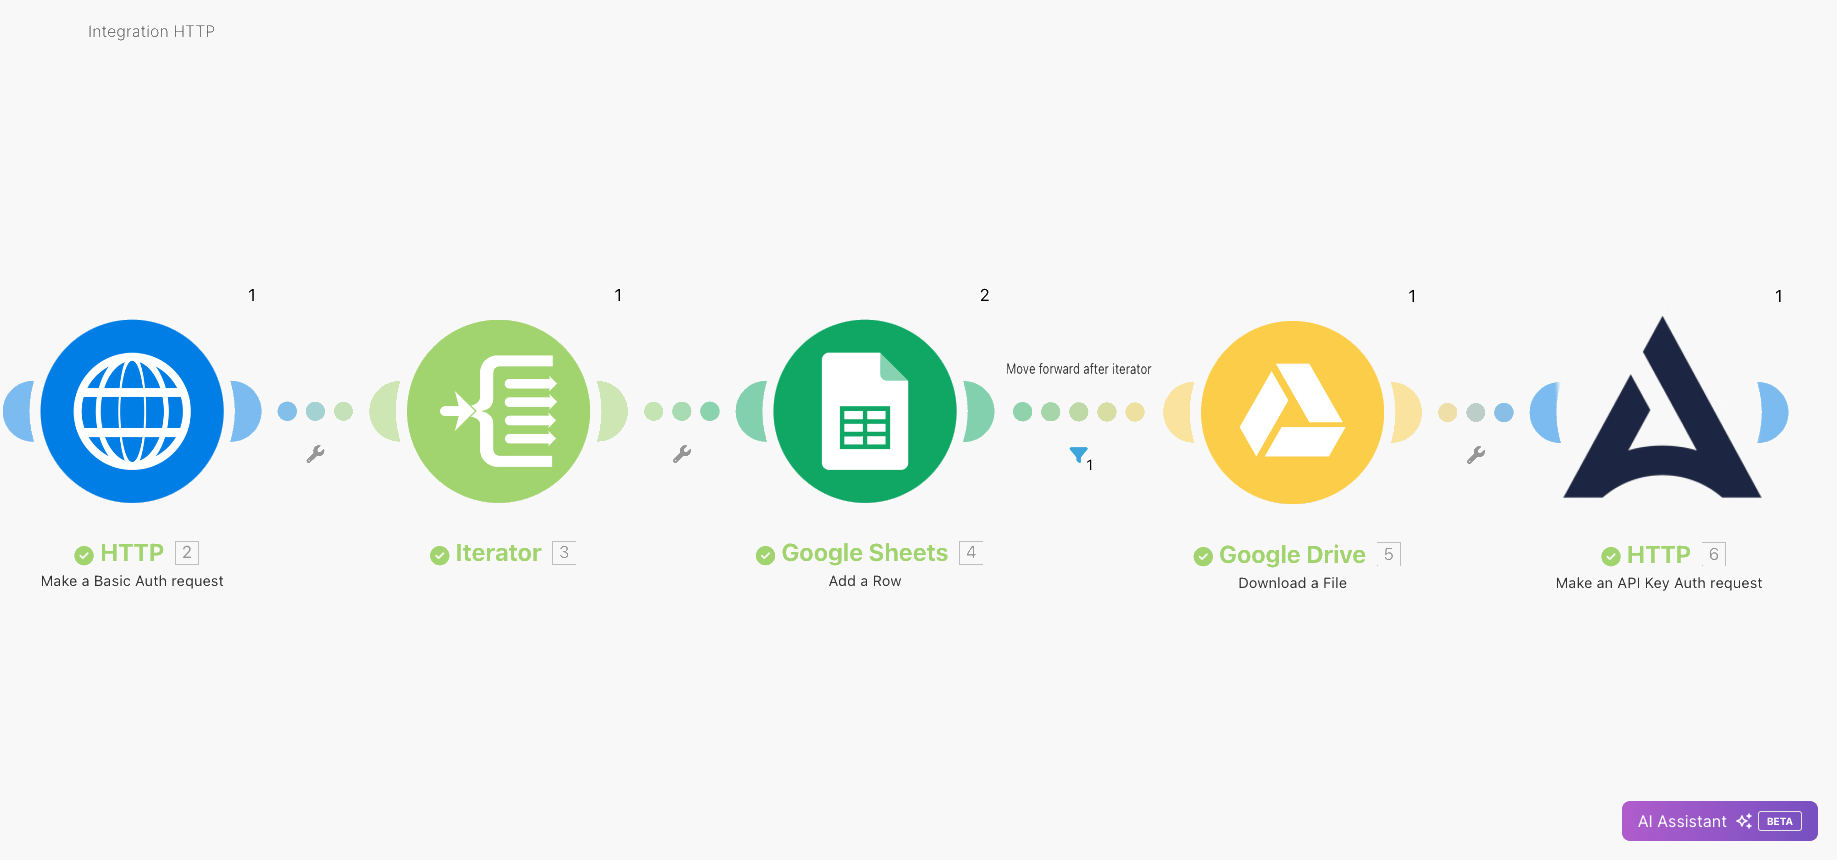
The flow we will be building:

Resources:
Make.com (the following modules)
HTTP - Make a Basic Auth request (to read SignInApp's API's)
Iterator (to iterate through an array of data)
Google Sheets (to store all information from SignInApp)
Google Drive (to download our new evidence as a PDF)
HTTP - Make an API key Auth request (to POST our new evidence to Drata)
Drata's API's:
Add evidence to Control: https://developers.drata.com/docs/openapi/reference/operation/GRCPublicController_uploadExternalEvidence/
Add evidence to Evidence Library: https://developers.drata.com/docs/openapi/reference/operation/EvidenceLibraryPublicController_createEvidence/
Sign In App API's:
Google Workspace / Google Drive & Google Sheets
We'll will require a Google Workspace account to post data to Google Sheets and pull it as a PDF from Google Drive after.
Let's get started
Setting up Make.com
Creating a new Scenario

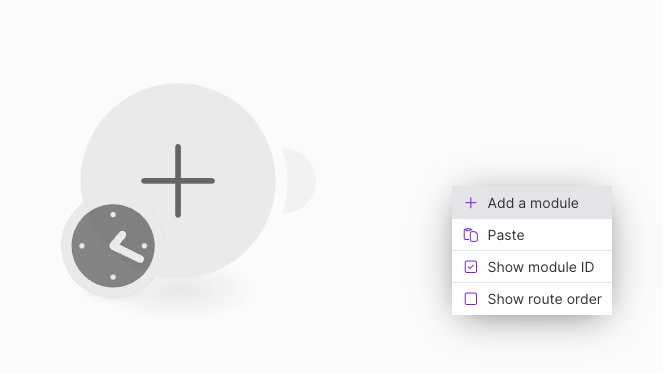
Once in the scenario - we want to right click and "Add module"
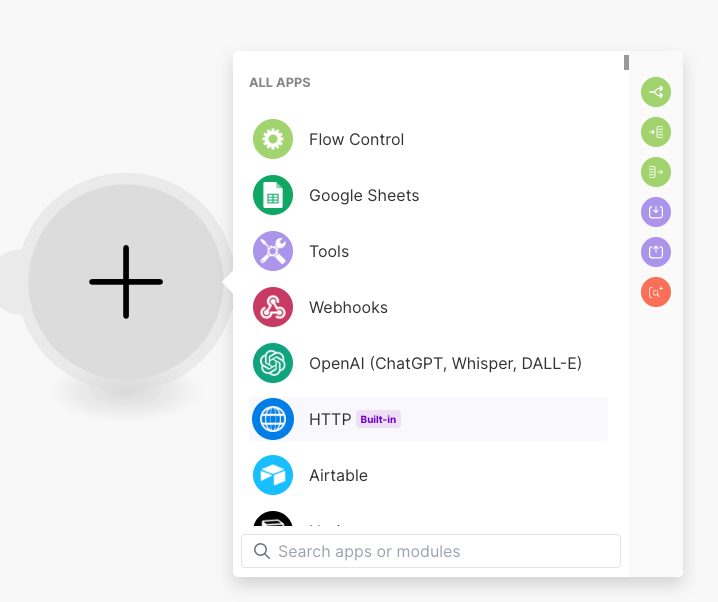
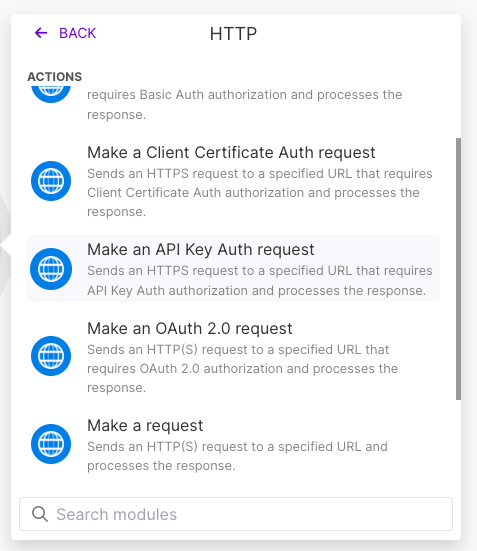
Then we will Select HTTP
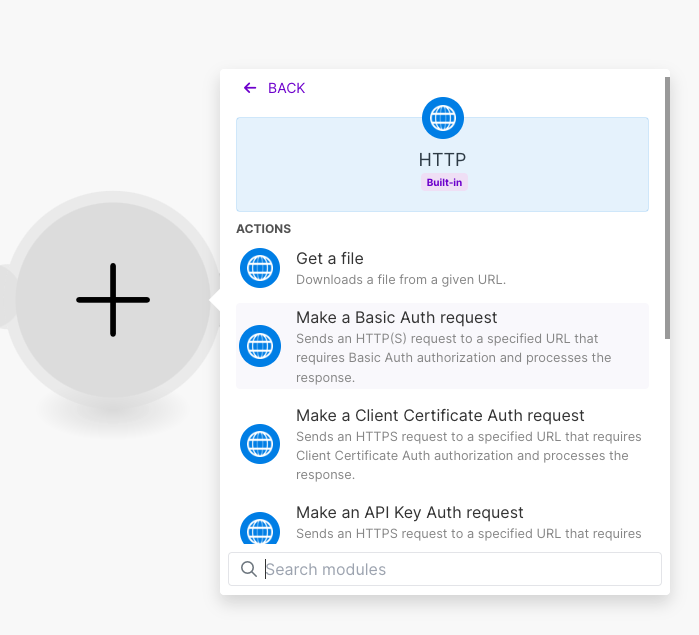
Select "Make a Basic Auth request"
In the new connection box - we need to click "Add" under connection

We now need our API keys from Sign In App: https://signinapp.com/docs/client-api/client-setup.html
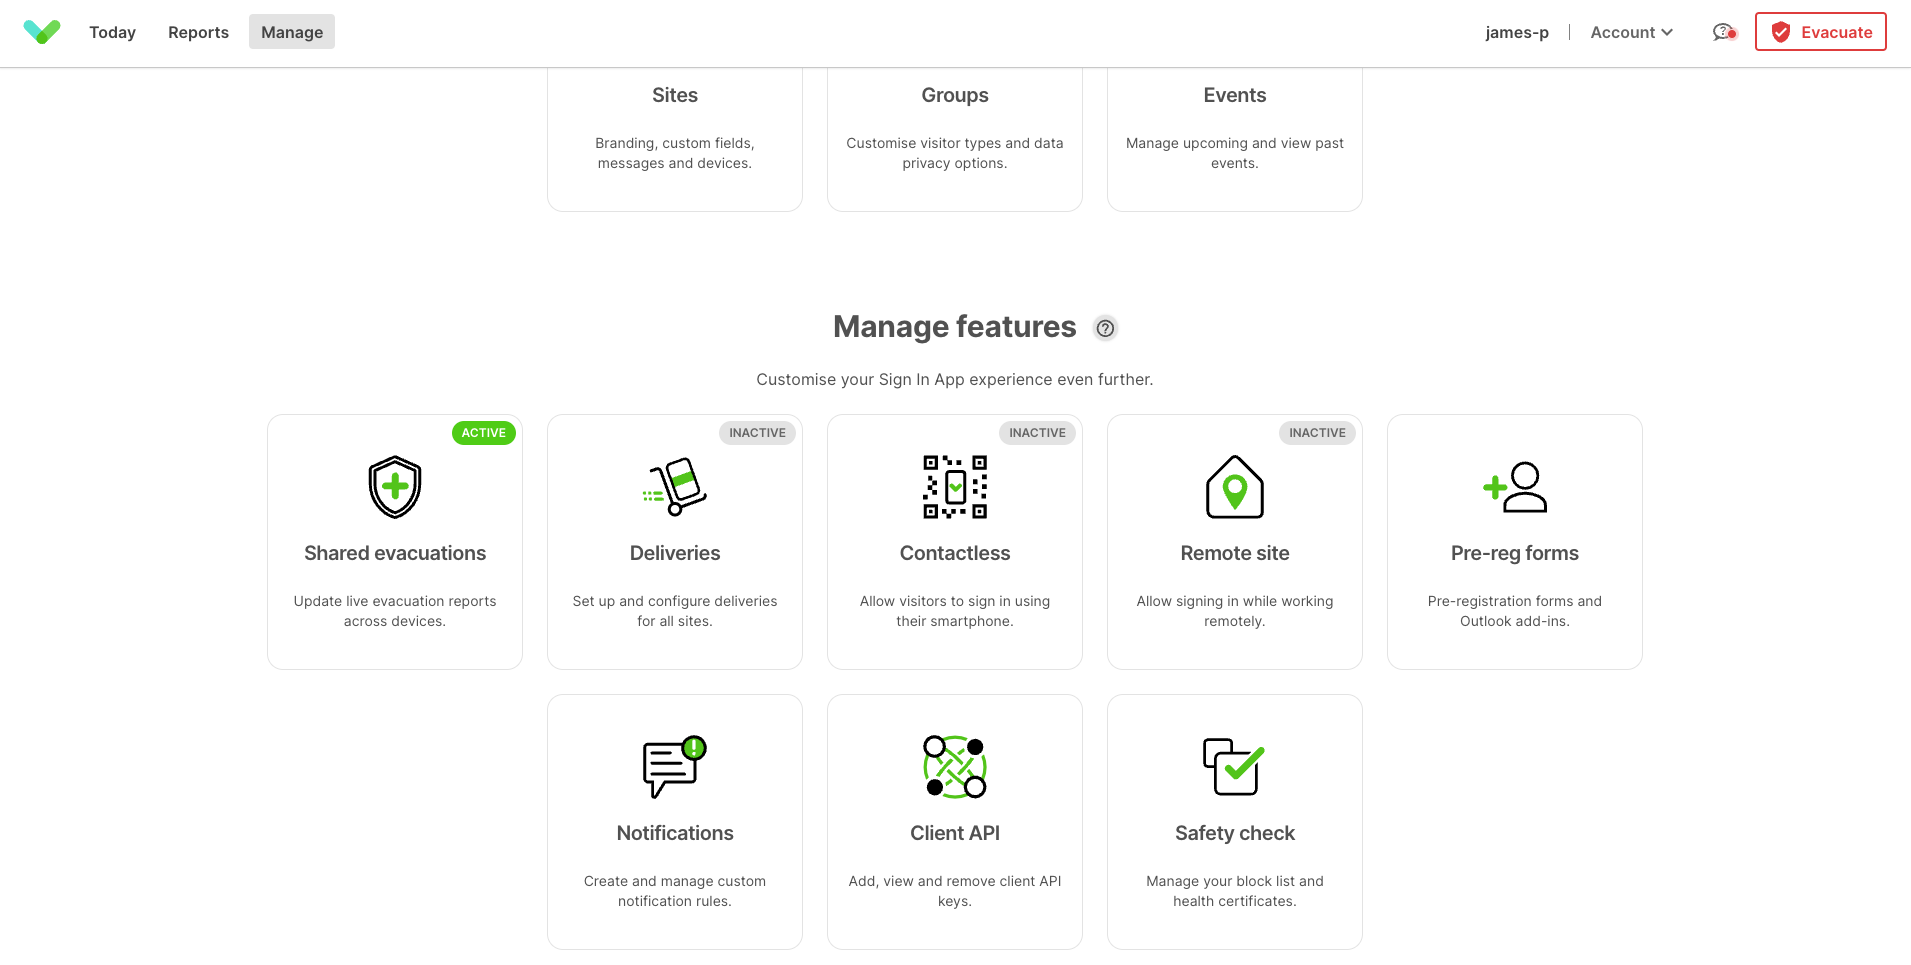
From Sign In App > Manage > Client API and click "Add New"
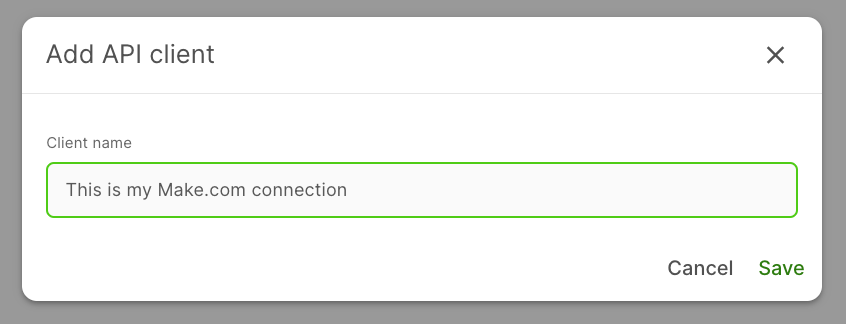
Set your client name - make this something memorable
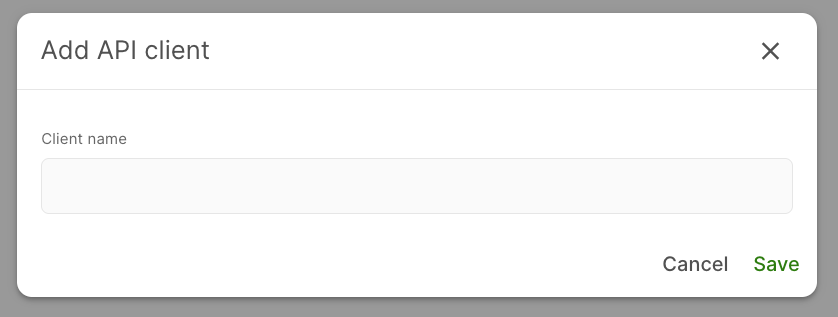
For example:
Click Save and we can now take our token to Make.com
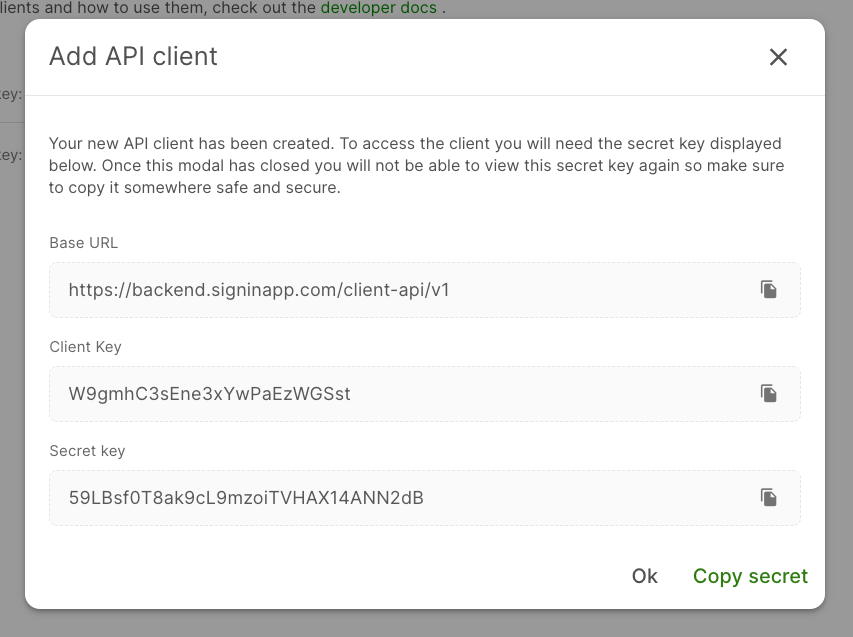
In Make
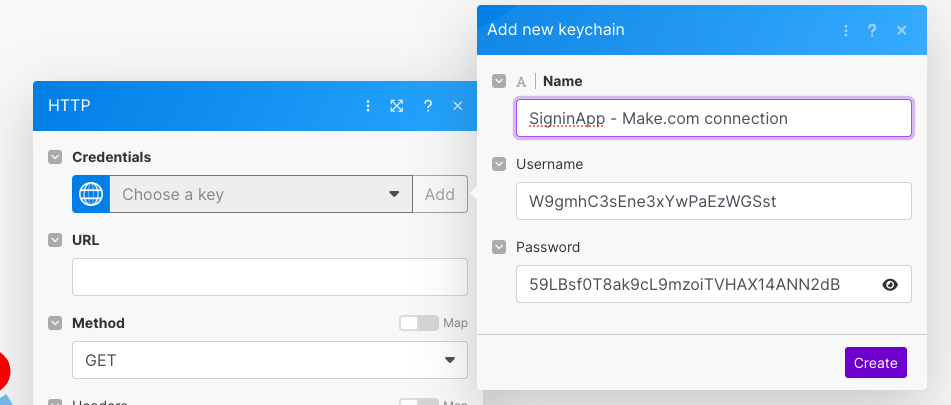
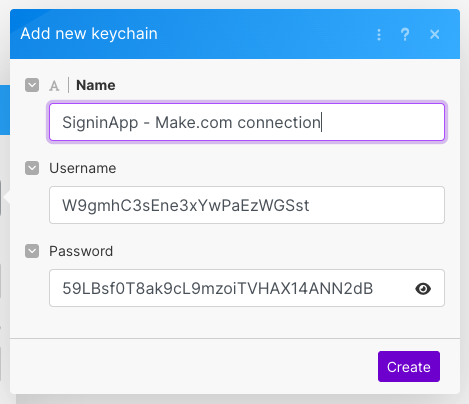
Now that we have the Credentials, we will end a URL to test. For this test we will use the /sites endpoint
https://backend.signinapp.com/client-api/v1/sites/
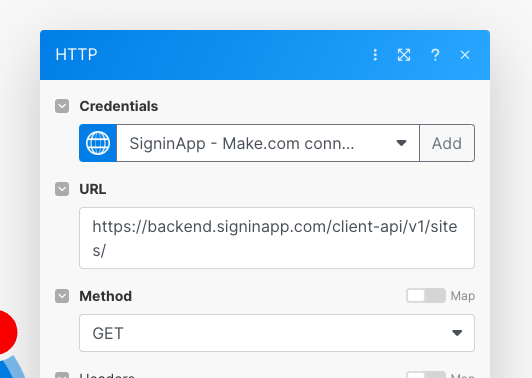
We can now test that this is all working correctly. If we right click the module, we can click "Run this module only"
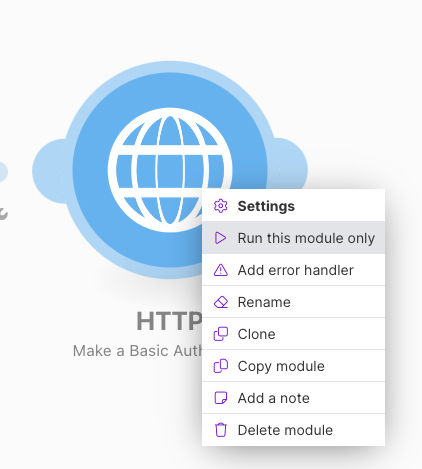
Once this has run, we should have a response show in a bubble above the module, in my case it shows "1"
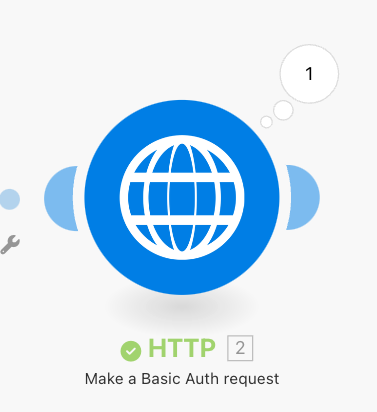
We can hover over the "1" and click the magnify glass to explore the results
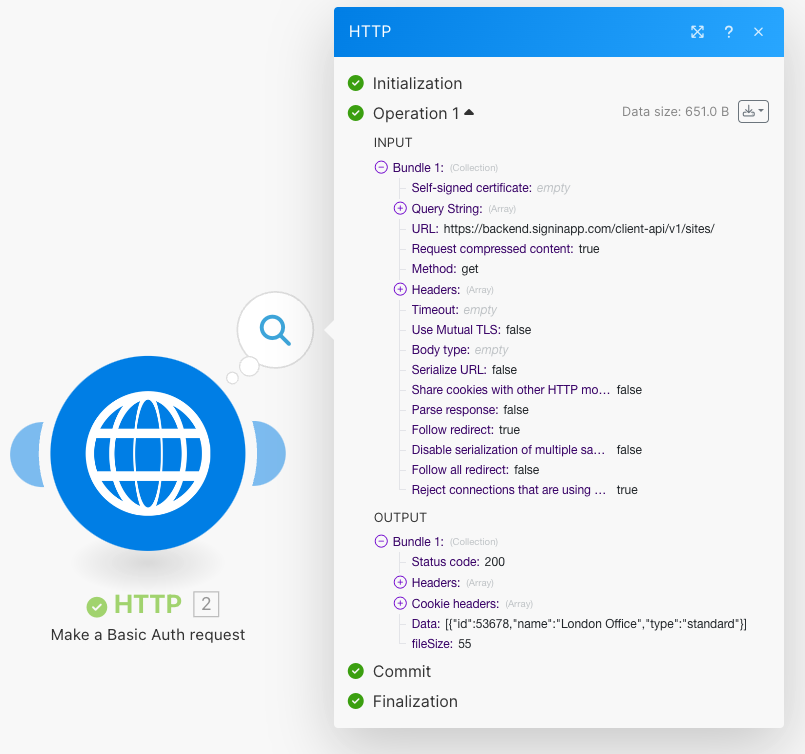
Next we want to add another module, again for: HTTP > Make a Basic Auth request
We need to point this to the site ID that we want to call as well as the date_from & date_to included in the request. We are going to use the variables available to use in Make - to set the date_from as 90 days from now/today and the date_to as now/today.
I've entered the URL I used below for you to copy and paste, but make sure you update your <site_id>. Also we want to set "Parse response" to Yes
https://backend.signinapp.com/client-api/v1/sites/<site_id>/history?date_from={{addDays(now; -90)}}&date_to={{now}}
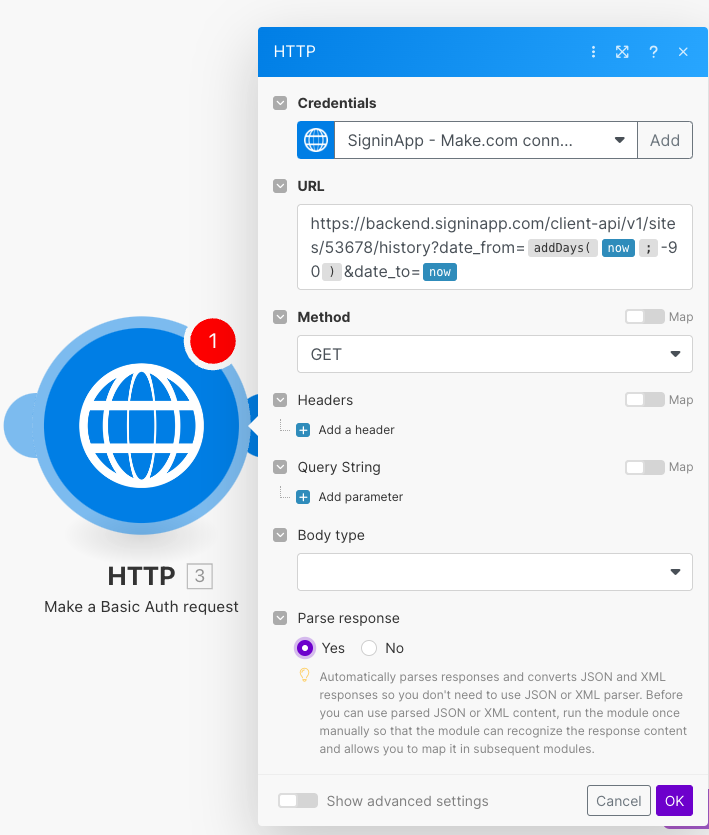
If we now run this new module, we should see the data show in the response:
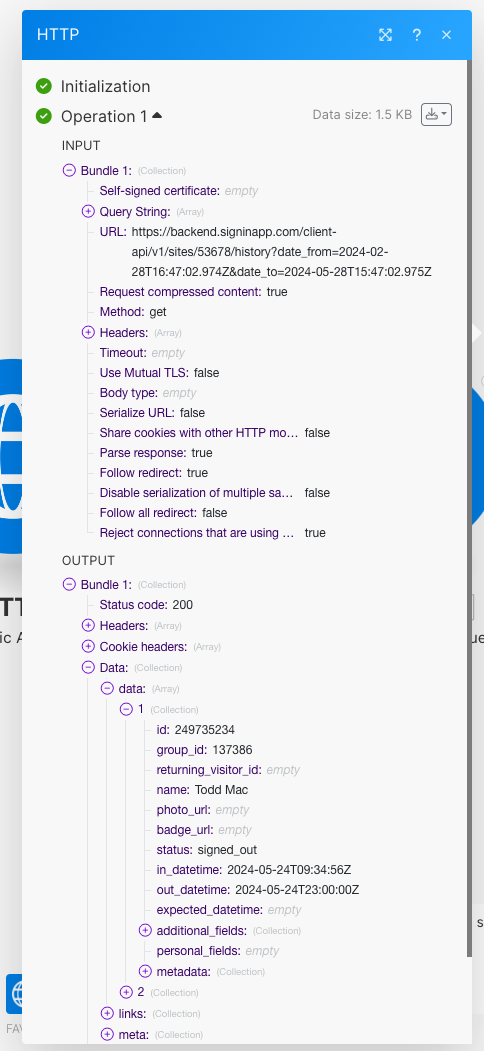
Now that we are getting an array of data from SignInApp we need to iterate through that and add each item to a spreadsheet.
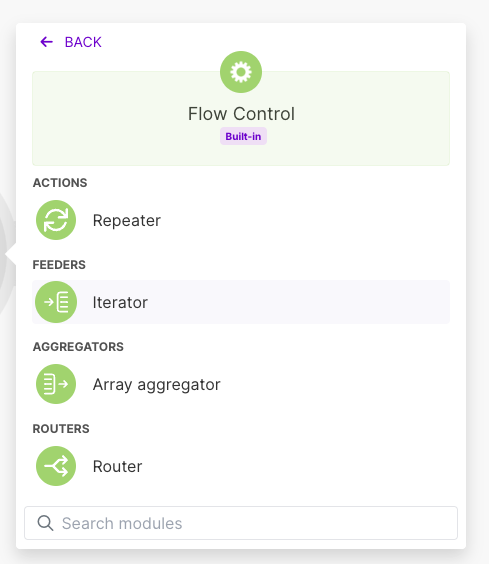
Add a new Module > Flow Control > Iterator
Now we need to tell the iterator which array to use - I am selecting the Data > Data[] from the last HTTP Basic Auth request
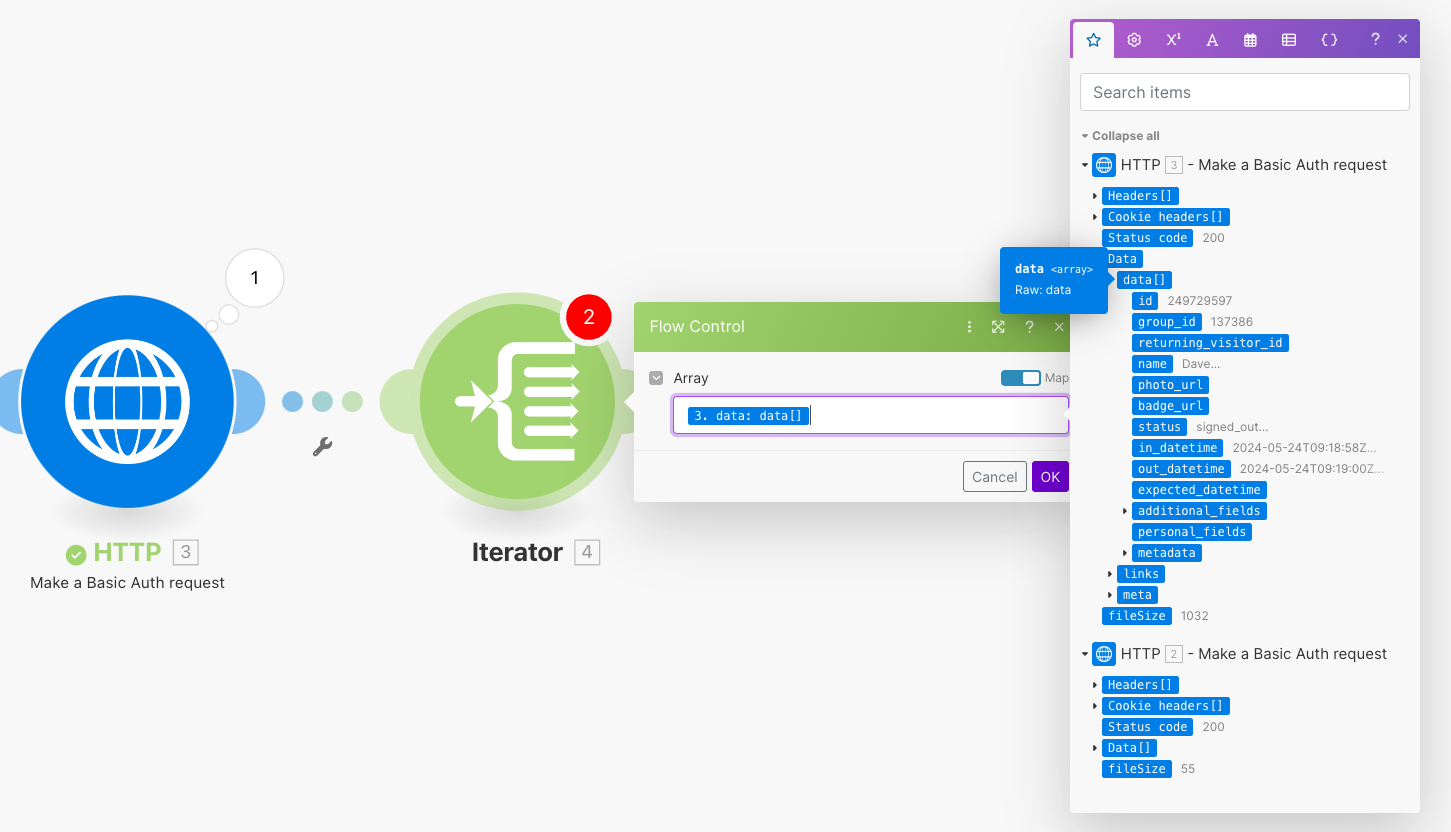
Now before we can do anything with the data from the Iterator, we need to run the flow once, so we can see the type of data that is returned from the iterator to map it in the next section, so click "Run once" at the bottom left of the pag

Next we need to send this data to a Google Sheet, so it is another module and this time Google Sheets > Add a Row
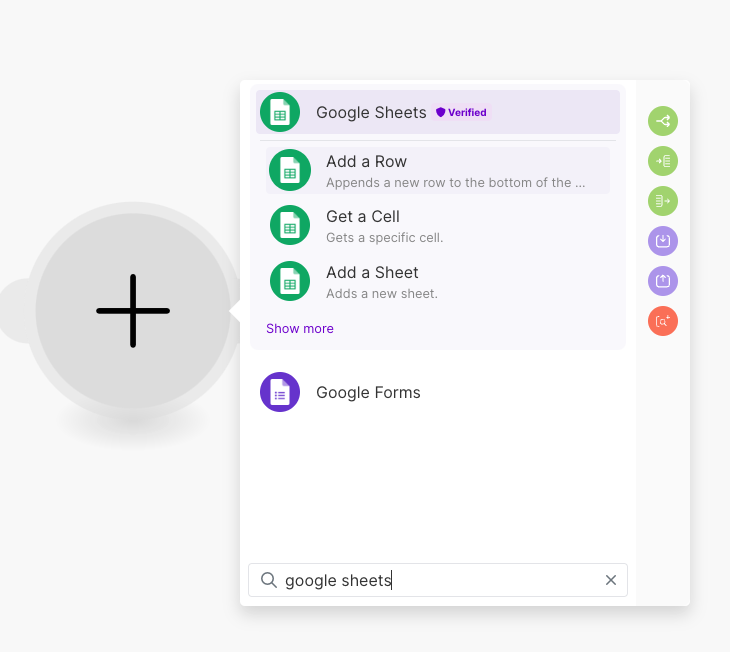
You can follow the Make - OAuth flow to approve Make connecting to your Google if you don't already have an active connection setup.
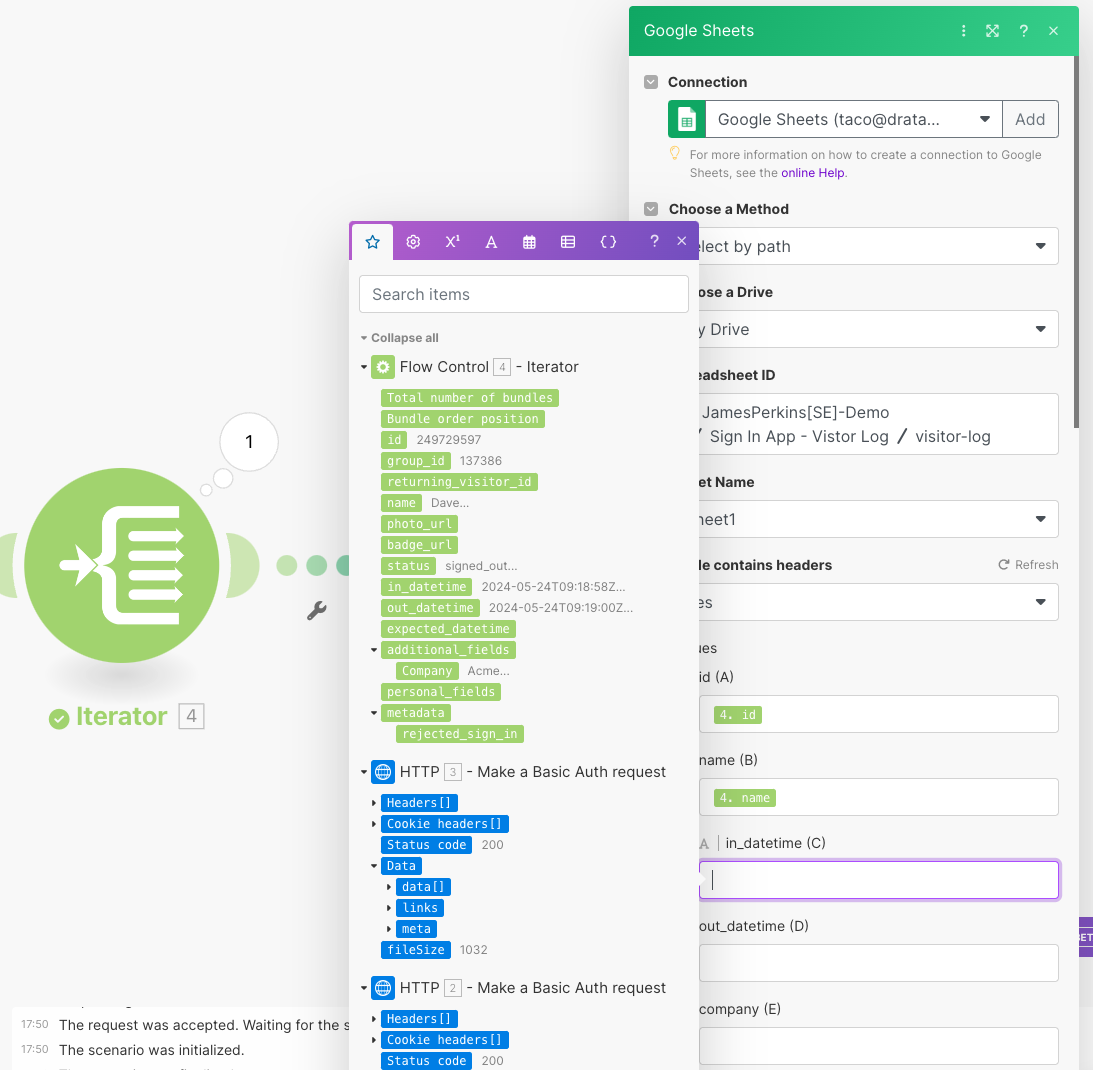
You'll then want to create a Google Sheet somewhere to call from Make.com and in my case, I added headers to my Google Sheet to make the mappings easier.
Next we add the mappings from the iterator to the headings of the sheet that we selected in Make
Our next Module is going to be Google Drive > Download a File
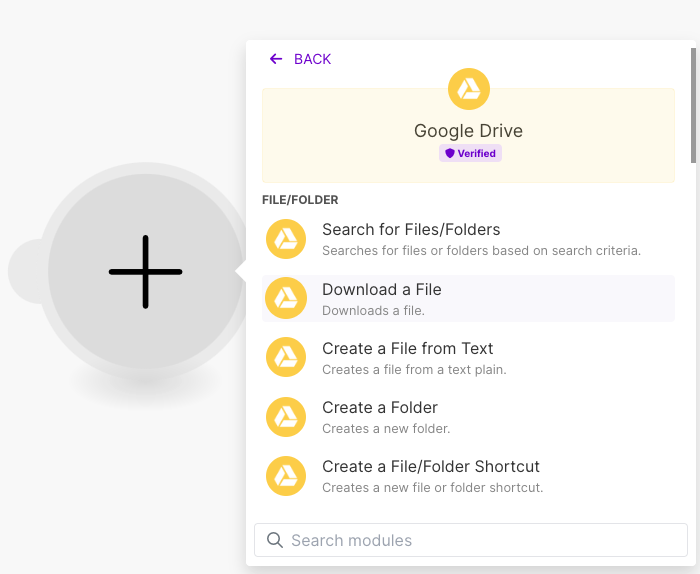
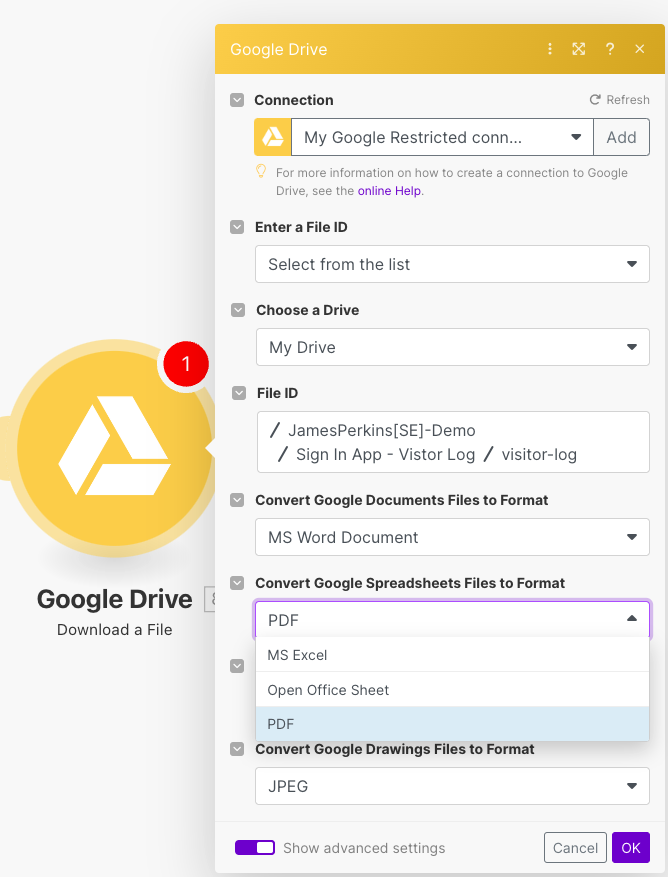
Find your file, either manually or from the list and enable the toggle for "Show advanced settings"
We are then going to set the "Convert Google Spreadsheet Files to Format" to PDF
Hold fire one second!
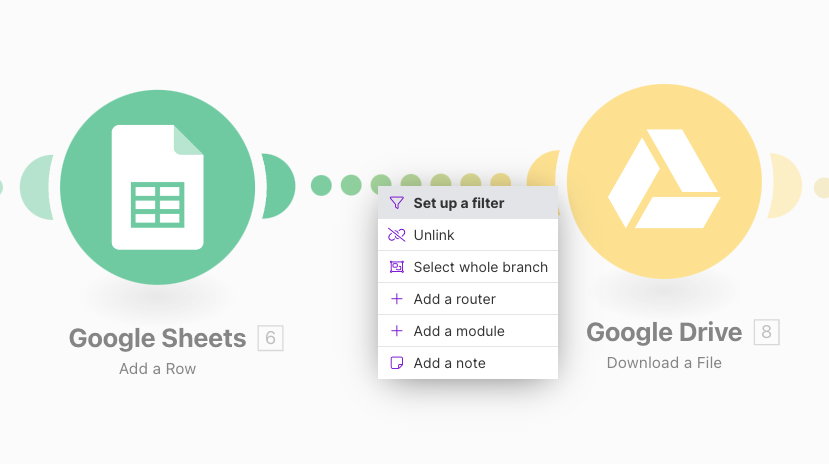
Before we go to far, we want to make sure we aren't progressing from the Google Sheet to downloading the file at every new row added to the Google sheet.
If we right click the line between Google Sheets and Google Drive and then click Set up a filter
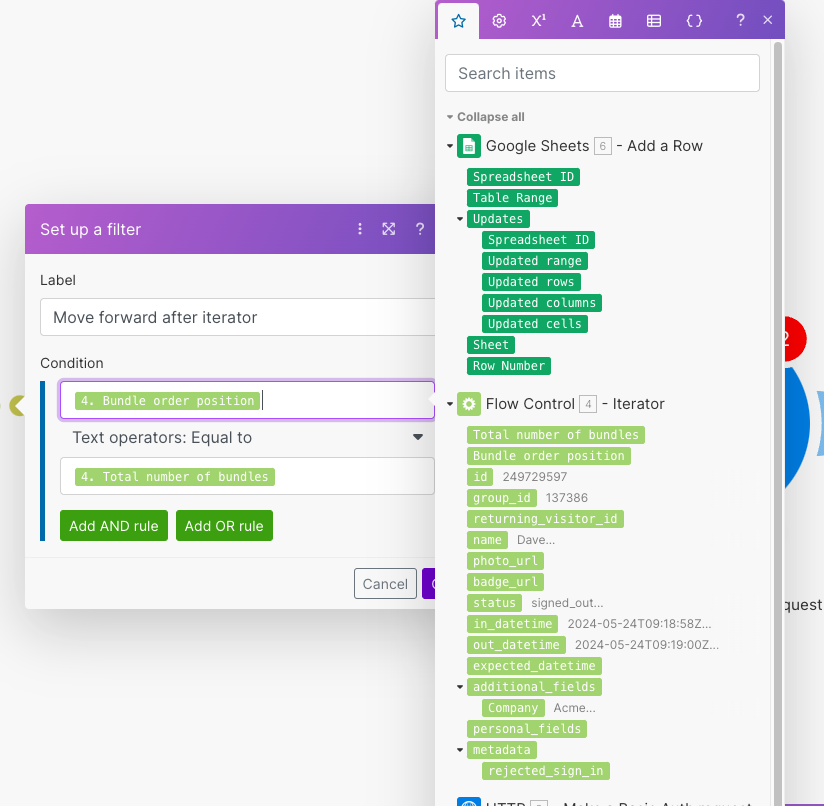
In the popup, enter a label that is useful for you.
The Condition should be Bundle order position - Equal to - Total number of bundles and the Bundle's are being called from the Iterator card
Adding a Drata connection into Make.com
Now that we have our evidence, we need to get it into Drata.
To setup the connection, we want to add a new module > HTTP > Make an API key Auth request
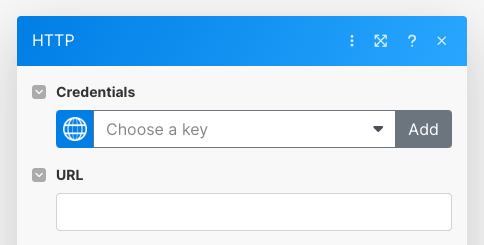
Under Credentials we want to click "Add"
Now we need to switch to Drata to create our API key
In Drata, click your Name at the bottom left > Settings
Under Company Settings, click API Keys
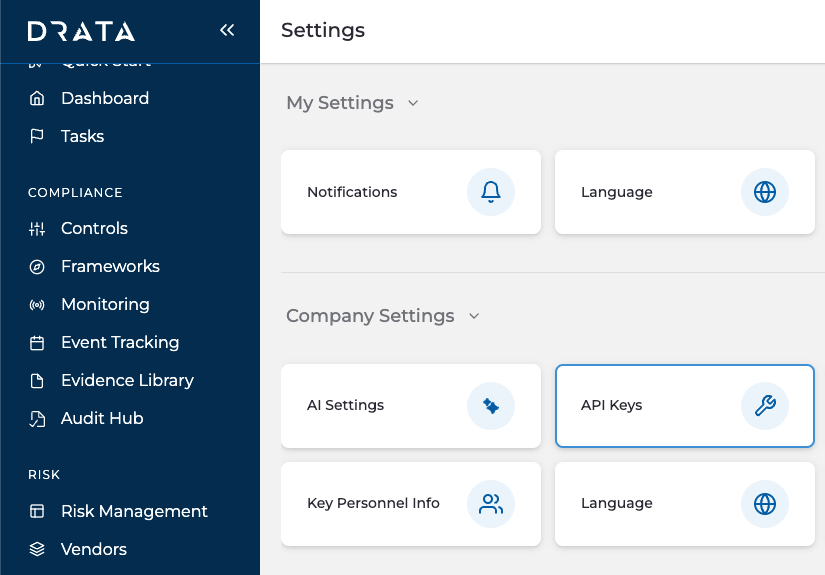
Click Create API Key
Follow the details, You can set an expiration or leave the life to Never Expires.
For the Scopes either select Custom and grant the correct Write Scopes that we will need (Controls:Map external evidence, Controls:Update control info, Evidence Library:Add Evidence & Evidence Library:Update Evidence) or select All read and write
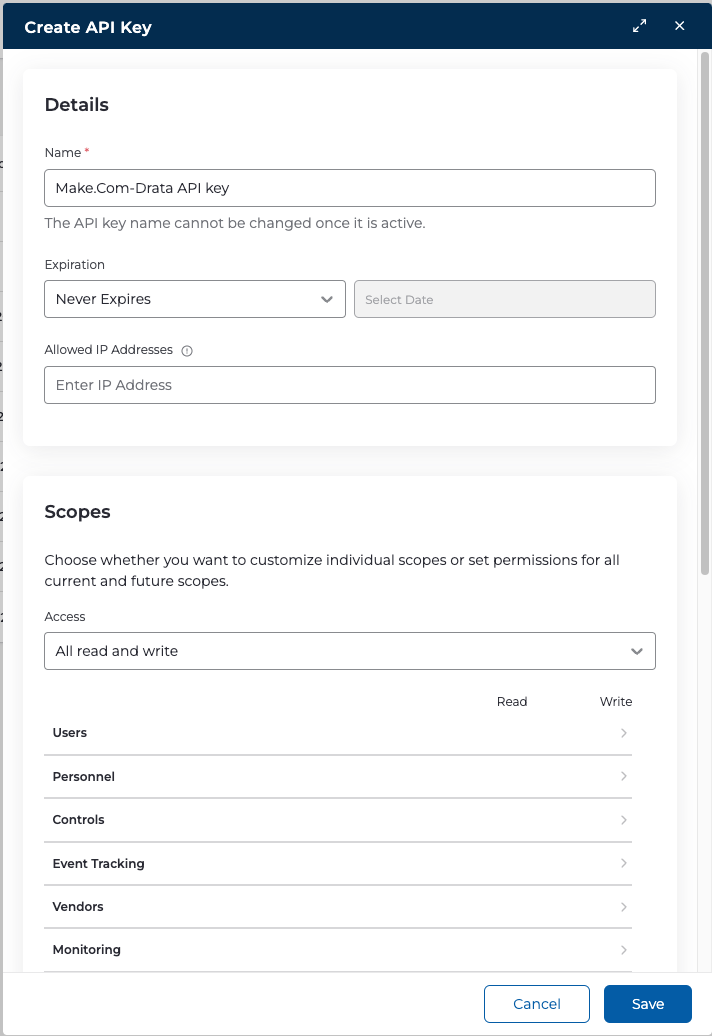
Now that we have our API key, we can take it back to Make.com
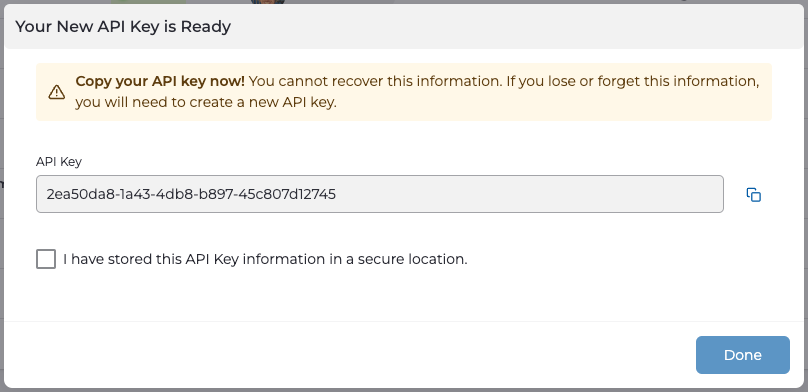
In Make.com we should see this screen
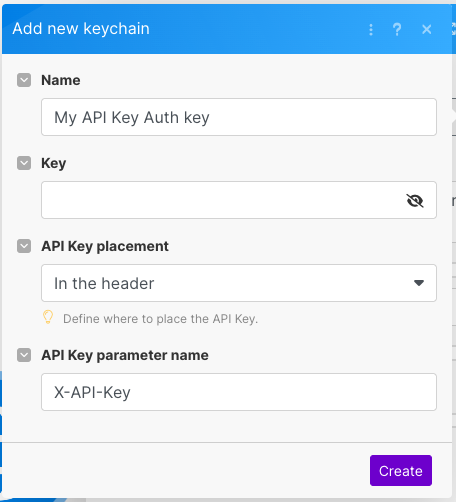
Update with the appropriate details, set the Name to something useful.
The Key value should be "Bearer <your_API_token>" (don't forget the the space between "Bearer" and the API token, you can see mine below
Bearer 2ea50da8-1a43-4db8-b897-45c807d12745
API Key placement should be left as default "In the header" and API Key parameter name should be changed to Authorization
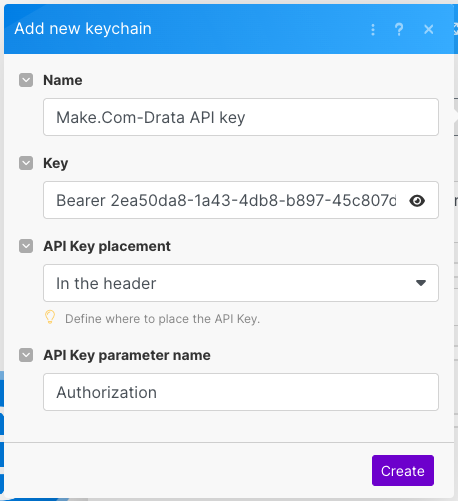
Click the purple Create button
Now we need to set the values to send to Drata, I have included 3 screenshots below to show my configuration, but the values are
URL: The API endpoint at Drata to post this data, this includes the WorkspaceID and the ControlID. In my Example below I am posting to the EU endpoint (not North America Base URL), Workspace 1 and Control ID of 632
https://public-api.eu.drata.com/public/workspaces/1/controls/632/external-evidence
Method: POST
Body type: Multipart/form-data
Fields:
Item 1, Field Type: File, Key: file, File: Select your Google Drive file we just downloaded
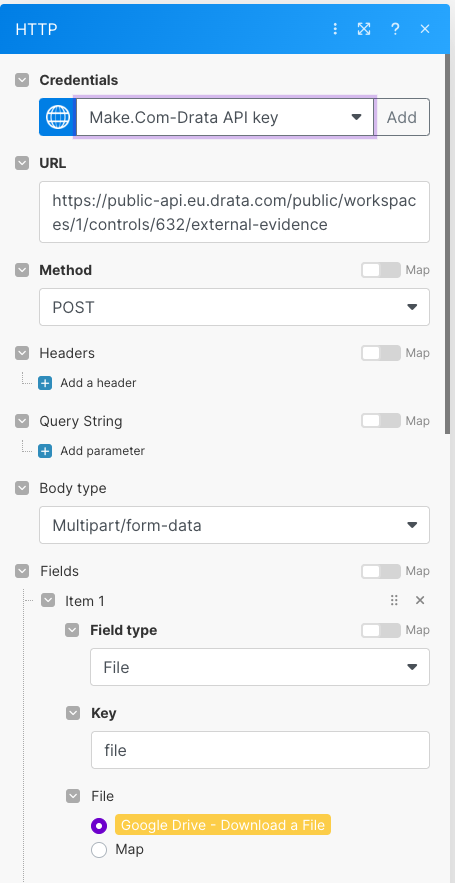
Item 2, Field Type: Text, Key: creationDate, Value: The Date you want to add (in my example below, I am using the current day, minus 1 day
{{formatDate(addDays(now; -1); "YYYY-MM-DD")}}
Item 3, Field Type: Text, Key: renewalScheduleType, Value: The length of time you want, I used: THREE_MONTHS
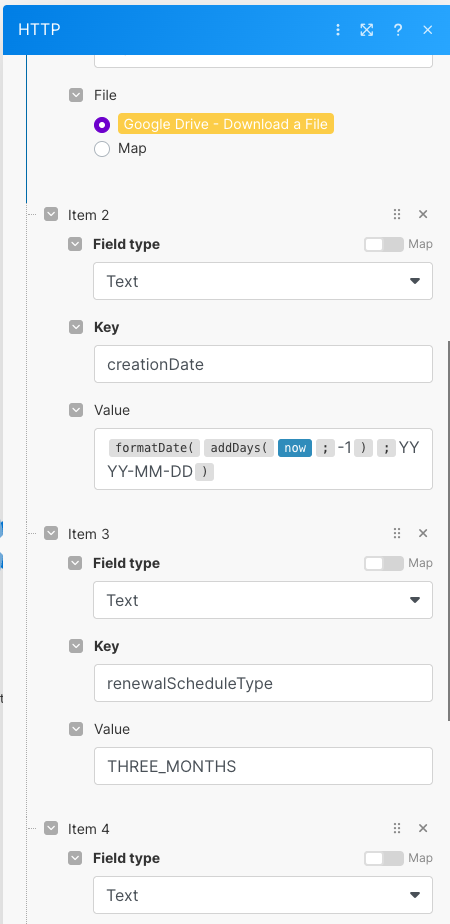
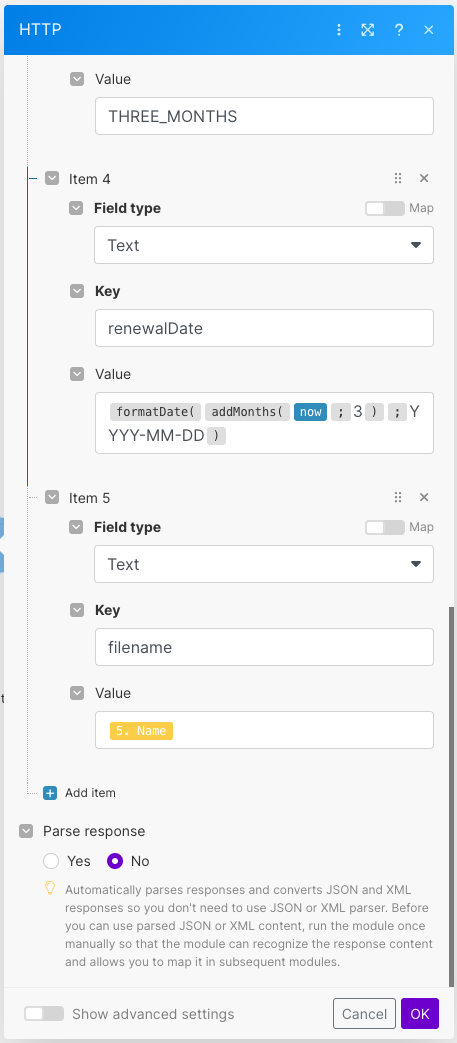
Item 4, Field Type: Text, Key: renewalDate, Value: The renewal date of the evidence. I set this to 3 months from today (in line with the THREE_MONTHS above). I used a Make.com variable, which you can copy and paste below
{{formatDate(addMonths(now; 3); "YYYY-MM-DD")}}
Item 5, Field Type: Text, Key: filename, Value: The name of the file (I called the name of the file from the previous Make card, but you could of course type something here such as "visitor-log.pdf"
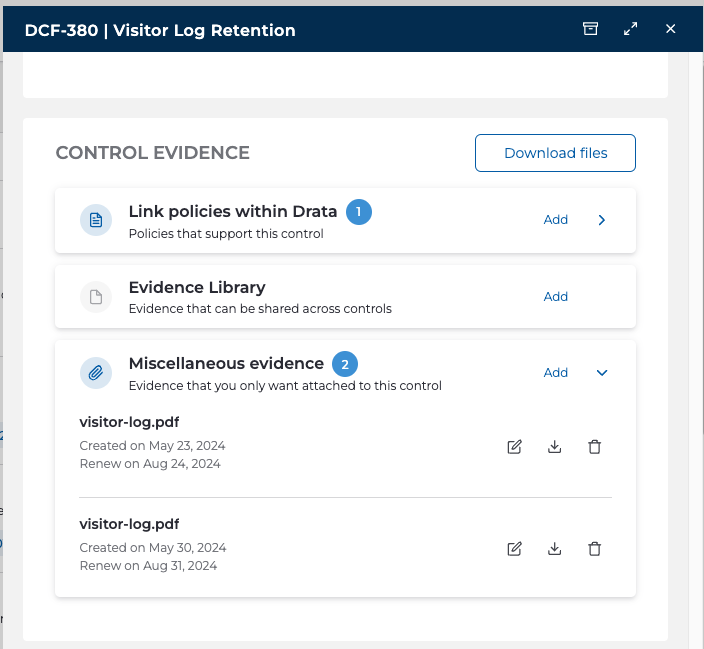
Now we have this. We should be able to run the Make flow and successfully call the data from Sign In App and post it to Drata
Summary
🚀 We now have an automation set within Make.com (which we can schedule or run manually) that will collect data from our Visitor management system (SignInApp) and store it in Drata ready for our audit.
This might not be the exact use-case you need, but hopefully it shows you how you can use Make.com to collect data from any resource and store it in Drata as evidence ready for your next audit.
Subscribe to my newsletter
Read articles from James Perkins directly inside your inbox. Subscribe to the newsletter, and don't miss out.
Written by
