Deploying Applications on Linux VM and Connecting to Windows VM Made Easy
 Nitin
Nitin
Heads up: This is the 3rd article in the series 'Deploy Your App on Azure Without Spending a Dime'. If you haven't checked out the first article yet, you can find it here.
*******************************************************************************
Table of Contents
Introduction
Identifying the Issue with 'Weather' Functionality
Creating a New Ubuntu VM on Azure
Searching for VM
Creating the VM
Configuring VM Details
Selecting VM Size
Configuring SSH Key
Configuring Disks
Configuring Networking
Reviewing and Creating the VM
Connecting to the Ubuntu VM
Using Azure CLI
Validating Connection
Running the Weather API on the Ubuntu VM
Installing Required Packages
Cloning the Weather API Repository
Starting the Weather API
Validating the Weather API
Using Private IP for Connection
Testing the API
Attempting Connection with Public IP
Achievements
Conclusion
***************************************************************************
If you have noticed, there is one more functionality as part of ‘ReadIt’—its ‘Weather’.
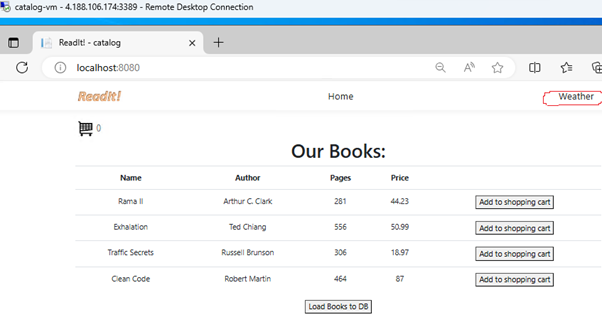
Currently, it’s not working, and I need to deploy it to another VM for it to function.
Clicking on the right top circled button lands you on the 'Our Weather:' page.

However, entering the public IP of my VM throws an error.
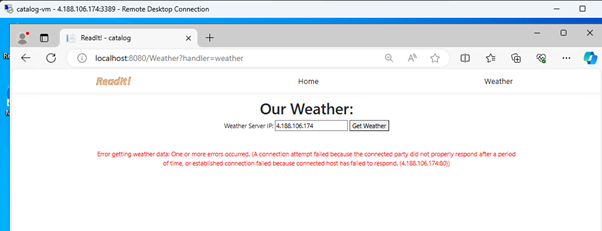
Trying to bring up the ‘weather’ API
I will create another VM based on UBUNTU.
To do that:
Search for VM in the search bar on Azure Portal.
Click on ‘+ Create’ to create a VM.
From the dropdown list, select Azure Virtual Machine.
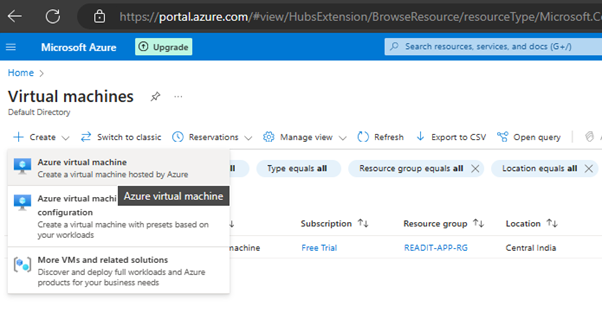
- Use the same ‘Resource Group’ that was used to create ‘catalog-vm’ last time.
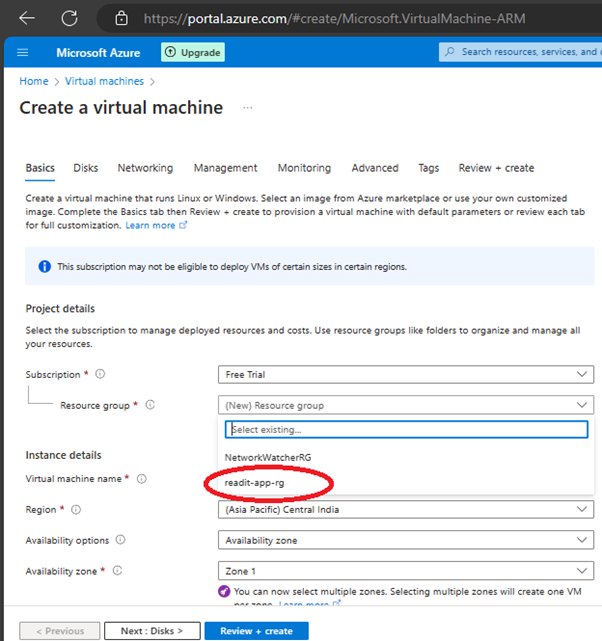
- Name the VM as ‘weather-VM’.
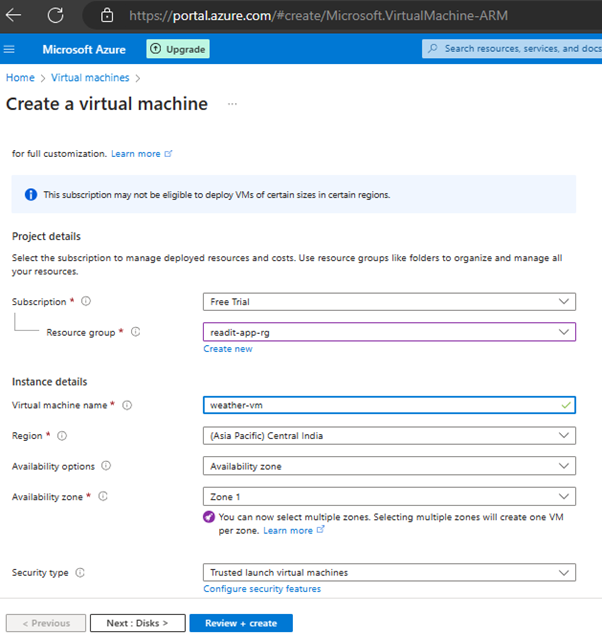
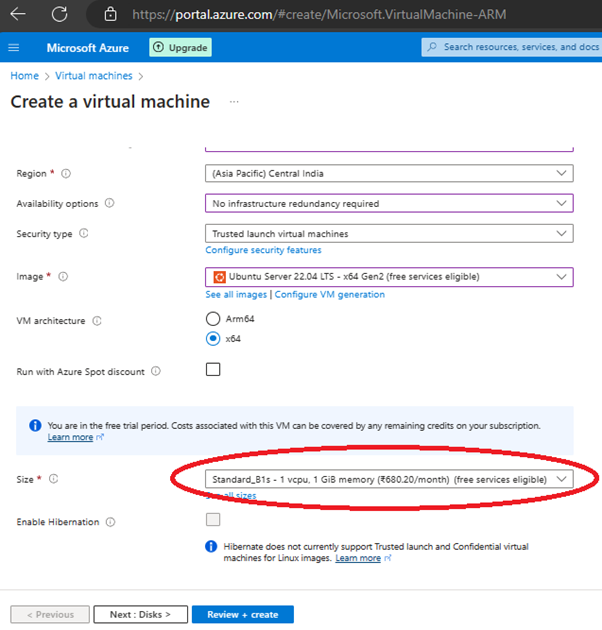
Use the same region as the ‘ReadIt’ app to avoid any connectivity delay.
No need for an ‘Availability zone’ for now.
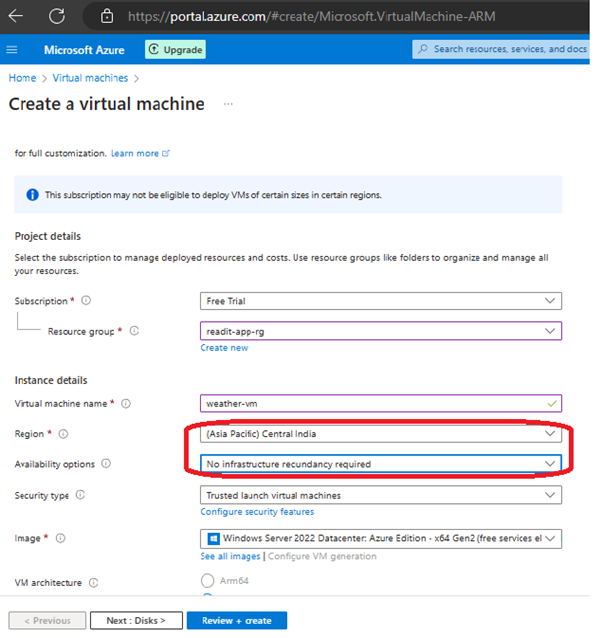
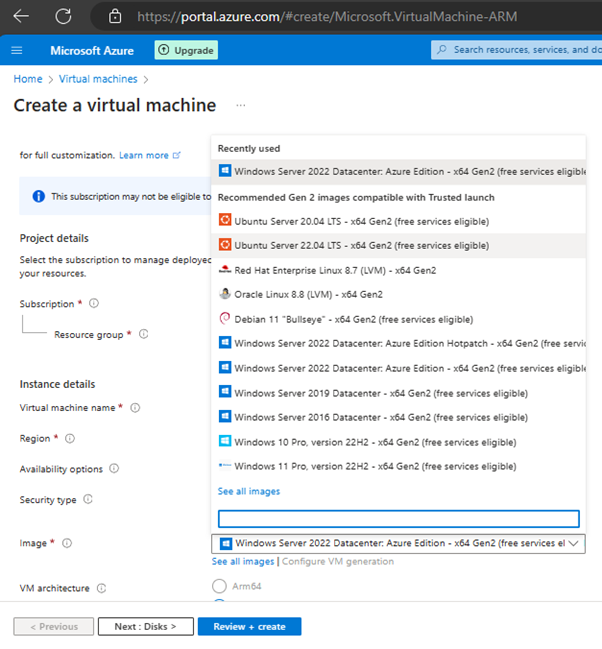
- Select the UBUNTU image for the VM.
- Select the size for the VM.
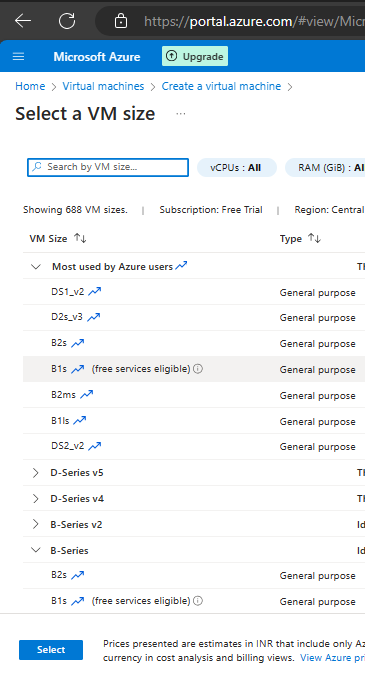
As the ‘weather’ service is small and the VM is Ubuntu, I don’t need the ‘B2ms’ size. I will choose a smaller one instead. Click on ‘See all sizes’.
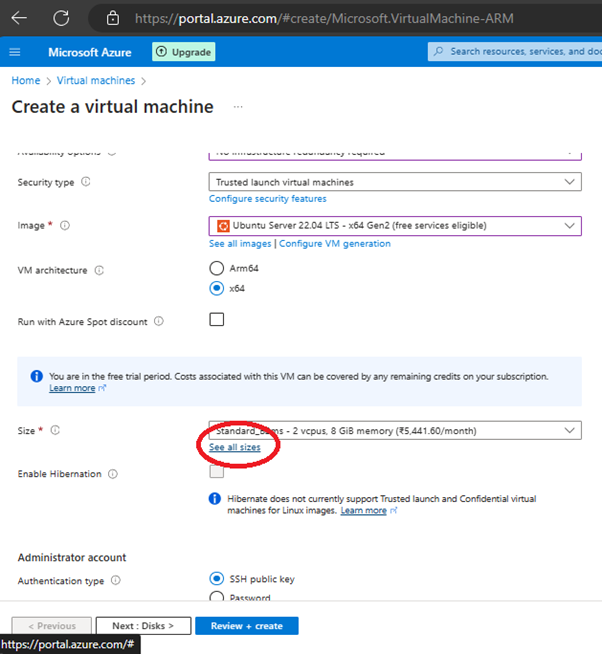
- Click on the ‘B1s’ from the list and click the ‘Select’ button at the bottom.
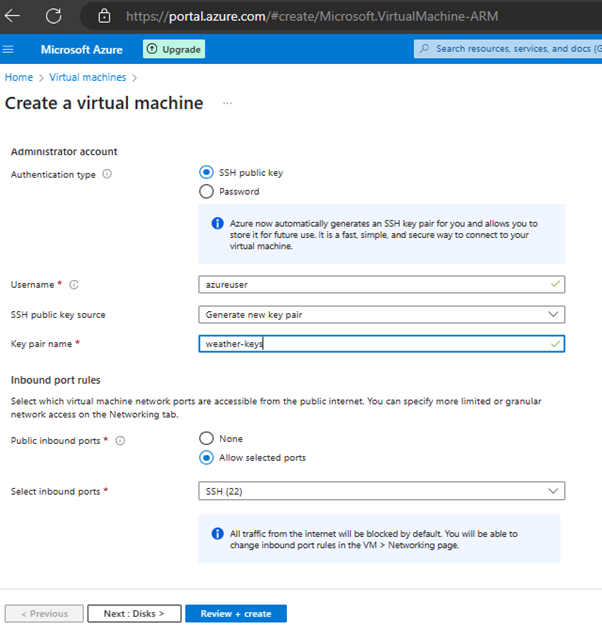
For username, keep it as generated by Azure.
For ‘SSH public key source’, keep the value as it is to generate a new key pair.
Name the key pair and keep the values as they are for the ‘Select inbound ports’ field.
- Navigate to ‘Next: Disks >’.
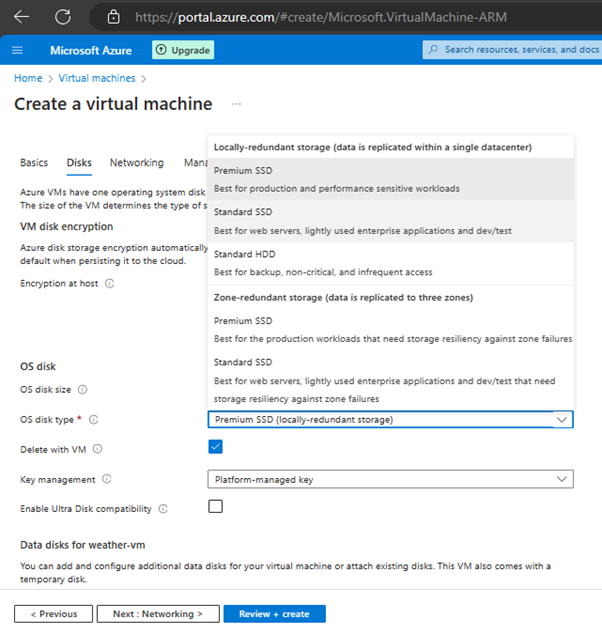
Change the disk type to ‘Standard SSD’ and keep the rest as it is.
- Click on ‘Next: Networking’.
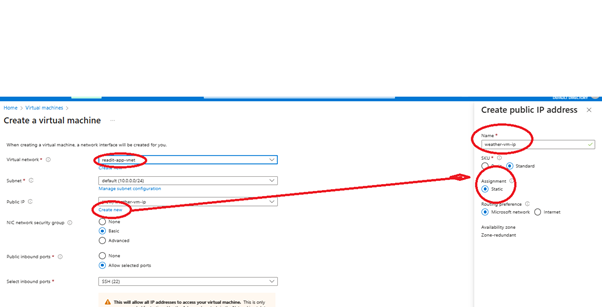
Ensure both VMs (ReadIt and Weather) are part of the same vnet as both need to connect to each other. The IP address should be static.
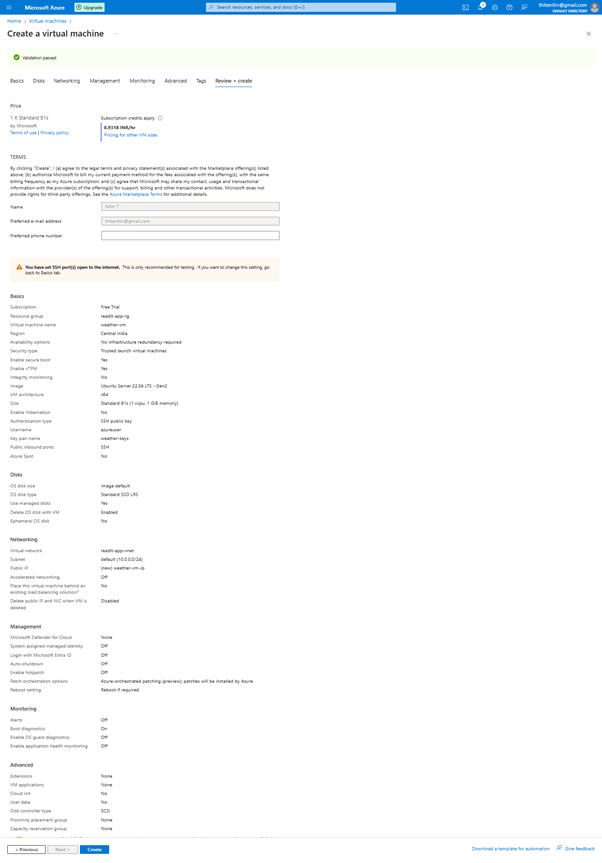
- Click on ‘Review + create’.
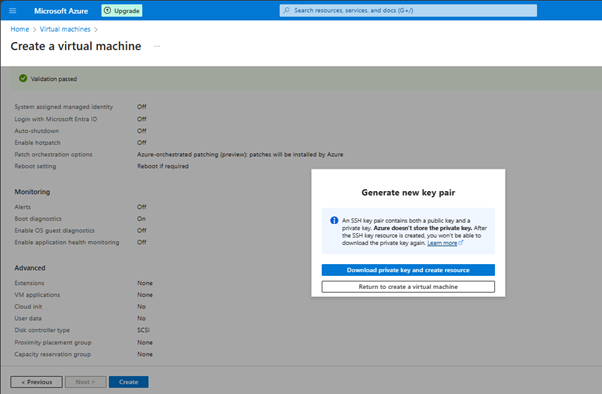
- Click on ‘Create’.
Download the key pair and create the resource. This key is needed to connect to the VM outside of the portal.
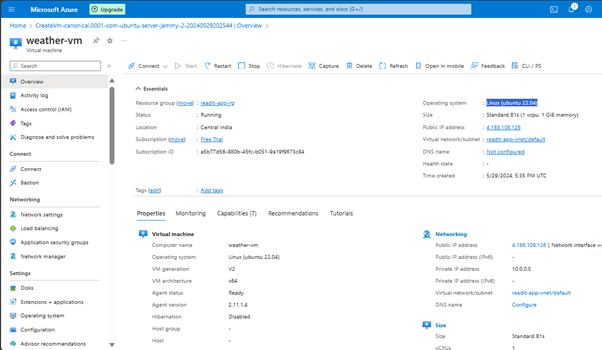
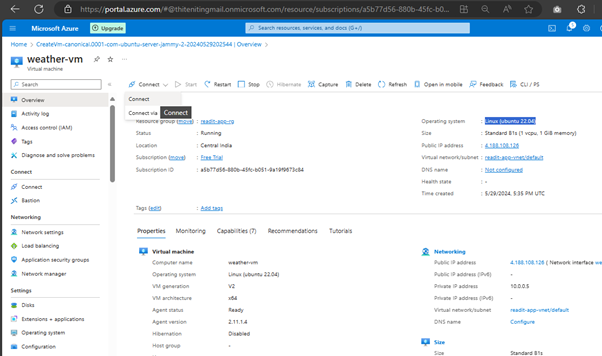
The UBUNTU-based VM is created with the details shown below.
Connecting to it.
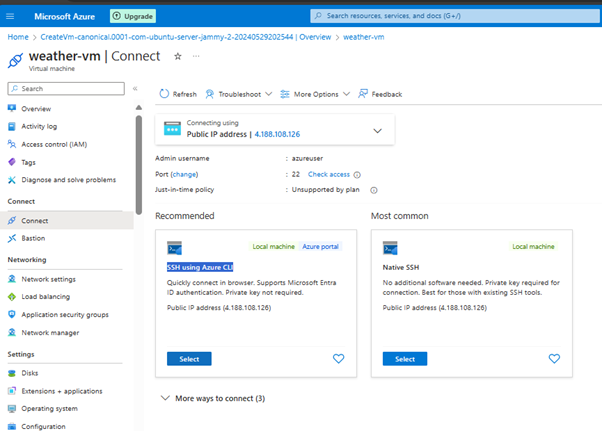
Select ‘SSH using Azure CLI’.
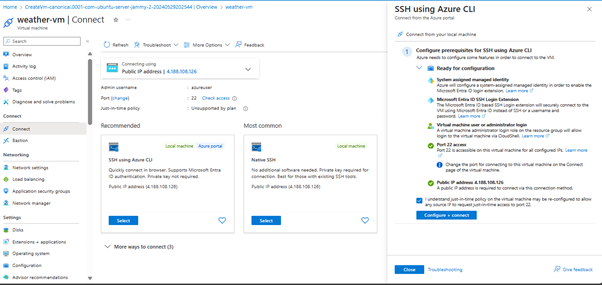
It will validate all the details. Click the confirmation checkbox and click ‘Configure + connect’.
It’s complete and asking to choose a CLI option.
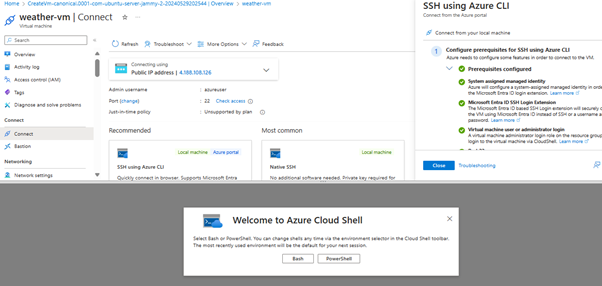
I selected ‘Bash’ and confirmed a few details.
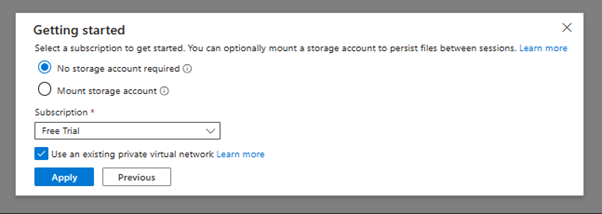
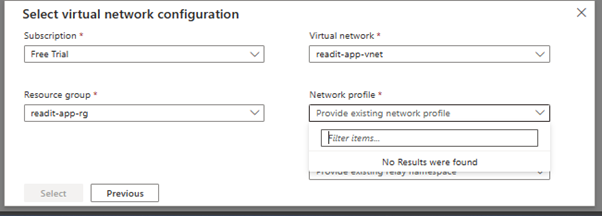
Oops! It seems I missed something in the network configuration. Let me fix this.
Learnings: How to connect Linux-based VM: I had shut down both the VMs—I started BOTH.
Referred to the Microsoft documentation to proceed further: Connect to a Linux VM - Azure Virtual Machines | Microsoft Learn
As I am connecting from a Windows machine, I selected the respective tab for guidance.

Followed the steps mentioned in the doc below:
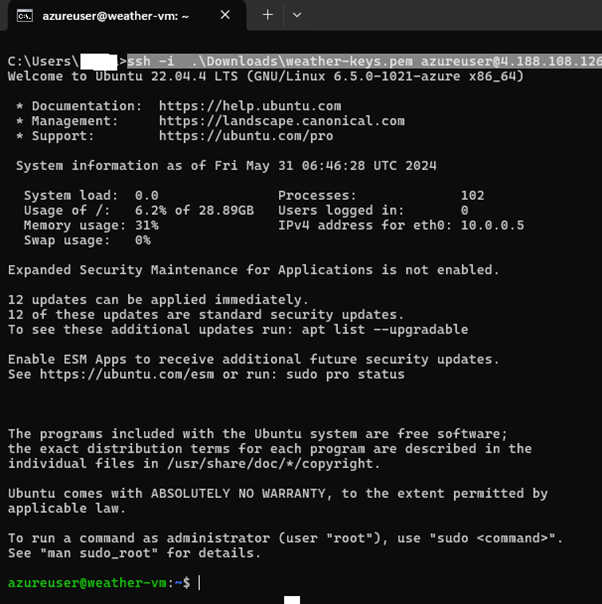
Hurray, connected to the ‘weather-vm’ AND I am inside the VM.
There are a few commands I run on ‘weather-vm’ to run the weather API. (NOTE: weatherAPI is developed using Node.js)
Below are those, step-by-step:
sudo apt install git
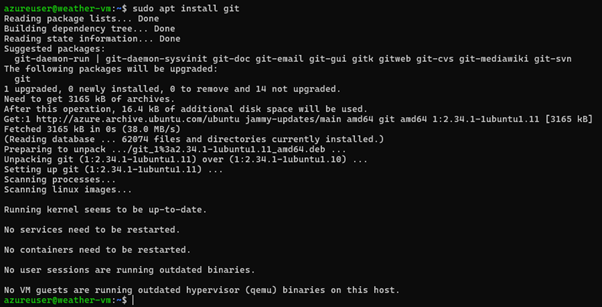
sudo apt update
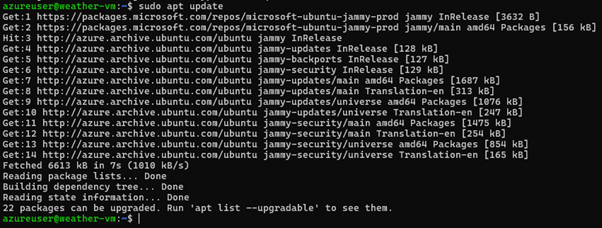
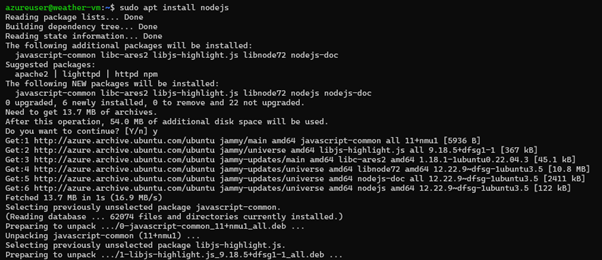
sudo apt install nodejs
NOTE: While executing this command, it will ask for permission to use the disk space—respond with ‘y’ to proceed.
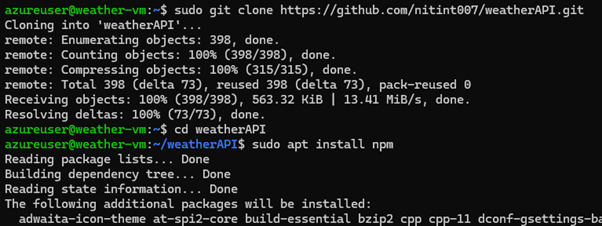
sudo git clonehttps://github.com/nitint007/weatherAPI.gitcd weatherAPIsudo apt install npm
NOTE: While executing ‘sudo apt install npm’, it will ask for permission to use the disk space—respond with ‘y’ to proceed.
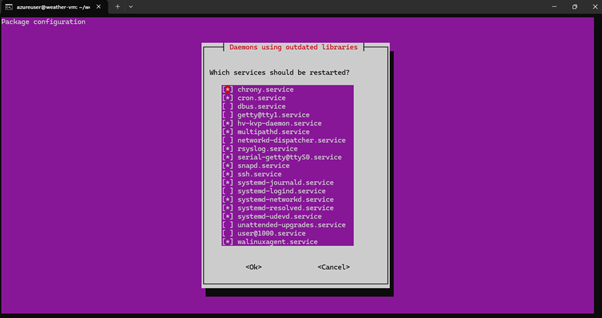
I got an alert on VM that Daemon using the outdated—asking if I want to update.
As I am unaware which one to, I selected ‘walinuxagent.service’ and clicked ‘Ok’.
- Confirmed if npm is installed successfully on VM.

npm start

As you can see, the API is up and running and listening on port 8080.
Validation of the weather API:
NOTE: Both my VMs are running as weather-api is using the same vnet as ‘catalog-vm’.
- Go to the ‘weather-vm’ overview page.
Use the ‘weather-vm’ Private IP address to connect to ‘weather-vm’ from ‘catalog app’ as both the VMs are part of the same network/vnet. Therefore, they can connect to each other using the private IP address. Copy the Private IP address of ‘weather-vm’.
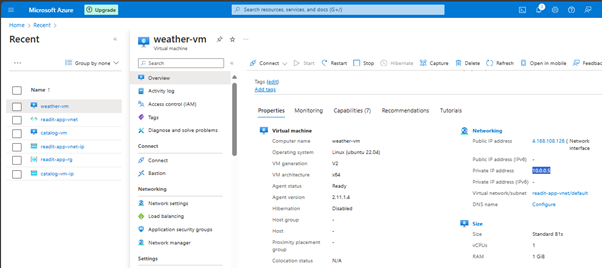
- Launch the ‘ReadIt’ app on catalog-vm by hitting ‘localhost:8080’.
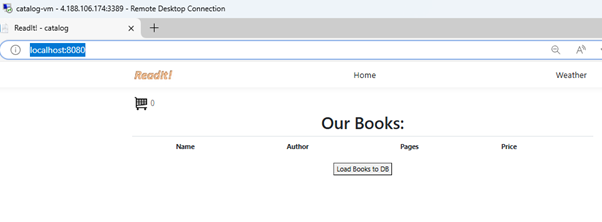
- Click on ‘Weather’ on the top right.

Paste the Private IP Address of the ‘weather-vm’ in the ‘Weather Server IP’ text box following the port 8080.
Click ‘Get Weather’ button.

- Click AGAIN on the ‘Get Weather’ button to validate fetching fresh results always.
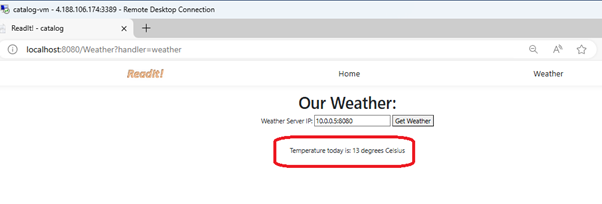
And it WORKS ALWAYS.
- Let me try if this works for the public IP as well.
Copy the public IP address of ‘weather-vm’ and try to access that using port 8080.
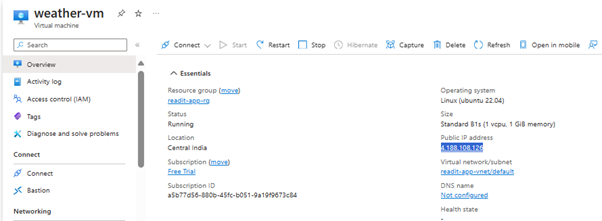
Try to fetch results on ‘weather app’ using public IP address.
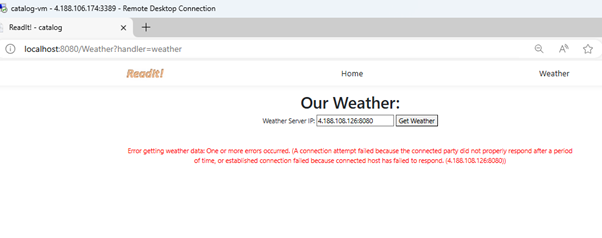
It throws the error AS EXPECTED because I can’t access the ‘weather-api’ using the Public IP Address since I haven’t allowed this connection to happen. ‘Weather-api’ can only be accessed through its Private IP Address, allowing selected entities to connect to ‘weather-api’.
Achievements:
I have 2 VMs—one for ‘catalog’ and another for ‘weather’.
Both are in the same virtual network.
Both VMs are connected with each other.
Subscribe to my newsletter
Read articles from Nitin directly inside your inbox. Subscribe to the newsletter, and don't miss out.
Written by

Nitin
Nitin
A Seasoned gate keeper for software quality (Manual / Automation (Web + Mobile native + API) / Performance test) with 13 years of experience, An automation🤖 lover and a continuous📚 learner. A test automation geek and a DevOps engineer using and exploring cloud☁️. Looking for opportunities in Cloud DevOps for mutual growth. (Working remotely since last 5 years with teams in Europe / USA and Canada)