How to Secure Your API Gateway with Cognito User Pools
 Pradyumna Gayake
Introduction
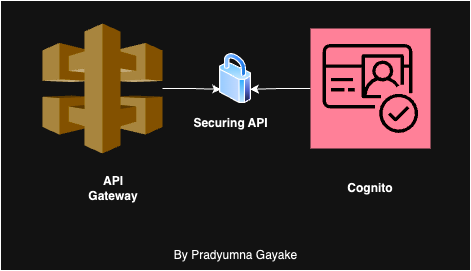
*The agenda is to secure the API Gateway using the Cognito user pool. We will authorize each API call using the Cognito user pool. In this landscape, it is important to secure APIs; we cannot keep our API endpoints open to any request. Amazon Cognito, AWS’s managed identity service, plays a crucial role in user authentication and management. When paired with API Gateways, which manage and secure APIs, Amazon Cognito User Pools provide a robust solution for enforcing authentication and authorization policies.*We will follow the below steps for securing APIs
Create API gateway
Create Resource and multiple methods under resources
Create an AWS Cognito user Pool
Integrate the Cognito user pool with the API gateway
Authenticate the user and provide access to the user
Test the API on Postman.
Create API Gateway
Create API gateway
Navigate to your AWS console and search API Gateway.
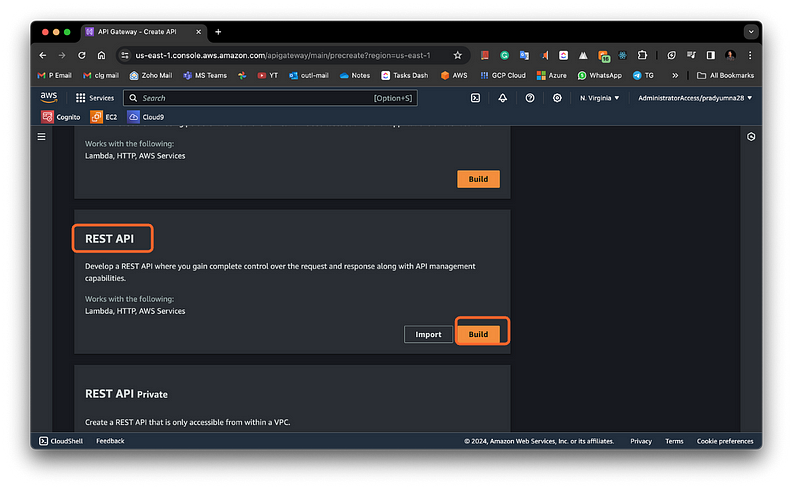
API Gateway creation
Then Next step create API gateway by giving suitable name.
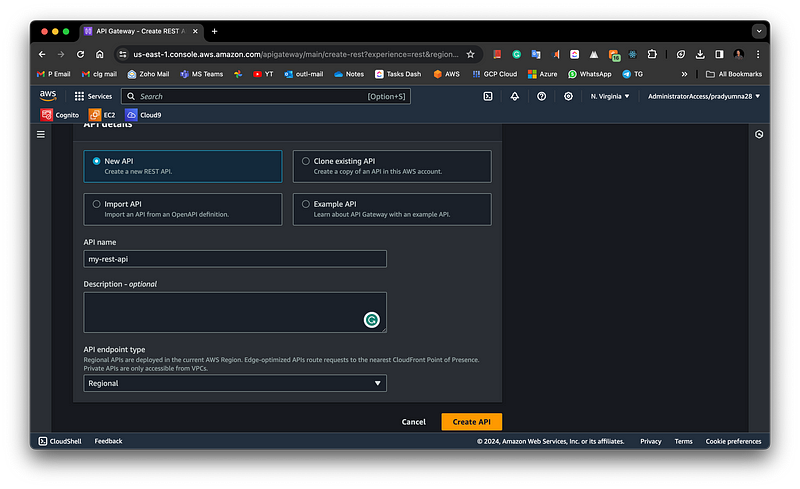
Create Resource and multiple methods under resources
Create a resource by clicking the “Create Resource” Tab refer to the below snippet.
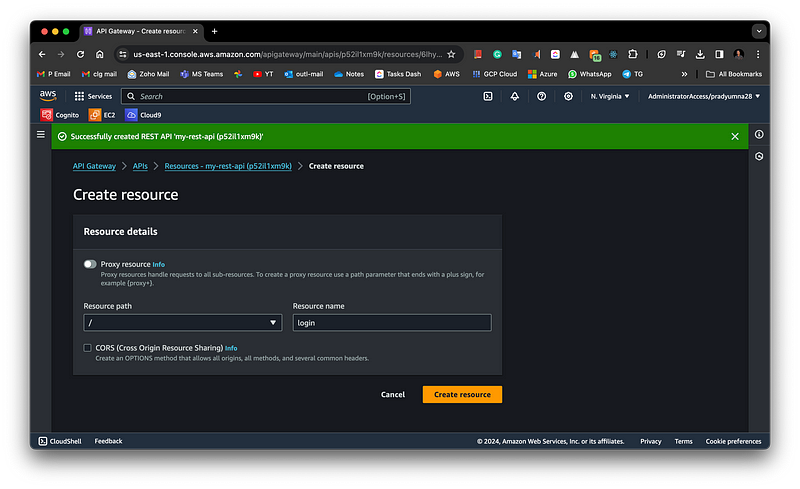
Now select the resource and create a method inside it, select the method type e.g. GET, POST, UPDATE, DELETE etc.
Select Integration based on your use case e.g. Lambda, HTTP, VPC Link, or AWS services. It would help if you had a lambda function created here so that you can attach it to the API gateway.
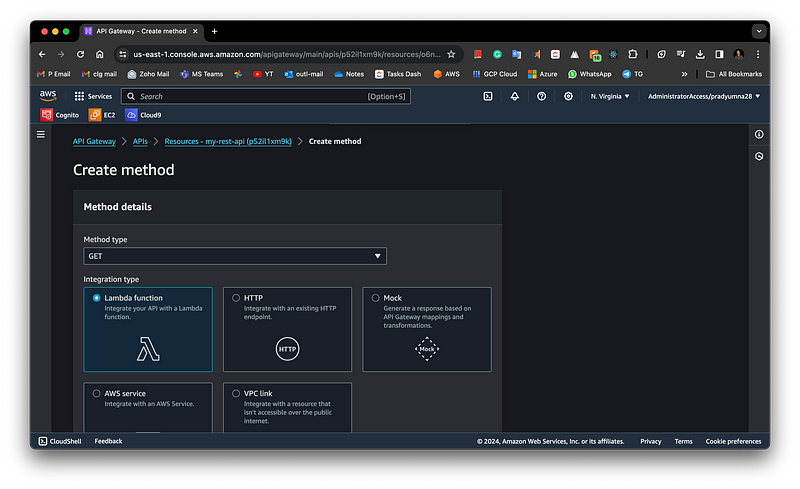
Lambda Creation on AWS console
Now deploy API by clicking the “Deploy API” Tab. Create a new stage and then deploy API. Test your API using hitting the “Invoke URL”
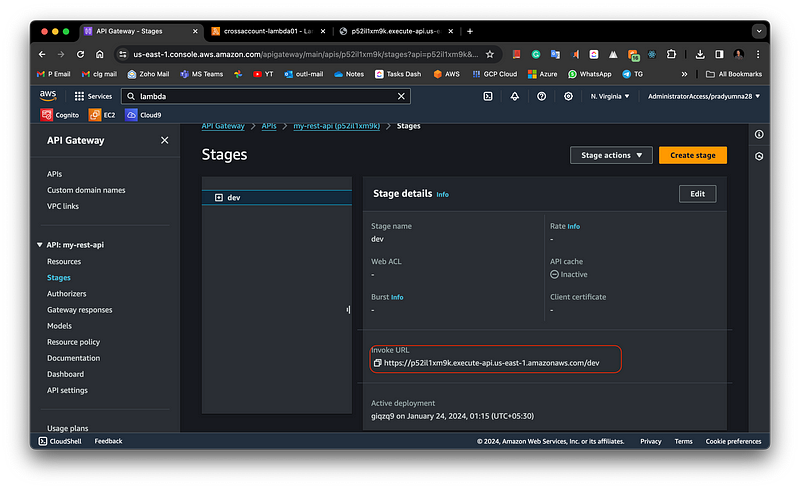
Deploying the API
API sample output will be like this without any authorizer

Testing API without the security token.
This above example was without any security layer, like the authentication lambda or the cognito layer.
Create an AWS Cognito user Pool
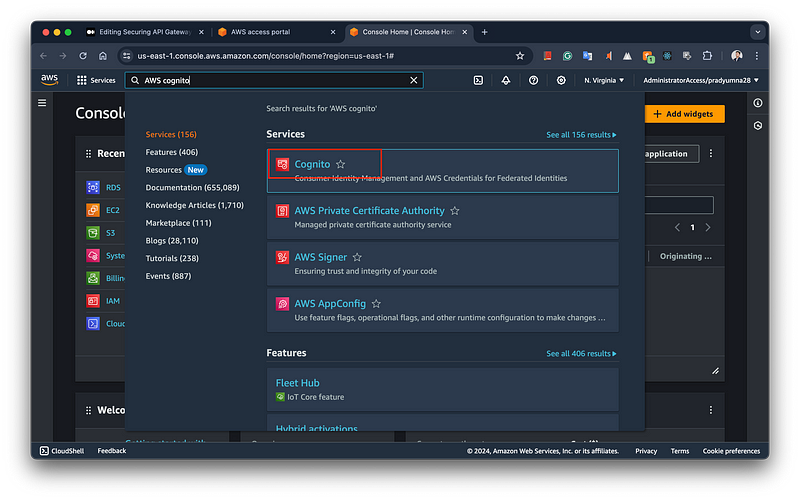
Navigate to the AWS Cognito Service on the console, as shown in the below Snapshot.
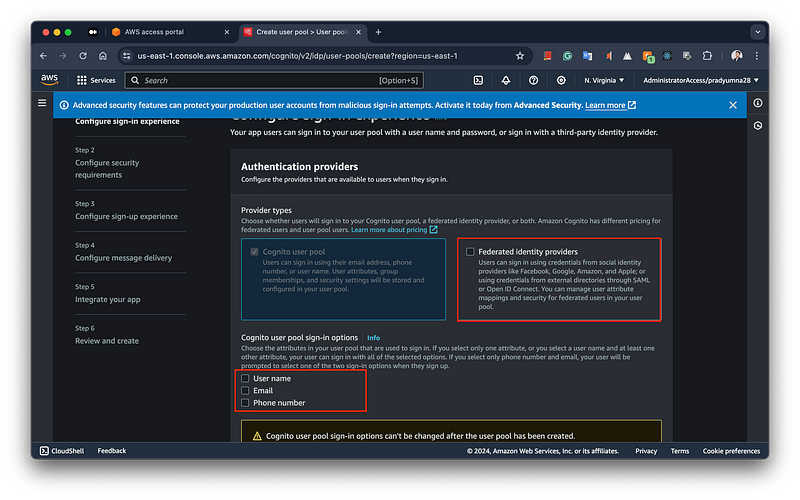
To create a new user pool in Amazon Cognito, navigate to the Cognito page and select “Create User Pool.” You will find multiple sign-in options to choose from, depending on your business requirements. Additionally, there is an option for Federated Identity Providers, which allows you to enable authentication through external providers such as Google, Facebook, and Twitter.
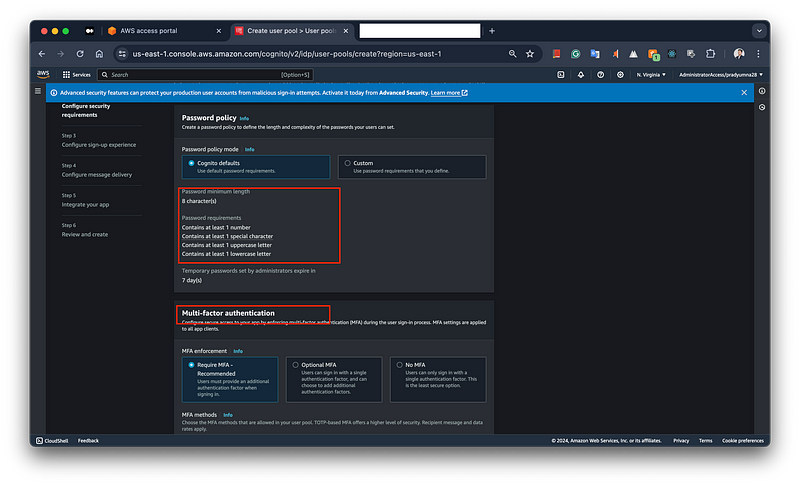
Once you head towards the next page, you will see two options, like Password policy and MFA requirements. On this Amazon Cognito configuration page, you can set up security requirements for your user pool. You have the option to define a custom password policy, specifying the minimum length and complexity, including requirements for numbers, special characters, and uppercase and lowercase letters. Additionally, you can configure Multi-Factor Authentication (MFA), with options to require MFA, make it optional, or not use it at all, enhancing the security of user sign-ins.
Proceed to the next page, keeping all settings at their default values. If needed, you can modify the settings according to your specific requirements.
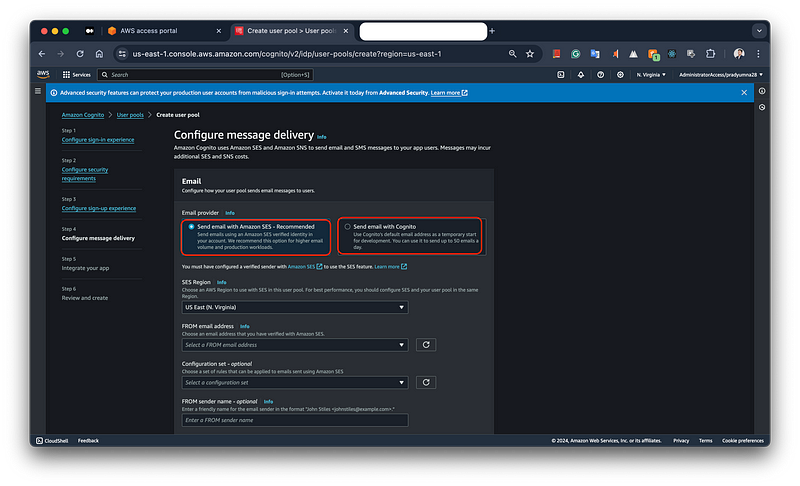
On the Configuration message delivery page you will find two options, like
a. Send an email with Amazon SES
b. Send an email with Cognito
ou can choose between sending emails with Amazon SES, recommended for higher email volumes and production workloads, or using Cognito’s default email service, suitable for development with a limit of 50 emails per day. Additional settings allow you to specify the SES region, the sender email address, and optional configuration sets and sender names.
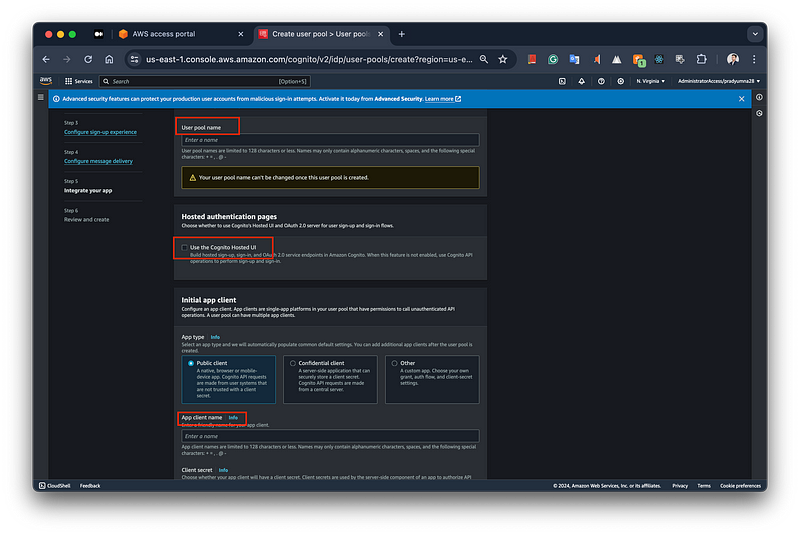
Lets complete the final step in the Cognito user pool setup, You need to provide a unique user pool name and also you have the Use the hosted UI provided the AWS cognito service. Additionally, you can set up an initial app client, choosing between a public client, a confidential client, or a custom app, and specifying an app client name and secret.
Integrate the Cognito user pool with the API gateway
Now lets configure the Cognito on API gateway to authorize incoming traffic.
Enter an Authorizer name: In the “Authorizer details” section, provide a name for your authorizer in the “Authorizer name” field. In the example, the name “Cognito-authorizer” has been entered.
Select the Authorizer type as “Cognito”: Under the “Authorizer type” section, choose the “Cognito” option. This indicates that you want to use Amazon Cognito as the authorizer for your API calls.
Choose the Cognito user pool: In the “Cognito user pool” dropdown, select the Cognito user pool that will authenticate requests to your API. The example shows the user pool “blog-userpool” being selected from the “us-east-1” AWS region.
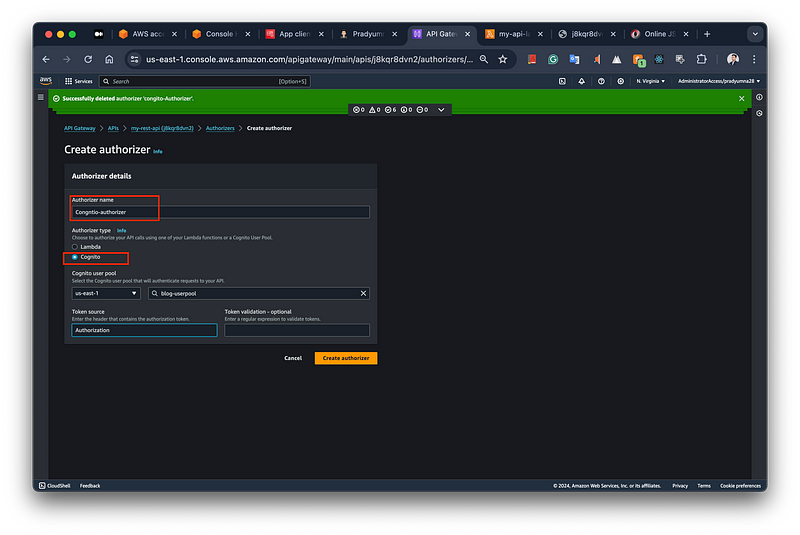
Selecting the Authorizer as Cognito in API Gateway.
Now create resource under API gateway, and follow bellow steps.
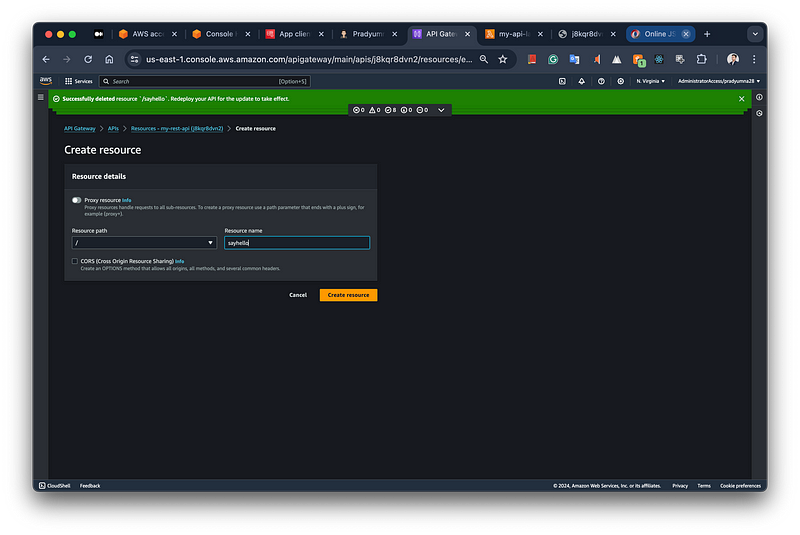
Select the Cognito authorizer: In the “Method request settings” section, under the “Authorization” dropdown, choose the authorizer you created earlier using Amazon Cognito. In the example image, the authorizer named “Cognito-authorizer” is listed.
Configure operation name (optional): You can optionally provide an “operation name” for the API method. This name can be used for logging and monitoring purposes. In the image, the operation name field is left blank, but you can enter a descriptive name if desired.
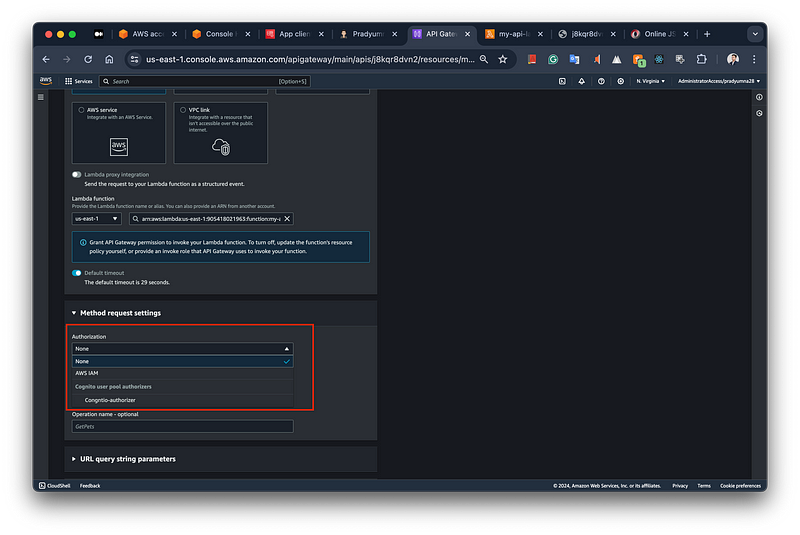
Selecting the Auth Option
Once you have configured the method with the Cognito authorizer and any desired operation name, click “Create Method” to save your changes. After that, you’ll need to deploy the API to make it publicly accessible. To do this, create a new stage by selecting the “Stages” option under the API Gateway section in the AWS console. Follow the prompts to create a new stage, providing a name and stage description. Once the stage is created successfully, your API will be deployed and accessible via the provided stage URL.
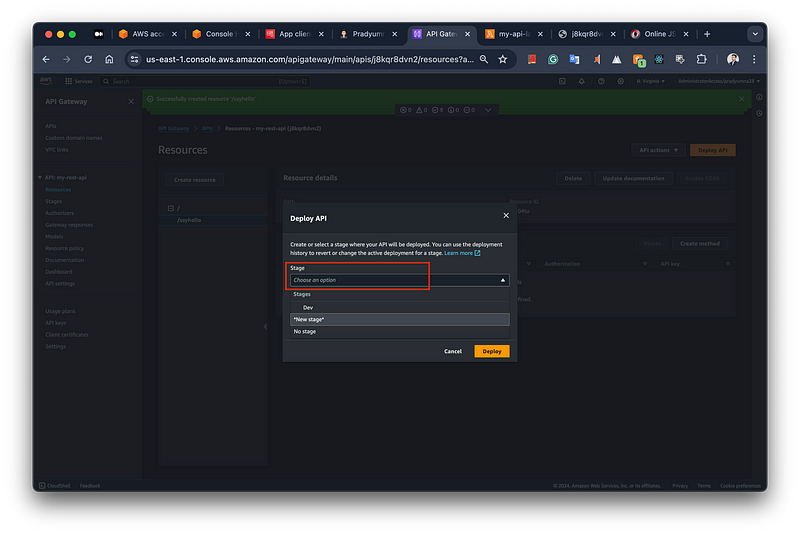
deploy the API Gateway.
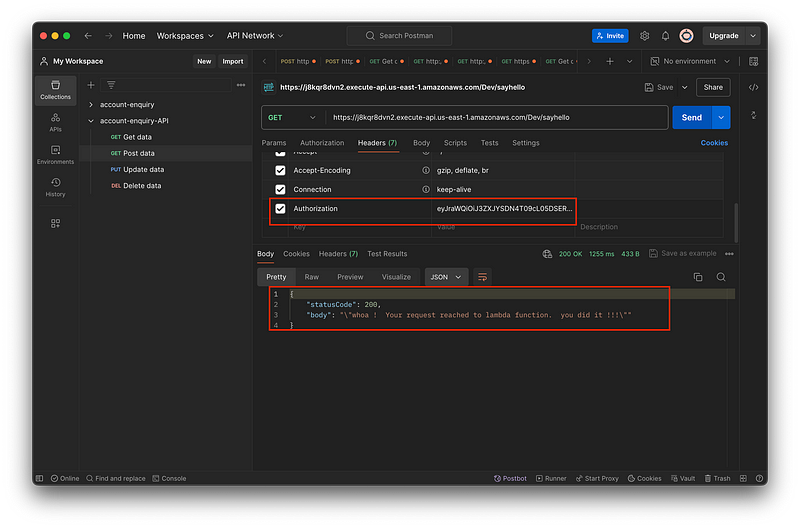
After deploying the API you will get the Invoke URL. Let's test that URL in Postman. Now you can see if we haven’t provided the Authorization token we are getting the result as “Unauthorized”. That means we need to pass the Authorization token.
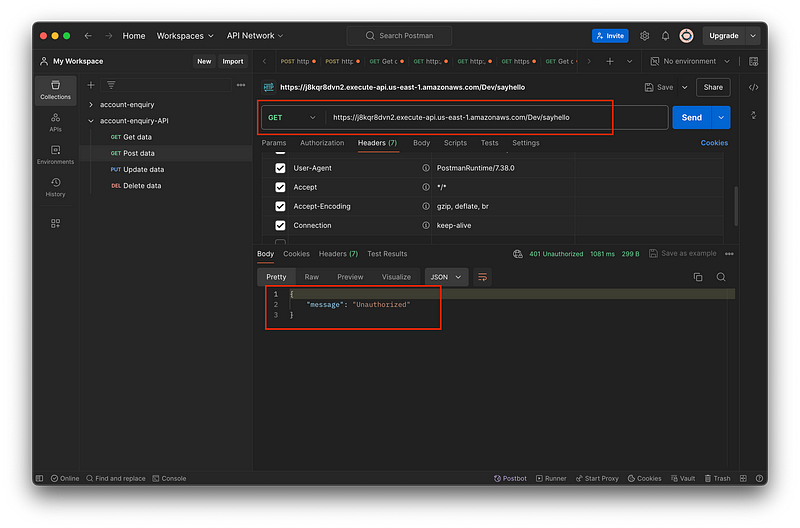
Testing API on Postman
To get the Authorization token we need to navigate to the AWS Cognito service > App Integration > App clients and analytics > “Select you app” > Hosted UI > view Hosted UI.
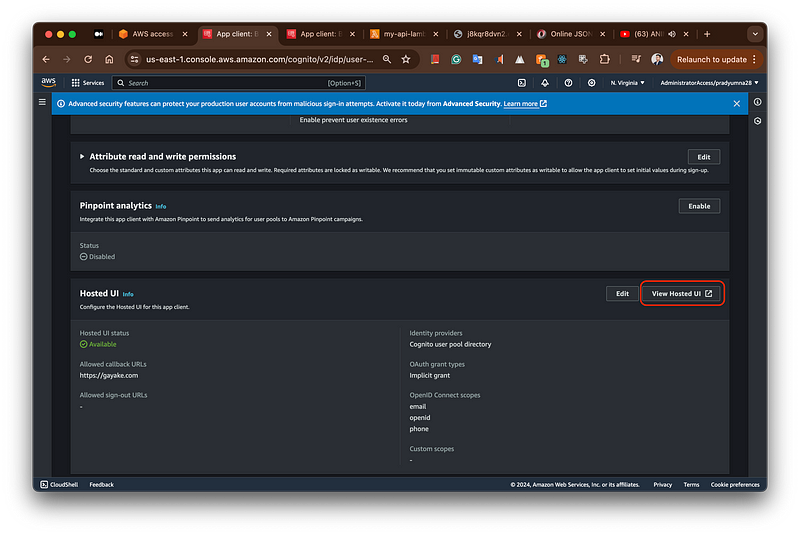
Once Login using the hosting UI you will receive one id_token. You need to pass the id_token as Authorization in Postman. After passing the token you can see the API tested successful and securely.
For more details, you can find me on LinkedIn or Github “search” Pradyumna Gayake
Website link: gayake.com
Subscribe to my newsletter
Read articles from Pradyumna Gayake directly inside your inbox. Subscribe to the newsletter, and don't miss out.
Written by
