Project 3: Deploying a flask application Using Docker
 Lalita Kashyap
2 min read

Step 1: Launch an EC2 Instance
With the help of this: https://lalitakashyapblog.hashnode.dev/step-by-step-guide-to-setting-up-an-ec2-instance
Step 2: Install docker
With the help of this: https://lalitakashyapblog.hashnode.dev/from-zero-to-docker-a-beginners-introduction-to-containers
Step 3: Create directory and move into it
mkdir projects
cd projects/
Step 4: Create project name directory and move into it
mkdir flask-app
cd flask-app/
Step 5: Clone repository url
git clone https://github.com/Lalita5Kashyap/flask-app-ecs.git
Step 6: Move into project folder
cd flask-app-ecs/
Delete Dockerfile if have.
Step 7: Create dockerfile
# Get base image with python
FROM python

#Create a working directory to run a node app
WORKDIR /app

#Copy code from local machine to docker container
COPY . .

#Install all the required dependencies
RUN pip install -r requirements.txt

#Run the python app
CMD ["python", "run.py"]
Step 8: Build image
docker build -t flask-app:latest .
Step 9: Check image created or not
docker images
Step 10: Create and run docker container
docker run -p 80:80 flask-app:latest
Step 11: Check container created or not
docker ps
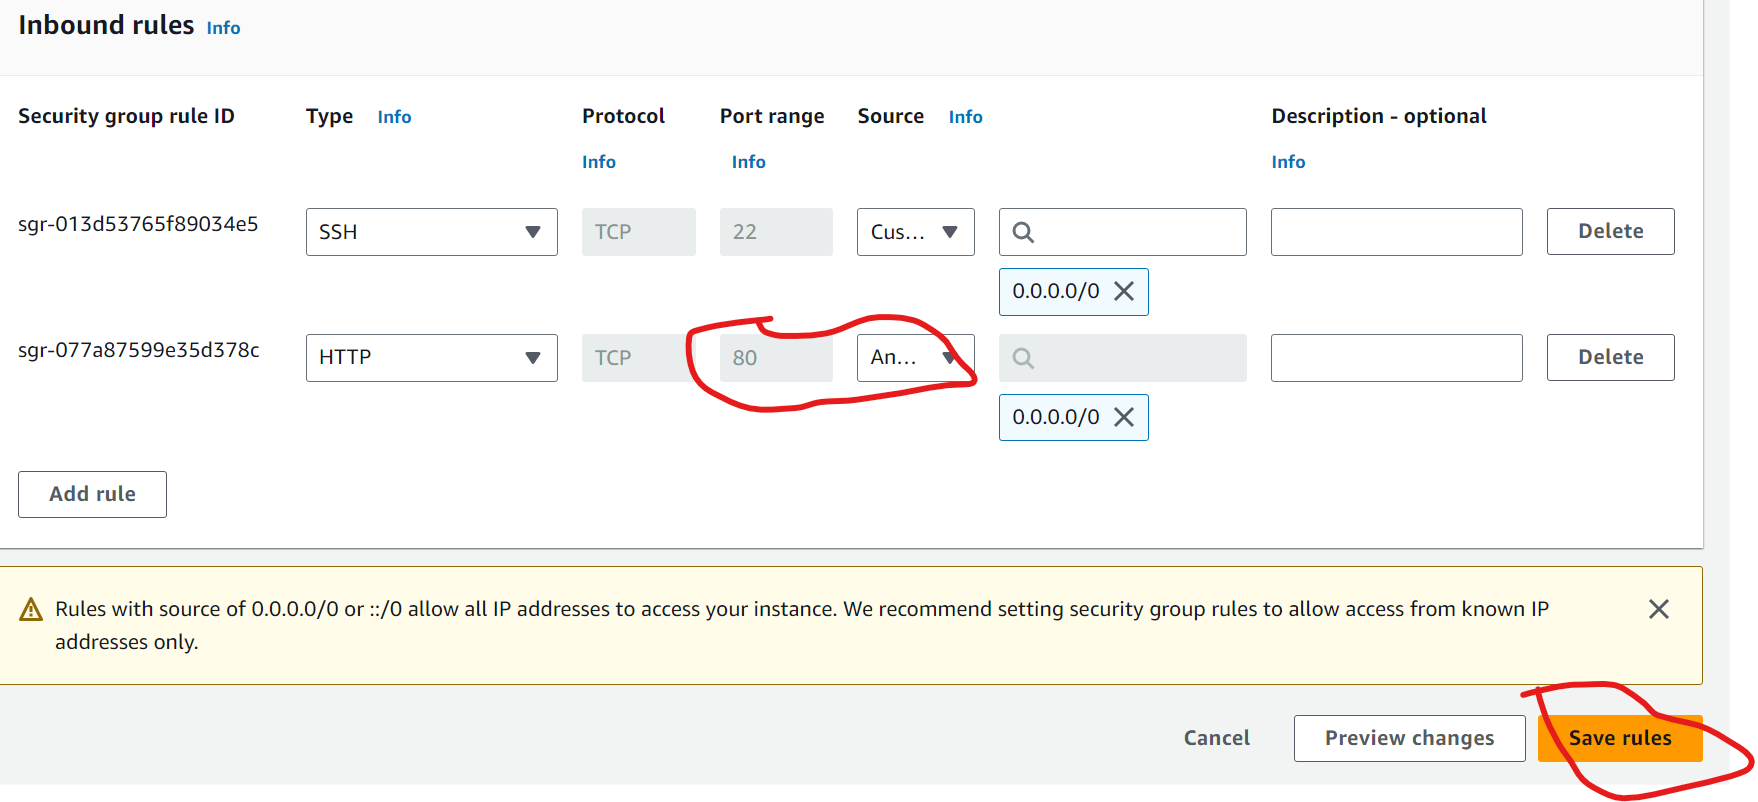
Step 12: Give permission to port "80" in instance
- Go to security group in instance

Click SG link

Click on "edit inbound rules"

Click on "Add rules"

Give "80" in port range and select "Anywhere" in source and click Save

Copy public dns from instance in networking

Now go to browser and paste public ip of instance

With all above steps, you should be able to deploy your Flask application using Docker efficiently.
Thank you 🙏
Keep Learning..
0
Subscribe to my newsletter
Read articles from Lalita Kashyap directly inside your inbox. Subscribe to the newsletter, and don't miss out.
Written by
