Your Own Custom Color Theme Extension for VS Code
 Nipuna Upeksha
I am an avid fan of VS Code when it comes to developing React or Angular applications due to the flexibility it offers. However, I felt that the default VS Code theme was not giving me a good developer experience. After trying out some of the VS Code themes provided in the marketplace, I noticed that there are some good themes and others that did not meet my expectations. Therefore, I wanted to create a new theme for VS Code named Sandevistan.
To create a new theme in VS Code, you need to have Node.js, npm, and git installed on your machine. To quickly switch between different Node.js versions, you can install nvm and use it as well. You can find out how to use nvm with the following article.
Steps
First, you need to install an npm package named yeoman and VS Code Extension Generator. You can install it as a global dependency using the following command.
npm i -g yo generator-code
Then, open a terminal in the directory you want to create your theme and type the following command to generate the barebones.
yo code
Then it will prompt a set of questions to create a project directory for you.
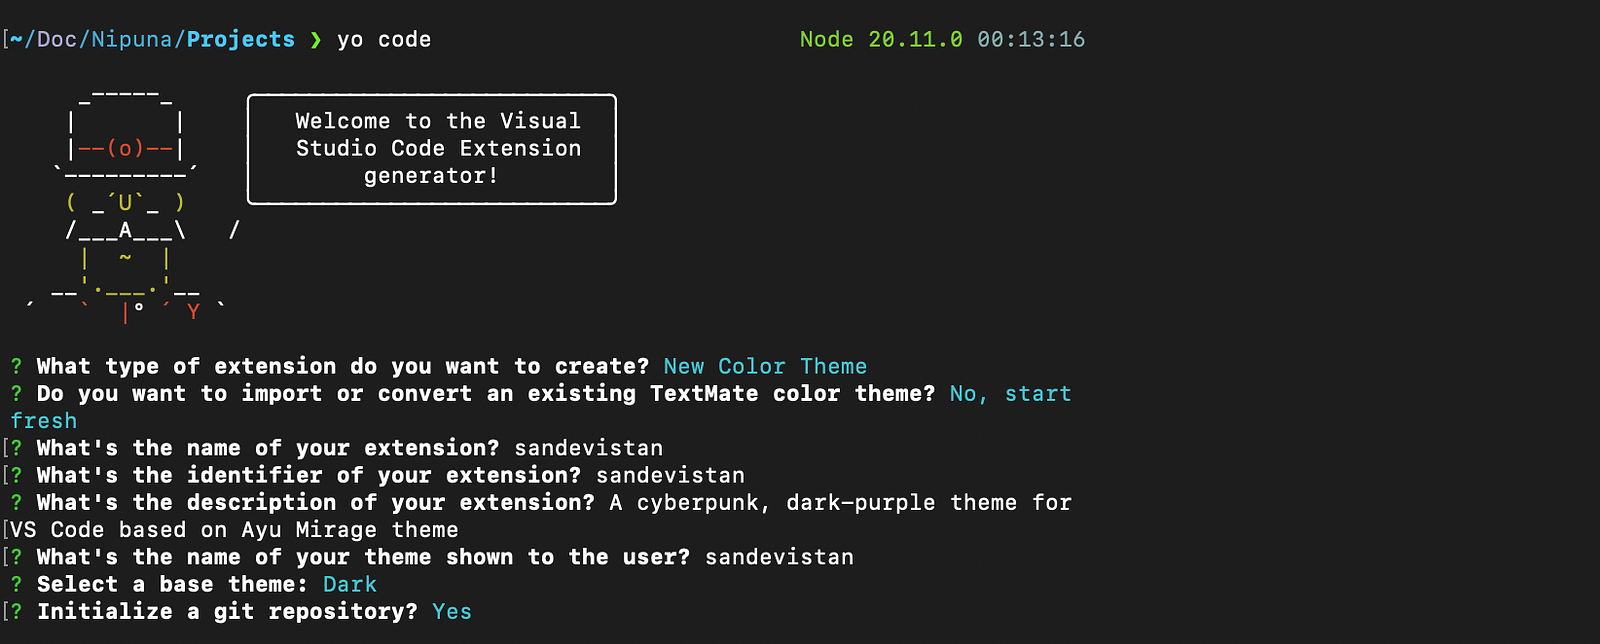
What type of extension do you want to create? New Color Theme
Do you want to import or convert an existing TextMate color theme? No, start fresh
What’s the name of your extension? sandevistan
What’s the identifier of your extension? sandevistan
What’s the description of your extension? A cyberpunk, dark-purple theme for VS Code based on Ayu Mirage theme
What’s the name of your theme shown to the user? sandevistan
Select a base theme: Dark
Initialize a git repository? Yes
Afterward, you can open the project directory with VS Code using the below commands.
cd {theme-name}
code .
The project structure will look like this.
.
├── CHANGELOG.md
├── README.md
├── package.json
├── themes
│   └── sandevistan-color-theme.json
└── vsc-extension-quickstart.md
After that, update the package.json to have the following properties in it.
author — The author of this extension.
repository — The GitHub repository of your theme.
bugs — If your theme is having issues with bugs, this will show where to address them.
homepage — The theme's homepage, whenever someone wants to check your theme.
galleryBanner — The banner for the VS Code marketplace.
keywords — This is for SEO.
{
  "name": "sandevistan",
  "displayName": "sandevistan",
  "description": "A cyberpunk, dark-purple theme for VS Code based on Ayu Mirage theme",
  "version": "0.0.1",
  "publisher": "nipunaupeksha",
  "icon": "images/logo.png",
  "author": {
    "name": "Nipuna Upeksha",
    "email": "nipuna.upeksha@gmail.com"
  },
  "repository": {
    "type": "git",
    "url": "https://github.com/nipunaupeksha/vscode-sandevistan"
  },
  "bugs": {
    "url": "https://github.com/nipunaupeksha/vscode-sandevistan/issues",
    "email": "nipuna.upeksha@gmail.com"
  },
  "homepage": "https://github.com/nipunaupeksha/vscode-sandevistan/blob/master/README.md",
  "galleryBanner": {
    "color": "#171c28",
    "theme": "dark"
  },
  "keywords": [
    "Themes",
    "Dark Theme",
    "color-theme",
    "Sandevistan",
    "Cyberpunk"
  ],
  "engines": {
    "vscode": "^1.89.0"
  },
  "categories": [
    "Themes"
  ],
  "contributes": {
    "themes": [
      {
        "label": "sandevistan",
        "uiTheme": "vs-dark",
        "path": "./themes/sandevistan-color-theme.json"
      }
    ]
  }
}
As you can see in my package.json file, I have created a new directory named images and added my logo for the theme as well. Also, note that I have made a git repository for my theme and connected it properly to address bugs and issues. Since I am using a README.md file as my homepage, I have added the information about my theme there as well.
Inside the ./themes directory, you can find a file named, {extension-name}-color-theme.json You can customize that file so that you can have a unique theme of your own. To customize that file, you can check the following links.
VS Code Color Theme Reference — https://code.visualstudio.com/api/references/theme-color
VS Code Theme Documentation — https://code.visualstudio.com/api/extension-capabilities/theming
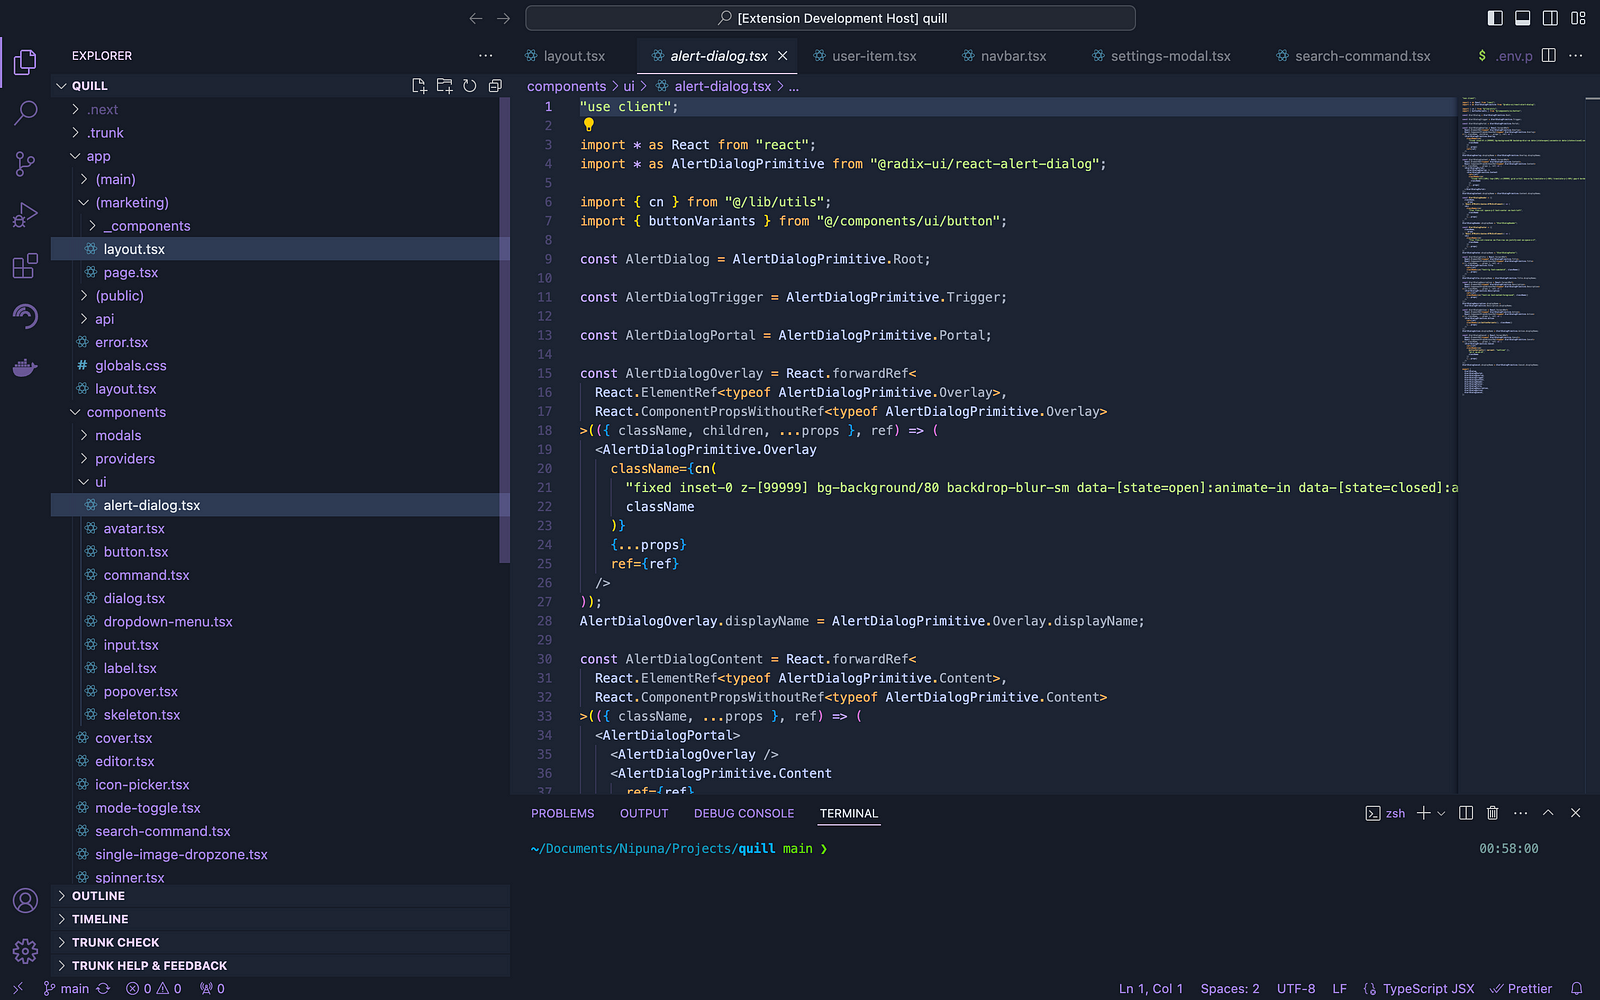
Afterward, press CMD+Shift+D to open the debug mode of VS Code and press f5 to check your theme in VS Code.
Now let’s publish our color theme.
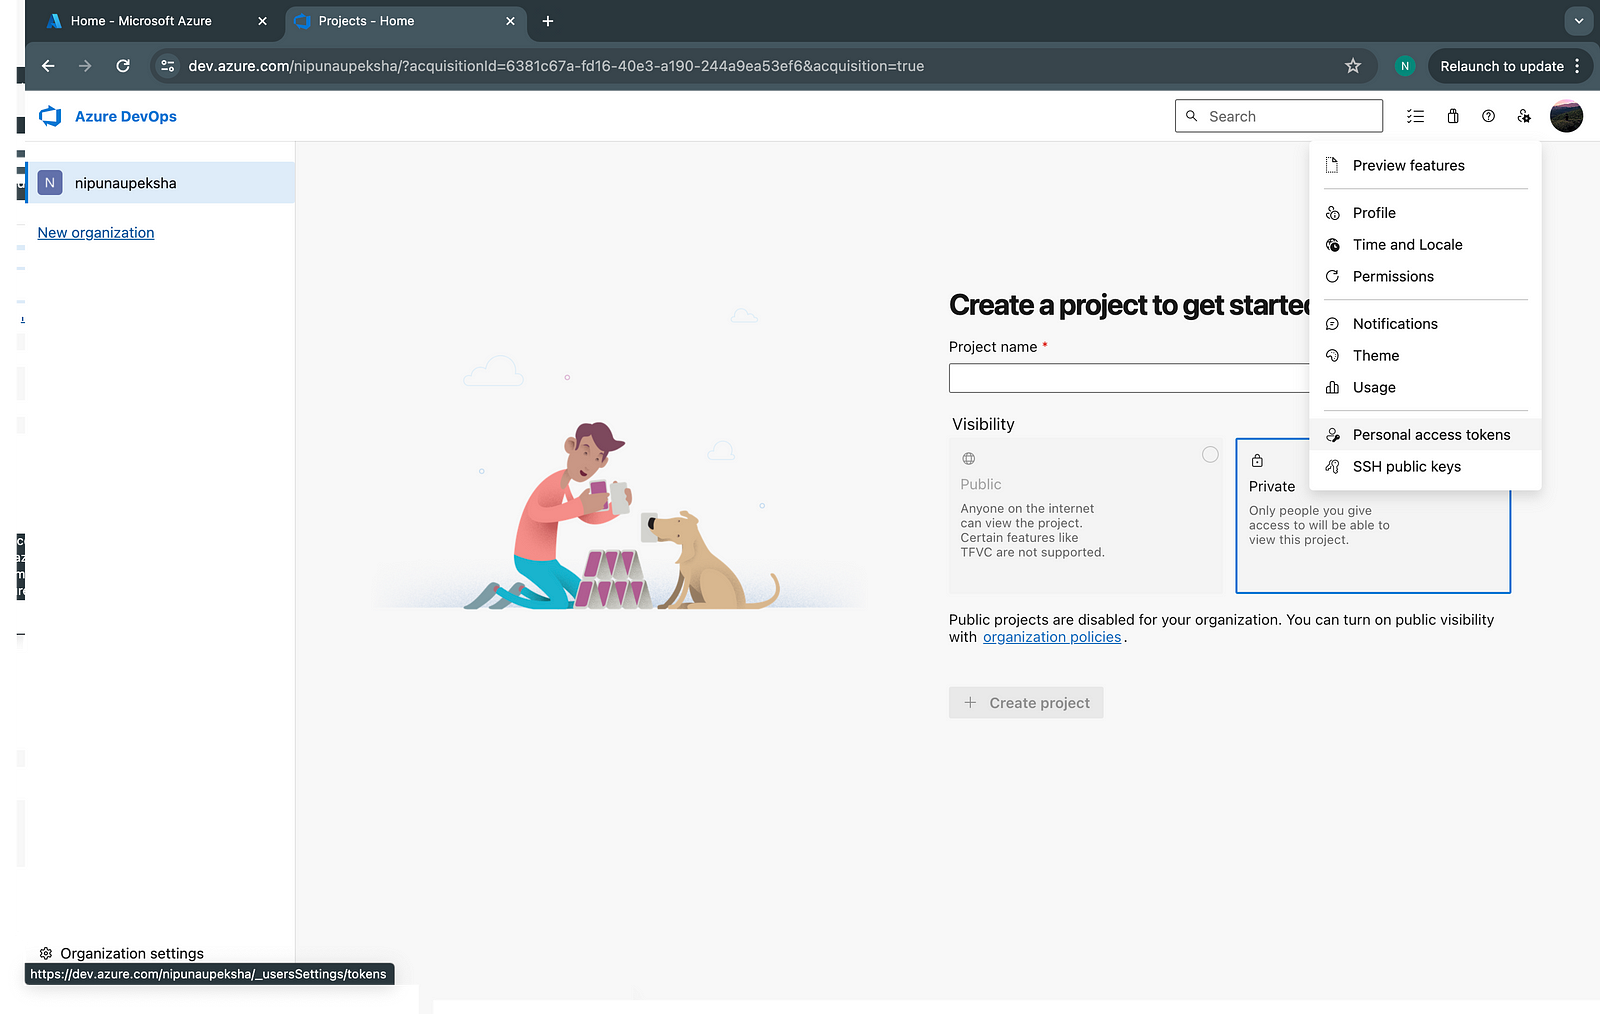
To do that, first, go to the Azure DevOps (https://dev.azure.com) and create a new personal access token(PAT).
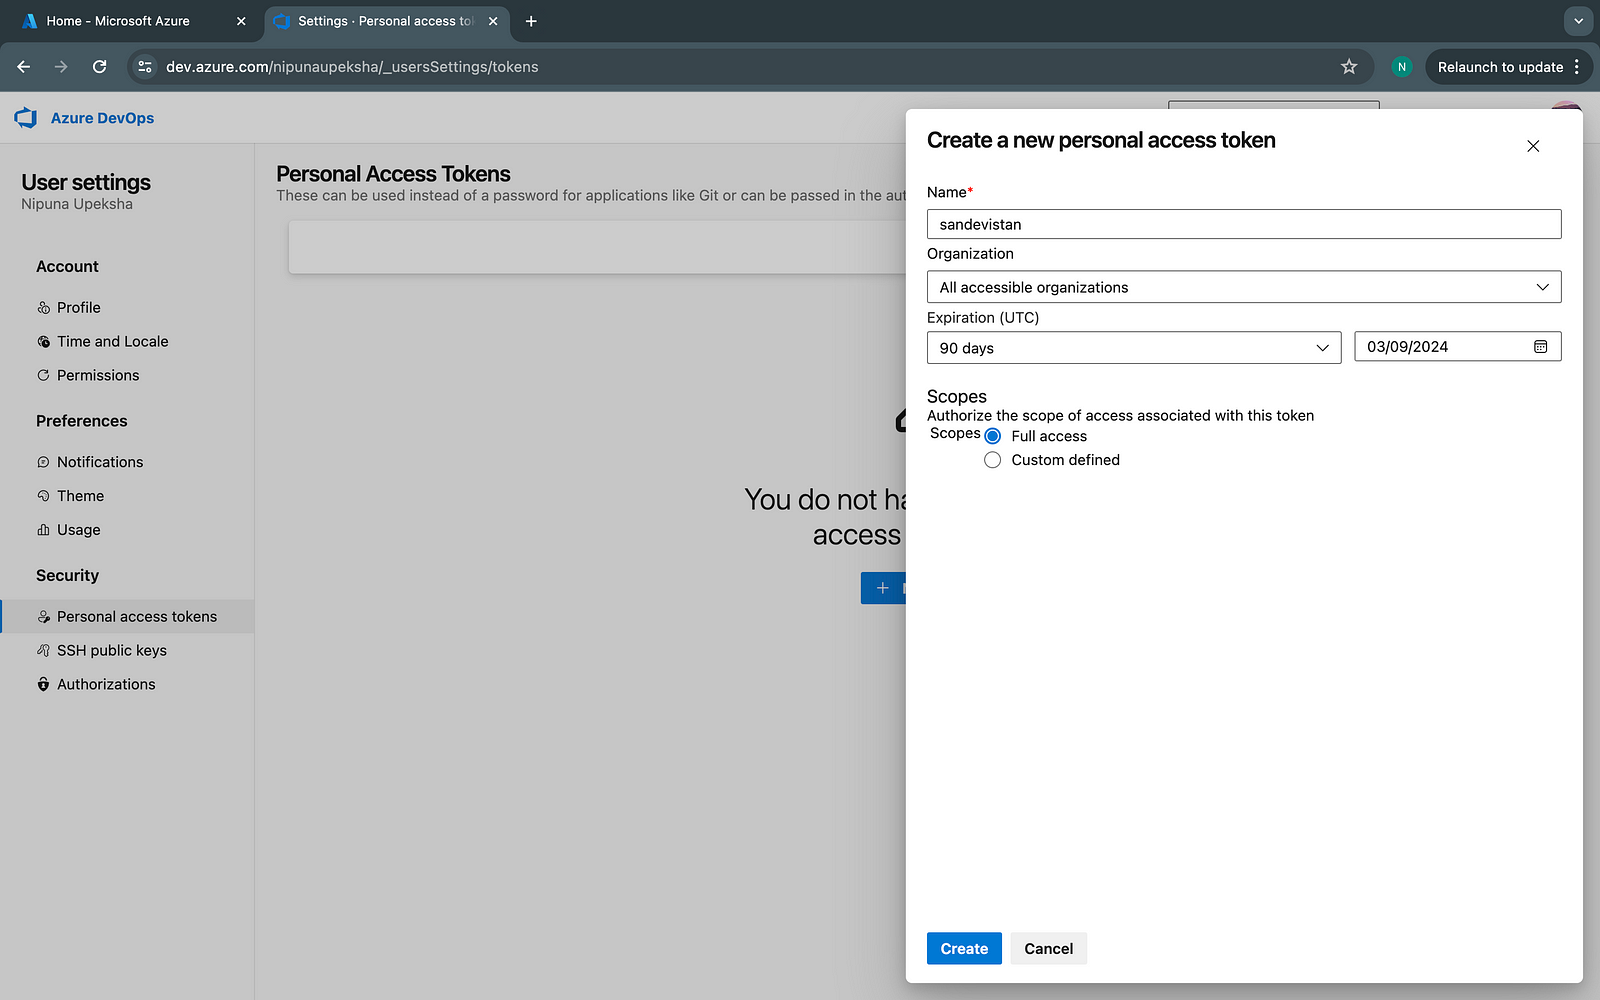
Make sure to select All accessible organizations and select Full access while creating the PAT.
Next, go to the VS Code marketplace and log in. Then create a new publisher using the following link, https://marketplace.visualstudio.com/manage/createpublisher
After that, go to your project directory and type the following commands. Provide the generated PAT token when it asks you to enter it.
npm install --global @vscode/vsce
vsce login (publisher id)
Then use the following command to package your theme and generate a vsix file.
vsce package
Next, you can publish the color theme using the below command.
vsce publish
Alternatively, you can go to https://marketplace.visualstudio.com/manage/publishers and click on New Extension → VSCode to drag and drop the .vsix file you have created.
Now, you should be able to find your theme by searching it in the extensions section of the VS Code.

Following are the resources that I have described in this article, which you can use to make a custom color theme. Also, let me know your thoughts on my custom color theme as well. :)
sandevistan - Visual Studio Marketplace
GitHub - nipunaupeksha/vscode-sandevistan
Subscribe to my newsletter
Read articles from Nipuna Upeksha directly inside your inbox. Subscribe to the newsletter, and don't miss out.
Written by
Nipuna Upeksha
Nipuna Upeksha
Software Engineer | MSc. in Big Data Analytics | Java | Spring | IAM Expert | AWS SAA | AWS DVA